Leaderboard


Popular Content
Showing content with the highest reputation on 09/02/2019 in Posts
-
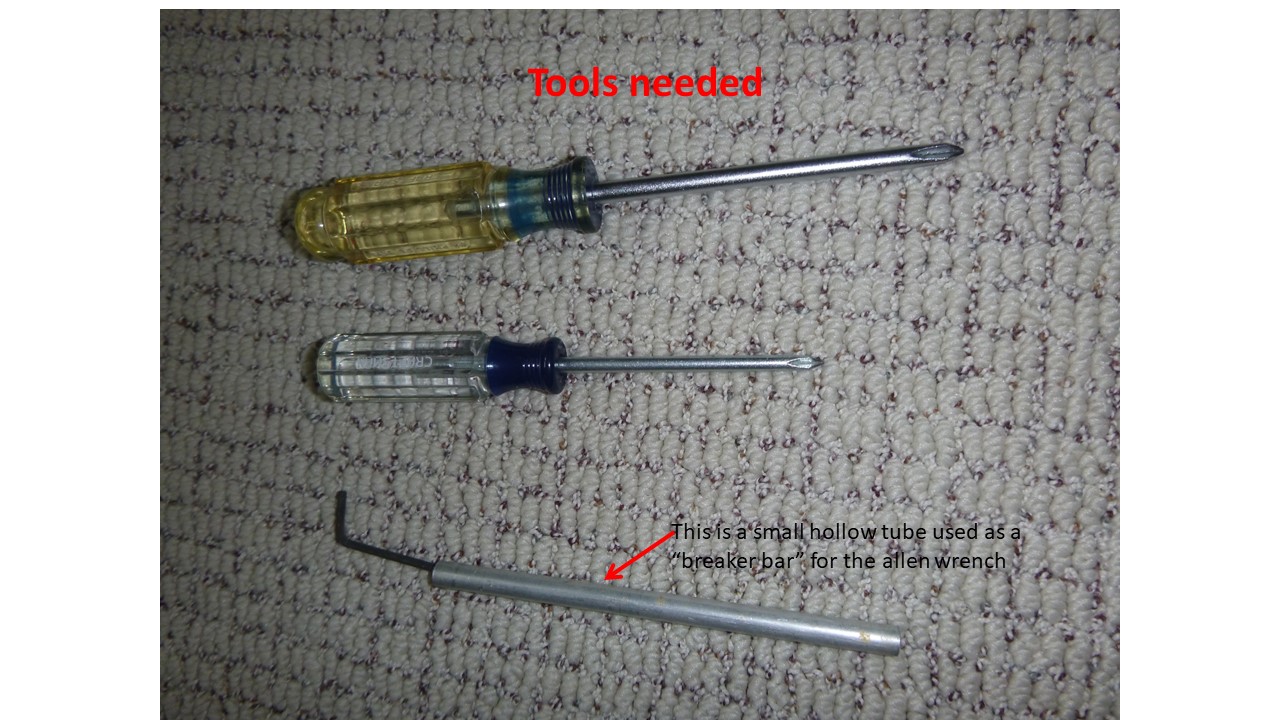
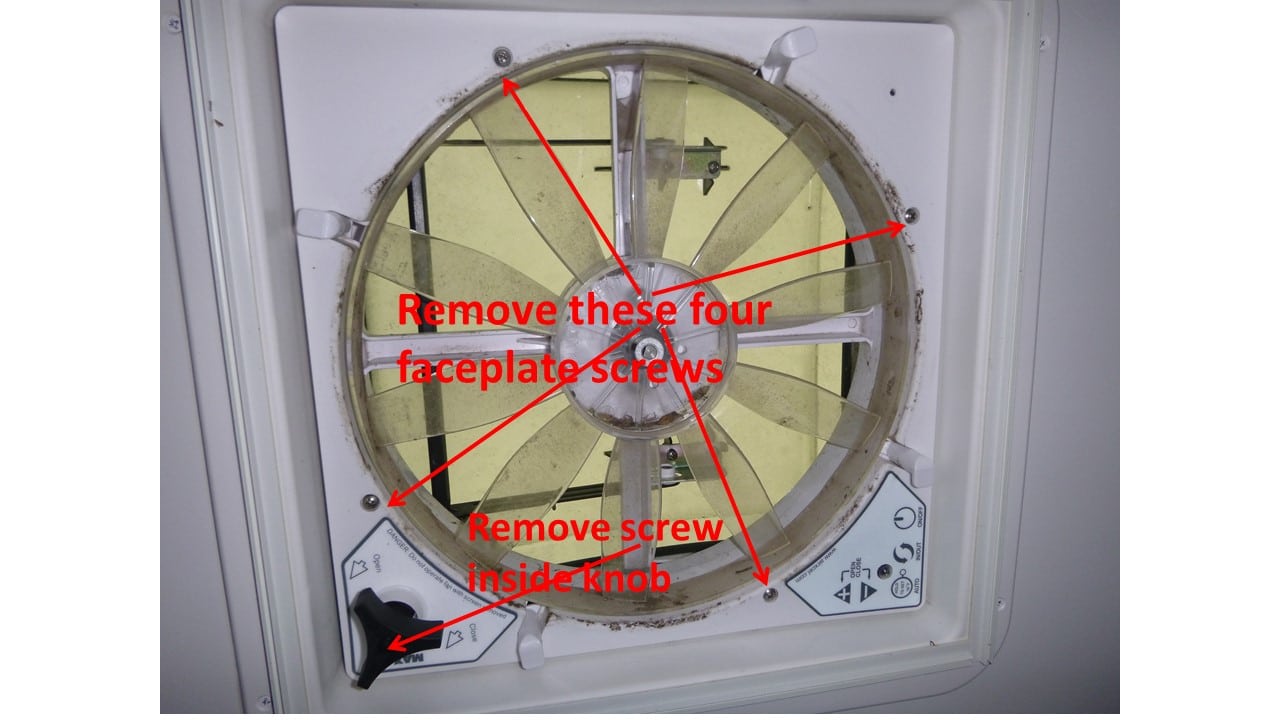
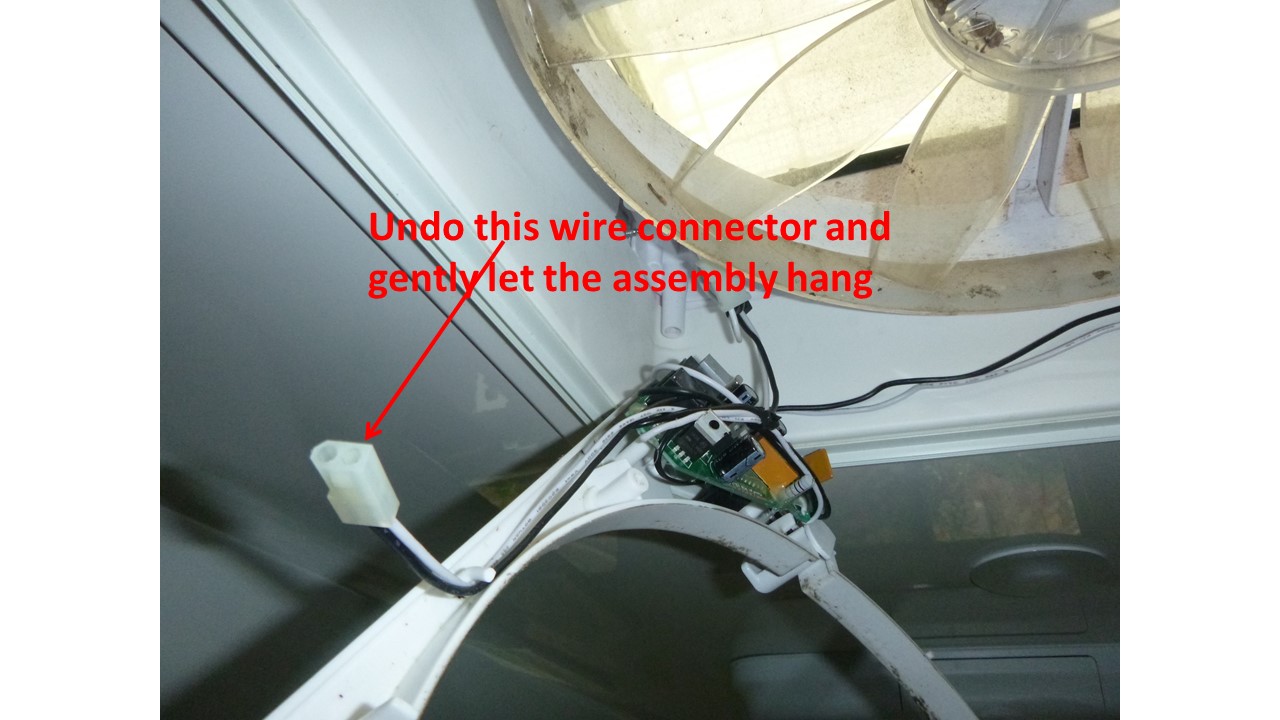
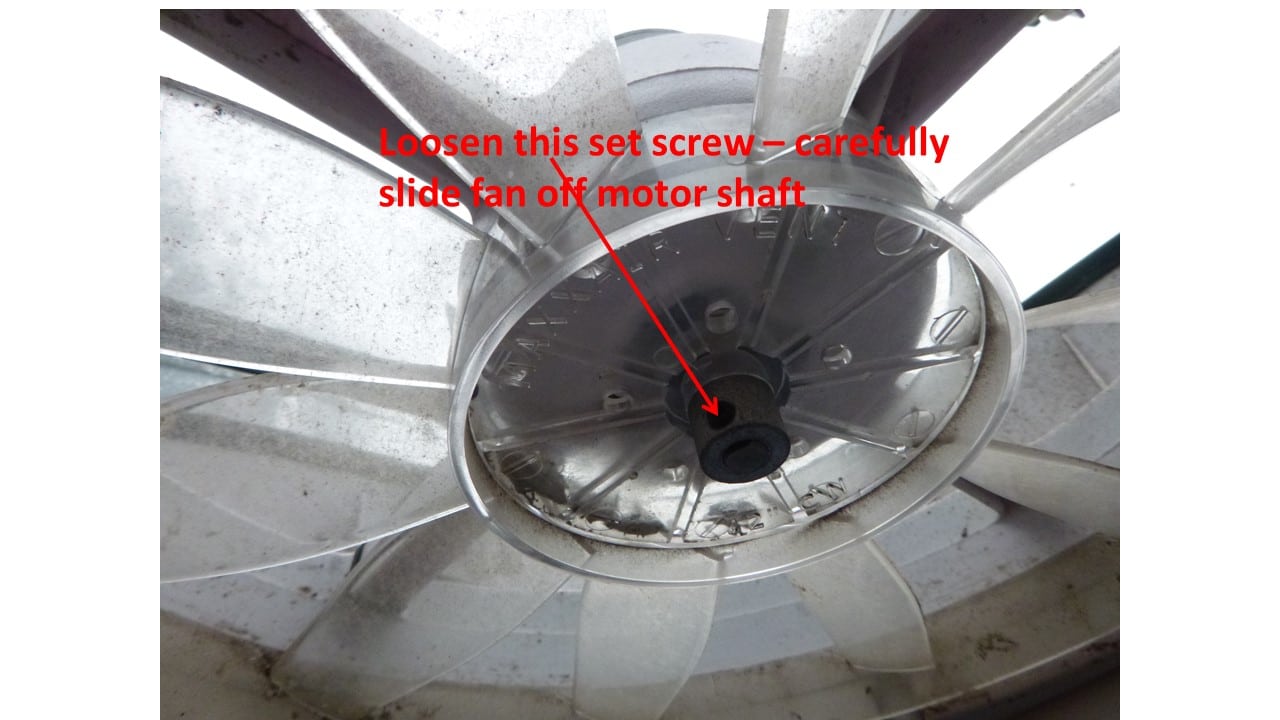
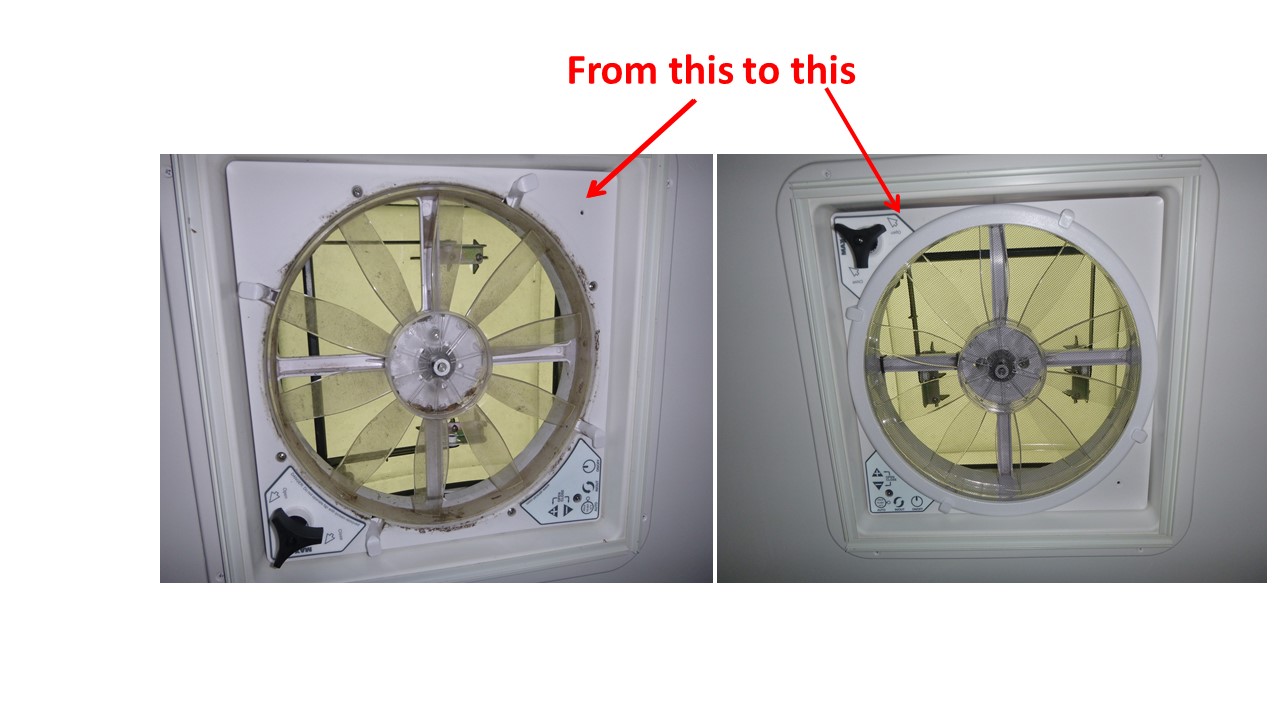
Sometime ago I presented a Mod where I installed a black filter material on the MaxxAir Fan in order to reduce light transmission into the interior of my Oliver. I thought an added benefit of this mod was that the filter material would keep the fan somewhat cleaner than it would have been otherwise since normally I only use the fan on the exhaust setting. While in Montana this year I noted a "couple" of insects that were trapped on the other side of the filter material and a few days before heading home the fan developed a ticking sound - particularly at slow speeds. So, I figured I'd remove the filter, fix that ticking sound and clean the interior of the fan for the first time in four years. Upon removing the filter material, I was totally surprised with the number of dead bugs and the nastiness of the fan. Since the MaxxAir frame is caulked into place (along with four screws) onto the inside shell of my Oliver, I proceeded to remove what I could of the fan without a total removal. Here is how I did it: 1 – Remove the screen by turning the four plastic “tabs” 180 degrees either to the right or left. 2 – Remove the inner face plate – the one with the controls and knob that is used to manually open the exterior cover (see picture) by removing four screws plus the screw in the center of the black knob. Disconnect the electrical connection noted in the picture and gently let the faceplate hang in place. 3 - Remove the fan using an allen wrench (3/32 I believe). In my case the set screw holding the fan to the motor shaft was either put on by a gorilla or had a bit of corrosion which caused the set screw to be difficult to loosen. I put a couple of drops of “Liquid Wrench” on the threads of the set screw, let it set for a few minutes and then used a small piece of tubing as a breaker bar as a help with the small allen wrench. Be a bit careful here with the force applied - you do not want to strip the inside of this set screw. Also be careful with all plastic parts in that they are easy to break. 4 – Clean and dry screen and fan. I used “Simple Green” cleaner and a soft brush to clean both the screen and the fan. The fan was then wiped down with the same mixture I use on the interior of the Oliver – 4 parts Duragloss detailer with 1 part Duragloss liquid wax – in order to give it a nice clean shine. 5 – Clean the inner face plate and clean all other interior surfaces of the MaxxAir. Again, I used this Duragloss mixture. 6 – Re-assemble all parts in the reverse order. Note that when re-installing the fan on the motor shaft, the fan set screw should be tightened against the “flat” surface on the motor shaft. Do not over-tighten any of the screws that go into plastic! Snug is sufficient. Don’t forget to re-connect that electrical connection that was disconnected in step 2 above. When re-installing the screen, if the four plastic “tabs” were originally turned 180 degrees then the screen should easily slip back into place. These four tabs can then be turned back to the original position into the indent on the face of the plastic on the screen. Do not force these plastic tabs, they are snug but finger pressure is all that is necessary if they and the screen are positioned correctly. 7 – Turn the fan on to make sure that all is well. For what its worth, the “ticking” sound was caused by a little label (serial number and model of fan) becoming partially un-stuck from the interior side of the fan housing. As the fan would rotate, the blades would hit this label causing the noise.
 1 point
 -
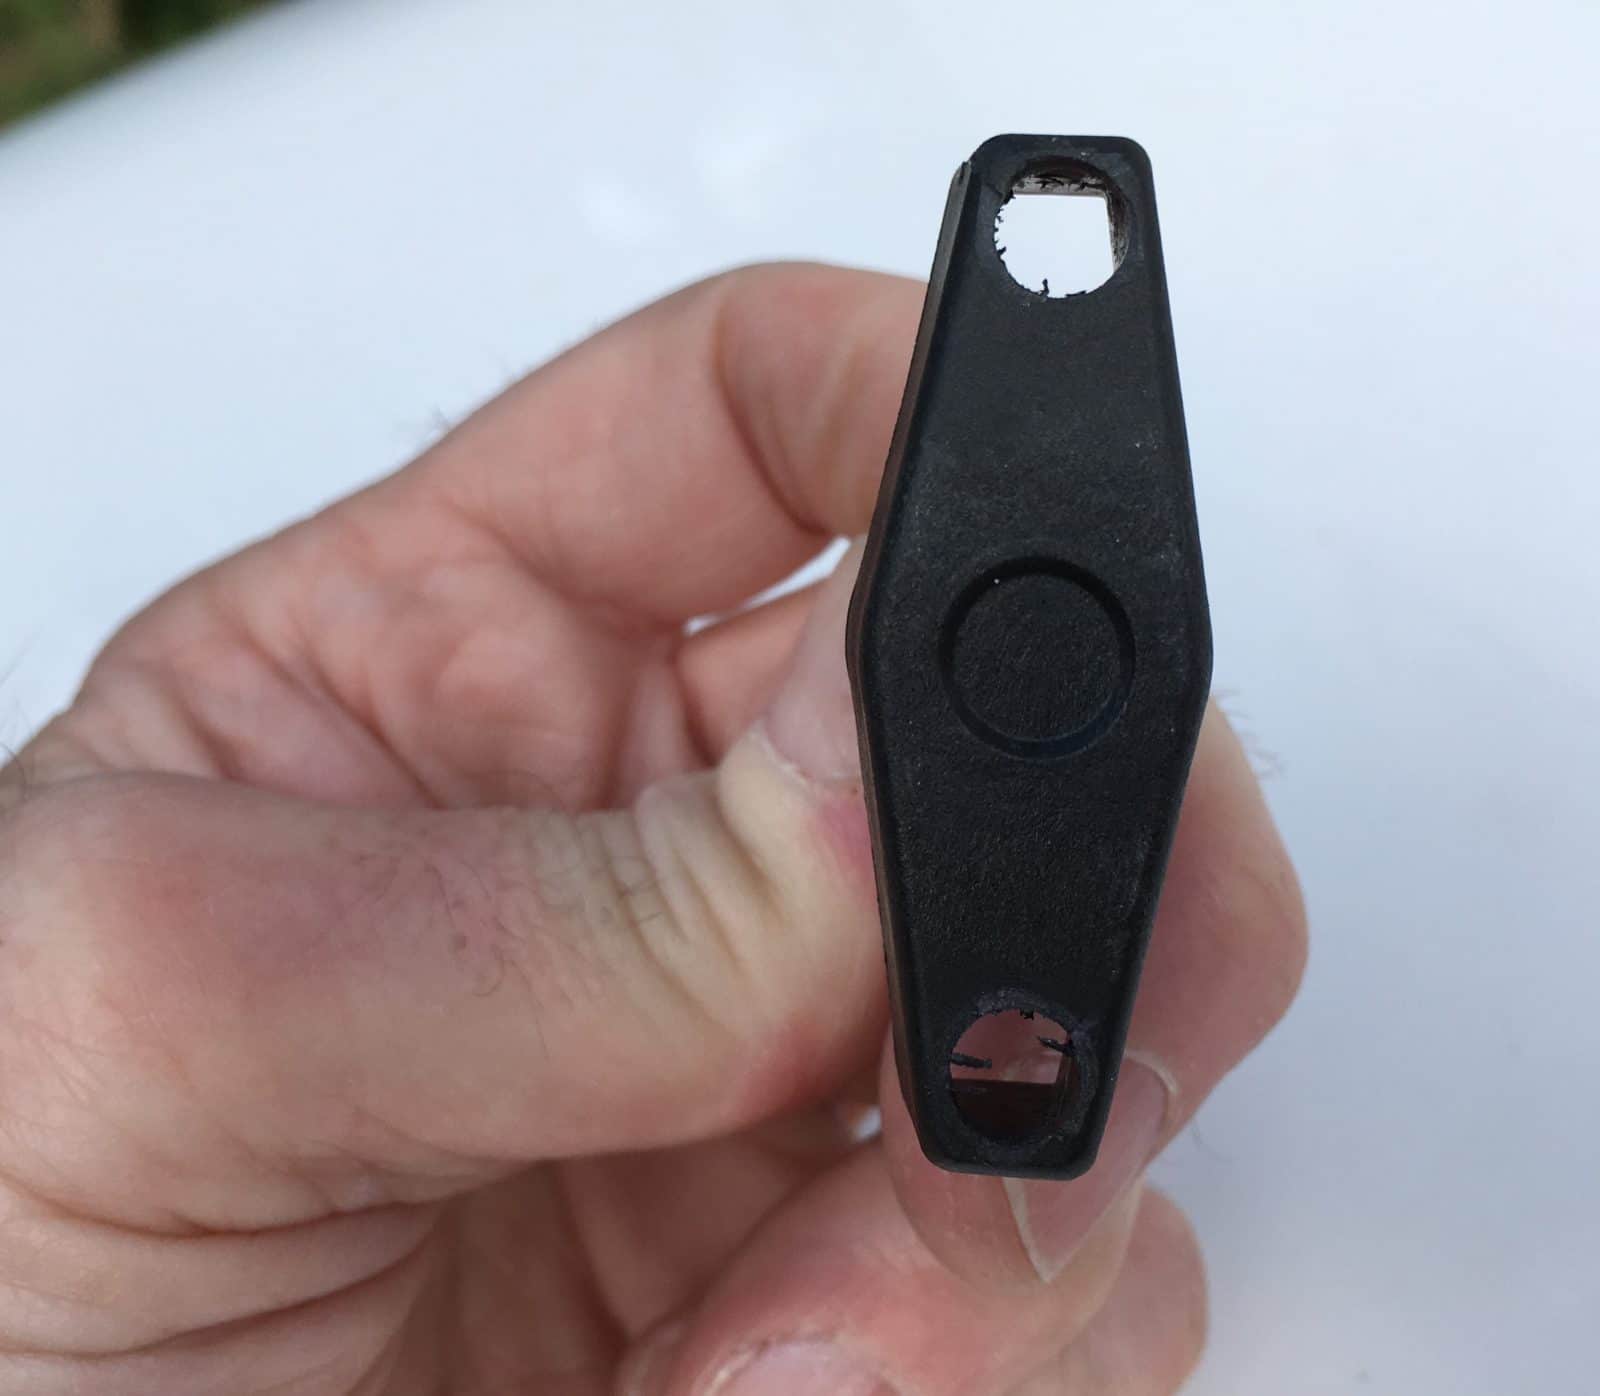
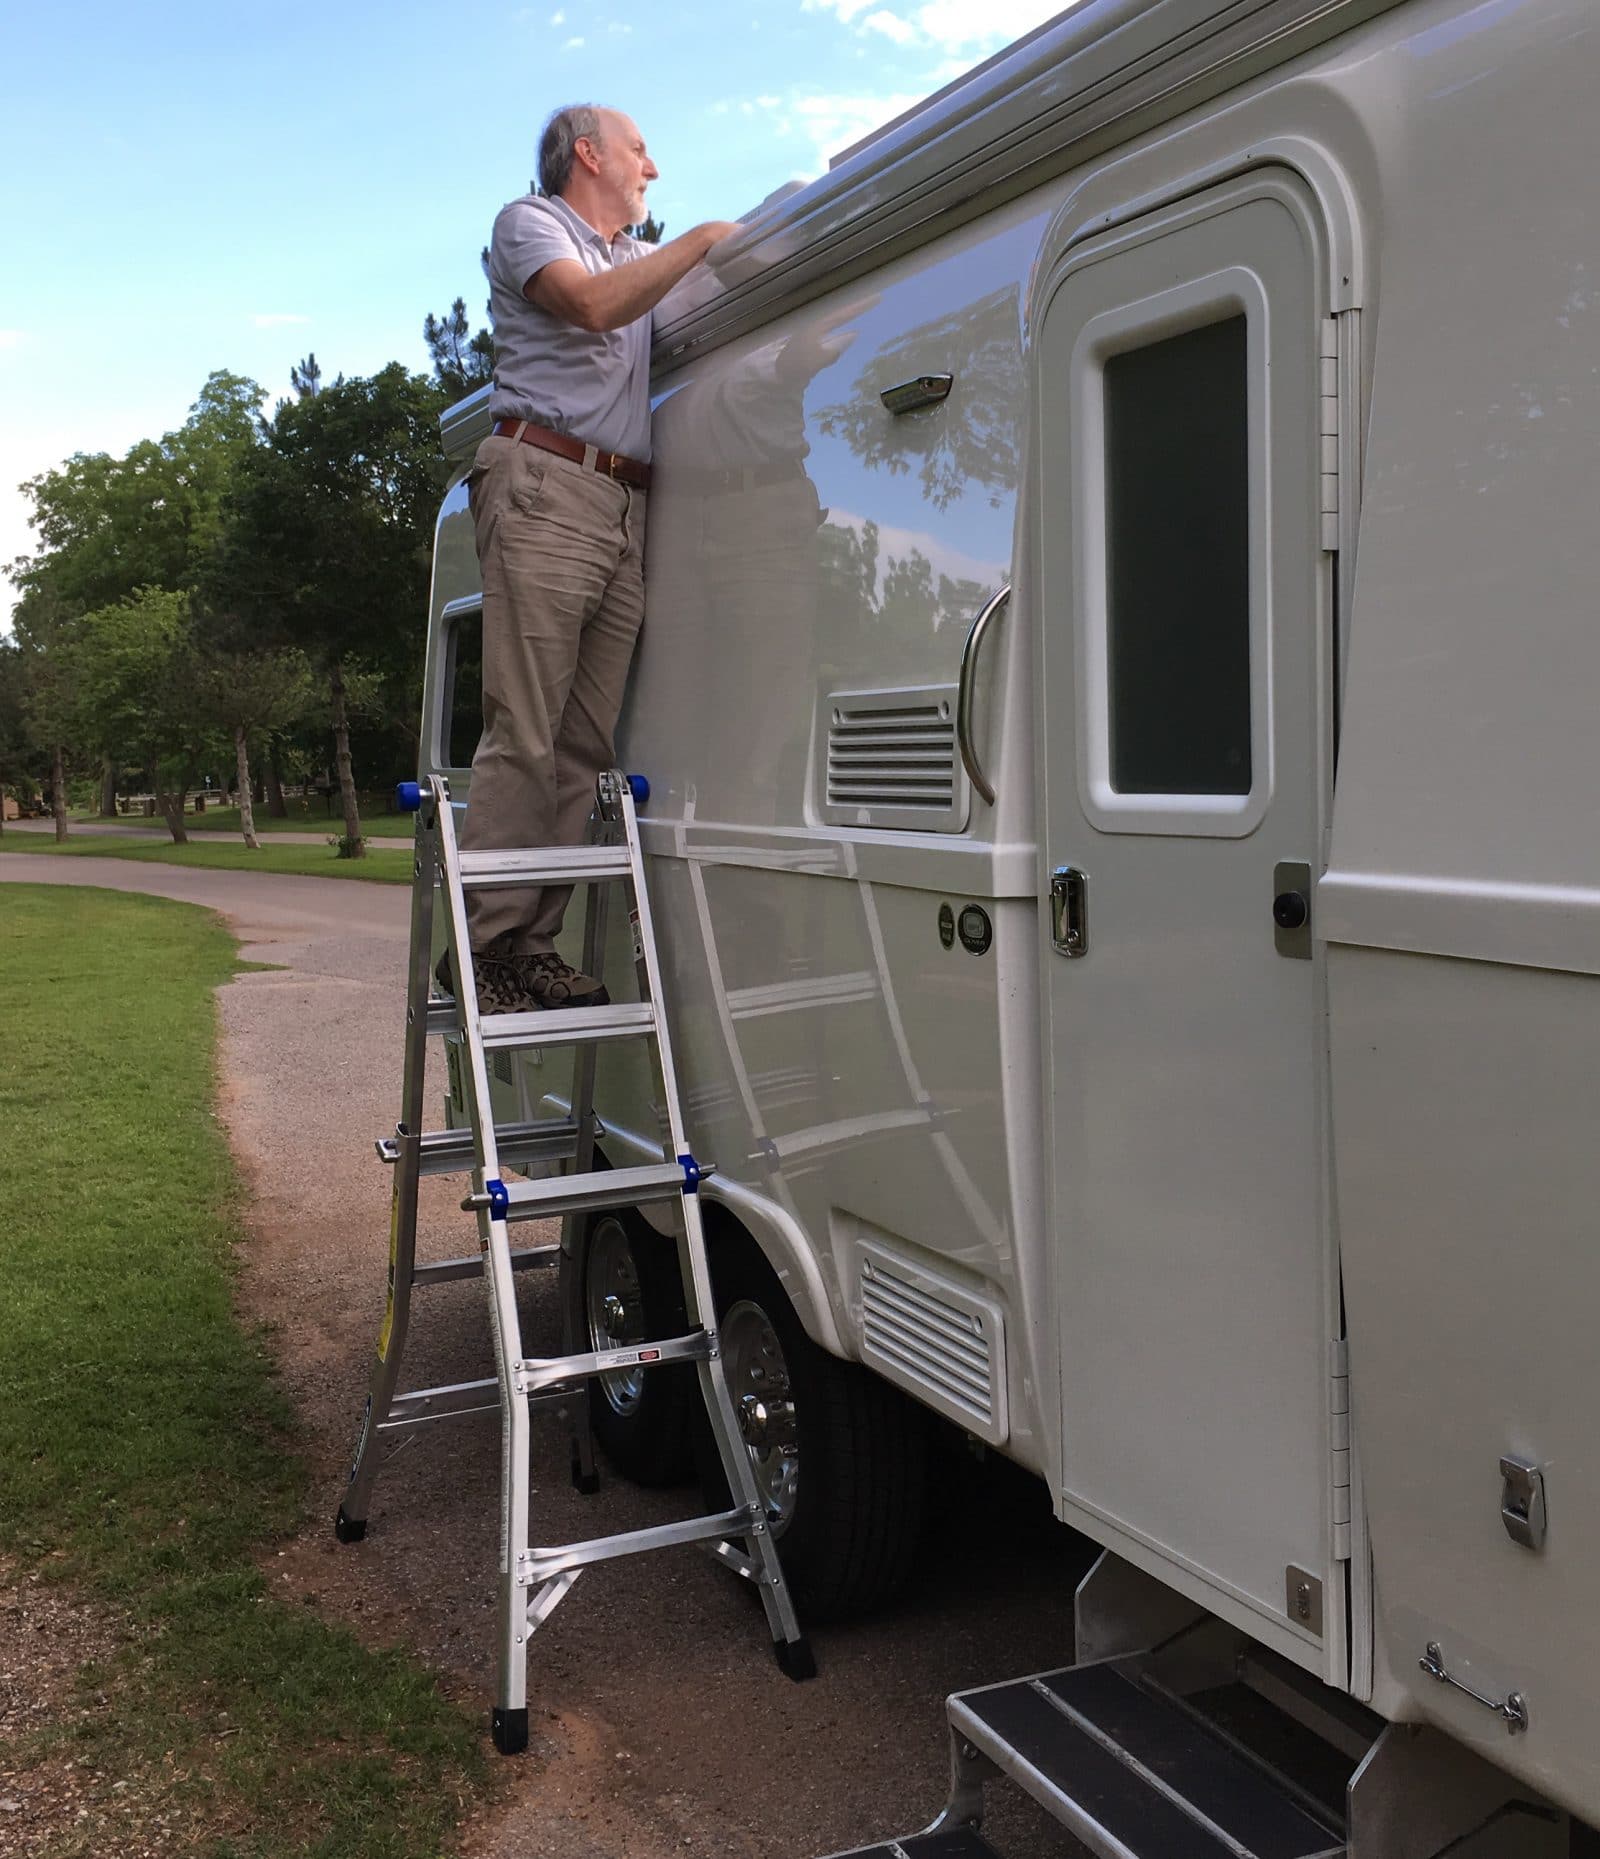
Three days after we took delivery of Mouse, I climbed up my ladder for a check of the roof. Everything looked fine, except for the solar panels. Three knobs were slightly loose, perhaps a 1/16th of a turn. One was a full half turn loose. This is dangerous since a loose or lost knob could wreck the panel and possibly the vent and AC unit behind it, especially if you are towing into a stiff and gusting headwind. I got out my Dewalt driver drill and modified the knobs so that I could secure them tight. I can't recall the hole size, probably 1/4 inch, big enough for a standard sized nylon wire tie. This is just like safety wiring a bolt using steel wire, but the advantage is that the big white ties are highly visible from the ground, so you can include a visual check of all four as you do your final walk around before leaving. You must route the tie so that all the forces are acting to tighten the knob. I think this should be done at the factory, but in the meantime I strongly recommend that everyone with panels on the roof secure the knobs. A better fix would be to drill out the threaded inserts and install through bolts with self locking nuts, but this would make it very hard to reposition the panels for cleaning the roof underneath.... Here is a question: have you ever checked them? If not, then please do so before your next trip. They may be loose.... Be safe. Here is my Werner convertible ladder in action. It is good to have access to your roof, always. John Davies Spokane WA
1 point
-
Hobo There is one more thing to check since you had some problems. Make sure your fresh tank is empty. Then connect your city water. Monitor the level of the fresh water tank. If the level is rising your water pump bypass valve is stuck causing the city water to fill the tank. And that would be caused by all the plastic you found it the line.1 point
-
One or two of our solar panel mounting knobs were loose last November when we put our Ollie away for the winter... just 3 nights camping from factory pickup. Checked them all and put it away with sufficiently tight nobs for the winter. We've maybe put a couple of thousand miles on it so far this season, and there were 2 knobs loose again. Not sure if it was the same 2 knobs as before or not. All knobs had a lock washer installed, but they were compressed between the metal bracket and the plastic knob so not sure if they were able to fully achieve the intended effect. I added a stainless flat washer to each knob, and implemented John Davies' locking solution described above (thanks, John!). Easy, cheap and effective. On a side note pertaining to tilting the solar panels to facilitate water runoff, that does not appear to be possible on our 2018 Elite I as the box holding the connectors is located right underneath the panel and is so tall that there is insufficient clearance to drop down either side of the panel a notch in the bracket. However, when the trailer is level (as determined by the bubble on the tongue jack/stabilizer) there is a slight forward tilt to the solar panels due to a slight slope in the top ridge of the roofline. When level and at rest, water flows forward and off of the panel's top surface.1 point
-
That looks good, for sure wouldn't effect departure angle build like that. Nice design. I don't know what you guys carry with you but adding mass up high is negligible. Also I'm guessing I'm younger than most of you so climbing up a ladder to get stuff I don't need on a daily basis is no biggy. We do a lot of different things during different seasons so being able to tuck away our backpacking gear, pack rafts, climbing gear, etc, etc. up on the roof would be fantastic. We'll be traveling full time for a couple of years so having it all with us is a must. I would argue that putting a couple hundred pounds on the roof towards the front of the trailer would have less effect on handling that cantilevering it off the rear. I would also argue that you won't feel either. It would be no higher than the A/C and quite a bit lighter than the A/C. Don't overthink this. Designed properly using thin walled rectangular aluminium tubing with dryboxes the entire rack would be less than 75lbs. I'm also building a rack for the pickup that goes around my softopper. It will also have small dryboxes on the sides and will be able to carry my inflated raft on the roof. Dogs get the bed on top of my full length bed drawers which house fishing, hunting goodies, tools and other odds and ends. So storage abound. I promise I won't overload the roof gents, but thanks for your concern.1 point
-
Thanks, because we are needing it.1 point


-
Recent Achievements
-


")


")


