Leaderboard


Popular Content
Showing content with the highest reputation on 02/05/2020 in all areas
-
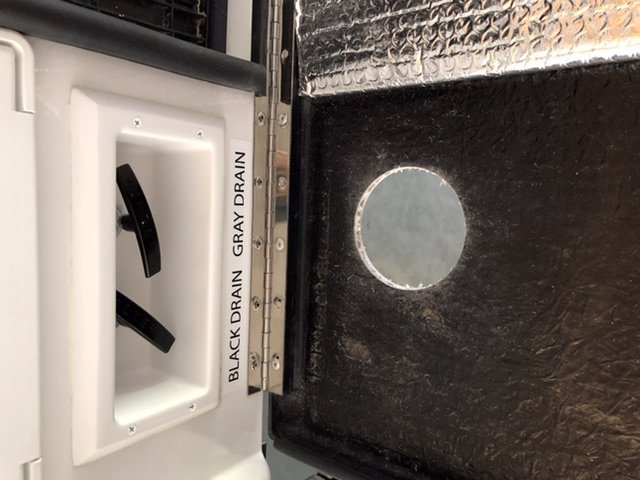
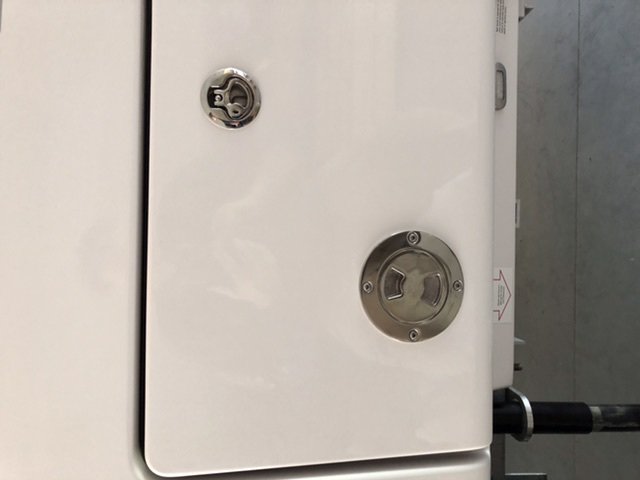
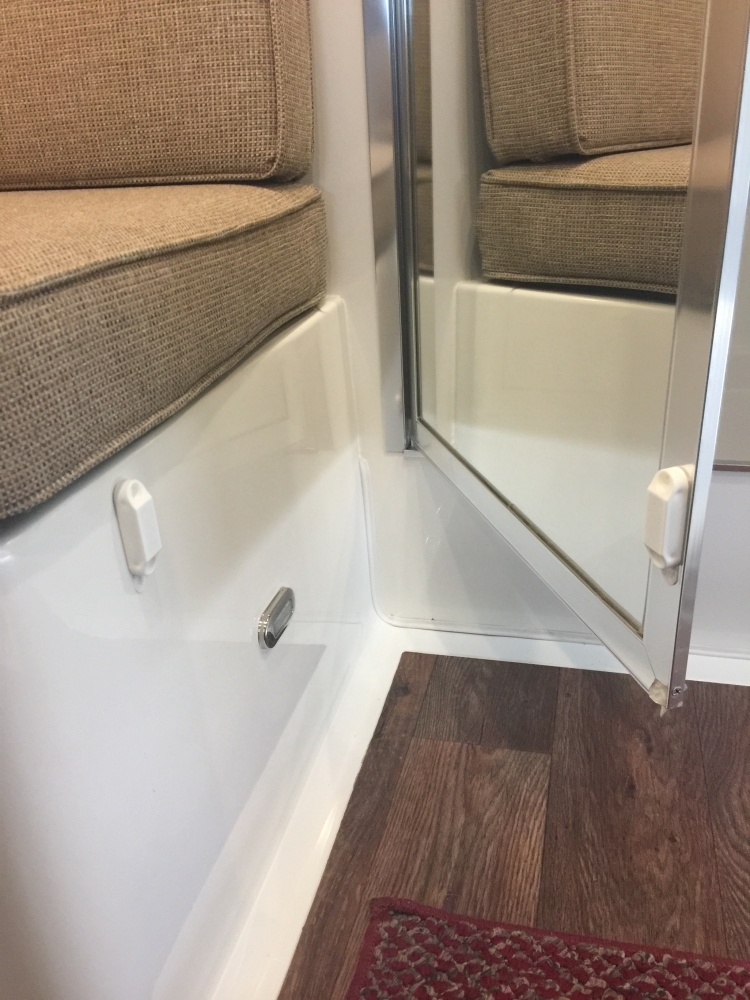
I haven’t seen many Ollie mods posted in awhile. I thought I’d share one of several i did recently. while camping with full hookup i keep my grey water valve open. I didn’t like the idea of having the basement door open while the valve was open. And having the valve open slightly With the door closed didn’t seem like a good idea. The pictures show what i came up with. Just a note. This access hatch is stainless steel one of the reasons for it, was its a 3in opening smallest available. All the white plastic versions are 4in and larger. I will say it does look good in stainless. Install was straight forward a 3in hole saw stainless hardware, measured 90 times then measured another 90. Wiped the sweat of my head and did it. My first major cut into Ollie.
 4 points
 -
I don't know - looks like you're a quarter inch short to my eye. May need to redo them.3 points
-
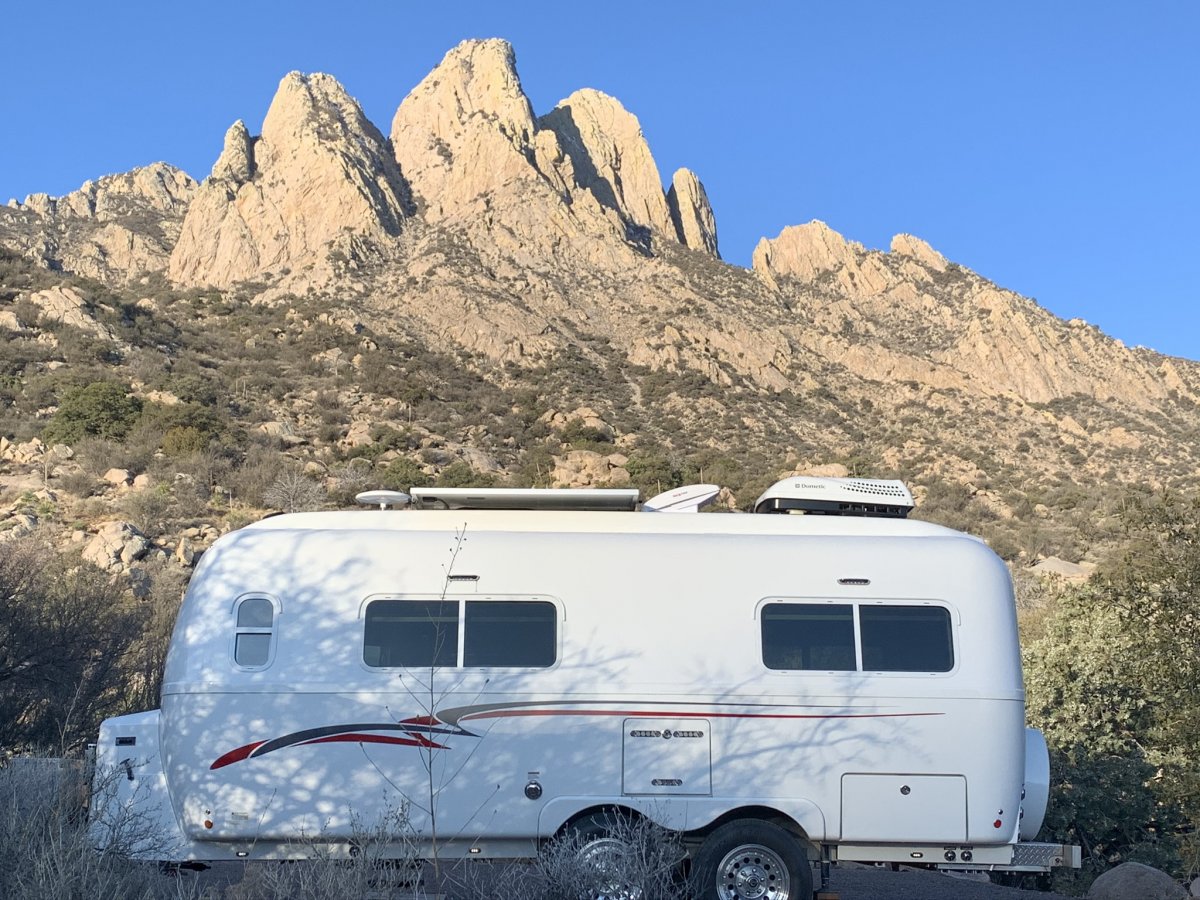
The picture is from a BLM campground called Goose Island, near Moab. The campsite is right on the Colorado River. More pictures and info in this earlier thread.2 points
-
This is at Aguirre Spring Campground outside of White Sands National Park. BLM, nice sites and vault toilets. No hookups. Steep winding drive up to the campground. $7/night, $3.50 with senior pass.
2 points
-
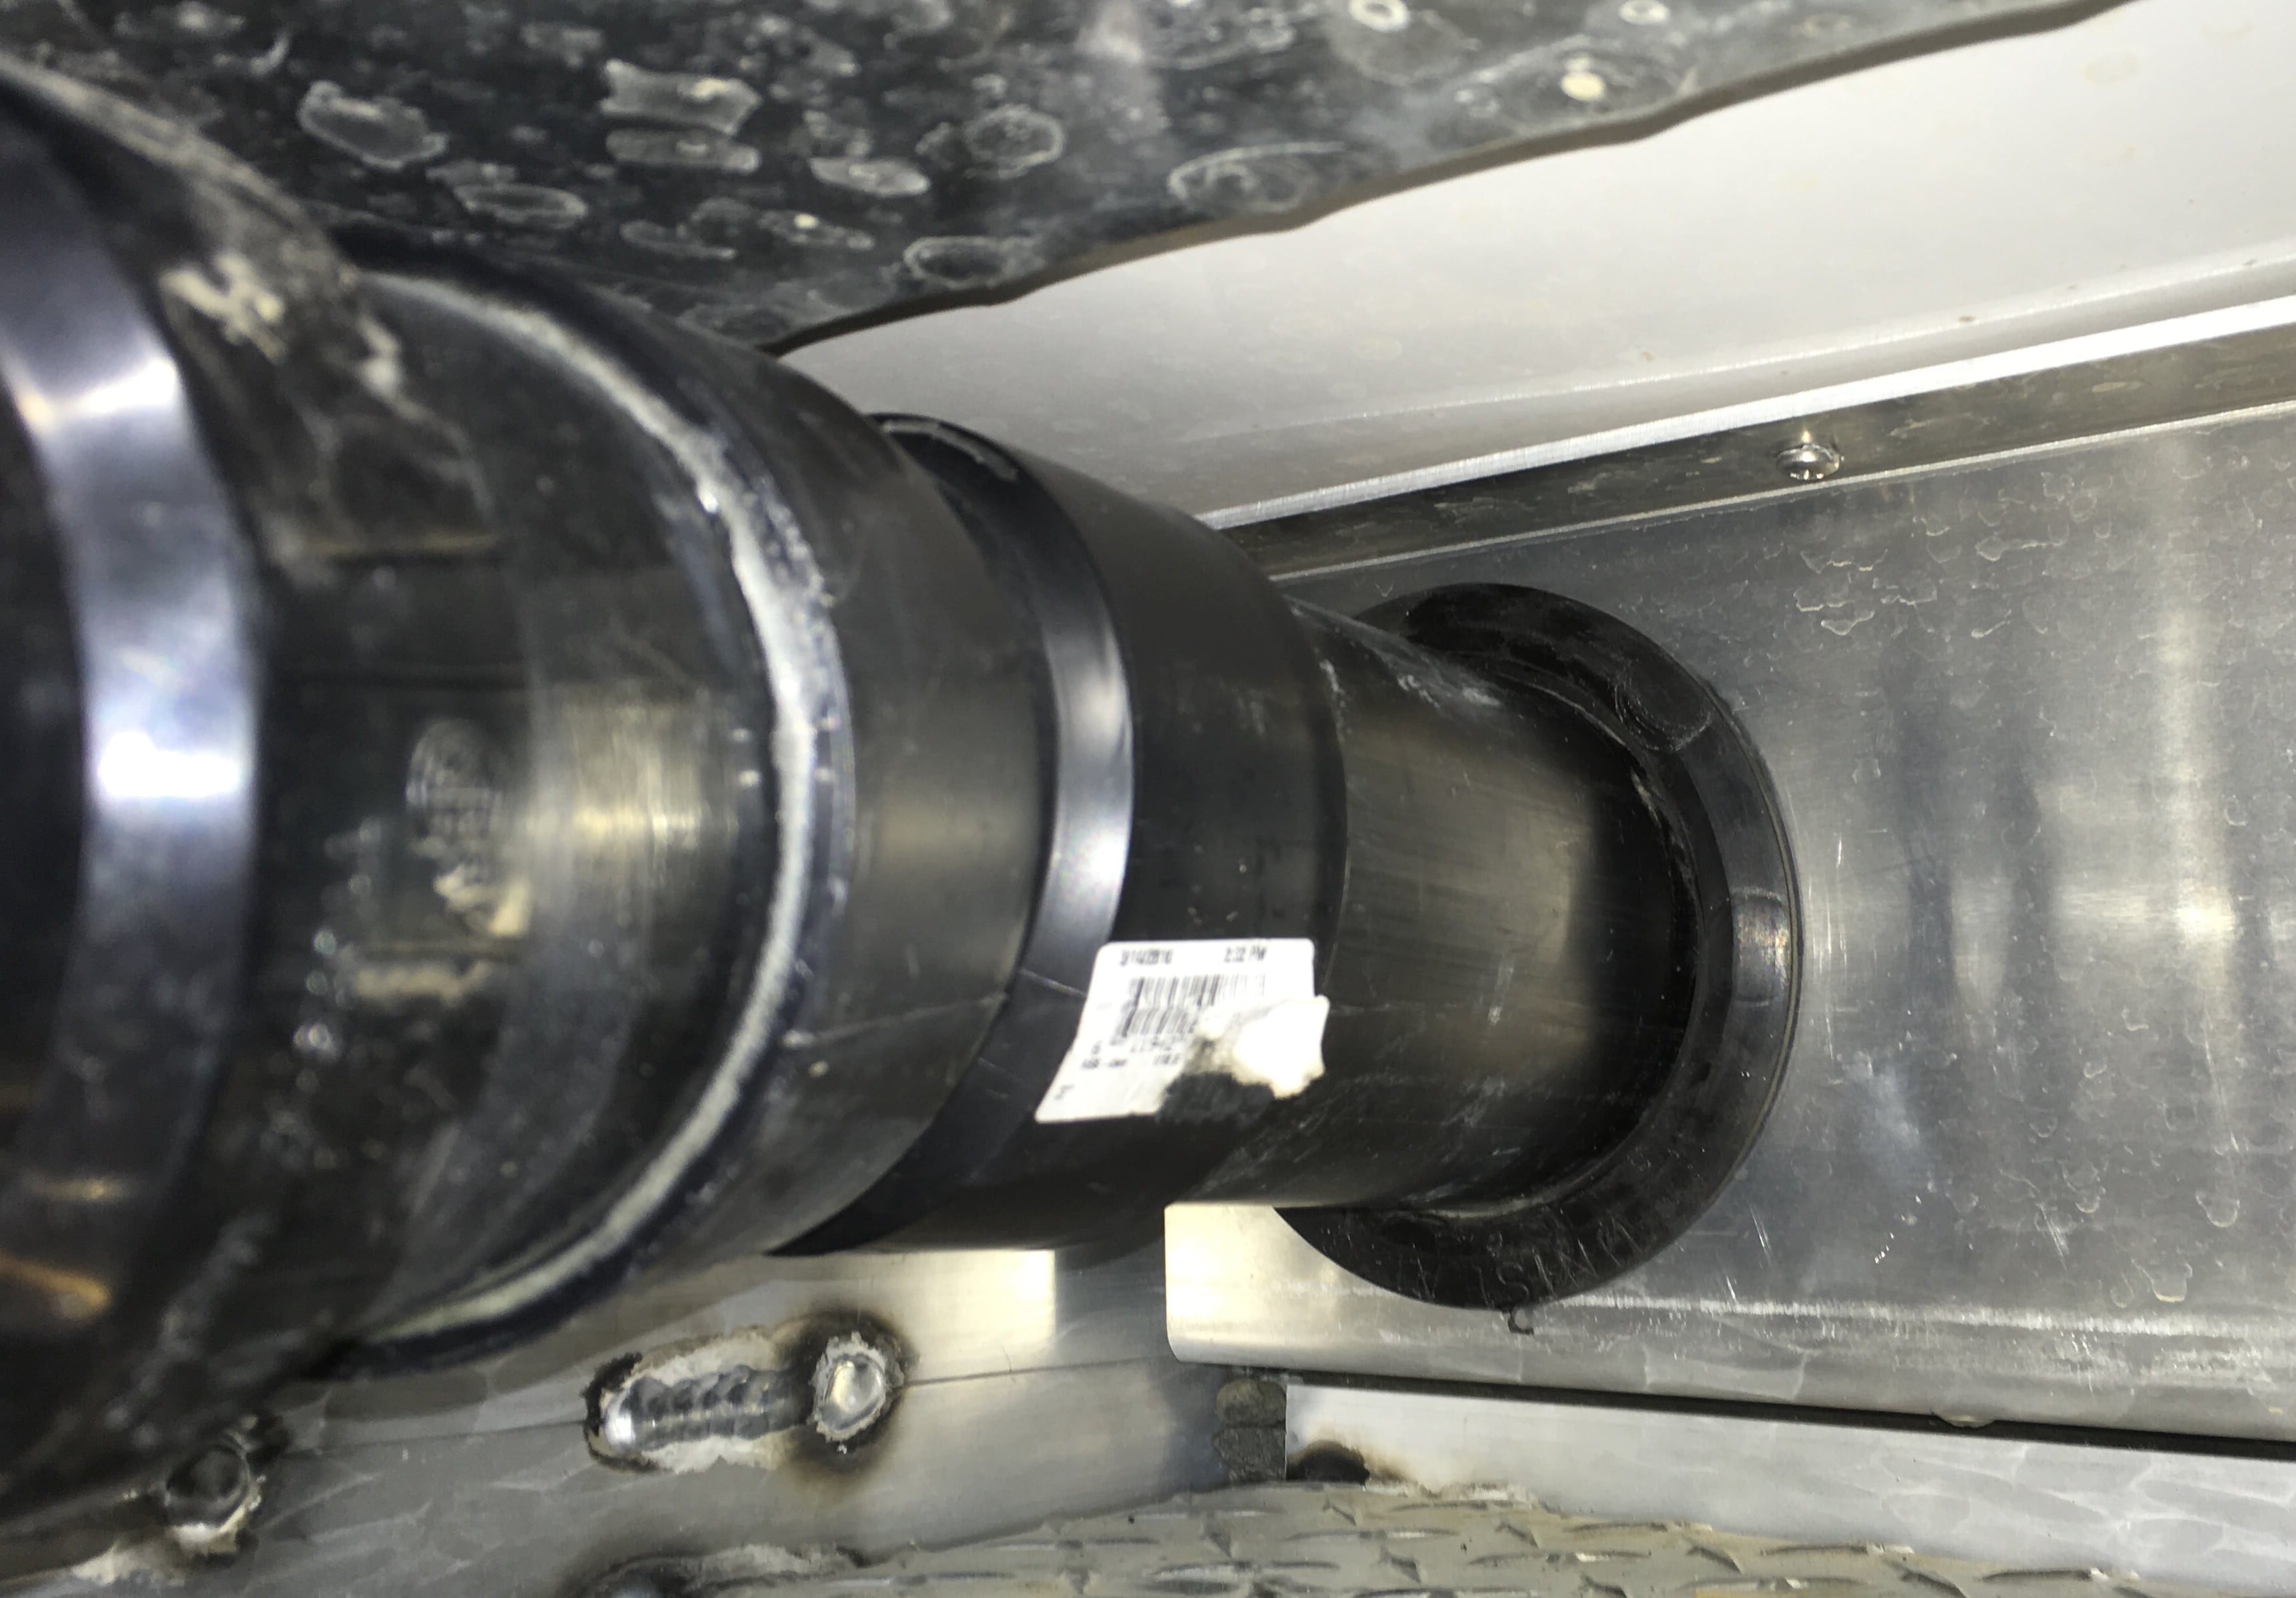
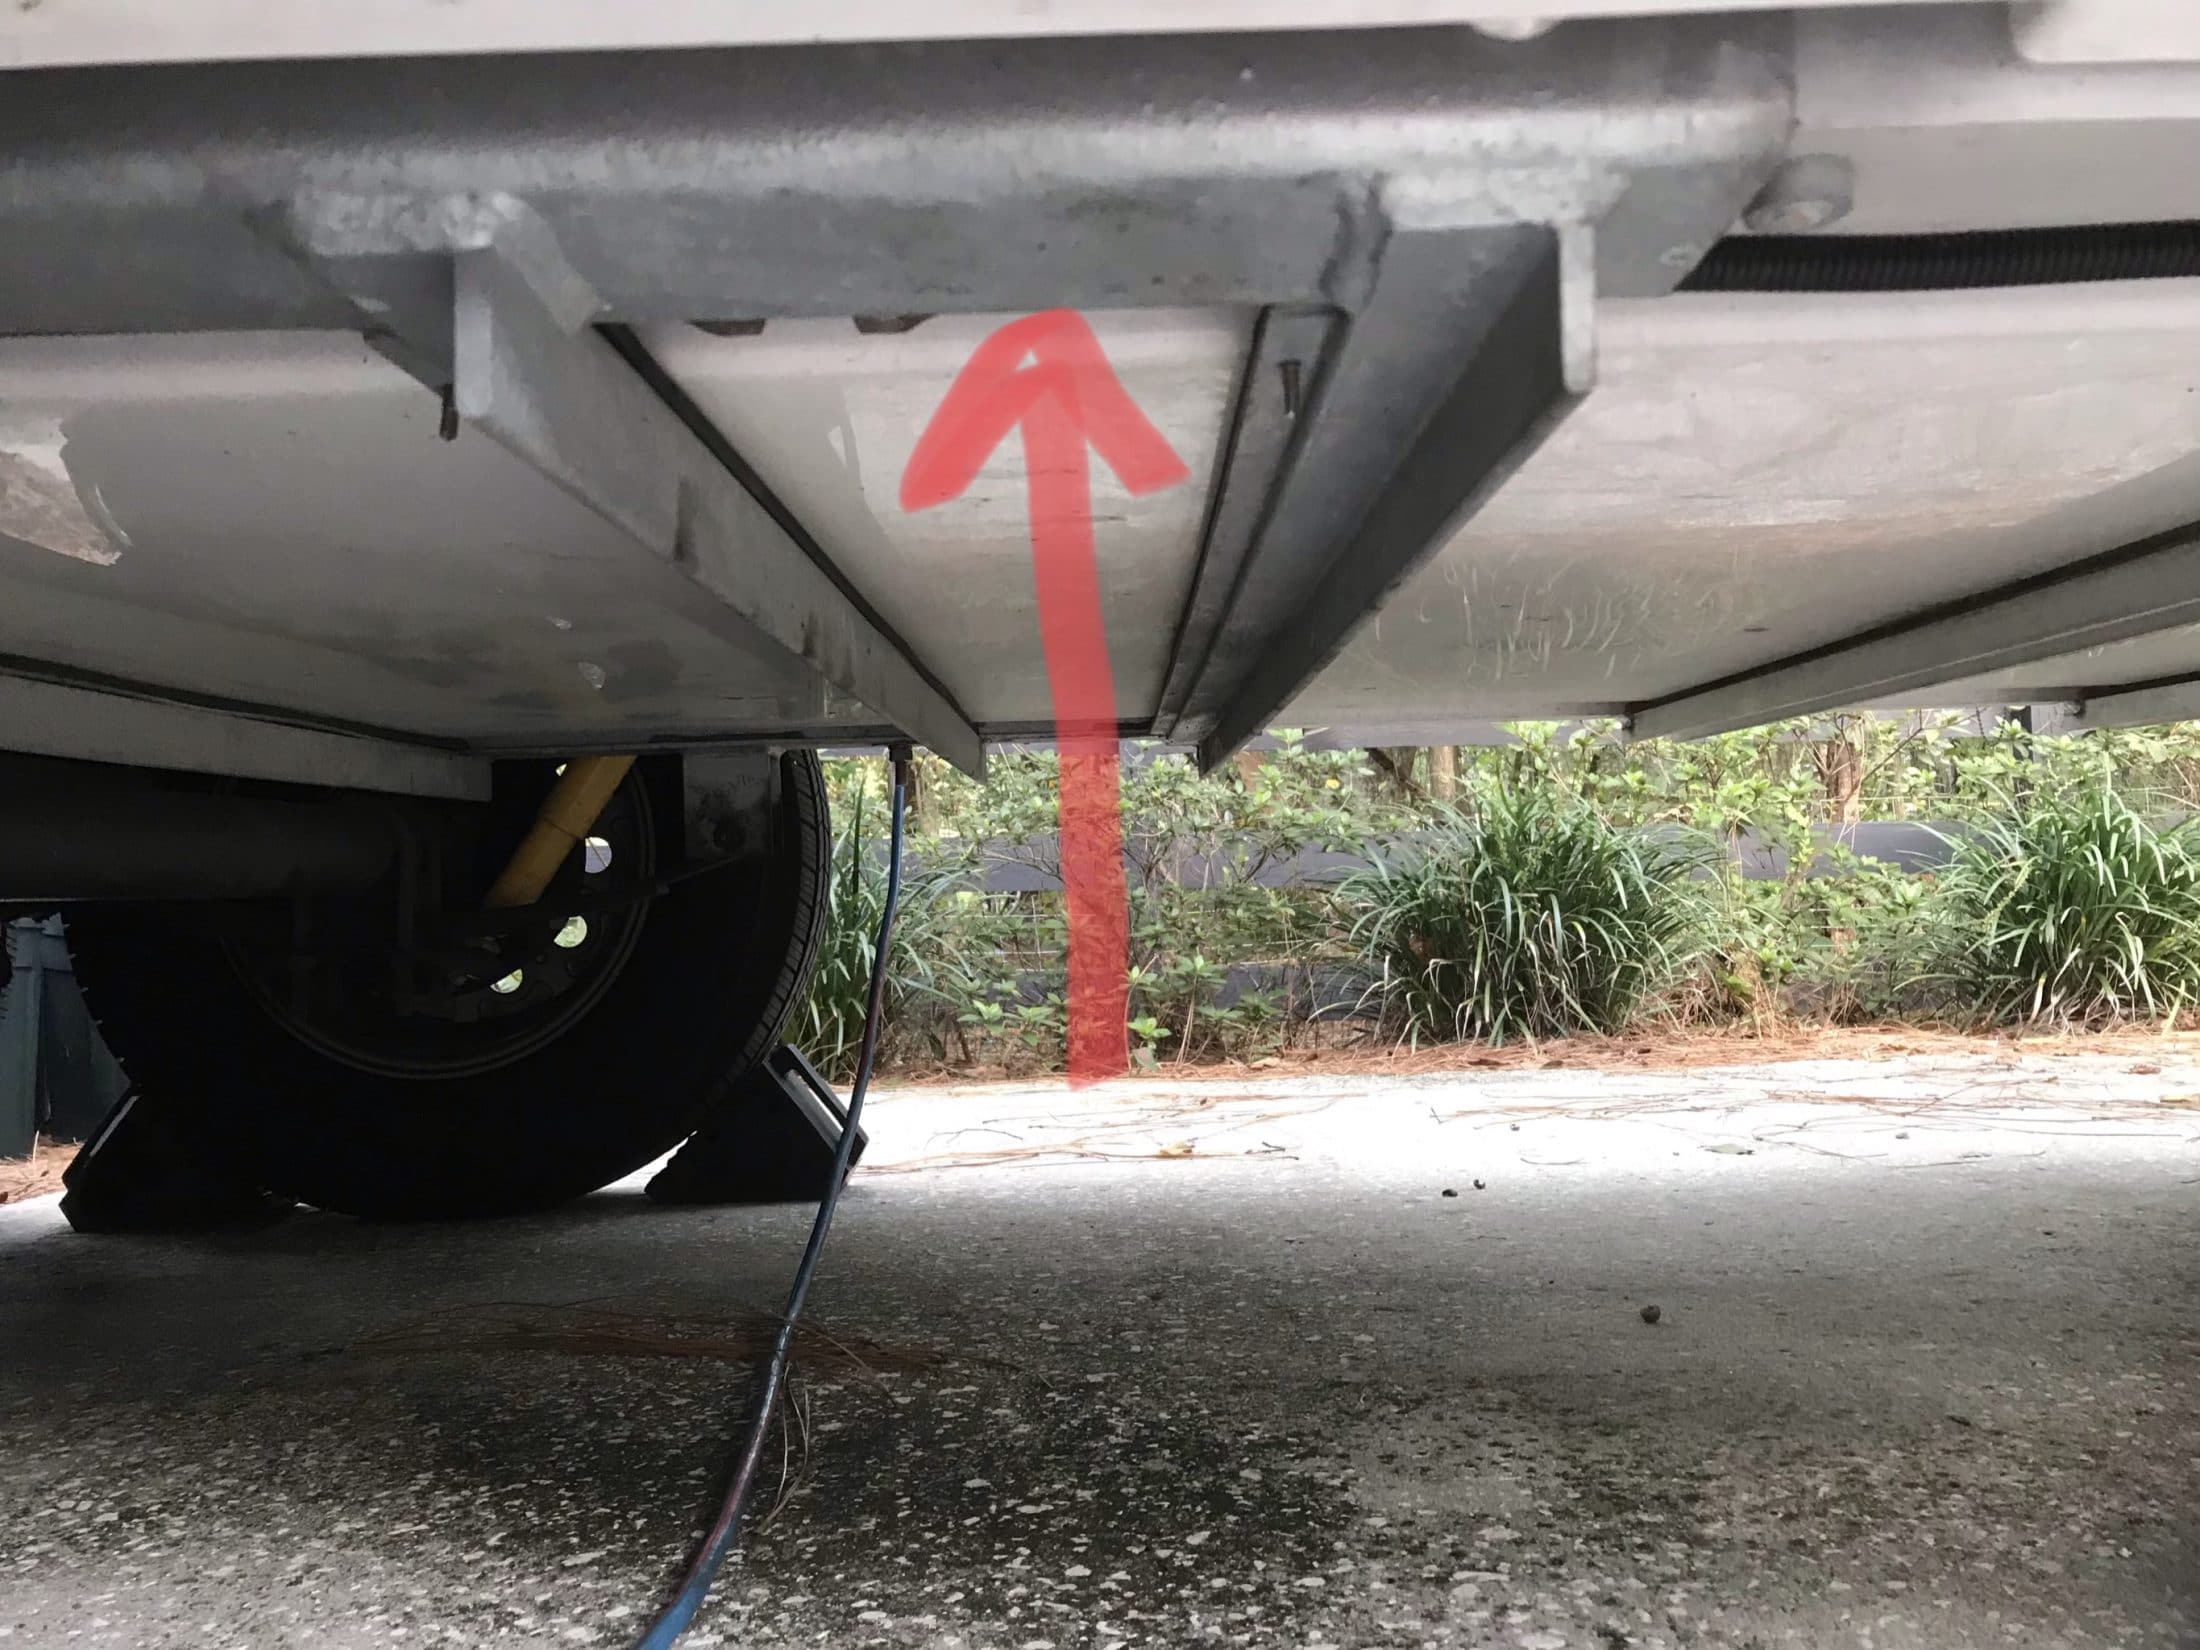
This really embarrasses me because it took 18 months to finally figure out what was going on. The waste pipe has always flopped around and it never occurred to me to get on my knees with a strong flashlight for a close look. I discovered that at the very front (dark) end of the hose compartment is a 5” hole where the 3” pipe exits the trailer. There is supposed to be a big flanged plastic grommet inserted into the hole to seal it. Mine was two inches back on the pipe. It had never been pushed into place. I drove it into position with a wood stick and a big mallet. The last little bit at the 6:00 position was tough, but I wedged a 2x4 under the pipe and finally got the last 30 degrees of grommet to snap firmly into place. Now the pipe does not move, nor will huge amounts of road dust enter there. If your pipe moves at all, check the grommet. It should look like this, fully seated all around. You can feel with a finger if there is a gap anywhere: Fixing it should RADICALLY slow down the nuisance dust buildup in my interior compartment: I will vacuum the dust out once more to see if it is stopped for good. This is what typically comes out of that rear compartment after dusty roads: John Davies Spokane WA
2 points
-
I have heard of people getting by with scattering their grey water around the site at the base of trees and what not, however I have not seen or read about anyone dumping their grey water as they use it right under the camper. I know most of the sites i'm aware of in TN would frown on that. I have done dishes outside in a tub plenty of times and dumped the water, however the perception of a sewage leak, grey water or not, under the trailer would raise a lot of eyebrows and draw unwanted attention.1 point
-
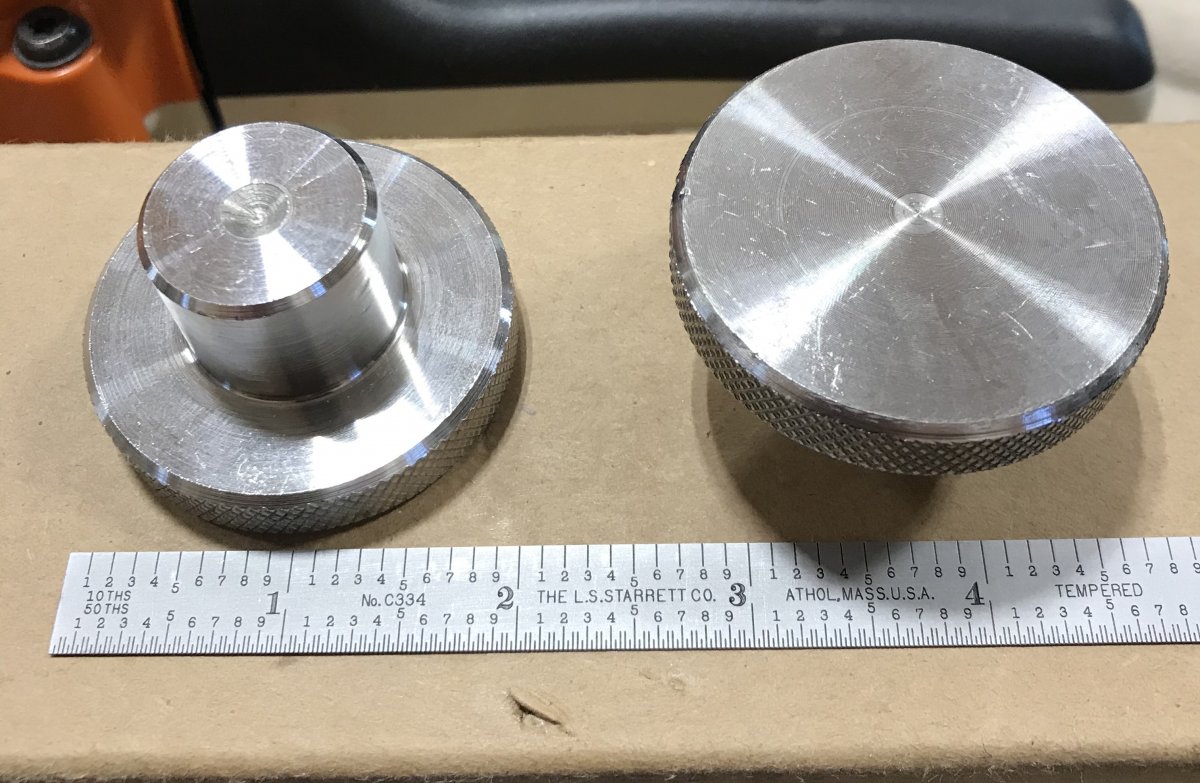
Now you need to replace those black handles with some 303 Stainless Steel knobs https://www.mcmaster.com/#60205K37 drilled and tapped for M6x1.0 threads.
1 point
-
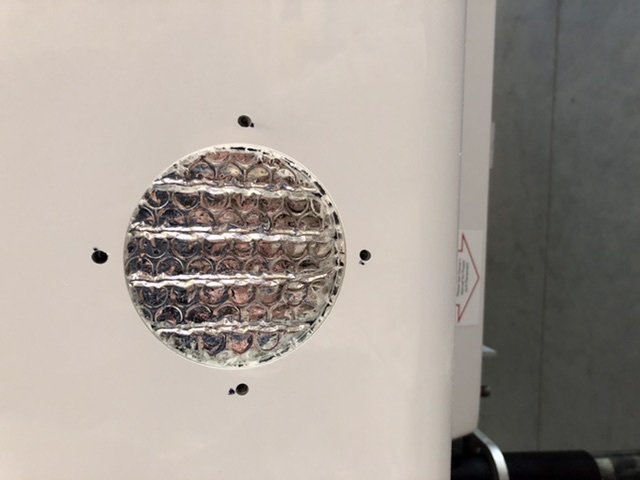
Thanks for the reply’s. I was skeptical about posting mods. I’m not one to put pen to paper as you can see from all the crooked pictures, and like John D who does a great job detailing on mods. Most of my fabrication and mods are from thought, eyes and hands not much paper. That being said as for measurements, nothing written down. Simple way. Open the compartment door measure top edge of opening to center of dump handle do the same from the side. Close compartment door and do the same measurement from the compartment opening not the door edge. The two measurements marked on the door will bring you to the center of the dump handle. Only measured ten times to verify, before using the hole saw. One thing i was surprised to see the compartment door is not solid fiberglass, its two thin layers with a plastic honey comb material in between. Still a strong door. One thing i forgot to mention. Because i wanted the smallest opening 3in i had to trim off approx 1/8 in off each side of the handle to be able to pull the handle through the hole easy. Another surprise. The tee handles are not plastic they are aluminum with a black coating, good quality. 2019 model year.1 point
-
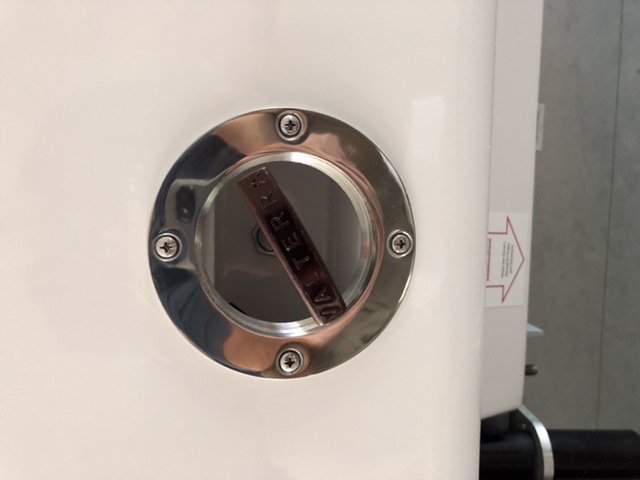
As quick as you once explained how to post items i quickly forgot, maybe a how to for the rally navigate and post on the forum. I’m in. Amazon Amarine Made 3” heavy duty 316 marine grade stainless steel boat deck access hatch. $26.991 point
-
We initially had a problem with our radio on our new 2019 LEII. I used a inspection camera and confirmed that the antenna was never connected. I was able to inspect the back of the Jensen to find the right connector and our radio problem was resolved.1 point
-
Nice! It is rather hard making that first hole..... after that it gets easy. I always wondered why the handles were designed so that you had to leave the big door open. What’s next on the Honey Do List? FYI, if you change the name of your thread to put the subject in it, like “Grey handle access hatch”, a Search will turn up much better results. John Davies Spokane WA1 point
-
My OCD compelled me to run the molding all the way down to the tangent point of the lower curve of the frame. 🙂1 point
-
I'm one of the ones that suggested extending the EZ Gutter down the sides of the windows. There is noting wrong with what FrankC did but probably half way down the sides would more than do the trick. On the other hand - if any of the gutter lifts, the easy fix is to use a product called "E-6000"to re-stick it. Bill1 point
-
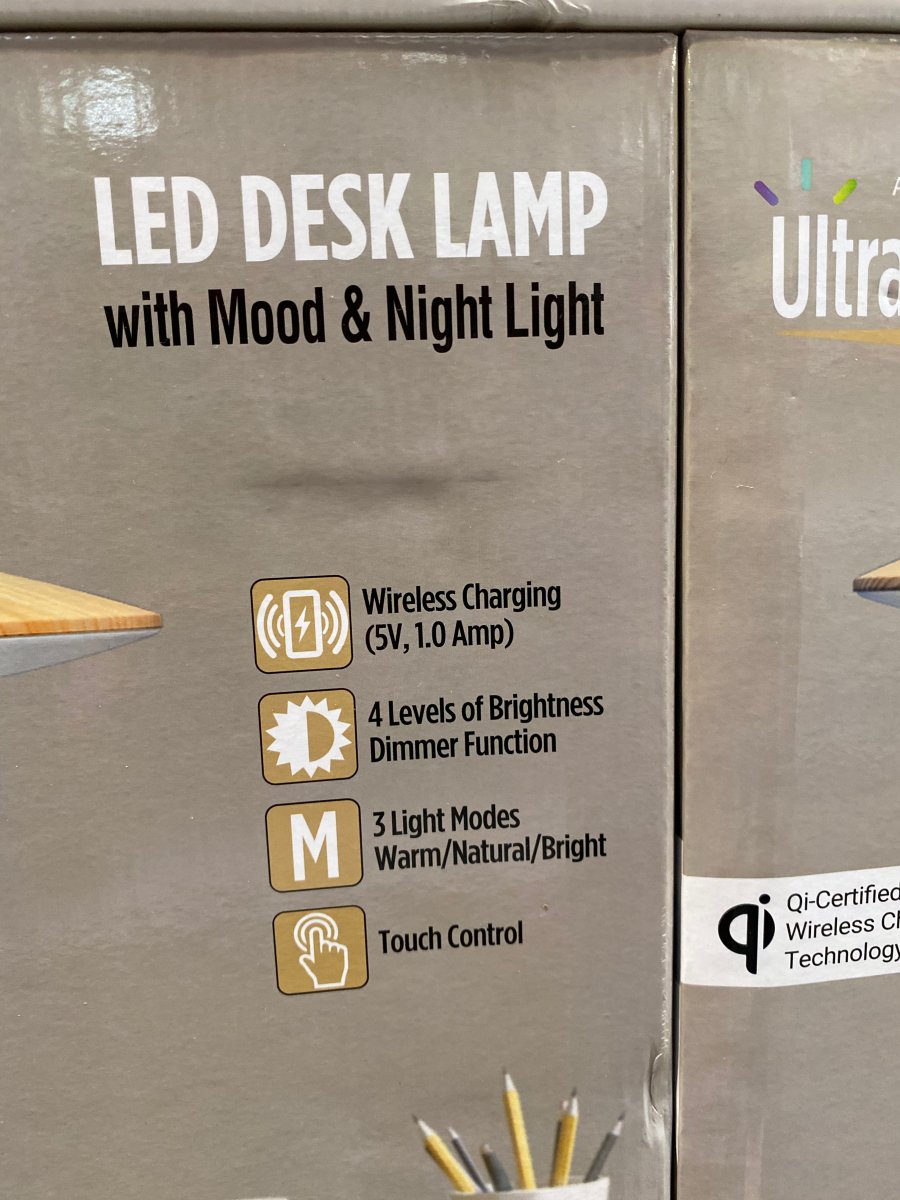
If anyone is looking for a good lamp to use on their nightstand, I saw these at Costco today and thought they'd work really well in an Ollie. They're $30, and have a wireless charging pad on the base for your phone/watch, a nightlight and 3 additional brightness settings, and 3 choices of color temperature plus other colors. It's contemporary but I think the style would work well in an Ollie. The best part is that it uses a 12 volt adapter, so it would be a really easy modification to snip off the transformer and replace it with a cigarette plug to connect directly to your 12v system. It's light enough, too, that I think some heavy duty velcro would hold it firmly to the nightstand for travel. And if you have a small 12v battery pack, it could even be used on a table outside. If we didn't already have a lamp, I definitely would have picked up one for Snowball.
1 point
-
I have the Voyager backup camera system that Oliver installed. While I use the backup camera when when reversing into a campsite or my storage facility, I rely more on my mirrors and my wife who acts as a spotter. I really like the backup camera when driving on the highway. I gives me a better picture of what is behind me than the side mirrors. When passing another vehicle and deciding when it is safe to change lanes, the backup camera really shines. It is so much better than the side mirrors for this. Your Ford setup with the backup camera only visible when in reverse would not work for me.1 point
-
That capacity depends on the availability of pit/ vault toilets, and possibly available "bush area," for the guys. Black tank has never been our limiting factor. Maybe a gallon or two a day, input, max, sans other facilities?. Freshwater, grey water capacity is more critical, for us. You don't have to hold the flush step forever with your foot, for just liquids. I'd say 9 or 10 days, conservatively, on our black. Long enough that we've never worried. I have no problem with maintained pits/ vaults. Our Alaska runs, with rental deliveries, have 24 or 32 gallon blacks, and rarely more than half full after three weeks or so. We have looked at composting for the boat. Maybe the trailer, someday, if we have to replace the toilet. Or the plumbing fails. More likely on the boat, where pumpout is much more of an issue, and more logistics/ PITA. Don't get me wrong. We like the composting idea. We just rarely replace a working system for something else, just because.. When systems work, we keep them. When they don't, we replace them. Sherry1 point
-
Well, this topic is drifting into dangerous waters. Rather than commenting directly, and risking offending anybody, I will offer this article. https://motivatetherapy.com/is-it-normal-to-pee-and-poo-at-the-same-time/ That said, my wife had similar concerns about using the Natures Head toilet and those turned out to be completely groundless. I love this forum! John Davies Spokane WA1 point
-
I believe composting toilets are an "older" technology, in a somewhat modern package ….1 point
-
As with most things, the answer to your questions is.... It depends (no pun intended). If you assume that the two of you are boondocking and only using the Oliver's indoor facilities then I would think that David's answer is correct for "most normal" people using the standard toilet . However, there are products that can be used along with an "outdoor" setup to prolong this time frame when boondocking. Or, if you are not boondocking then using "pit" toilets or a campground's facilities (assuming no sewer hookup) can dramatically prolong intervals before a tank dump. For me (us) the cost of the composting toilet versus the standard one simply didn't make sense. Also, my wife found the higher "seated position" on the Nature's Head to be very uncomfortable. Bill1 point
-
Yep. Same here. Especially the getting older part.1 point
-
With two of us the black tank usually lasts four to five days. And that is with both of us getting up several times each night to use the toilet. One of the unfortunate pleasures of getting older... The people who have the composting toilet seem to really like them. If you use the search function on the forum, you will find a lot of threads. When I explained how they worked, my wife was definitely not interested in a composting toilet. When either of us sit down to poop, our bodies naturally want to pee at the same time, and you have to segregate those two bodily functions with a composting toilet.1 point
-
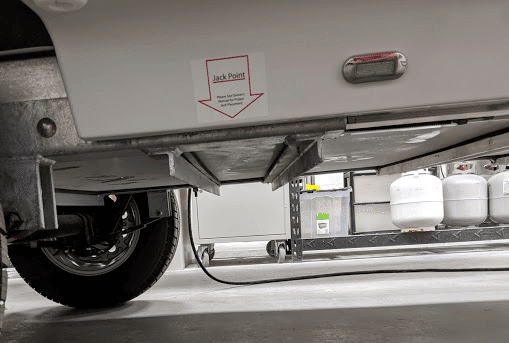
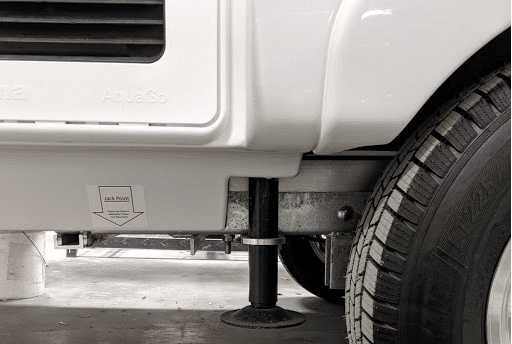
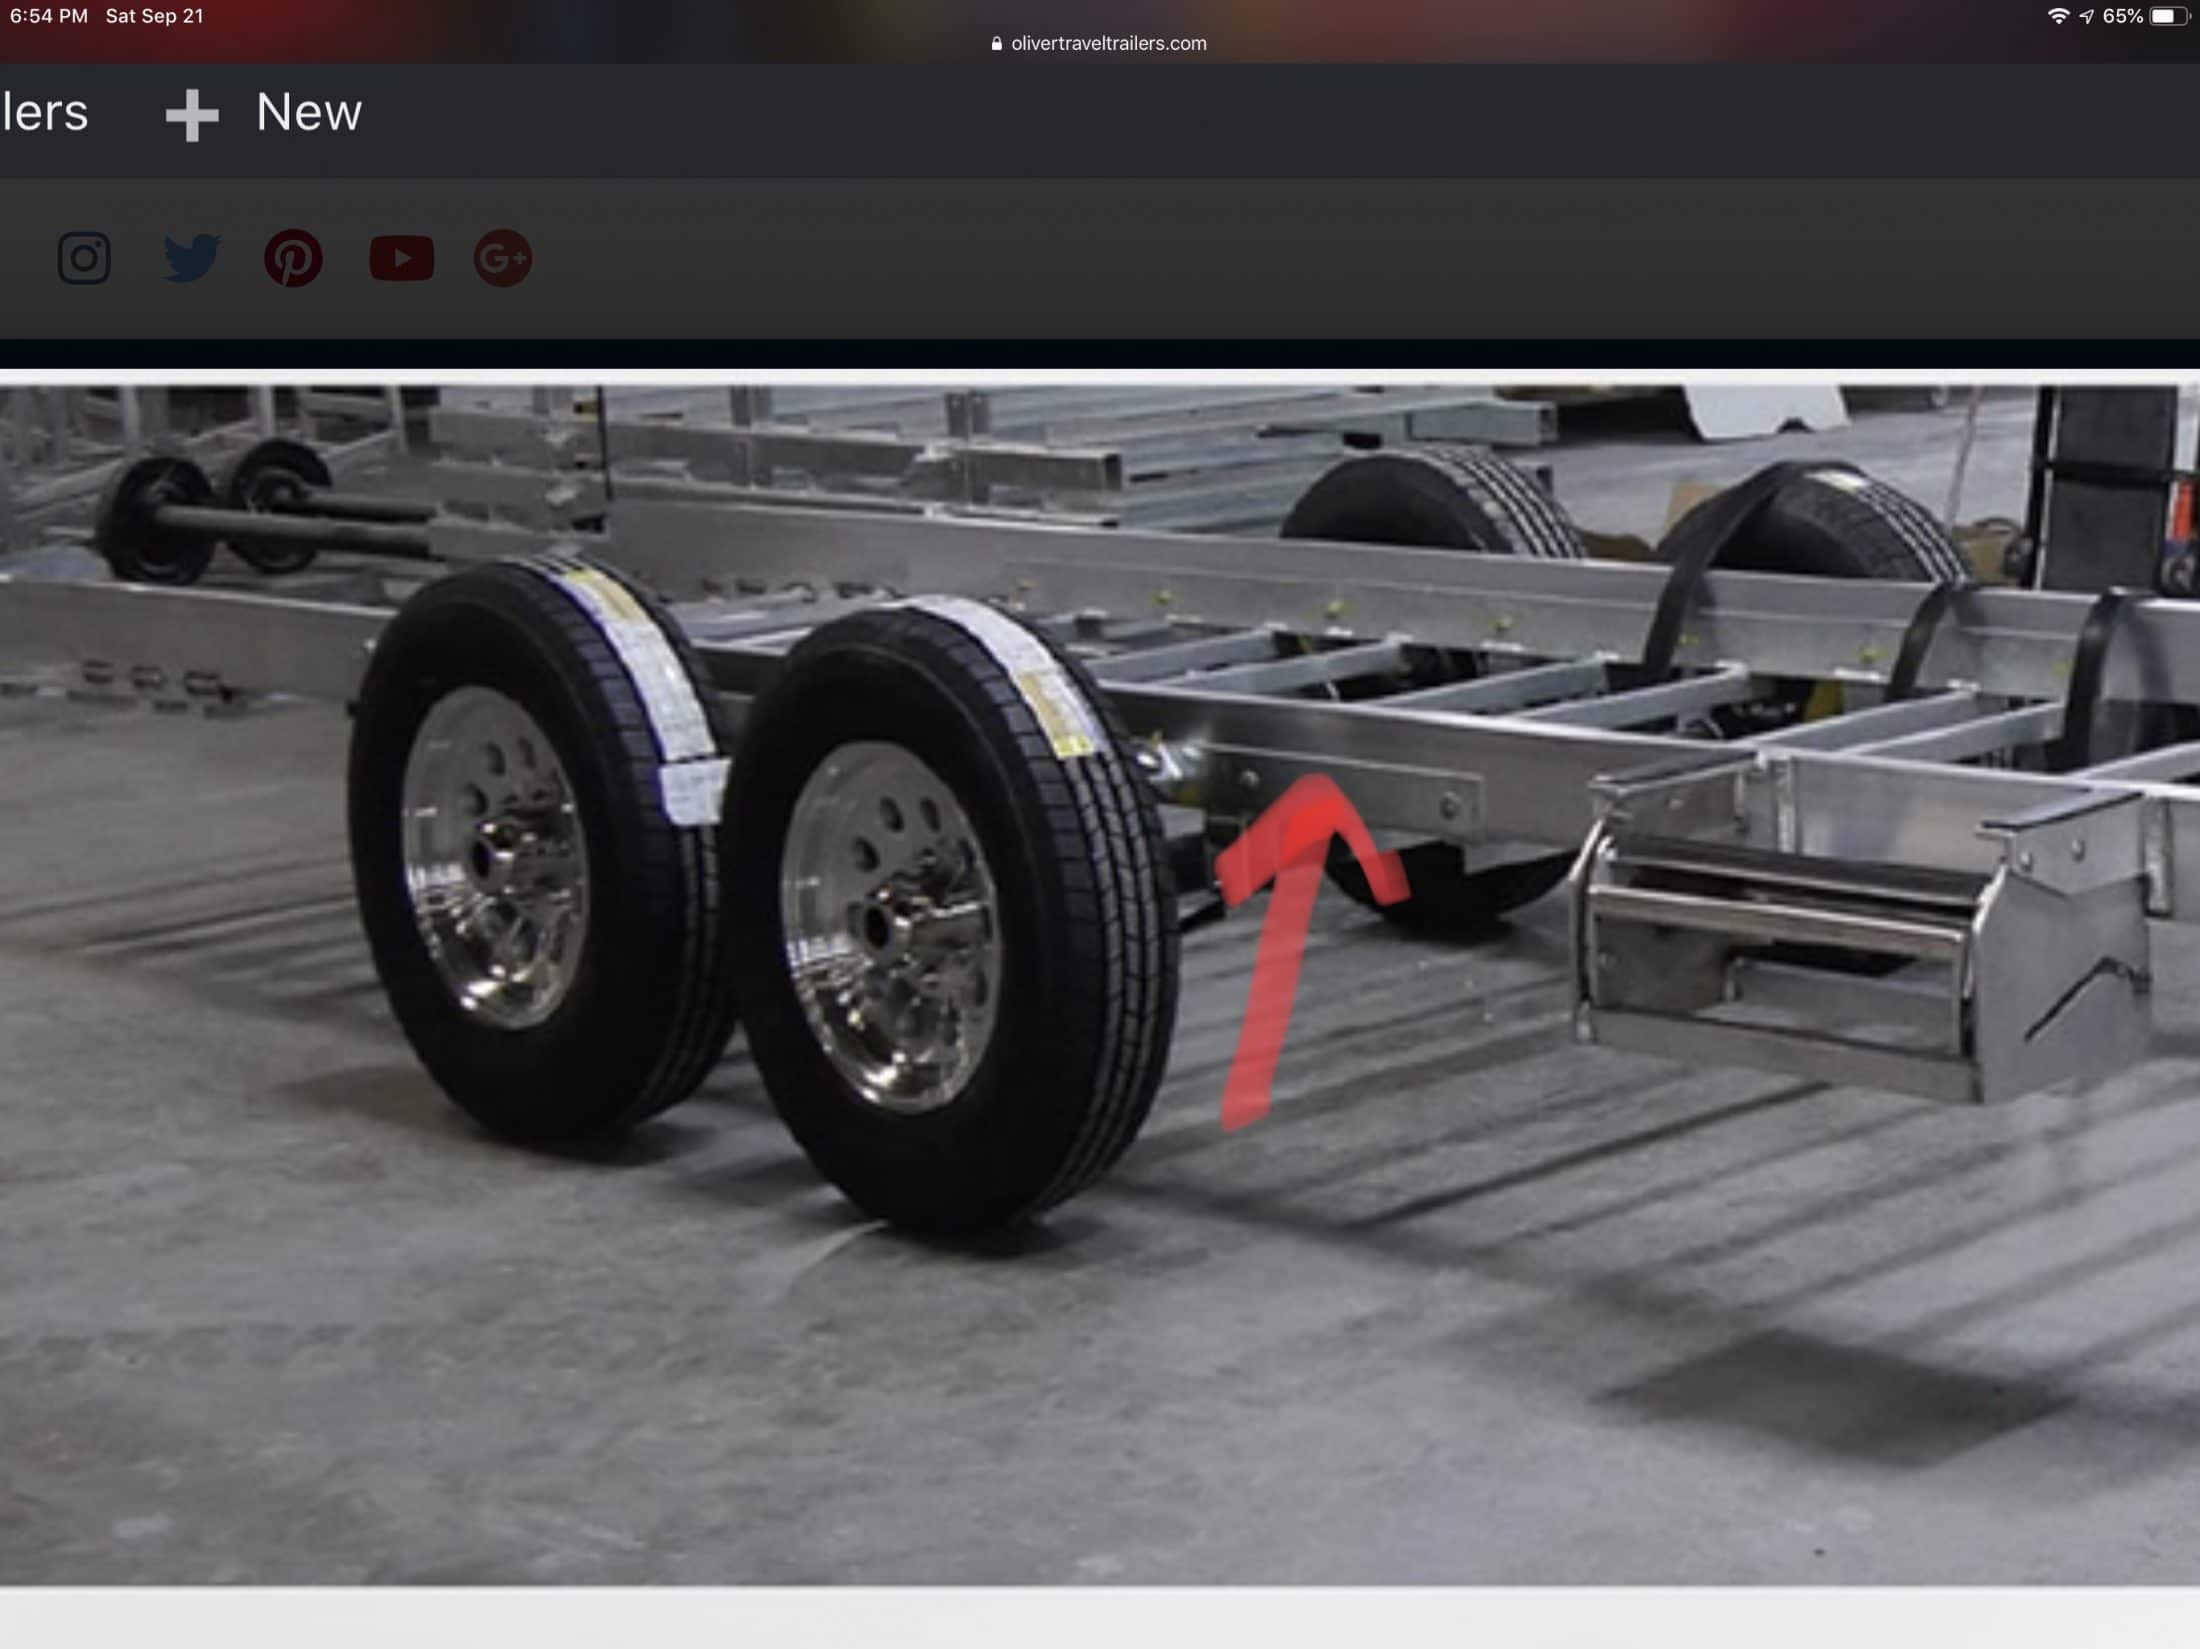
Excellent points Steve! It was not my intention to suggest that the only place to jack up the trailer to change a tire was from in front of the front tire. I just couldn’t get a clear picture of the rear jacking point on my trailer. That was also the reason I referenced the newsletter as it has a better description than I provided. But here are 2 pictures copied from the newsletter showing the jack points for OTT's 2017 and newer. Mike
1 point
-
This is a picture of my 2017 EII. The outside aluminum frame member in bolted to a galvanized steel channel. You want to place your jack under the steel channel, never under the aluminum. The have been some pictures of the 2019 or 2020 trailers and they have a sticker pointing to the jack points, but I can’t find them now. EDIT: The picture of the jack point stickers is in the September 2019 newsletter.
1 point
-
I recently replaced my original TPMS with an EEZ tire unit. My old system still works and I would be happy to give it to anyone at this year's Owner's Rally for the price of a beer. So, if you are sitting on the fence or are just curious as to how these things work, you certainly can't beat the price! Bill edit: the old TPMS has been spoken for - if this changes for any reason I will let it be know at the Rally.1 point
-
Stainless steel Banjo TC-331 just snug. Not tight. Bill
1 point
-
Didn’t need them on the front or back just the two ends. No not dulled, I don’t have any cheap drills! I took the loaded basket to a large local lake area. There I found a guy who makes boat covers and such. He digitized the whole assembly and made the cover from heavyweight truckers tarp material. Any decent boat cover or convertible top maker can do this and will have the good material. I bought the large stainless snaps from McMaster-Carr. These included either an attached #8 or #10 (can’t remember right now) stainless stud. 14 evenly spaced all around so the cover wouldn’t flap or remove itself along an interstate. Also, more effort for the curious/thief to peek under.
1 point
-
There have been a number of discussions of TPMS on the Oliver Forum. In addition to the one Mike and Carol mentioned, there are threads here and here. Coy (@hardrock) posted providing info on a web site that compares the features of different systems, and this was quite useful to me. I then found other product comparisons at motorhome.com and trailerlife.com. After my research I got the EEZTire Tire Pressure Monitoring System - 4 Sensors at $269. Excellent reviews, and good features. While there are some systems that use sensors that are internal to the tire, I got a system with external sensors. There are some sensors that are flow thru, meaning they do not need to be removed before using a tire pressure gauge or adding air. I got the version with the non flow thru sensors, which are easy enough to remove, but have an anti-theft feature. I also liked the fact that these EEZTire sensors are light enough that the tire does not need to be re-balanced. (As it turned out, I put the sensors on before I finally got the tires balanced.) I found it easy to use, especially with good how-to videos ( and ) that showed how to program the system and link the individual sensors. The video had several good ideas, including putting clear nail polish over the number tags that identify each sensor, and using Anti-Seize Lubricant when attaching the sensors. I urge everyone to get a TPMS system, as this provides an important margin for safety while towing. I expect all of the TPMS products work well, so don't delay. Choose a system and get it installed.1 point
-
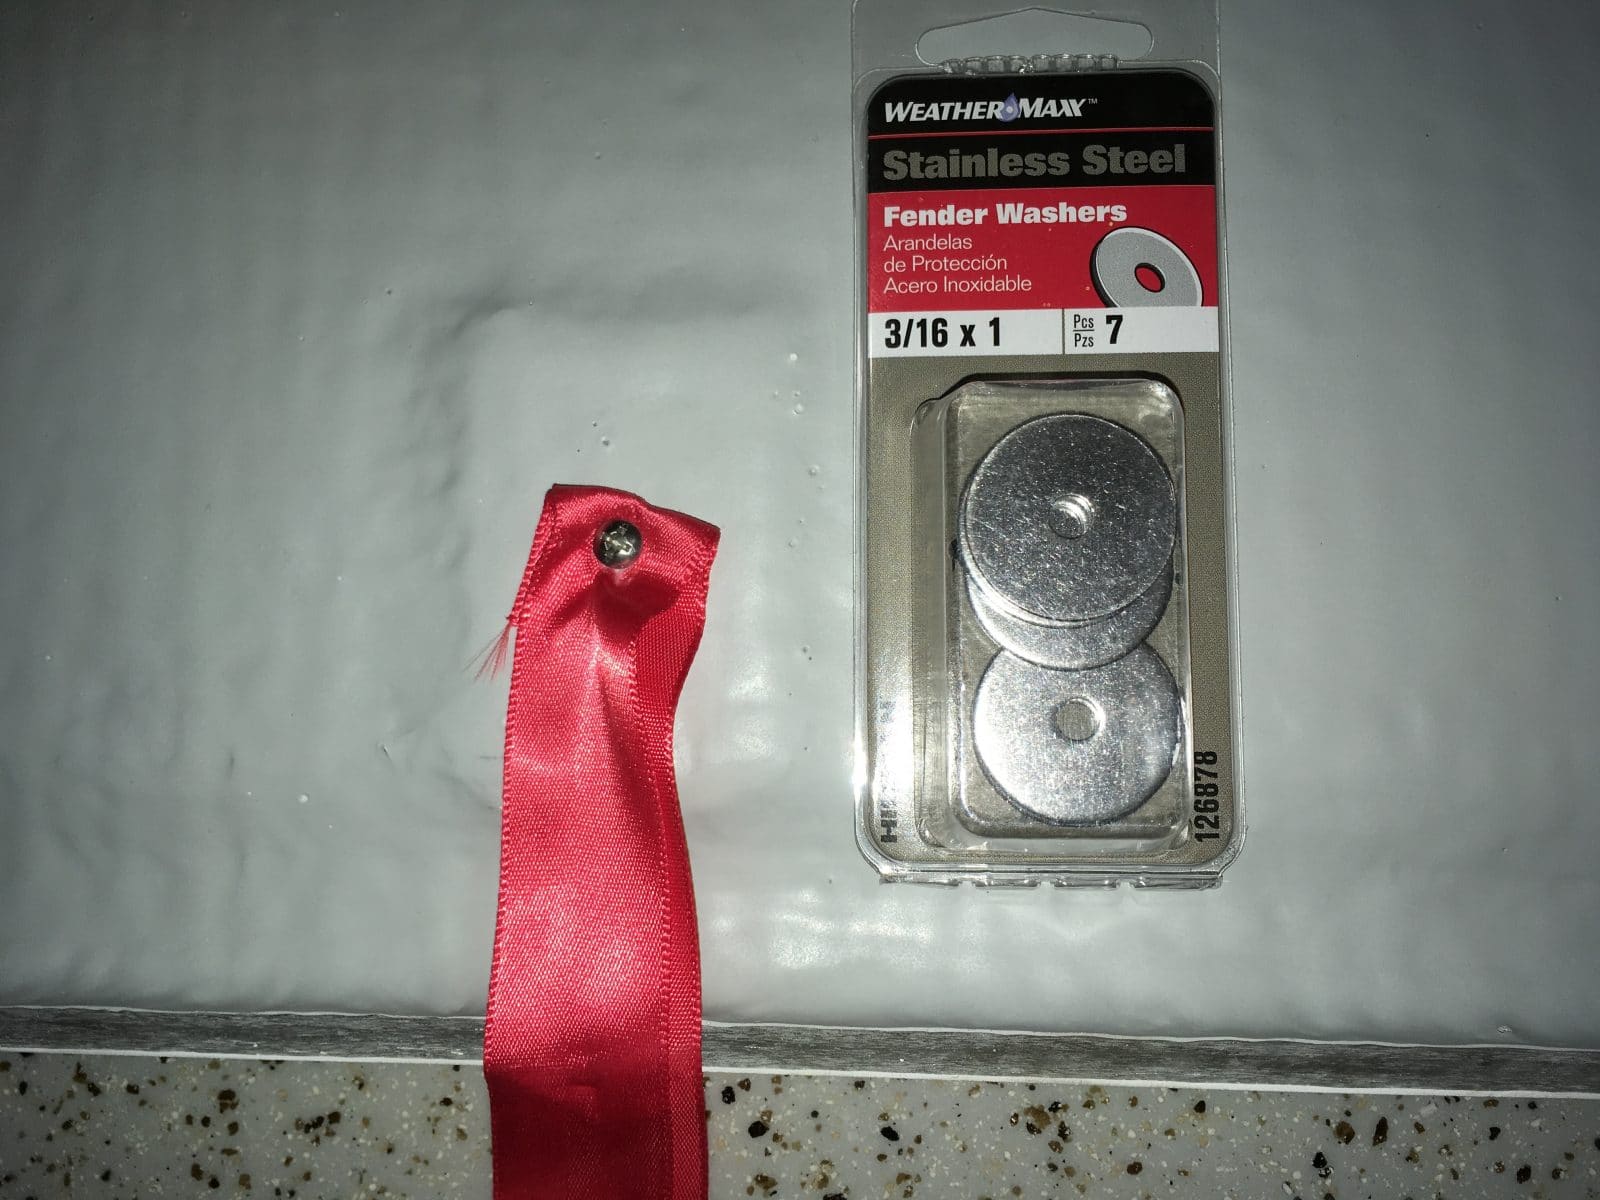
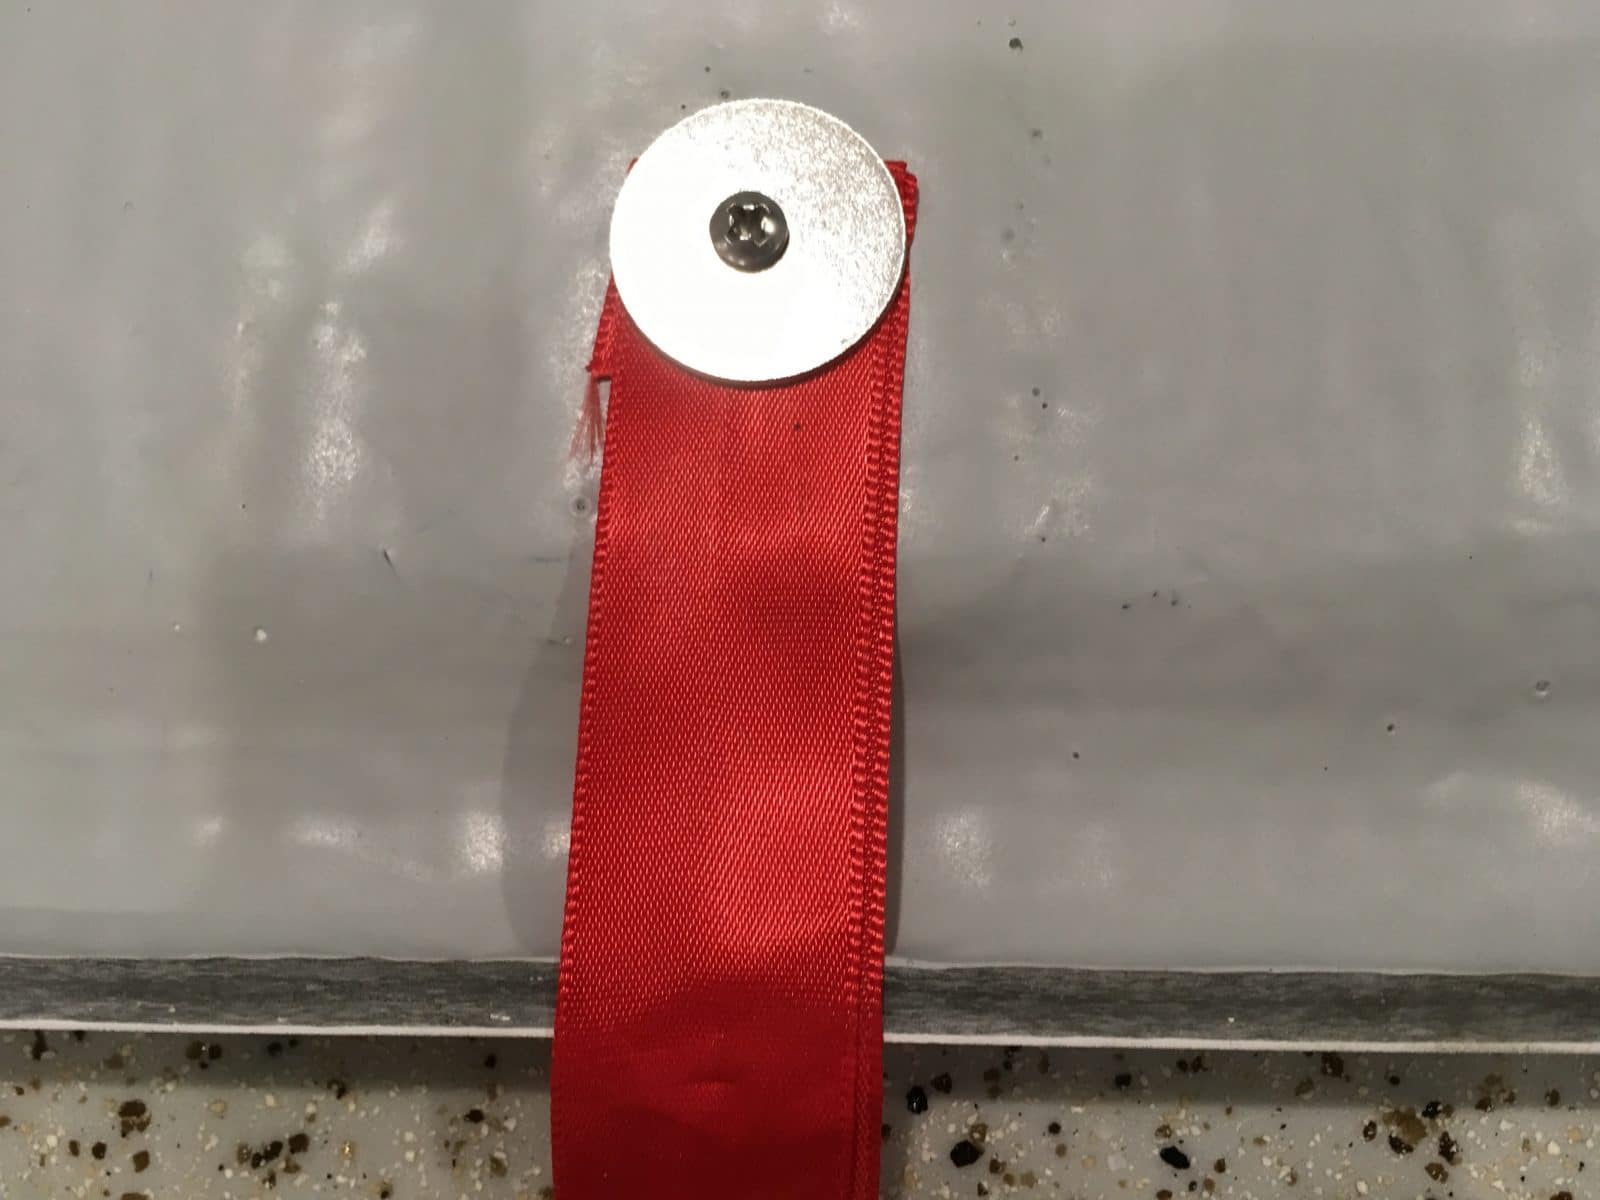
One of my straps tore free because there was no washer under the little screw head to spread the load. They were all like this: Fixed: John Davies Spokane WA
1 point
-
Mike & Carol - that is very nice and CLASSY - just like both of you! Bill1 point
-
https://www.amazon.com/gp/product/B01INZ7RY0/ref=oh_aui_detailpage_o04_s00?ie=UTF8&psc=1 Mike
1 point
-
Got on the ladder this afternoon to clean our solar panels before heading to NM tomorrow. Three knobs were tight. One moved about a quarter of an inch. All four have lock washers. I'll be checking every time I'm up on the ladder.1 point
-
Yup, I check mine each time that I clean the solar panels. I ended up tilting my panels down as far as they can go in the bottom holes to the street side to keep the water from pooling on them in the rain. Plus I prefer to park with the sun off of that side when we are boondocking. All of my adjustment bolts have been tight every time but I may use some loctite if needed in the future. I go up every couple of weeks to dust them off and remove the small cedar cones that get blown down on them. So far, having them tilted has stopped the pooling and associated dirt or dust rings left on the panels after it rains.1 point
-
Can't speak to your install, but we've towed 80k miles with our panels, without issue . We check regularly. No zipties needed. I will check ours in the fall,again, when we tow home to the South. Thanks for the heads up. Sherry1 point


-
Recent Achievements
-


")


")


