Leaderboard


Popular Content
Showing content with the highest reputation since 03/09/2020 in all areas
-
One of the great features of the Oliver trailer design is the fast and easy (no tools needed) access to ALMOST all of the plumbing, heating, and electrical systems through the hatches under the dinette seats and the beds, or by removing the kitchen cabinet drawers. One area that’s NOT readily accessible is the area under the bathroom vanity, even though there is plumbing, electrical, and furnace ductwork all tucked inside the vanity. The storage cubby in the front of the vanity is screwed AND CAULKED in place by Oliver at the factory, so access is a bit more complicated than the other areas. I recently needed to get into that vanity area for some inspection and maintenance, and after completing that I wanted to make future access easier (no tools needed and no caulking). I know some owners have replaced the storage cubby with a hinged marine access panel, but I didn’t want to lose the cubby storage. So here’s a detailed description of a simple modification I did, along with links to the parts used. Access is now fast and easy. No-Slip Clip-On Barrel Nut, for 0.025" to 0.15" Panel Thickness, 8-32 Thread Size https://www.mcmaster.com/94850A111 #8-32 x 1" Thumb Screw Stainless... https://www.amazon.com/dp/B09FZVLZKD?ref=ppx_pop_mob_ap_share uxcell Edge Trim U Seal Extrusion, Silicone White U Channel Edge Protector Sheet Fits 0.5-2.5mm Edge 3Meters/9.84Ft Length https://a.co/d/1uWUZB3 Molex -3 Match Set - (3-Pin) w/14-20 AWG, Wire Connector - 2.13mm D, Latch Lock, MLX https://a.co/d/gapvioi
 39 points
 -
We do not bring but a few clothes that need to hang. We felt like we were losing so much storage area. I built shelves to fill the lower area of the closet. That curve is a bugger to work with. Shelves have a 4" lip in the front to help hold the gear. They are not perfect but work well.
34 points
-
My son is a computer game programmer and they recently got into 3D printing. Here is what arrived for Christmas...... It was a total surprise. The $5 bill is for scale. The hull is exactly 6” long, the LE2 hull is 18’, so this makes the model 1:32 scale. There are lots of truck models in this size, my Land Cruiser 200 would be 5.9” long at this scale. ..... https://www.ebay.com/itm/Toyota-Land-Cruiser-4x4-1-32-Scale-200-VX-Wagon-SUV-Diecast-Model-Mini-4wd-Car-/362667098231 And this is what the model looked like before final trim “processing”, I have NO clue how that is done. They were not able to find an actual data file online, they did this completely from scratch using photos. They are willing to share the print file if somebody wants to try this at home. They are thinking about dividing the build into layers, so you could print the tires, frame and hull in different colors and then join them.... but it would not be too difficult to prime and paint the all white version. And no, they do not want to start mass producing these. That would be something for the much rumored, never seen Ollie Store in Hohenwald. Happy Holidays. John Davies Spokane WA EDIT: FILES AND BASIC 3D PRINT INSTRUCTIONS. NO GUARANTEES, THIS IS NOT PLUG AND PLAY EASY. If you cannot download these files directly from this thread, let me know and I will try another method. Thanks to my son Ian! oliver legacy elite 2 trailer davies.stl oliver legacy elite 2 trailer davies.3mf “Provided as is - this shouldn't be too hard of a print, but you'll probably want to have a basic handle on printing. The print specifics below are what I used to print it. They're not required, but might serve as a starting point. Print specifics: Printer: Original Prusa i3 MK3S, 0.4mm nozzle Slicer: PrusaSlicer 2.2 Filament: 1.75mm Prusament PLA (stock profile in PrusaSlicer) Perimeters: 3 Layer Height: 0.1mm Infill: Gyroid, 5% Supports: On Raft: 2 layers (not necessary, just makes it a bit easier to get the tires round) Model print scale: 850% (~200mm x 66mm x 82mm) Total filament (including supports): 143g/48m If you slice it yourself, you'll probably want to put support blockers in the wheel wells - cleaning supports out of there is a pain. This will require some postprocessing - mostly just removing supports from small gaps. If your printer isn't precise enough, or if you're printing with a larger layer height, you may want to do some sanding to get the curves more fluid.” I. D.
26 points
-
With the help of a number of good folks on this forum and my great RV Tech, Mathew Gonzales, who has worked on my 2017 Elite II since I brought in home to SE AZ, I finally achieved my goal of being able to run my AC off of my 2000-watt inverter and my new battery bank: 4 100ah Battle Born lithium batteries. After asking for, and getting, advice from folks on the forum about a number of issues that Mat and I ran encountered when attempting this upgrade, I made these decisions and Mat did this work: I first made the decision to purchase the Houghton 9.5K Low Profile Air Conditioner from RecPro--due mainly to how much quieter it runs compared to the Dometic Penguin that came with my Ollie, and to its lower amp draw (10 vs. the 16 for the Dometic). I learned that the Houghton could be run off of the 2000-watt inverter that came with my Ollie, using a transfer switch plugged into it running to the AC. I asked Mat to move the Micro-Air soft start previously installed in the Dometic to the Houghton. We discovered that he needed to reprogram the soft start to coordinate with the new AC. Since, unlike the Dometic set-up that came with my 2017 Ollie, the Houghton did not have a way to control the furnace, Mat installed and wired an Emerson non-programable thermostat--once again using information gleaned from folks on this forum--to control the furnace. I figured it was a good idea to supplement the 320-watt solar panels that came with my Ollie with a 180-watt Zamp solar panel kit. I also purchased a Zamp solar port that Mat installed near the shore power input. When my AGM batteries overheated last fall, I found I had no way to easily disconnect the battery bank. (This, I suspect, is something that is an original defect in the electrical system of my Oliver. Is it for all Olivers still?) So, while Mat was doing all of the other work, I had him install a battery disconnect switch near the inverter. I don't want this to appear as a straightforward process. It took a lot of back and forth between Mat and me trying to come up with solutions to problems encountered along the way. This back-and-forth involved a lot of advice from folks on this forum, some of whom I have not thanked by name. I would like to give special mention and thanks, however, to CnC and Minnesota Oli, who spent a good deal of time with me exchanging private messages. Man, were they patient with this technical novice! The outcome is that I now have a much quieter AC that runs off of my solar, batteries, and 2000-watt inverter. One can read elsewhere about the advantages of the Houghton. Mat told me, before I took my camper home, that he ran the Houghton for about four hours, supplementing the roof-top solar with the Zamp portable kit, and the voltage never dropped below 13 volts. I ran it when I brought the camper home, and verified that the system seemed to run the AC flawlessly AND much more quietly than before. I am delighted, as I have been wanting for a long time to be able to boondock in climes needing cooling of the cabin without having to resort to the hassle and noise of a generator. I will follow up with another post if I run into any issues. Disclaimer: I still have very little technical understanding about how this system functions and how the components and wiring fit together, so I will not be the one to answer many, if any, technical questions, but I know that on this forum, if you ask, you receive. There are some good posts on this forum involving the Houghton AC and related issues, so take a look around, and don't hesitate to submit your questions on this forum. Doing so paid off big time for me! Here is the interior view of my newly installed Houghton 9.5K Low Profile Air Conditioner: Here is an exterior view (birds won't be able to nest in this one!): Here is a photo of how Mat secured and wired the transfer switch and battery disconnect switch: Here is a photo of the Emerson non-programable thermostat to control the furnace (thanks go to John Davies who suggested the purchase): Here is a photo of the Zamp solar port with cord leading to the Zamp 180-watt portable solar panel kit: Here is a photo of the charge controller on my Zamp 180-watt portable solar panel kit, showing the voltage just after I plugged it in. (In less than 10 minutes, this controller and the interior Zamp showed the voltage up to 14.6 before dropping back into the floating voltage range.):
25 points
-
I had seen the posting on 4/22/21 by @Calypso showing an externally mounted towel bar on the side of Hull #520. The towel bar was made from a suction cup lifter and a piece of ¾" PVC tubing. I thought this a great idea and made one for our LEII picked up on 2/17/22. Due to nearly constant downpours in central TN the week we picked up Hull #990, we had immediate need for an external towel bar. We recently returned from a two week trip during which we also encountered several downpours. We used the towel bar nearly every day, often not having enough space to hang damp items. Upon our return I was about to make a second towel bar. I was thinking of adding an improvement to offset the bar/tube further from the hull of our LEII, to avoid having towels in contact with dirt on the hull. After mulling over a design for several days, I had an Aha! moment. I could modify my existing PVC towel bar assembly and add additional tubes for greater capacity, while also moving the tubes further away from the hull. Below are photos and a description of the result. Materials (Quantity, Description, Source, Cost, URL) 1- 4-2/3 In., 125 Lb. Dual Suction Cup Lifter (Harbor Freight, $8.99, https://www.harborfreight.com/4-23-in-125-lb-dual-suction-cup-lifter-57501.html?_br_psugg_q=suction+cup+lifters) 2- 3/4 in. PVC Schedule 40 MPT x S Male Adapter (Home Depot,$0.71/each, https://www.homedepot.com/p/Charlotte-Pipe-3-4-in-PVC-Schedule-40-MPT-x-S-Male-Adapter-PVC021090800HD/203811638 4- 3/4 in. PVC Schedule. 40 90° S x S Elbow Fitting (Home Depot, $0.75/each, https://www.homedepot.com/p/Charlotte-Pipe-3-4-in-PVC-Schedule-40-90-S-x-S-Elbow-Fitting-PVC023000800HD/203812123) 4- 3/4 in. Schedule 40 S x S x S Tee (Home Depot. $0.85, https://www.homedepot.com/p/Charlotte-Pipe-3-4-in-Schedule-40-S-x-S-x-S-Tee-PVC024000800HD/203812197) 2- 3/4 in. x 10 ft. PVC Schedule 40 Plain-End Pipe (Home Depot, $6.98/each, https://www.homedepot.com/p/Charlotte-Pipe-3-4-in-x-10-ft-PVC-Schedule-40-Plain-End-Pipe-PVC-04007-0600/100348472) 1- 0.091 in. x 2-3/4 in. Zinc-Plated Safety Pin (2-Piece) (Home Depot, $2.31, https://www.homedepot.com/p/Everbilt-0-091-in-x-2-3-4-in-Zinc-Plated-Safety-Pin-2-Piece-815408/204276312#overlay) The finished towel bar/drying rack shown in place below. The disassembled parts are shown below: I chose NOT to cement the entire assembly, since it would be much harder to store when in transit. Construction Cut the handle of the HF Dual Suction Cup Lifter in half transversely. A hack saw or bandsaw is recommended. File/sand the cut edges to remove burrs. Use PVC primer and cement to fasten the threaded end of each 3/4 in. PVC Schedule 40 MPT x S Male Adapters to each of the cut ends of the handles of the Dual Suction Cup Lifter. Cut the ¾" PVC tubing for the hanging tubes I chose to make 3 hanging tubes, each 45" long. This length easily fits in our rear cargo carrier and sags very little Adjust length to suit yourself. Cut 8 pieces of ¾" PVC tube to 1-½" in length. These short pieces serve to couple the elbows, tees and adapter together. Using a belt sander I slightly beveled the cut ends of the hanging tubes and the connector tubes so they would more easily slide into the tee and elbow sockets. Assemble the two "manifolds" as shown above, each having: 2 elbows, 2 tees and 4 of the 1-½" connector tubes. Use PVC primer and regular PVC cement to assemble one joint at a time. Be sure to align the open sockets of the tees and elbows. Hold each joint until cement prevents movement of components. The manifolds should be identical. NOTE: do not put PVC primer or cement on the short connector tubes which will be inserted into the adapters cemented onto each handle of the Dual Suction Cup Lifter. When the manifolds are assembled insert the hanging tubes into the three open sockets on each manifold. Again, I chose not to glue the hanging tubes to the manifolds for ease of storage. Insert the connector tube on each manifold into the adapters cemented to each half of the Dual Suction Cup handle. Again, do not use PVC primer or glue. With all components assembled, do a test fitting on the hull of your Oliver. Slightly dampening the suction cups significantly improves their grip on the hull. The hanging tubes and manifolds assembled should largely support themselves horizontally. I had leveled my trailer and used a level to also level the towel bar/rack. When the towel bar/rack is level drill a 7/64" hole vertically through the adapter coupling joining each half of the Dual Suction Cup Lifter to the short connector tube of each manifold. The purpose of the hole is to permit insertion of the zinc plated safety pin which will prevent the towel bar/rack from sagging, while still permitting the rack to be disassembled. Insert the zinc plated safety pins through the holes drilled into the adapter couplings to maintain the towel bar/rack in a horizontal position extending from the hull. I marked the suction cups and manifolds Left and Right to avoid difficulty later inserting the pins through the connectors. I also put an index mark on the adapters and manifold connectors for easier alignment. I have not yet tested this assembly in the field, but am confident it is strong enough to hold as many towels and clothes as will fit. I expect it could also support wet shoes or hiking boots. I hope this is useful to other owners. I welcome suggestions for improvements. As a final note, update your departure checklists to include removing and stowing the towel bar/rack.
25 points
-
To Oliver Owners and Valued Customers, The Oliver team and family greatly appreciates and values our current owners and individuals that are considering the purchase of an Oliver. Without you the organization and Oliver brand would not be what it is today. As most of you know, Oliver Travel Trailers is going through a transition period and some of the decisions have created some questions and potential uncertainty as it relates to the direction of the company. Oliver is paying attention, listening, and monitoring all of the feedback and comments on the forum, social media, emails, and phone calls. Oliver Travel Trailers’ intent is to be very straightforward and honest with our owners, potential customers, and employees. Integrity is the foundation of the Oliver brand. Oliver feels an official company update is appropriate to help clear things up. The following are some key facts: The rumor that Oliver Travel Trailers is positioning the business to sell is absolutely a false statement. The Oliver sales team is still actively working with all new and existing customers to answer questions and assist in the purchasing process. If you are interested in purchasing an Oliver or have questions, please contact us directly. The Oliver service team is still actively providing technical support to our Oliver owners to ensure issues are resolved as quickly as possible. If you have technical support needs, please contact us directly for assistance. The decision to close the service department at this time has not been received well by many Oliver owners and potential customers. Oliver leadership is listening and plans to have discussions on this topic next week. Oliver will update our owners in the coming weeks regarding any changes. Again, Oliver Travel Trailers truly values the voice of our owners and potential customers. We’re listening and we care. Oliver Travel Trailers isn’t a prefect organization, but we are committed to ensuring our brand, our owners, and our future customers have a product and customer support that is the best it can be. Thank you for being part of the Oliver Family. Rodney Lomax Director of Operations Oliver Travel Trailers Sales & Service23 points
-
Just a quick follow up to let everyone know both Cyndi and I continue to do well with no hidden injuries from our rollover accident. In addition, we were successful in finding and purchasing a 2017 Oliver Legacy Elite II this past week and have just now returned to our home location after successfully making some of our originally planned stops from our interrupted vacation on Apr 2nd. It is truly amazing we were uninjured in the accident and able to get back on our feet with truck and trailer within the remaining two weeks of our scheduled vacation. Thanks again for all the support the Oliver community has given us these past few weeks. This alone should convince anyone on the fence about purchasing the best built travel trailer on the market. Mark and Cyndi
23 points
-
There have been numerous posts in this forum about Oliver’s lithium battery systems—about their usefulness, limitations, and value with respect to cost. Despite reasonable arguments against it, a number of us have purchased the lithium package. Reasons for purchasing the option have included the ability to run the air conditioner (A/C) for short durations (like at highway rest stops), greater usable energy (more boondocking in cloudy weather without needing a generator), faster charging, and longer battery life. This post summarizes things I’ve learned over the last 6 months about the Xantrex/Lithium/Zamp system. This post might also be titled “Things I Wish I’d Known from the Start.” This summary is a work in progress. Hopefully, with your corrections and additions, this thread will be of use to others that have purchased the Lithionics option or are considering doing so. At the time of this writing, manuals and other information for the Lithionics batteries are in the Service Center Knowledge Base — see links at the end of this post. I assume at some point Lithionics information will be compiled with all of the other trailer manuals in Oliver University. Battery State of Charge A key component of the Lithionics system is the app that lets users monitor State of Charge (SOC) and voltage (see links below). The reliability of the SOC values (which describes the amount of energy remaining in the battery) depends on (1) maintaining SOC calibration and having (2) up-to-date Lithionics firmware. The SOC should be near 100% at 13.6 volts, and about 50% (+/- about 10%) at 13.2 volts. If this is not what you’re seeing on the Zamp controller, Xantrex remote, or Lithionics battery app, then something’s wrong. By way of example, a couple times we’ve experienced the SOC readings of 60% when the batteries were dead -- not good. Note that the voltage reading on the app while there is a load on the system (e.g., electric heater) is different than when there is no load; the “resting” voltage may be higher. SOC Calibration The SOC requires periodic calibration. According to the manual for the 130 Ah batteries, the SOC can be calibrated simply by charging the batteries to 14.4 volts. The manual also states that fully charging the batteries to 14.4 volts should be done at least once every two weeks for battery life. Get the 130-Ah battery manual from Lithionics using the links below; at the time of this writing, Oliver has the incorrect manual posted in the Knowledge Base). When charging with shore power, it is not always apparent that the batteries have reached 14.4 volts, because when charging, the batteries only stay at ~14.4 volts for a short while before dropping back to about 13.6 volts. You can verify that batteries have reached 14.4 volts by monitoring battery voltage using the Lithionics app during a charging event. If you are unsure that the batteries are reaching 14.4 volts, you can at least confirm that the Xantrex charger/inverter is set to charge to at least 14.4 volts in the Xantrex app (https://support.olivertraveltrailers.com/portal/en/kb/articles/xantrex-remote-bluetooth-pair-operation) and, under Settings, check the custom absorption voltage. Ours came from the factory set at 14.6 volts, which is sufficiently high to get the batteries to 14.4 volts. Lithionics Firmware At least some of us that picked up our trailers in spring or early summer have batteries with outdated firmware. As I understand from Lithionics, more recent firmware versions have an improved SOC algorithm (our initial SOC readings were unreliable). You can check firmware version with the Lithionics app by clicking on a battery, then clicking on the settings “sprocket” in the upper right side, and then clicking on firmware. Our battery came with firmware version 1.0.05; I’ve recently updated to 1.0.07 by clicking on flash firmware. This has to be done with your phone in close proximity to the battery, and has to be done separately for each battery. Updating firmware comes with a “…this is a critical operation…” warning; you might want to check with Oliver or Lithionics if you have any questions about doing this. Has updating firmware improved our SOC readings? I’m not sure yet, but I think so. So far, the readings seem more reliable, but I’m still testing. SOC Calibration by Cycling A Lithionics rep told me that the SOC can be calibrated by “cycling” the batteries, and that this should be done every two months. Cycling consists of discharging the batteries to reserve voltage (e.g., ~12.1 volts) and then charging to 14.4 volts. However, the rep could not point to written documentation supporting this form of calibration. As the batteries support more partial cycles than full cycles (see graph below), calibrating by simply charging to 14.4 volts (assuming this effectively calibrates the SOC) seems better for battery life. Lithionics batteries will not charge from tow vehicle The standard 7-pin connection from tow vehicle to trailer cannot be used for charging the Lithionics batteries. Charging the batteries from the TV requires a DC to DC charger, which is an aftermarket installation. For more discussion on this, search for John Davies’ Redarc DC-to-DC charger installation description. Batteries Turn Off Twice now one or two of the three 130-Ah batteries have turned off when reaching low voltage (which happened because we were relying on incorrect SOC values). The SOC readings themselves looked OK, but the voltage did not correspond with SOC. The battery State in the Lithionics app reads “Off” for each battery when it is off. There is no flag on the Zamp or Xantrex control panel that alert the user to one or two batteries being off. The lesson (at least for me): monitor all three batteries, not just one, and note the Current, Power, State, and Status Code settings. If one or more batteries are off, turn the battery(ies) back on, and fully charge to 14.4 volts. Inverter Noise The Xantrex charger/inverter can be noisy charging the batteries with shore power (I’ve measured 60-64 decibels in the cabin when batteries are charging, and about 72 decibels adjacent to the inverter). The noise comes from (1) the charger/inverter fan and (2) the way in which the inverter is mounted (the fiberglass wall to which the inverter is mounted propagates noise into the cabin). The noise can be masked by turning on the A/C. Alternatively, the noise level can be reduced somewhat by lowering the charger current. In the Xantrex app, go to settings, and change the Charger Current from, for example, 100 amps to 30 amps. This will reduce fan noise. It will obviously take longer to charge the batteries with lower current. If you would like to be connected to shore power (to run an electric heater or the A/C, for example), but not charge the batteries (to avoid keeping them fully charged for long periods of time, or to reduce inverter noise) you can set the charger ignition control in the Xantrex app settings to “auto-on” (thanks to NCEagle for figuring this one out). In this mode shore power energizes the 110 outlets, the A/C, and the fridge, but does not charge the batteries. Turn the charger ignition control “off” to resume charging batteries with shore power. There are likely ways of re-mounting the inverter so that noise does not propagate into the cabin, with either a different mounting location or perhaps mounts using rubber bushings. Has anyone tried this yet? Xantrex Communication Errors Too often, I’ve gotten “Code 20” communication errors on the Xantrex remote panel. This can be resolved by pushing the red button on the 300A breaker under the streetside bed, waiting for at least 30 minutes, and then pressing in the little red flag on the breaker. Yes, this is a pain (I wish this breaker were more accessible), but it usually resolves the issue. Leaving the Xantrex inverter on battery mode for 25 hours or more will result in the Code 20 communication error. The time limit can be changed in the Xantrex app, but cannot be lengthened to more than 25 hours. As long as the inverter has not timed out, turning the inverter off and then on again at the remote panel resets the 25-hour time-limit clock. Battery Storage Lithionics provides guidance for storing the lithium batteries (see link below). Long term storage can include lowering the SOC to about 50%. Discharging to the appropriate SOC can be accomplished by turning on an electrical load (e.g., A/C or space heater) while in battery mode and monitoring frequently. Theoretically one could set the inverter cutoff voltage (in the inverter app, under settings), to something like 13.2 volts, but the highest cutoff-voltage option is 12.8 volts. Lithionics recommends keeping a log of SOC and voltage readings prior to and after storage for warranty purposes. ------------------------ Hope this helps. Again, please correct any errors that you see, and please add your observations and tips. Fritz ------------------------------------------ Relevant Links Lithionics battery app: https://support.olivertraveltrailers.com/portal/api/kbArticles/386680000012415191/locale/en/attachments/lpqvx861bbc9c842d48f7995281b07d0a193d/content?portalId=edbsnfe5dceb1ade7571879ff200cb63e14a94b62f48e3338c31a6401acd00130b0bc&inline=true). Lithionics battery manual: At the time of this writing, the Oliver Knowledge Base has links to Lithionics manuals for 125 Ah and 320 Ah batteries. However, our LE2 has three 130 Ah batteries as part of the 390-Ah package, and the manuals for the 125-AH batteries and the 130-Ah batteries are not the same. A manual for the 130 Ah battery can be found on the Lithionics website: https://lithionicsbattery.com/wp-content/uploads/2018/12/12V130-G31LRBM8-Battery-User-Guide-R1.pdf. Lithionics Storage Procedure https://support.olivertraveltrailers.com/portal/api/kbArticles/386680000012415191/locale/en/attachments/lrotz3ebee5a7020f42a58eb0d4db18a41356/content?portalId=edbsnfe5dceb1ade7571879ff200cb63e14a94b62f48e3338c31a6401acd00130b0bc&inline=true Lithionics FAQs https://support.olivertraveltrailers.com/portal/api/kbArticles/386680000012415191/locale/en/attachments/lrotz0edc34bc92ef4dce941bbb7f3f2d89db/content?portalId=edbsnfe5dceb1ade7571879ff200cb63e14a94b62f48e3338c31a6401acd00130b0bc&inline=true Xantrex Remote Bluetooth Pairing and Operation https://support.olivertraveltrailers.com/portal/en/kb/articles/xantrex-remote-bluetooth-pair-operation
22 points
-
22 points
-
After a long wait, the day finally came last week. We picked up our LE II and could not be happier. We camped in it for two night on electric and water and then two nights dry camping. Temps were between 30 and 50 and we could not have been more comfortable. We have been on the forums for quite some time now so I won't introduce myself. Looking forward to meeting new people and putting some faces to forum names at the Owner's Rally in May. This is a picture of our campsite at Mousetail Landing State Park about an hour from Hoenwald, TN. Cheers, Brian & Brandelyne
22 points
-
I spent this summer working on Olies winter home and just finished it this morning just before it snows tomorrow.
22 points
-
Let me preface this story by making it clear that I am NOT a hunter but I do now understand why we SHOOT deer in the wild... I never liked the taste of venison, too gamey or too wild or too something. So, I had this idea ...that I could rope a deer, put it in a stall, feed it up on corn for a couple of weeks, then kill it and eat it. The first step in this adventure was getting a deer. I figured that, since they congregate at my cattle feeder and do not seem to have much fear of me when we are there (a bold one will sometimes come right up and sniff at the bags of feed while I am in the back of the truck not 4 feet away), it should not be difficult to rope one, get up to it and toss a bag over its head (to calm it down) then hog tie it and transport it home. I filled the cattle feeder then hid down at the end with my rope. The cattle, having seen the roping thing before, stayed well back. They were not having any of it. After about 20 minutes, my deer showed up-- 3 of them. I picked out a likely looking one, stepped out from the end of the feeder, and threw my rope. The deer just stood there and stared at me. I wrapped the rope around my waist and twisted the end so I would have a good hold. The deer still just stood and stared at me, but you could tell it was mildly concerned about the whole rope situation. I took a step towards it, it took a step away. I put a little tension on the rope, and then received an education. The first thing that I learned is that, while a deer may just stand there looking at you funny while you rope it, they are spurred to action when you start pulling on that rope. That deer EXPLODED. The second thing I learned is that pound for pound, a deer is a LOT stronger than a cow or a colt. A cow or a colt in that weight range I could fight down with a rope and with some dignity. A deer-- NO Chance. That thing ran and bucked and twisted and pulled. There was no controlling it and certainly no getting close to it. As it jerked me off my feet and started dragging me across the ground, it occurred to me that having a deer on a rope was not nearly as good an idea as I had originally imagined. The only upside is that they do not have as much stamina as many other animals. A brief 10 minutes later, it was tired and not nearly as quick to jerk me off my feet and drag me when I managed to get up. It took me a few minutes to realize this, since I was mostly blinded by the blood flowing out of the big gash in my head. At that point, I had lost my taste for corn-fed venison. I just wanted to get that devil creature off the end of that rope. At the time, there was no love at all between me and that deer, but I figured if I just let it go with the rope hanging around its neck, it would likely die slow and painfully somewhere. At that moment, I hated the thing, and I would venture a guess that the feeling was mutual. Despite the gash in my head and the several large knots where I had cleverly arrested the deer's momentum by bracing my head against various large rocks as it dragged me across the ground, I could still think clearly enough to recognize that there was a small chance that I shared some tiny amount of responsibility for the situation we were in. I didn't want the deer to have to suffer a slow death, so I managed to get it lined back up in between my truck and the feeder - a little trap I had set before hand...kind of like a squeeze chute. I got it to back in there and I started moving up so I could get my rope back. Did you know that deer bite? They do! I never in a million years would have thought that a deer would bite somebody, so I was very surprised when ..... I reached up there to grab that rope and the deer grabbed hold of my wrist. Now, when a deer bites you, it is not like being bit by a horse where they just bite you and slide off to then let go. A deer bites you and shakes its head--almost like a pit bull. They bite HARD and it hurts. The proper thing to do when a deer bites you is probably to freeze and draw back slowly. I tried screaming and shaking instead. My method was ineffective. It seems like the deer was biting and shaking for several minutes, but it was likely only several seconds. I, being smarter than a deer (though you may be questioning that claim by now), tricked it. While I kept it busy tearing the tendons out of my right arm, I reached up with my left hand and pulled that rope loose. That was when I got my final lesson in deer behavior for the day. Deer will strike at you with their front feet. They rear right up on their back feet and strike right about head and shoulder level, and their hooves are surprisingly sharp... I learned a long time ago that, when an animal -like a horse --strikes at you with their hooves and you can't get away easily, the best thing to do is try to make a loud noise and make an aggressive move towards the animal. This will usually cause them to back down a bit so you can escape. This was not a horse. This was a deer, so obviously, such trickery would not work. In the course of a millisecond, I devised a different strategy. I screamed like a woman and tried to turn and run. The reason I had always been told NOT to try to turn and run from a horse that paws at you is that there is a good chance that it will hit you in the back of the head. Deer may not be so different from horses after all, besides being twice as strong and 3 times as evil, because the second I turned to run, it hit me right in the back of the head and knocked me down. Now, when a deer paws at you and knocks you down, it does not immediately leave. I suspect it does not recognize that the danger has passed. What they do instead is paw your back and jump up and down on you while you are laying there crying like a little girl and covering your head. I finally managed to crawl under the truck and the deer went away. So now I know why when people go deer hunting they bring a rifle with a scope......to sort of even the odds!! All these events are true, so help me God...An Educated Farmer22 points
-
The seed was planted for this furnace mod when we grabbed a canceled reservation three weeks out at a Minnesota State Park. This reservation was mid October and when the date arrived the weather forecast had changed for the worse. We stayed for only two of the three days and we received our first snow of the season, 6 inches of wet snow. We had a non electric site and my batteries were having trouble making it through the night and I was concerned about the water freezing in the Oliver. I have already addressed switching to lithium batteries and posted about it on Oliver Forum. Now I want to share with you what I have done to relieve my worries about water freeze ups in the Oliver, provided that I have a functioning furnace. I first tried to identify the weak spots and came up with the following. Boondocking Inlet Outside Wash Station Fresh Tank Fill Inlet City Water Inlet Black Tank Flush Port Toilet Water Supply Line Hot & Cold Lines Crossing Back Of Oliver The Oliver has all of it's heat ducts run on the curbside which protect the kitchen and the bathroom faucets from freezing. My plan is to run a 2" ducting along the back to the street side and terminating in to the trough that the water lines run in for the city water inlet, fresh tank fill inlet and outside faucet. This trough also has the check valves for those two inlets and has the floor of the exterior storage compartment covering over the top of it. To get at the trough you will have to remove the back wall of the storage compartment and flip the mat back that covers the floor. This exposes the water lines that come across the back of the trailer and drop into that trough. There is a wall that separates the furnace compartment from storage and extends past the wall you just removed. It has a opening for the water lines and it is large enough to run the 2" duct through it and on top of the water lines across the back and into the trough. Now you can flip the mat back down and they are long enough to cover the water lines and the newly installed 2" duct, then the wall is put back in place. On the connection to the furnace I removed the back of the heat exchanger. There is one hard to get at screw on the bottom but the rest are easily accessible. I made two holes, a 2" and a 4" in that back plate. I could not find a 2" starter collar locally so I bought two 4" and removed the rivets on one of them and formed a two inch collar, cut to length and re-rivet. I then installed the 2" and 4" starter collars to the heat exchanger back panel and then the panel to the furnace. I then hooked up the 2" duct to the furnace. Looking in to the access hole under the street side bed you are able to see where the water lines come up and out of the trough and to the valve of the out side wash station. When the furnace fan is running it will blow out a lit Bic Lighter held in that area. So we're protecting water lines, the check valves and dumping warm air underneath the outside wash station valve. Now back at the furnace I attach a 4" heavy duty aluminum foil duct to the newly installed starter collar. It is routed forward a short distance until it can be routed across the basement to the street side and then fed between the hot and cold water lines that go to the outside wash station valve. At this point I need to use a 4" coupler that is 6" long to attach the next 8' piece of 4" duct. I use the 6" long coupler so I can add holes if I need to flood a area with heat, this particular coupler did not need to. I then routed the duct from the wash station valve along the outer wall and over the wheel well, make the corner by the battery compartment and then once getting past the wheel well go down and under battery compartment. Up in that corner I attach a adhesive base 3/4" cable anchor so I can loop a 20" releasable tie strap through it and around the 4" duct holding it up and out of the way. A second 20" tie strap is used were the duct heads down under the battery compartment, it utilizes the loop that anchors the 4/0 cable coming out of the battery compartment. Next I prep another 6" long 4" coupler by adding a metal mounting bracket. It is bolted to the coupler using two 10-24 machine screws that go through the bracket the coupler wall and then a backing plate that has tapped holes. This coupler I will add a1" hole that will be pointed up to flood heat at the battery compartment. The mounting bracket will be utilizing the upper bolt of the support leg for the battery compartment. This keeps the duct up and away from the inverter and electrical components and positions it to flood heat up against the bottom of the battery compartment. The next length of 4" duct is clamped to that coupler and routed up from under the battery compartment over to and along the wheel well. It is held by two 20" tie straps similar to the other side. Because I want to run the heat duct under the foot space of the dinette I need to transition to 2" duct. There is access via the same trough that I utilized in the back of the trailer, but at the front there is more room and I am able to pull the 2" ducting through. From there it continues toward the front until it reaches the black tank flush inlet where it then follows that pipe back along the black tank and terminates by the water supply line for the toilet. At the transition point I add two more short pieces of 2" duct and route them down to where the main black tank drain pipe goes under the dinette foot space, they are terminated on either side of that pipe. There was not enough room to run the 2" duct but enough to force air along either side. At the transition from 4" to the three 2" ducts I simply inserted the three 2" into the end of the 4" and used aluminum foil duct tape to seal the transition. I also want to mention that I used the aluminum foil duct tape to reinforce the ends of every 4" duct by wrapping outside and inside before clamping. That should cover the install, now lets talk about the results of the test in subzero weather. I rounded up seven digital thermometers and put them in the areas I was concerned about. Was placed just inside the empty rear storage compartment. Was placed on top of the batteries and a piece of acoustical insulation that was for large generator enclosure, it was 1-1/2" thick and 19" square. This was squeezed in the opening before the door was closed. Was placed in the rear basement curbside next to boondocking inlet. Was placed in the rear basement street side below the outside wash station valve. Was placed on the floor of the closet with the door left closed. Was placed on the lower shelf in the vanity in the bathroom with the door left closed. Was placed in front basement street side next to the black tank flush port line. I moved it out of the heated shed at 1:00 pm on Sunday 2-7-21. I moved it back in at 3:00 pm on Tuesday 2-9-21. The furnace was cycling off and on at -4 ' but I noticed at -8' and colder it ran continuous. I have the Truma water heater and that was also turned on. I checked propane consumption by putting on two 20 pound tanks that I had weighed and left them in place for 12 hours. It was -12' when I put them on and -2' when I took them off. Because of the subzero temperature the propane was not gasifying very well and the regulator automatically changed from the primary to the reserve after only consuming 2.353 gallons. The total consumed out of both tanks in 12 hours was 3.294 gallons, so that would be .274 gallons in one hour. My Victron BMV-712 was telling me that I had depleted my 400 Ah Battle Born batteries to 47% and at rate of use I had two days and nine hours left. I thought I would comment on a couple of things I like about the outcome of the project. The bathroom was comfy warm and the wall next to the bed was not icy cold. I am not planing to take up subzero camping but it does gives me a benchmark to go off of for any situation that I might run in to. If you have any suggestions or see something that is of concern please let me know. Paul
22 points
-
Hey guys, Phil here with Oliver Travel Trailers. It is important to understand that we as a company have not made any decisions to partner with any other entities at this time. It is simply a consideration to offer the best service from a handful of service centers/dealers to our customers who live the farthest away from Tennessee. We do NOT have any plans to mass produce the Oliver. Quality will not suffer as we will still have control of manufacturing and inspecting the trailers before they roll off the line. We haven't lied to or mislead anyone, rather, we have reached out to you, our family members and best sales force for your feedback. Thank you for those who have responded with your concerns. We are reading and listening to each of them and taking them seriously. Please let me know if you have any questions. Have a great Labor Day weekend!21 points
-
It was quite painful to sell, but this was the correct move at this stage in my life. For privacy I won’t say who bought it, but he is a member and if he wants to announce it, that will be on his dime. I emptied out the RV bay for the first time in six years, washed the floor using a push broom and Dawn detergent, and lots of water, and moved my LC200 over to that spot. I now have a vast area to park a vehicle or do workshop type projects, and my wife now has a big corner dedicated to gardening, with two big workbenches, power, light and pegboard. A happy wife is a happy me… Plus I have even more room for my indoor 10 meter airgun range. We will continue to travel and explore the back country at times, but we will stay primarily in motels or B&Bs. But if we encounter a splendid isolated pull-off overlooking a great vista, we can pop the Maggiolina Grand Tour 360 Carbon and rough it for a few nights. It takes about a minute to crank up, and three minutes to put back down. It is pretty darn crude compared to an Ollie, but it is a simply stunning tent. I was really afraid that there would be a big mpg hit from the tent, like with the Yakima RocketBox Carbonite Low, but I was delighted to discover that I got 16 mpgs going to the dealer with bare round bars, and 17 coming back, and no noise at all at 72 mph. That is good mileage for a Land Cruiser with LT tires, they are gas hogs. It’s way better than the 10-12 I got towing “Mouse” at 62 mph. I may install wimpy Geolander AT G015 tires after our next big trip, they will save 52 (!) pounds of rotating mass and I expect to gain another couple of mpgs. They are great “tweener” tires for an Outback, RAV4 or LC200 that isn’t doing lots of rocky stuff. I have had two sets already on other vehicles and I am impressed. We plan to attend the Total Solar Eclipse rally in Fredericksburg next April, but we will be forced to sleep in the ground due to stupid CG rules. If anyone wants a dirt cheap big heavy Eureka! tent and fly in fine condition, come by and talk to me on Tuesday morning after the crowds have departed. After the eclipse, we will head home via the Utah parks and hopefully spend a few nights on the delightful White Rim Road in Canyonlands NP. I will continue to hang out here on the forum, but my posting will be dramatically reduced. The members here feel very much like family, I can’t just go away. John Davies Spokane WA
21 points
-
We just returned to Atlanta from a nearly 8 week journey in our Oliver E II. An amazing experience overall and I'm really happy with how the supercharged Tundra and Oliver performed. A few highlights - Days gone - 52 Miles traveled - 12.430. Drove the Alcan, the Steese/Elliott/Dalton to Arctic Circle, Glenn. Taylor, Richardson/Edgerton/McCarthy, Top of the World and a few others. Fuel consumed - approximately 1200 gallons (mostly) premium gasoline Oil consumed - less than 1/2 quart (love those Toyota V8's) U.S. National Parks visited - 10 (7 in Alaska) States/Provinces traversed - 11/3 Oliver sightings - 6! Wildlife spotting - too many to count Costco's visited - 22! Some more than once. (Saved enough on fuel to pay the annual Executive membership fee) Flat tires - 0! (Had two spares each for truck and trailer). Glad I carried extra fuel though, as the fuel station at the Yukon River (Dalton Hwy) was out. Oliver issues - two touch LED lights, one water leak at water pump (very loose flexible hose). Thankful for the double hull and drains. Tundra issues - two divots in windshield. Supercharger drive coupling is going bad (known issue), but made it home for repair here. Memories - a lifetime! Now for a week of cleaning and maintenance on the Tundra and Oliver. Highly recommend this trip if you can spare the time and expense.21 points
-
Selling our beloved Oliver recently was a bittersweet experience. We had six wonderful years of great camping experiences with our cherished Ollie. I enjoy photography, and I have taken a lot of pictures of our Ollie in beautiful locations. I went through my photos and selected the best to share here. I then asked myself how to present these photos. By chronological order, or maybe by geographical location? I looked through the EXIF data for the photos and looked at the time when the photos were taken. I noticed that nearly all of the photos were taken in the early morning, late afternoon, or early evening, the Golden Hour of photography. So I decided to present these photos based on the time of day. In the Best Possible Light. Morning photos 6:31 AM July 19, 2019 Deer Creek State Park, near Midway, UT 6:32 AM May 7, 2018 Oliver Rally Lake Guntersville State Park, Guntersville, AL 6:43 AM May 4, 2019 Jalama Beach County Park, near Lompoc, CA 6:53 AM April 5, 2018 Valley of the Gods BLM land, near Bluff, UT This is not a campground, but open BLM land and camping is free. No water, no toilets no picnic tables. Just gorgeous country, and lots of privacy. This is the most spectacular campsite we had in our travels. 6:54 AM June 3, 2020 Lake Jordanelle State Park, near Park City, UT 7:18 AM May 19, 2017 Kodachrome Basin State Park, near Cannonville, UT I distinctly remember taking this photo. It was very cold the night before, and hard to get out of my bed to take this picture. I had sized up the location the previous night and knew that this would look good in the morning light. 7:49 AM March 20, 2019 Goose Island BLM Campground, near Moab, UT We had a great campsite right on the Colorado River. BLM campgrounds are primitive, with a fire pit, a picnic table, and pit toilets. 8:21 AM Sept 17, 2017 Rain Forest Campground, Lake Quinault, WA Afternoon 3:04 PM April 5, 2018 Valley of the Gods BLM land, near Bluff, UT 3:21 AM April 6, 2018 Gouldings Campground, near Monument Valley, UT 5:34 PM August 30, 2019 Rush No More Campground, near Sturgis, SD This was part of the Inyan Fiberglass Rally. 5:44 PM August 25, 2019 Horsehead Campground Angostura Recreation Area, near Hot Springs, SD This was part of the Inyan Fiberglass Rally. Evening 6:09 PM April 15, 2017 Upper Big Bend BLM Campground, near Moab, UT This was a small campground, with a really small spot to put the trailer. I was still new to maneuvering the trailer, but I was able to back Ollie into place. A bigger trailer would not have worked. 6:29 PM April 4, 2018 Valley of the Gods BLM land, near Bluff, UT 6:31 PM April 28, 2018 Piney Campground, Land Between the Lakes National Recreation Area, near Dover, TN 6:37 PM September 7, 2017 Whitby Island, WA We were on our way to Olympic National Park with my sister and her husband and their Casita, when we “driveway camped” at a family friend’s place. 6:38 PM September 21, 2016 Rivers Trail of Tears State Park, near Cape Girardeau, MO We picked up our trailer on September 20, 2016, and spent that night near Hohenwald, TN. This was our first night on our own, at a campsite overlooking the Mississippi River. 6:42 PM October 15, 2020 Castle Valley, UT We were camped with our friends and their Airstream on their land near Castle Valley, UT. 7:04 PM April 9, 2022 Watchman Campground, Zion National Park, UT This is special to us, as this was our last trip with Ollie. 7:17 PM April 4, 2018 Valley of the Gods BLM land, near Bluff, UT My favorite Ollie picture. 7:34 PM May 18, 2017 Kodachrome Basin State Park, near Cannonville, UT 7:40 PM April 13, 2017 Upper Big Bend BLM Campground, near Moab, UT 7:42 PM May 3, 2019 Jalama Beach County Park, near Lompoc, CA 7:58 PM March 28, 2019 Goose Island BLM Campground, near Moab, UT Our propane firepit right on the Colorado River. 8:07 PM September 10, 2017 Hobuck Beach Park Campground, Neah Bay, WA 8:40 PM May 18, 2017 Kodachrome Basin State Park, near Cannonville, UT This was our first time using our propane firepit. 9:09 PM May 20, 2017 Kodachrome Basin State Park, near Cannonville, UT I hope you enjoy these photos, and that you enjoy camping in your Oliver. -- David
21 points
-
Just passing along: Heard back from Rodney Lomax, Sales Manager at factory about a few minor changes to 2024 model year: No big changes as many happened last year. 1) Delete both street side water ports from side of trailer Simplify down to just 2 ports for water. ( These side mounted ports get lots of grime and road abuse. Moving to rear should help.) 2) Move current street side fresh tank fill to left side of rear bumper. (Like the current boondocking port on right (curb) side.) 3) Change right rear boondocking port valves so it is both the regular pressurized input line….and a boondocking port. (In 2024 Only 2 ports for water on rear of trailer) 4) Rework body moulds to remove the inset used for upper fridge vent. New fridges don’t need that vent. The trailer will then be streamlined all the way to the door on the upper hull. 5) The exterior solar port will no longer be standard but will be a dealer option for customers that wish to have it. (Note: Several owners added their own solar ports in the past.) 6) There is a possibility of a bathroom door change but that is still in the R & D phase and may not pan out.20 points
-
First, thank you all for being generous with your time. I found many detailed answers in the forum and the broader community was a major factor in deciding on an Oliver. This will be my first travel trailer. It is perfect for me and my wife and our two miniature dachshunds. Kids started college and we are still a few years out from retirement. But we can see it coming up fast. My wife is a history teacher and I own my own business - so we spend most of our time in California (Ventura County) and summers and holidays in Williamsburg VA. My toolbox consists of a wrench and a roll of duct tape. But I am up for the adventure and look forward to acquiring new skills. I have to say I am very impressed with all of you and look forward to getting to know you. Rich and Christine Mutell20 points
-
So true.
20 points
-
Camp pillows that tickled my funny bone...
20 points
-
Summary: Check under your kitchen sink I walked up to an Oliver at a campground one time to introduce myself. I noticed water running down the curb side rear stabilizer. After exchanging greetings I brought the leak to the attention of the owner. After looking under the curb side bunk and finding nothing I suggested that he look under the kitchen sink for the source of the leak. Upon removal of the drawers he found water soaked plywood caused by a loose coupling on the kitchen sink drain trap. Since then I have tried to check mine occasionally to ensure that it is tight and to look around for any other problems. Today I found that the quarter turn stop on the hot water was not completely open. It had probably been like that since we took delivery. Anyway, I opened it and improved the hot water flow at the sink. Occasionally remove your (kitchen) drawers and check on stuff down there -tightness of the drain coupling -quarter turn stops fully open -refrigerator plug plugged in -hose weight located between back of drawers and rear of cabinet carcass -hose not twisted -any sign of moisture -anything rubbing against something -and especially that blue clip on the faucet hose assembly. There was an owner that heard water running underneath her sink when she turned the faucet on. Turns out that blue clip was missing and the hose had completely separated. We have a 2018 OEII, hull 313. Some of this stuff has probably changed. The round port was added after production to access a loose clamp on the exit end of the fresh tank overflow hose. It sure is useful for checking below the cabinets. There is a plumbing vent under the back right corner of the range. It is supposed to let air in and not let grey tank smells out. If you are smelling something foul (grey tank odors, not black tank odors) and you can’t locate a leak you might have a bad plumbing vent.
19 points
-
Like others, we’ve been disappointed with the lack heating in the bathroom. In our Oliver, even the kitchen had minimal air flow and hot air was blasting under the bed. When I took a closer look at the duct routing from the furnace, the problems became obvious. There were two 4” ducts coming out of the furnace, one from the front outlet facing towards the registers, and the other from the rear outlet facing away from the registers. The front outlet was connected to the bedroom register with one 900 bend. It had the shortest run with the least turns, and twice as much air flow as the other two combined. The rear furnace outlet was connected to the kitchen register after making a 1800 u-turn. From there it was Tee’d and reduced to 3” to feed the bathroom. The 3” duct then takes a long and torturous path to reach the bathroom. The resistance from over 2800 of turns, and the longer run, resulted in much lower air flow to both the kitchen and the bathroom. I also found a hole from where the duct had been rubbing on the hot water valve, and the kitchen had a restrictively tight bend at the register. Fortunately this was a relatively easy fix, and the results were significant. Our 2022 Elite II has the Dometic furnace, but I suspect that other furnace brands could have similar ducting issues and it might be worth taking a look. The sketch shows how the duct routing was modified for better balance to all three registers. The bedroom and kitchen registers now feed from the high resistance u-turn at the rear furnace outlet. The bathroom has its own feed from the front outlet giving it the minimal number of turns possible. This modification involved moving the Tee which is under the kitchen cabinet. There is an access port under the forward kitchen drawers to reach the Tee and kitchen register, and it’s best to pull them right out of the access port to work on them. The 3” bathroom reducer stays in place and it gets a new duct directly to the front furnace outlet. The bedroom/kitchen gets connected to the rear furnace outlet. Rather than using flexible duct to make the 1800 u-turn, I used two 900 rigid fittings for less flow resistance. All of the parts needed for this modification are readily available at hardware stores. They usually sell duct by the foot, I bought 5’. Use sheet metal screws and foil duct tape for the connections to make sure they don't come apart. The kitchen register can be screwed together from the inside of the register rather than trying to do it from under the cabinet. I used an anemometer before and after the modification to measure flow, and a on-line calculator was used to get Cubic Feet per Minute (CFM): Before After Bedroom - 4” 100.7 53.2 Kitchen - 4" 39.3 65 Bathroom - 3" 11.8 30.2 Total 151.8 148.5 Cheers, Geoff
19 points
-
Hull 505 - Galway Girl Made it to mile 0. Updates later.
19 points
-
This is most excellent, if you want to understand why lithium batteries are so cool. "You have just sold your first-born into slavery, remortgaged the house, and bought yourself a lithium-ion battery! Now you want to know how to take care of your precious new purchase: How to best charge lithium-iron batteries, how to discharge them, and how to get the maximum life out of your lithium-ion batteries. This article will explain the do’s and don’ts." How to Find Happiness With LiFePO4 (Lithium-Ion) Batteries John Davies Spokane WA EDIT: That is a pdf that doesn't print well. I made a Pages doc out of it, that can be printed and added to your Ollie records, if you like. JD How to Find Happiness With LiFePO4 (Lithium-Ion) Batteries - Solacity .pages EDIT 05/16/23. Thanks to Jim and Francis for converting the article to a PDF: How to Find Happiness With LiFePO4 (Lithium-Ion) Batteries19 points
-
Many of you know that this has been a long, drawn out project. I think I started talking about it to a few people at the 2019 rally - so it's been well over a year in the making, almost two. Not that it was particularly difficult (though certainly a more major mod), but because of laziness and indecision on all the components it ended up being a start and stop project, with months sometimes between fits of activity. And then it snowballed into a complete plumbing overhaul, which was unnecessary - but then that's how the trailer got its name, after all. I'll post about all the plumbing stuff later, but since there have been a few recent posts about shower and bath mods, I figured I'd go ahead and toss this one into the mix. This project started for a few reasons. One, I've always found the bath sink to be mostly useless. It's fine for washing hands, but for most anything else, you've got to crane your neck around with the front wall curving in to hit your head. And trying to use a tiny little sink for washing your face just leaves water everywhere. So we found that were using the kitchen sink almost exclusively. That was fine - no big deal - but with the bigger sink, I was getting tired of wasting water cleaning toothpaste residue out of the sink, and it seemed silly to have a bath sink that got little to no use. The second reason for the upgrade is that after we redid the kitchen sink, the bath sink just looked sad. In addition to functionality, the bath needed some sexy. So the obvious solution was a vessel sink of some sort. Since a vessel sink sits on top of the counter, I'd have much more leeway in size and placement. I could pull it forward as much as I wanted, plus it had the added benefit of raising the sink to a more comfortable height for us. Some experimentation with kitchen bowls of different sized showed that I could get a fairly generous sink that didn't take up too much shower space. I settled on something in the 11" to 12" range; which proved to be a little difficult to source, especially after deciding on the material. I had bookmarks for dozens of sinks of different materials, but I couldn't find one that I really liked. I almost picked a glass one off Amazon, but in the end I thought that was going to be too heavy. What I really wanted - since I had already swapped out almost all of the brushed chrome fixtures in the bath for polished - was a simple polished stainless sink. There were a few out there, but nothing in the right size, nor at a reasonable price. So the project bogged down a bit at that point; but I was confident that I'd find something eventually, and so I went ahead and ordered a new vanity top from Oliver, without any cutouts for the sink or faucet. I’m glad I did, since Oliver has apparently now stopped offering our countertop color And sure enough, a few months later I came across a discontinued sink on Overstock.com that was exactly right. 11.25", polished inside and out. It's the Acquaio sink from WS Bath, if you can find one. I know that other sizes are still available. It was still pricy even on discount, but by that point I didn't care. To make up for the splurge, I got a faucet from Ikea, which is actually pretty nice. The colors from chrome to stainless don't exactly match, but they're close enough and it doesn't bother me. Since I was swapping out the faucet, I needed to find a separate shower valve, which was another lengthy quest. I thought at first that I'd put one to the right of the bath caddy, like @mountainoliver has in his trailer. But most everything I found was just a bit too big to fit (I didn't know about mountainoliver's mod and the mixer valve he used until later). Then I found the Grohe Grohtherm valve, which was interesting in a couple of respects - it didn't recess into the vanity at all (which eliminated a potential issue with the plumbing), it matched the Grohe faucet that I had already installed in the kitchen, and since it was linear, I thought that it might actually fit in the space above the caddy, between it and the vanity top. And it did fit, but looked squished in place, plus I didn't think until trying to place both it and the sink that the the sink drain and trap was going to be difficult to work the plumbing around. Plus putting it there meant that the shower hose was going to be strung across the vanity and generally look bad and be in the way. The problem with this realization was that I'd ordered the valve and the sink before one of my 3-month breaks in the project and now neither was returnable - so I had to make it work. This meant that the shower valve was going on the closet wall. I also realized during the test fitting that when I pulled the sink forward, the drain trap was going to hit the top of the bath caddy, meaning that I couldn't get it far enough forward to work. Small disaster. But I realized though that the bath caddy wasn't symmetrical, and if I turned it upside down, everything fit. I'd lose the flat shelf on the bottom, but we only use the caddy to hold the bath mat, so not a problem. Small problem with the water pump switch placement, though, since it would be on the bottom - but a quick email to Oliver had a new caddy that hadn’t been drilled for the switch on the way. At that point, all the pieces were here, all the logistics worked out, and I was ready to go. Time for another couple months off while I built up the courage to drill through the closet wall. Then finally... First step was to remove the existing vanity top, which is possibly one of the most firmly attached things in the trailer. It's glued in place, so the only way I could find to get it off without completely destroying the vanity was to cut through the joint with an oscillating saw. That's a slow, tiring, dusty endeavor; and it generates a great deal of heat, so you've got to work in spurts to keep the fiberglass resin from burning - which is fine really, since working through the caddy access, your shoulders will welcome the rest. I had to do a tiny bit of trimming on the new top to get it to fit as snuggly as the old one; and once in place, I sealed it with silicone like the original. Top off, new drain lines in place, and I decided to attach the new top with industrial velcro to make it easier to remove in the future (works well). Next, shower lines teed off the existing plumbing, line to the nonexistent toilet removed, and some insulation added to both the plumbing lines and the outside wall behind the vanity. (I have a circulating pump on the hot water, hence the extra line.) I also glued a small PVC block to the back side of the vanity wall to tie down the water lines and prevent them from vibrating too much. And as always, cleaned out as much fiberglass dust as possible, cleaned up and wrapped wiring, etc. The access port on the closet side is something that Oliver gave me in the original build. The sink valves and drain trap are accessible from that port, and since I used velcro for the top, I have the option now of cutting the silicone on the top and pulling that off for access, in addition to taking out the caddy. New plumbing in the closet for the shower. I drilled out a short piece of aluminum as a backing plate for the shower valve. The plumbing is protected somewhat in the closet by the ABS vent, and we really don't keep much in there that could bump around and damage the plumbing. But a few layers of aluminum tape should help protect the insulation from getting beat up and gives a bit of a spaceship vibe. The valve is supposed to stand out from the wall about an inch or so, but I decided to recess it so that it attaches flush and as out of the way as possible. I caulked around the valve and it ended up making a nice little shelf for a razor, and I placed it low enough that my wife can use it to prop a foot while shaving her legs. You can also hang a bar of soap on one of the handles to drip dry. The faucet has a neat feature with stops on both valves, which can be custom set to whatever temperature and flow you prefer. The little buttons on the handles allow you to go past the stops when you want. And that's really it. Installing the sink and faucet is just drilling two holes and following the directions. The only change I made is that the sink came with a short stainless ring to mount between the sink and counter, but I didn't like the look and so just used one of the black rubber gaskets that was inside the ring. That way the sink looks like it’s sitting right on the counter instead of a pedestal. We tested everything out on our last trip and functionally, it all works as expected. The sink isn't in the way at all while showering, and really is so much more usable. Plus I think it looks great. The shower functions just as nicely, with the valve not being obtrusive. I added a second holder for the shower head up high, which works better for me, though my wife prefers the original one. I still need to swap that one out, since I think it's the only bit of brushed chrome left in the trailer. I added the same backsplash material that a few other owners have recommended. I wanted to order a new, wider mirror; but the original one is glued on and so I didn’t want to go through the trouble of trying to get it off. I suppose I could just place one on top of the other, so maybe that’ll be a future project. Glamor shots -
19 points
-
We picked up our camper on Friday of last week (March 19th 2021), and after a fairly long day of questions, tutorials, etc we set out on the Natchez Trace for our first night at Davey Crockett, followed by heading back north to where we are now, and will stay until Easter. Thanks to everyone who has answered my questions over the past year or so. Every one of your answers has helped my wife and I (and our dog valentine) get to this point and we love our camper so far.
19 points
-
Ok... I love these forums! Nothing like great ideas shared by a group of common minded OTT owners. I'm thinking I stole this one from a comment that @SeaDawg mentioned a while back regarding his "LED-lit" Shower Fan. Well, Diane read his post and thought it would be a good upgrade - so, the new MAXXAIR w/LED unit arrived yesterday via Amazon (Happy Wife - Happy Life category). This would be the short story of its installation... First off, the original VANAIR Ventline fan assembly operated perfectly - no leaks, no bearing wobble, smooth actuation, but alas, no LED. It's the exact unit we had in our previous SOBs. BTW: Its up for grabs - a "freebee", I'll cover any CONUS shipping costs for anyone needing a Ventline. There was major brain cramping involved to plot-out a list of instructions for the R&R drill, especially the Removal phase. The first "R" was straight forward - using a plastic "razor" scrapper to remove the butyl tape from the gelcoat. Cleaned gelcoat with a fresh microfiber cloth doused with an ounce of rubbing alcohol. 2. Filled original mounting holes with clear silicone, they will be further sealed with the butyl tape attached to the new fan housing. 3. Cut-to-fit the included plastic sleeve that fits between the top flange and bottom (shower side) trim piece. Applied clear silicone around circumference of plastic sleeve and upper gelcoat. BTW - the OTT factory fan hole was exactly the correct diameter - no additional cutting was needed (WHEW!). 4. Mounted new assembly up top, carefully pre-drilled/chamfered 8 new holes in exterior gelcoat. Lightly torqued-in stainless screws enough to "push" butyl tape out from flange. Trimmed tape and applied clear silicone around perimeter of flange. 5. Rain guard: The new unit included a "rain-guard" which may be helpful if operating the fan in a heavy downpour. Applied butyl tape on the RG flange and carefully pre-drilled/chamfered 6 new holes for the RG. Trimmed tape after torquing screws in and then applied clear silicone around perimeter of RG. Attached fan cap with the provided 2 white screws. 6. Applied clear silicone to the trim piece groove where plastic sleeve seats. Carefully pre-drilled/chamfered 4 new holes for the trim. Connected 12vDC power to fan motor and LED - used solder and heat-shrink for connections. Tucked wires inside trim piece and mounted it with 4 screws. 7. Unlike the Ventline unit, the MAXXAIR has a locking mechanism when depressed allows the fan lid to open/raise. Its raises/lowers smoothly. Fan and LED each have separate switches. And as, I believe, @Patriot has recently said, "Let there be light!" One and done... Happy Wife.
18 points
-
I wanted to let everybody know that Anita has had an accident inside her home. She fell while descending a flight of stairs to her basement and has sustained a hip fracture. She endured a 10 hour procedure to remove hardware placed during a (years ago) surgery after car accident before her hip could be repaired. She states she is currently in a lot of pain. I know she is facing months of rehab and recovery. She is hopeful she will be well enough and her doctors will allow her to come to Guntersville in May. Please keep Anita in your thoughts and prayers as she works her way through this difficult time.18 points
-
I asked my husband to build me some closet shelves after seeing posted photos of others who have added shelves, and here they are! I love it! So much more space and so much more organized! We opted to not wrap the shelf around the right side because I hang a shoe rack and I didn’t want to lose hanging space. He did add a small shelf on the opposite side. We ordered the black rubber shelf lining from Oliver which will be here soon. I also added command hooks to hang hats. I love that the wasted space behind the clothes rod is now useable and valuable space. ❤️ IMG_7332.mov
18 points
-
I realize I might be an odd duck, but I can't say enough about this national monument. It's strange but I love it. There are about 50 campsites, first come first serve. No reservations. I pulled in today at 11:30 and had my pick of almost any site. Some too small for the Ollie but most are plenty big. There are nice flush toilets nearby and water faucets spaced throughout. Most sites aren't too close together.
18 points
-
Here's what we ordered: - 2023 Oliver Legacy Elite II Twin Bed - Standard Mattresses (KTT mattresses after receipt) - Standard Fabric - Midnight - Hypervent - Omnidirectional Antenna (local weather etc. if we don't have cell service) - Street Side Awning - Frosted Cabinet Doors - Convection Microwave - 20 Gallon Propane (to keep tongue weight down) - Front/Rear Propane Quick-Connects - Standard Toilet (with possible AirHead composting replacement) - Full Truma Package AC, Furnace, Water Heater and Antifreeze kit - Lithium Platinum Package - Backup Camera - Rear Bumper Receiver (to be converted to 2" after receipt) - Anderson Hitch - Aluminum Storage Basket - Basement Door - No Graphics Delivery Date: Wednesday, March 29, 2023 Status: Thrilled beyond belief!! A huge thank you to everyone here who has helped us through the entire process over the past ten months! Your support cannot be understate. I can't wait meet all of you! Steve and @DebM Mock-up of the graphics that are on order from Robin at Banana Banners (using one of the images from this forum for a background - thanks to whomever I stole it from) "curiosity" logo used with the kind permission and encouragement of Curiosity Software Ireland
18 points
-
OLIVER HULL #1291 DELIVERY, INSPECTION AND WARRANTY SERVICE EXPERIENCE This very long post details our delivery, inspection and initial warranty service experience with our new Legacy Elite II travel trailer picked up on November 10, 2022. I begin with our overall impressions, for those who want just the “bottom line.” OVERALL IMPRESSIONS The Elite II is a quality trailer worth the price paid. We are glad we waited to get the Truma upgrade package including the AC, the CP Plus Varioheat wall control and the Varioheat furnace. Oliver does not lap seal all screw holes on the roof during production, but does lap seal as part of the first year’s annual maintenance. Oliver’s production staff continues to make some mistakes, but Oliver’s Service Department promptly and effectively addresses flaws for which service tickets are submitted. If you are interested in more detail, including how our delivery process went, the specific issues with our Hull #1291, and how they were resolved, keep reading. DELIVERY Ryan from Service did a generally good job with the delivery process. But, he failed to provide instructions for running the AC on battery power, which is one of the reasons we bought the Lithium Pro package. We had to figure out on our own that the AC remote must first be electronically paired with the CP Plus Varioheat wall control, and that the inverter must be switched on, or the AC unit will not be recognized by the CP Plus Varioheat wall control. Once we completed those steps, the AC worked well on inverted battery power. Our trailer has Goodyear Wrangler Workhorse LT tires mounted on 16” wheels. I was advised by Oliver Operations Manager Rodney Lomax that the ST tires on 15” wheels will not be installed on new trailers until March, 2023. I asked Ryan if the tires contained balance beads. He replied that after the balance bead/valve stem issue, Oliver determined to remove balance beads from all tires going forward, and leave them unbalanced. He asserted that trailer tires don’t need to be balanced. Jason Essary and Oliver Operations Manager Rodney Lomax also advised they are satisfied that trailer tires do not need balancing. Note Added After Towing 2000+ Miles Back to Idaho: I do not feel the need to get the trailer tires balanced. The trailer towed smoothly. SPECIFIC OBSERVATIONS ABOUT THE TRAILER Hull #1291 is the third trailer delivered with the new Truma package including Aventa AC, Varioheat furnace and CP-Plus integrated thermostat/control for heat/AC/water heater. We deferred our delivery from September to November 10 so we could get the Truma package in our 2022. #1291 is also the third trailer to get the Victron MPPT solar charge controller, which is standard with the 2023 solar package. I mistakenly presumed that since the Victron BMV-712 Smart Battery Monitor is mounted in the same place that the Zamp monitor was that it, too, reports solar panel charging data. It does not. It reports only the battery charge status. In trailers with both the solar and lithium packages, it is one of four ways to access battery charge data: (1) by reading the Smart Battery Monitor; (2) through the Lithionics app; (3) through the Victron Connect app and (4) by pressing “Batt” on the Seelevel monitor. Those who order wet cell or AGM batteries without a solar package have one way to check battery charge level: the Seelevel monitor. To check on solar charge data, there is only one option: you must access the Victron Connect App and click not on the Smart Battery Monitor icon, but on the Solar Charge Controller icon. You can then see real time solar charge data (if it’s night the charge data will be 0), and historical data for the past 30 days. The Truma AC is quiet. Although it produces 62 dB on high, the low and night settings logged in at 48 dB. It is easy to carry on a normal conversation at those levels. The Varioheat furnace includes much more substantial ducting than what I have seen in photos of Suburban furnace installs. It is not kinked or twisted, as some have reported with previous furnaces. Hull #1291 also includes a return air vent in the bathroom, which allows cold air to be returned to the furnace through the service area in the bottom of the trailer. This results in a much better balanced forced air heat system. Previous posters with the Suburban furnace noted that the “bilge” area under the street side bed where the external faucet is located stayed about 5 degrees above the outside ambient temperature on cold nights in the teens. We found that, with the Varioheat furnace set to heat the cabin to 70 degrees F, the “bilge” area stayed at 38 degrees F with outside temps at 11 degrees F. We did not then worry that the plumbing and tanks below the floor would freeze. The CP Plus Varioheat thermostat requires a learning curve, as it is not yet covered by any Oliver videos. It controls the Varioheat Furnace and the Aventa AC, as well as the Aquago water heater. AC control appears as an option on shore power, but not on battery power until the inverter is turned on. We were shown how to use it on shore power during the delivery process, but we were grateful that Oliver also provides a notebook containing owners manuals for the Truma products, as we had to study the owner’s manual later to really learn how to operate it, including when testing the AC on inverted battery power. The fit and finish inside and outside the trailer is improved over that reported by some on this forum. The interior caulking, such as in the shower, is nicely done. As an example, the plumbing vent hole in the closet is now sealed with a gasket, rather than just caulked (sometimes incompletely) as noted by earlier posts on this forum. INSPECTION AT DAVID CROCKETT STATE PARK From review of posts on this forum, I had compiled a long list of nearly 100 production defects noted by posters over the past several years. I spent most of the next 3 days at David Crockett State Park inspecting the trailer inside and out to determine if any of those defects were present in our trailer. None of those issues, ranging from improperly installed windows, to missing caulk around stabilizer jacks, to improper grounding of the inverter, were found in our trailer, save two: (1) there were no rubber plugs in the drum brake backing plates and (2) there was a roof leak. We found 5 significant issues, for which we submitted service tickets: 1. A leak appeared onto the standard bed area below the Truma Aventa air conditioner. It rained in Hohenwald the night we took delivery, then we found the leak the next day when we arrived at David Crockett State Park. As we had not used the AC, we suspected something on the roof needed to be resealed to prevent rainwater from penetrating the hull when on the road. This issue was on my list. 2. The Truma Aquago Antifreeze unit we purchased from Oliver did not yet communicate with the Truma CP Plus Varioheat wall control unit, so it could not be used. 3. The grey tank sensor gave erratic readings that did not correlate to water usage. 4. The bath fan vent and plumbing vent screws on the roof were not sealed, providing possible leak points; and 5. The one other item that was on my checklist: The drum brake backing pads do not have rubber plugs to protect the adjustment mechanism from road grit. When dumping the black and grey tanks before heading back to Hohenwald, the grey tank cable pull handle came out in my hand, preventing me from dumping the grey tank. When speaking with Mike Sharpe from Oliver Service, I also advised him of this issue that had come up that morning. RETURN VISIT TO HOHENWALD We delivered Hull #1291 to Oliver Service the late morning of Monday November 14, 2022. Later that afternoon, Jason Essary advised that his techs had verified the water leak and believed its origin was around the ventilation fan. They resealed that area, but then also applied sealant to all of the exposed screws on the roof (at no additional charge), because I had expressed concern that they were potential leak points. Operations and Sales manager Rodney Lomax advised that those screws are not sealed during production, but that the Service Department applies lap seal to them if annual maintenance is scheduled. I suggested that, like the screws that secure metal roofing to sheathing, those screws should be either gasketed or otherwise sealed as part of the manufacturing process. We were asked to leave the trailer overnight, so the sealant could cure before leak testing the next day. Because rain was forecast for that night, and because we asked to be able to sleep in the trailer, Operations Manager Rodney Lomax arranged for the trailer to be placed under a large awning/overhang at the Sales and Service facility to keep the roof dry. We noted when we slept in the trailer that night that all of the service ticket items had already been addressed except the water leak and the plugs for the drum brake backing plate. The grey water tank sensor was now reading consistently and the CP Plus wall unit was recognizing and controlling the antifreeze kit. The grey water tank pull handle had been reattached. [My later inspection suggested that the set screw, which secures the aluminum shaft (to which the grey tank drain handle is attached) to the guillotine valve under the street side bed, had come loose. I expect the handle with shaft simply needed to be reinserted and the set screw properly torqued.] We were advised that the brakes come from Dexter without plugs for the access holes, and Oliver does not supply them. So, I determined to cover the access holes with Gorilla tape until I could buy plugs online at home and install them. We yielded the trailer to the service team the next morning, expecting that after a leak test, we could be on our way home. But, we were advised a few hours later that when leak testing, it was discovered that our windows had not been installed according to a new protocol recently implemented by Oliver, so Jason had instructed his techs to pull and properly reinstall all windows, including re-caulking exterior flanges. That took the balance of the day. Jason and some of his staff stayed until after 6:00 p.m. that evening to complete the work and return the trailer to us, so we could camp another night at the Oliver campsite rather than find a motel. The process of addressing our multiple service tickets required us to hang out in Hohenwald for another two days, and delay our plans to return to Idaho. But, we had planned extra time for this purpose knowing that such a delay was possible. In total, we spent 6 days in Tennessee receiving delivery, inspecting and testing systems, and coordinating repairs. We appreciate Oliver lap sealing all of the screw heads and holes in the roof of our trailer, at no charge to us. We believe all Oliver trailers should have all roof screw holes lap sealed as part of the production process. Had that been done to our trailer before we took delivery, it would have saved us a day in Hohenwald. We also appreciate the Oliver service team for promptly addressing our service tickets right after we arrived back at their facility, and, even though it took an extra day, for ensuring that the windows were properly resealed though we had noted no issues with the windows. It is a concern that Oliver’s production staff overlooked the items for which we submitted service tickets during construction, and failed to follow the new protocol for window installation when building our trailer. But, we left (two days later than we had originally hoped) with what we believe is a high quality trailer that is worth the premium we paid for it. And we left with great respect for the integrity and commitment to quality of the Oliver service and management team. HELPFUL THINGS LEARNED FROM FORUM POSTERS I learned many things from posters on this forum which have made using the trailer much easier and safer. These include: Inserting turnbuckles into the chains of the Andersen WD hitch, with the extra chain links required to fit the Elite II. This has made it easier to attach and detach the Andersen by turning the turnbuckles to create slack. It also makes it much easier to get the “whale tail” back on if it was detached at an angle—just loosen the turnbuckle on the long side even more, and the whale tail can be installed at an angle. Then, of course, tighten the turnbuckles to tension the WD hitch. I use Robogrips to complete the tightening process. This is much easier for an old guy than crawling under the trailer to loosen the nut with the Andersen provided socket. Using a Camco water filter and a brass hose elbow when hooking up city water Installing a dash cam Using a PUR water filter pitcher Installing a Tire Minder TPMS system Using a squeegee to wipe down shower walls Installing X-Chocks between the wheels on the two axles. If you posted about these items, THANK YOU!18 points
-
Today was the day I got to do the fun messy job of replacing the China Bomb wheel bearings/seals on the ILOVHER on over to USA made Timkens. This was quite the all day project as we also changed out the shocks and lubed the EZ Flex suspension. We beat the rain by a mere ten minutes! My only experience prior to this, was replacing entire preloaded hubs and manual brakes on my Casita which was easy compared to this. After figuring out the best way to jack the side of the trailer up. (Yes, we used multiple floor jacks, and safety jacks stands, chocks and wood cribbing all while being attached to my truck) All I can say is, Thank God my son was here to teach me and to remove the seals in those hubs! (His father owns an excavating company so he knows a bit about trailers/brakes) There is no way on Gods green earth I would have been able to remove them by myself. We had a puller and they would not budge. I think they were permatex'd in there. He somehow was able to use his strength, ingenuity and multiple tools to get them out without scoring. Here are some observations and or questions we had: 1. My son thinks that the shocks look too large for the application. We used the exact replacement that Oliver uses (Monroe 555025) He says they're nearly all the way compressed with the way the suspension sits and that is why potentially two of them were blown. His opinion is that they'd do more if they were just a bit smaller. I have no idea or opinion but it was the one job I was able to complete by myself so I'm good with it. 2. It was quite the surprise to see that the axle spindle did not have the Dexter EZ lube feature. My understanding is that this was not an option on an LE2 in 2017? I did not know this and bought new grease caps with the rubber insert. As much as I learned today, this was sort of disconcerting. Even my Casita had EZ lube axle and it was a 2007. I greased my bearings every year and it made it easy. All those great suspension features like shocks and a EZ Flex but no way to easily grease bearings?? What gives? I sort of dread doing this again. 3. What's with grease guns? OMG..I wanted to throw and shoot them with a real rifle like skeet. I used two separate guns and they both were being unruly and messy. I could have bought stock today in rubber gloves and shop towels! LOL 4. Bearing grease packer seemed like a great idea. Who knew you'd have to use all 200# of human body weight to press down in order for the thing to squeeze grease into the bearings? 4. I took the advice on the forum and replaced a few zerks with 90s and 45s and used plastic cap covers but OMG.. crawling under the trailer is not for the faint of heart or my elderly bones! I think I want/need a creeper. 5. Thank God for Harbor Freight! I now have all kinds of fun new cheap tools, like impact driver and a torque wrench which I properly learned how to use! I now can afford to go to the Rally. 6. The Nev-r-Adjust Brakes looked good but I think I'm going to go with manual brakes next time. I don't feel confident about what I learned about them today and how they actually DO need adjustment. We greased the important parts with a good brake grease. At least we didn't find any loose parts. springs or worn pads floating about. 7. Found four cracked lug nuts. Son says the sheath on the outside is cracked and I should consider solid replacements. Any recommendations? 8. Beer never tasted so good. Thank you for all of the forum help I've received, without you guys, I'd be dead in the water. See y'all safely at the Rally !
18 points
-
Oliver Owners, We picked up our new trailer (Legacy Elite I #664) on Sept 16, 2020 and have been using it on/off since this date. Overall, our experience has been wonderful and the quality of the trailer has been much better than what we have read about other manufacturers. In an attempt to help others with our recent learnings, I am listing some of the items were have learned about, fixed, and/or submitted a tickets for: Initial Pickup: - The bathroom interior window frame was bent due to being over tightened - Jason and the person showing us the trailer located a new frame and installed. - Window shade over the rear driver's side window had damage to the felt liner at the bottom of the night shade. - Orientation team replaced. First Night Camp @ Davy Crockett State Park: - Noticed that the propane alarm was not on. - Contacted Jason via telephone and he walked me through installing the 1A fuse that was included in the box of spare fuses provided. The fuse holder is located under the dinette seat and is somewhat hard to find as it is black and not easy to see. - Upon opening the rear compartment door, the bracket where the wire attaches to keep the door from swinging down came unglued. - Contacted Jason to let him know and he said they would send me some epoxy to fix. Ended up purchasing some a few weeks after getting back home as it never arrived. I let Jason know we no longer needed as I had fixed per his recommendation of Gorilla 2 part epoxy. - Shower floor squeaks a lot - Contacted Oliver Service and have a ticket for them to repair when we take the trailer back to TN for its annual checkup. According to Jason, the squeak is most likely from the shower tub not being cut correctly or the padding under it not installed correctly. No biggie for now as we have learned to live with it knowing that it will get fixed. If your spouse decides to use the bathroom at night, It will wake you up. No liquids right before bedtime. 🙁 First Long Drive from TN to AR: - Had someone flag us down and let us know that the rear compartment door had come open during travel. Upon pulling over and inspecting, we noticed that the screws had come loose on the latch and allowed the door to open with the latch locked close. I was lucky enough to have some blue lock-tight with me to use on the screws when retightening. No further issues experienced. We let Oliver know that this happened and they indicated that lock-tight should have been added to the screws at the factory. I am confident they put new procedures in place to keep this from happening again. First Time Back Home: - Spent time learning about the solar system, inverter, appliances, etc.... - Realized that both the Solar Controller and the Inverter were both set to flooded batteries vs. the AGMs we had installed. Changed both to AGM. No issues noted so not sure if it really mattered. Texas State Park Close to Home: - Noticed a small gap at the top of the external door window frame. - Contacted Oliver and was told that the frames are designed to click together but requires special plastic keys to take the frame off to inspect. From my reading this is a common thing from the door factories with the tabs getting broken. We tried several time to get the internal frame to snap together with the external frame. No luck. Contacted Oliver again and Jason said he would have a new frame (and plastic keys) sent to us so we can repair/replace. The suppliers are backed up, so it has now been two months with the door window frame and glass loose. I was successful in learning that there is a supplier zarcor.com that has the window frames (Lippert) in stock and can be purchased/delivered within a couple of days. We will most likely end up just ordering and replacing as they also offer a clear tinted glass and window shutter for the door. There is another post in this forum with pictures if you are interested. Being that this repair is taking a long time to get resolved, I would recommend anyone picking up their trailer inspect this and have it repaired before taking delivery. Arkansas State Park (Crater of Diamonds): - Upon arrival at the State Park we noticed that the trailer was squeaking loudly with every small bump in the park. Upon inspection, I did not notice any lose bolts, nuts, fittings on the suspension. We contacted Jason at Oliver and he had not heard of anyone having this problem before. We ducked our heads down and slowly made it to our campsite without disturbing the other campers throughout the park. We did get some stares tho with the squeaks. Once setup, I made a quick trip to the local hardware store to purchase a small grease gun/grease, 90-degree zerk fitting as the zerks are not accessible without having the pull the tire off, and some dry lube spray. Utilized to the stabilizers to take some weight off the trailer and utilized the grease gun. Fun fact - the top zerk fitting (wet bolt) that attaches to the frame bracket actually serves no purpose as the bolt is not contained within a bushing (Only on the single axle trailers). I would not recommend you go to town putting grease in this wet bolt as the grease will just exit the bolt and make a nice stream of grease falling on the lower spring eye. Not sure why dexter/oliver designed it with a wet bolt in this location. Sad part is that, the squeak we had was between the shackle and the trailer frame bracket and without the trailer bracket having a bushing there is no real way to get grease between the two. Only option at this point was to use the dry lube spray. Happy to say that this resolved most of the squeak until we could get back home (~400 miles). Upon getting home, I used a spray can of Fluid Film to spray down the area between the shackle and trailer bracket. No more annoying squeak! I have some pictures on another computer that I can attach at a later time if you are curious. Other trips - Nothing new to report beyond what has already been said above. Improvements - As recommended by others on this forum, we did go ahead and install the black window seals available on pellandent.com due to some of the white window seals had stains on them from the factory and were cut about 1" too short. I must say that the black seals look much better and should eliminate an excess amount of water needing to travel through the window drains due to them now being long enough. If you do a search on this forum for pellandent you will see some pictures posted by others. Once again, the point of this post is to inform others of our experience and to share some of the things we have learned. As with anything, enjoying life comes with opportunities to improve oneself and help others on their journey. Mark
18 points
-
We have found the coolest new tow vehicle. A restored 1968 Oliver 1250 tractor. We can also use it to clear an area to camp in.
18 points
-
Not one single thing to complain about, Thus far its everything I expected and more. Tows like a dream behind the One-Ton (no anderson hitch just a 2-5/16 Ball.) My tongue weight is 610 Lbs. Fresh Water Tank is Full rest empty. My Hitch provides the actual weight on the spot. I can imagine others have a much higher tongue weight as I am single and pack very light in comparison to most. I do have two 15 gallon water jugs in the front box that I bought filled and strapped there to increase the tongue weight because at 490 Lbs. (This was the exact weight when I pulled it out of the factory and for the first 500 miles before I put any of my stuff inside of it) I was feeling a bit more feedback from the trailer than I appreciate and I figured the additional weight would change its attitude. It did and having the extra water along is a plus until I hit cold country next week then I may change them out for a couple sand bags. Before JD tells me the front box is only rated for 150 Lbs... I know... Its fine and I will beef it up before my next trip. I will post a couple pics when I get better service or home I think this Weigh Safe hitch may be something others find helpful especially if your in a situation where tongue weight is critical due to your tow vehicle. A quick google of "weighsafehitch" and you will be looking at it. I can attest to the fact that it works well and is much faster then finding and weighing on a CAT scale at a truck stop especially if your experimenting with different weights to find your comfort zone. At any rate Props to Oliver for building a quality product in a time when that is not so common anymore and I was very impressed with their staff and how I was treated by them on my pick up day. They are all working hard to push these units out the door but they are doing it with Grace and I appreciate that a lot and they deserve the credit for it. I have attended three Nascar races in a row now (I did not have the Oliver yet for the first two) and will be dry camping in the infield of Kansas City Speedway this weekend, this will be my first time dry camping and I am sure I will exceed the tanks capacity but they do have service running there to pump and fill so I am REALLY not dry camping but I will give it a go and see how long I can get by.... Trouble is that insta hot water heater works very well and it only takes a handful of showers to top off the grey when the water does not get cold. Oh, and the towel hooks somebody was hating on in their blog? they work perfectly, my towels have not fallen off in over a thousand miles and I doubt they ever will but you DO have to know how to hang the towel properly on this style hook..... thanks Grandma for that lesson years ago! Happy Trails Everyone, From Guthrie Oklahoma... For Now...
18 points
-
Please take a moment of silence for those Americans we lost and those that still suffer from this horrific attack on our beautiful country. Thank you for all those who serve and have served in protecting our great nation. Our flag flies at half on this day every year. May God continue to Bless the United States of America. Be Safe Oliver Family. -Patriot
18 points
-
Summary I have installed a rear mounted cargo carrier, with lights, to our 2022 Oliver Legacy Elite II (LEII) travel trailer. We recently completed a two week, ~2000 mile trip, using the cargo carrier, which performed flawlessly. Below are photos of the installed cargo carrier, which are followed by a detailed description of its installation. Storage Constraints Prior to ordering our Oliver Legacy Elite II (LEII) travel trailer I knew we would need additional storage space on the trailer. We are using a 2014 BMW X5 35d (diesel) as our tow vehicle, rather than a pickup truck. Thus, we could not plan to use the pickup bed for supplemental storage. We also needed to stay within the tow vehicle's cargo capacity of 1100 lbs and maximum tongue weight of 600 lbs.. Expecting a tongue weight of approximately 500 lbs. plus two occupants at approximately 300 lbs, we could only accommodate a maximum of 300 lbs. of other cargo. The available payload will be partially used by our camera gear, which must be protected from exposure to moisture. A tongue mounted cargo carrier was not viable, given the tongue weight limit for the tow vehicle. Storage Requirements I anticipated needing additional storage space for the following items: Champion Dual Fuel Generator- 2500 watt (~45 lbs.) (too large for basement storage) Napoleon TravelQ™ 285 Portable Propane Gas Grill and hose (~35 lbs.) (too large for basement storage) Anderson Ultimate Leveling kit (~25 lbs) Harbor Freight rubber chocks (4) (~20 lbs.) Camco Stabilizer Jack Supports (3) (~10 lbs.) Miscellaneous accessories All of these items can tolerate some exposure to moisture, which is likely when stored in any external cargo carrier. A closed and reasonably secure cargo carrier was needed. Searching the owners' forum, I found examples of rear cargo carriers/bike racks and found several examples, including: Oliver's original bike rack design using twin receivers and extending approximately 3 feet beyond the rear bumper; Various rear mounted metal cargo boxes, including custom designs; Rear mounting of an Oliver tongue cargo box by John E. Davies. I also looked extensively at aluminum cargo boxes from various manufacturers, trying to find options which could accommodate the cargo items listed above. I already owned a cargo carrier which we had used on the BMW X5 tow vehicle. This carrier has a heavy steel swing-away frame which mounts to a standard 2" receiver. Mounted on the steel frame are a polypropylene tray and an enclosed container with 13.5 cubic foot capacity. The tray and enclosed container interlock. This cargo carrier also is equipped with fully functional lights (running, brake, turn, flasher). Interlocking pins on the enclosed container mate with the tray. Locking latches secure the container to the tray. Solution Approach I decided to re-use the polypropylene tray and enclosed cargo container, but not the heavy steel frame. Instead, I would use a design similar to the original Oliver bike rack. I ordered the current optional Oliver bike rack when we placed our LEII order, planning to utilize some, but not all, of its components. The current Oliver rear hitch (photo below) utilizes twin receivers that are 11" long, constructed to receive 2" x 2" X 0.25" (wall thickness) T6061 aluminum square tube support arms, which are 17 inches long. The receivers are each mounted to the LEII frame by two long 0.5" diameter stainless steel bolts and nuts. The other components of the rack are a 2" x 5" x 0.25" T6061 aluminum cross-member, 51-1/8" long (with end caps), and a 1-1/4" receiver for connecting a bike rack. I planned to use the twin receivers, and the cross-member, but not the support arms, nor the 1-1/4" receiver. Instead, I would replace the 17" long original support arms with longer equivalents, whose length was to be determined. I would utilize the original 2" x 5" x 0.25" T6061 aluminum cross-member and add another cross member, this one 2" x 2" x 0.25" T6061 aluminum, also 51-1/8" inches long with end caps. The cross members would be bolted to the support arms, in the same manner as on the Oliver rear hitch. The tray and enclosed container from my existing cargo carrier would be mounted to the cross-members. Note the clevis pins circled in the photo below, there are two 0.50" diameter horizontal clevis pins securing the support arms in their receivers. Each clevis pin has a washer on either side of the receiver. Removing the clevis pins permits the support arms to be pulled to the rear, enabling removal of the spare tire cover and spare tire without dismount the support arms. Solution Model A critical dimension to be determined was the length of the 2" x 2" x 0.25" support arms. The new support arms need to be long enough to: Support the polypropylene tray and enclosed cargo box and attach using the molded mounting holes in the tray; Allow the lid of the enclosed cargo box to open without striking the spare tire cover; Permit removal of the spare tire cover and spare tire without removing the cargo carrier and support frame; Permit access to waste water hoses stored behind the bumper; Minimize the additional length of the cargo carrier and support frame to the LEII's length. I fabricated 2" x 2" wooden support arms, approximately 40" long. Using woodworking equipment, I cut slots into one end of each support arm to fit around the bolts holding the twin receivers to the frame. I also drilled horizontal holes for the clevis pins which retain the support arms in the receivers. Positioning the Cargo Carrier on the Cross-members The wooden support arms were inserted into the twin receivers and secured with the clevis pins. Then the 2" x 5" x 51.125" T6061 cross-member was placed across the support arms near the bumper. The additional 2" x 2" x 51.125" wooden cross-member, was also placed across the support arms, but further from the bumper. Clamps were used to hold the cross-members in place on the support arms. The polypropylene tray and enclosed container, latched together, were positioned on the cross-members, centering both to the trailer's width. I opened the lid of the enclosed container and adjusted the spacing (fore and aft) between the lid and the spare tire cover to ensure they did not contact each other. Once I had located the joined tray and enclosed container in what appeared to be a desirable position, I adjusted the positions of the cross-members fore and aft to establish alignment with the mounting holes in the tray. The 2" x 5" cross-member engages two mounting holes on each side of the tray. The 2" x 2" cross- member engages only one mounting hole on each side of the base of the tray. Six 5/16" carriage bolts will fasten the tray to the cross-members. Only four carriage bolts attached the tray to its original steel support frame. I used a mason's string stretched across the width of the tray with weights on either end to aid in aligning the mounting holes in the tray with the positions of the cross-members. I also used carpenter's squares to verify the cross-members were perpendicular to the support arms. Another check of squareness was made by measuring the distance from the trailer bumper to the cross-members. Once I was satisfied with the position of the tray and enclosed container on the support structure, I marked the locations for the holes to be drilled for the six mounting bolts to secure the tray to the cross-members. The tray overhangs the rear cross-member at the rear. With the cargo carrier tray and enclosed container in place on the clamped cross-members, I wanted to determine if the spare tire cover could be removed without removing the entire cargo carrier and support assembly. I found I could remove the clevis pins and pull the support arms aft approximately 7 inches out of the twin receivers and enable removal of the spare tire cover. With the tray and enclosed container positioned on the cross-members, I could now determine the required length of the support arms, which is 33.75 inches. The location of the rear cross-member determines the length of the support arms. After locating the mounting position of the tray and enclosed container I marked all key positions and hole locations on the wooden support arms and wooden rear cross-member. I cut the wooden support arms to the desired final length. Material Sourcing and Machining The required T6061 aluminum components required are: 2" x 2" x 0.25" x 33.75", square tube, quantity 2 (support arms), cost= $110.18 2" x 2" x 0.25" x 51.125", square tube, quantity 1 (cross-member), cost= to $99.08 2" x 12" x 0.125", flat bar, quantity 1 (to be cut into 2" squares for end caps on the support arms and rear cross-member), cost= $6.86 Sales tax= $17.83 No shipping charge. I picked up the materials at the local Metal Supermarkets warehouse Total cost= a $233.95 The above T6061 aluminum components, cut to specified length, were obtained from: Stainless steel bolts and nyloc nuts were obtained from: I was referred by Metal Supermarkets to a local machine shop: When I received the materials I took them and my wooden mockups of the support arms and cross-member to Air & Earth. I also took one of the original support arms. I discussed the machining needed: to cut the slots in one end of the support arms and to drill the needed 0.50 diameter holes for the clevis pins and mounting bolts. I also asked them to cut the 2" x 0.125" flat bar into 2" x 2" squares. I did not ask them to drill the smaller holes for mounting the cargo tray to the cross-members. I was quoted $220 and turnaround of the job within a week. They did an excellent job within the promised timeframe. Finishing and Assembly of the Support Structure After Air & Earth completed the requested machining, I performed the following finishing steps, which included: Rounding the edges of the 2" x 2" square tubing on the slotted end to be inserted into the receivers. I used a 3" wide belt sander with 100 grit sanding belts to round the corners of approximately 12" of the tube which would be inserted into the receivers . The original Oliver support arms also had the corners rounded to more easily slide within the receivers. Several trial fittings were required to verify smooth insertion and removal to/from the receivers. The support arms and the rear cross-member were sanded with an orbital sander using 200 grit disks. This sanding removed markings on the tubes and made the surface textured, similar to the Oliver rear hitch components. The support arms were inserted into their receivers and fastened with the clevis pins. The cross members were aligned with the mounting holes on the support arms and bolted into place. The cargo tray was positioned on the 2" x 5" cross-member at the previously determined mounting position and holes drilled to mount the cargo tray. Holes were then drilled in the 2" x 2" rear cross-member. Carriage bolts, flat washers and double jamb nuts were used to secure the cargo tray to the cross-members. Once all test fittings of the support assembly were completed, lithium grease was applied to the ends of the support arms which are inserted into the receivers. 2" x 2" x 0.125" caps were attached to the open ends of the support arms and the rear cross-member, similar to the end caps used by Oliver. These were attached to the square tubing using JB Weld epoxy. Cargo Carrier Lighting The cargo carrier partially blocks visibility to the taillights of the trailer, which is most noticeable when viewed from close behind the trailer. At a distance the taillights are largely visible. The cargo tray is fitted with two LED light fixtures and a wiring harness with a 4-pin flat connector. A corresponding 4-pin flat connector was installed on the LEII to integrate the lighting on the cargo carrier with the trailer lighting. Details of the installation of the 4-pin connector in the trailer are covered in a separate article. The lights on the cargo carrier ensure the trailer is quite visible from behind. A license plate mount was added to the cargo carrier tray, since the license plate mount on the spare tire cover is blocked by the cargo carrier. Lighting for the license plate mount is provided by adding a Y connector to the license plate light cable under the spare tire cover and adding an extension cable routed to the cargo tray mounted license plate mount. I also added reflective tape to the support frame members. I used the following reflective tape: https://www.amazon.com/gp/your-account/order-history/ref=ppx_yo2ov_dt_b_search?opt=ab&search=reflective Conclusion This addition to our trailer provides significant benefits, with no significant disadvantages. It does add approximately two feet to the length of the trailer. Besides the additional storage space, the cargo carrier and its load slightly reduces the tongue weight. I measured the tongue weight, using a Sherline scale, at 450 lbs., with no water onboard. Tongue weight seems sufficient, as no swaying or other handling issues have been observed. This project had a successful outcome due largely to the information I was able to glean from the Oliver Owners Forum. I hope this information is useful to others on the forum. Comments and suggestions welcome. Regards, Don
17 points
-
Tired of my books scattered all over the trailer and staring at the wasted space under the streetside twin bed “wing”, I installed three plastic bins that I found at Target ($6/ea) and installed using command velcro strips so they can be easily removed for cleaning. Now my books have a home, are easy to access while in bed and don’t fly around on rough roads. Bin dimensions/ea are roughly 5”Hx5”Wx14.5”L. I installed them about mid-way up the wall under the bed so there is still toe room underneath and books can still be removed easily.
17 points
-
We were accustomed to separate single beds in our pop-up A-frame. Since picking up our Elite I Hull # 1209 on August 11, we are trying a single bed across the back for my wife, that we leave in place. I use the dinette bed across from the galley, putting it up each evening. This keeps us from having to crawl over each other during the night. It also creates more space by not having the large dinette and opens up a seat on each side in front of her bed. I simply made a plywood support and use the small fiberglass extension that was in the closet. The 4 small side cushions are the middle of the bed and we have a 3 inch memory foam over the cushions that extends across the back. By no means will this work for everyone, but we're not very large so it seems to be working well for now. Having lots of small pillows, that I recovered, helps for lounging around in the evening while watching a movie or reading. The valances are on 1x2 poplar with the fabric stapled to it and velcro holds them in place very well so far. I borrowed Foy's ceiling panel design. I did have him make me one of his beautiful shower mats! Ron
17 points
-
Hi Everyone, This is a few weeks out of date as this pesky job keeps me busy. But I wanted to share my experience while it is still fresh in my mind and hopefully some of these comments will help, especially for 1st time travelers. I suspect a few of the veterans of the group will reflect fondly on these rookie mistakes. In no particular order: First Night: 1. Stay at the Oliver Travel Trailer campsite when picking up your Ollie. I suggest an AM pickup so staff is still around during daylight hours. The walk-through was awesome. After years of looking at YouTube, it is very much different to be in your trailer. It's actually YOURS! There is a very distinct "new-trailer" smell and it is even better than a "new-car" smell. Lots to go over, and much of it gets lost when you are on your own. I must have made the walk from my campsite to the office at least 10 to 12 times. All of my questions immediately answered. But some simple things that just needed to be fixed / corrected. And a few "what is that sounds" and "is this normal"? They were so patient and kind (especially Hannah). 2. It was COLD. There was still ice on the trees but the heater did it's job. The cabinets and closets stayed pretty cold, but overall I was comfortable. I do find in very cold temperatures the vents in the front of the trailer did not produce as much heat as the bed vents. And those vents don't rotate. I broke a blade and Hannah came out and replaced it in no time. 3. Get a sewer house wrench. One of those Camco ones. Perhaps it was the temperature, but I found it very hard to get the hoses on and off. 4. Practice dumping at the Oliver Campsite. But you have to make sure the Ollie is off the hitch so gravity could do its job. There was a fair amount of grey water still left when I got to the next campsite. Luckily it was grey. First Time Towing: 5. For some reason, I was worried about a Brake Controller. Never using one before, I used a Bluetooth one on my Armada and it was pretty simple to change and configure. Basically drive about 20-25 miles per hour, hit the button, and see how the trailer breaks slow down the truck. Adjust as needed. I did need to adjust this a bit throughout the trip - but it was easy once I got the hang of it. 6. With the Anderson hitch, It was a very comfortable tow. I took it easy and went down Natchez Trace Parkway. Not many cars on the road but it was perfect to ease me into the trip. I mostly just stayed at KOA's as I felt it was easier to get pull through sites initially. The second day I took State Roads to Texarkana, and by the 3rd Day I was comfortable on the Interstates. I do recommend easing into it if this is your first time. You'll get the feel and that nervousness wore off over the first few days. I did stop and torque the tires as directed. Made me feel like I knew what I was doing - even though I never owned a torque wrench in my life. 7. Yes - in freezing temperatures, don't hook up your hose. Fill your Fresh Water tank. The KOA host told me next time, I could also just open up my grey tank and key the water dripping all night. But that leads me to my next experience - everyone along the way was very kind and helpful. 8. OK - this was a BIG ONE, probably the biggest safety issue but having a checklist matters. When I arrived at my second campsite, I noticed the receiver pin was half-way out! Follow a checklist! How it got loose, I have no idea. But luckily I had a pin-lock and was able to put it on. First Time Getting the Look: 9. People LOVED asking me about my Oliver. Gas stations, rest stops. Wal-Mart (shopping, not camping). I stayed at this KOA Resort in Tuscan AZ with full-timers in these massive Diesel Pushers - they stopped to ask me about My Oliver!! You'll feel good towing this behind you. For those in the know, they know quality. Only issue ... my Stove Glass came loose. Seems there are tiny bolts that hold the screws on and it most likely was not tight during the install from Dometic. The road shook them off and I suspect they are somewhere in the bottom of the trailer. I did find one in the drawer. Overall, I was a bit nervous. But for you first timers, you can do it. The team at Oliver has your back. They want you to love your Ollie, they want you to enjoy it for years to come, and they want you to be safe. I felt very much supported through the entire process. Thanks again to all of you for your advise too. Much appreciated. Look forward to meeting some of you soon. Rich17 points
-
I requested that production swap the furnace & water heater locations because the furnace ducting was running right over the top of the water heater bypass valve. This made locating the valve difficult for new owners as well as having to move the duct aside with the potential to tear it. Hopefully this change has made it better for access and does not cause any issues. I have also requested the return air vents as well and they did start putting a return vent in the bath where the air can return below the dinette about a year ago. They are still working on getting one placed in the closet which should be one on the top & one on the bottom for better air circulation through that area. The return air vents is something that can be easily added on older models if you choose to.17 points
-
After reading all the classifieds of Ollies for sale because of "health reasons," and one person who said they bought their Ollie "one year too late," we decided to push ahead with our purchase before actually retiring. Then it happened to us. Steph was diagnosed with stage 4 metastatic breast cancer in July, just two weeks after we took delivery of Eggcelsior. Our little Ollie allowed us to find last minute reservations at state and COE parks and get away a bit during the initial treatments. The change of scenery was good for both our souls. At the moment, Steph is doing spectacularly well, with no cancer detected in her last PET scan. She's not cured, but it's very, very encouraging! We've pushed our retirement up a bit and we're hoping we can continue to enjoy good heath and get out in Eggcelsior as much as possible in the coming years. I think the message here is: don't wait for retirement to live your best life. We've seen friends and coworkers put off their adventures, waiting for a retirement they never got. If you've got the means to get out there and have your adventures now, in an Ollie or not, strike while you can. You just never know. Be safe and well, everyone. We'll see you on the road!17 points
-
We are with Elli Rose 🌹 in the Traverse City Region of Michigan. Only 3 months since we picked her up. She’s a dream to travel in. Here are some pics along the way 🙂A good place for lunchOn the 45th!Leland, otherwise known as FishtownFrom the dock…can’t beat nature’s paletteA break for dinner from our trek on M22 Cherries everywhere 🍒 Sleeping Bear Dunes…the water looks like the Caribbean 🏝 Until tomorrow 🥰
17 points
-
17 points
-
I made a sheet metal box to fit in the space but not hit or rub on any wires or tubing. It is suspended from the flange so it can not drop down. It is easy to remove and reinstall.
17 points
-
Here'a a fun project that provides you a backup 12v Pump for your Ollie. I bought a spare 12V Shurflo water pump to carry with me on our coming long long adventures around the US. I decided to build it into a water transfer pump that I could use for multiple uses and still have a backup pump. Some ways I can use this transfer pump: Transfer fresh water from portable tanks and bladders directly through the Oliver fresh tank port. (This is without using the boondocking port.) Use as a pusher pump for a bladder to the street side water port on the Oliver Use around the campsite as a portable pump for wash stations etc. Use as a backup pump should my main pump fail. Electrical Consideration: I designed this so it can hook it directly to the Zamp Solar Port on the side of the trailer as the 12V source. That SAE Zamp port has direct connection to the batteries in the Oliver. I wanted to make sure to create a fused connection, and also be sure to wire it to match the Polarity on the Zamp port. I put a matching ZAMP port on the pump case, and build the fused connection cable out of a pair of fused SAE solar cables. The fuze is closest to the Oliver's ZAMP port for safety. (Zamp also sells an excellent "replacement" cable that could be used for the project.) ZAMP Solar Port Polarity is reversed from typical SAE Connectors: Zamp wires their solar ports in a way that the + lead on the solar cable coming from the solar array is into the plastic covered end of the cable. (That's opposite normal SAE use. They do this to protect users from plugging into the solar array and touching the male exposed connector.) Here's a basic material list (if you want specific part numbers of connectors etc. PM me on the forum.) I bought all of the material from the combination of Ace Hardware, Harbor Freight and Amazon. Total cost $190.73 1) Case: $39.00 Apache 3800 Transit Case - : Harbor Freight ( Interior Dim: 14 7/8"x10 5/8" x 6 1/8") Fits pump perfectly bolted into the case without the bottom foam. 2) Shurflo Pump model 4800, $72.00 - : Amazon/RecPro 3) Inline Shurflo Filter Model 15-085-00 included with pump - : Amazon/RecPro 4) Basic Fresh water hose (white) - $17.00 : Amazon cut to use short pieces for pump connections and used the other pieces as the input side hose (with a rigid piece of 1/2" pex as the drop lead) and outlet hose with repaired male end connector. 5) Qty 1 - Inlet side Female Swivel Garden Hose Connector (barb connector style) $1.50 ea - : Ace HW 6) Qty 2 - Male Garden Hose Connectors (barb connector style) one used on outlet, one to repair the outlet hose. 7) Qty 4 - 1/2" stainless pipe clamps - $4.00 : Ace HW 8) Qty 2 - SHURFLO (244-2926 1/2" x 14 NPT x 1/2" Barb Straight Wingnut Swivel Adapter - : Amazon 9) Qty 1- Zamp Waterproof Solar Port - : Amazon 10) Qty 1 - SPARKING 6' SAE To Ring Terminal Harness Quick Connect/Disconnect Assembly & 10A Fuse + SPARKING 2' SAE Quick Connect Harness (this is to make the other side of the cable) - : Amazon 11) Qty 1 - Fastronix SPST HD 20 Amp AC/DC Toggle Switch with Weatherproof Neoprene Boot - : Amazon So here are some pictures of the finished project in the transit case. Case in closed ready for travel position: Case opened to show hoses and electrical connectors stored inside: Contents removed so you can see the pump connection setup: Hoses and electrical connectors shown beside case: Handle side shows DC connector (that matches the ZAMP port wiring) and on/off switch: Inlet side: Outlet Side: Assembly comments and learnings: 1) Pump body - originally I was going to mount it onto a pvc board but found that the depth of the transit case and height of pump worked out better if I could simply bolt into the case. I used 4 bolts with baking washers to secure the pump into the case. 2) Port locations - I tried to figure out a way for the ports to exit out the handle side of the box, in fact I bought some elbow connectors for the pump, but quickly found that they interfered with the closure clasps. As a result I went for a simpler straight side to side flow. 2) Electrical Switch Location - My initial hole for the switch ended up interfering with the closure clasp once the switch was installed and in the ON position. I decided to plug that hole with an automotive plug and move the switch mounting down a bit further. (See handle side view.) Pump Performance: 1) I used the pump yesterday to pump a 6 gallon container of my tank sanitizer solution into the fresh tank. The pump operated smoothly and the 6 gallons were pumped into the tank in 58 seconds. (The pumps spec is 3 GPM ...so it met that spec.) 2) I also tried the pump on the street side water inlet, and the pump would cycle on and off as I turned on and off the sink faucets. So another use is to hook it up to a bigger bladder tank external and use it as the main water supply. (*Note - The pump has a 55PSI max, and is factory set for 45 PSI working shutoff pressure.) The case stores nicely run the Oliver Elite II basement on top of my water filter holder. Possible upgrades: 1) I might add a stainless vent pair on the box so I can run the pump with the box closed. The vent would allow for airflow in/out and adequate cooling space around the pump body if running for a longer time. 2) Build a Zamp (SAE) to Anderson Connector so I can plug this into my truck power port's that I'll install this summer. 3) Try running this pump off of a small rechargeable 12v Lithium Battery bank. Make up appropriate 12v connectors. Questions and comments welcome. Craig Short Hull 505 - Galway Girl
17 points
-
I know many of us are in a mood to say "good riddance" to much of what 2020 brought, but I'd like to say, I'm thankful for many things that did happen this year. Early in the year, my nephew married one of the sweetest young women I've ever met. Much of my family was here. I'm really thankful my nephew and his bride chose a February date for their wedding. It's the last time in 2020 that joy and hugs abounded, and so much family could gather. During our more quiet, more isolated time, since March, we've completed dozens of projects we'd been postponing. And, of course, made new lists. I'm studying yet another language, hoping to be able to speak to some of Paul's cousins when they (hopefully) can visit next year from Italy, without resorting to Google translate on my phone. I've renewed several old friendships over text and phone, as we check in with each other. Most especially, I've reunited with a cousin who was my BFF as a little girl, but we grew apart. We speak often, now. The shared experiences of today have brought renewed memories of our shared childhood experiences. I'm thankful that my mom, with all her health issues, has done well so far, with the help of all my siblings, and great doctors . I'm thankful that the younger members of our family who still work are all employed, happy, and healthy. And the few who did get covid, survived and are back on their feet. And, I'm thankful for my neighborhood, where we can talk over the fences, or on patios, share stories (and eggs, sugar, etc.), and never feel alone in quarantine times. Not to ever make light of this strange year, or minimize the tragedies. I lost one cousin, and there was only a small, immediate family only funeral. For those of you who have lost loved ones, I offer my heartfelt sympathies. I know what loss feels like, and this year, without our customary practices, it's especially and uniquely difficult. Not to be able to travel, and hug my aunt and hold her, and comfort her in her time of loss, was very difficult for me, and for my mom, her sister. In these difficult and very different times, I'd also like to say thank you for the community here. Every morning, I look forward to seeing friends here, as well. I wish you a very happy, and healthy, new year in 2021. Sherry17 points
-
Organ Pipe Cactus National Monument is south west Arizona.
17 points

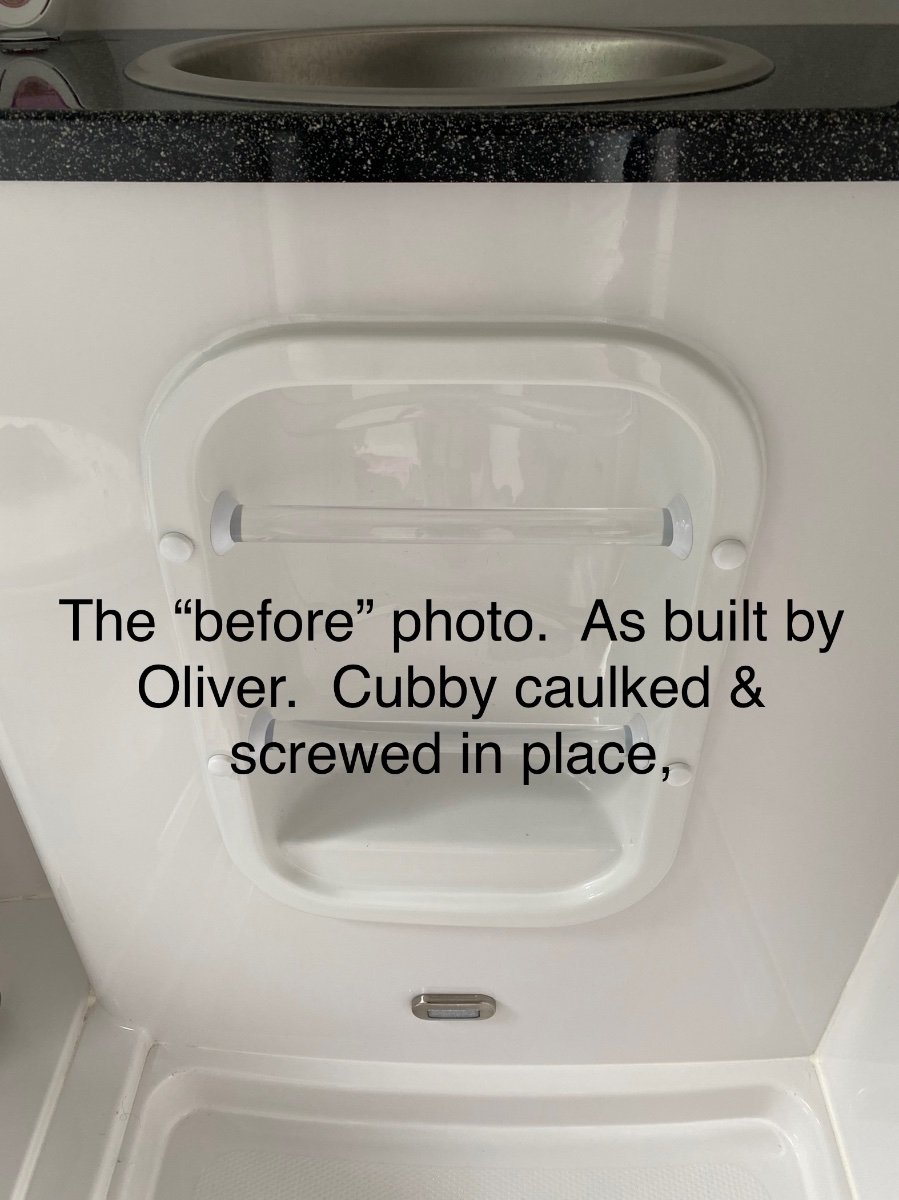
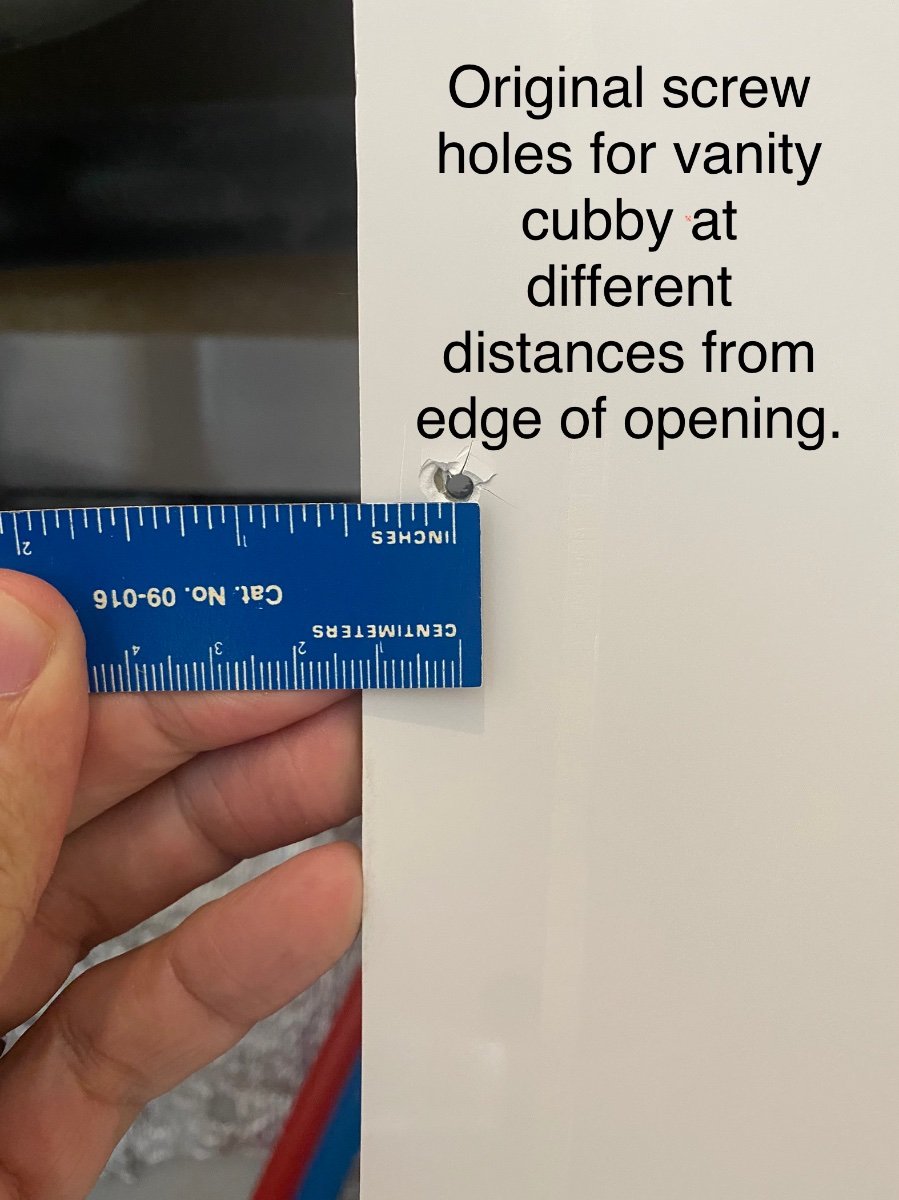
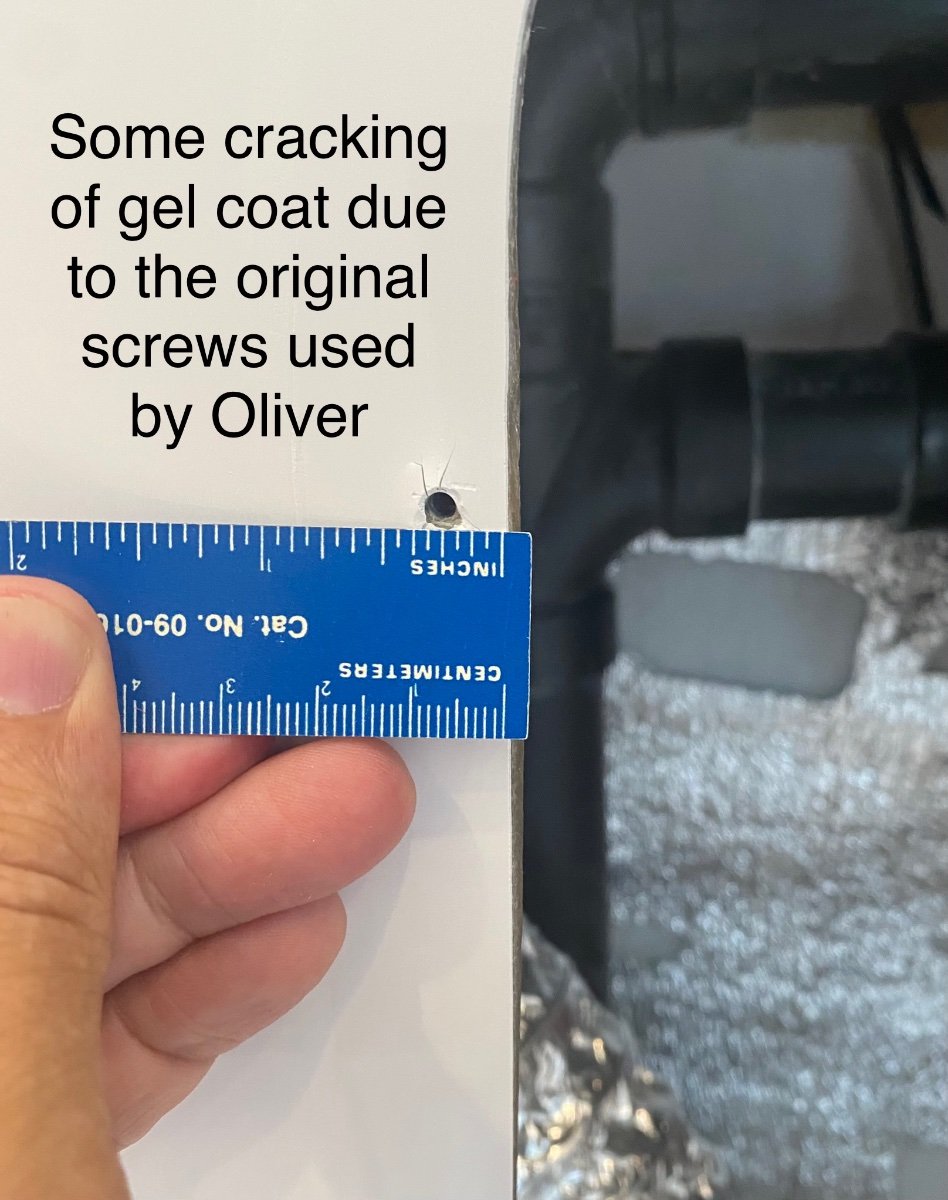

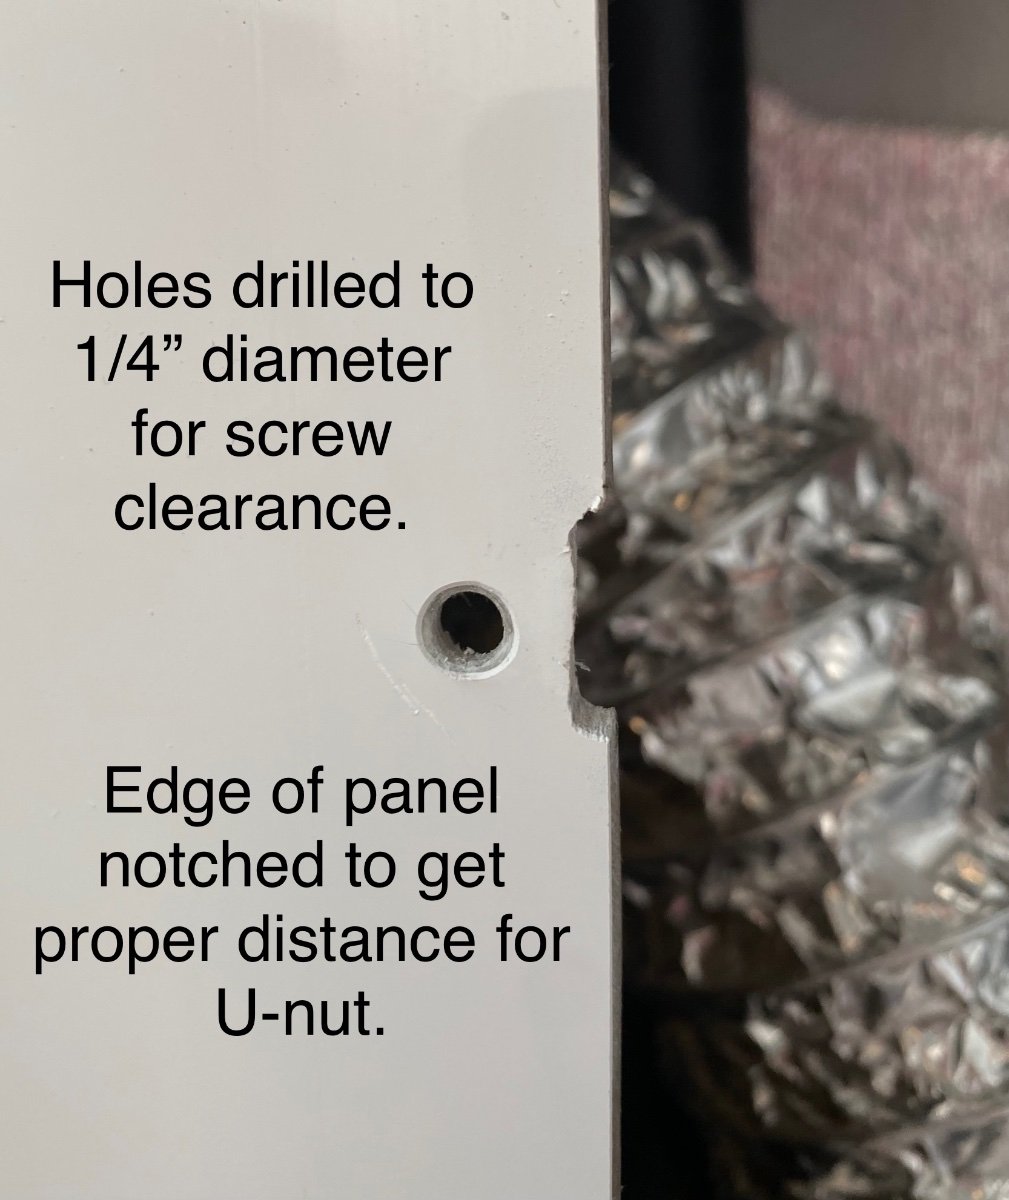
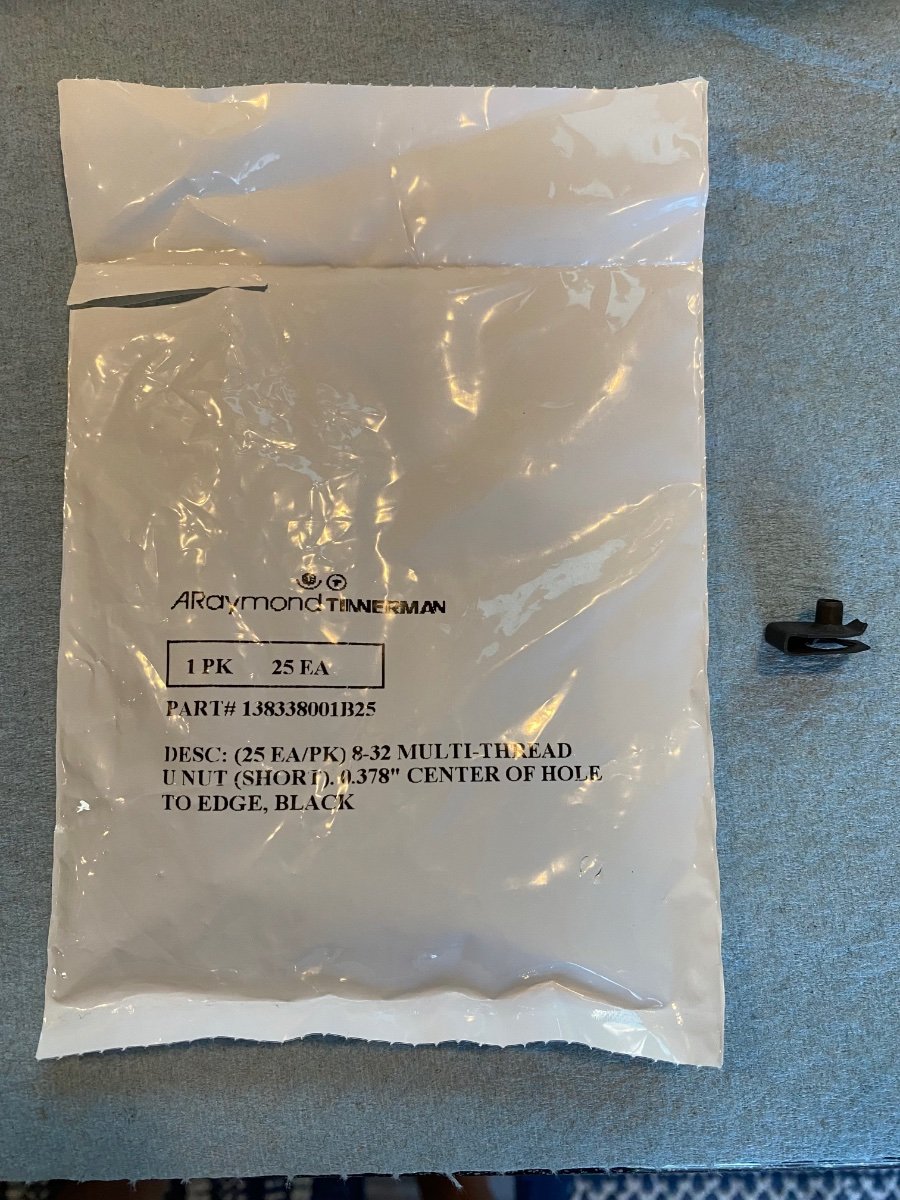
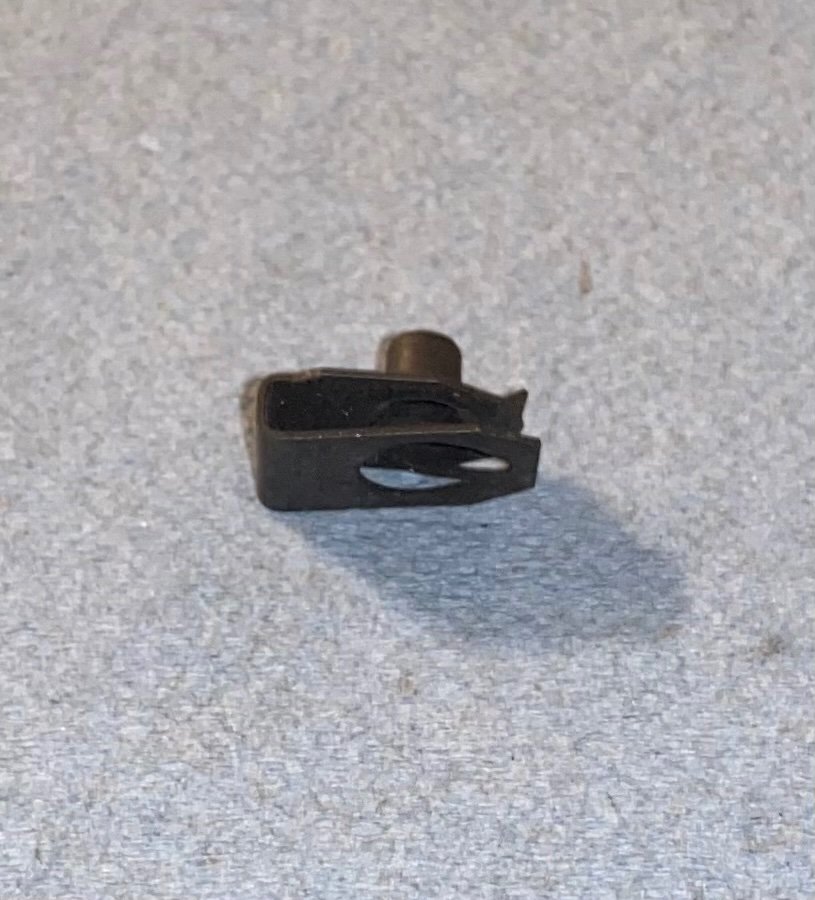
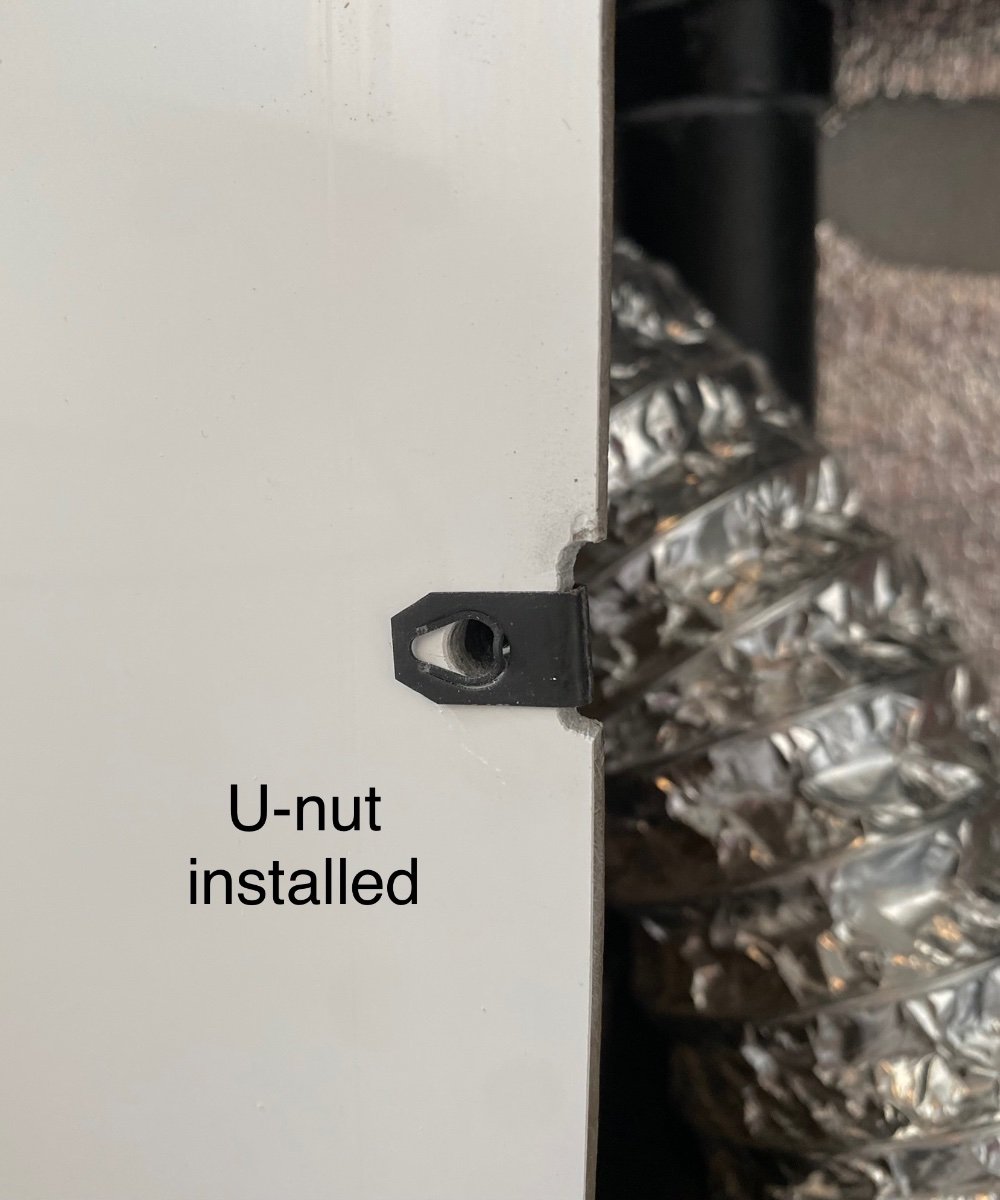

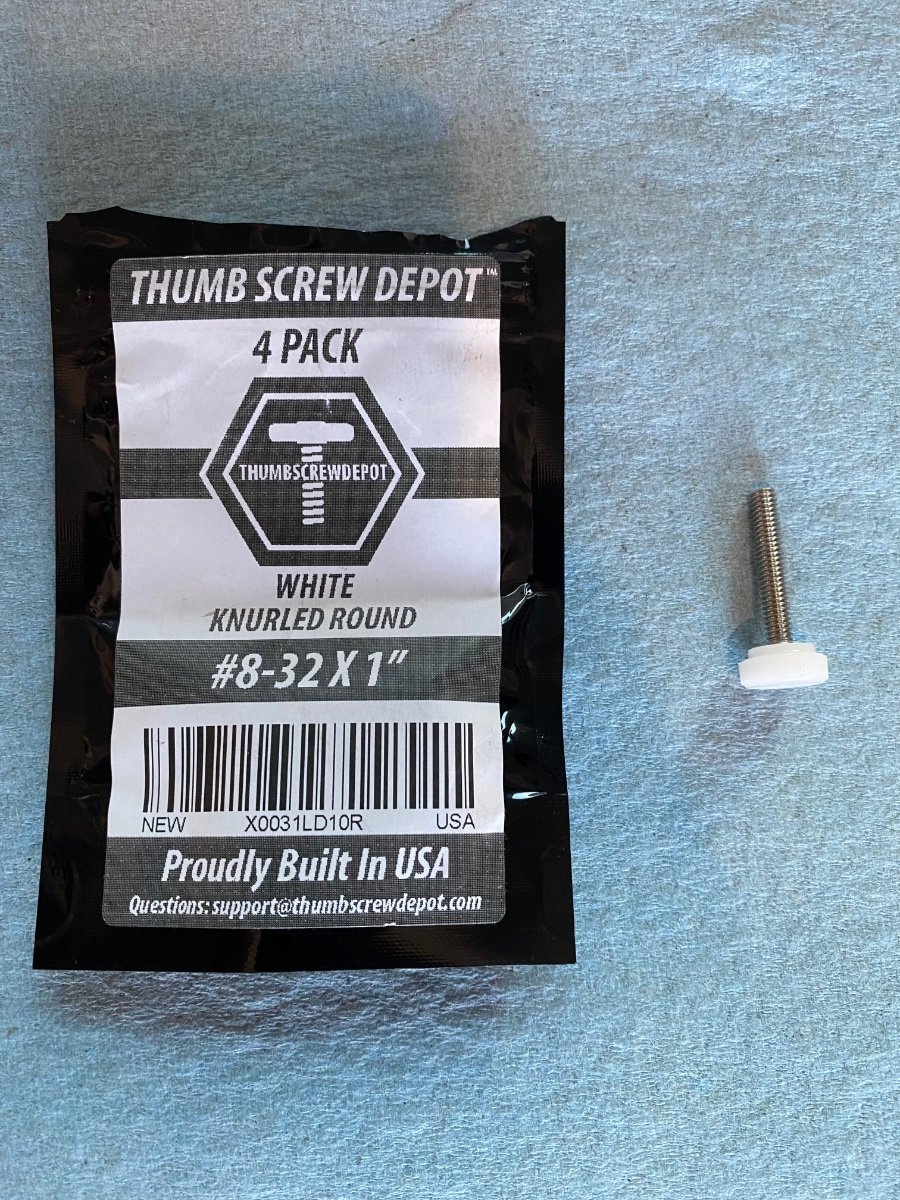

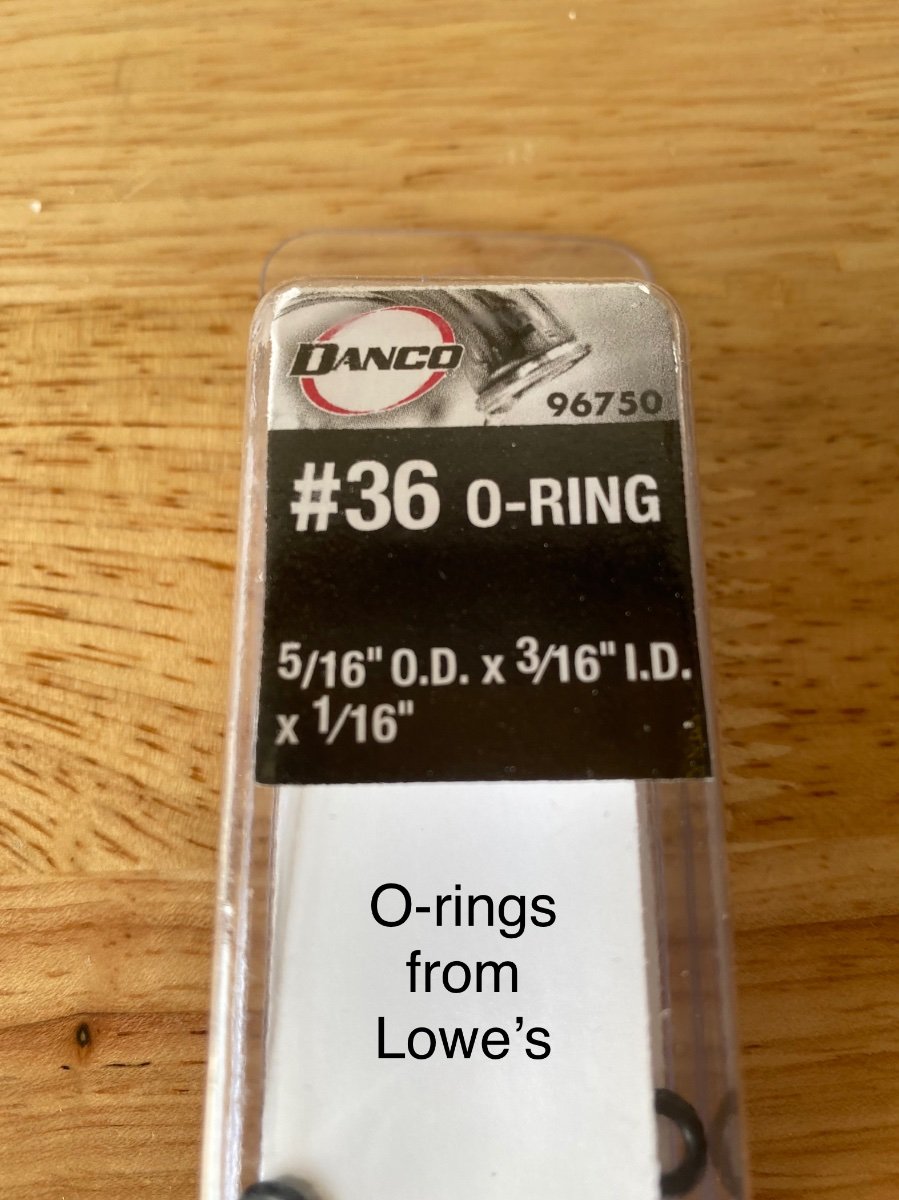
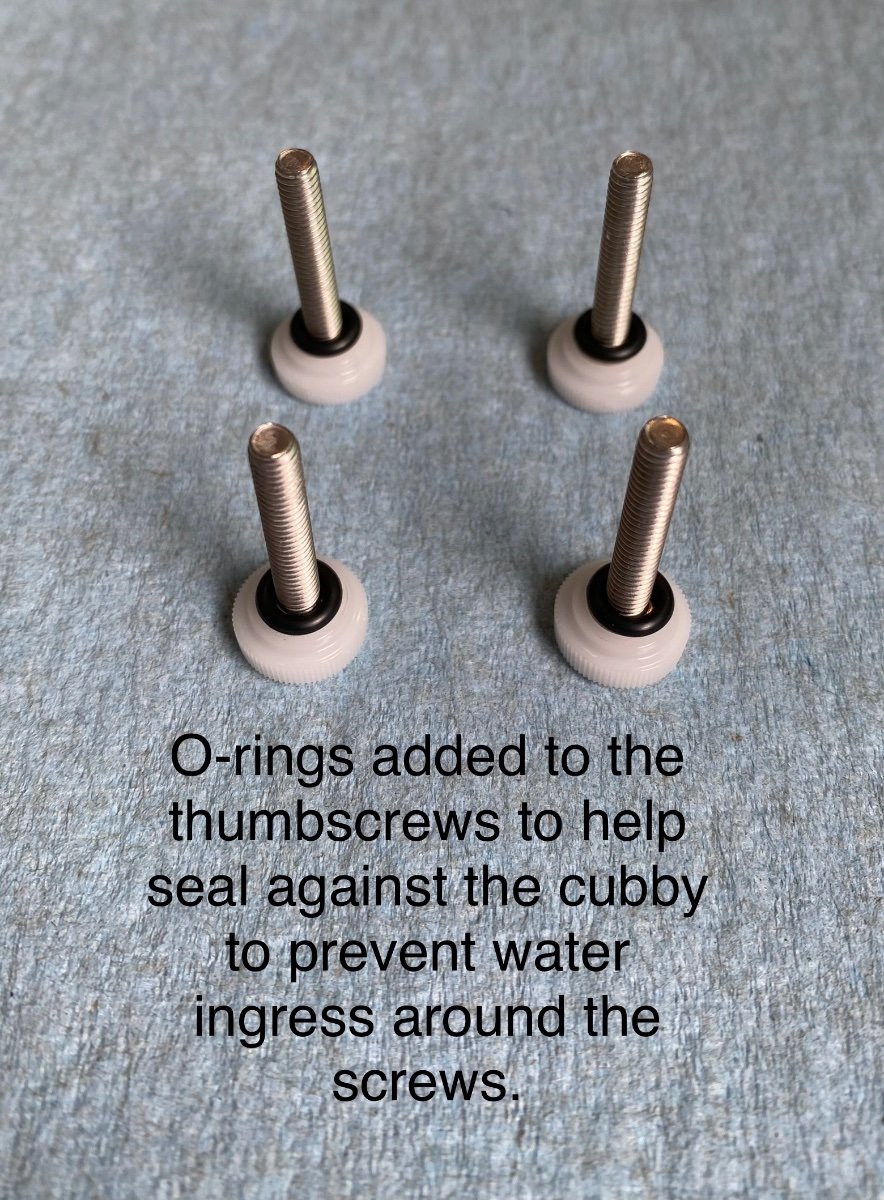
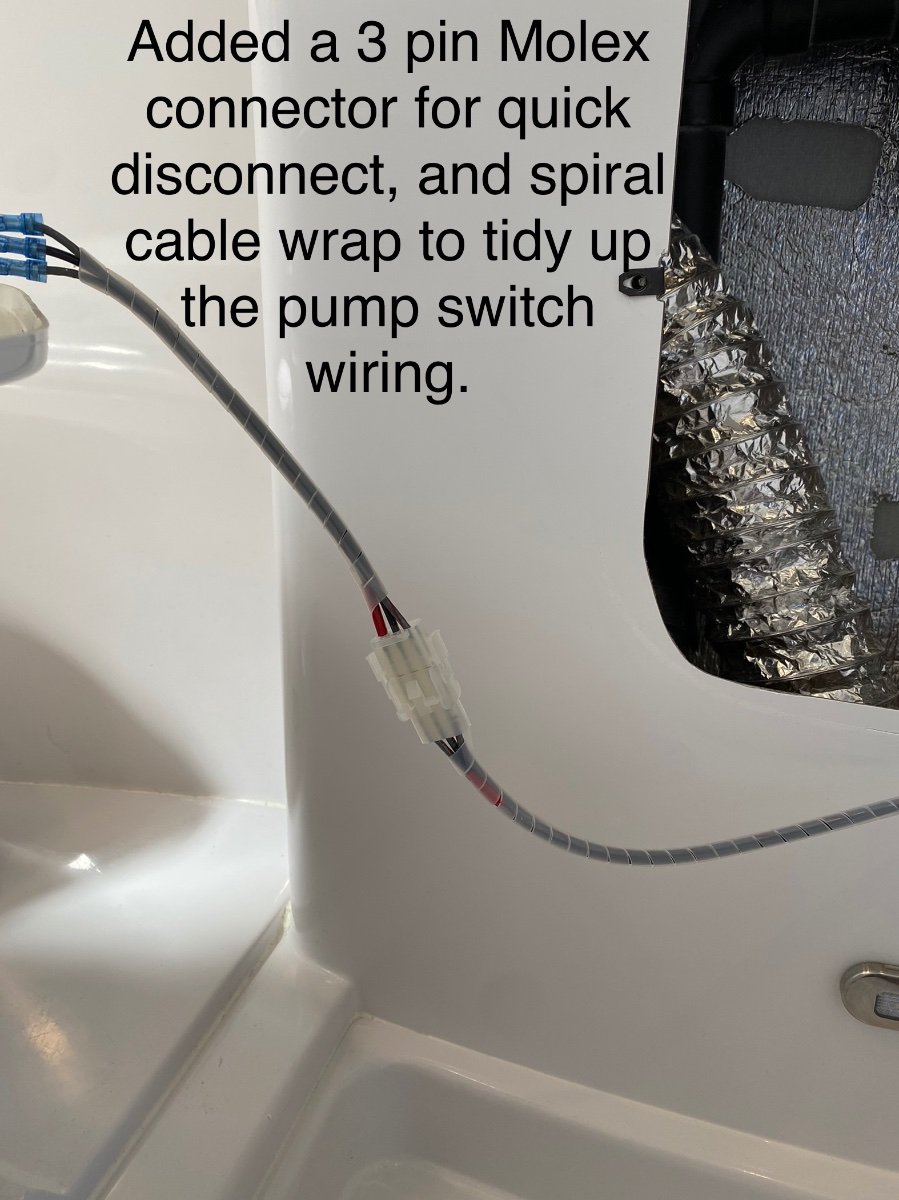
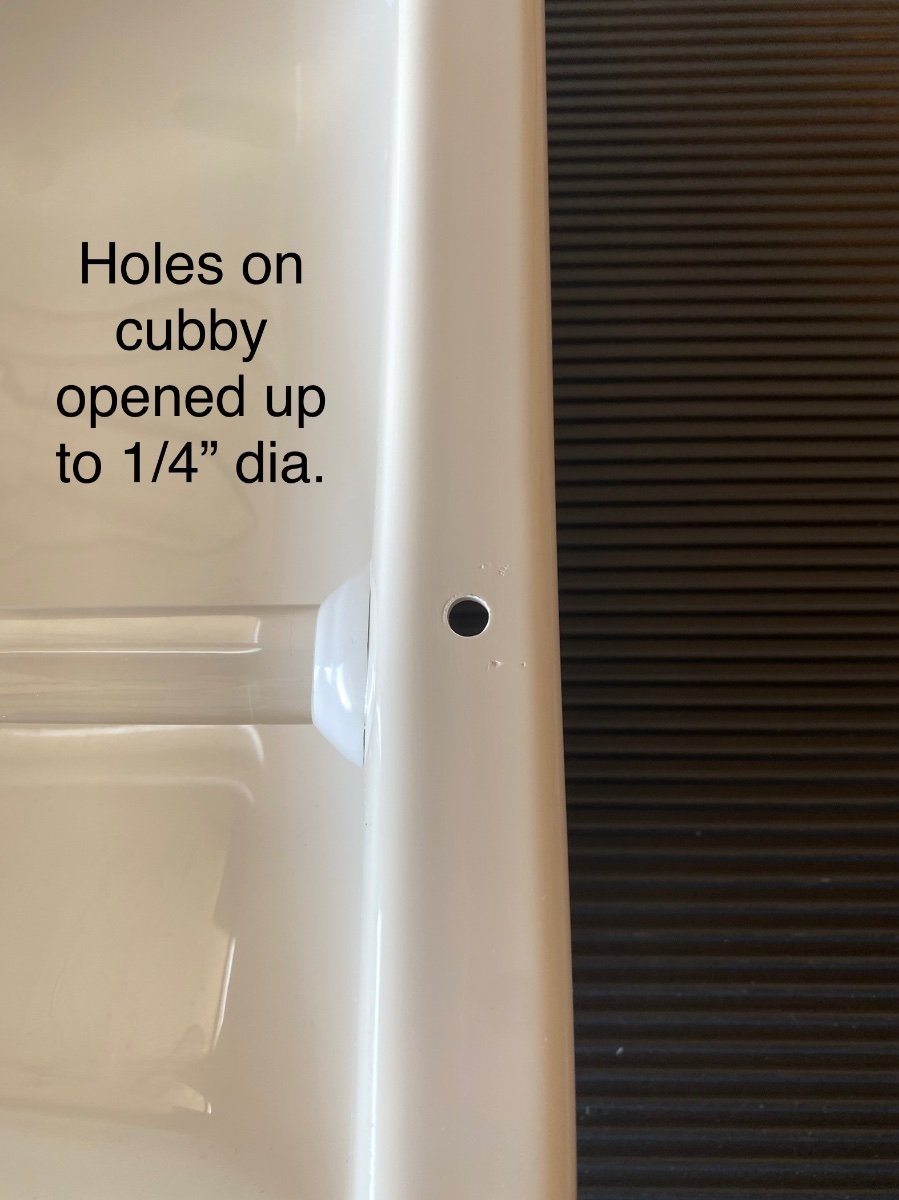
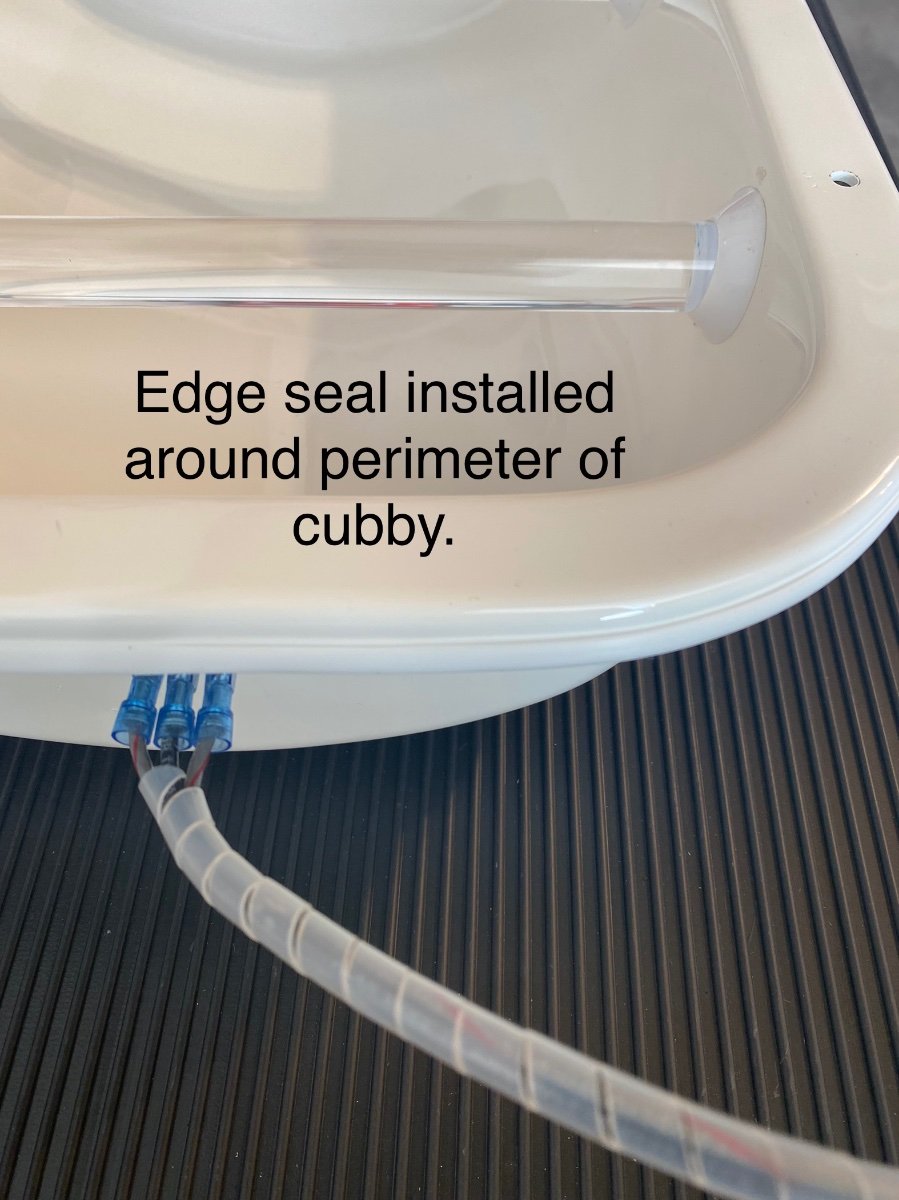


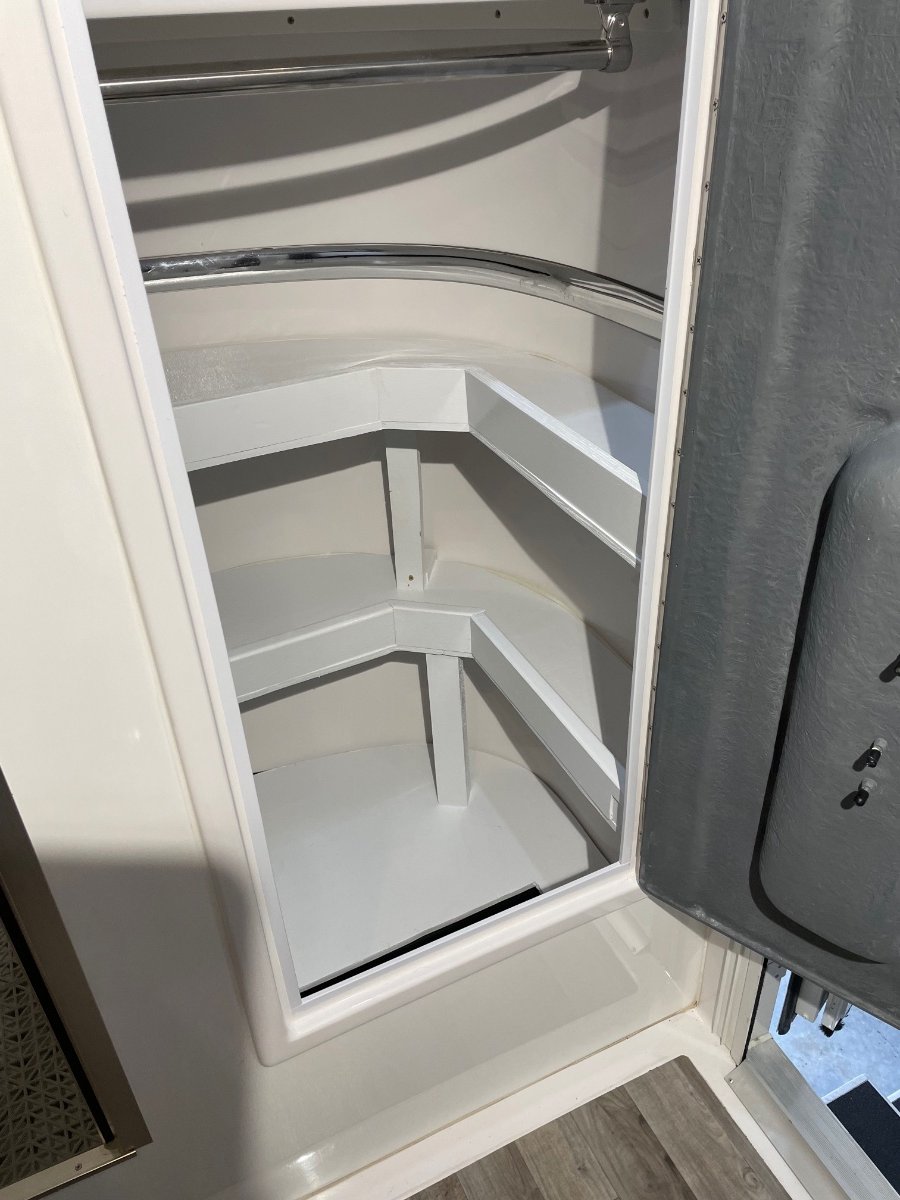
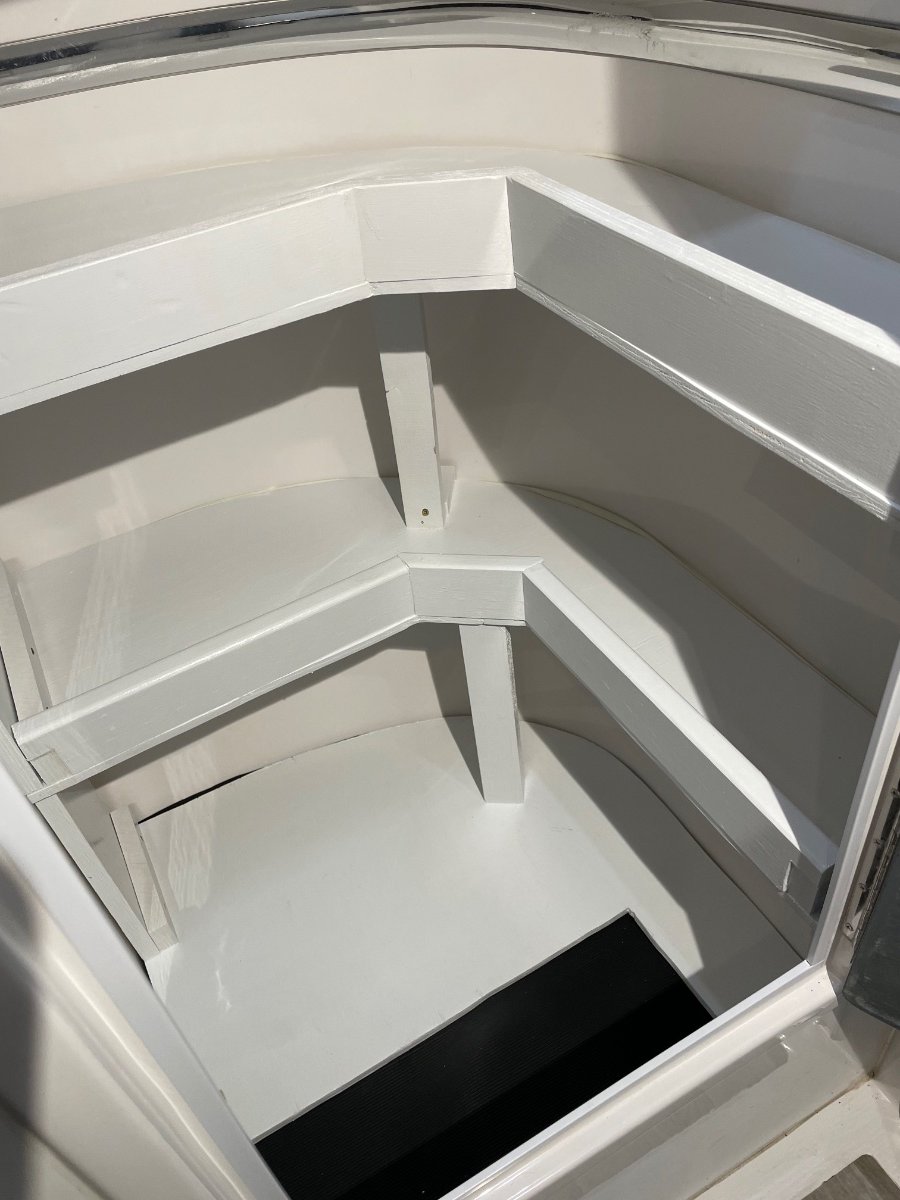
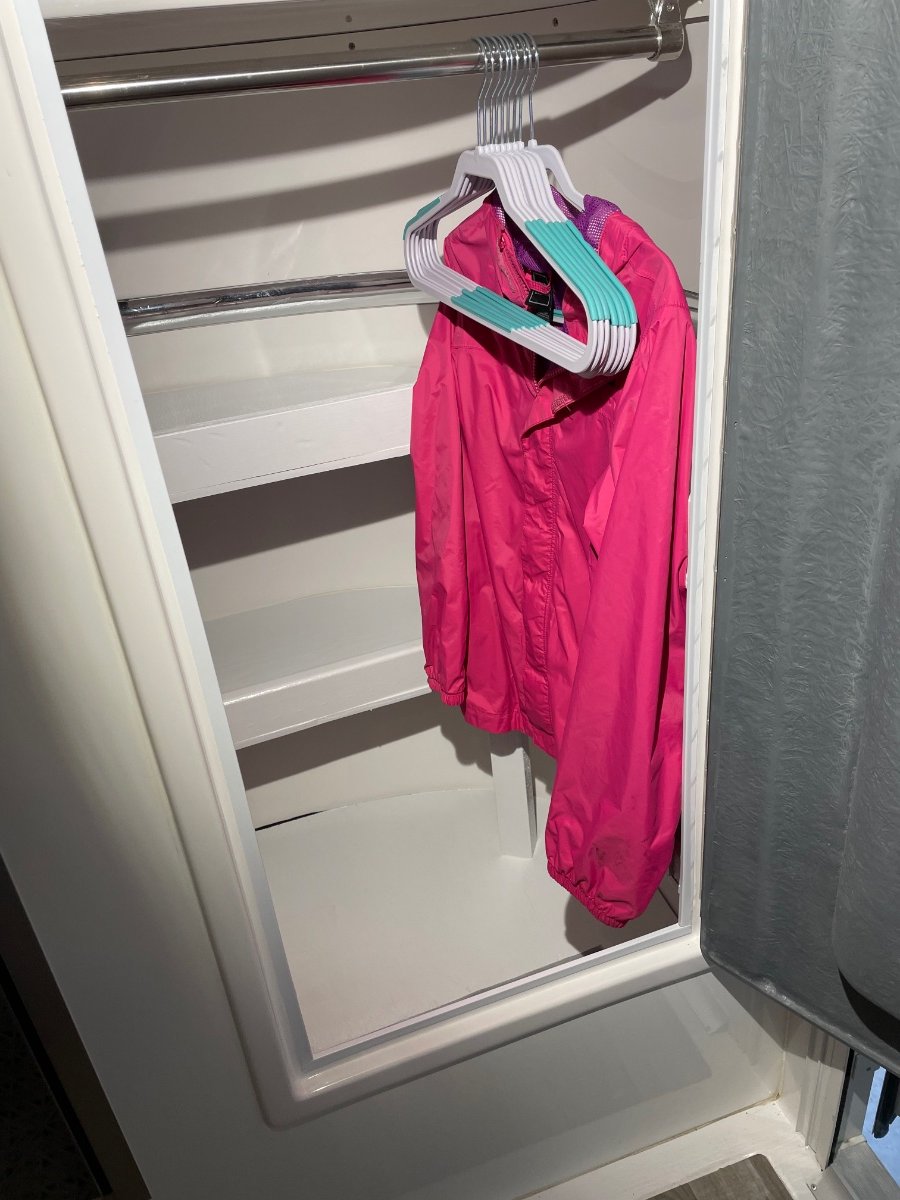
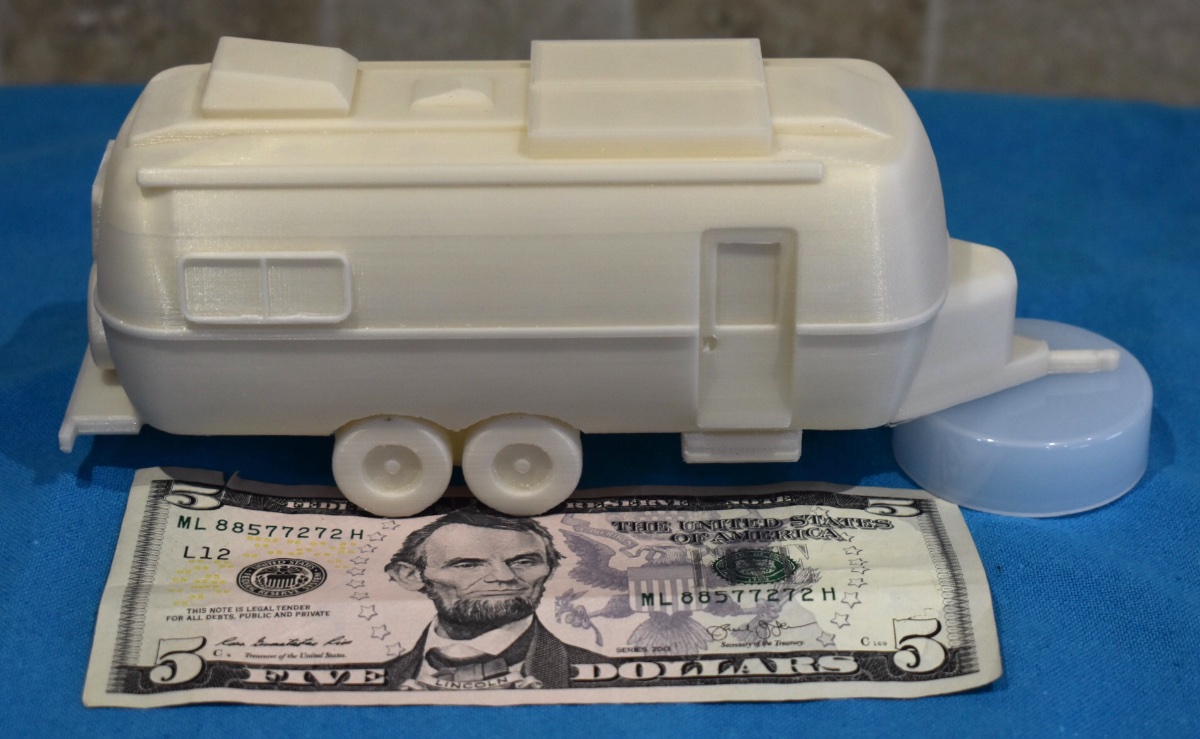
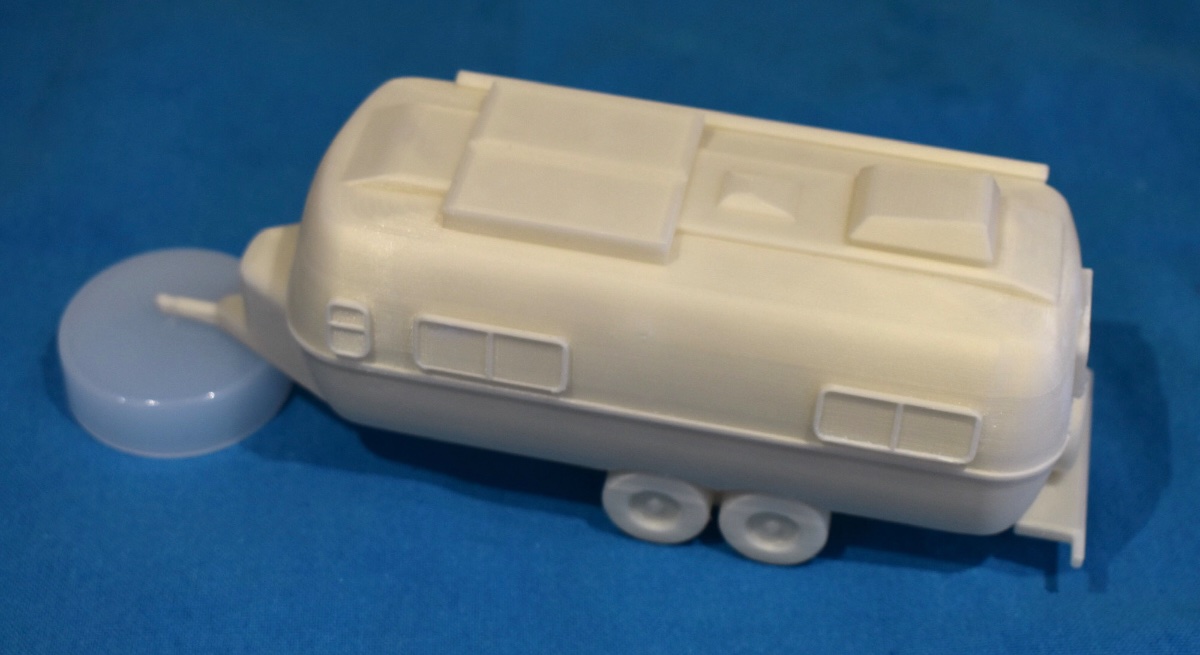


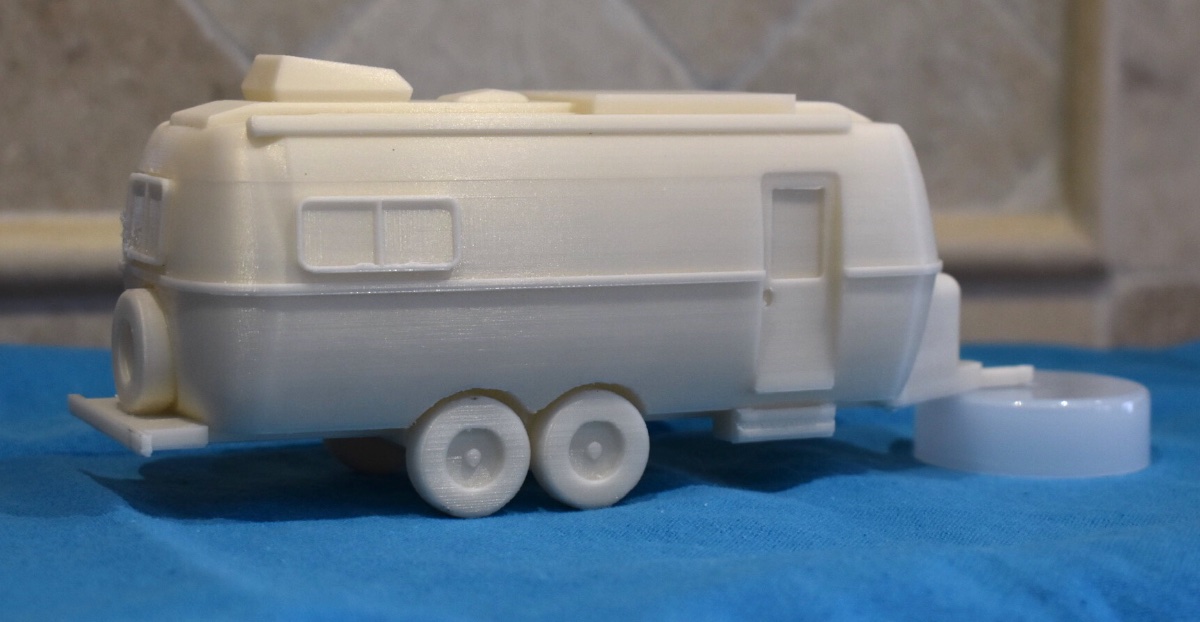
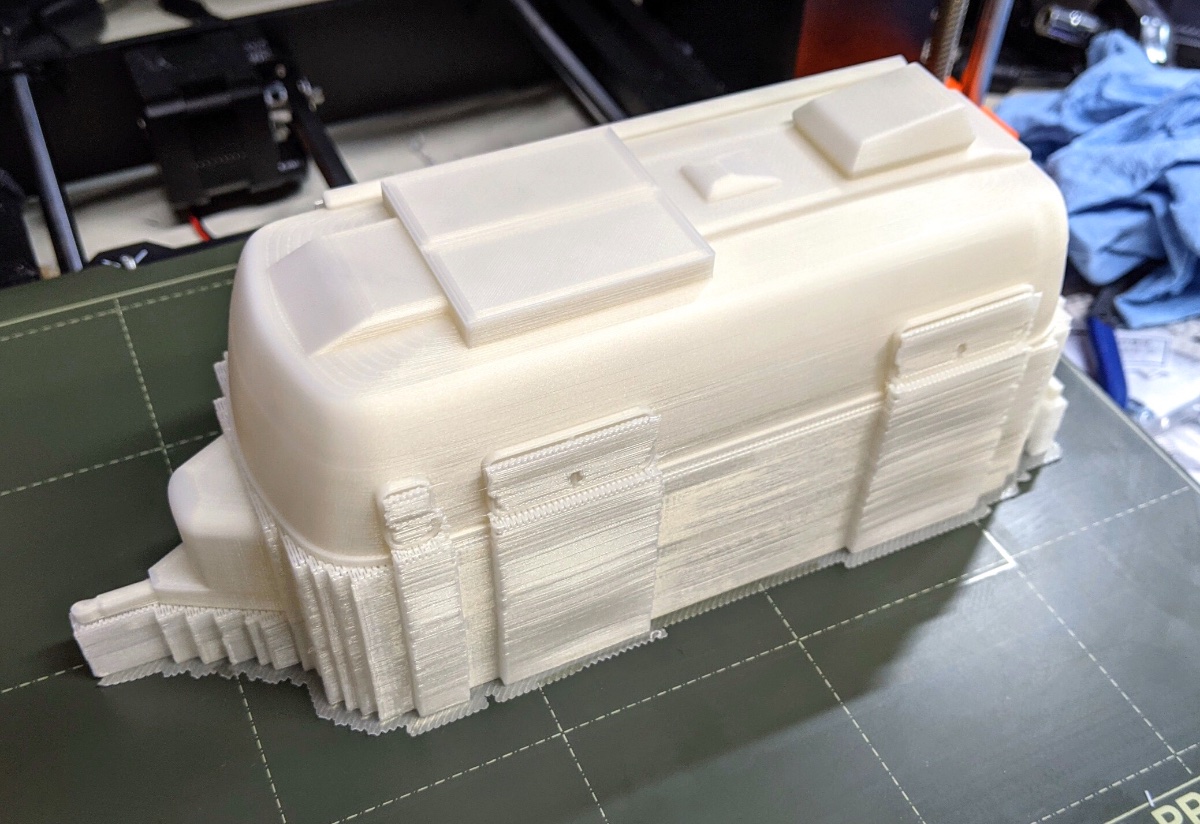

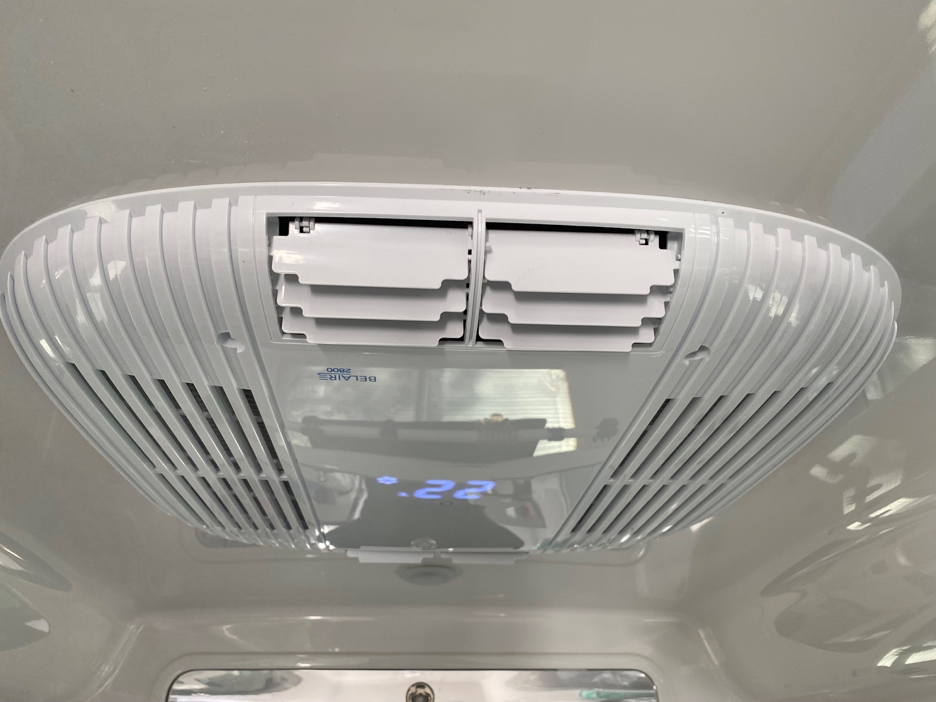
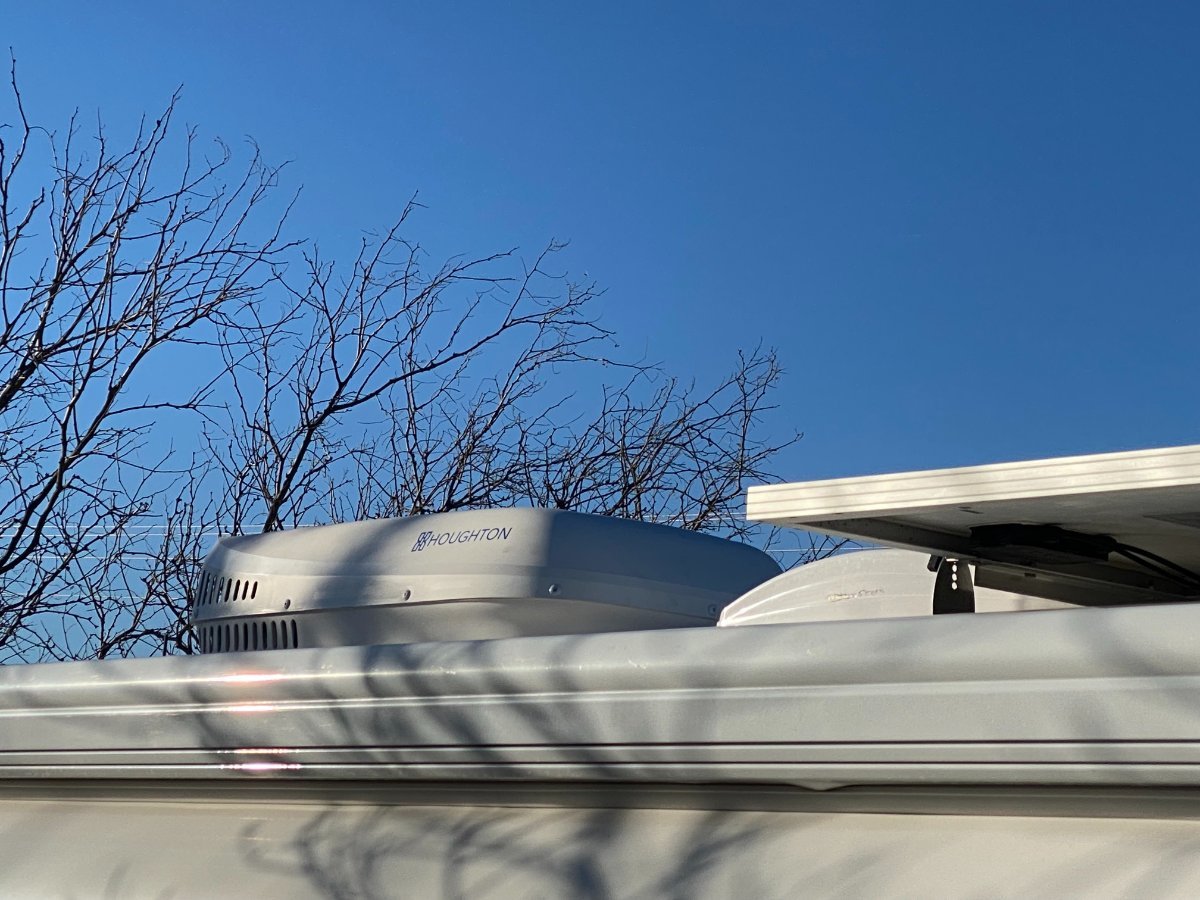
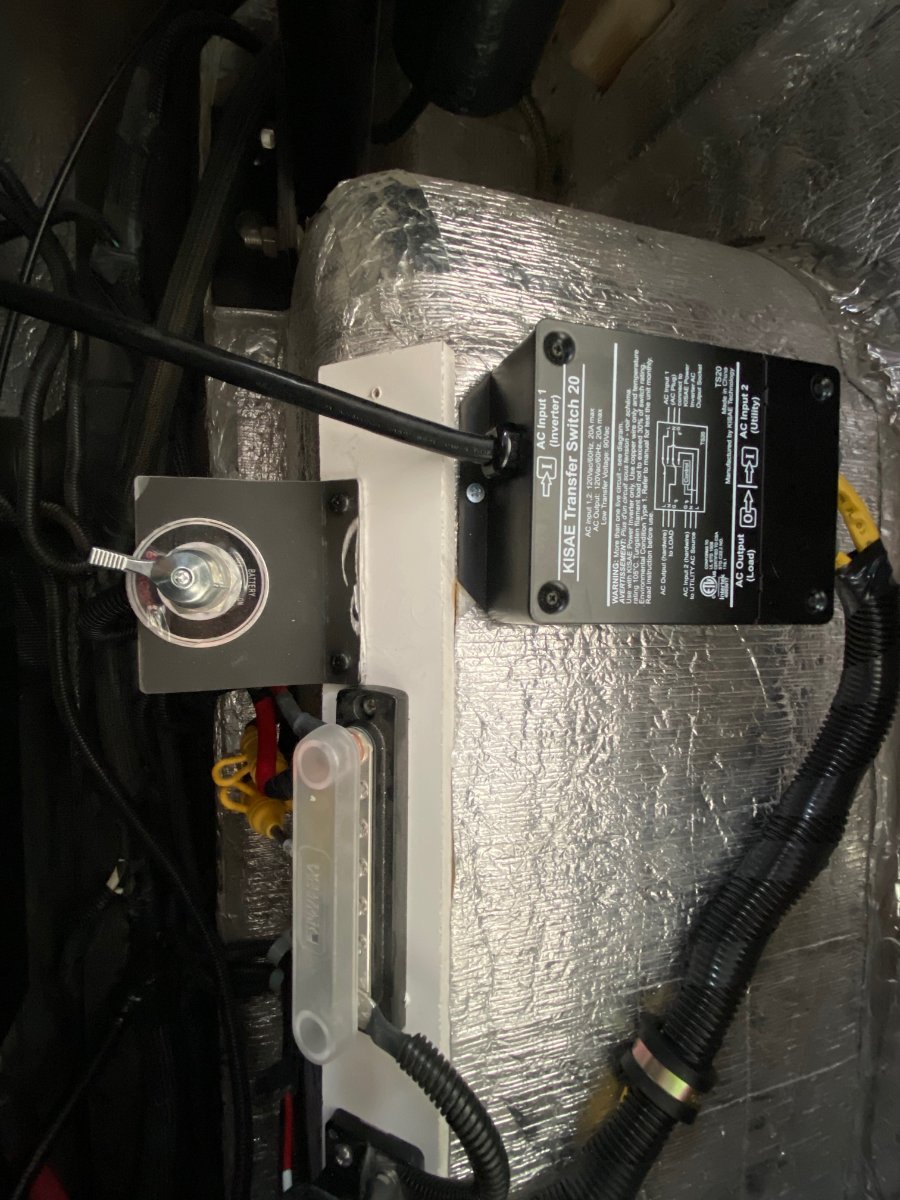
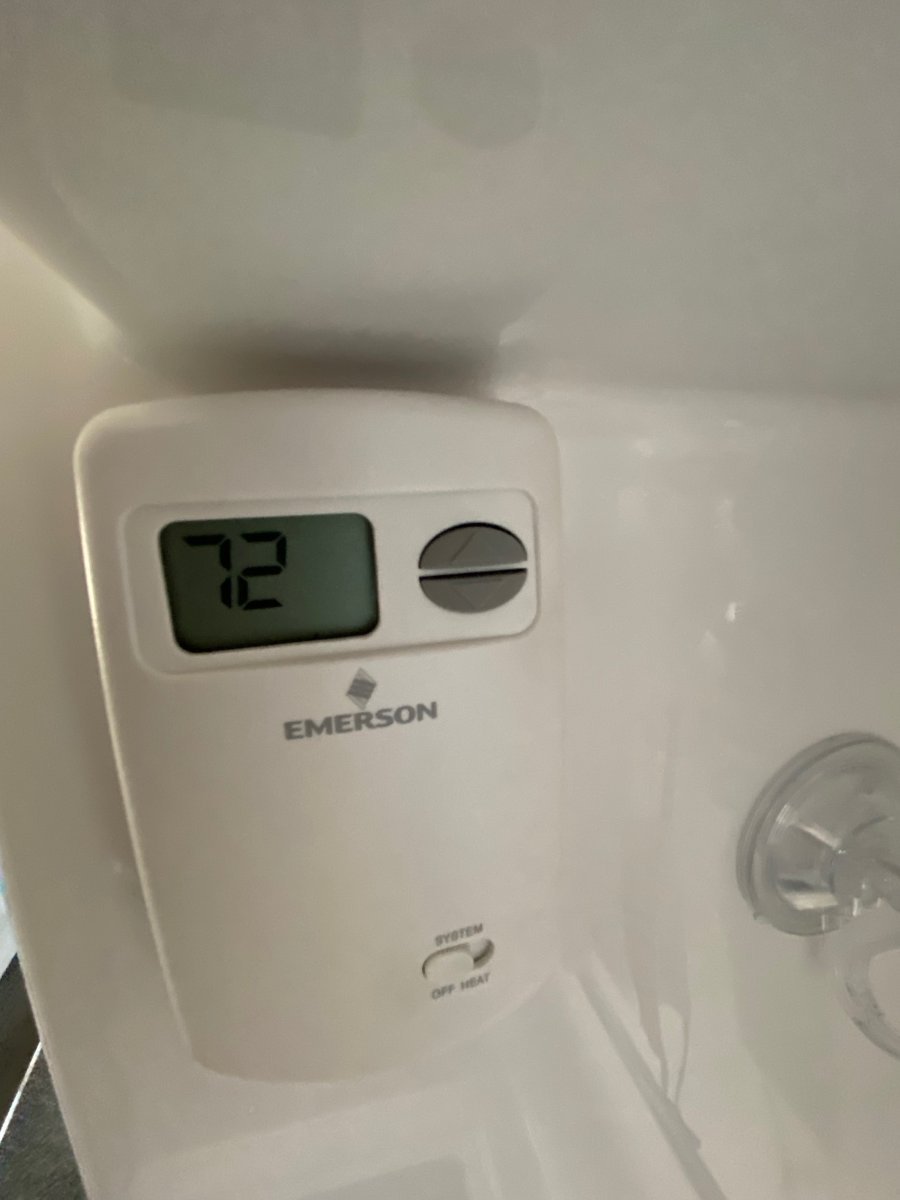


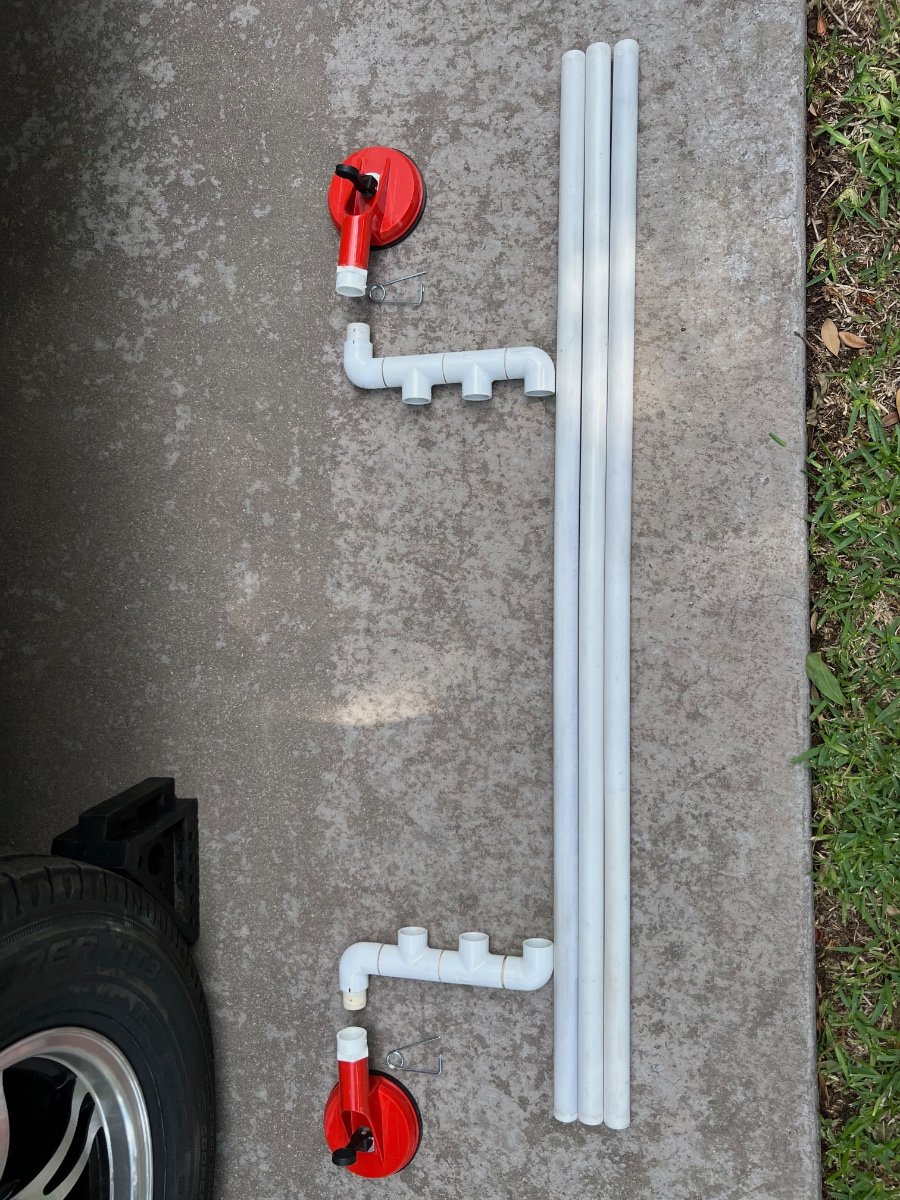
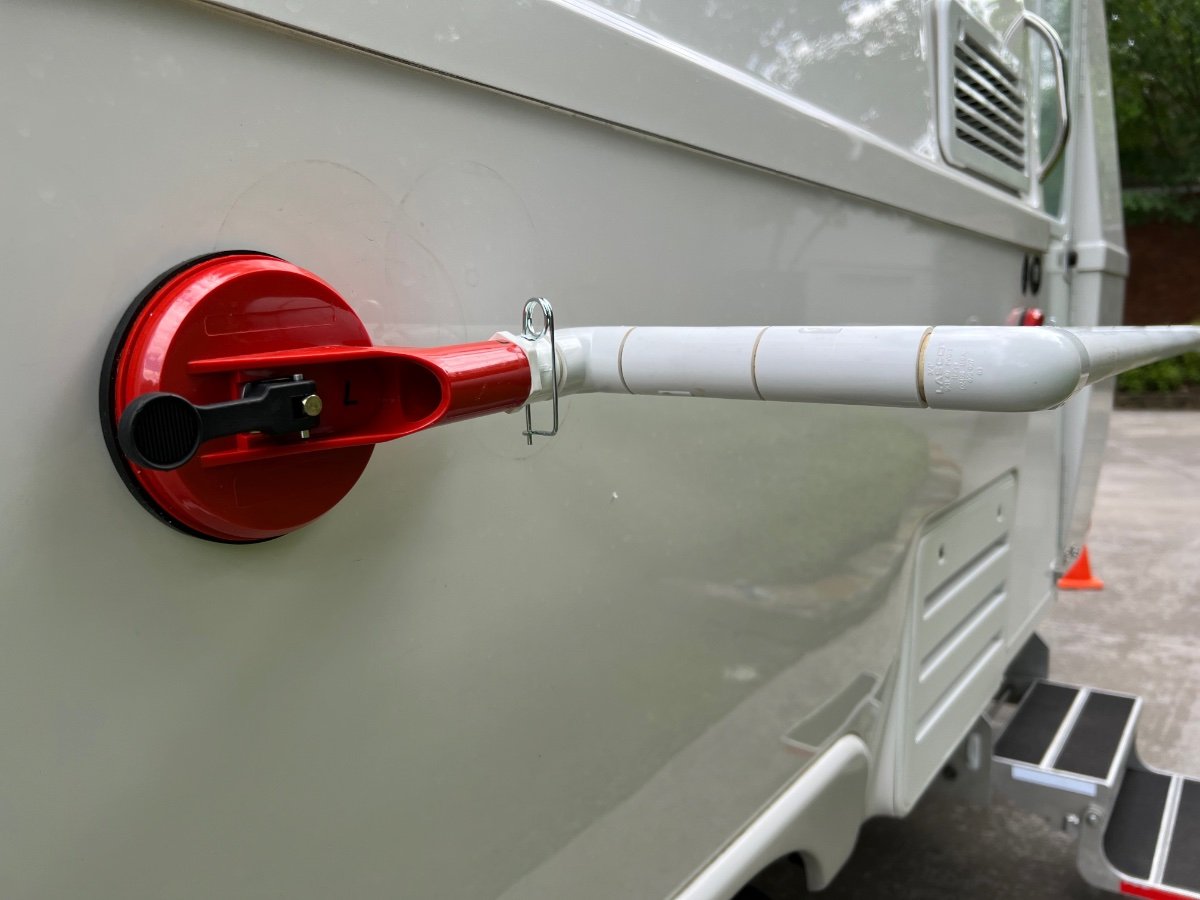
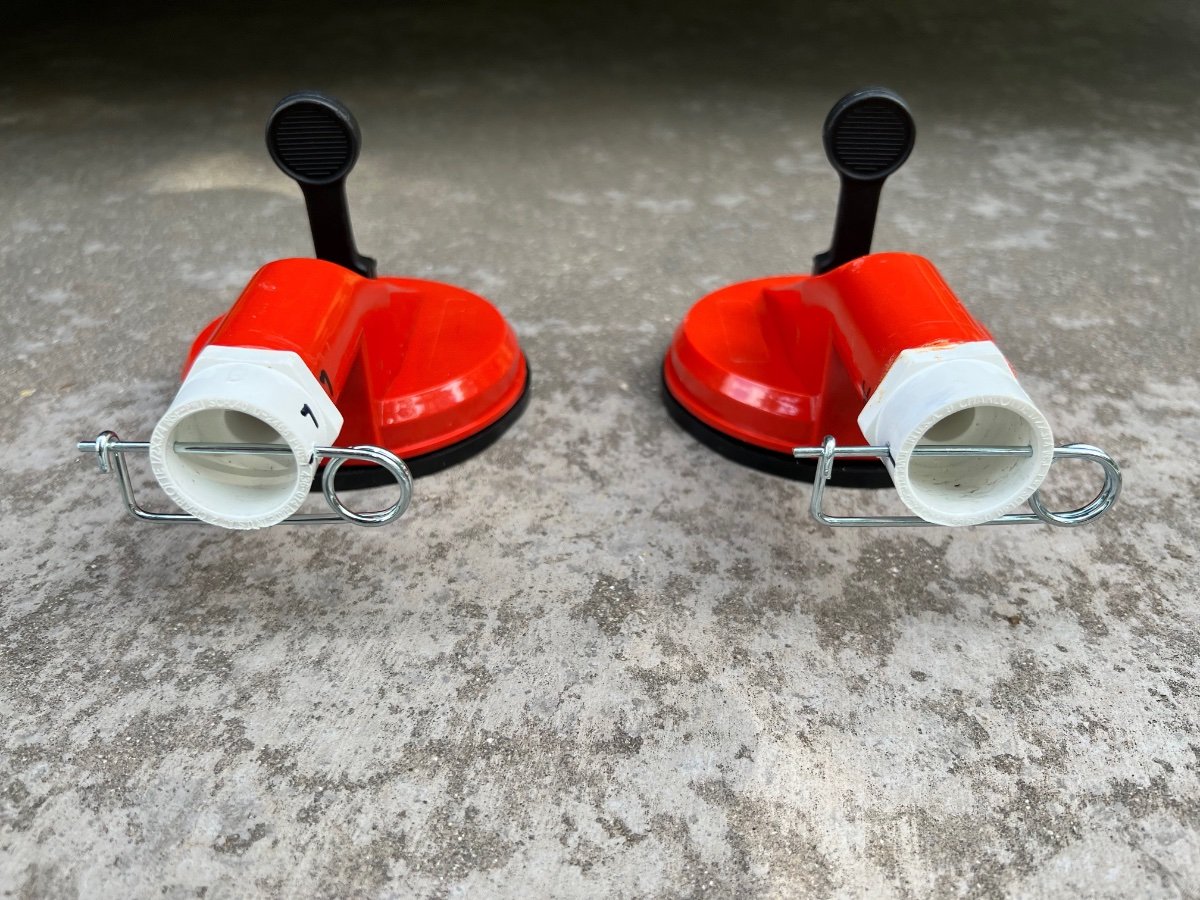


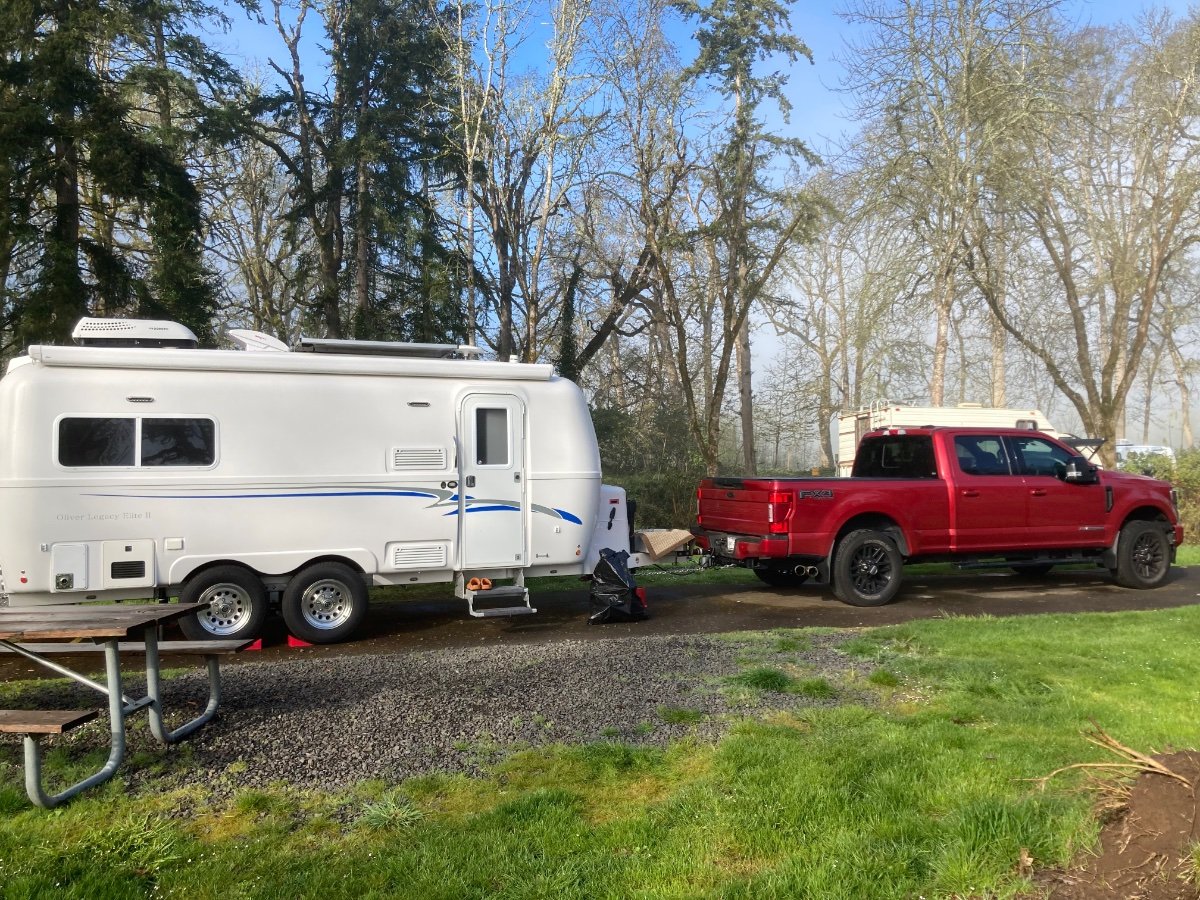


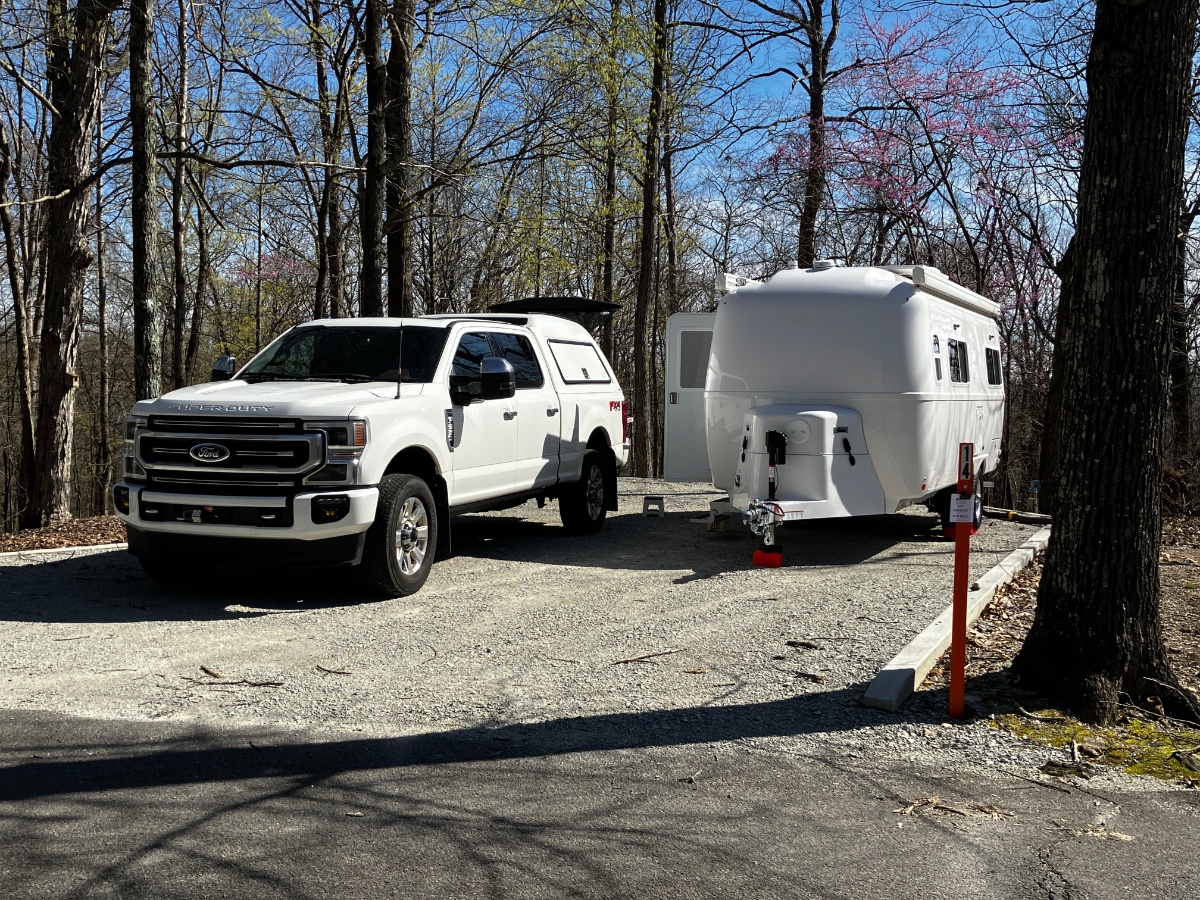

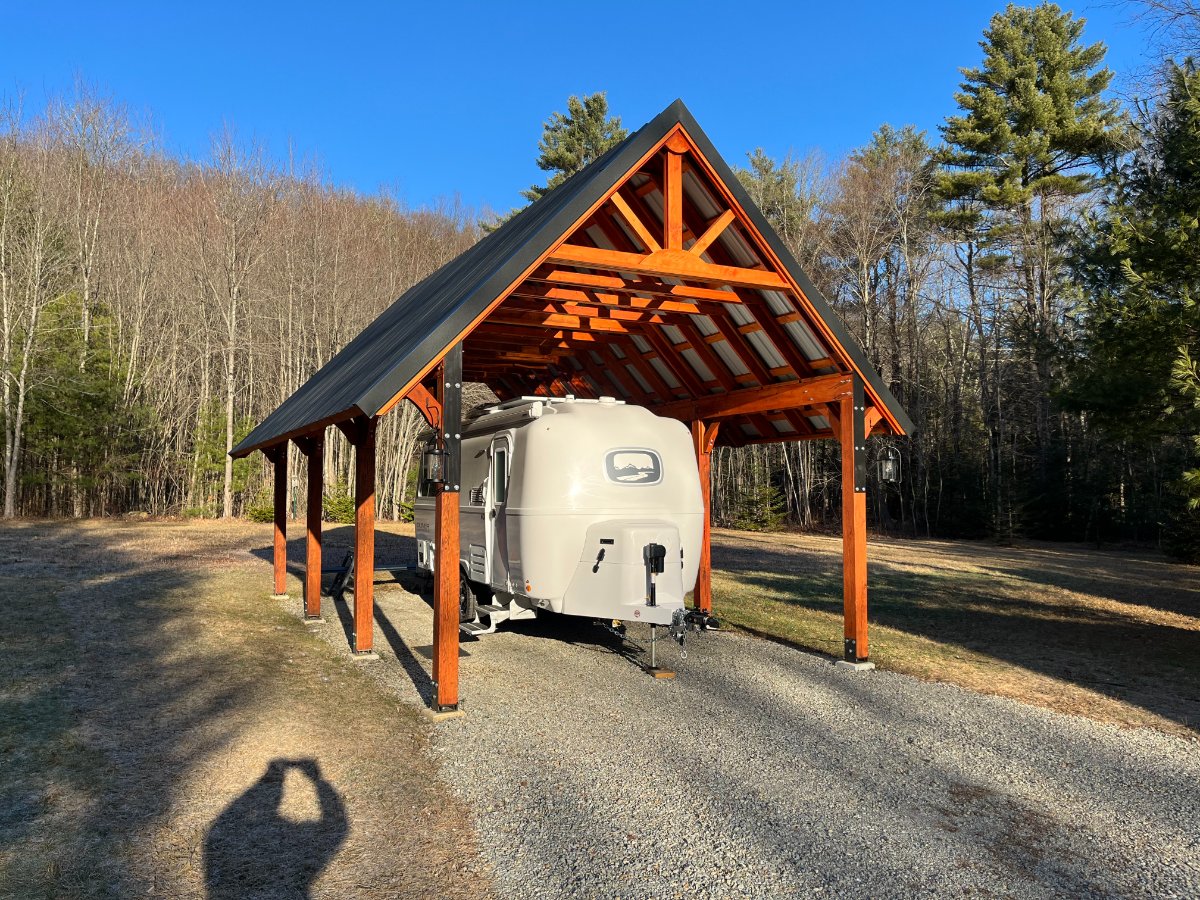


.jpg.b4fb182c2dd38b005d42f99a3317e409.jpg)
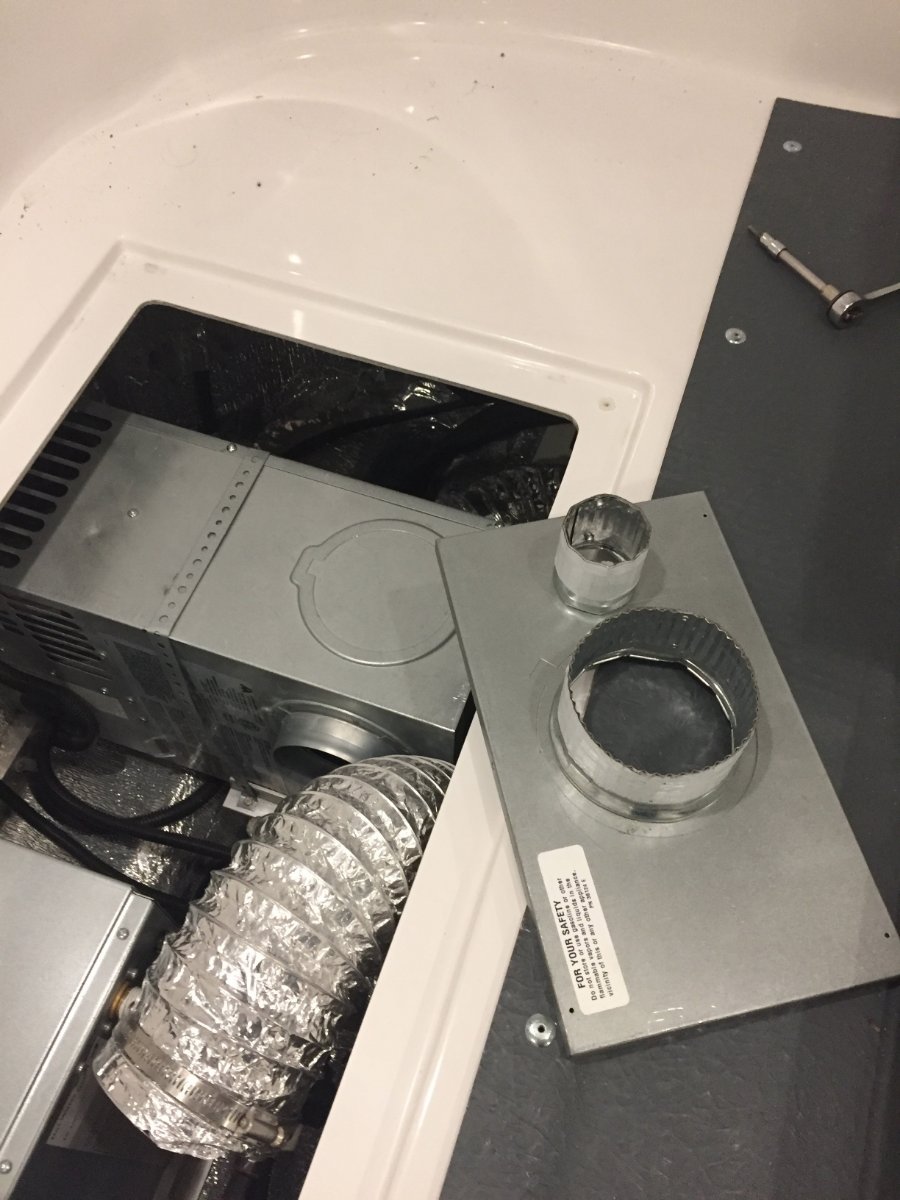

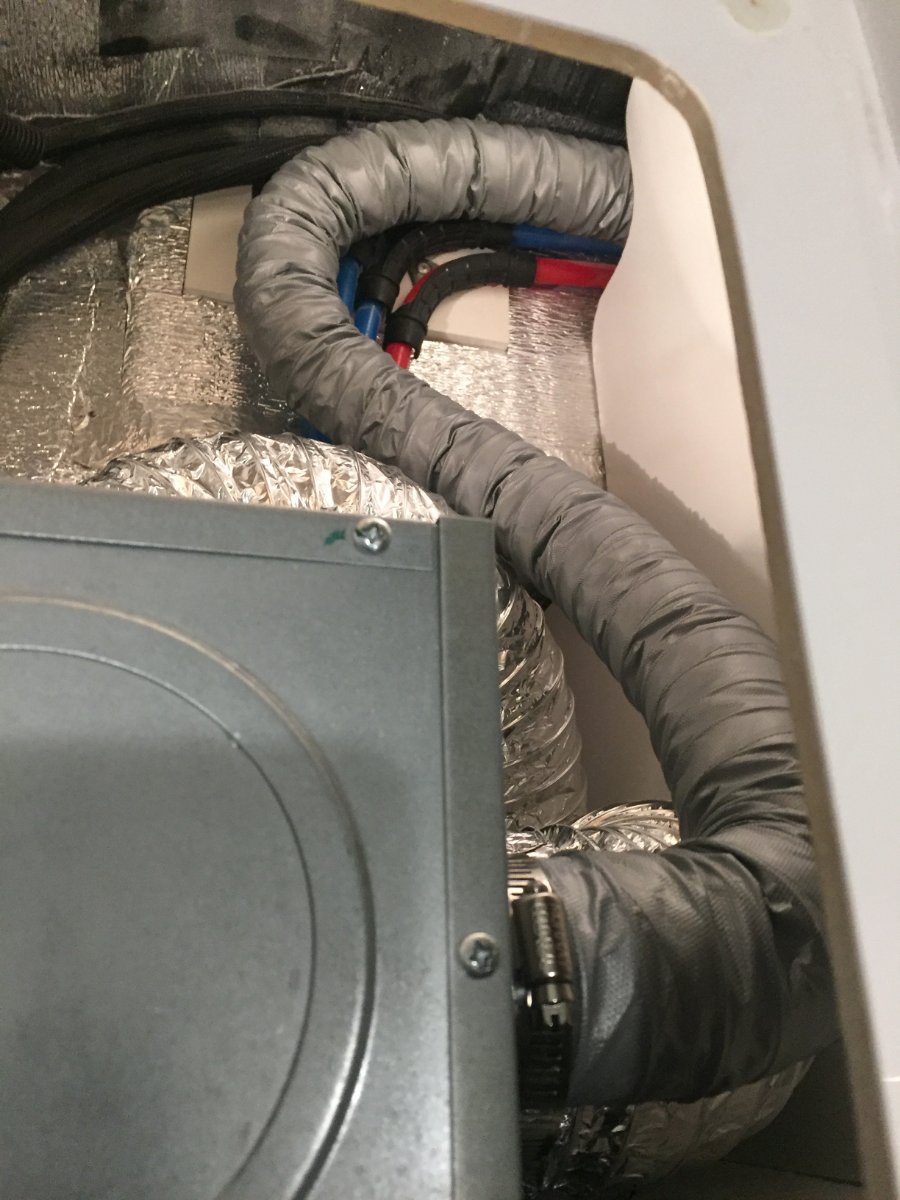
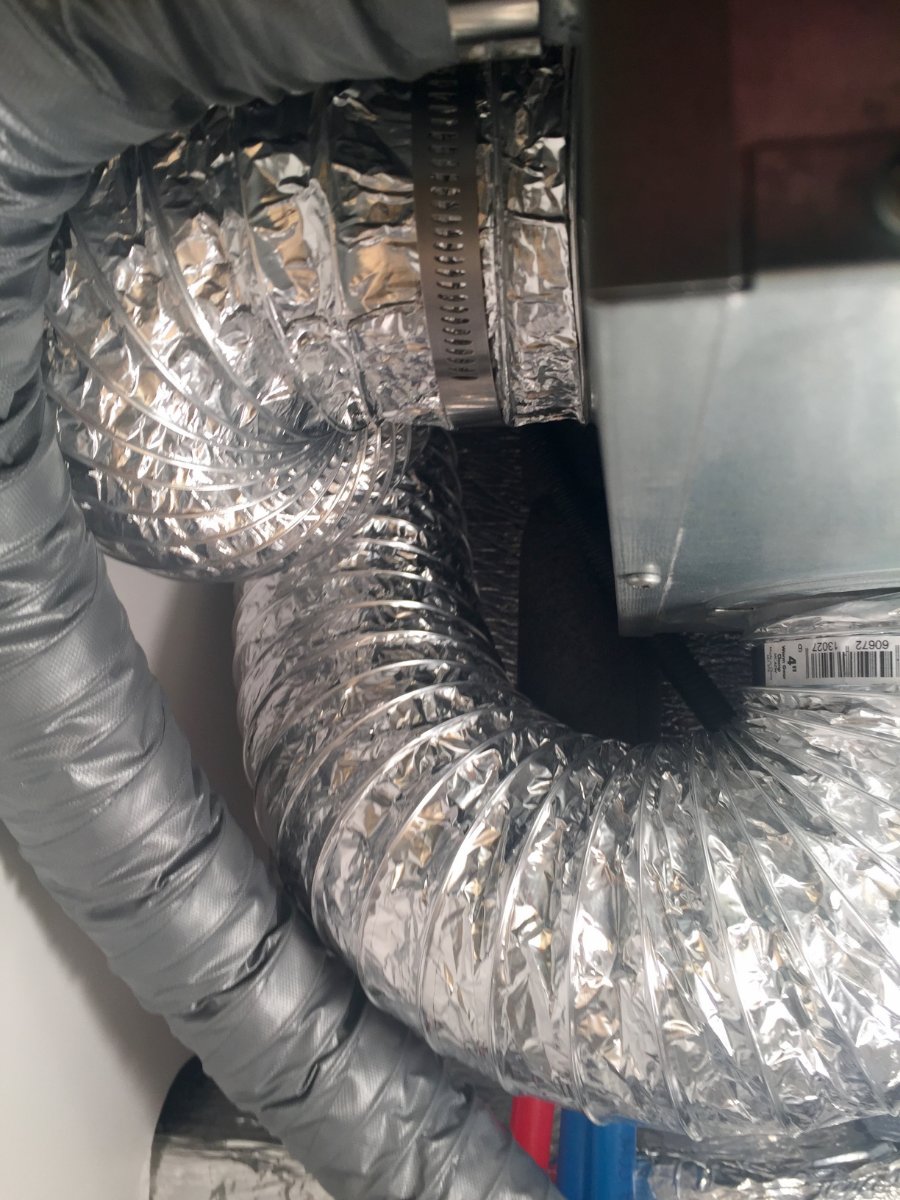

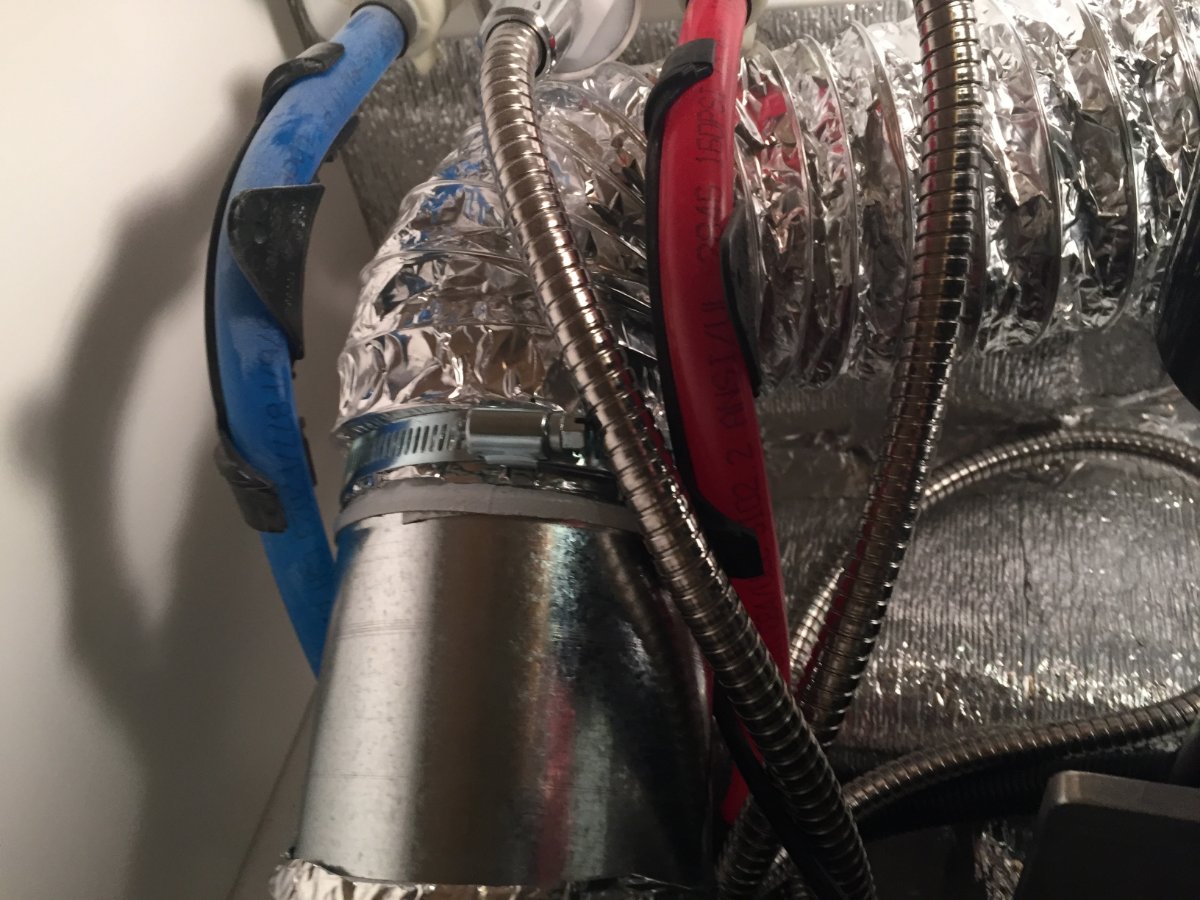
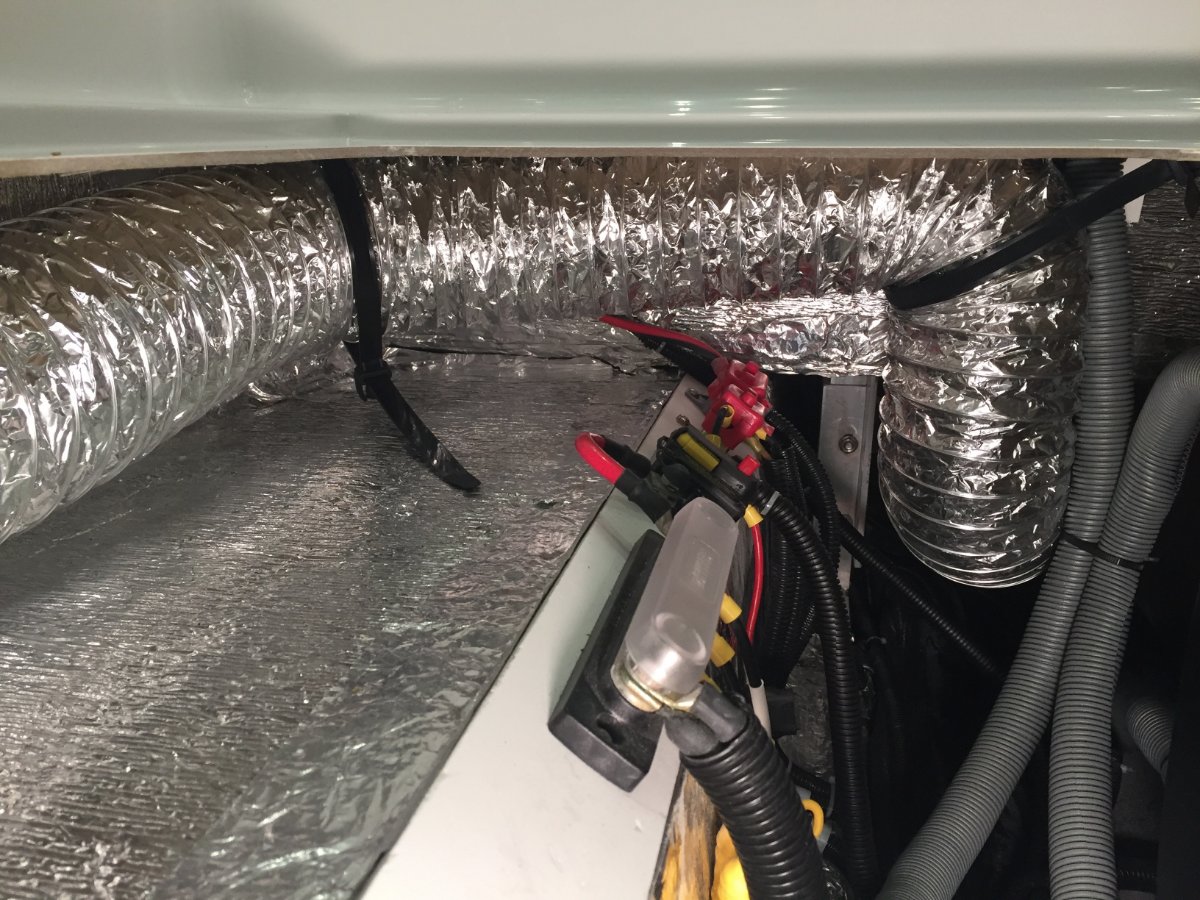
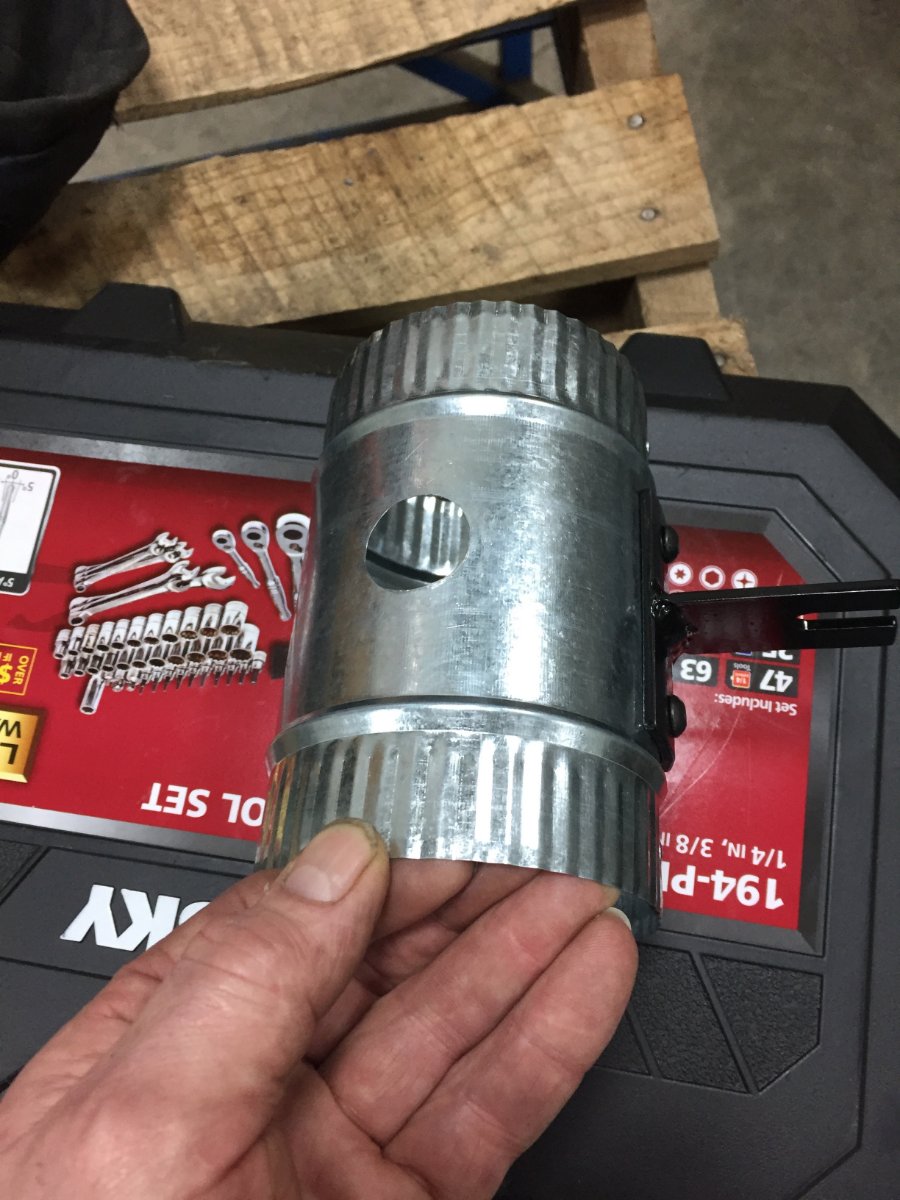
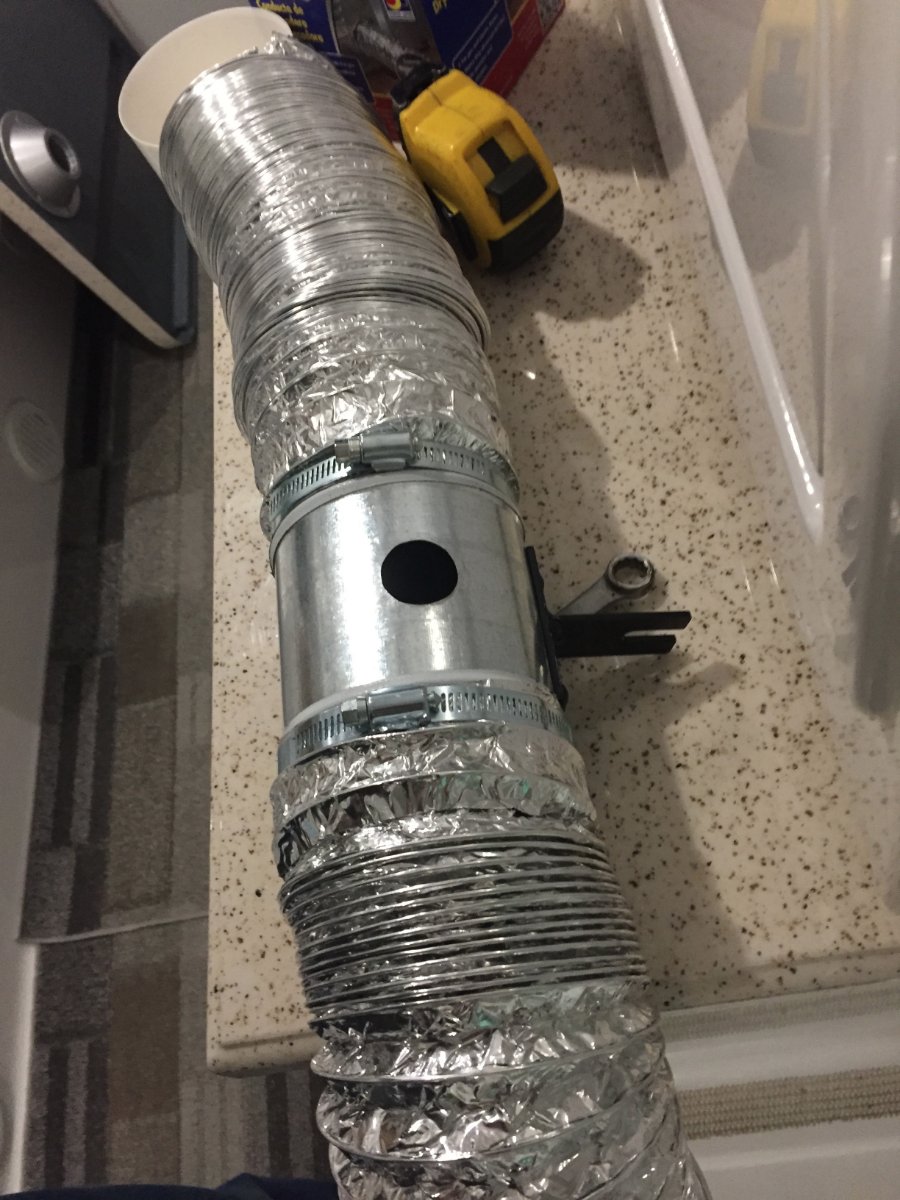
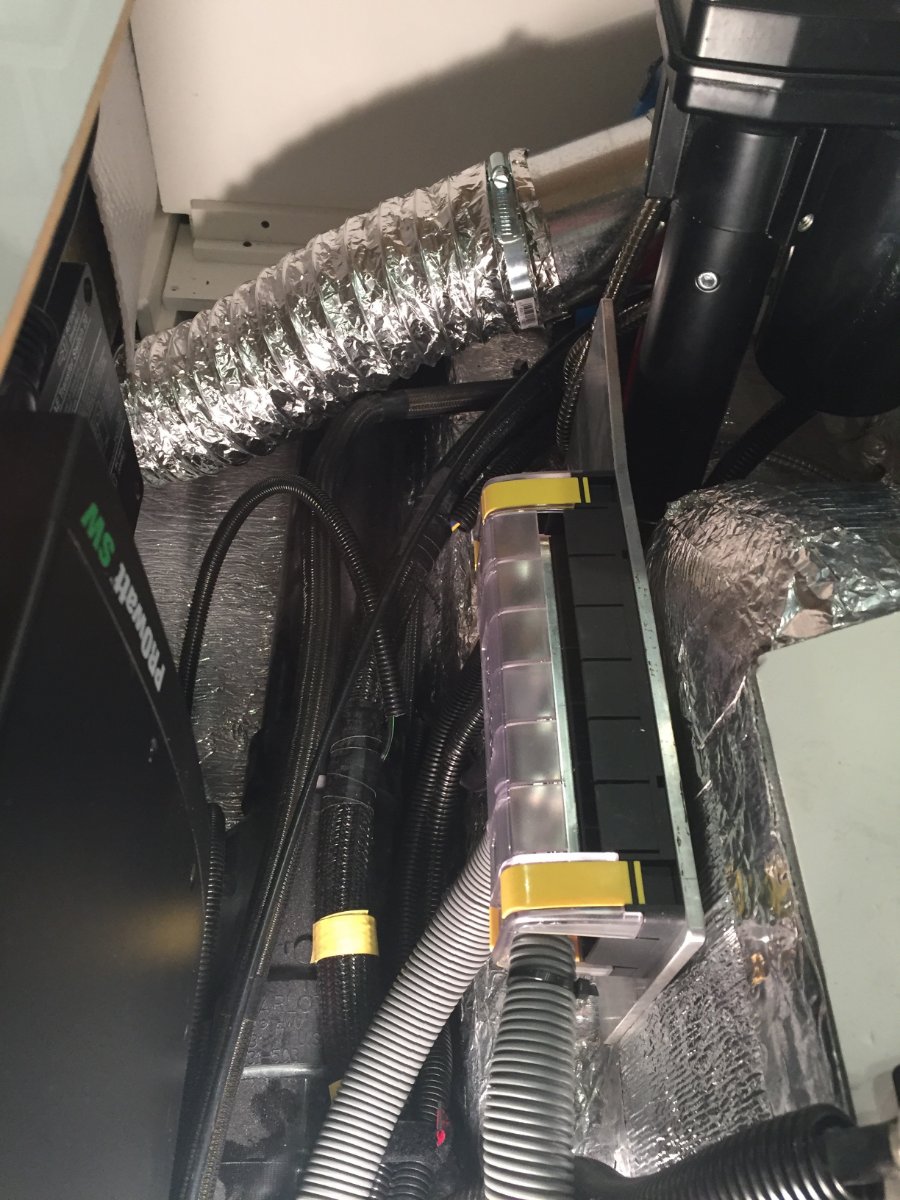
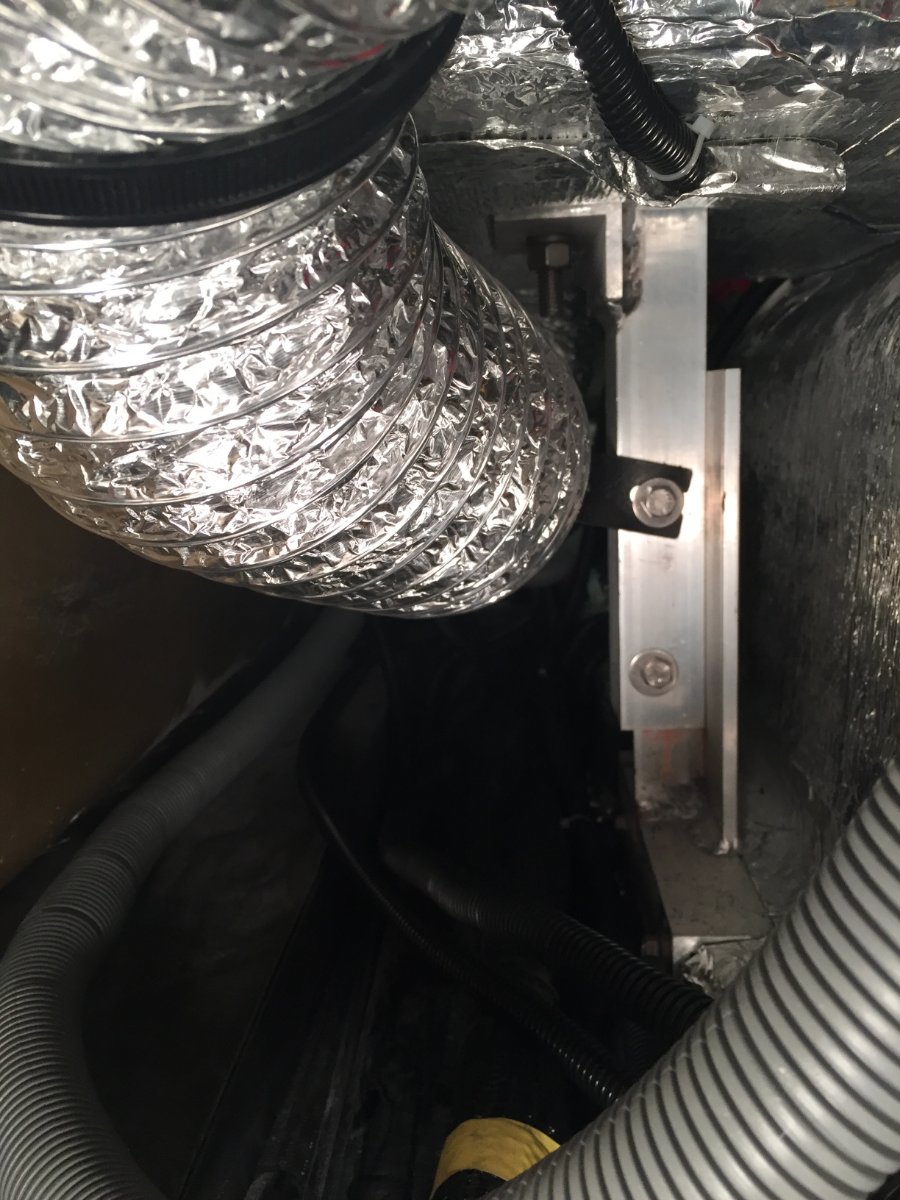

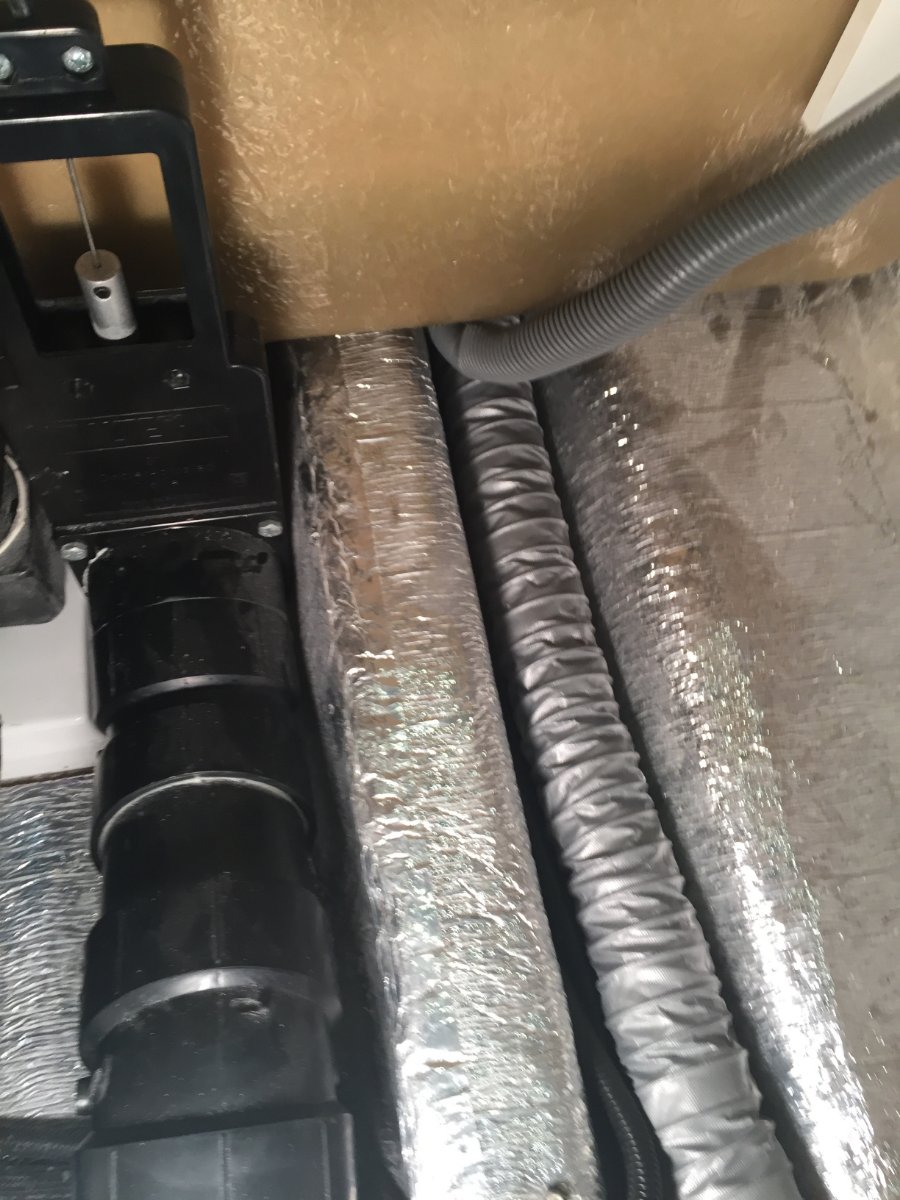
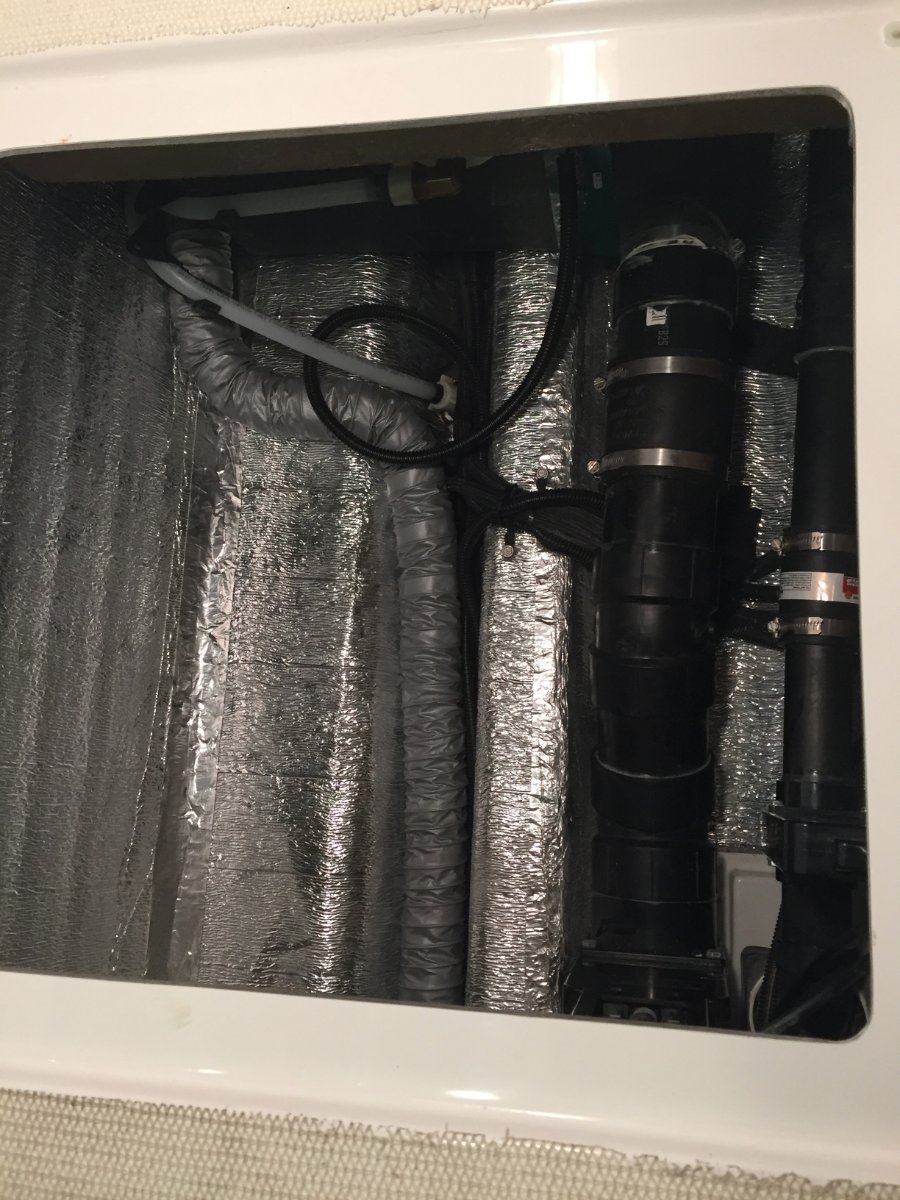
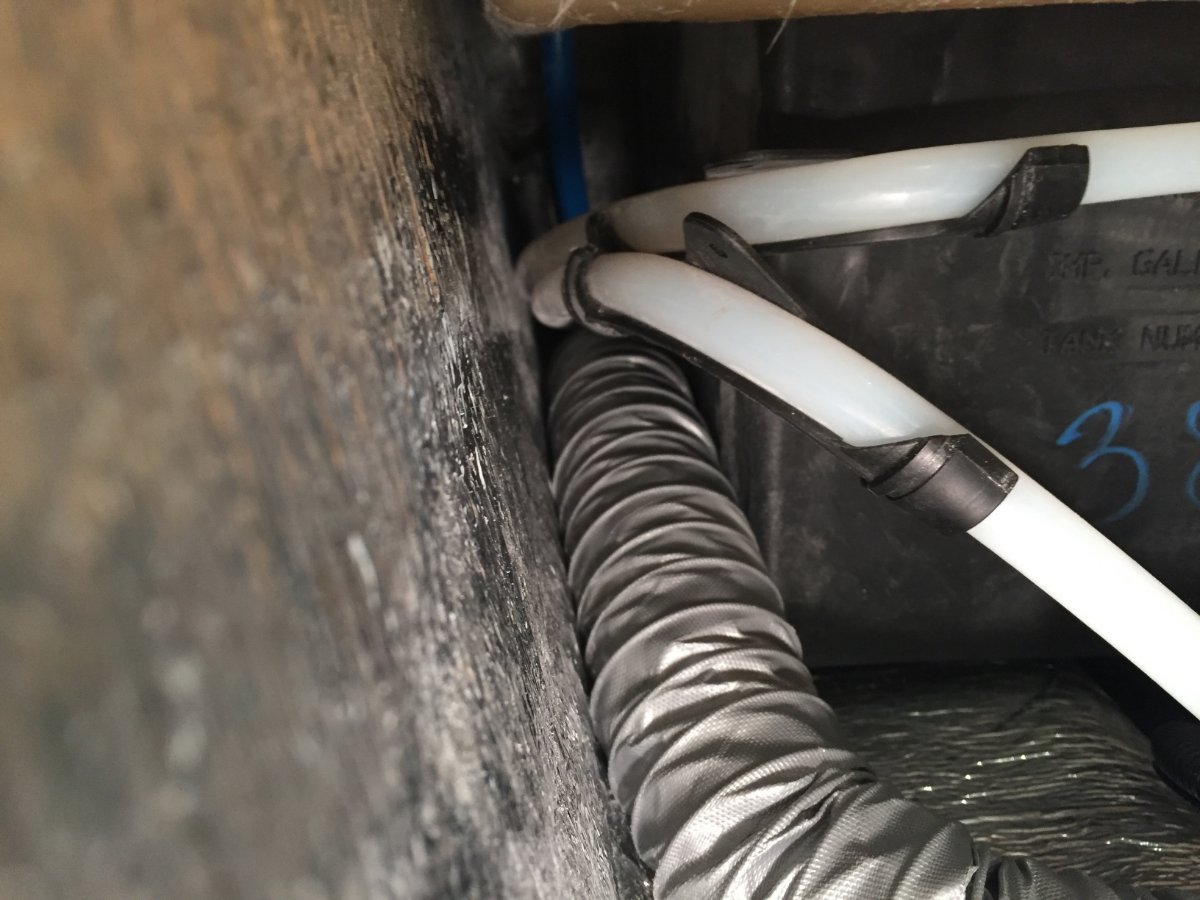
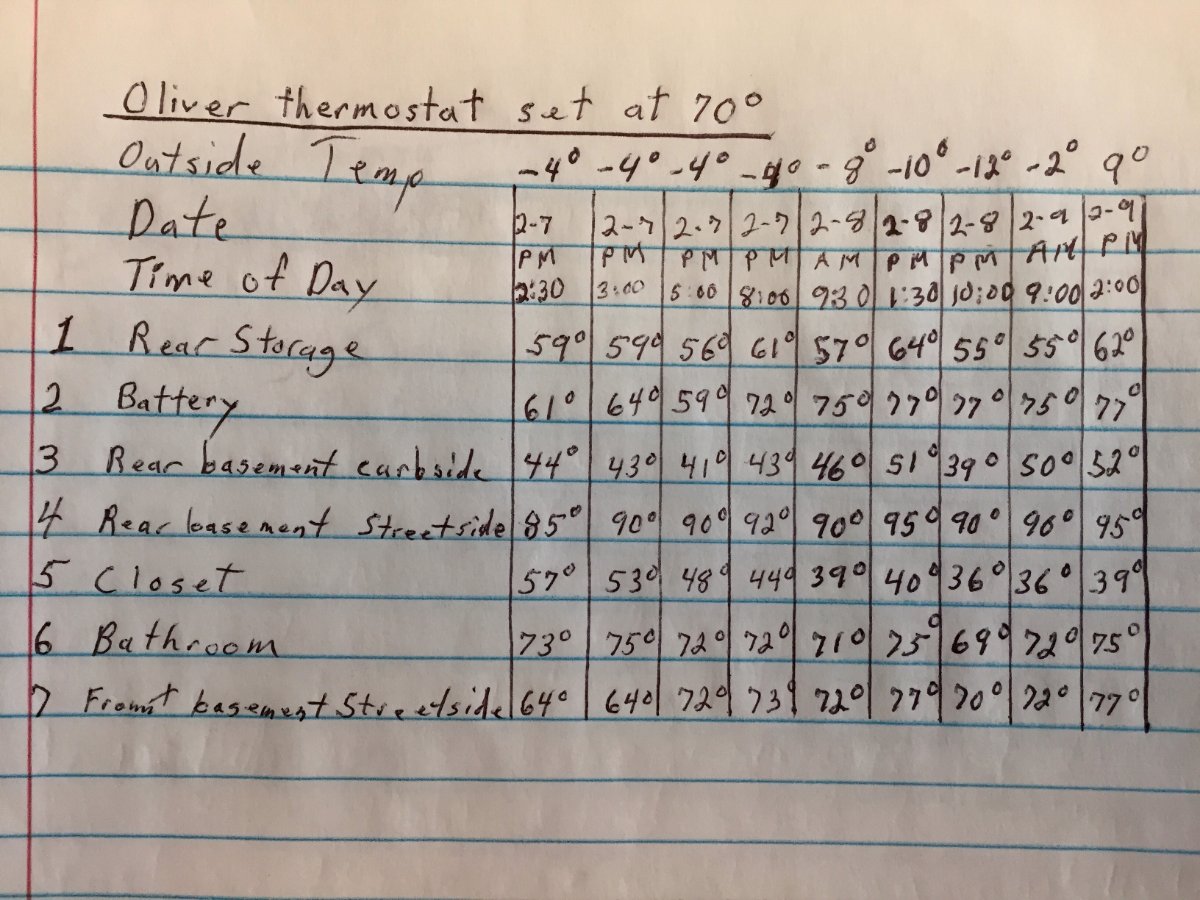

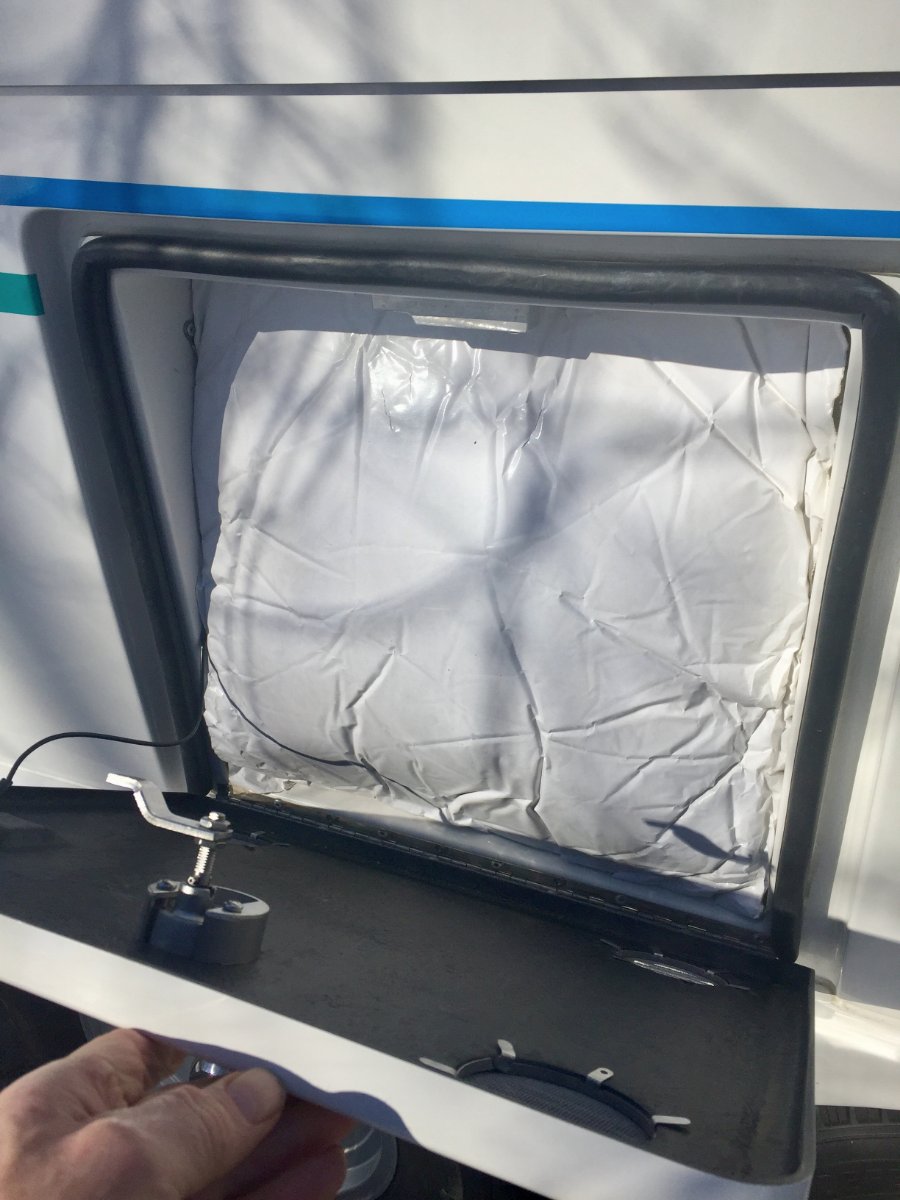

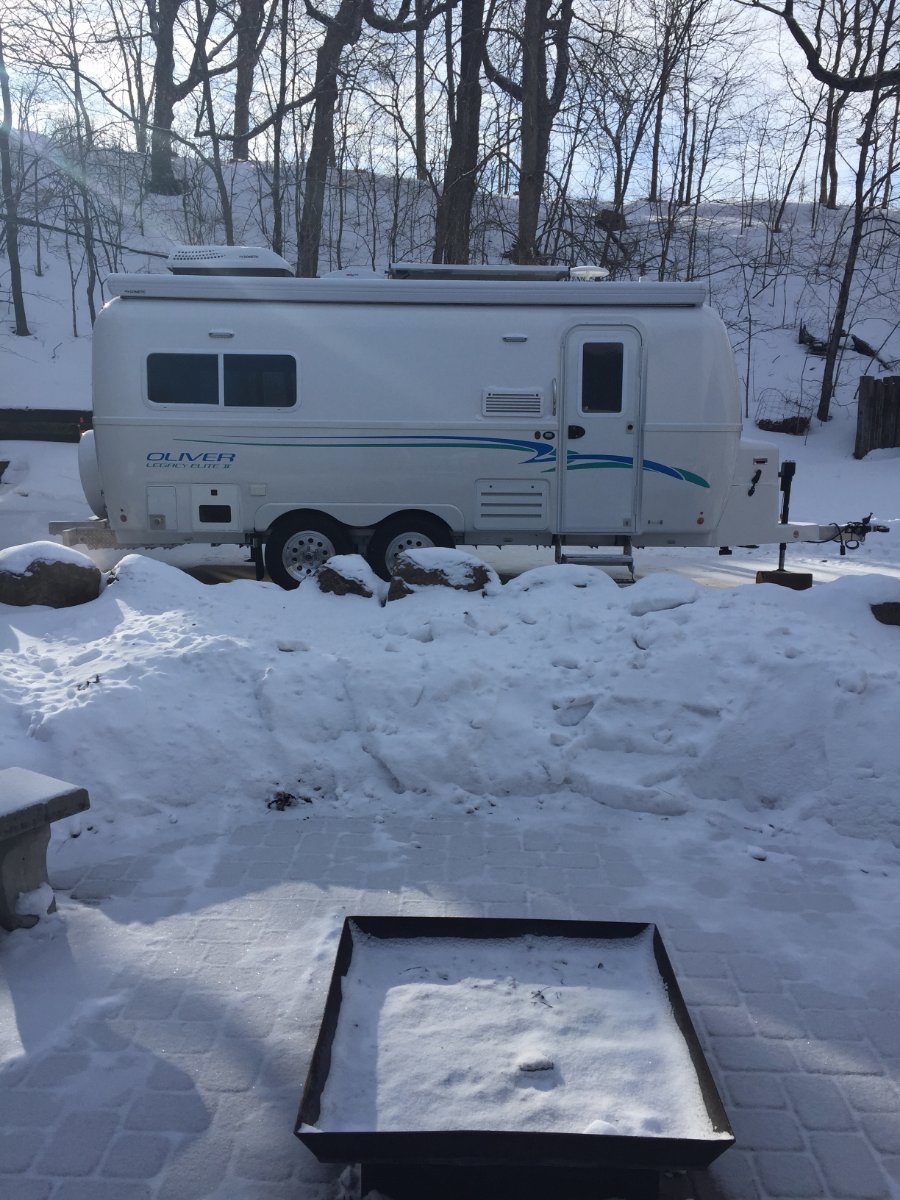


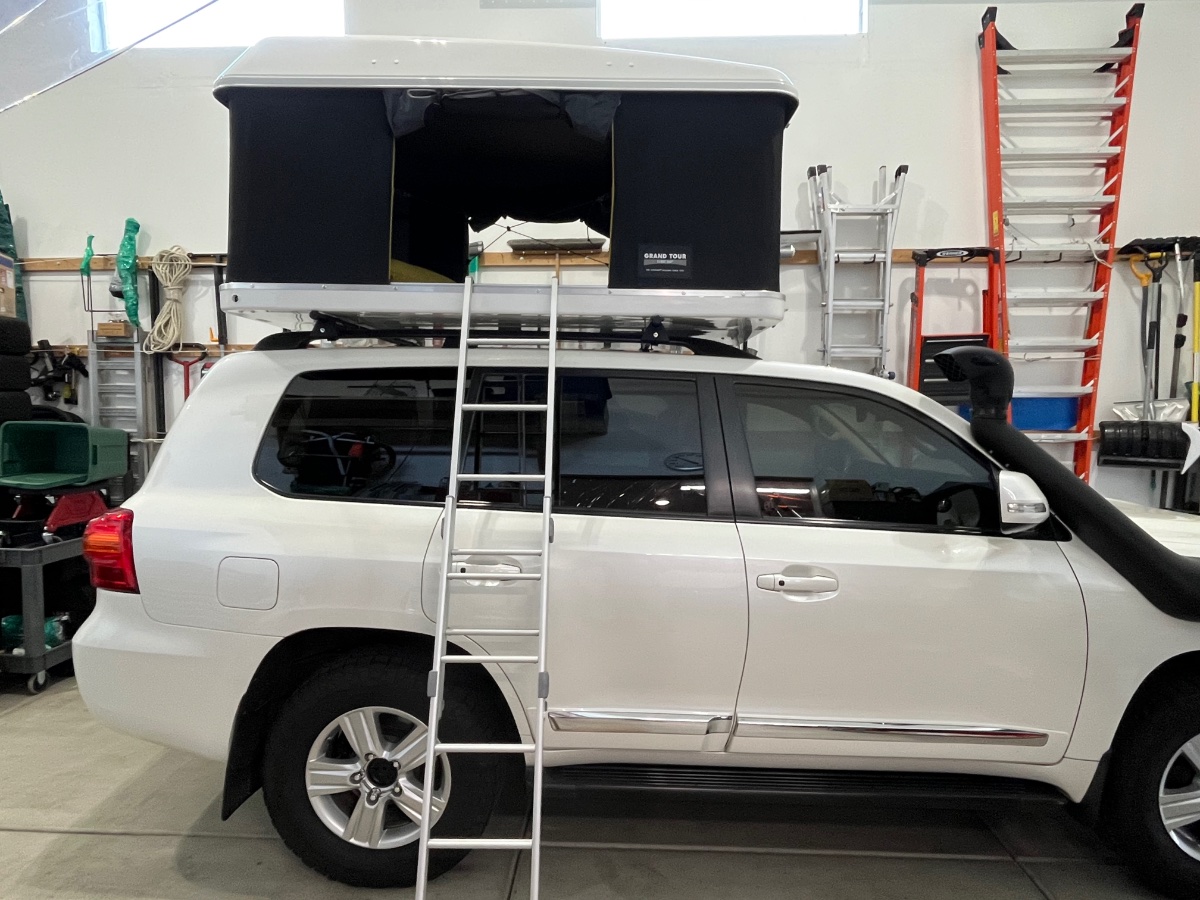


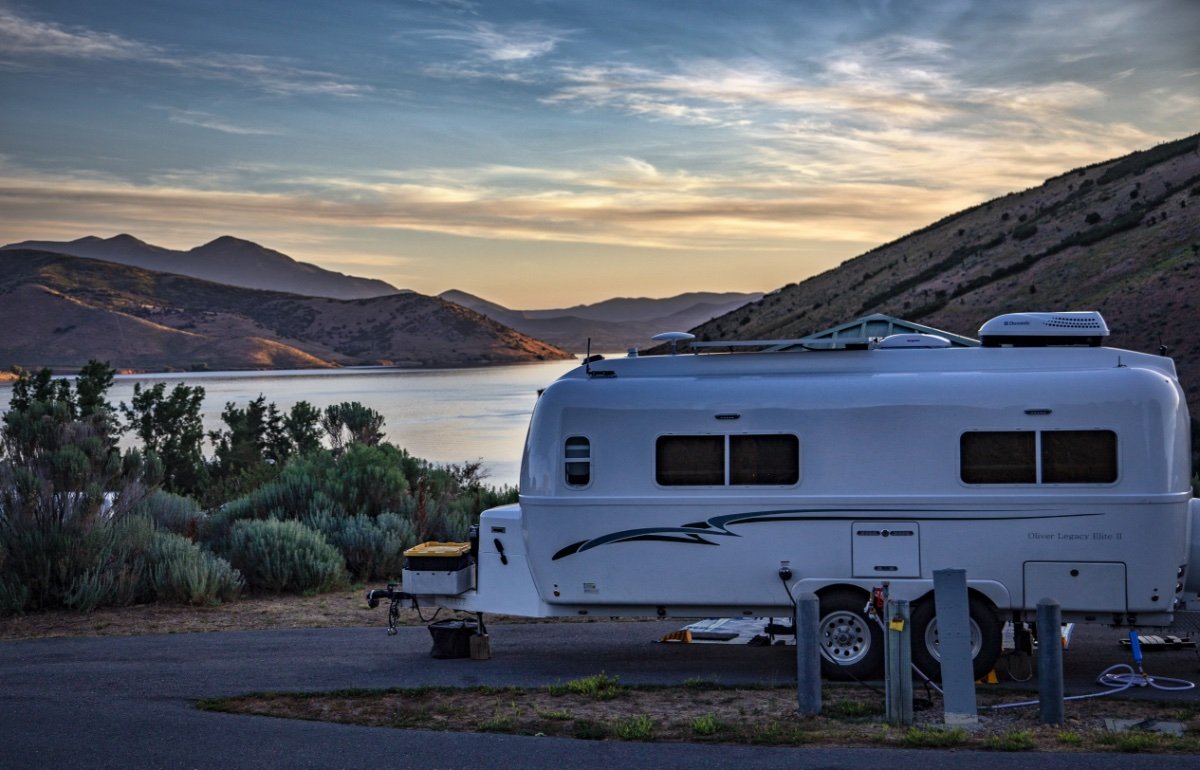
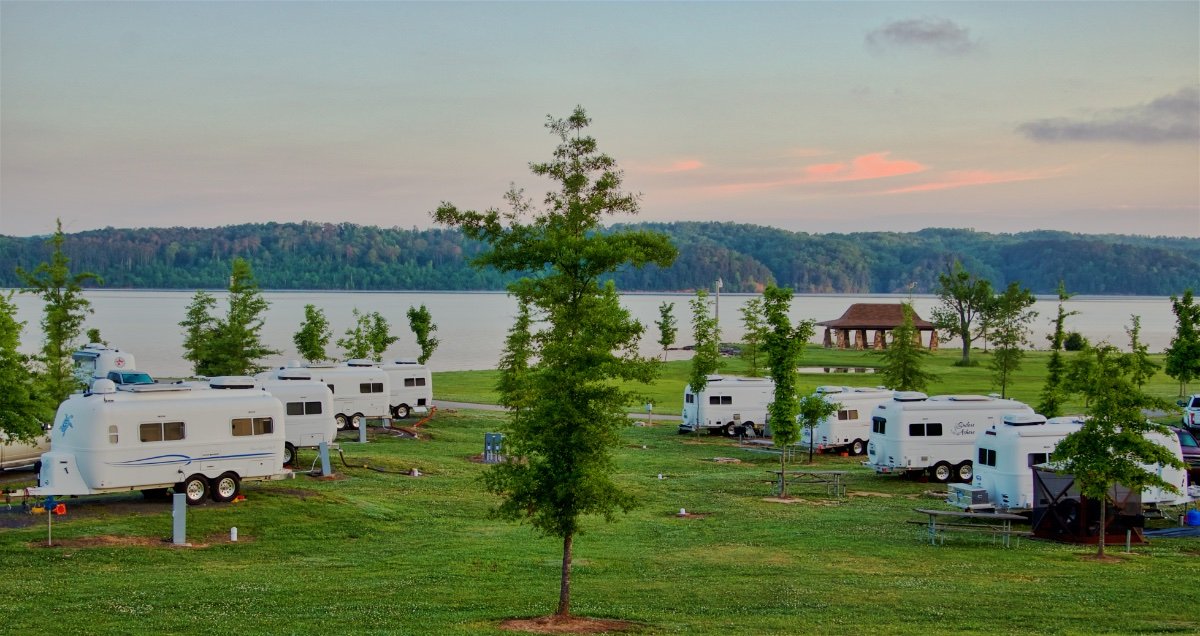

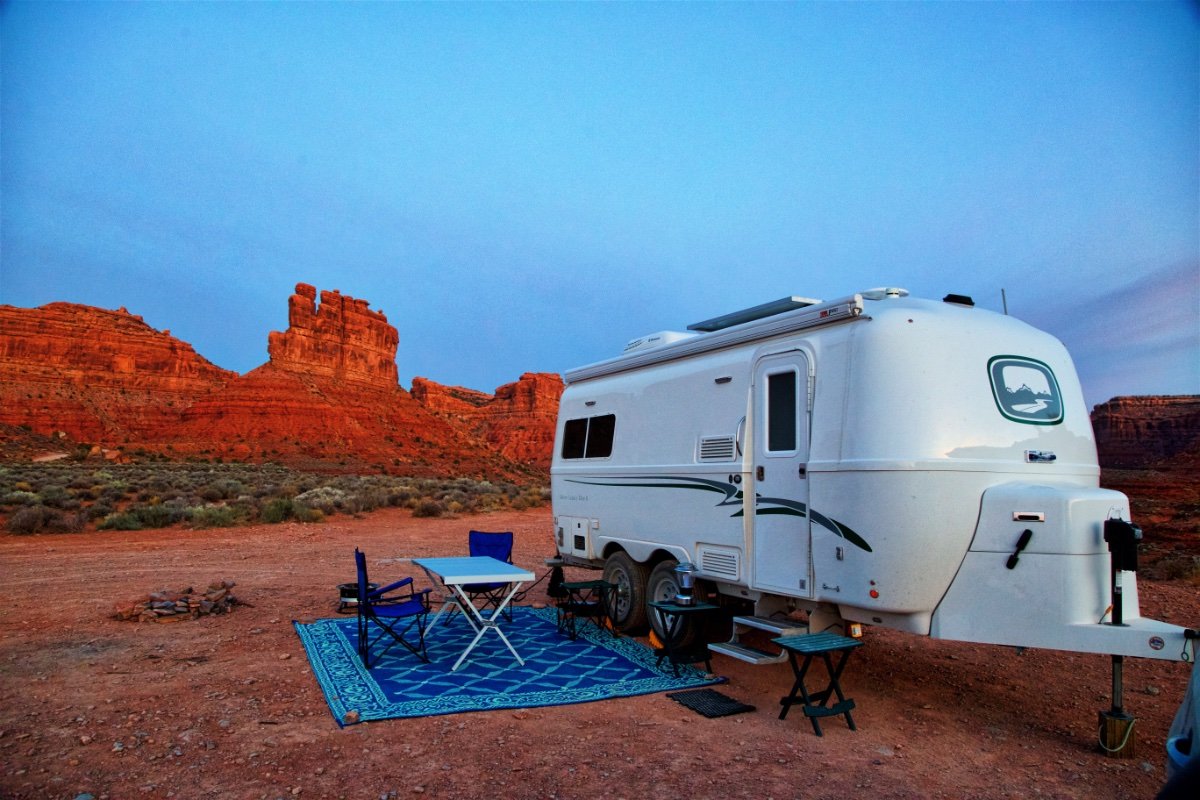

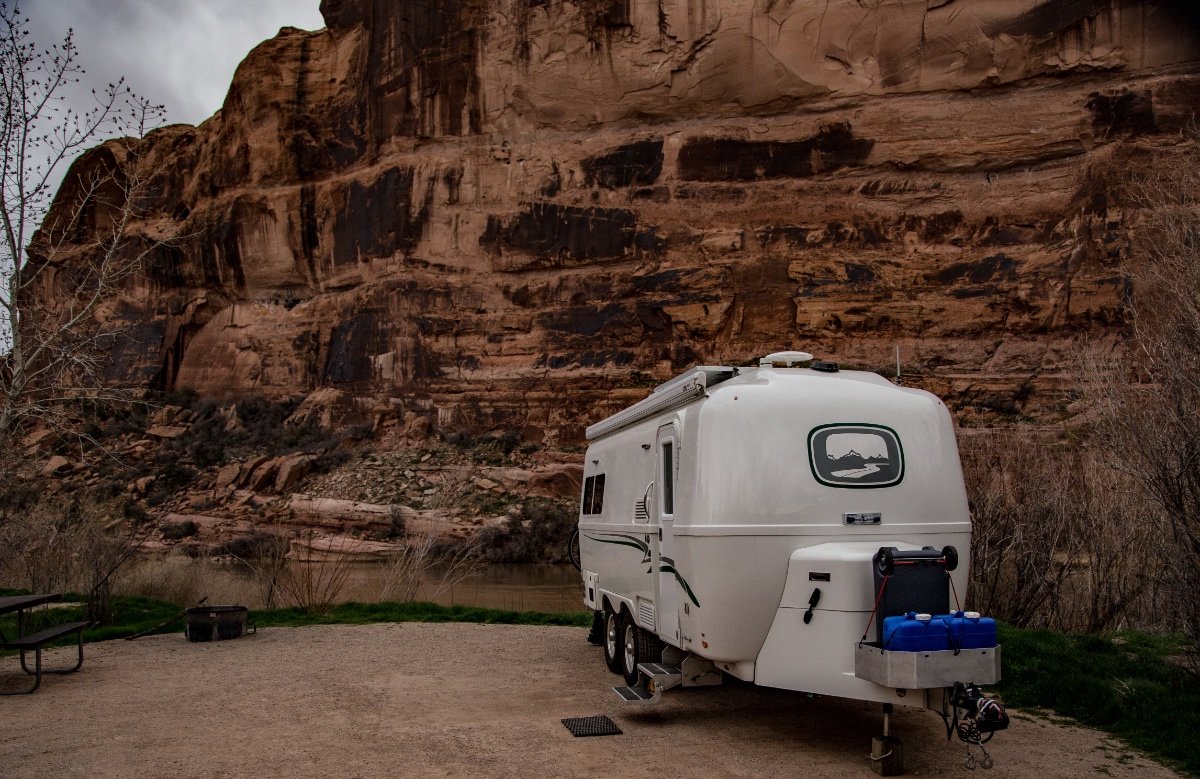
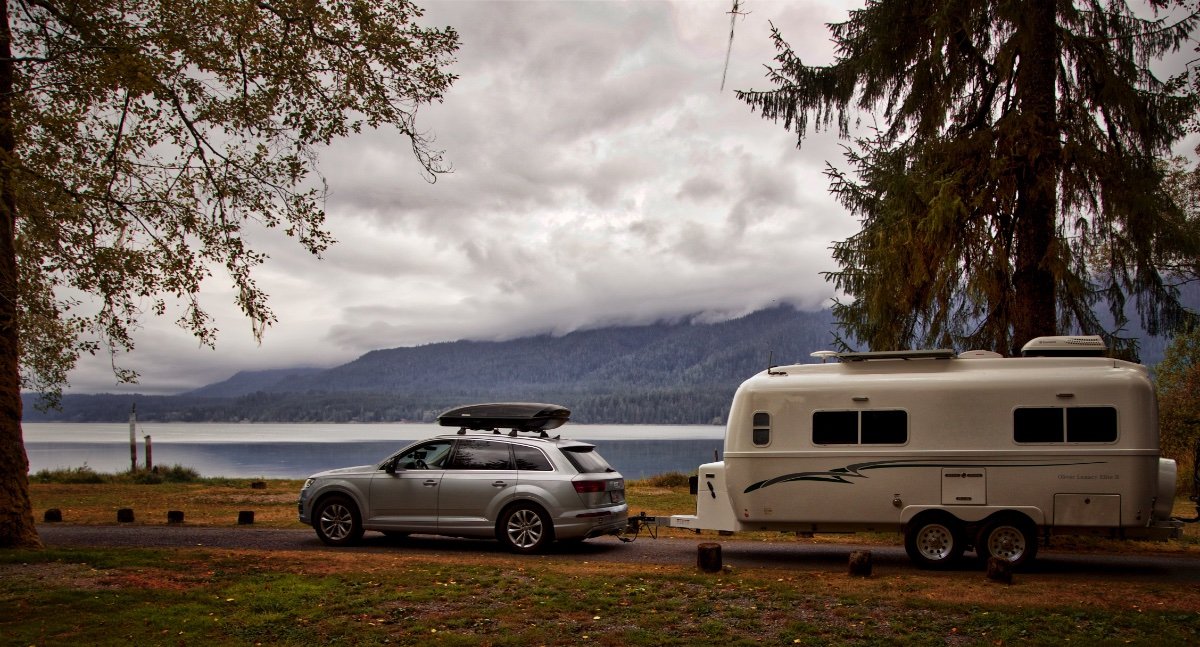
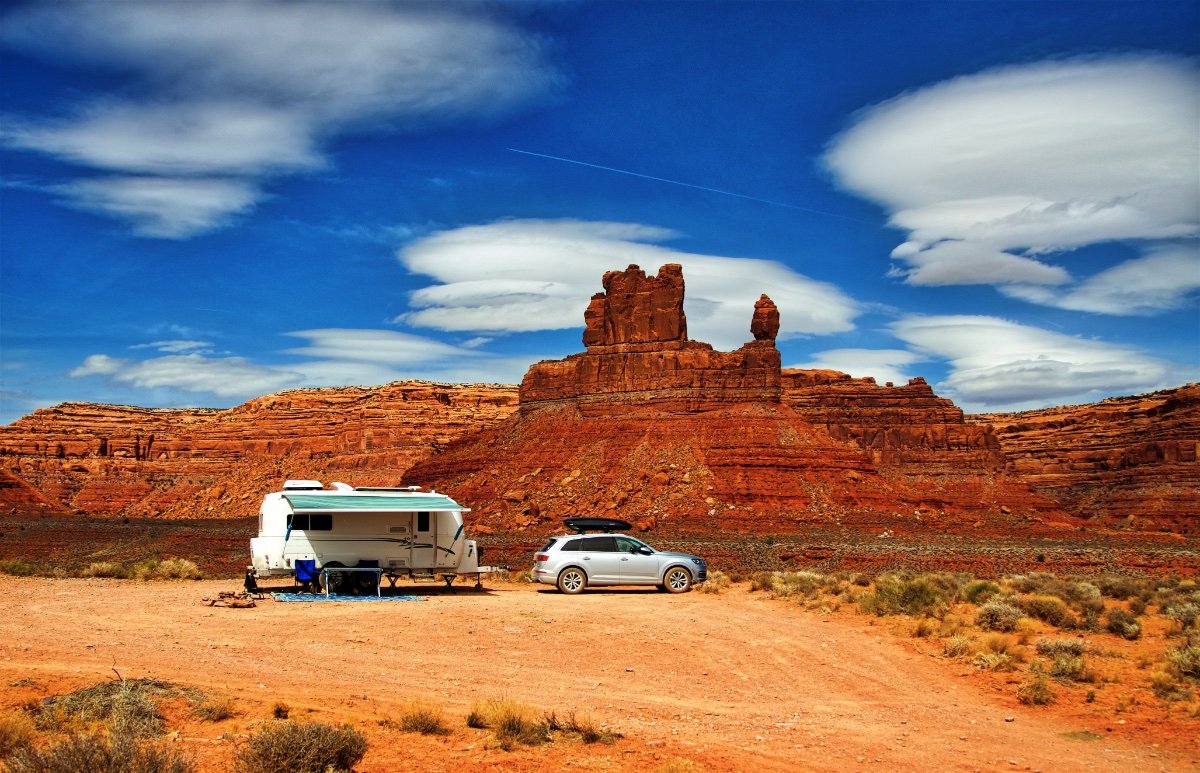
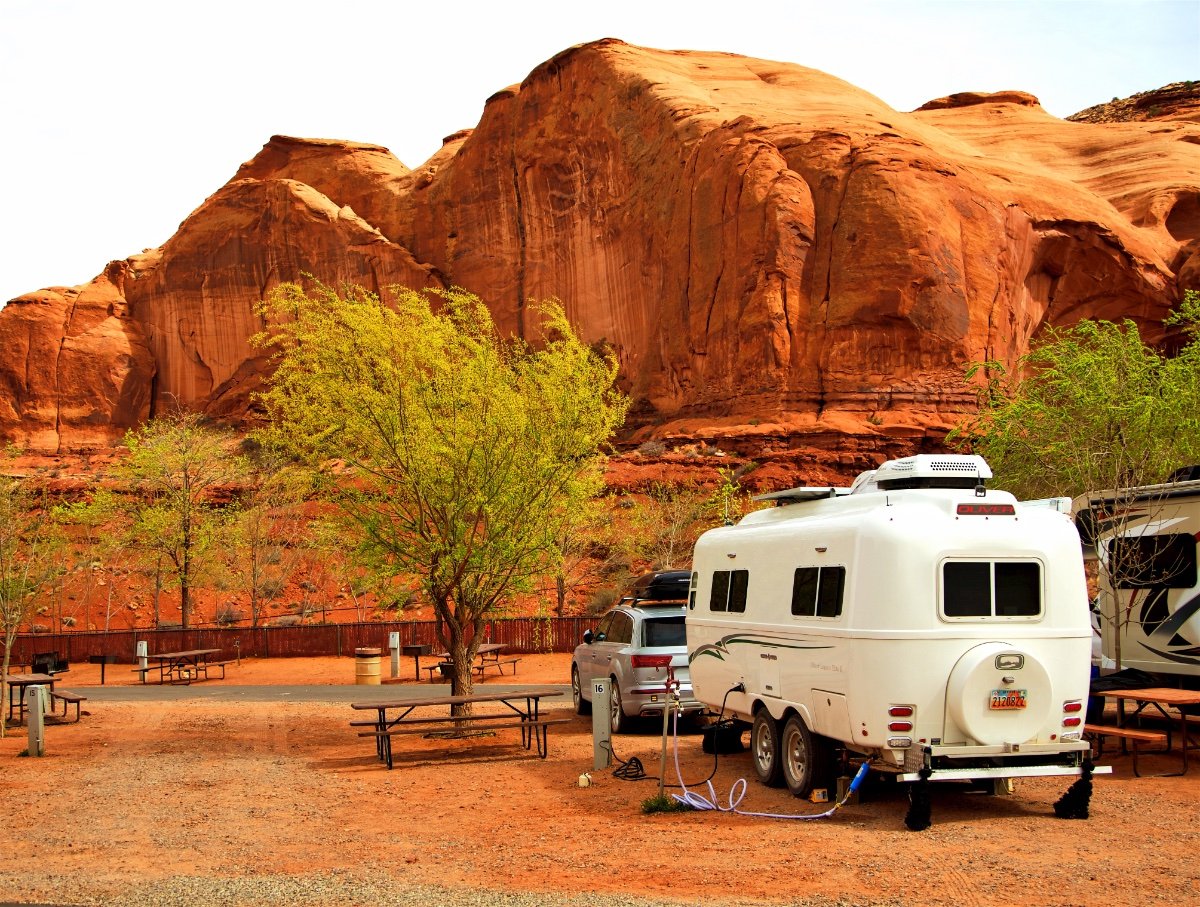

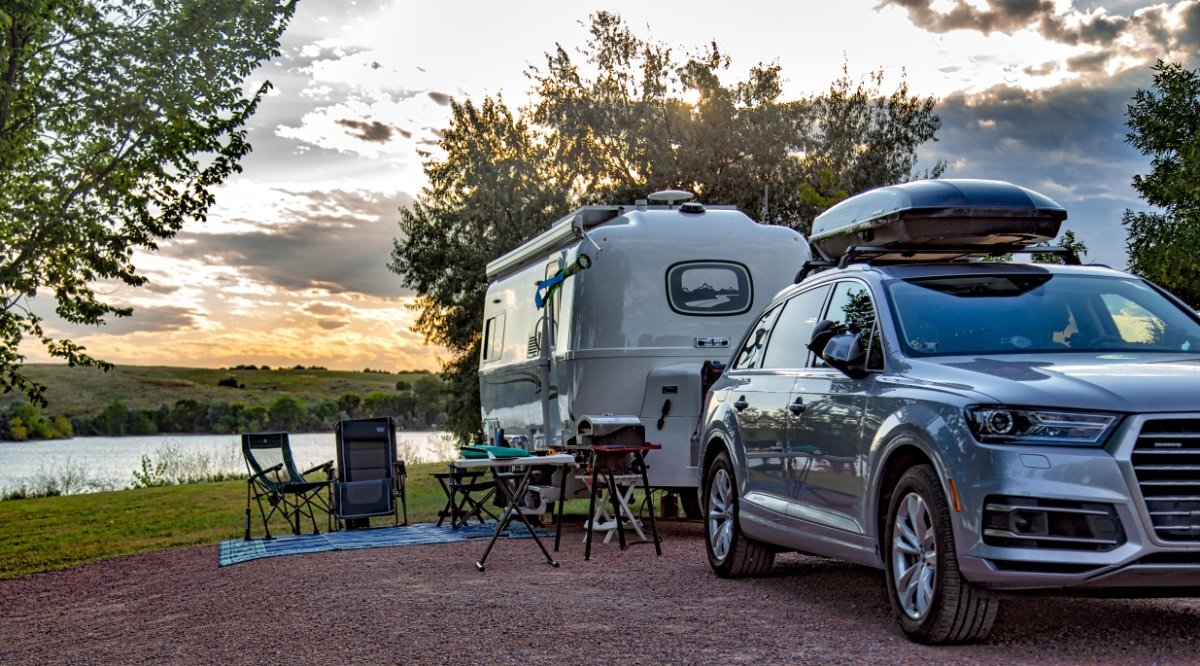

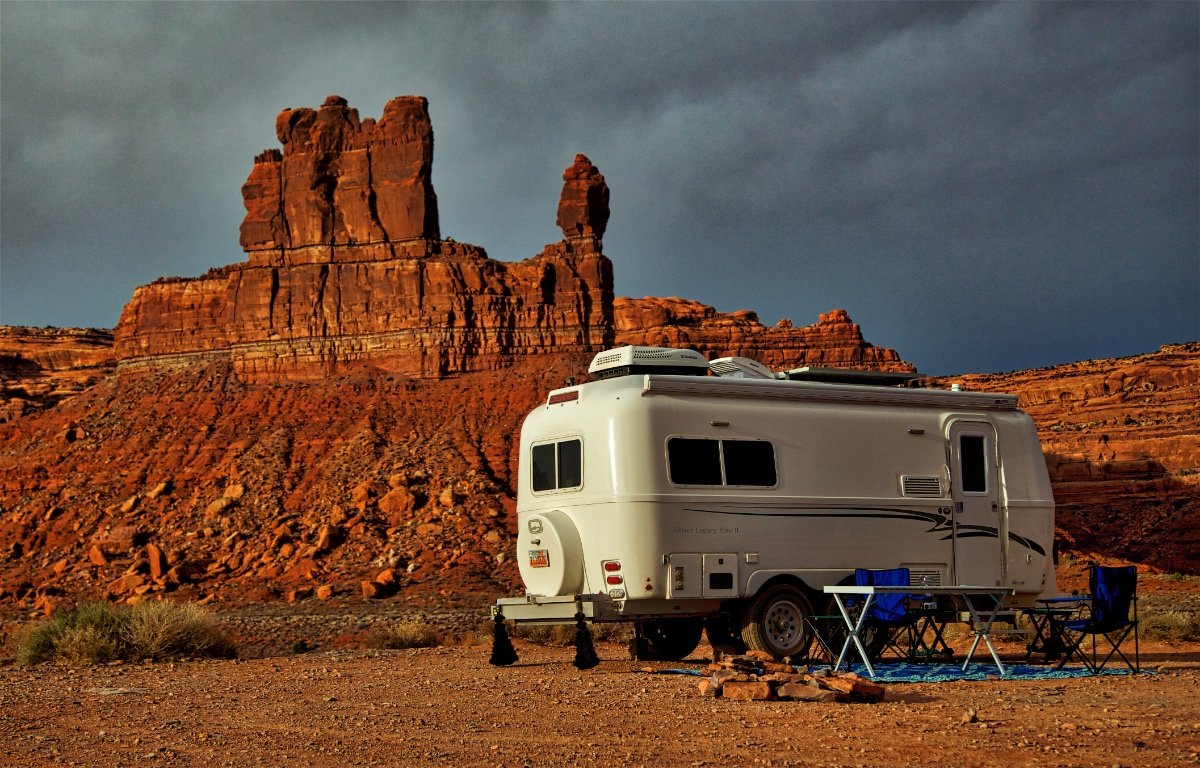

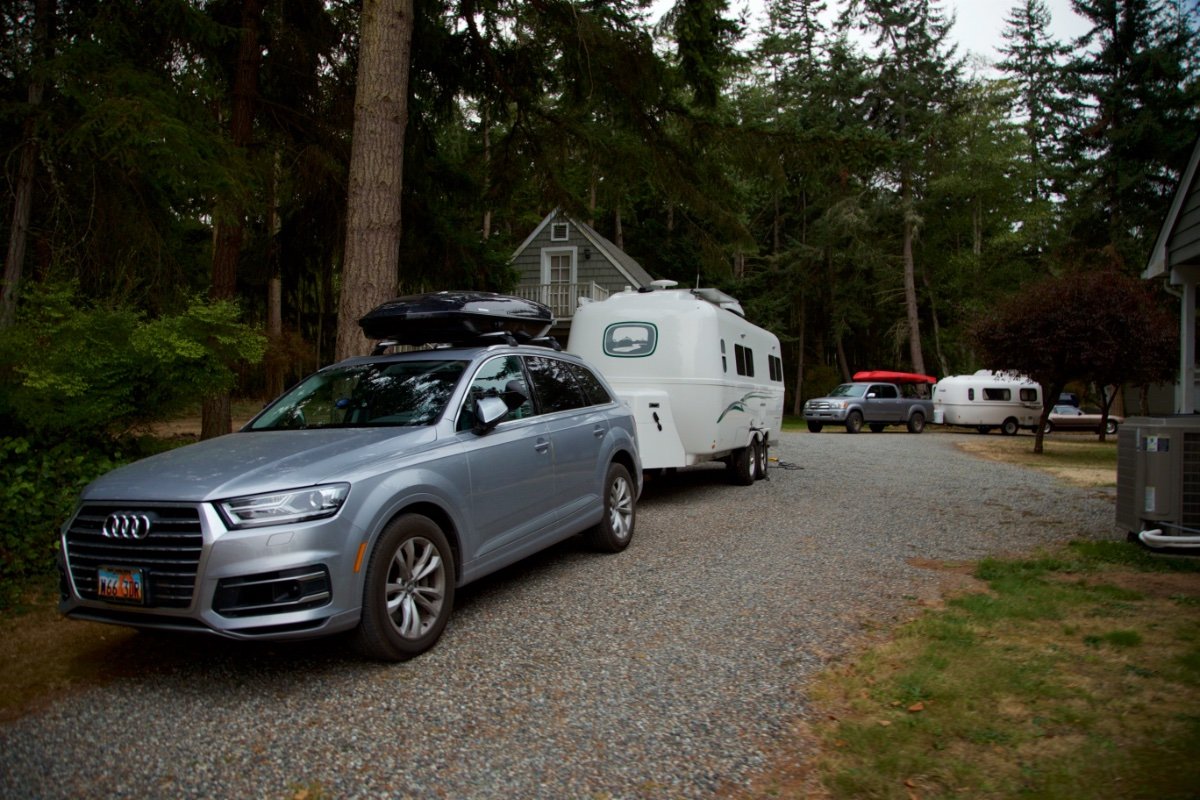
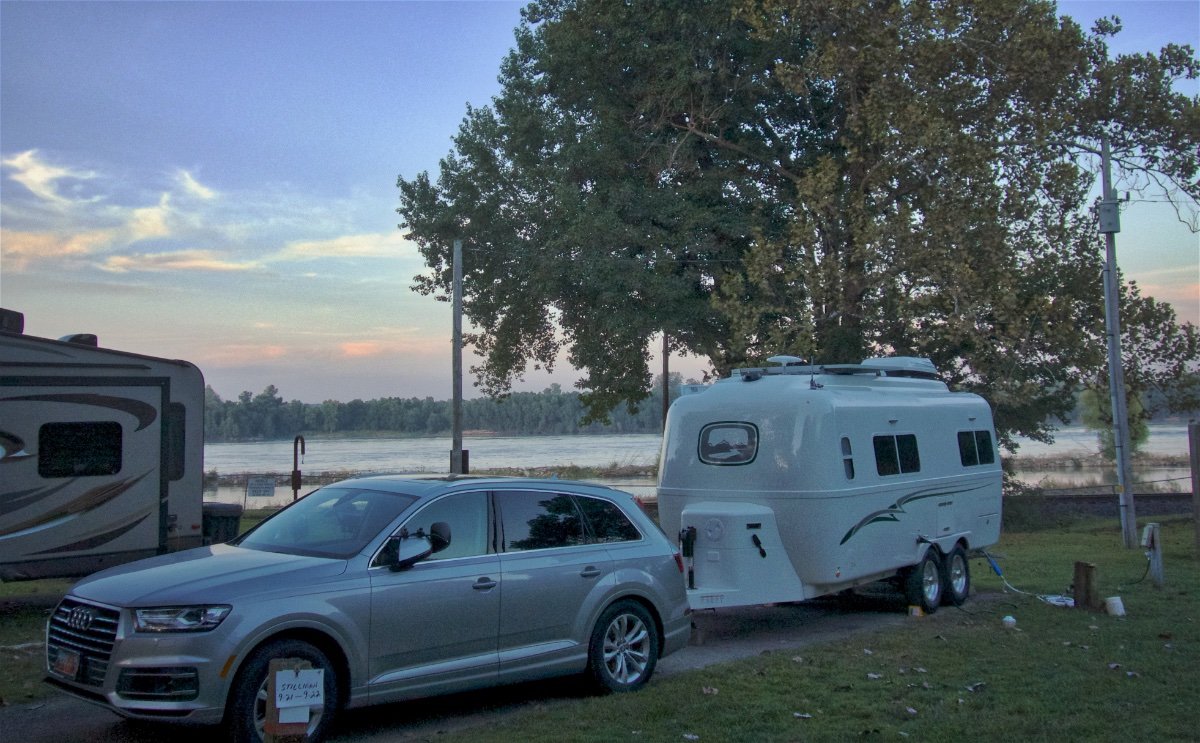
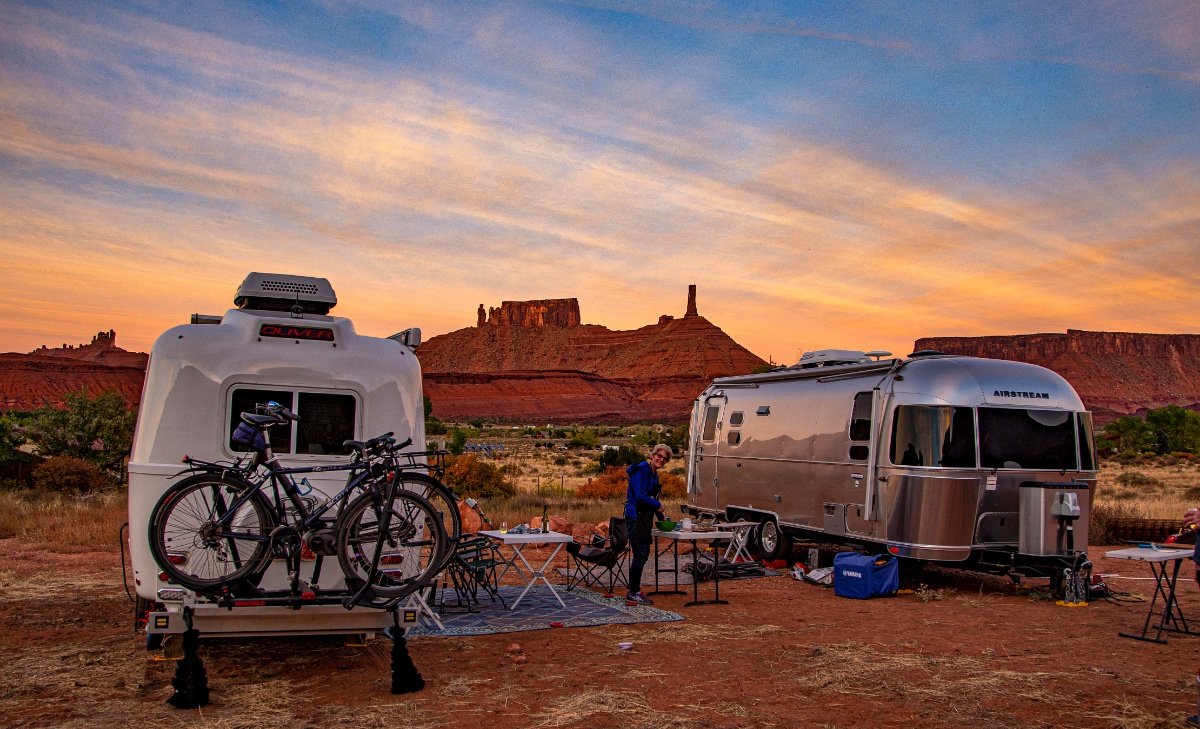
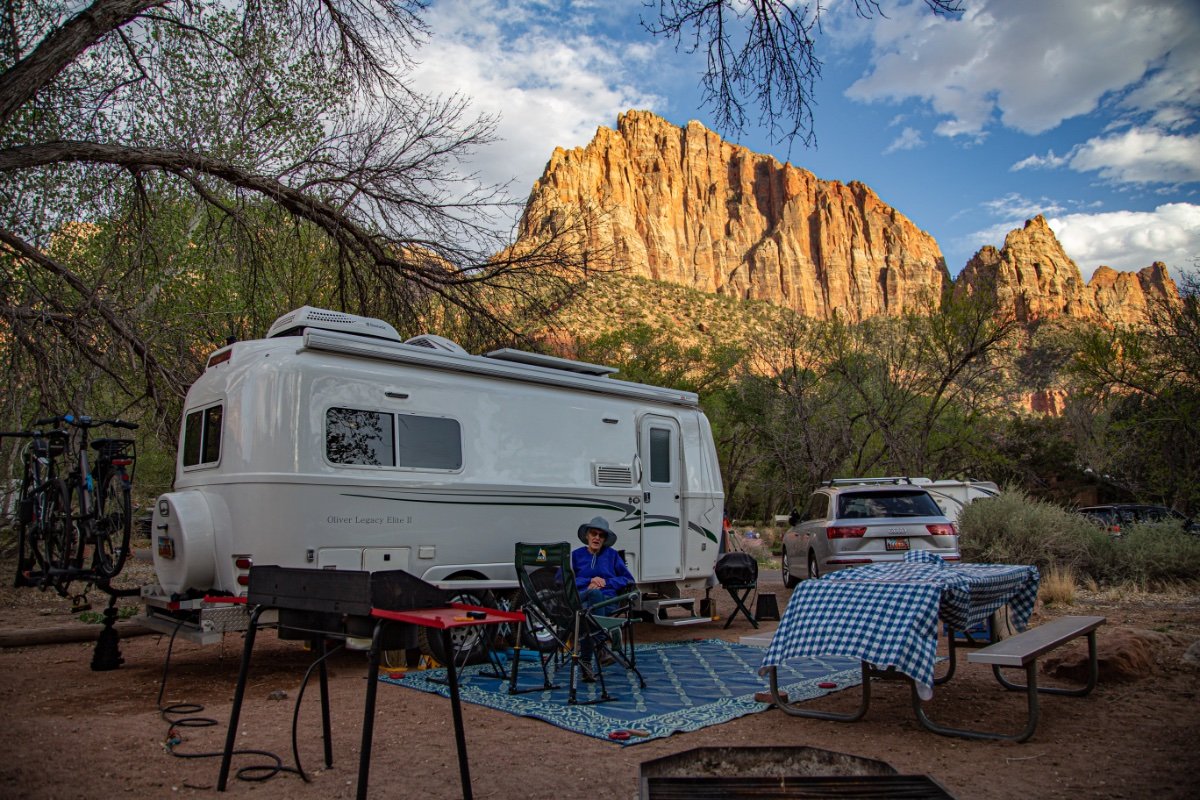
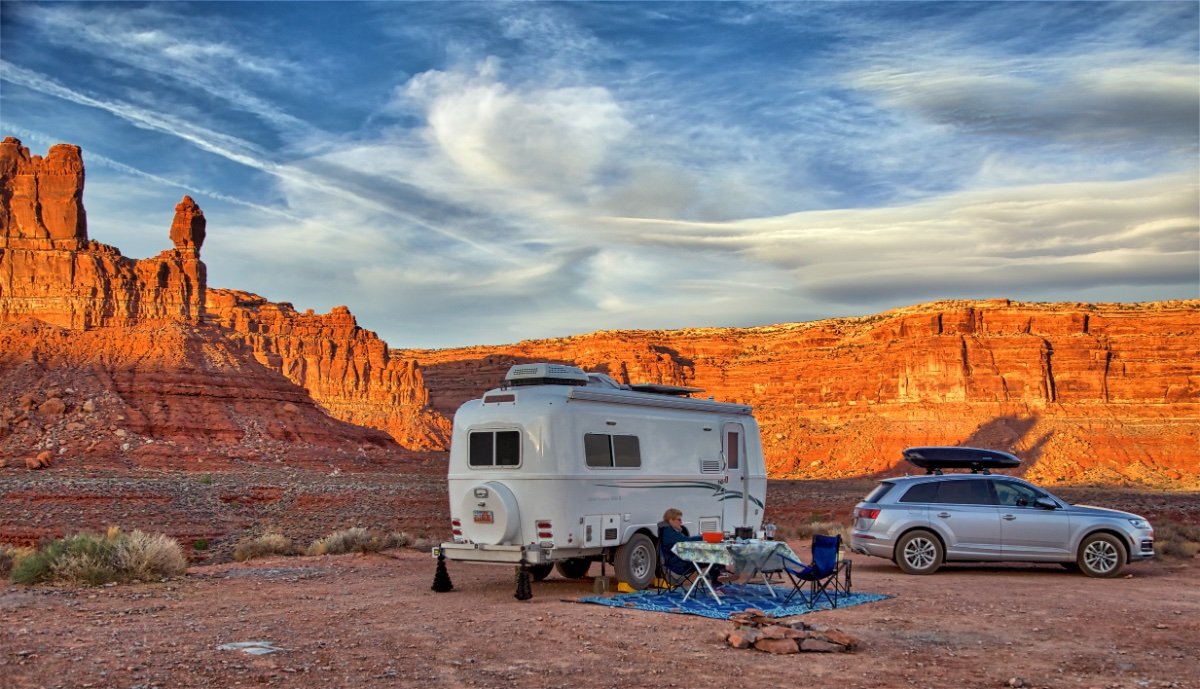
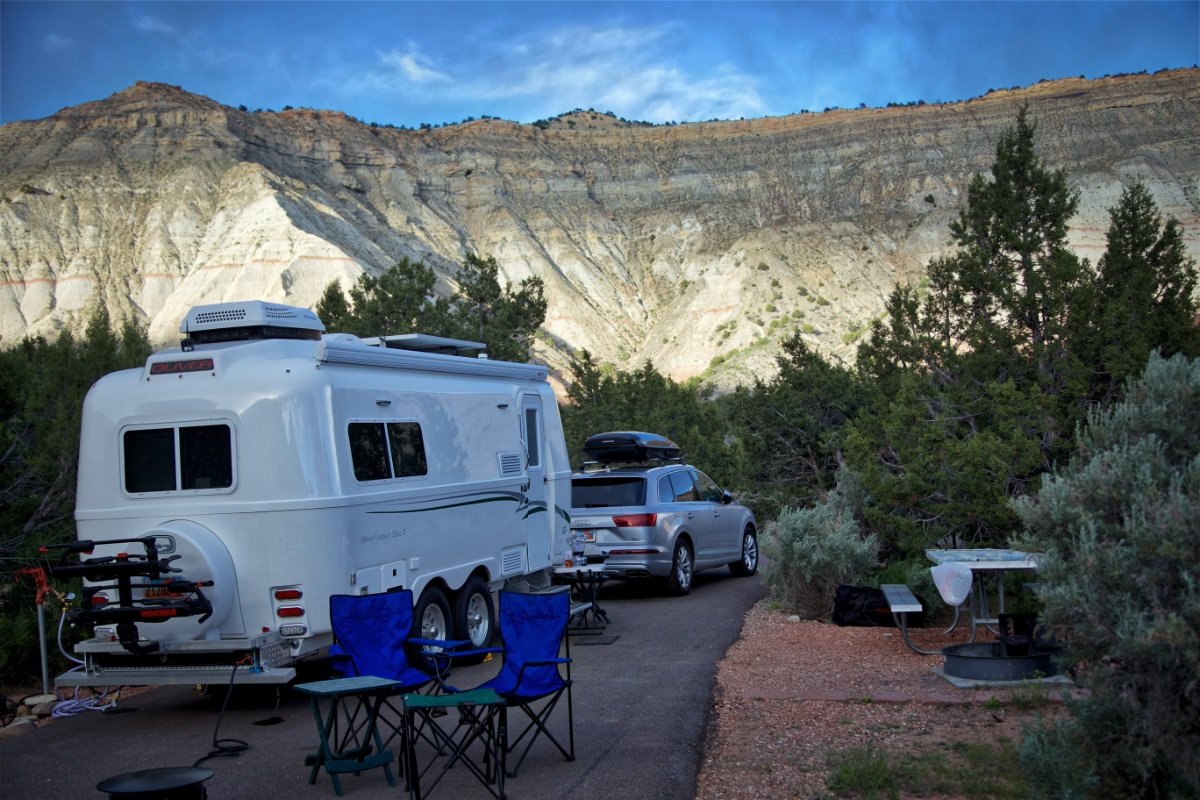

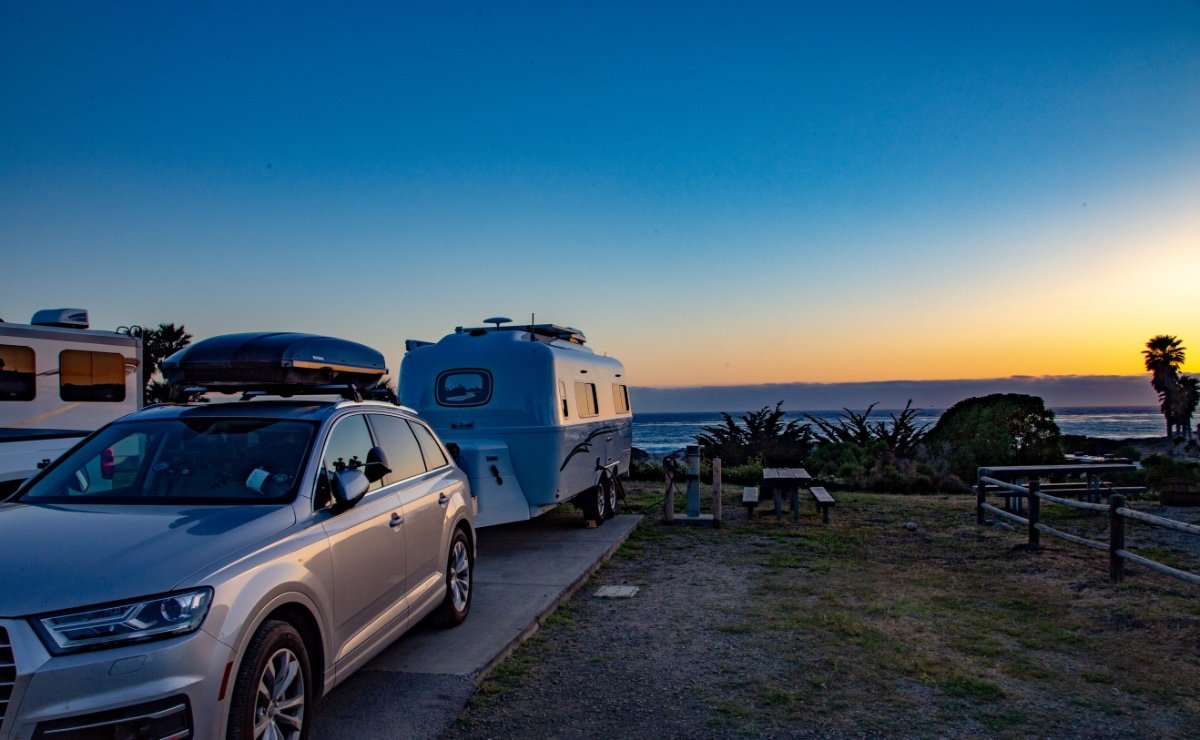

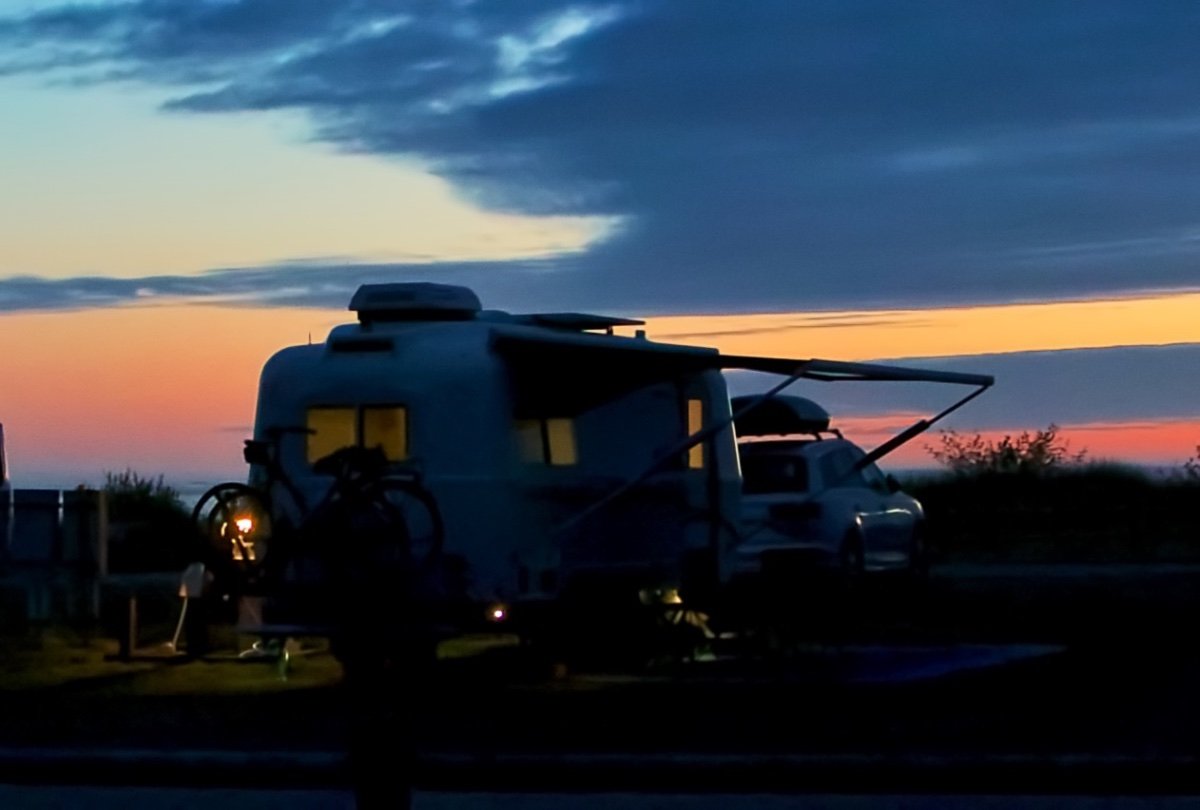
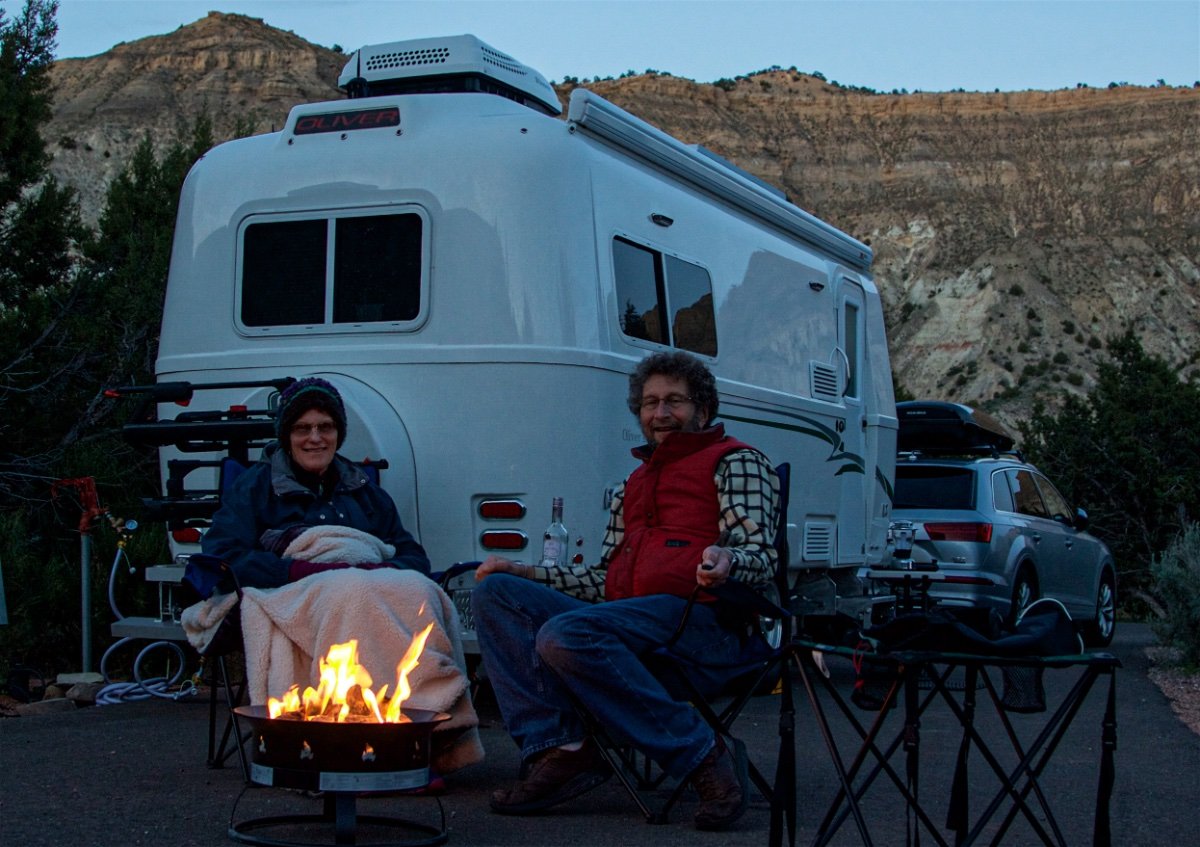
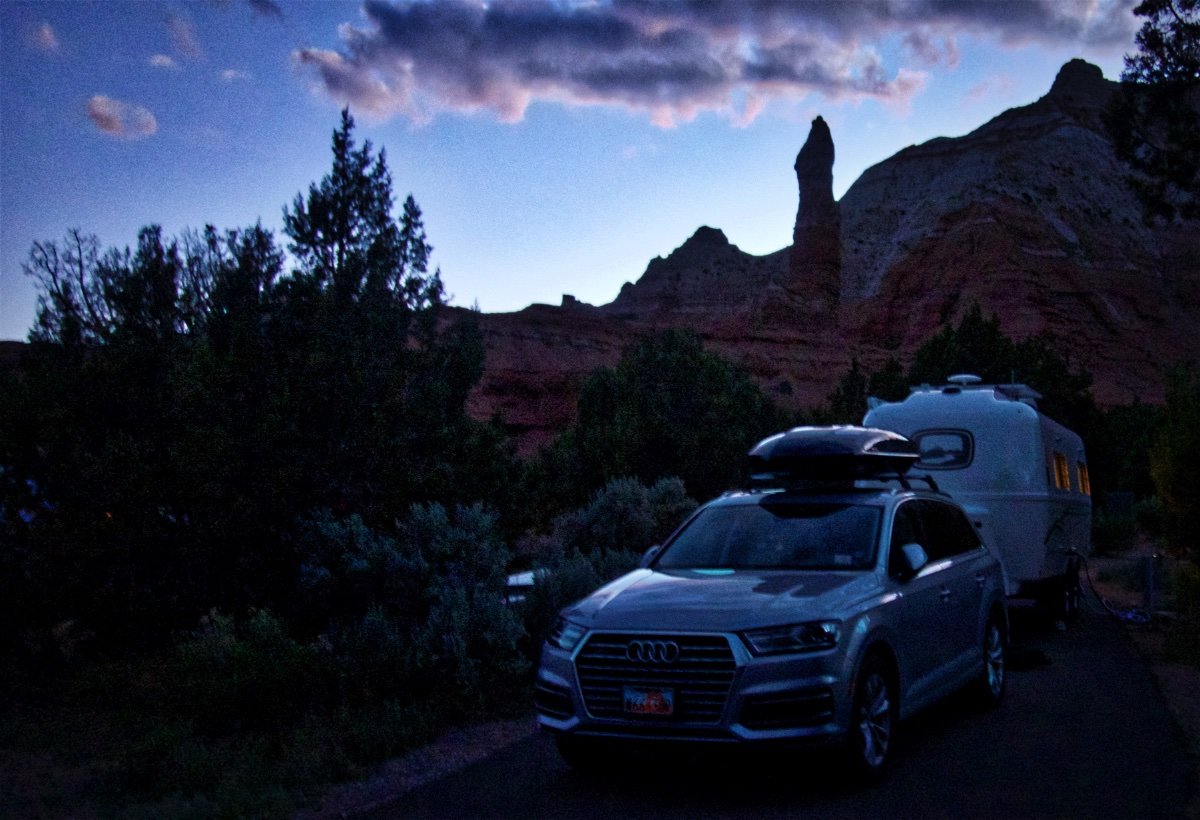
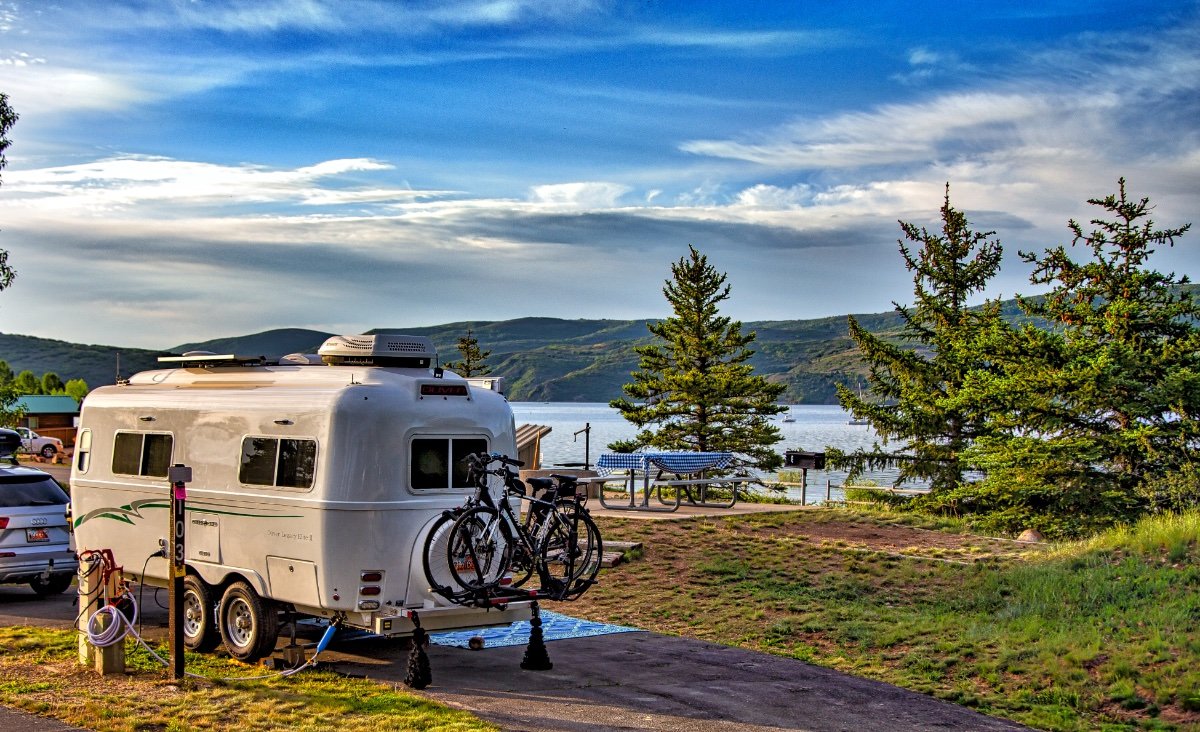


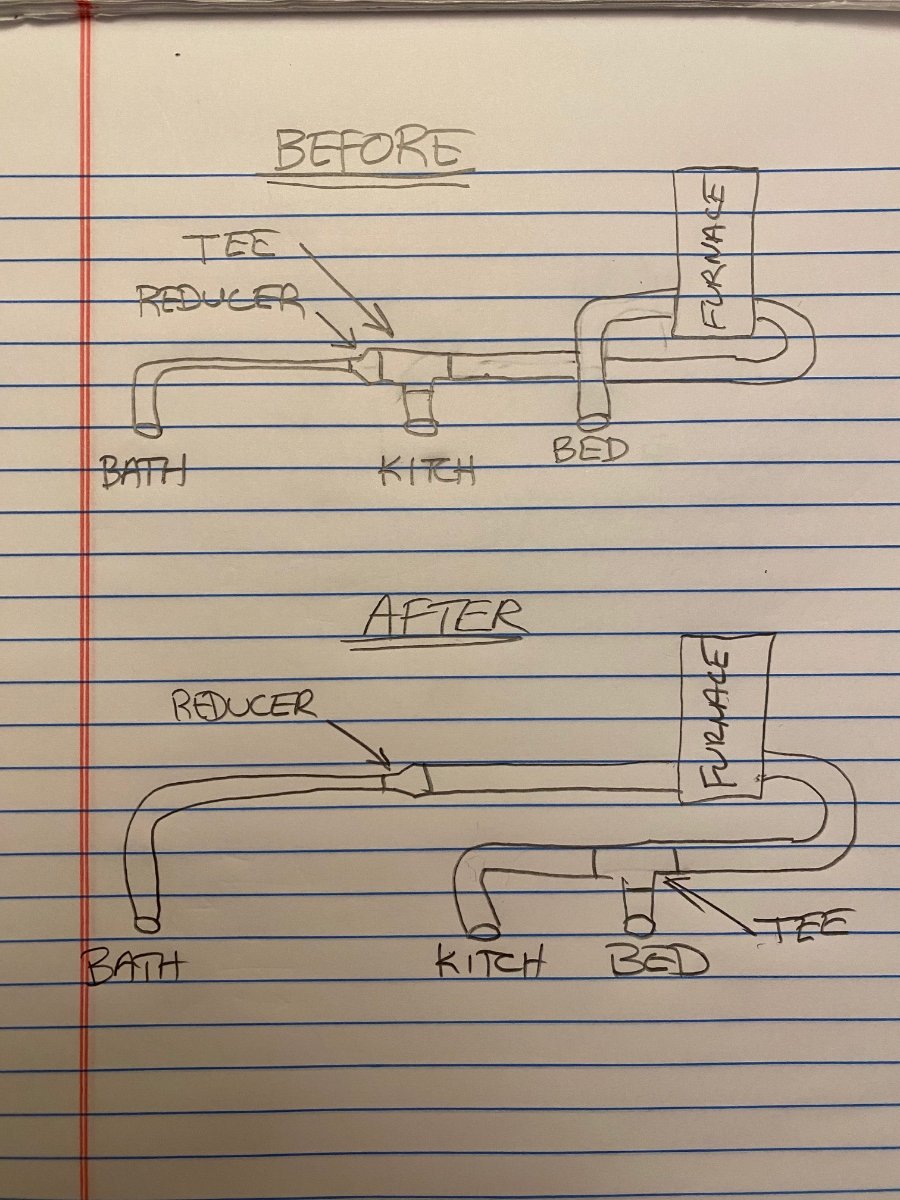
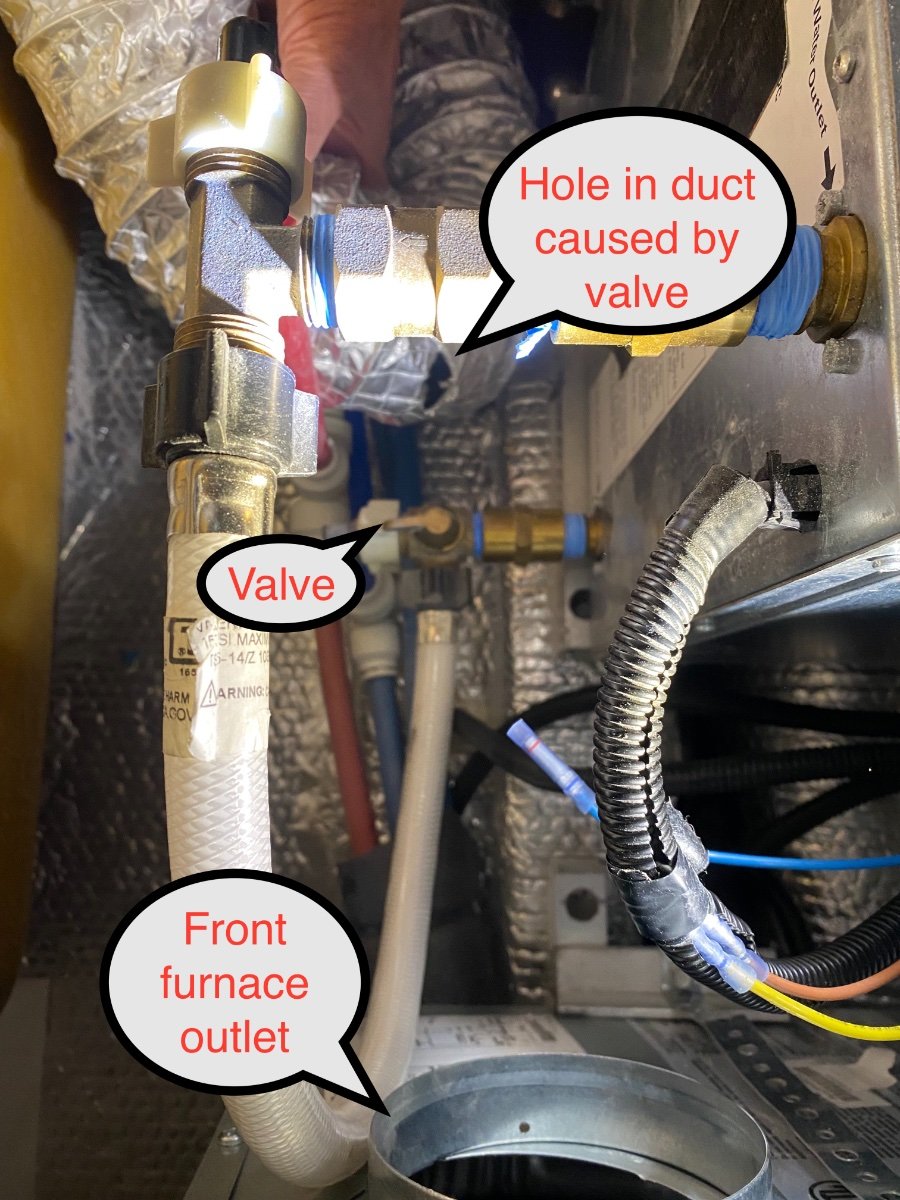
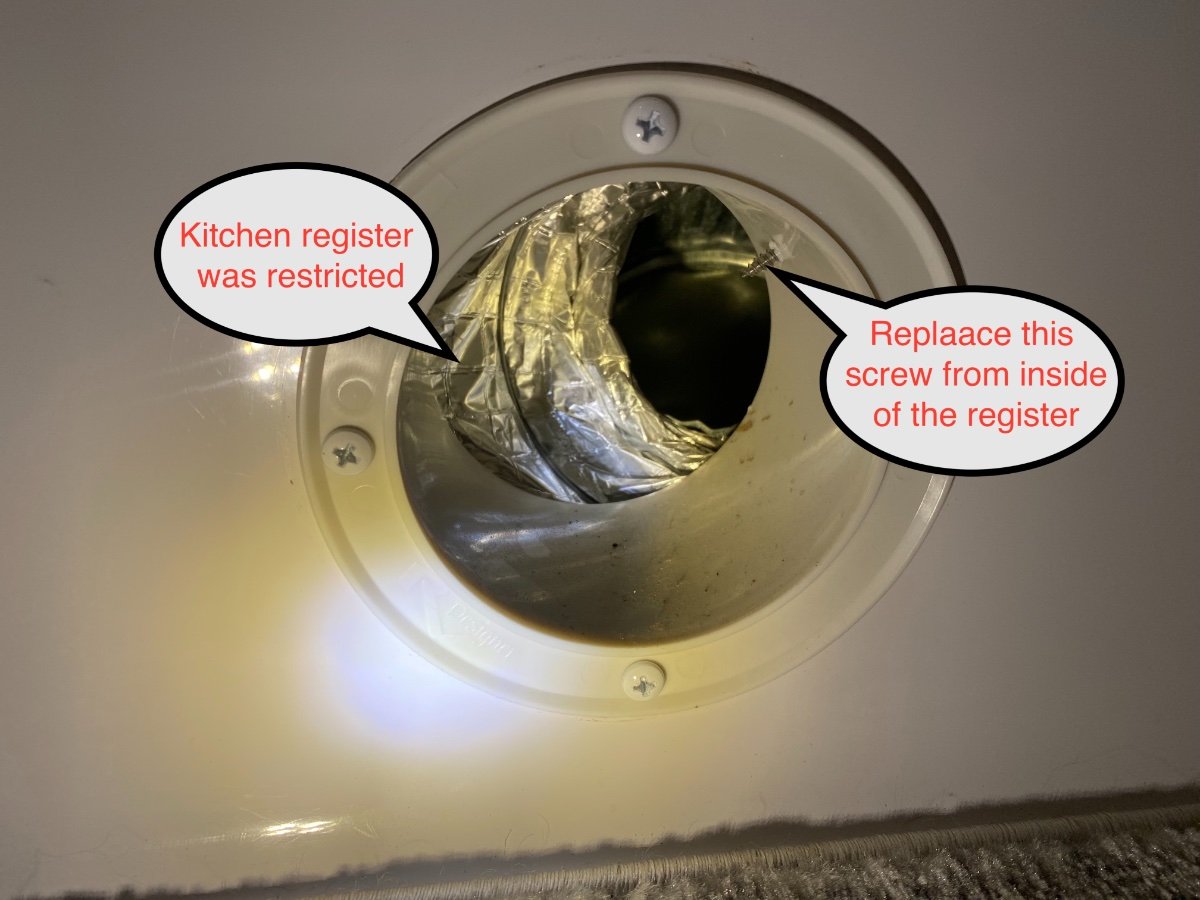


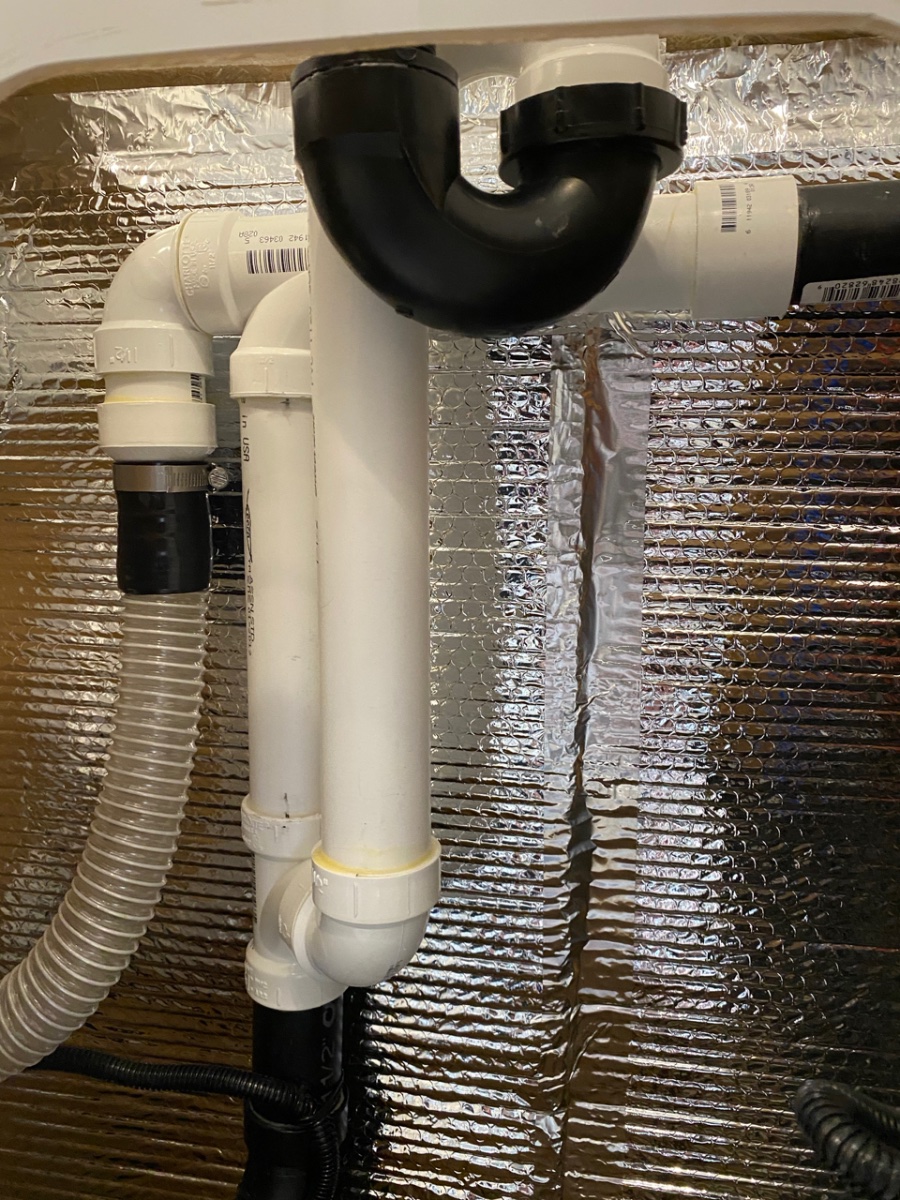
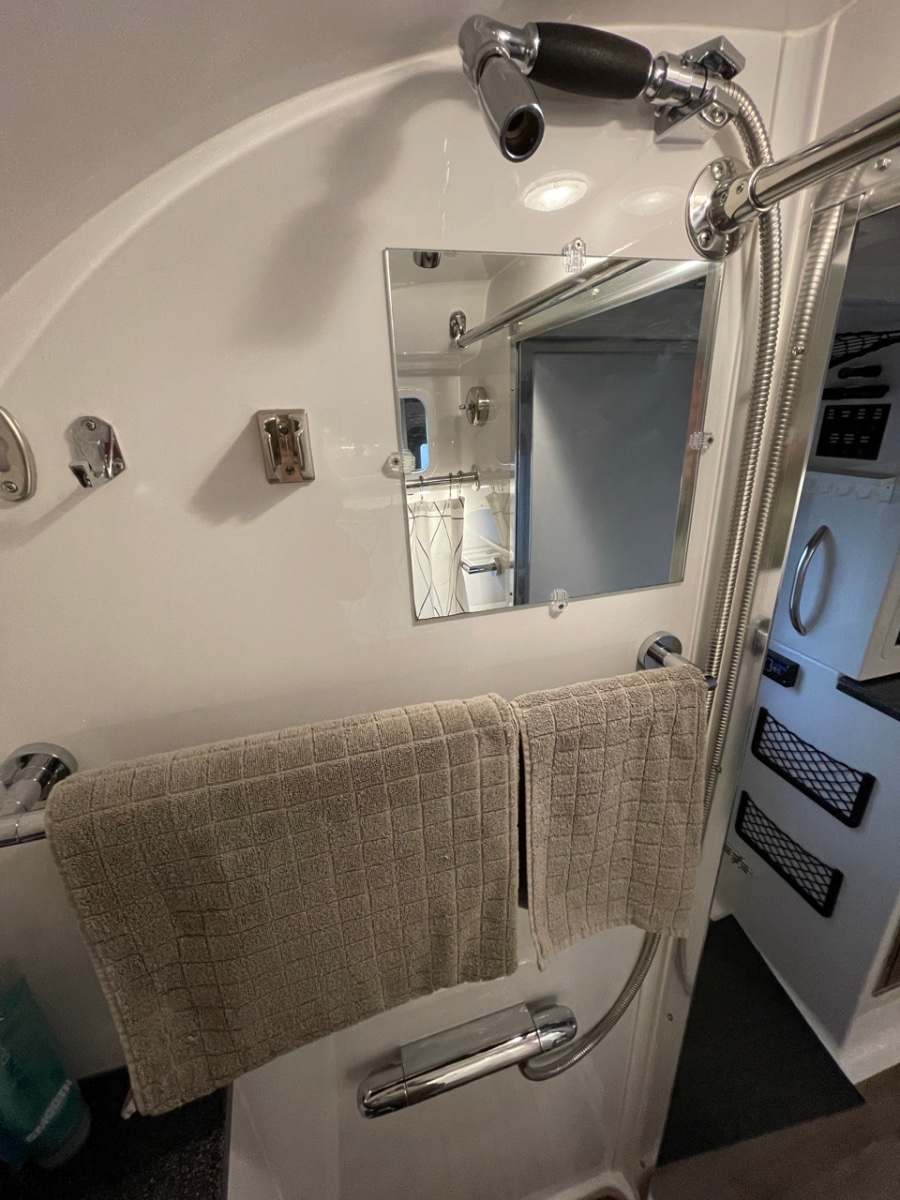

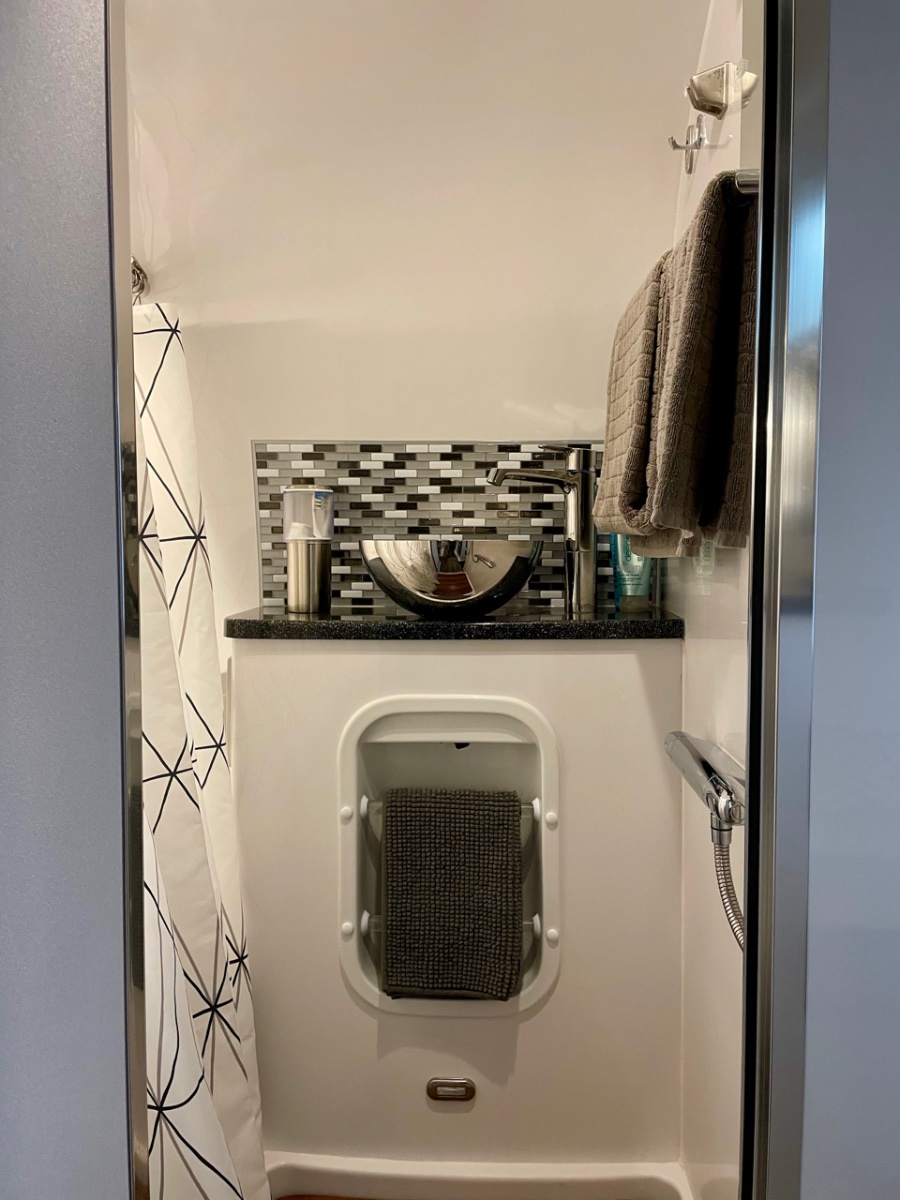
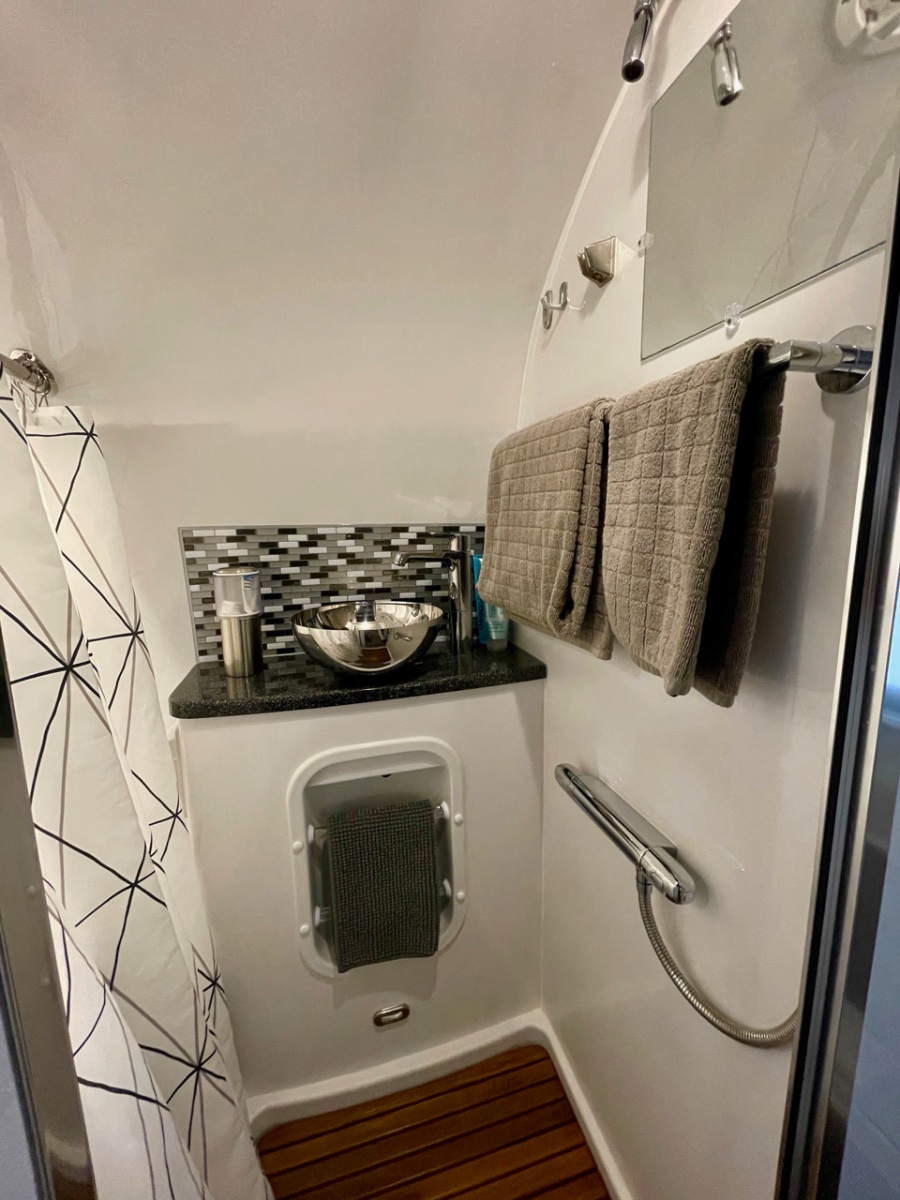
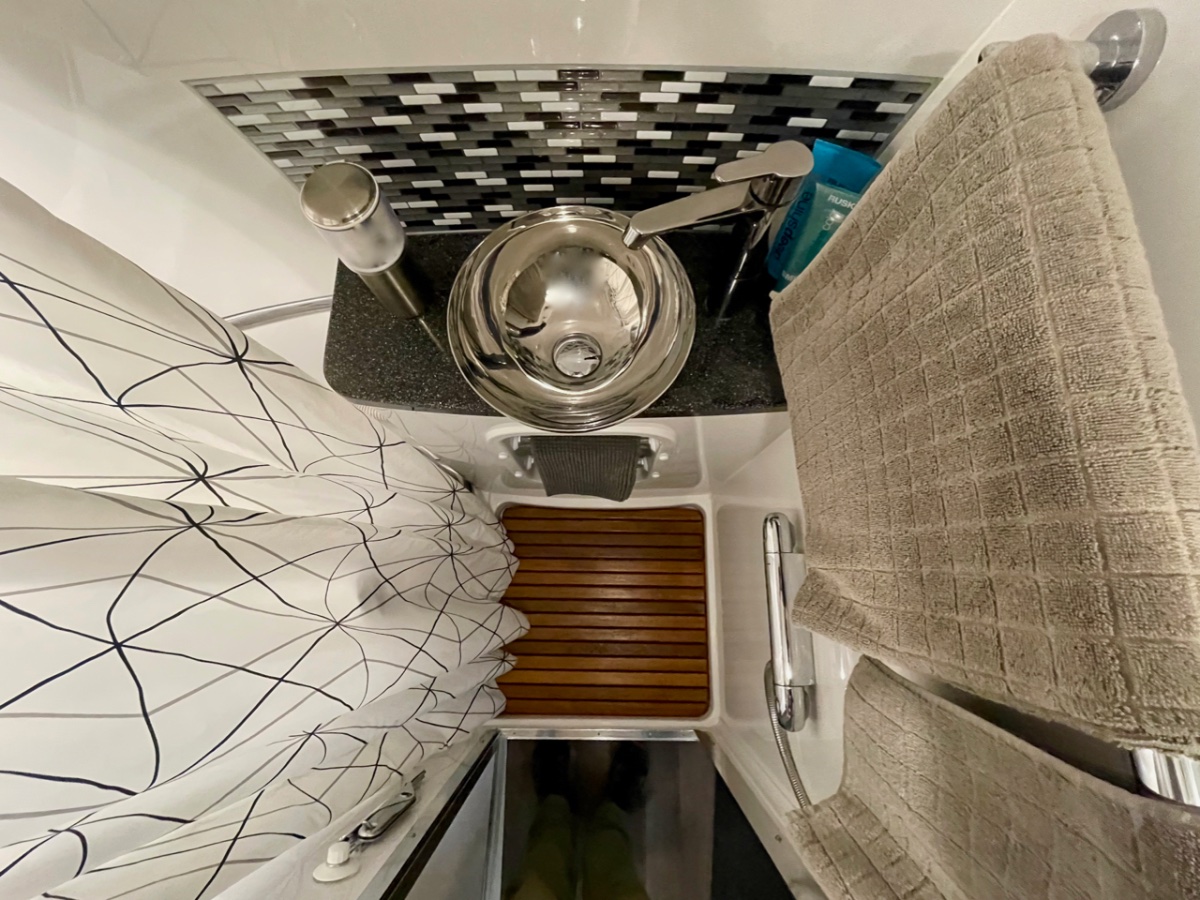
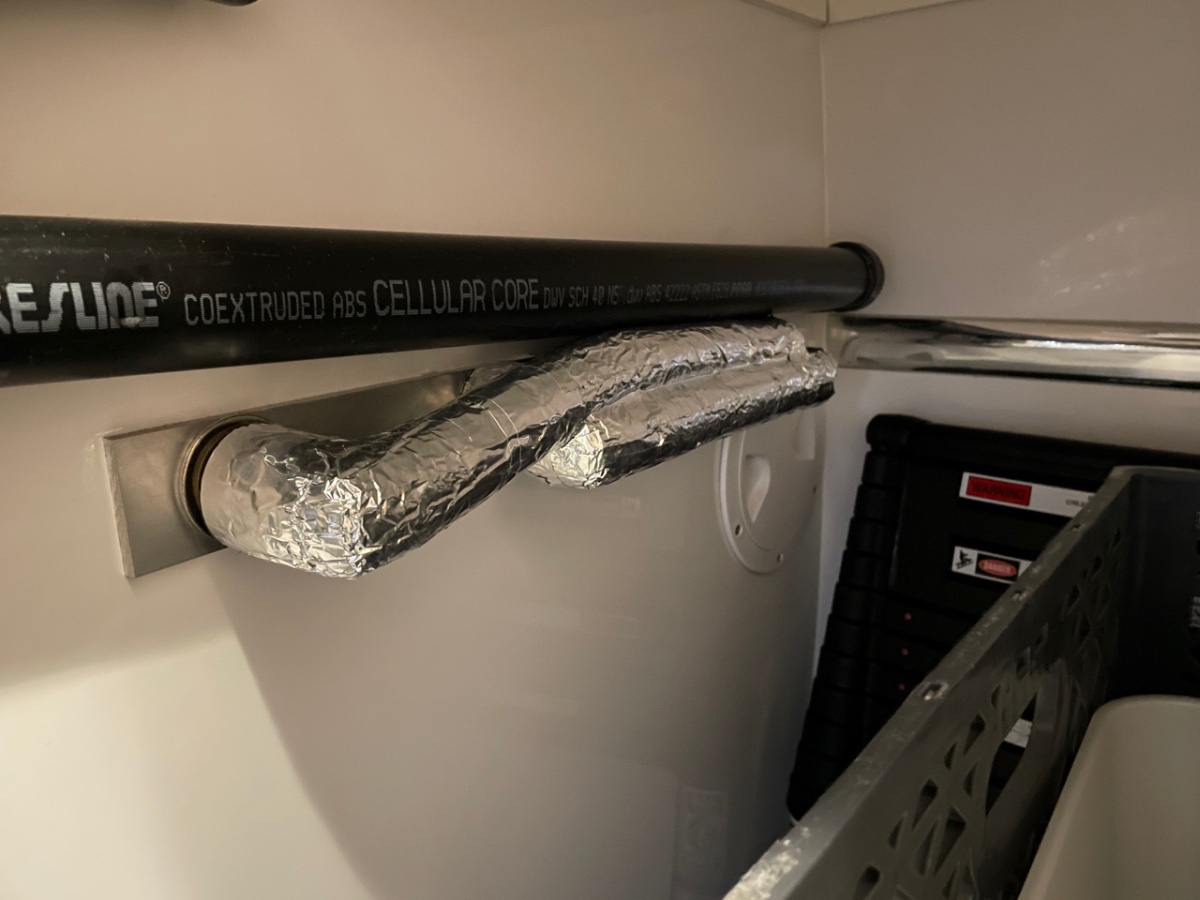

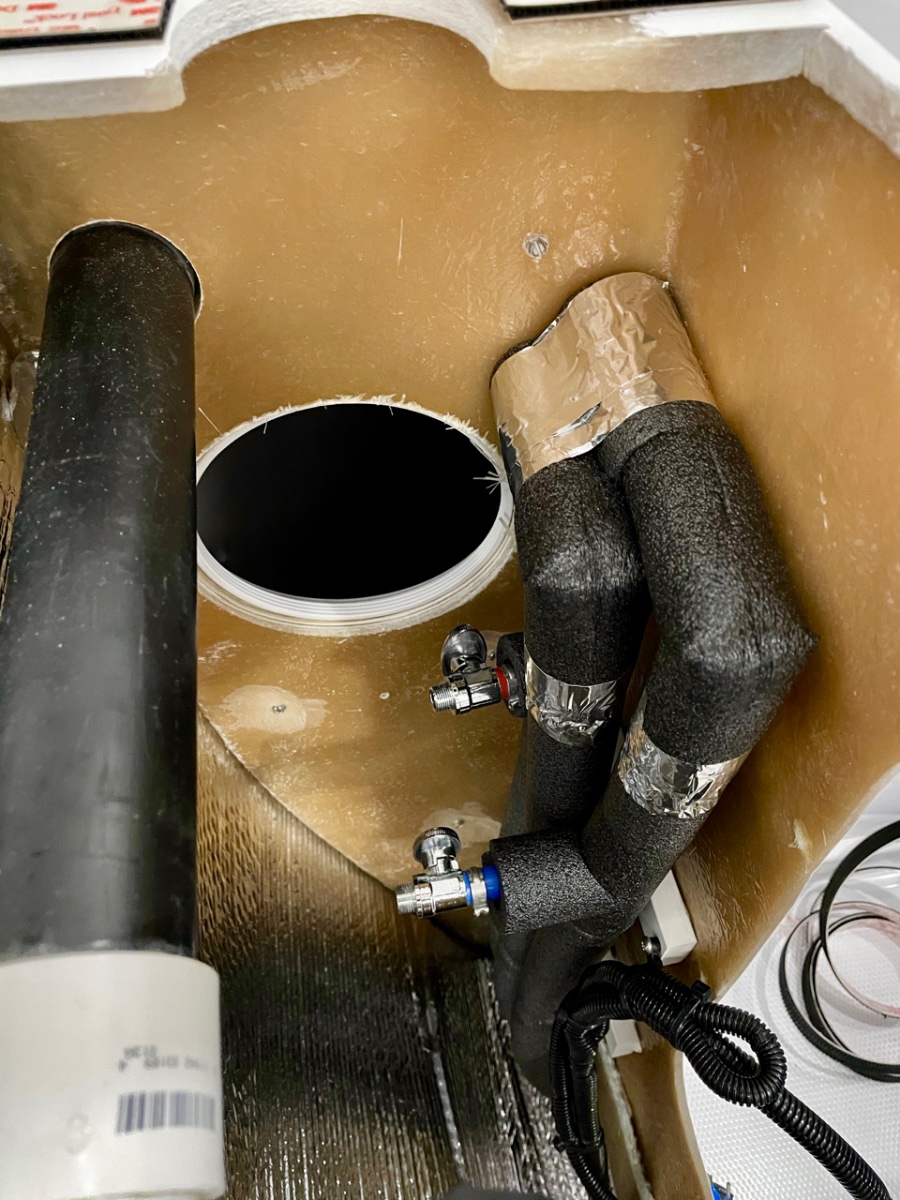

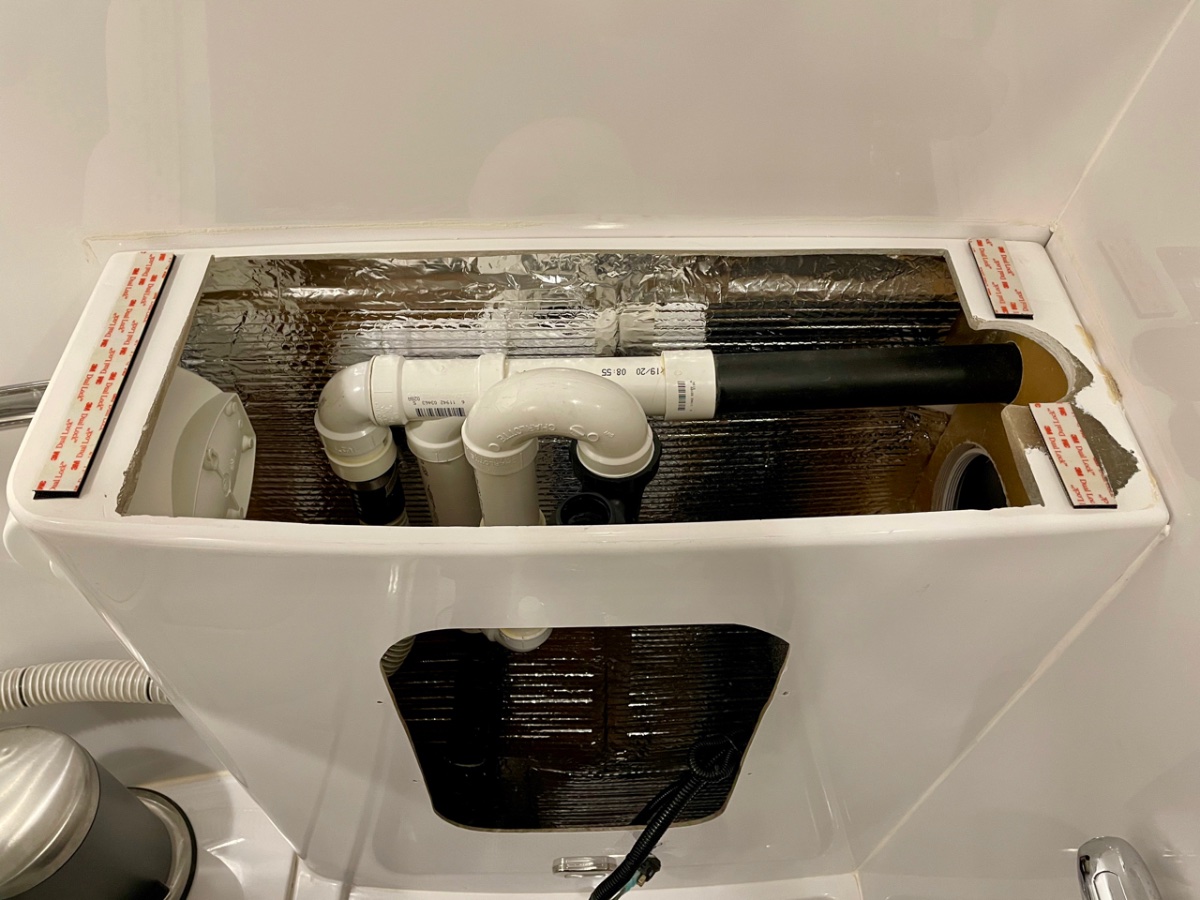

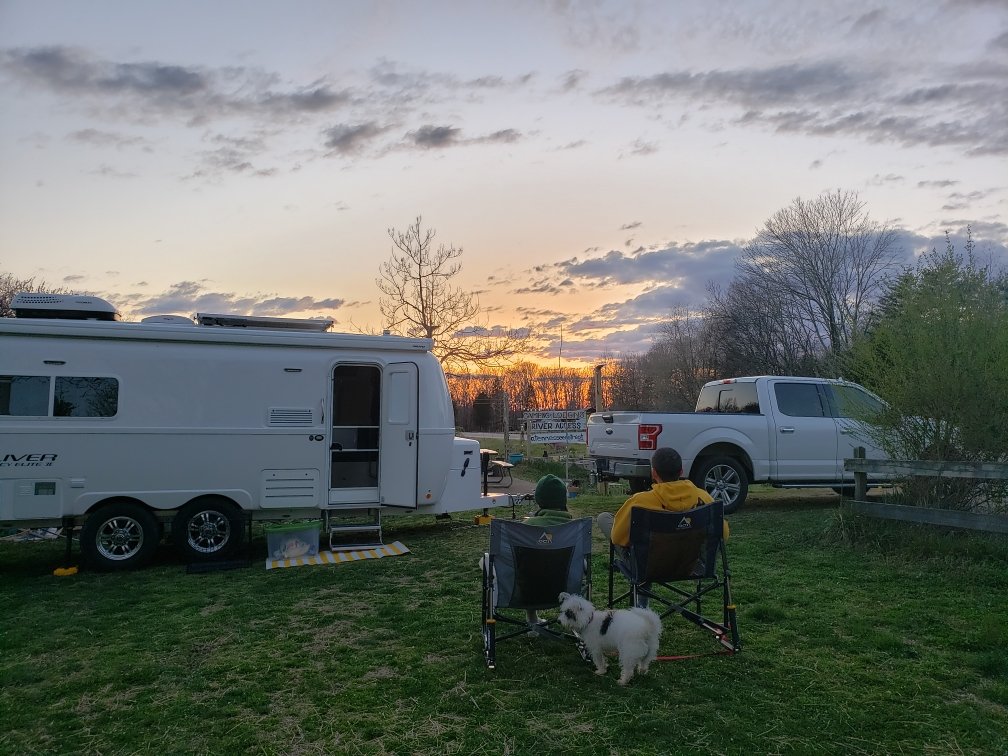

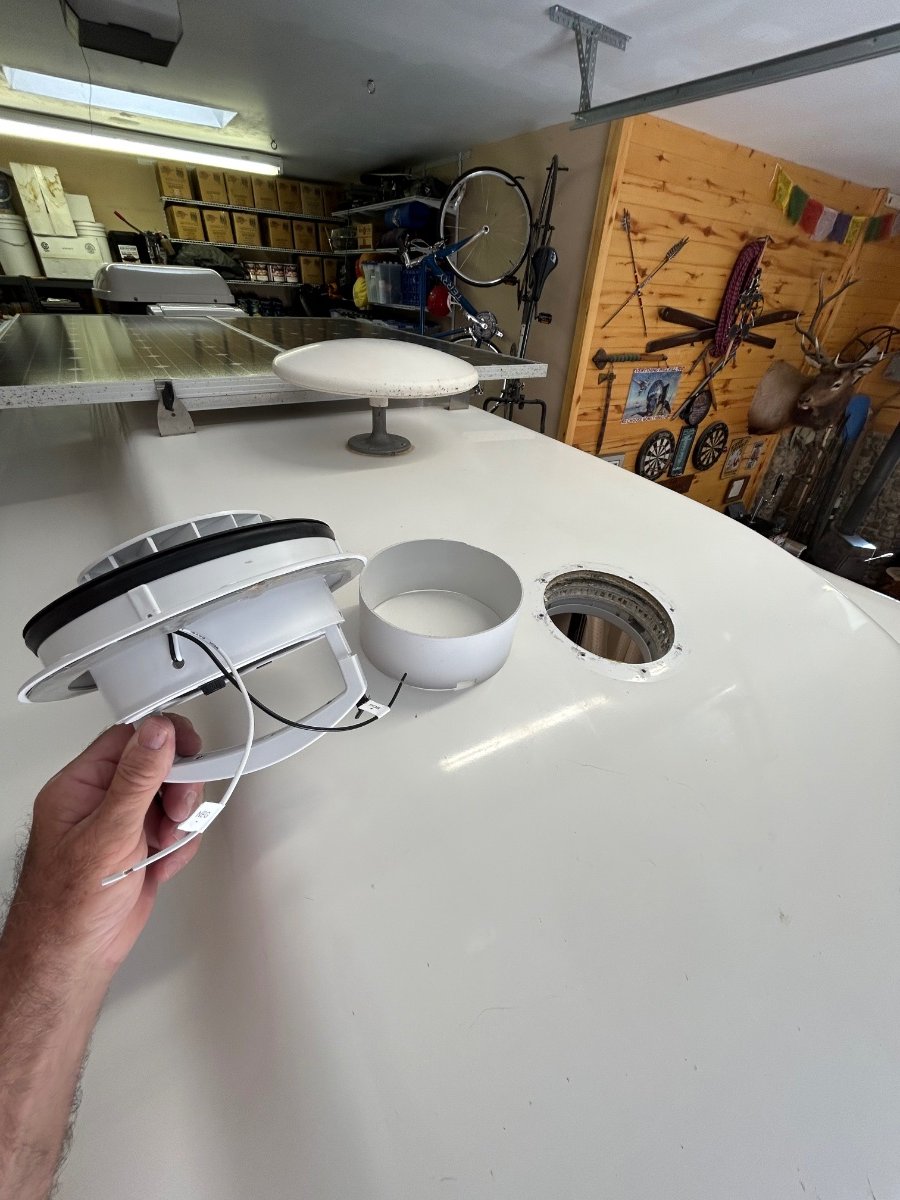
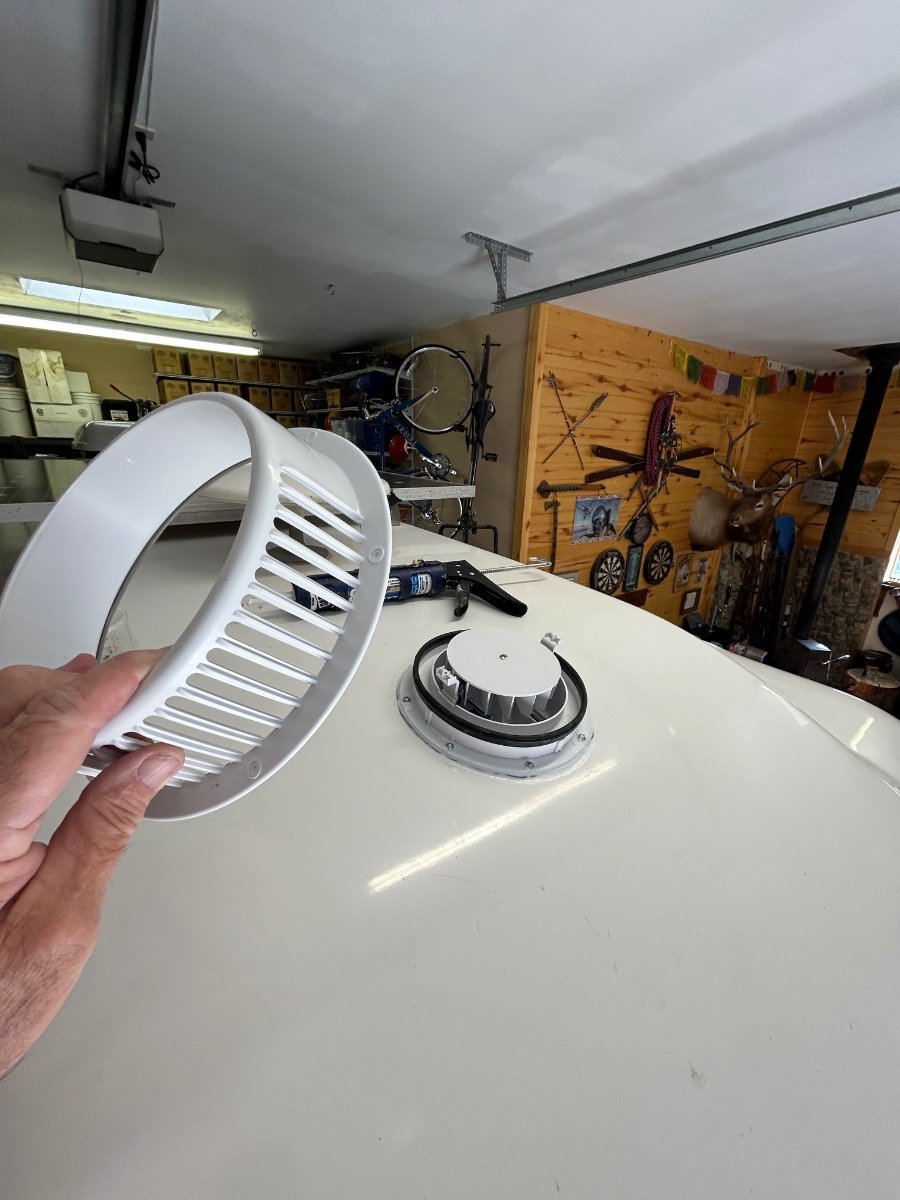
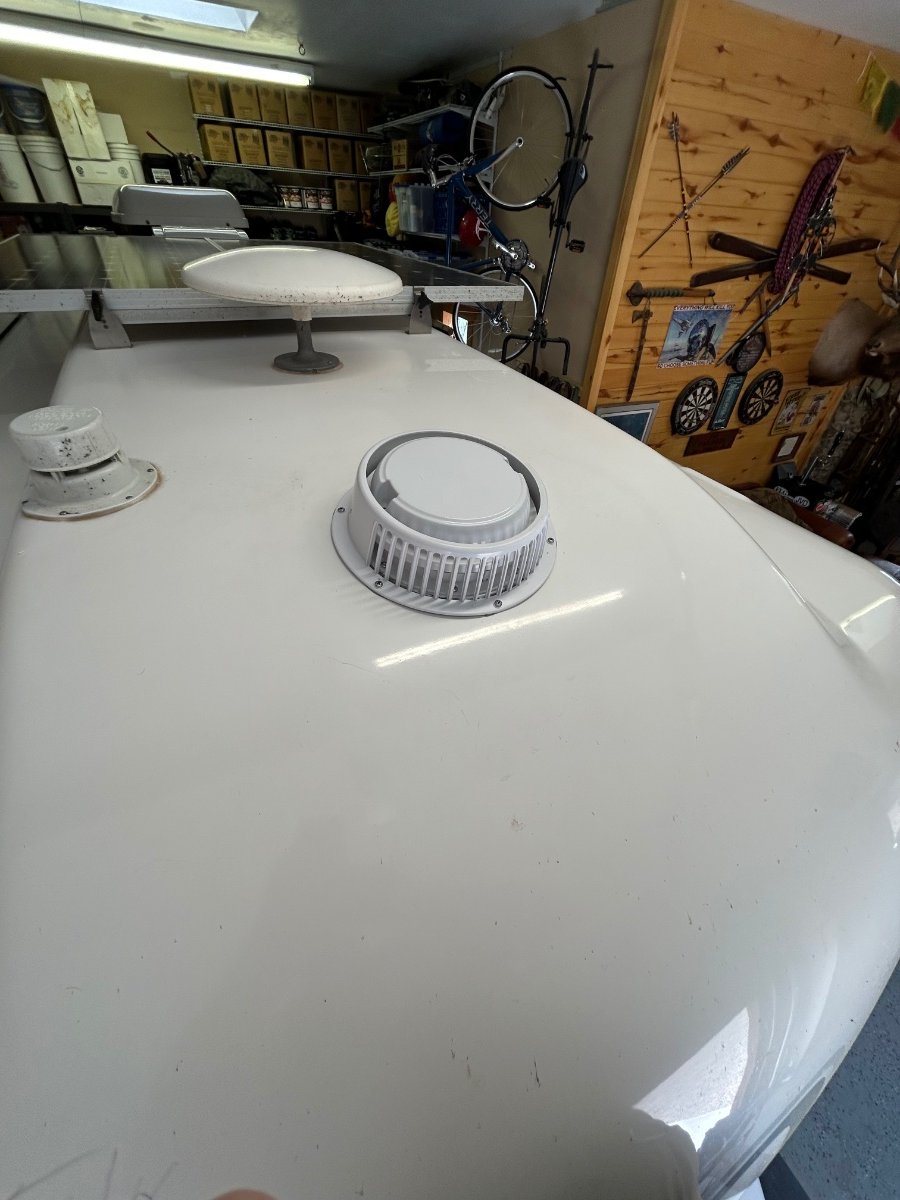
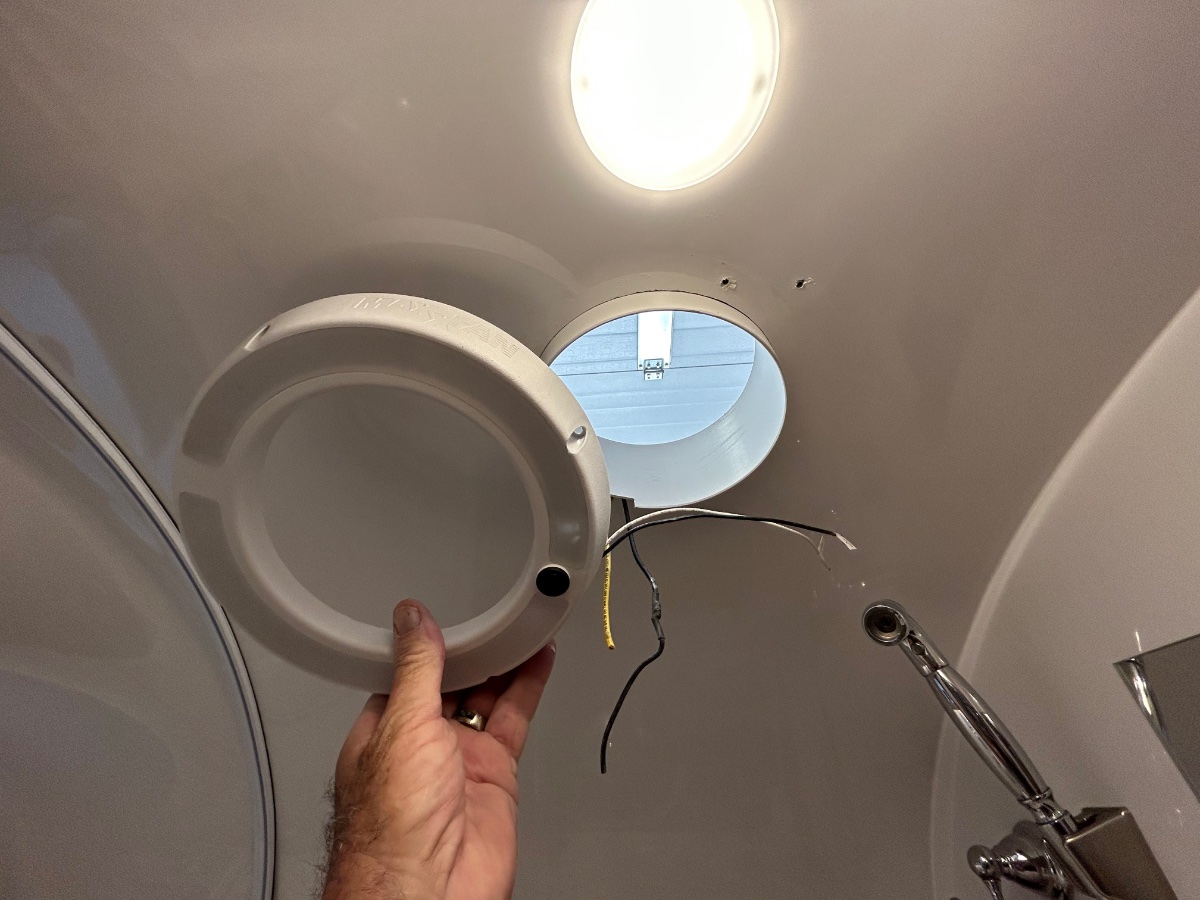
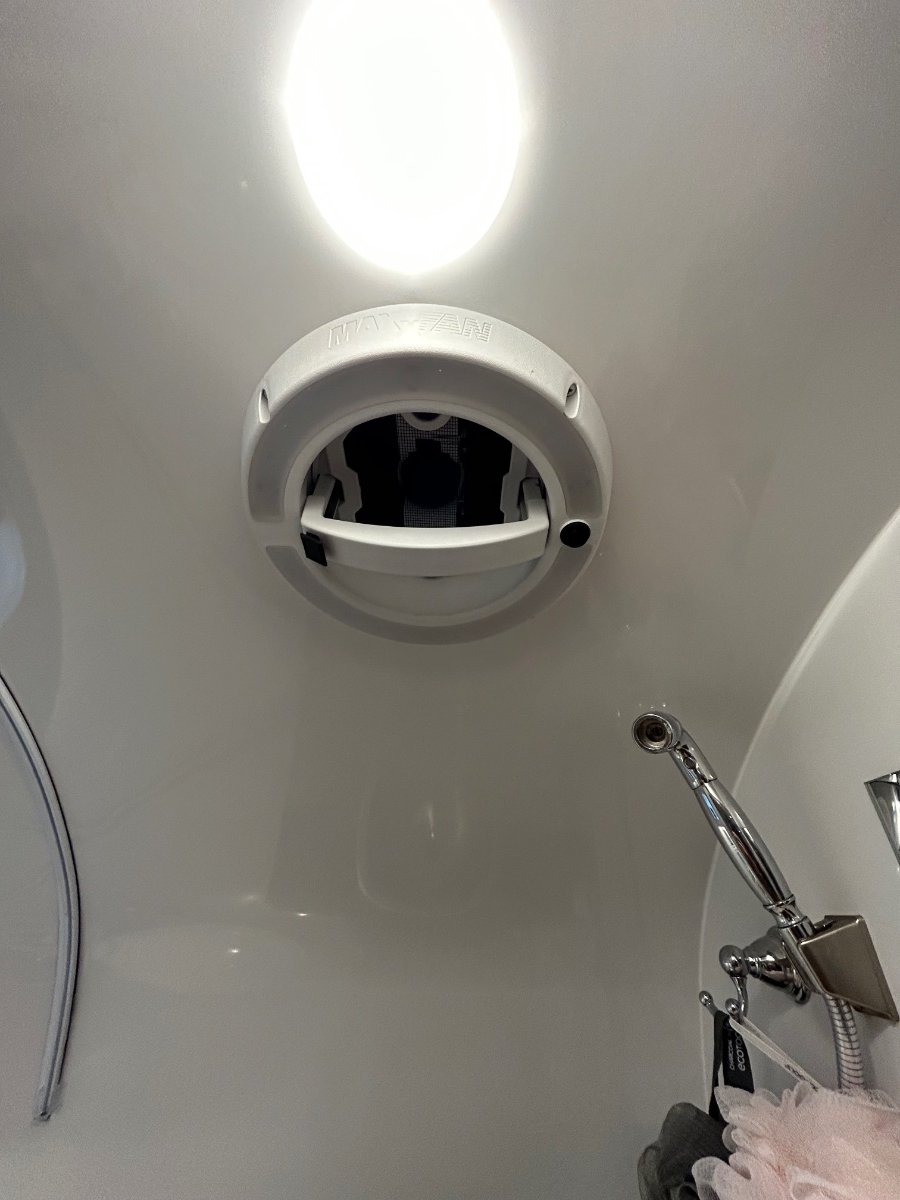
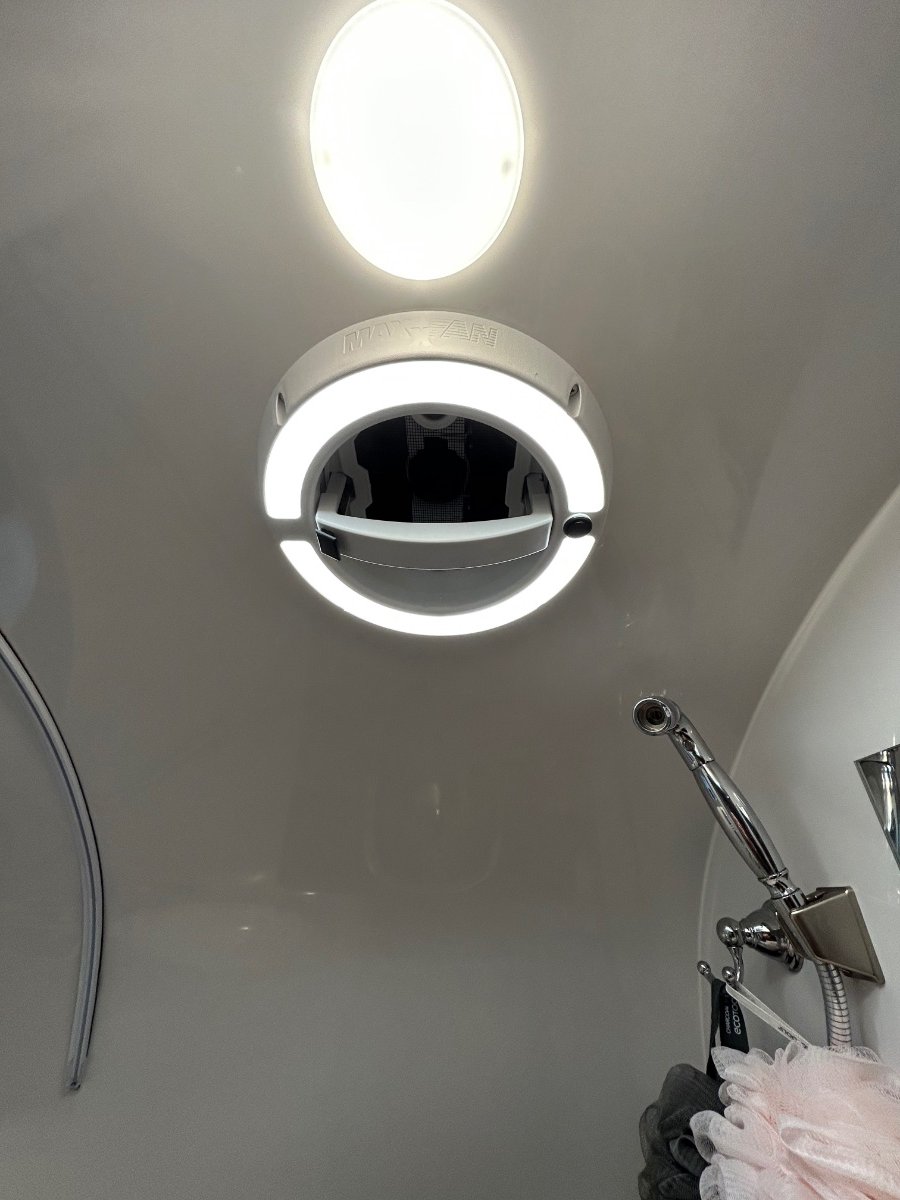

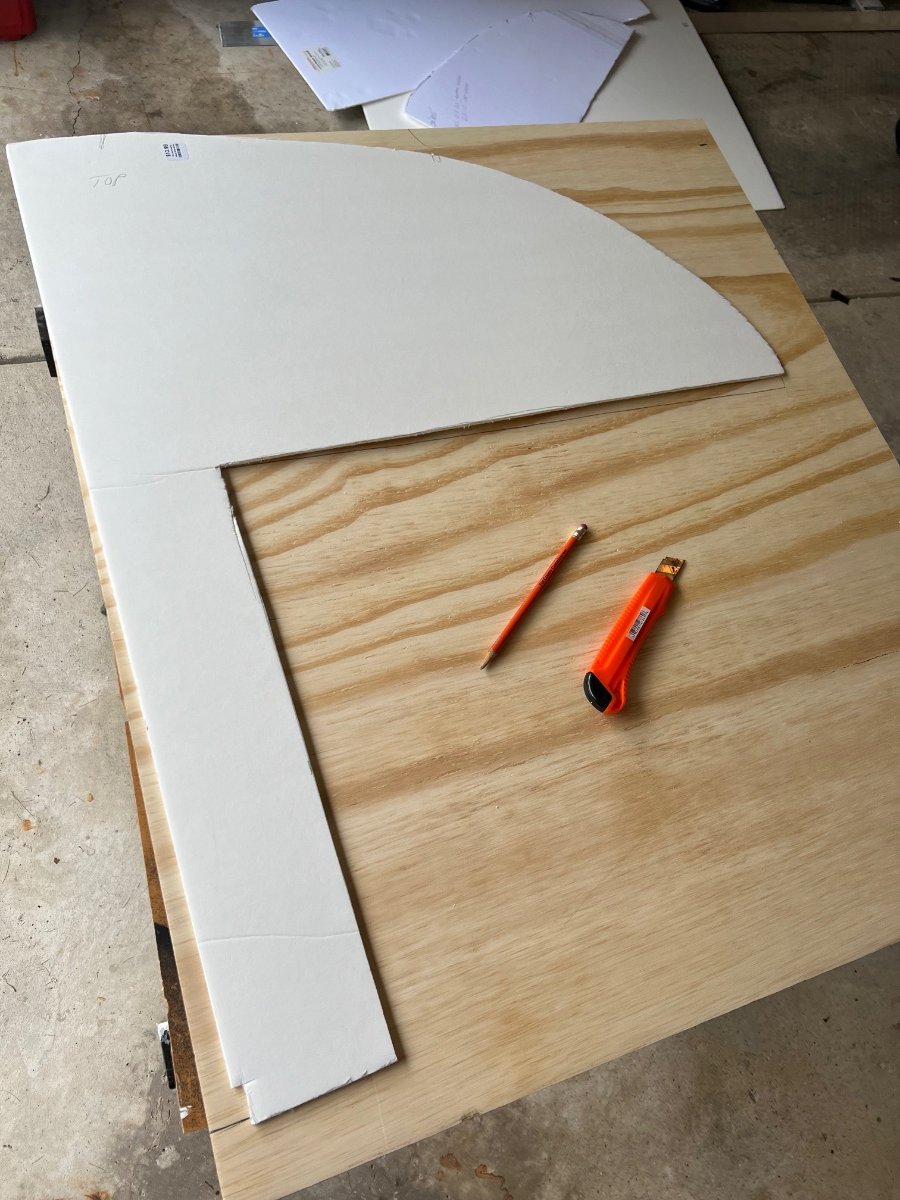
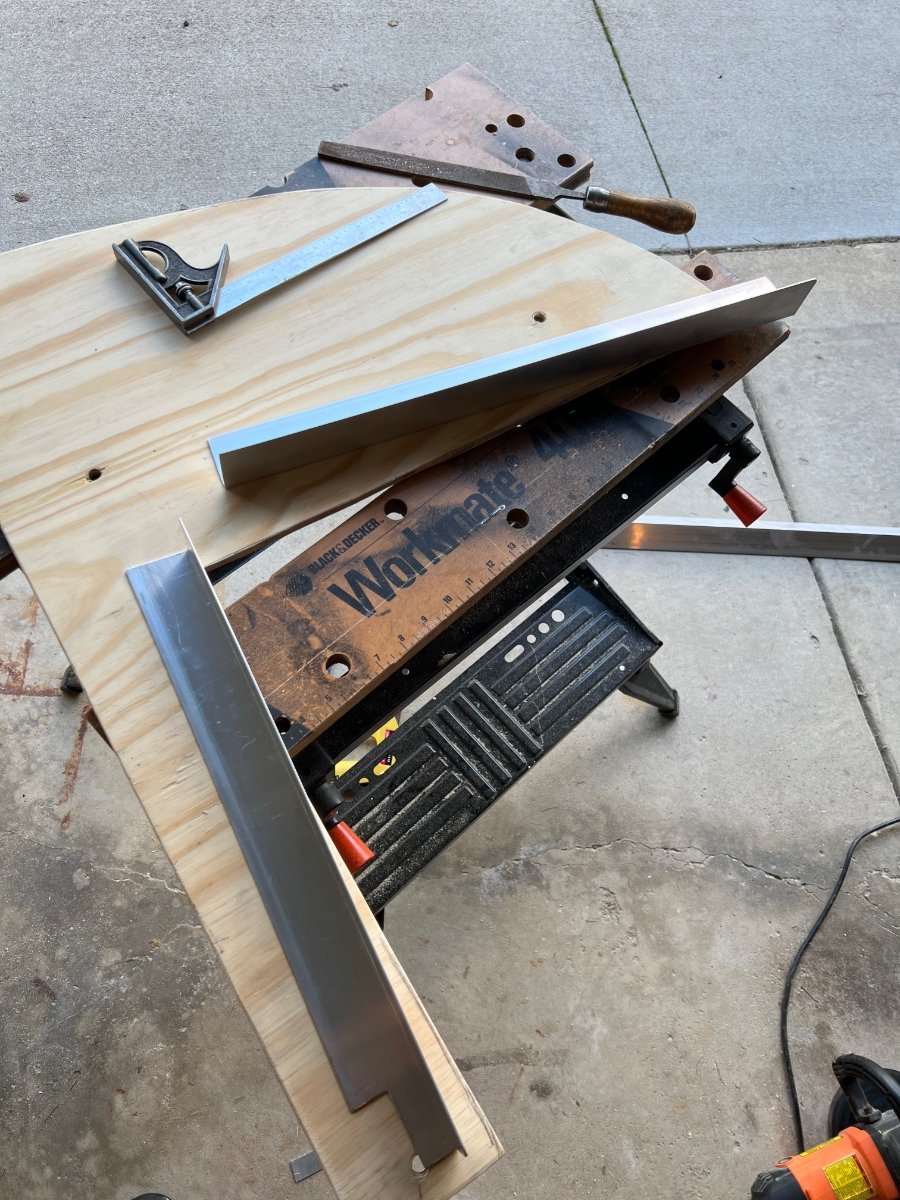
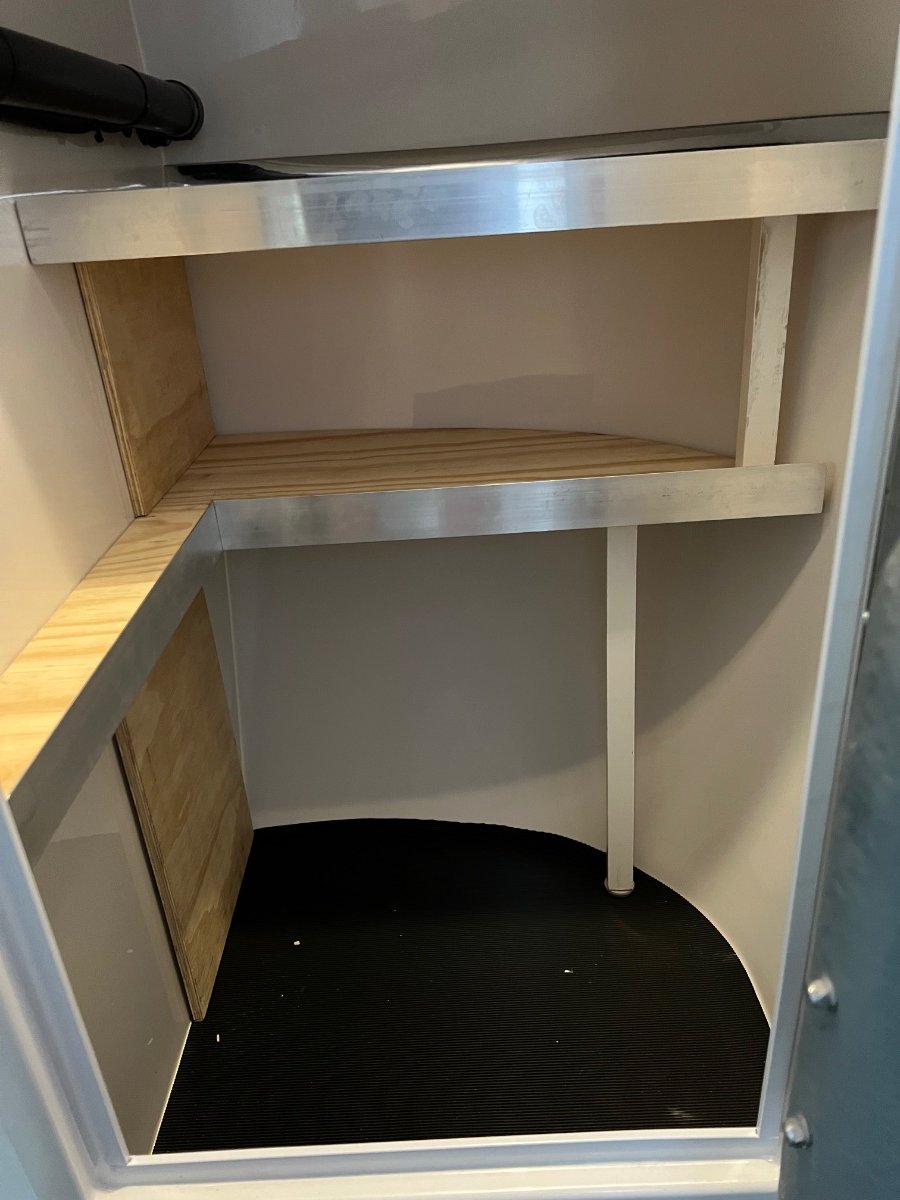
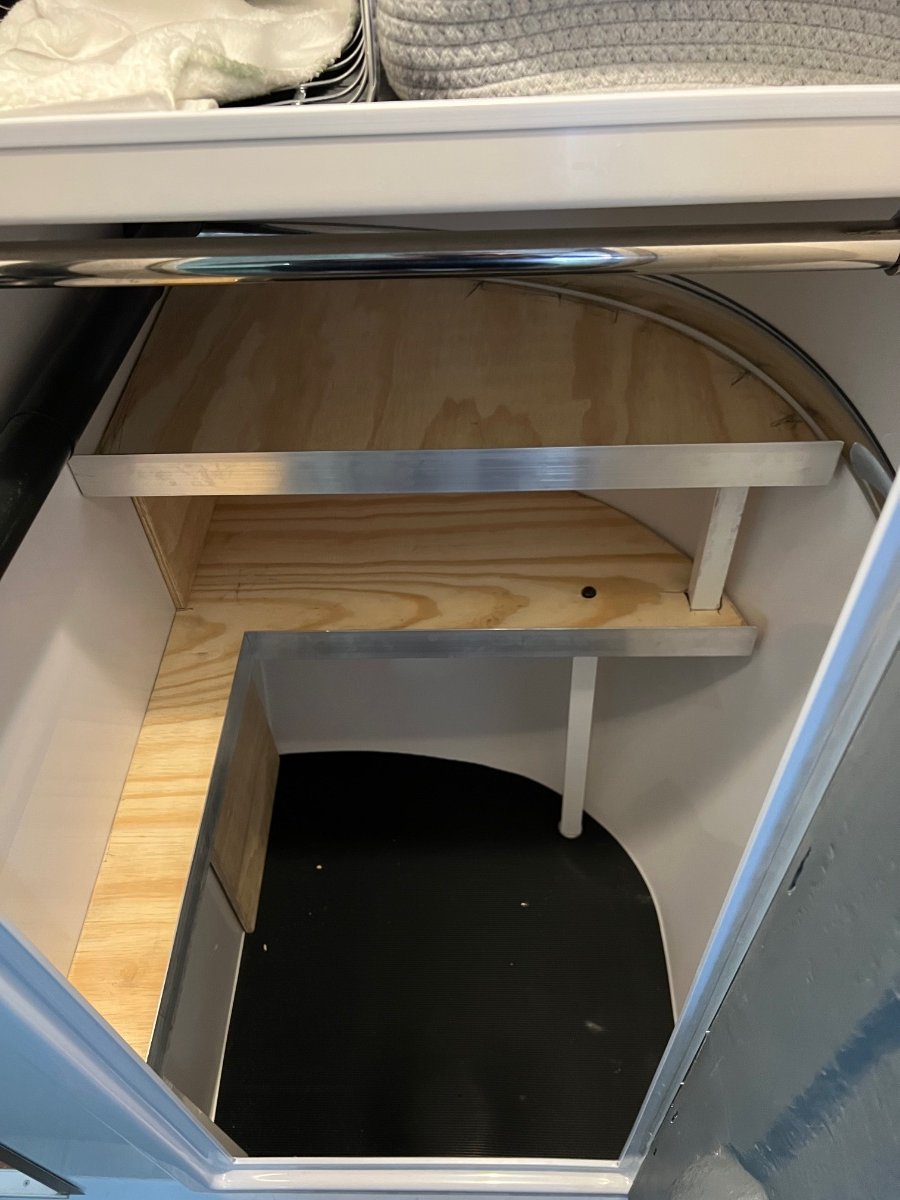
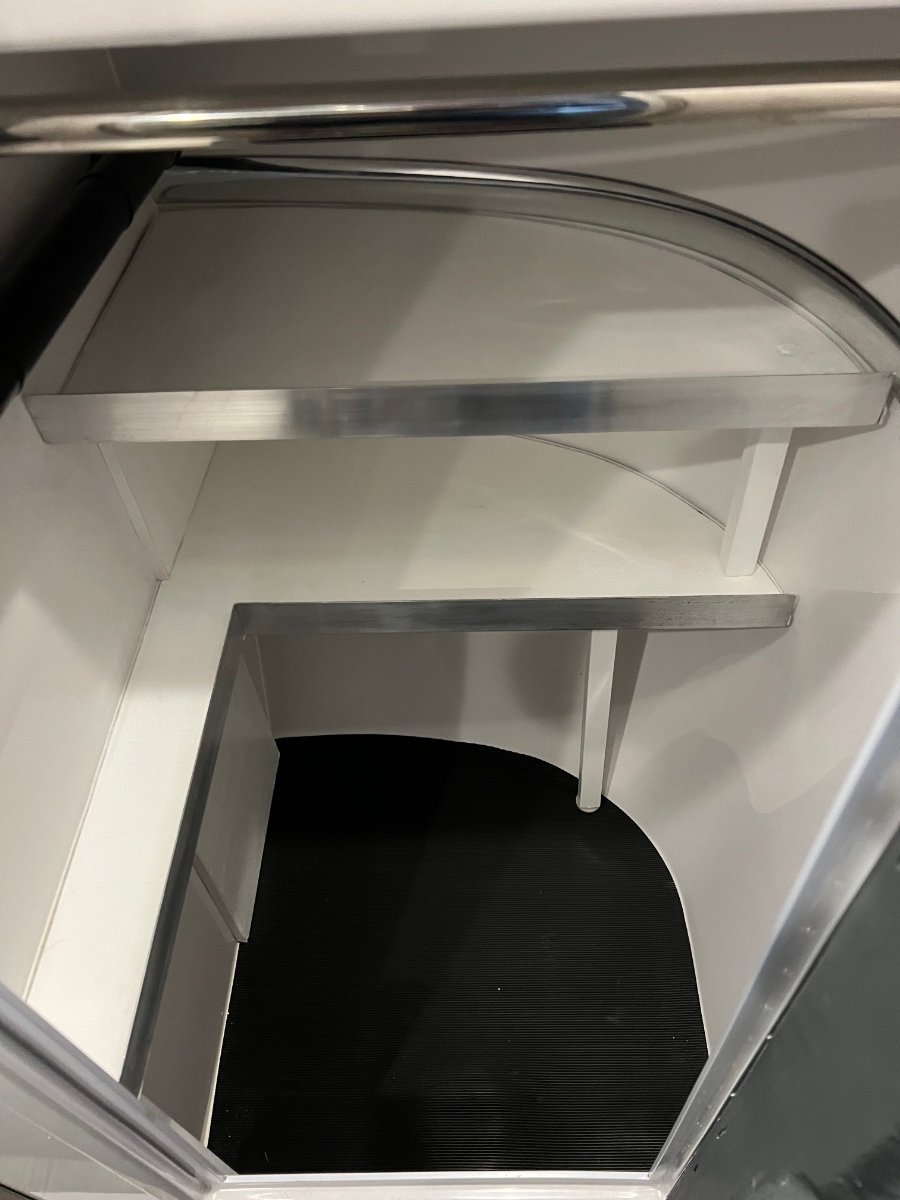
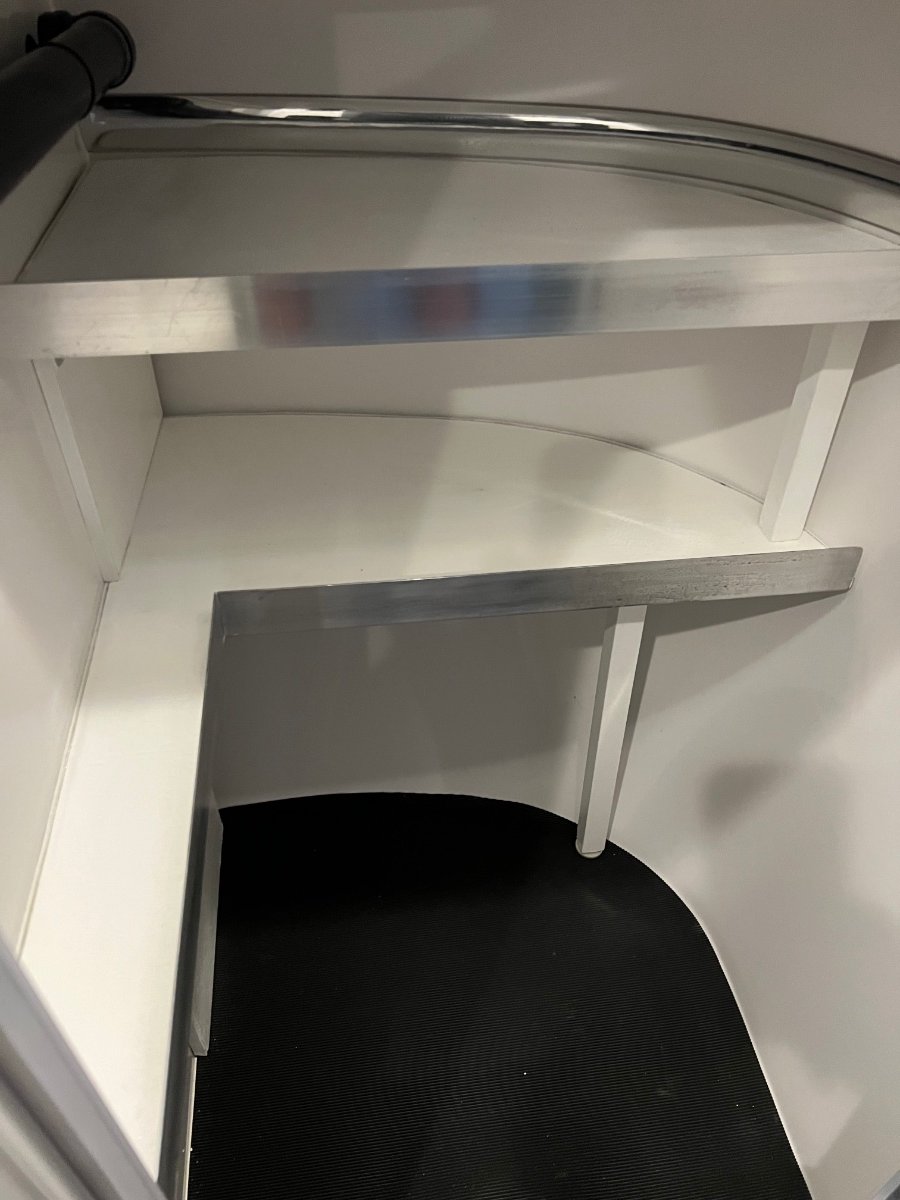
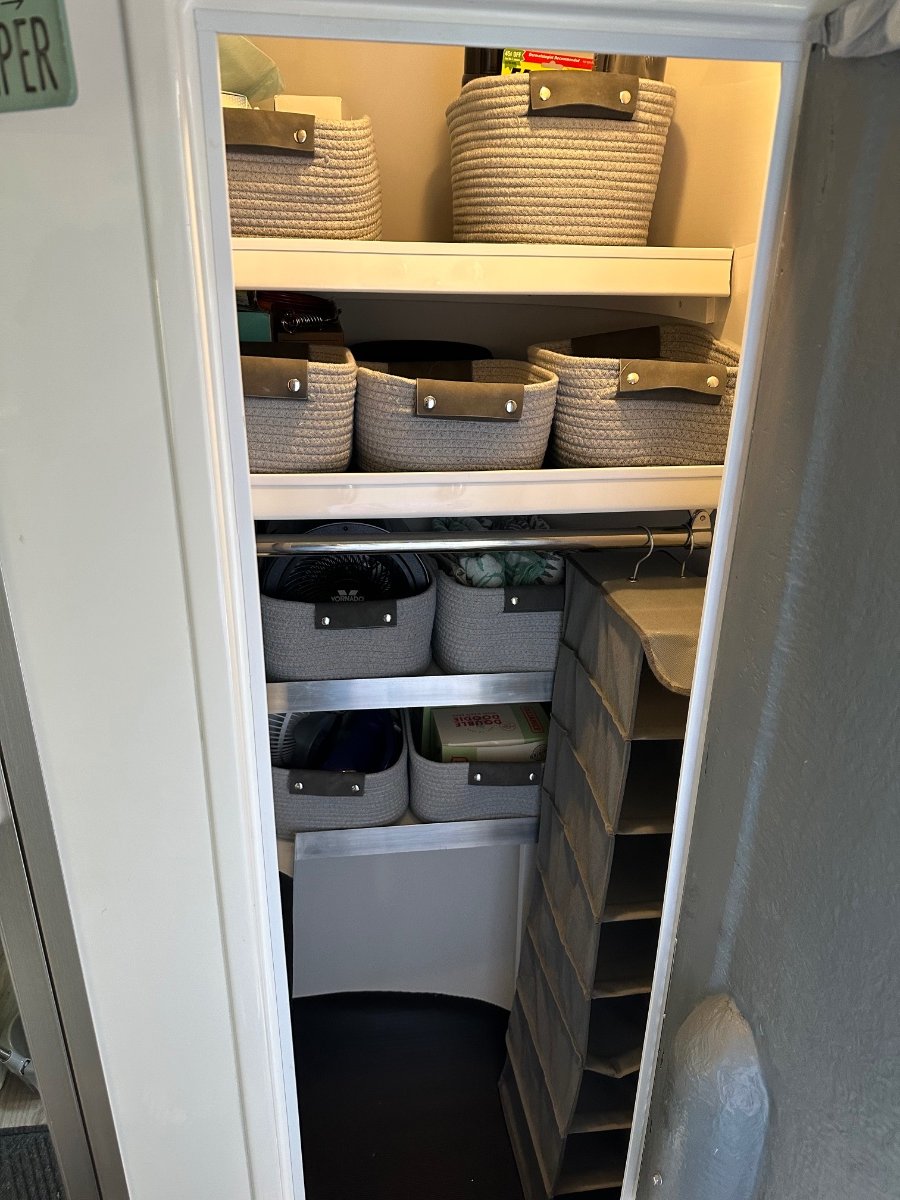
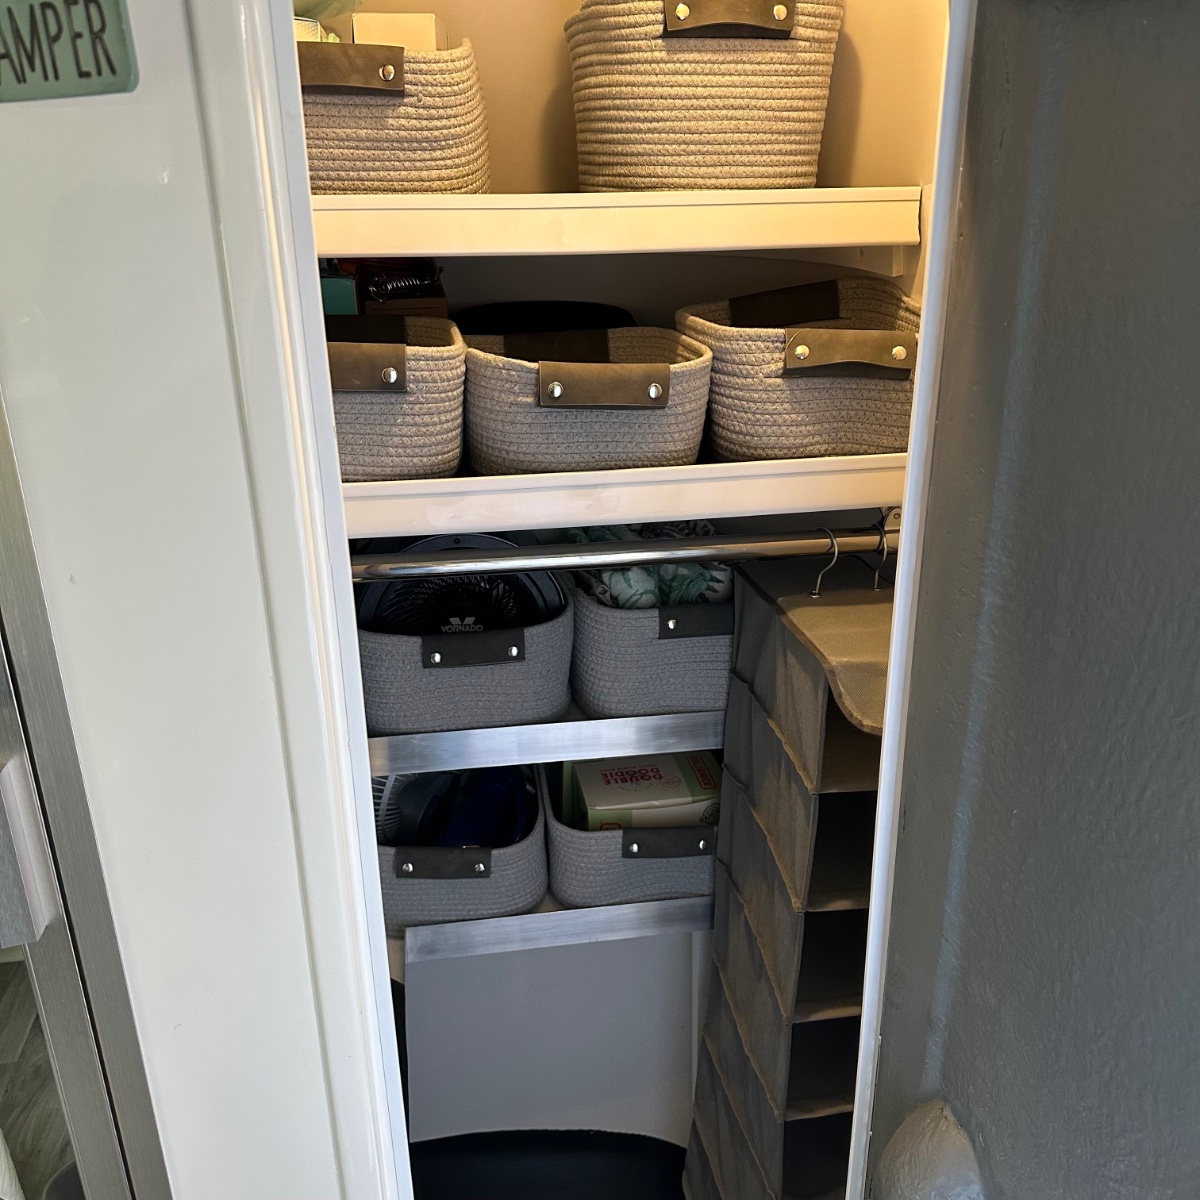
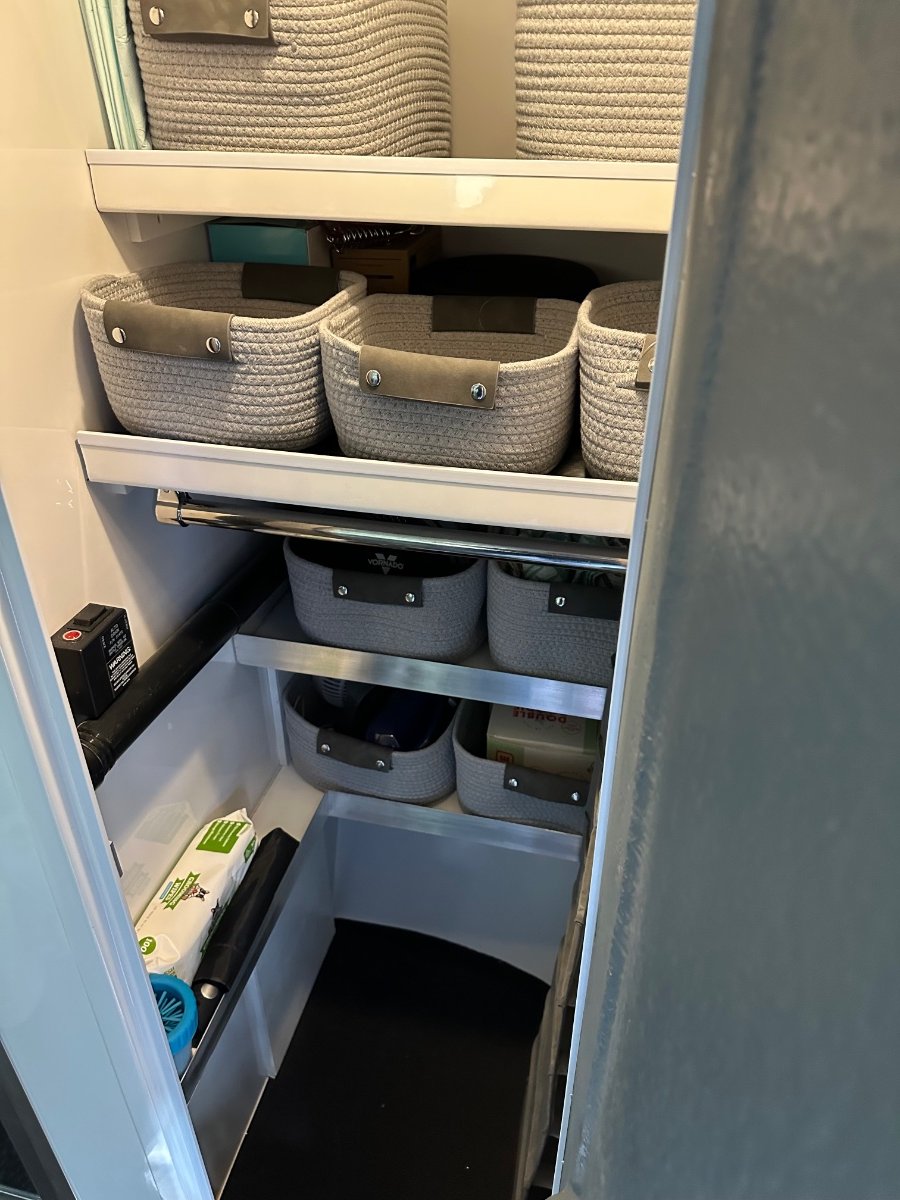

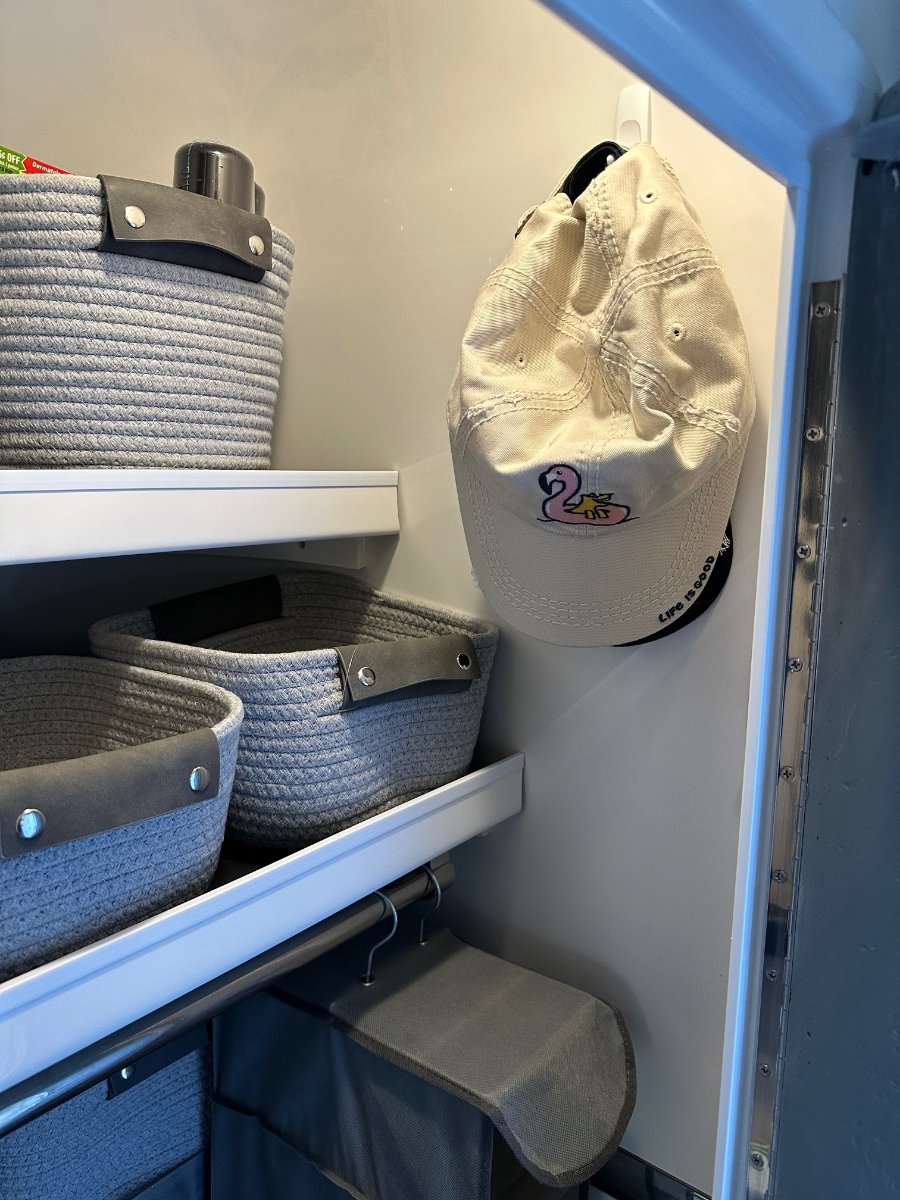
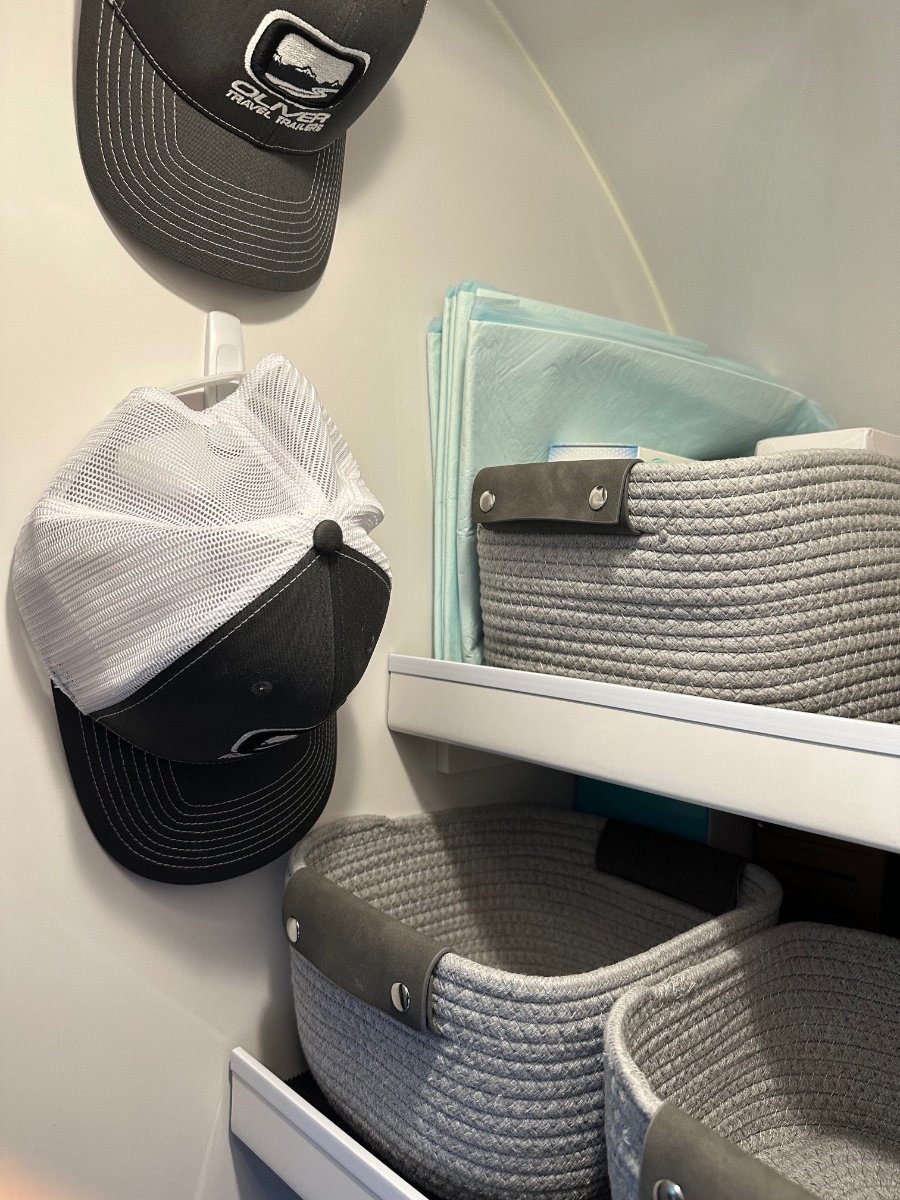

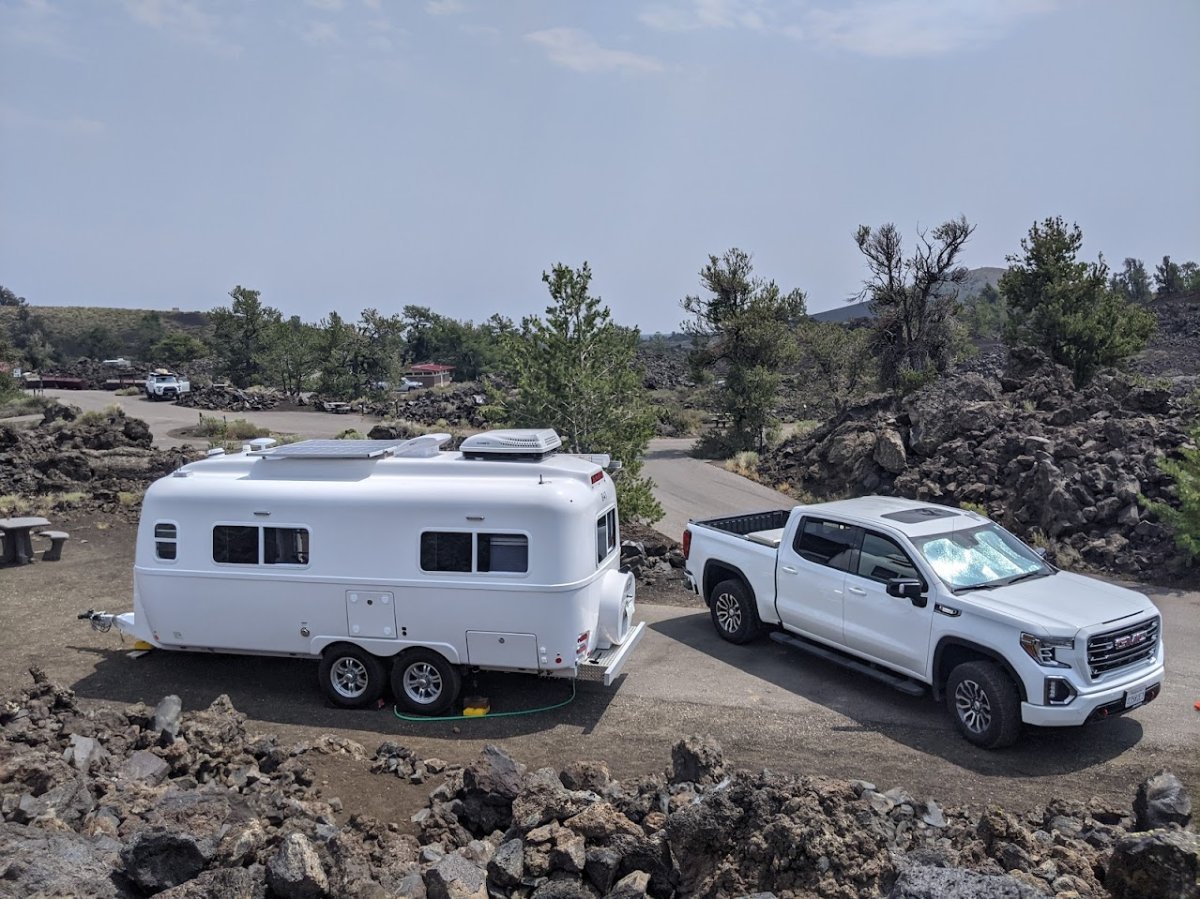

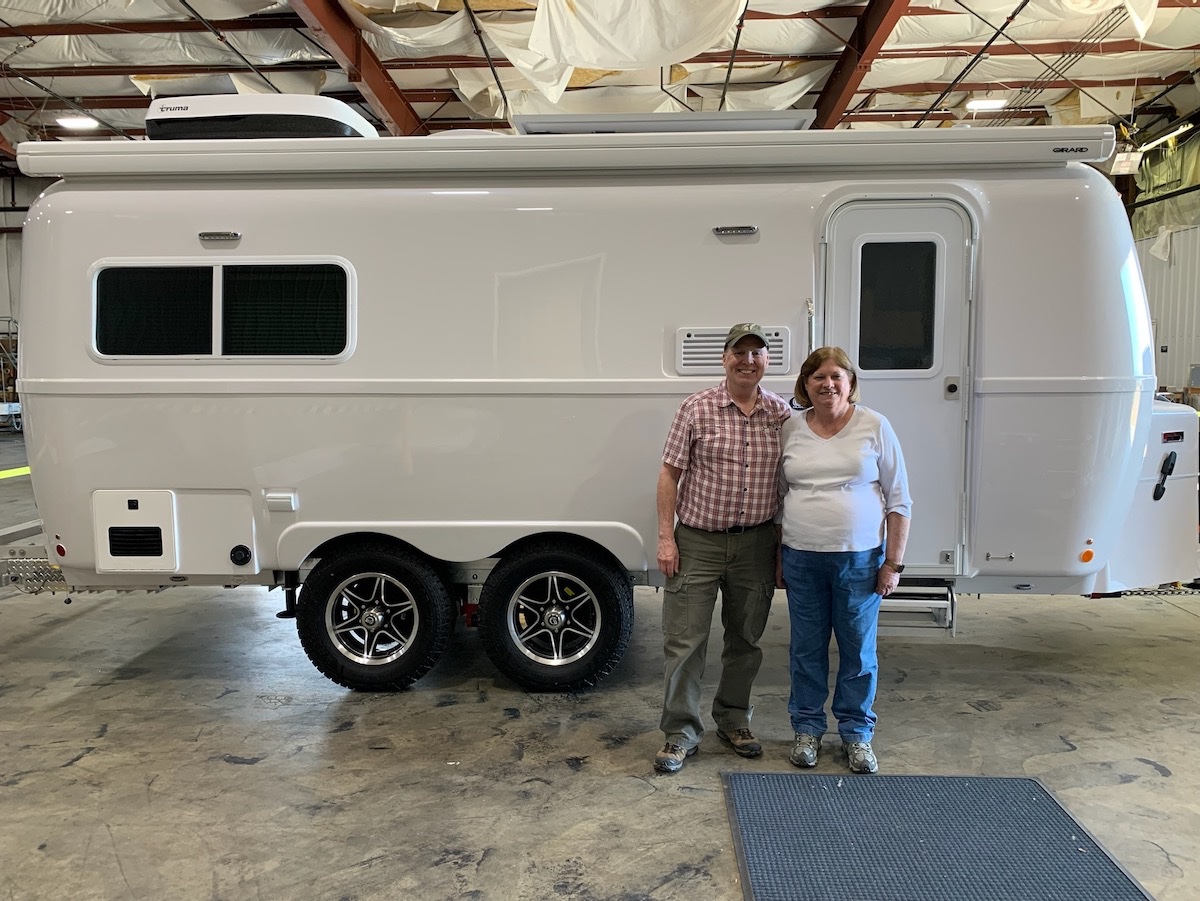
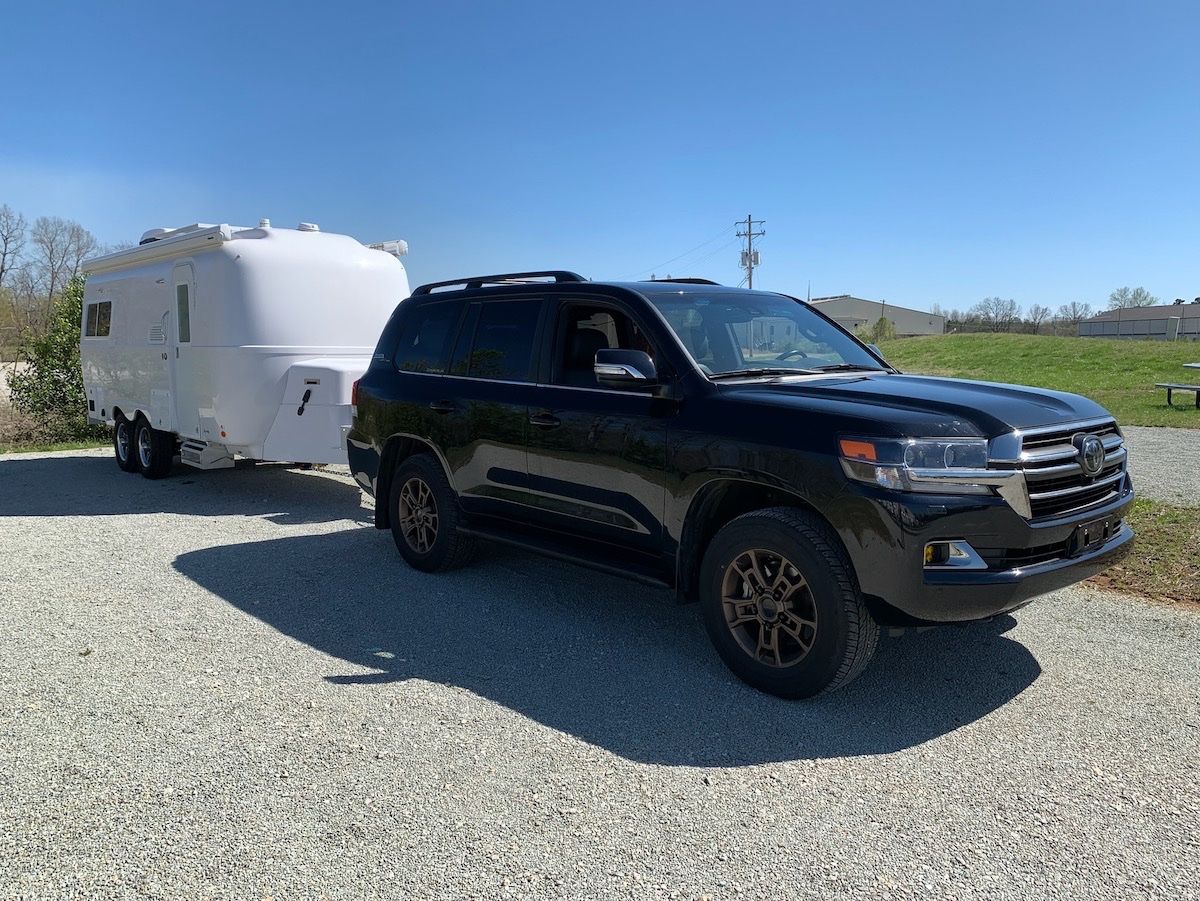
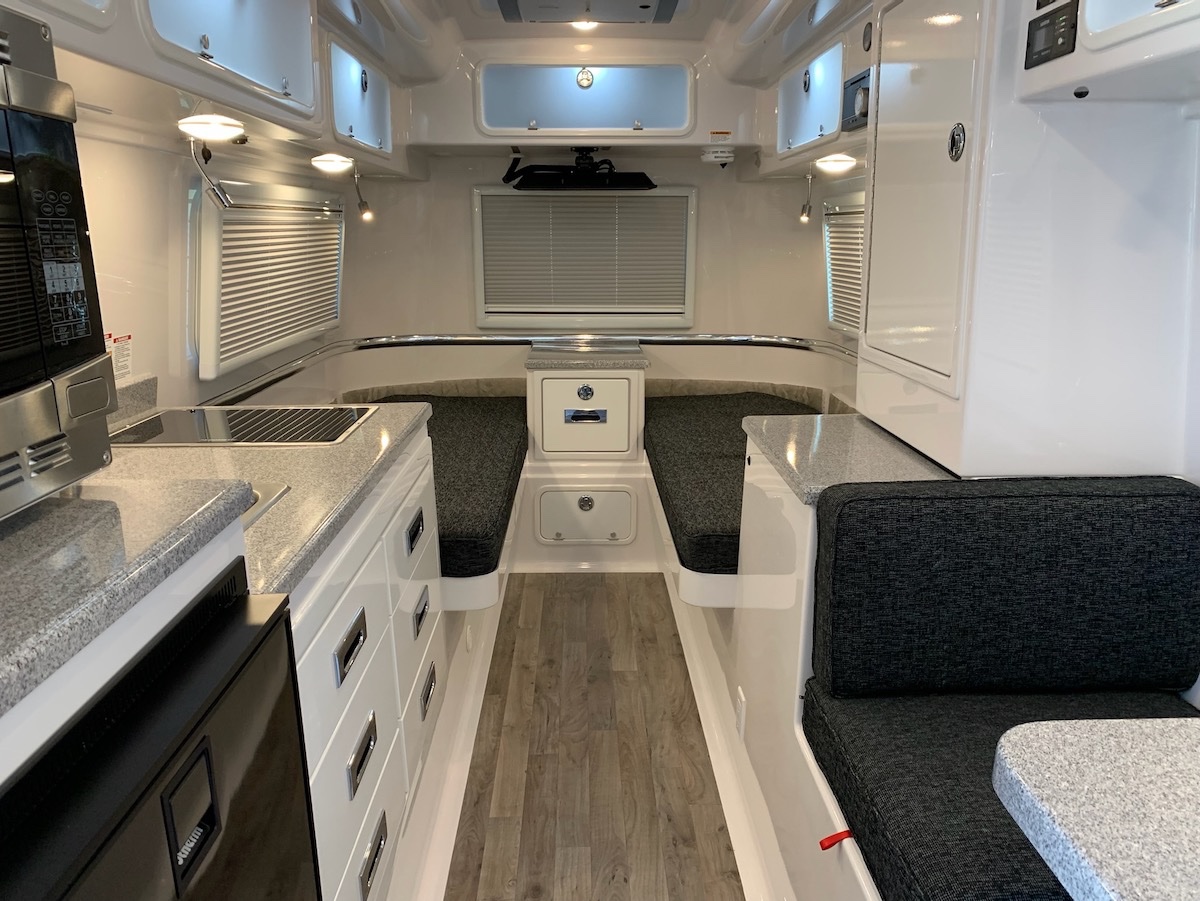


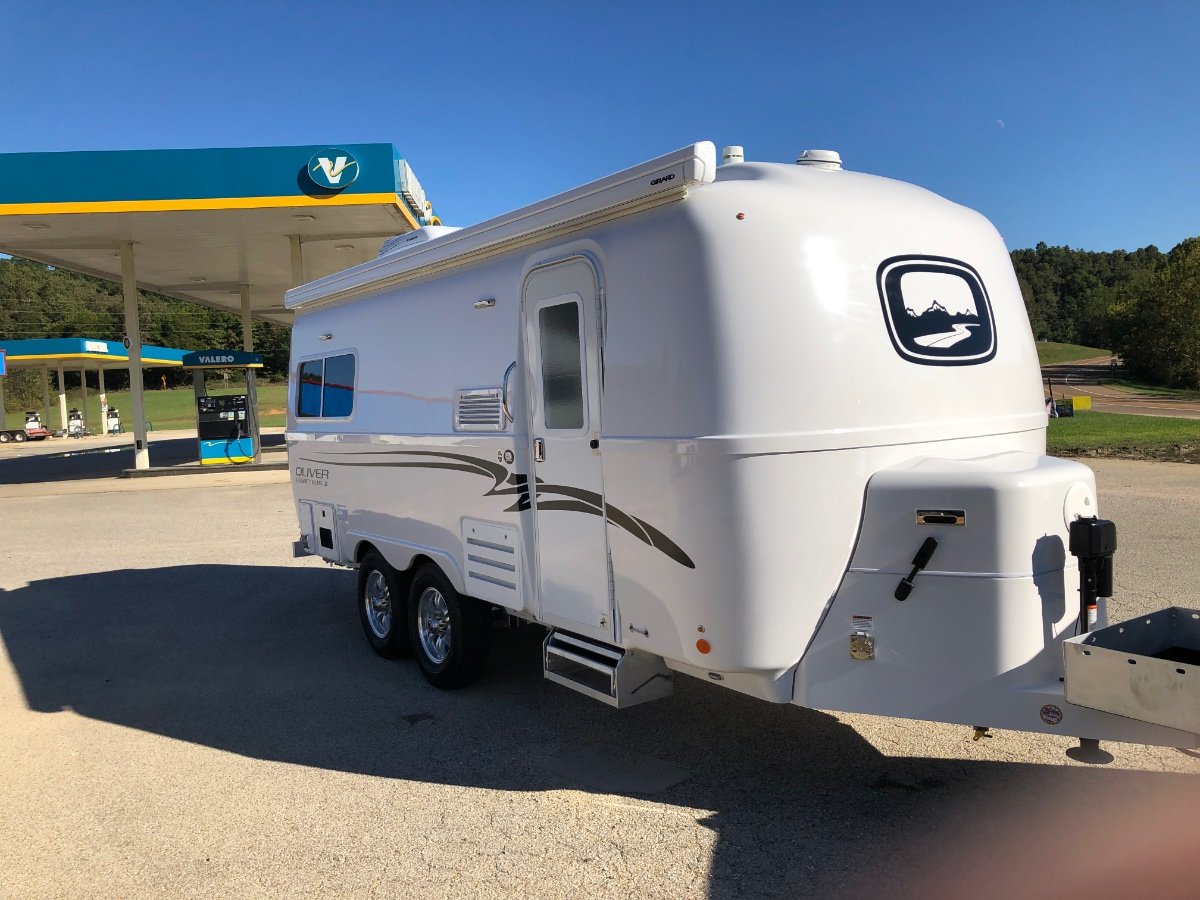
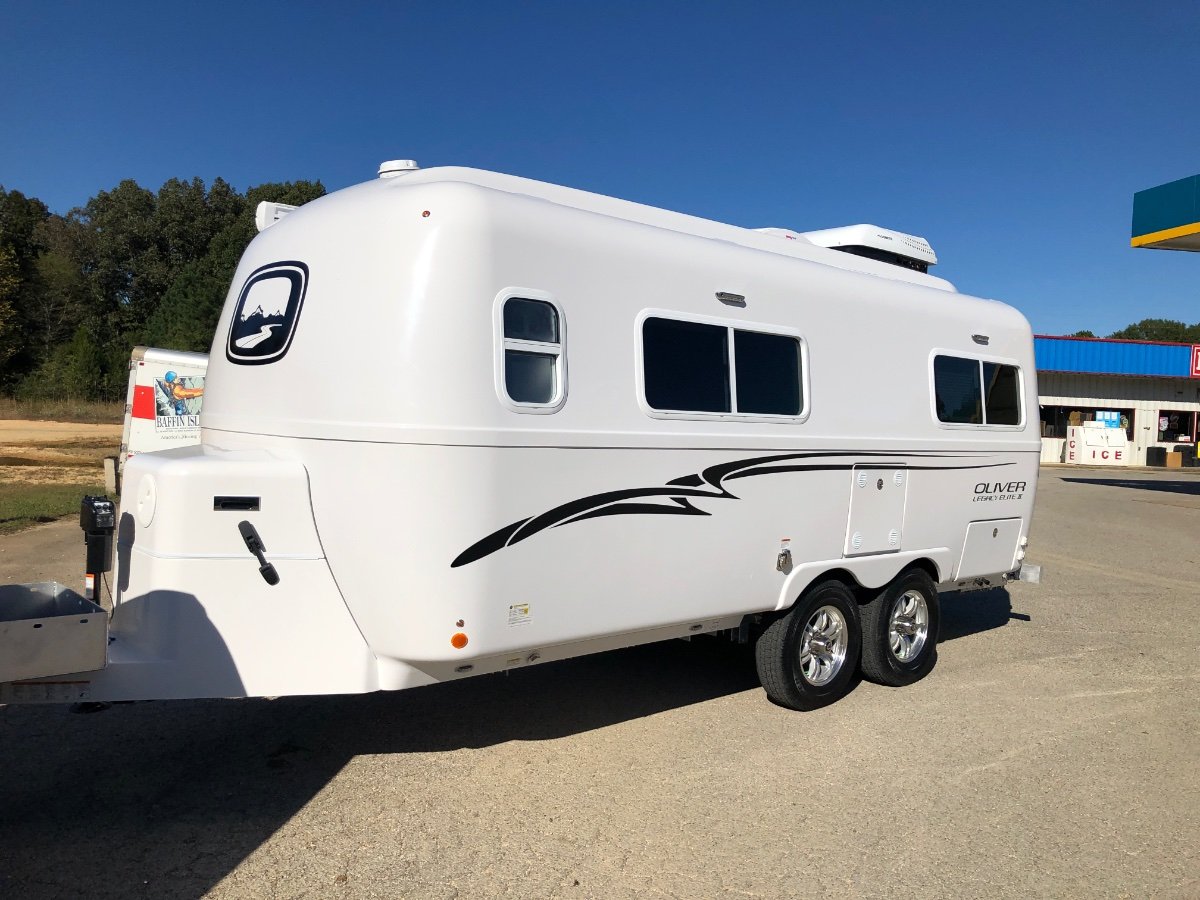

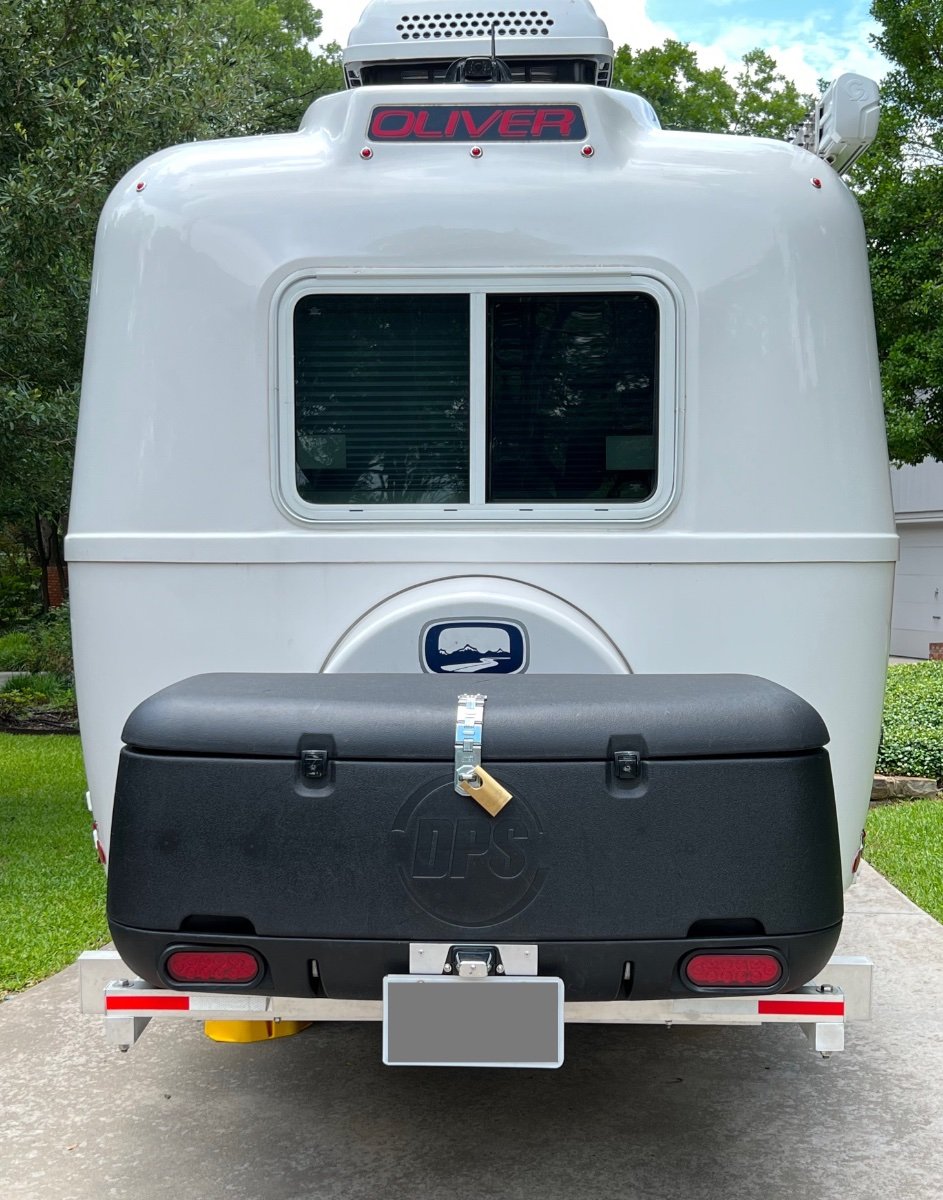
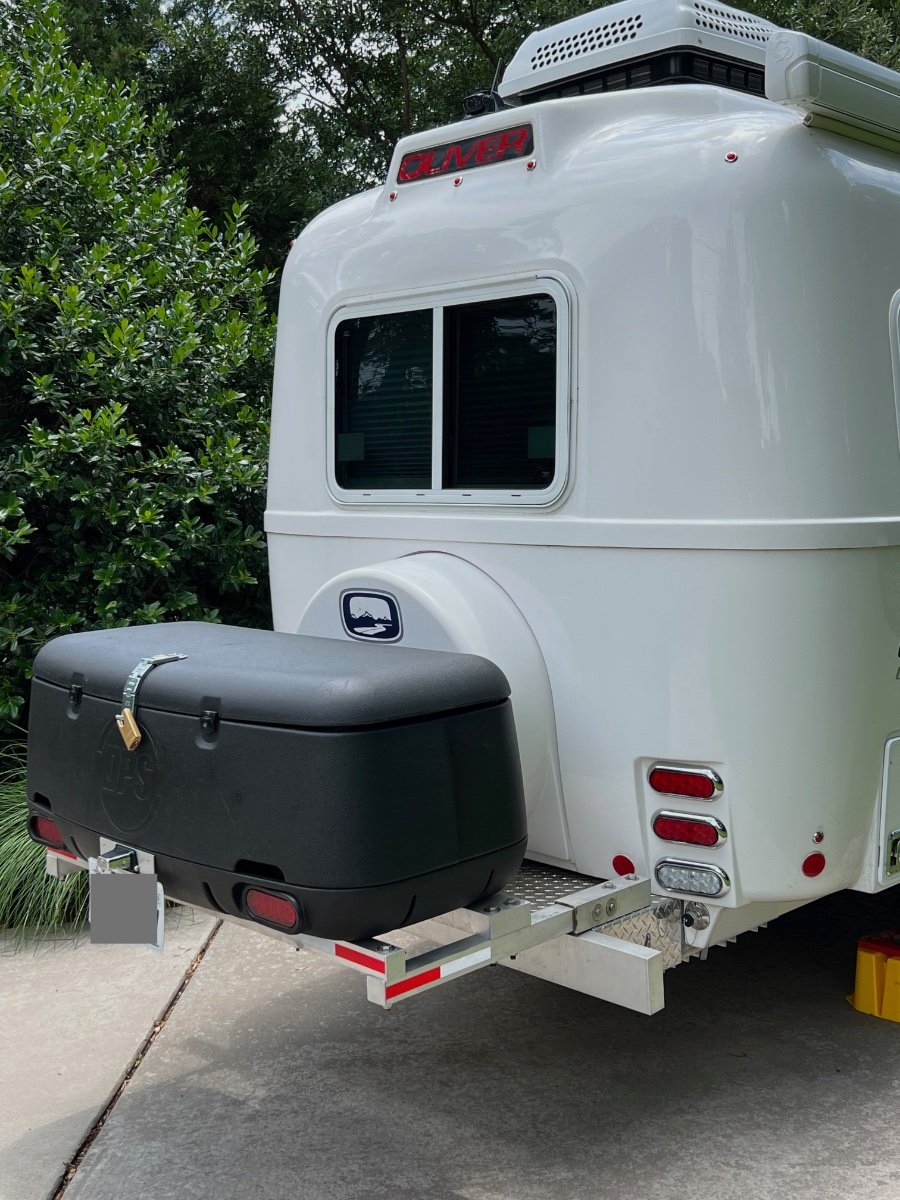
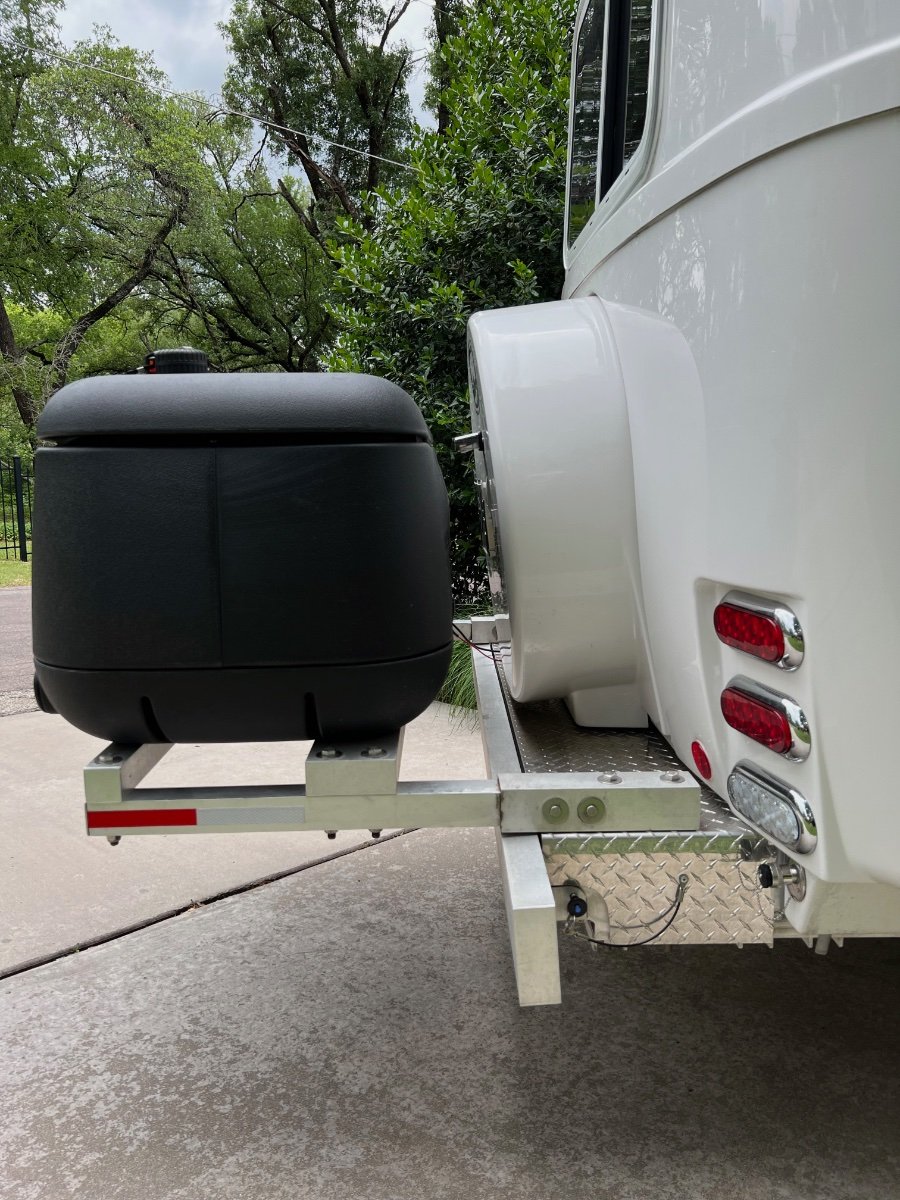
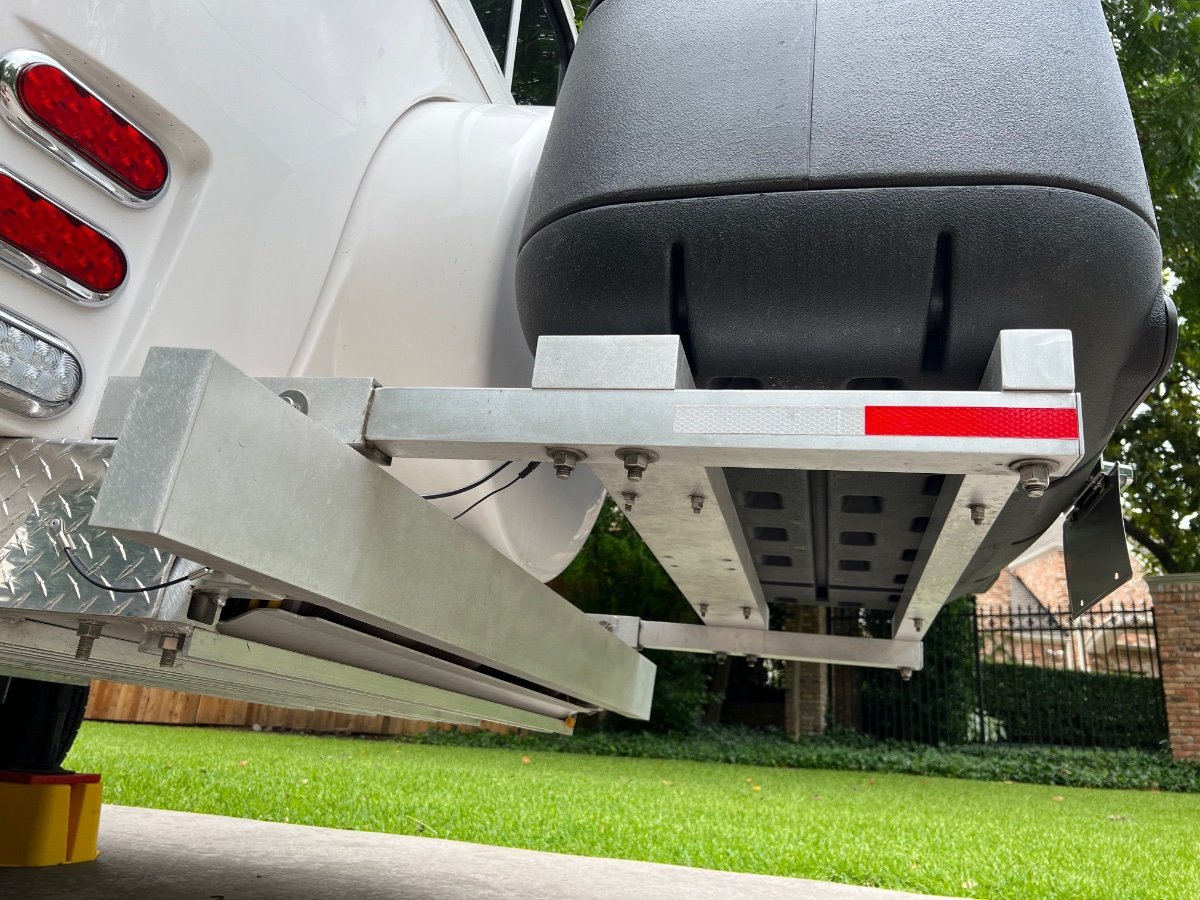
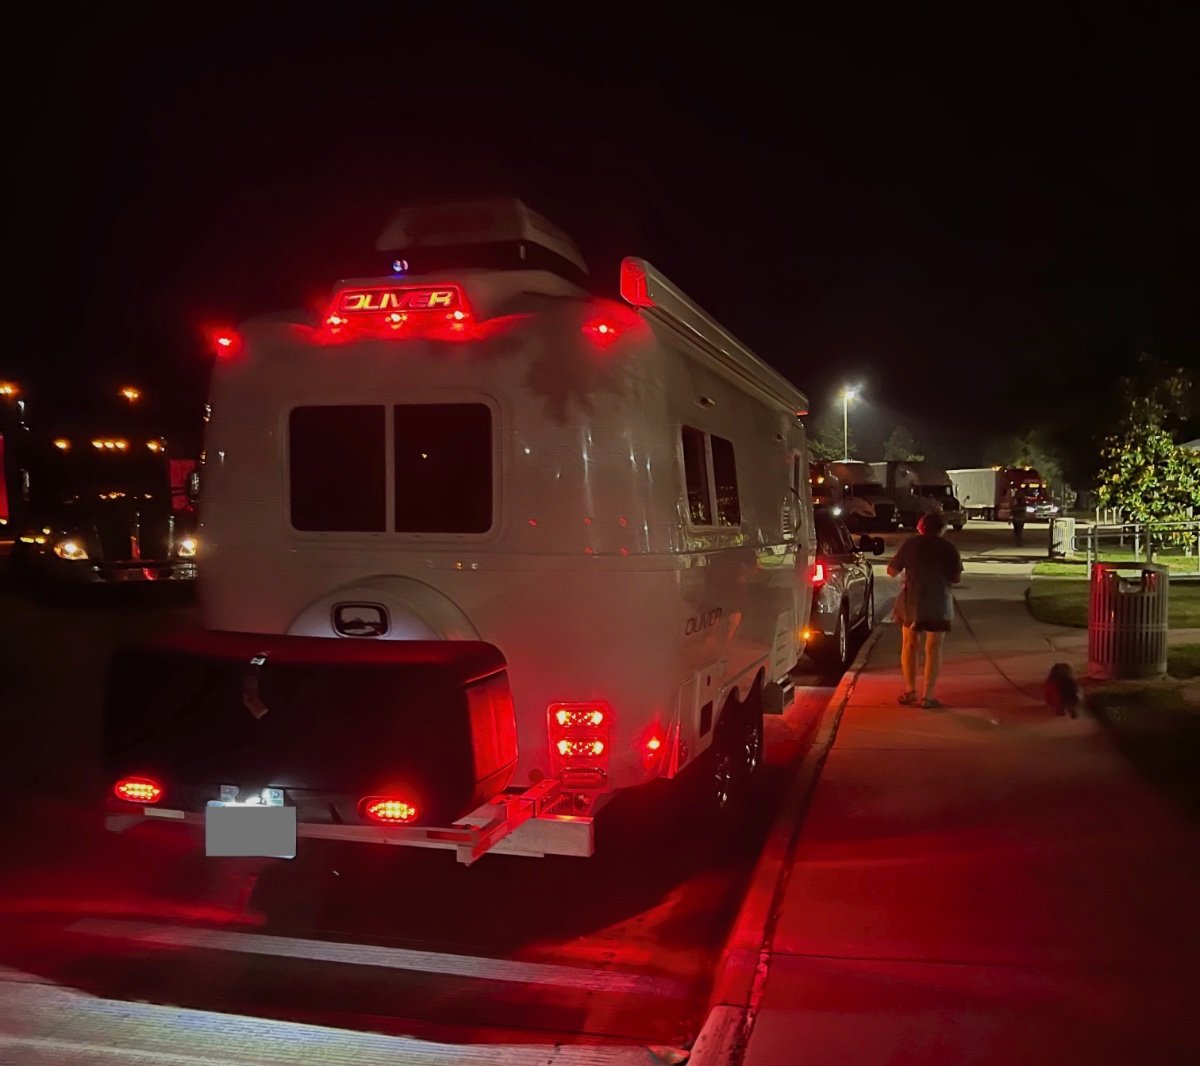


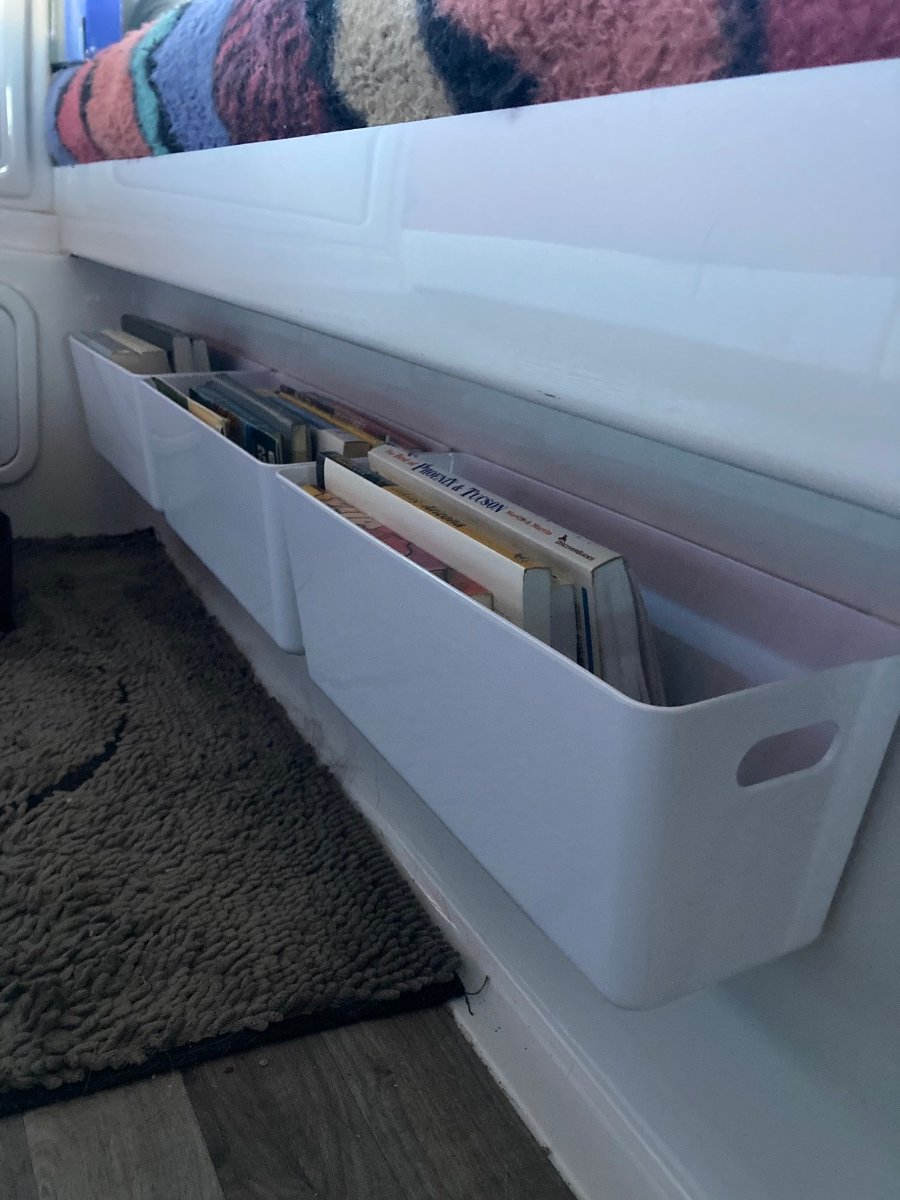

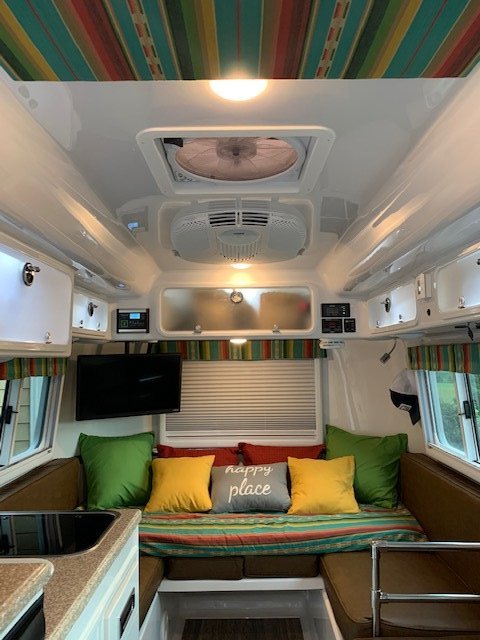


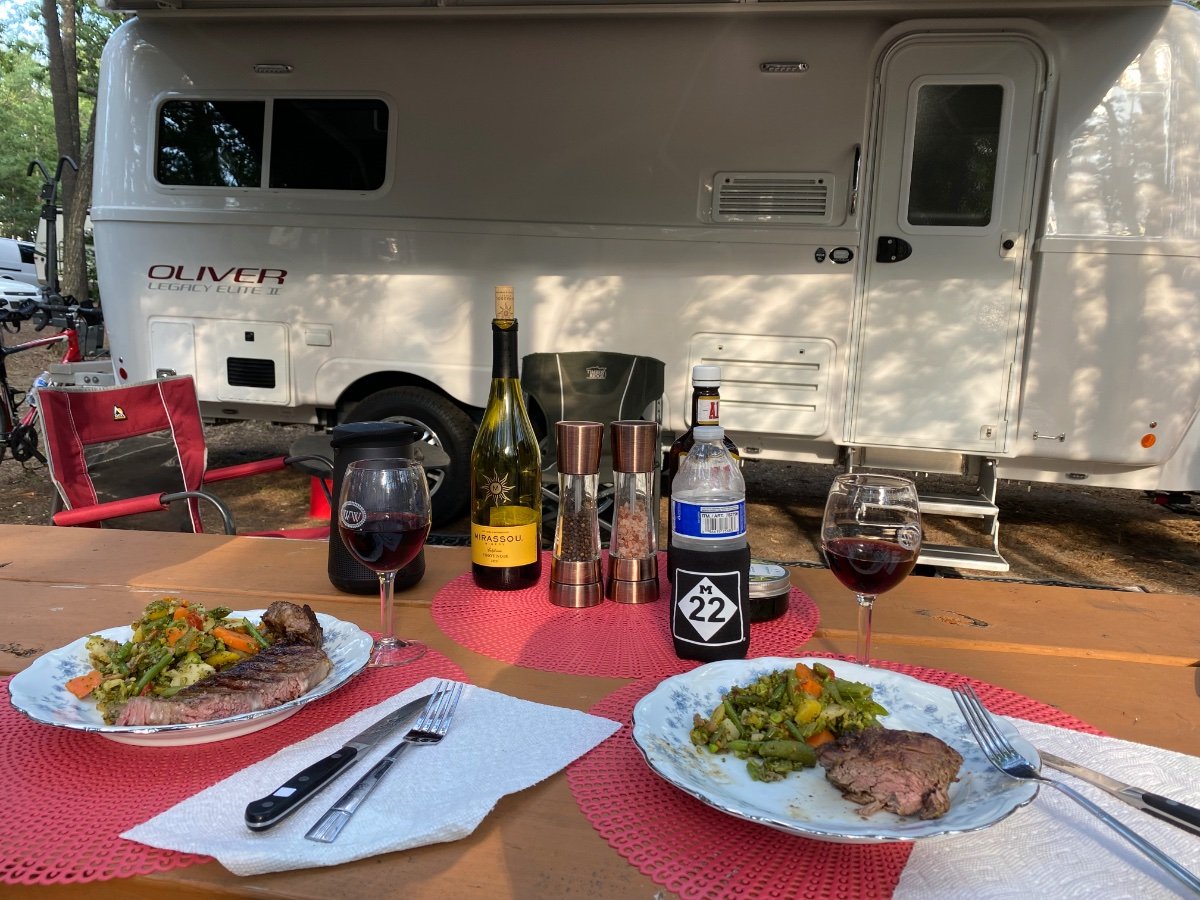

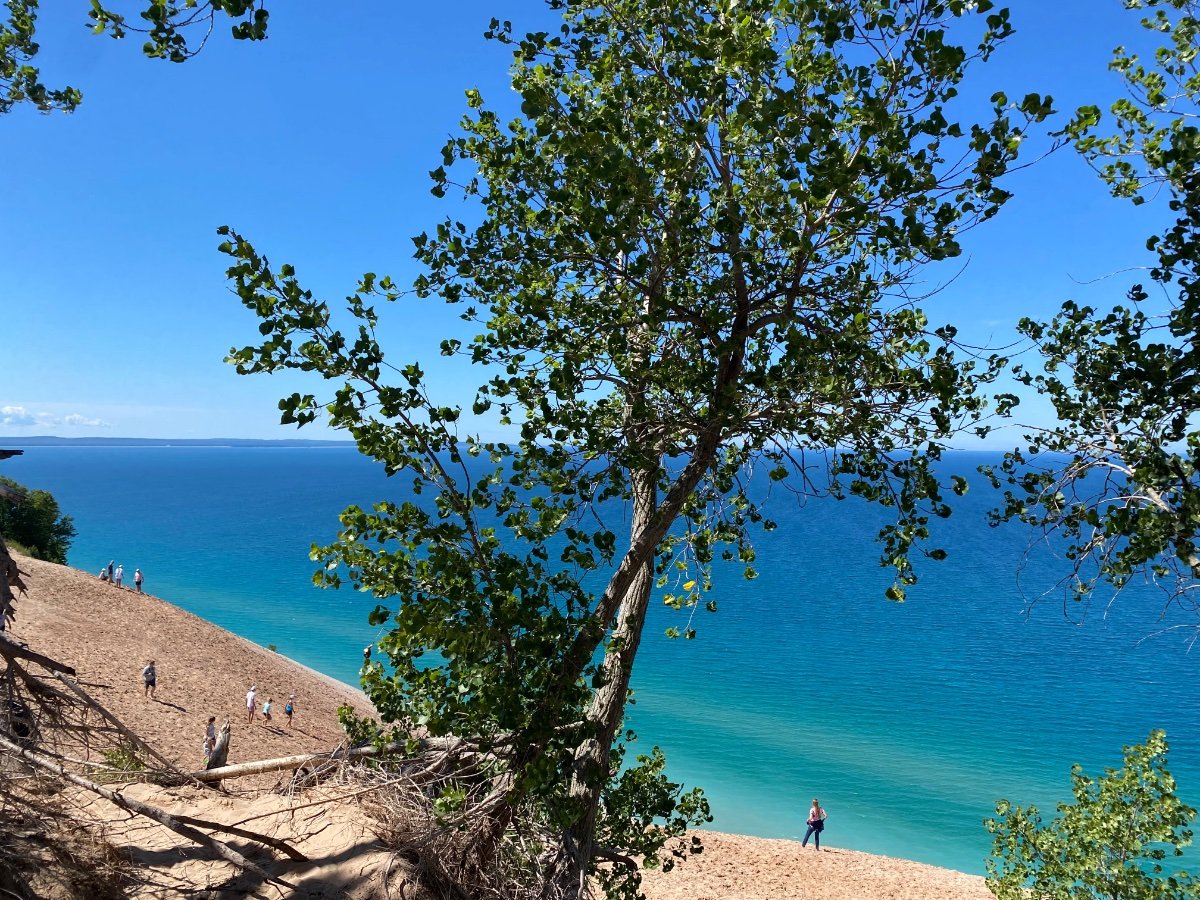


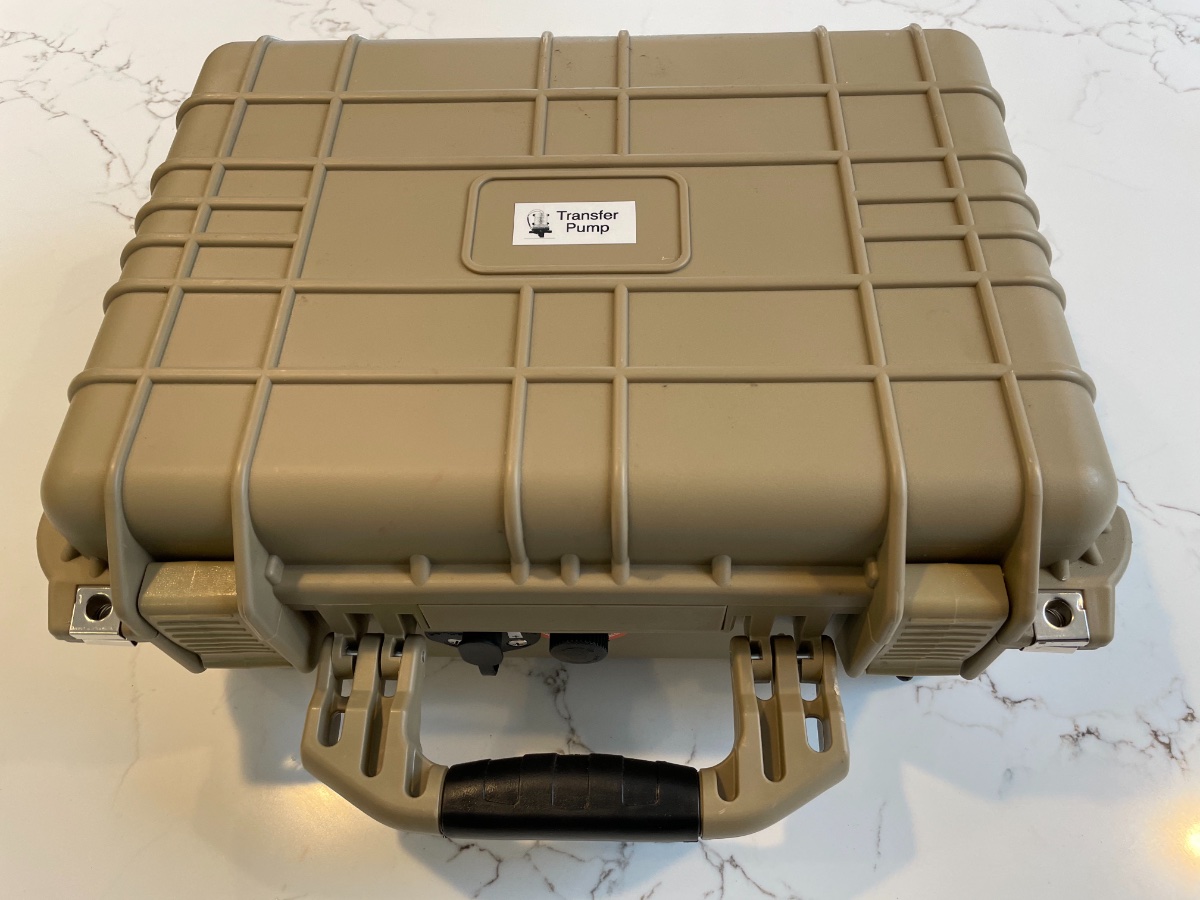
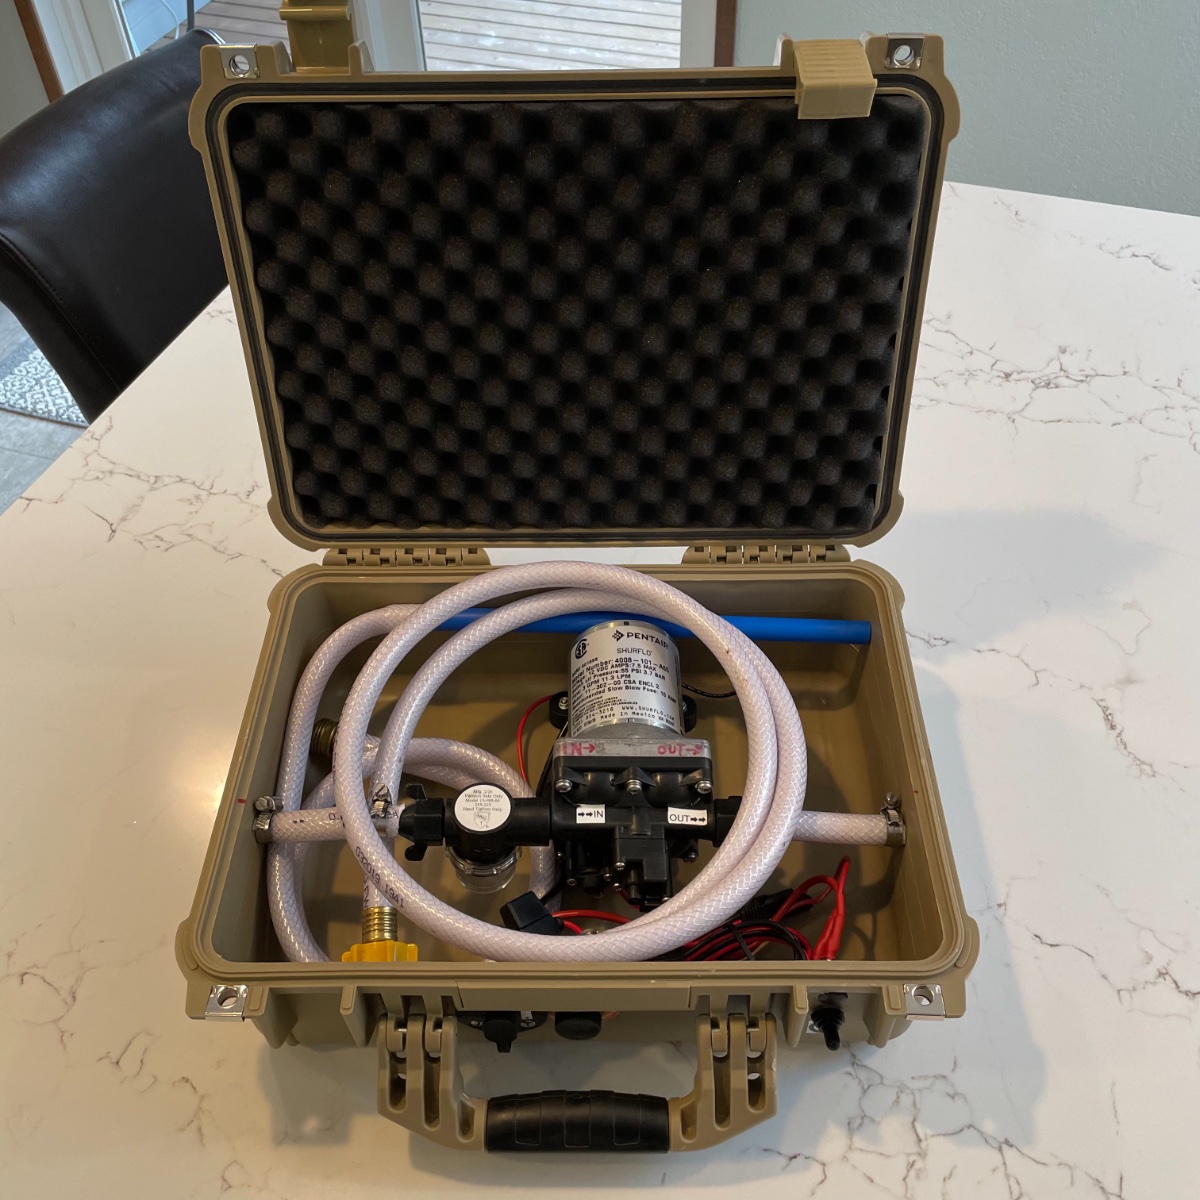

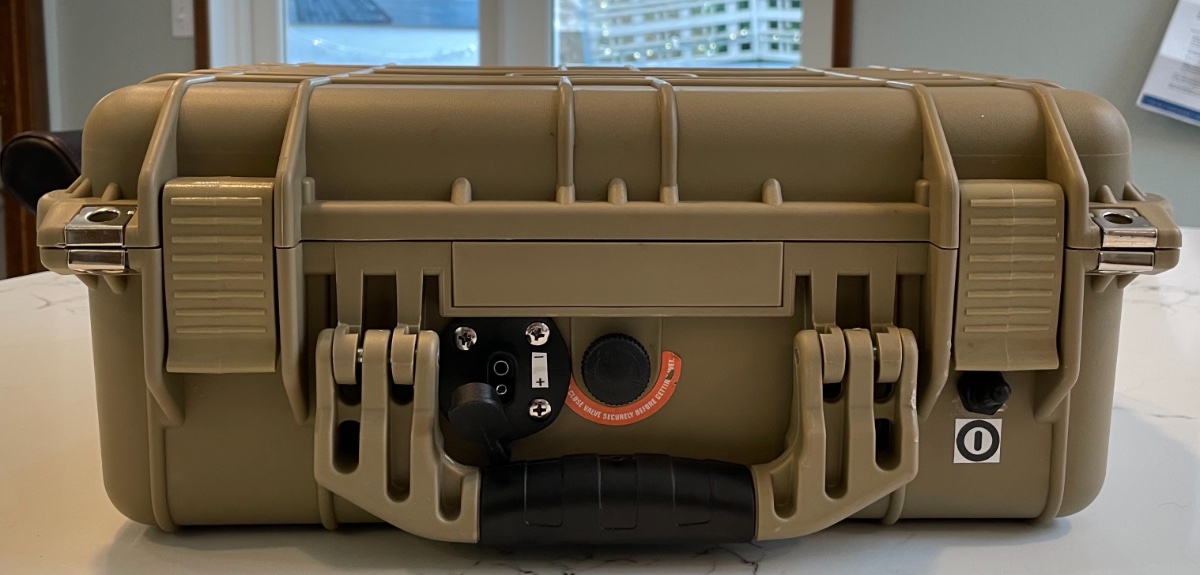
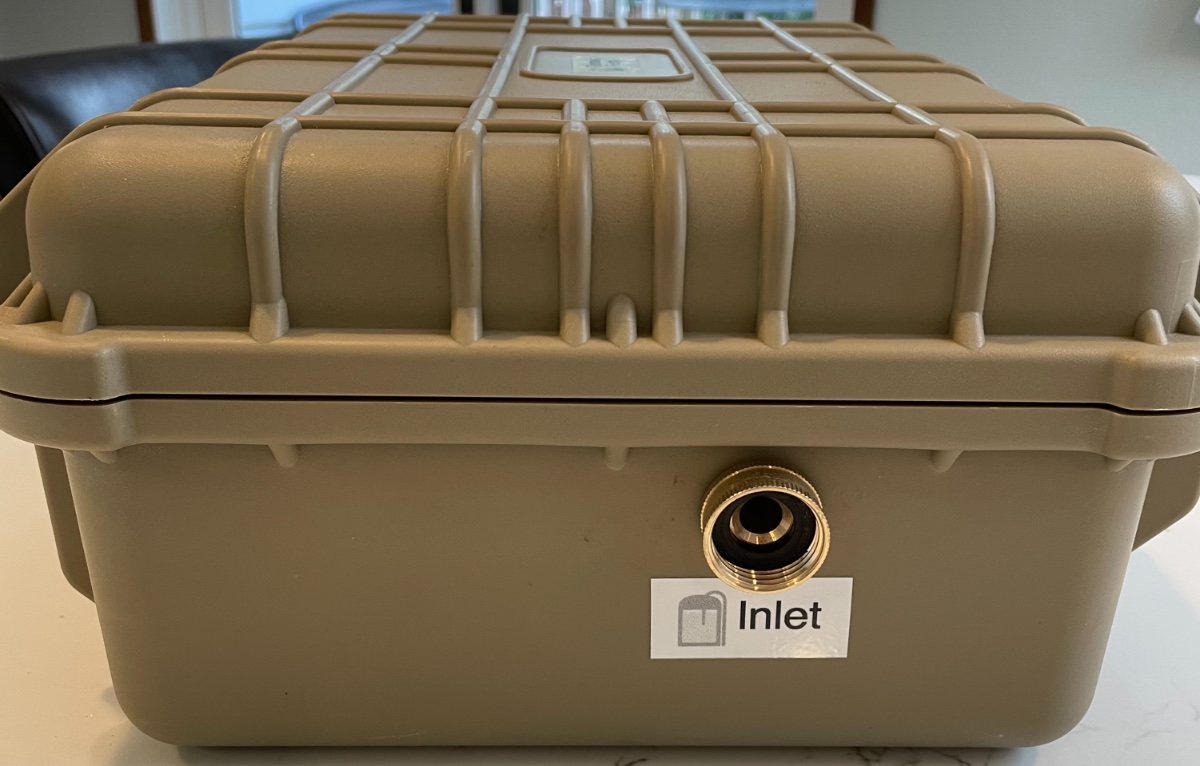
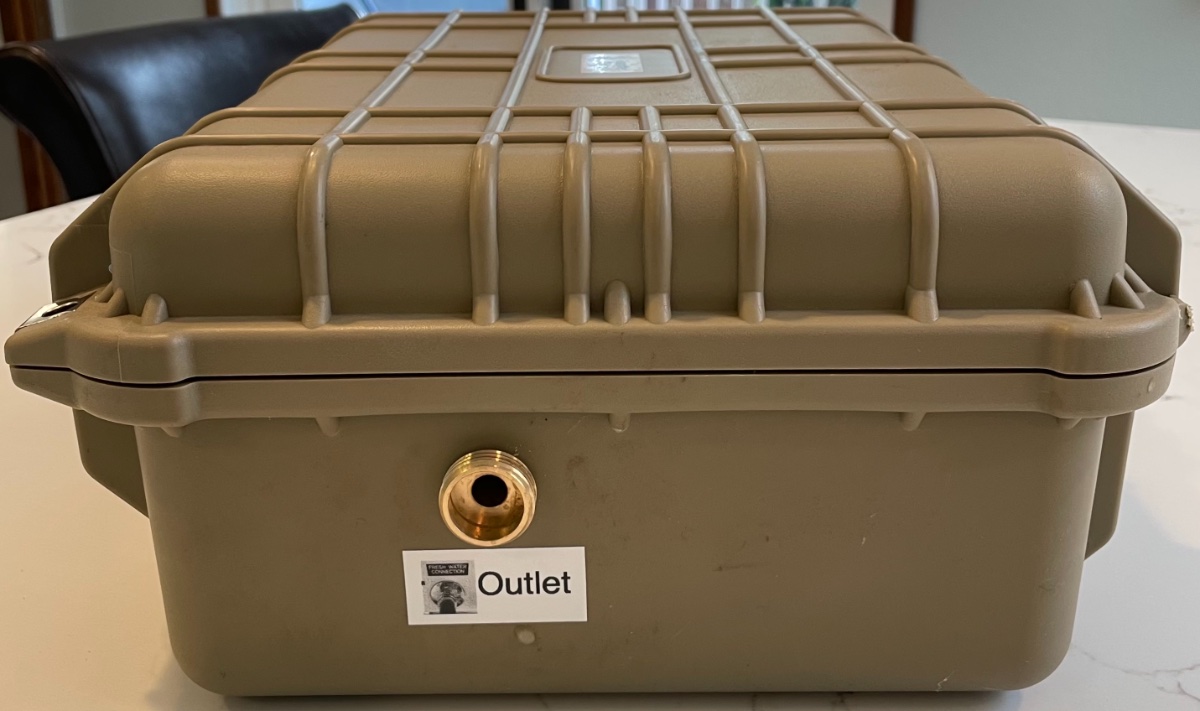
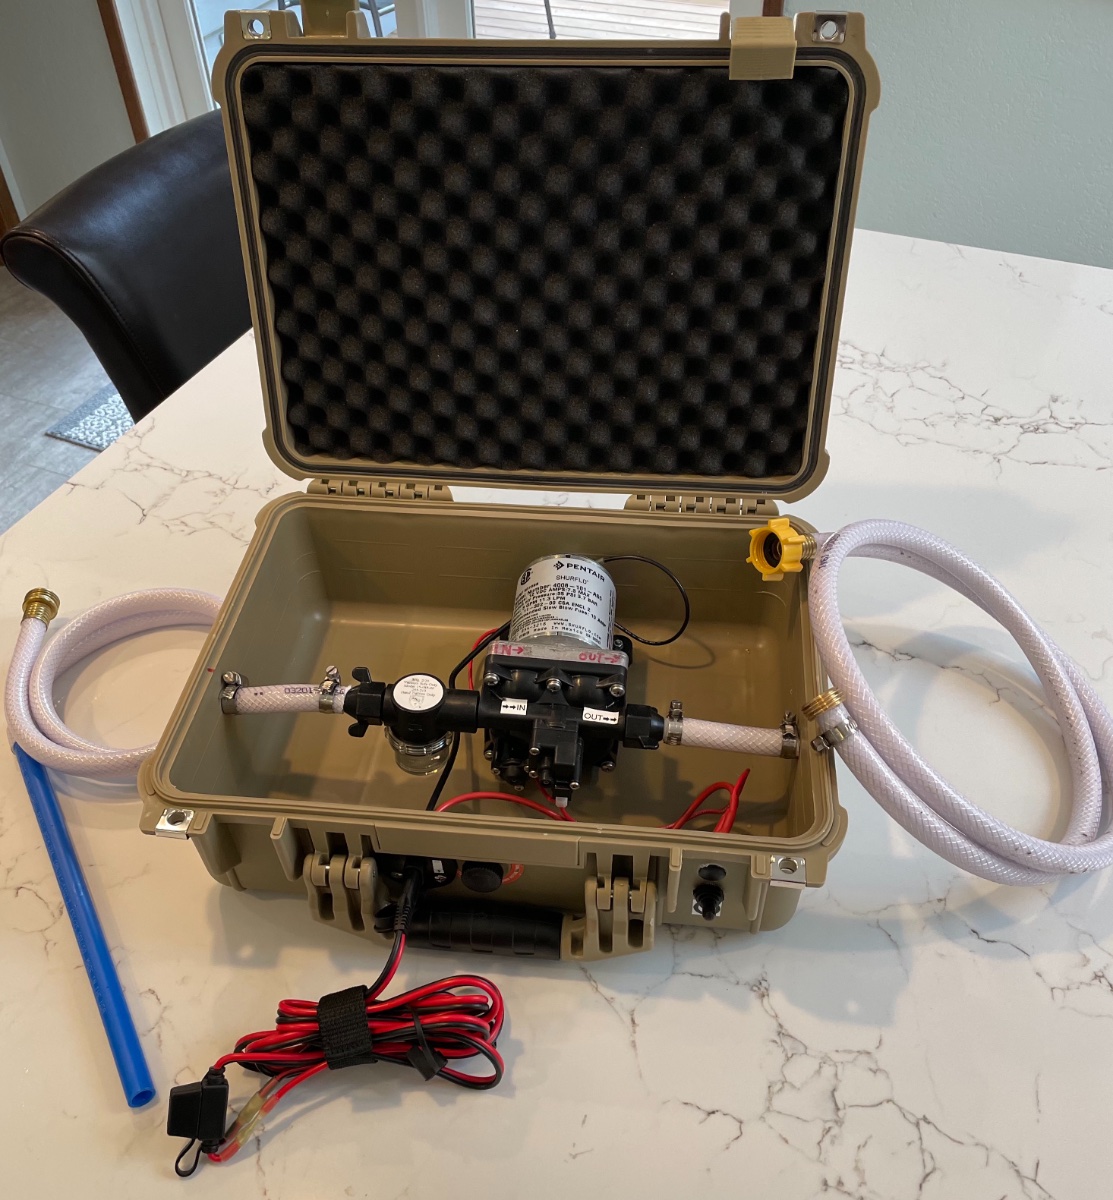
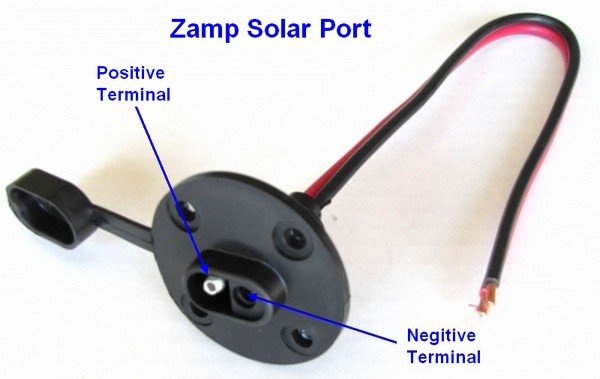

-
Recent Achievements
-


")


")


