Leaderboard


Popular Content
Showing content with the highest reputation on 03/23/2021 in all areas
-
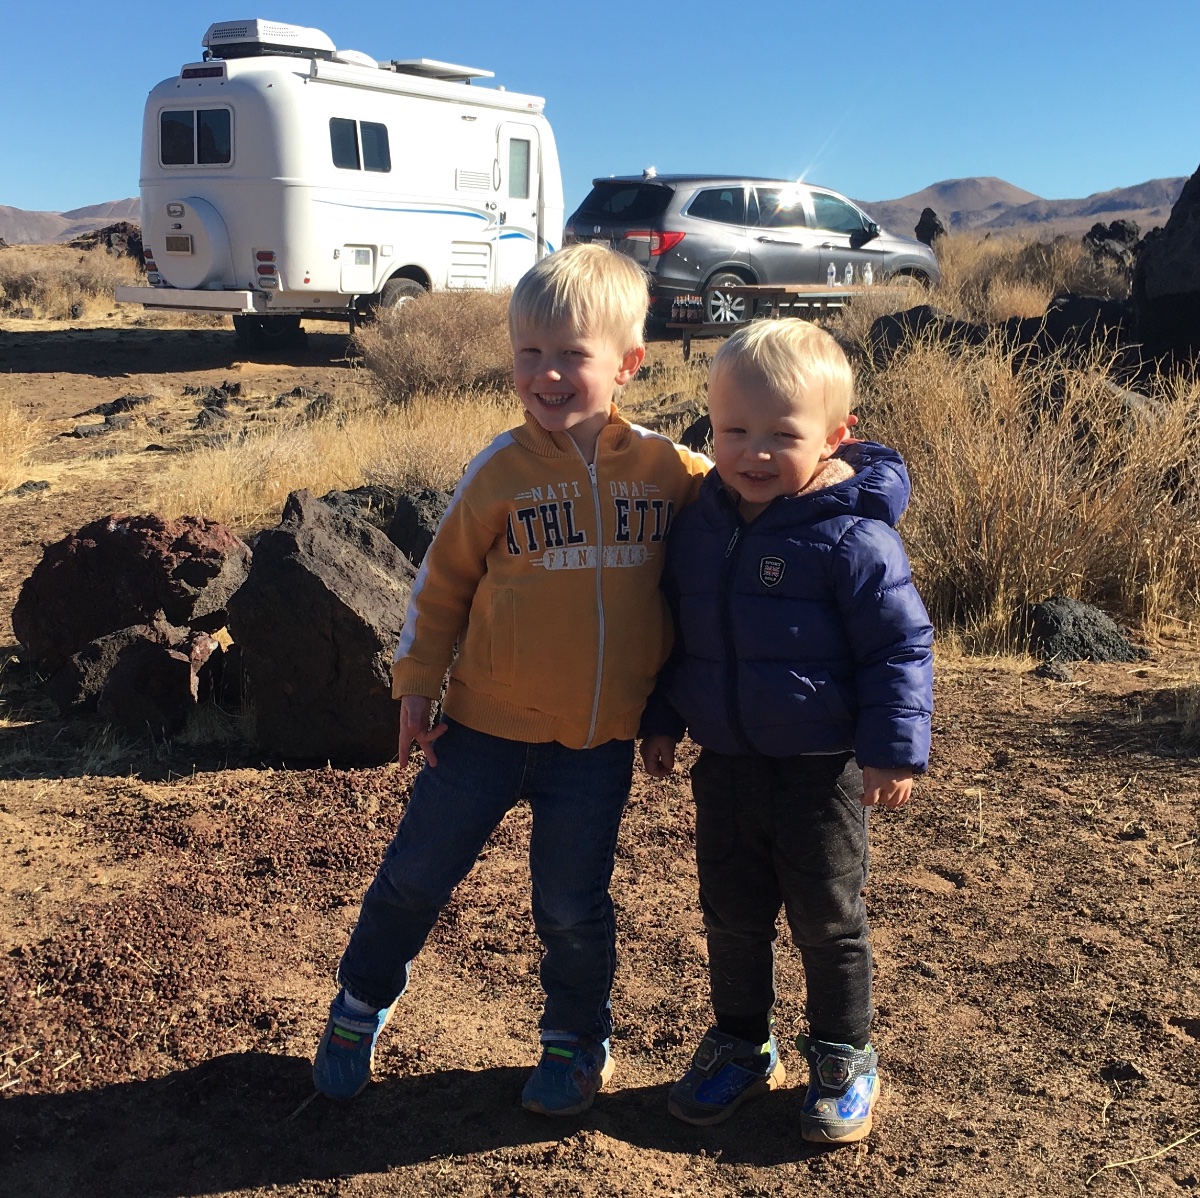
These 2 little guys fit on the little bed, but I’m betting they’ll out grow it two years. Right now though, they’re having a blast!
 9 points
 -
Try opening the cold water valve on the outside shower while pumping.4 points
-
I’m not sure why folks are loosening/tightening chains each time they hook up and unhook. They method I was shown by Oliver, 5 years ago, was to put the trailer on the ball, then raise the ball and truck a few inches which puts slack in the chains, then attach the triangle plate to the hitch, lower and go. When disconnecting, you first raise the hitch until there is adequate slack in the chains, disconnect the triangle plate, lower a bit, then open the bulldog. Once I had my chains adjusted I never touched them again.... for years. Is this not the preferred method anymore? I did make it a habit to check the extender links and the shackles on the triangle plate to ensure they were tight. Mike4 points
-
This entire thread just comforts me - the vast array of music and artists displayed here span almost the entire spectrum of music genres. ( don't think I've seen any Opera, little classical) My hats off to you all, one would be hard pressed to characterize the group as a bunch of doddering old folks, quietly enjoying their RV, waiting for the sun to set. Once again - I find there are not enough hours in the day - and now I have to find time to add new music to my systems. Jeesh, what next, I fear to think. RB4 points
-
Here's one way to use a black tank that may be available for other uses (e.g., a composting toilet installed). Since the black and grey tanks share the same drainage pipe, an unused black tank is only good for holding extra grey water without major modifications to the plumbing. It's pretty simple to put a cap with a hose connection on the end of the tank drain pipe and then use an inline hose pump to pump up to 15 gallons (in my case) of grey water into the black tank. I never thought having extra grey water capacity would be important, but camping on the East coast involves pretty hefty fines if you are caught draining your gray water into nature. I also assumed that camping with full water / electricity hookups meant unlimited, long hot showers in the Ollie (not the case!). So, 15 extra gallons of grey water capacity could mean you don't have to tow your trailer over to the dump station in the middle of your camping trip because you have to empty your grey water tank.2 points
-
We bought a used 2017 Oliver Elite 1 last year, literally like new, never used. It had all of the options I wanted, with exception of missing the tankless water heater. It also came with the WiFi extender, which I wouldn’t have gotten. We’ve had quite a few good camping trips with it, it fits our small family of 4 well so far, but will likely be too small for us in a couple years when the kiddos get bigger. Haven't had occasion to use the A/C yet, and I also removed the microwave because we didn’t use it and I wanted the storage. Had to make a few repairs already: the Atwood heater control board got water damaged; replaced with a Dinosaur control board. The water drain line got clogged with plastic shavings; cut it out and replaced with an Uponor style ball valve (larger diameter fitting). The middle galley drawer came loose during transit, ripping out the four 1/2 inch screws that secure it to the track; replaced with 3/4 long screws and some wood glue. Currently use painters tape to hold the drawers closed while traveling; still trying to devise a better long term solution. Also had an Andersen D ring fail; replaced with a stainless one. The water pump doesn’t draw from the bottom of the water tank, and I have to lift the nose when at 25% capacity; I’ll resolve that problem later. Otherwise, we’re having fun with our little trailer! We had ordered a Casita (and still need to cancel our order), but this is the same size and floor plan we wanted, only much nicer. Looking forward to bumping into the rest of you on the road! Ben2 points
-
Thanks Mike et al, Because the threads did not appear to be stripped when I took the stretched coupler off, I assumed that it had not been tightened when it was delivered. I was not told anything about the chain coupler when it was delivered - not a complaint, just an observation. Oliver had to cut quite a few links off the chain to fit the E1. I was told at delivery just what you said, Mike, about leaving the adjustments alone. However, the Andersen website and manual instructions say that you should loosen before removal of the whale tail and tighten when the whale tail is replaced. Wasn't sure what to do, and it sounds as though there is no one consensus as to what to do. I have not been able to get the pin back into the hitch without loosening just a quarter turn. I was told to leave the trailer attached to the ball, raise it until the hitch closes the gap in the receiver (just a little more than an inch) and remove the whale tail, and reverse the procedure to install. The chains are just a bit too taught to easily remove the pin and whale tail. I also have had the issue where the two chains have differing tension. One may have no deflection while the other is sloppy loose, as checked when getting fuel and the truck/trailer are in a straight line. At the next stop, the taught/sloppy chains may be reversed, so it is not one is too taught and the other is too loose. I have opened a service ticket. Other than that, I have only had an issue with the door step binding when I try to slide it into the chassis. I took a few extra minutes today to figure out how it works, and think that I see the issue. The rod binds in the slot, and does not allow the step to properly seat, then binds in the slots when trying to return. There must be a trick to shoving in the step. I will keep an eye on the hitch chains to see if anything changes. It may be that the bushings are settling in, as the brakes have settled in after the first about 2,000 miles. I went from an 8.5 on the P3 just to have any slight braking to now a 5.2 to prevent grabbing.2 points
-
That’s what was demonstrated to me as well. I raised the tongue, watching the hitch at the truck receiver. It never took more than and inch or so after that for the chains to be loose enough to pull the pin and drop the whale tail. I never had the ball pop out. I retired my Andersen in December. Mike2 points
-
Thanks everyone! We ordered a 9 x 12 Camco from Amazon. Next purchase is a water purification system; decided on the Clear Source Ultra. Gotta have good water. R-Villa starts down the production line tomorrow! And we are waiting for a new GMC ¾-ton, too! Hard to believe it is finally happening.2 points
-
Will go nicely with my inflatable 4 seat SPA/Hot tub. RB2 points
-
Stranded - You might want to contact Oliver Service in regards to that fresh water pickup issue. This is a known issue on these campers that were manufactured prior to a change in the plumbing system and Oliver was "repairing" these "older" units at no cost to the owner. Bill2 points
-
Please cease - I have more chairs than I can count - there are only two of us - yet we carry 4 - and how many are left at home. Camp chairs anonymous - please help. RB2 points
-
The double live album with this on it is incredible and still in my playlists. “Mercenary Territory” and “Spanish Moon” on same live album are amazing!2 points
-
@SNY SD UP You might like...2 points
-
If you haven't done so already, I would encourage you to open a service ticket on the home screen here. Even if you fix it yourself, Oliver should be made aware of it.2 points
-
One hit wonder, really, but this song is just awesome...The best of "Boomer" music Overland 🙂2 points
-
I just lifted up on my "countertop" and it came off, held on by Velcro. Opens up possibilities. I wanted to make some changes/additions to the countertop. I have a leak around the sink to fix. And wanted to put an extension off the end, next to the rangetop. There is essentially no countertop as is. I have a different refrigerator than you, I think. I don't have the cubby below the countertop. My countertop was lifte in the front a bit. When I replaced it, I smushed it down, and it is no longer lifted.1 point
-
Then , you don't even need to worry about his process . I'm interested in more detail, as well.1 point
-
Yes, we did. We are thoroughly enjoying it as well. We are on the borderline of boondocking currently (we have power and water but no sewer hookup) and we are glad we do not have to go into town to dump a black tank. Our host lets us drain the grey water into the ditch 👍1 point
-
Jordanv, did you get the composting toilet?1 point
-
Funny you mention that... but I purchased a used anderson hitch from someone on this forum. So Oliver installed it for me at the factory (for a fee). The left chain has loosened up after it as tightened two or three times so far. They didnt see anything wrong with the hitch, so they thought it may be that the silicone bushing is settling in. Needless to say, I have tightened them each time I re-connected our trailer to the F150 so far.1 point
-
Do you really have one, or is that an early April fool's joke?1 point
-
That's what I'd try - can't hurt. You've got the connection, an elbow, and then the check valve which could be frozen; but it's all brass on brass so they should heat up relatively quickly with a hair dryer. But try Carnivore's suggestion first.1 point
-
Thanks! I've read the forum posts about the fix, and I have watched the Youtube video of the spin weld of the female fitting being added to the top of the water tank so a water pick-up tube can been added from on top. I just don't have the courage to do the spin-weld myself. We do have a road trip planned to visit my mother-in-law in Chattanooga Tennessee this June, so I'm hoping to make a detour to Hohenwald and have them do the spin-weld to the water tank. The plumbing I'll do myself as I I prefer the use of Uponor style water fittings over the Pex-B style clamps used by the factory. All I need is the spin-weld of the female fitting added to the top of the tank.... I'm hoping the service department returns my phone call this week so I can schedule the day in June to have them add the female fitting.1 point
-
I recall a few posts about some folks overdoing it using the tongue jack to raise the hitch while still hooked to the tow vehicle, raising it really high and putting a lot of stress on the ball (even pulling the ball shank out of the Andersen hitch) or stressing the closure of the Bulldog coupler. I think there’s even a warning/caution on this somewhere in the Andersen literature to only raise it about 1” to 2” above the unloaded ball height. Any more than that and you’re basically lifting your tow vehicle by the hitch. At delivery we were shown to only raise the hitch just enough to just barely unload the trailer tongue weight on receiver on the tow vehicle, and to judge that by watching the ball mount in the receiver to see when it just raised enough to move off the bottom of the receiver. That put enough slack in the chains to allow the tensioning nuts to be loosened by hand to easily remove the whale tail. And then reverse the process when reattaching, then lower the tongue and use a wrench to tighten the nuts, and to count the exposed threads extending out of the nut (6 or 7 exposed) to tension the chains. That process worked well but it was tedious. Now towing with an F-250 so I no longer use the Andersen.1 point
-
My wife just got her a chair that rocks, it is a camping chair that folds and stores well, I'm sticking with my camping chair that has the food and drink storage on it, it becomes a choice of rather to rock, or eat, so you can see which one I went with. trainman1 point
-
If those legs are not secured to the ground in some manner there will be NO additional "support" for the awning in the event of any wind. Also, if the legs are NOT secured in the fixtures on the side of the trailer when they are in that position then there will be no additional "support" for the awning in the event of wind. Bill1 point
-
Somewhat. For sure, the racket that the legs make when attached to the hull acts as a nice early warning system for when the wind picks up.1 point
-
Sheri, so, did you ditch the Andersen WD hitch? What hitch are you now using? As we discussed on the phone, your Threaded Quick Link deformed and stretched because it was not properly screwed together. That link is easily replaced if you want to begin using the Andersen again. Checking these links to make sure they're tight before travel is necessary (but, since your truck likely needs no weight distribution, as Overland stated, it was not a dangerous situation). There is no reason to ever loosen them as this would not serve for any adjustment. As some have suggested, if I had an Andersen set-up (I don't) I would put a drop of Loctite on the threads and tighten them down well.1 point
-
FWIW, this entire album is incredible and I say that even though I am somewhat biased (drummer sent me the chords for intro as he was the one who actually wrote this song’s intro guitar part). Mark Hennessy (lead vocals) was with grunge era’s most over-looked and critically-acclaimed release “Dragline” by Paw. Out of Lawrence KS. Hennessy is also a poet and taught writing at a college (factoid).1 point
-
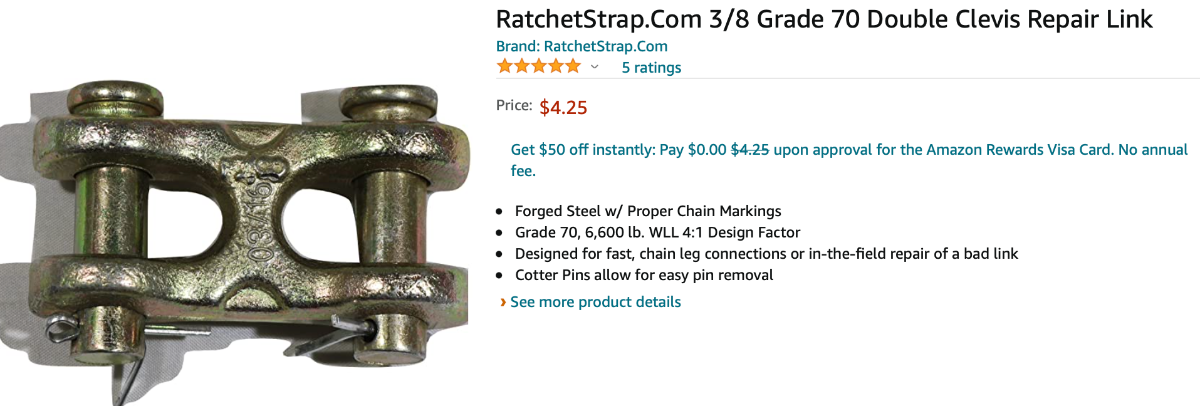
Your coupler, AKA "repair link" needs to be rated for at least the rating of the chain. Quick-links like the one that failed are typically not rated very high. More like something that one would put on a dog chain. Oh yes, they do have their place. I use them to connect to the eyelet on my bird feeders hanging from the eaves on my garage. IMHO, something like this would be much safer...
1 point
-
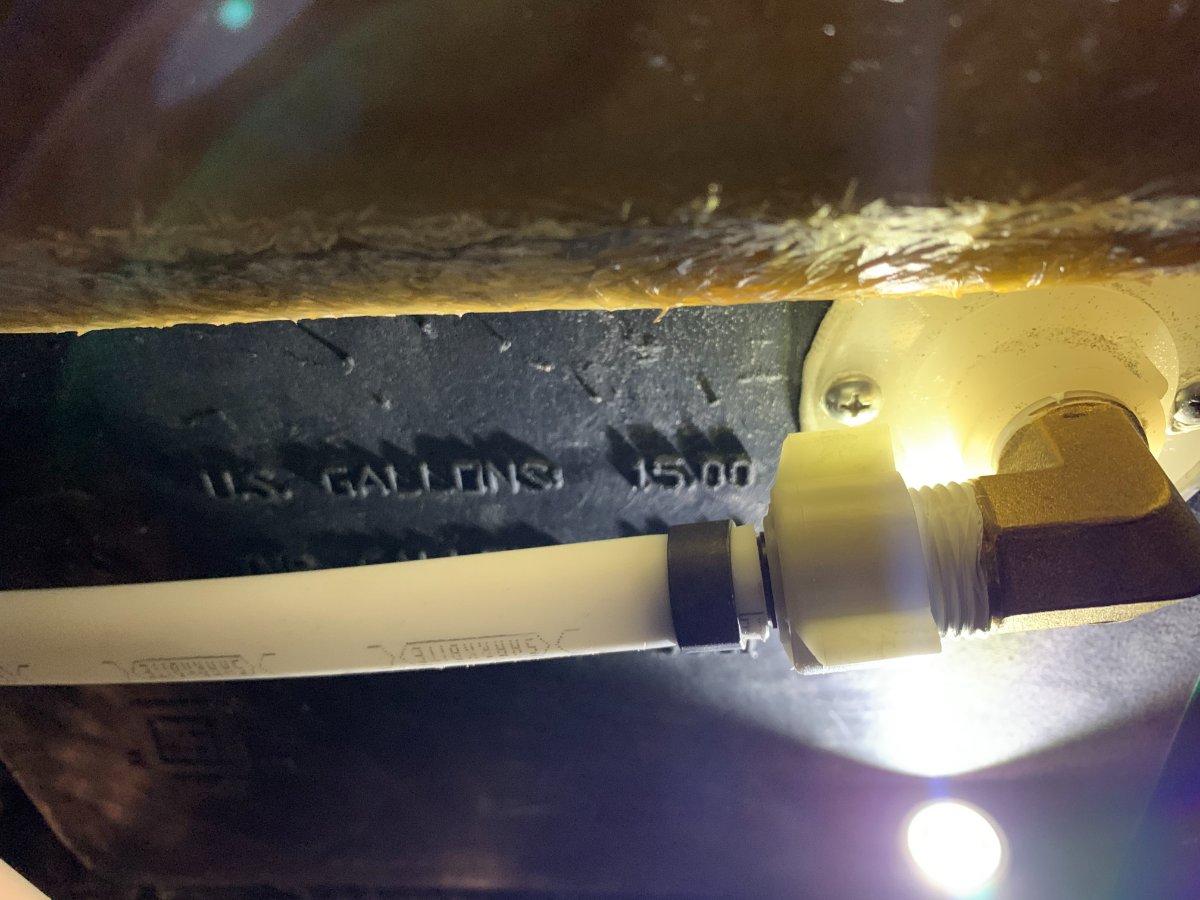
Wow, thanks for sharing this Overland. I did a similar thing when I was filling my tanks, but I used 5 gallon increments instead of 2 gallons. I also found the SeeLevel readings to be all over the place and not of much use. I heard lots of gurgling and had to shake the trailer around to get the air out of my grey tank too. So you are definitely doing much better than I can do at the moment. My 2020 owners manual says the fresh tank capacity is 30 gallons, the grey tank capacity is 32.5 gallons, and the black tank capacity is 18.5 gallons. I'm going to try again and be much more precise in my measuring. The real bummer is the grey water is our limiting camping factor at the moment and now that I've got an easy way to use my black tank for grey water I'm not able to use 6 gallons of grey capacity (2.5 gallons in my grey tank and 3.5 gallons in my black tank). I opened a case on my black tank. It really "stinks" (pun intended) that my black tank is only 15 gallons and it's supposed to be 18.5. 😞 I wonder how many other 15 gallon black tanks are out there.
1 point
-
My favorite from Little Feat...Toe tappin'1 point
-
One from the back of the file1 point
-
John is your TV a GL450 Mercedes Benz?1 point
-
So so agree! These awning lights remind me of the midway at County Fairs or a Marquee. NOT a camping experience. I may have to try the yellow film on the light near the door. Would a red film preserve your night vision like on a boat better, and be less of a distraction to yourself and any neighbors. If I need lights that is what flashlights and lanterns are for. It is called 'Camping' after all, not hotel ing!1 point
-
1 point
-
Ok - old grumpy guy comment....... - I just don't understand the need of some folks who seem to need daylight - at night - and then leave them on all night. A few nice - mood inducing awning lights work well - but the stadiums - hmm. Therefore I try to stay as inconspicuous as possible with the lighting. I remember a pod of AS owners that all wanted their running lights on while parked in the CG - I guess its Christmas all year. Me being inconspicuous is not easy - by the way.1 point
-
I must admit - i rarely use that light - i prefer the lower ones - if at all.1 point
-
Might have to try that. It also might help with the issue of the folks next to us at the moment ( street side) in a tent that must feel like a UFO has landed 10 ft away from them when I snap on the porch lights.....1 point
-
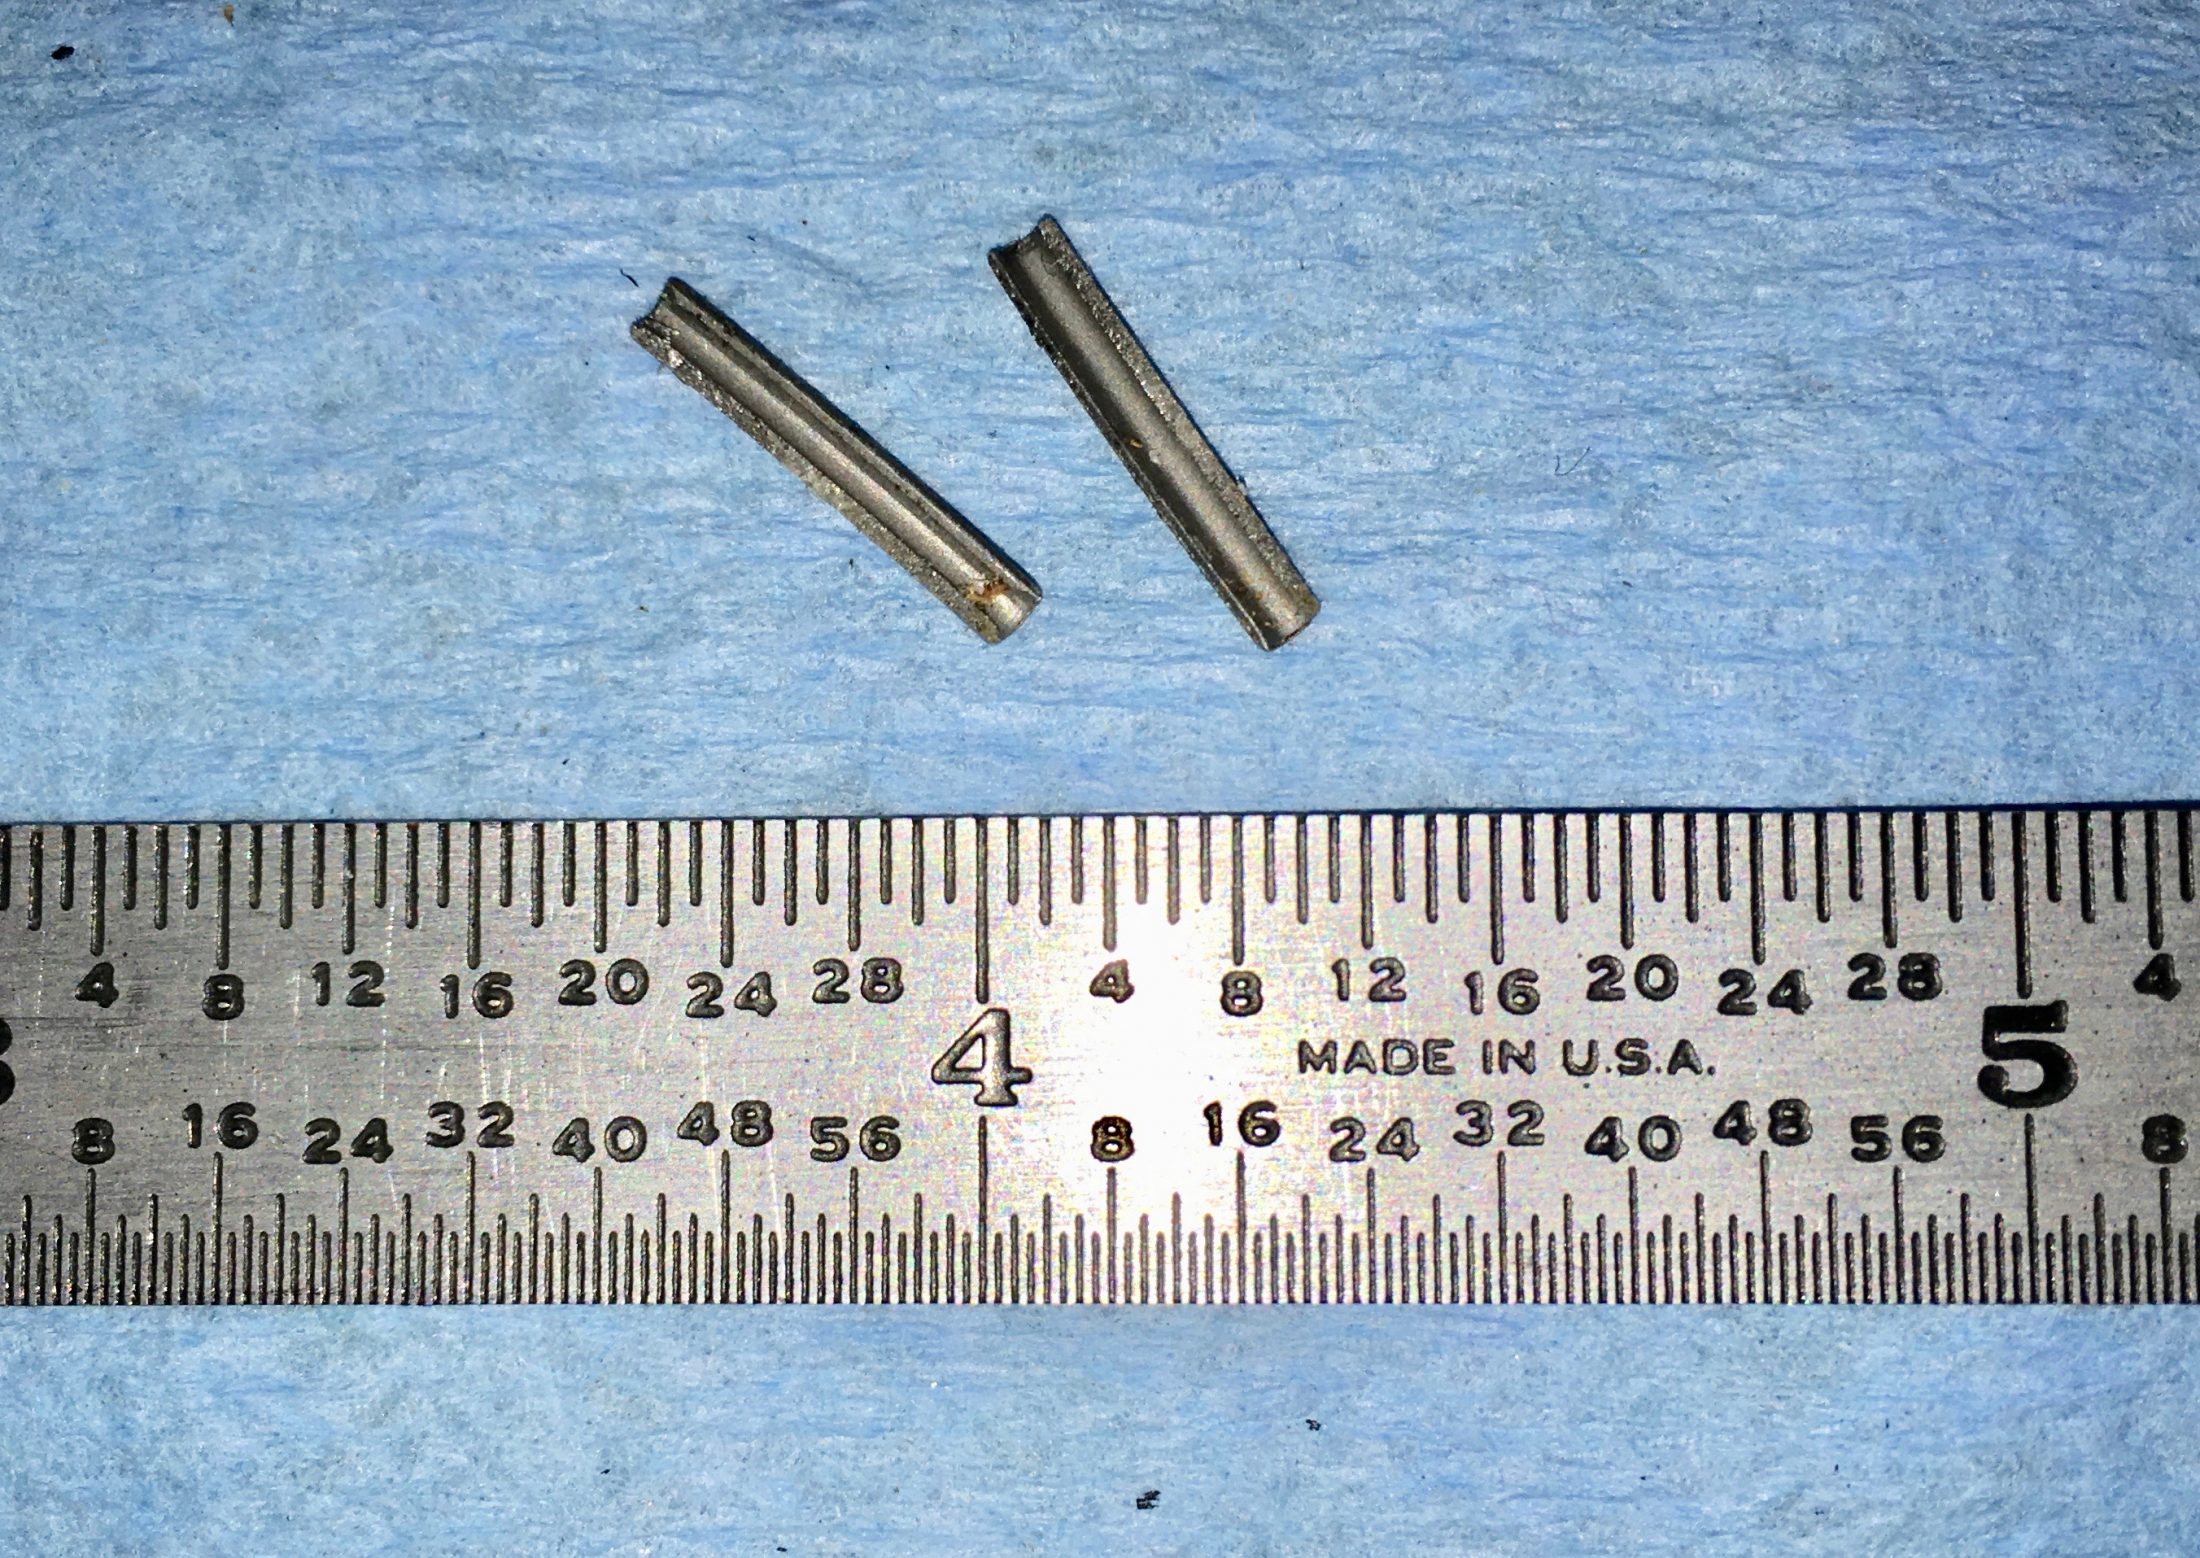
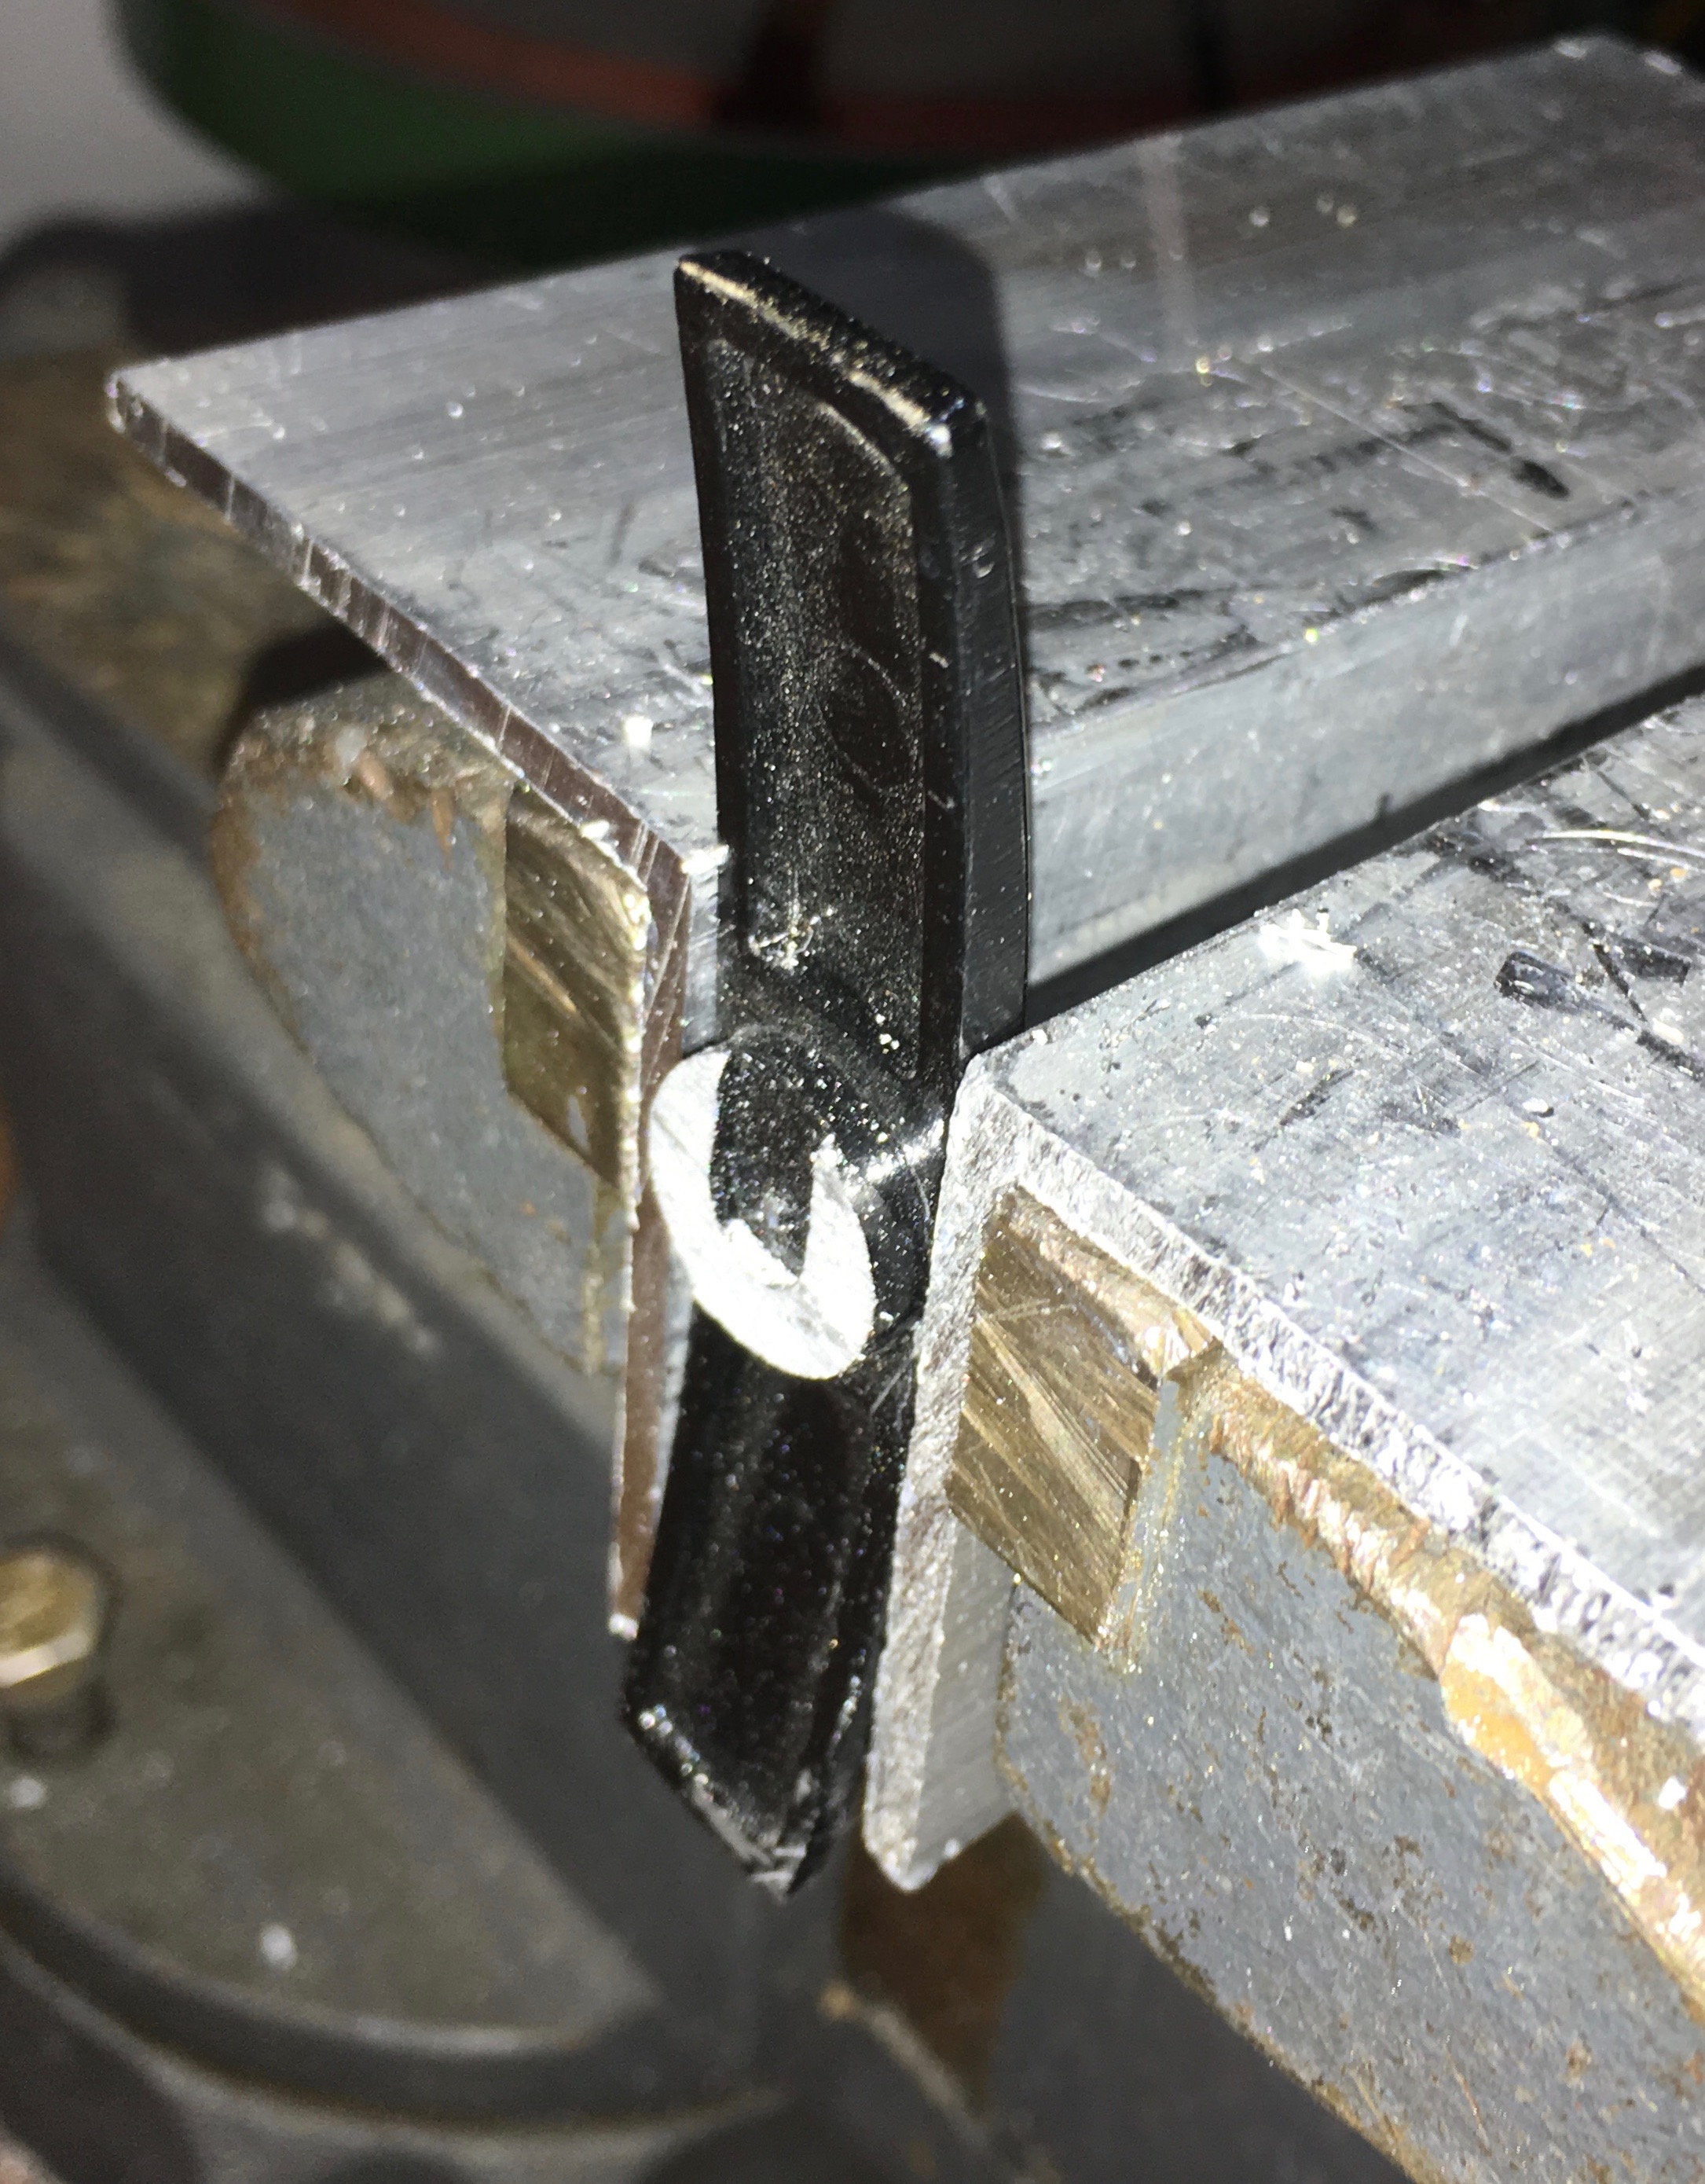
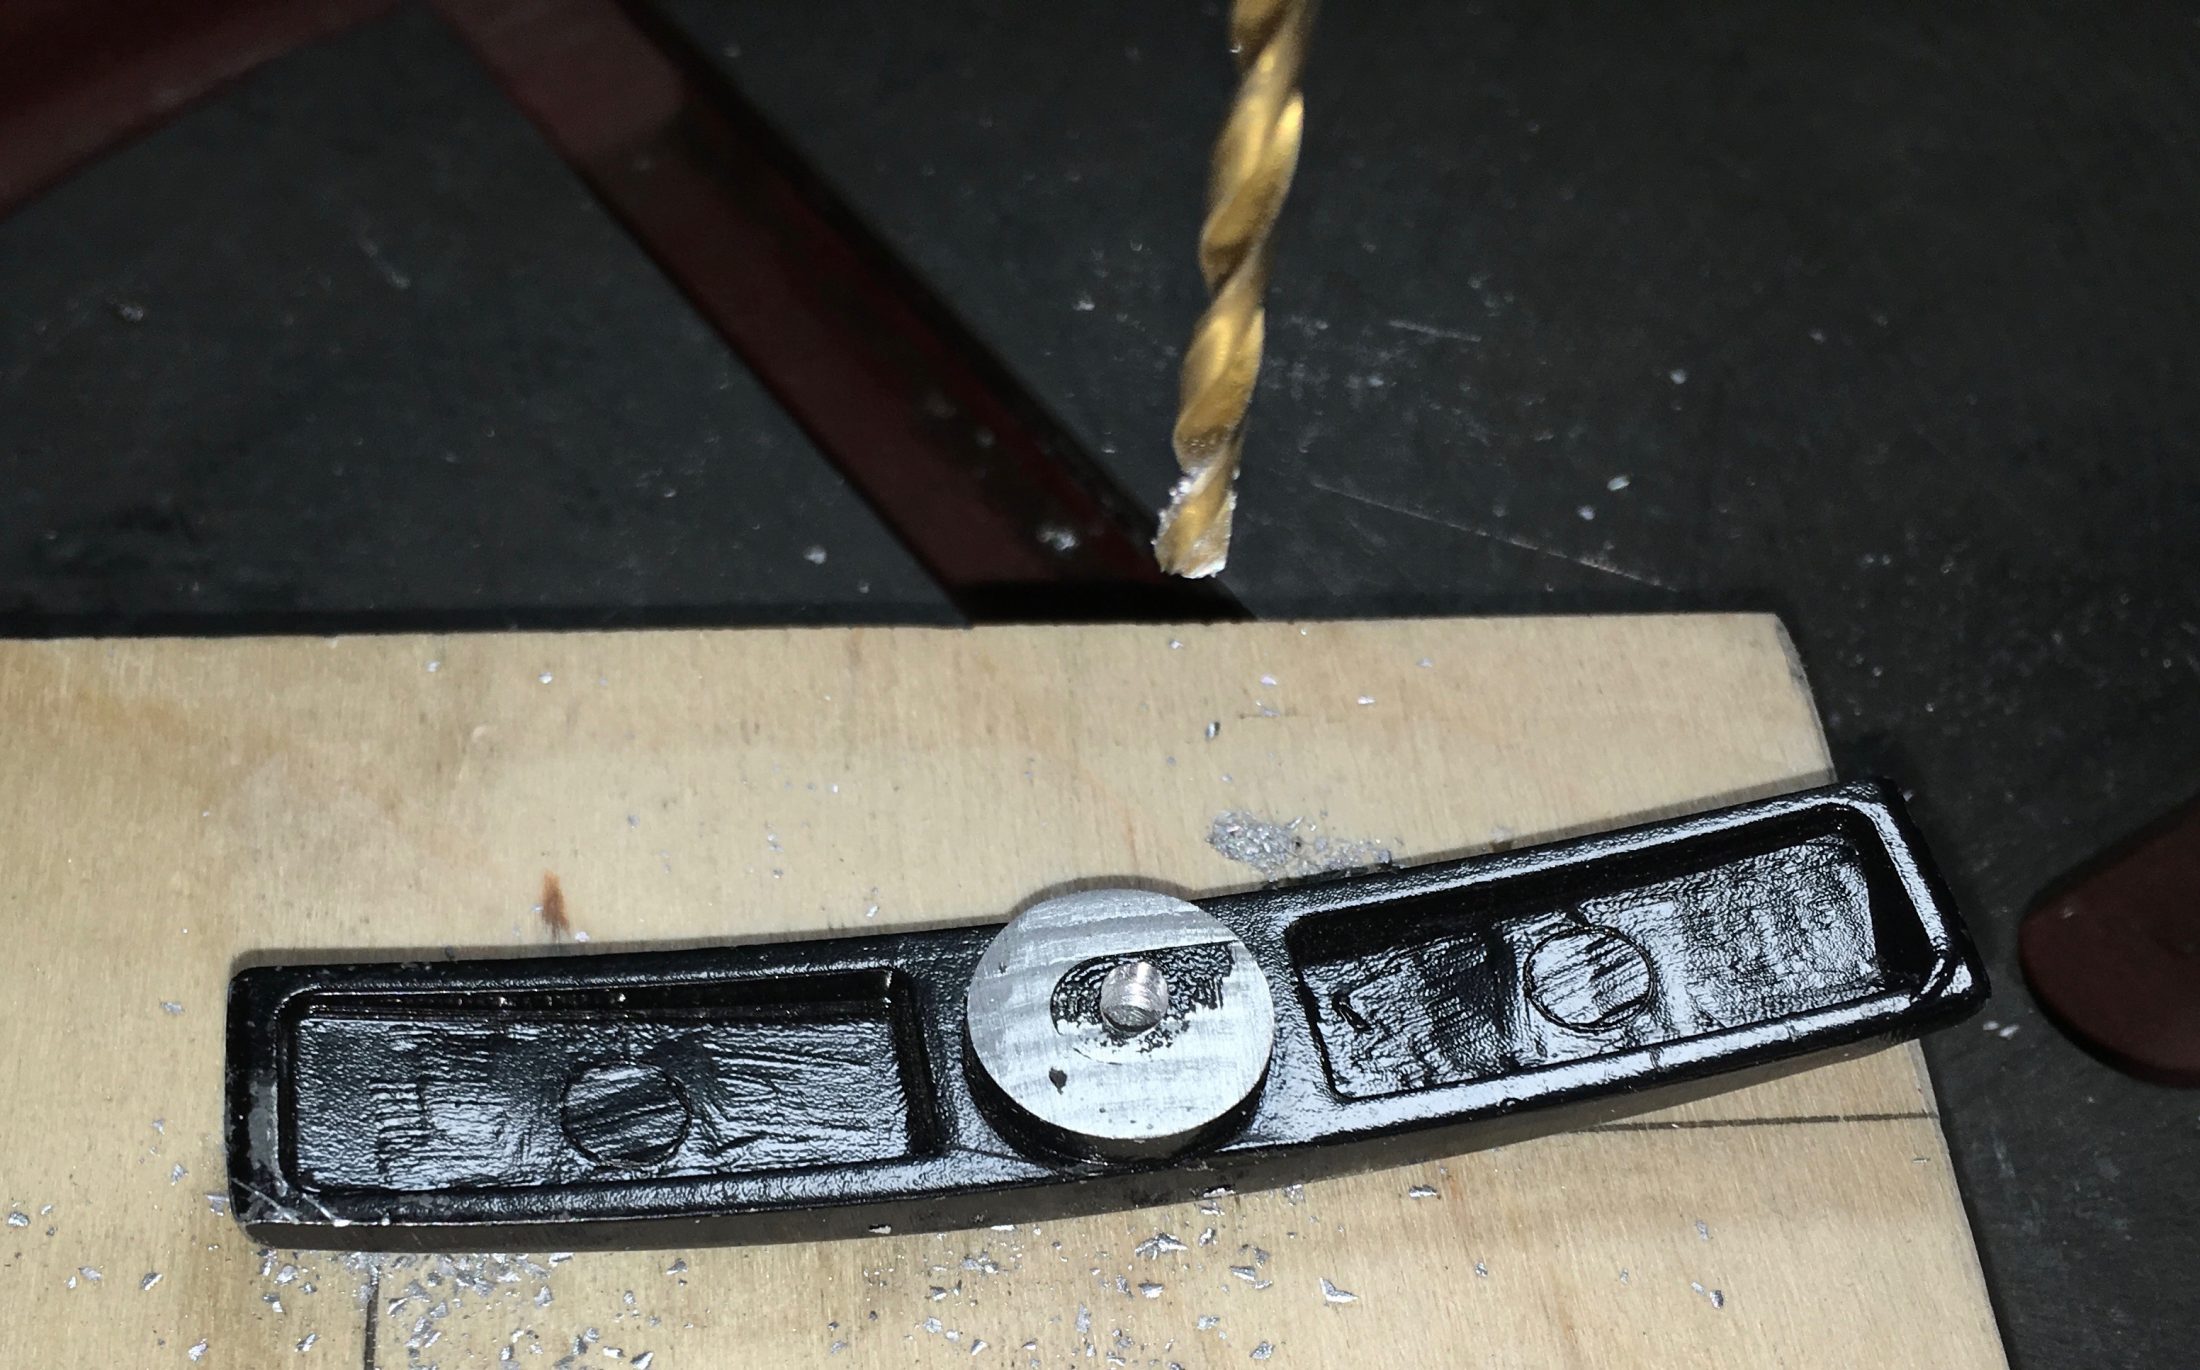
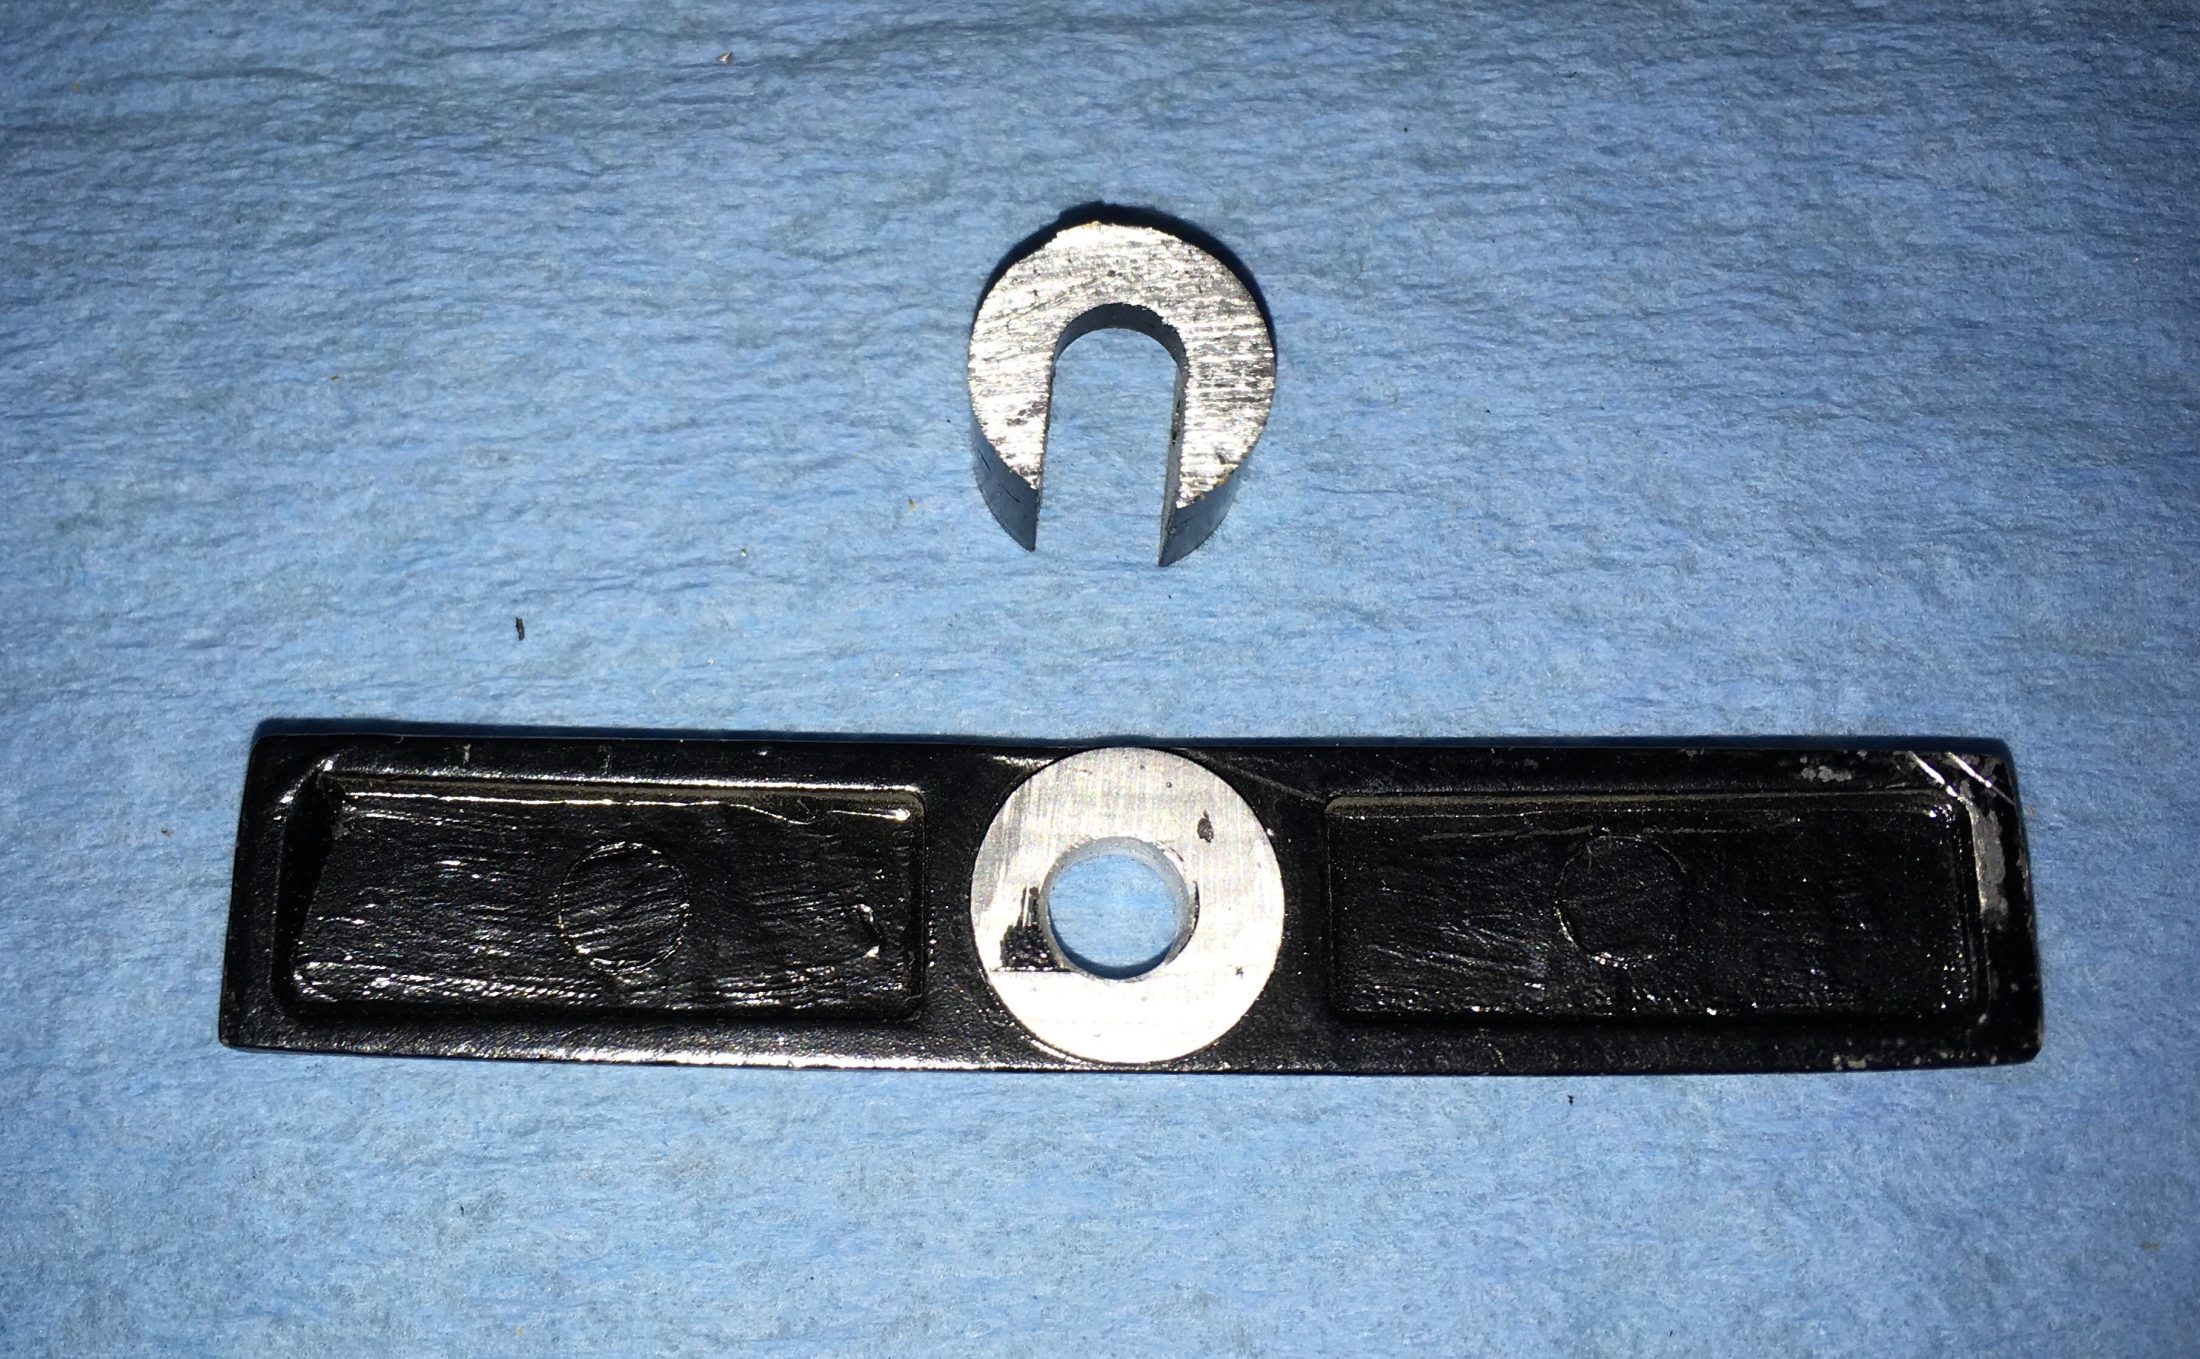
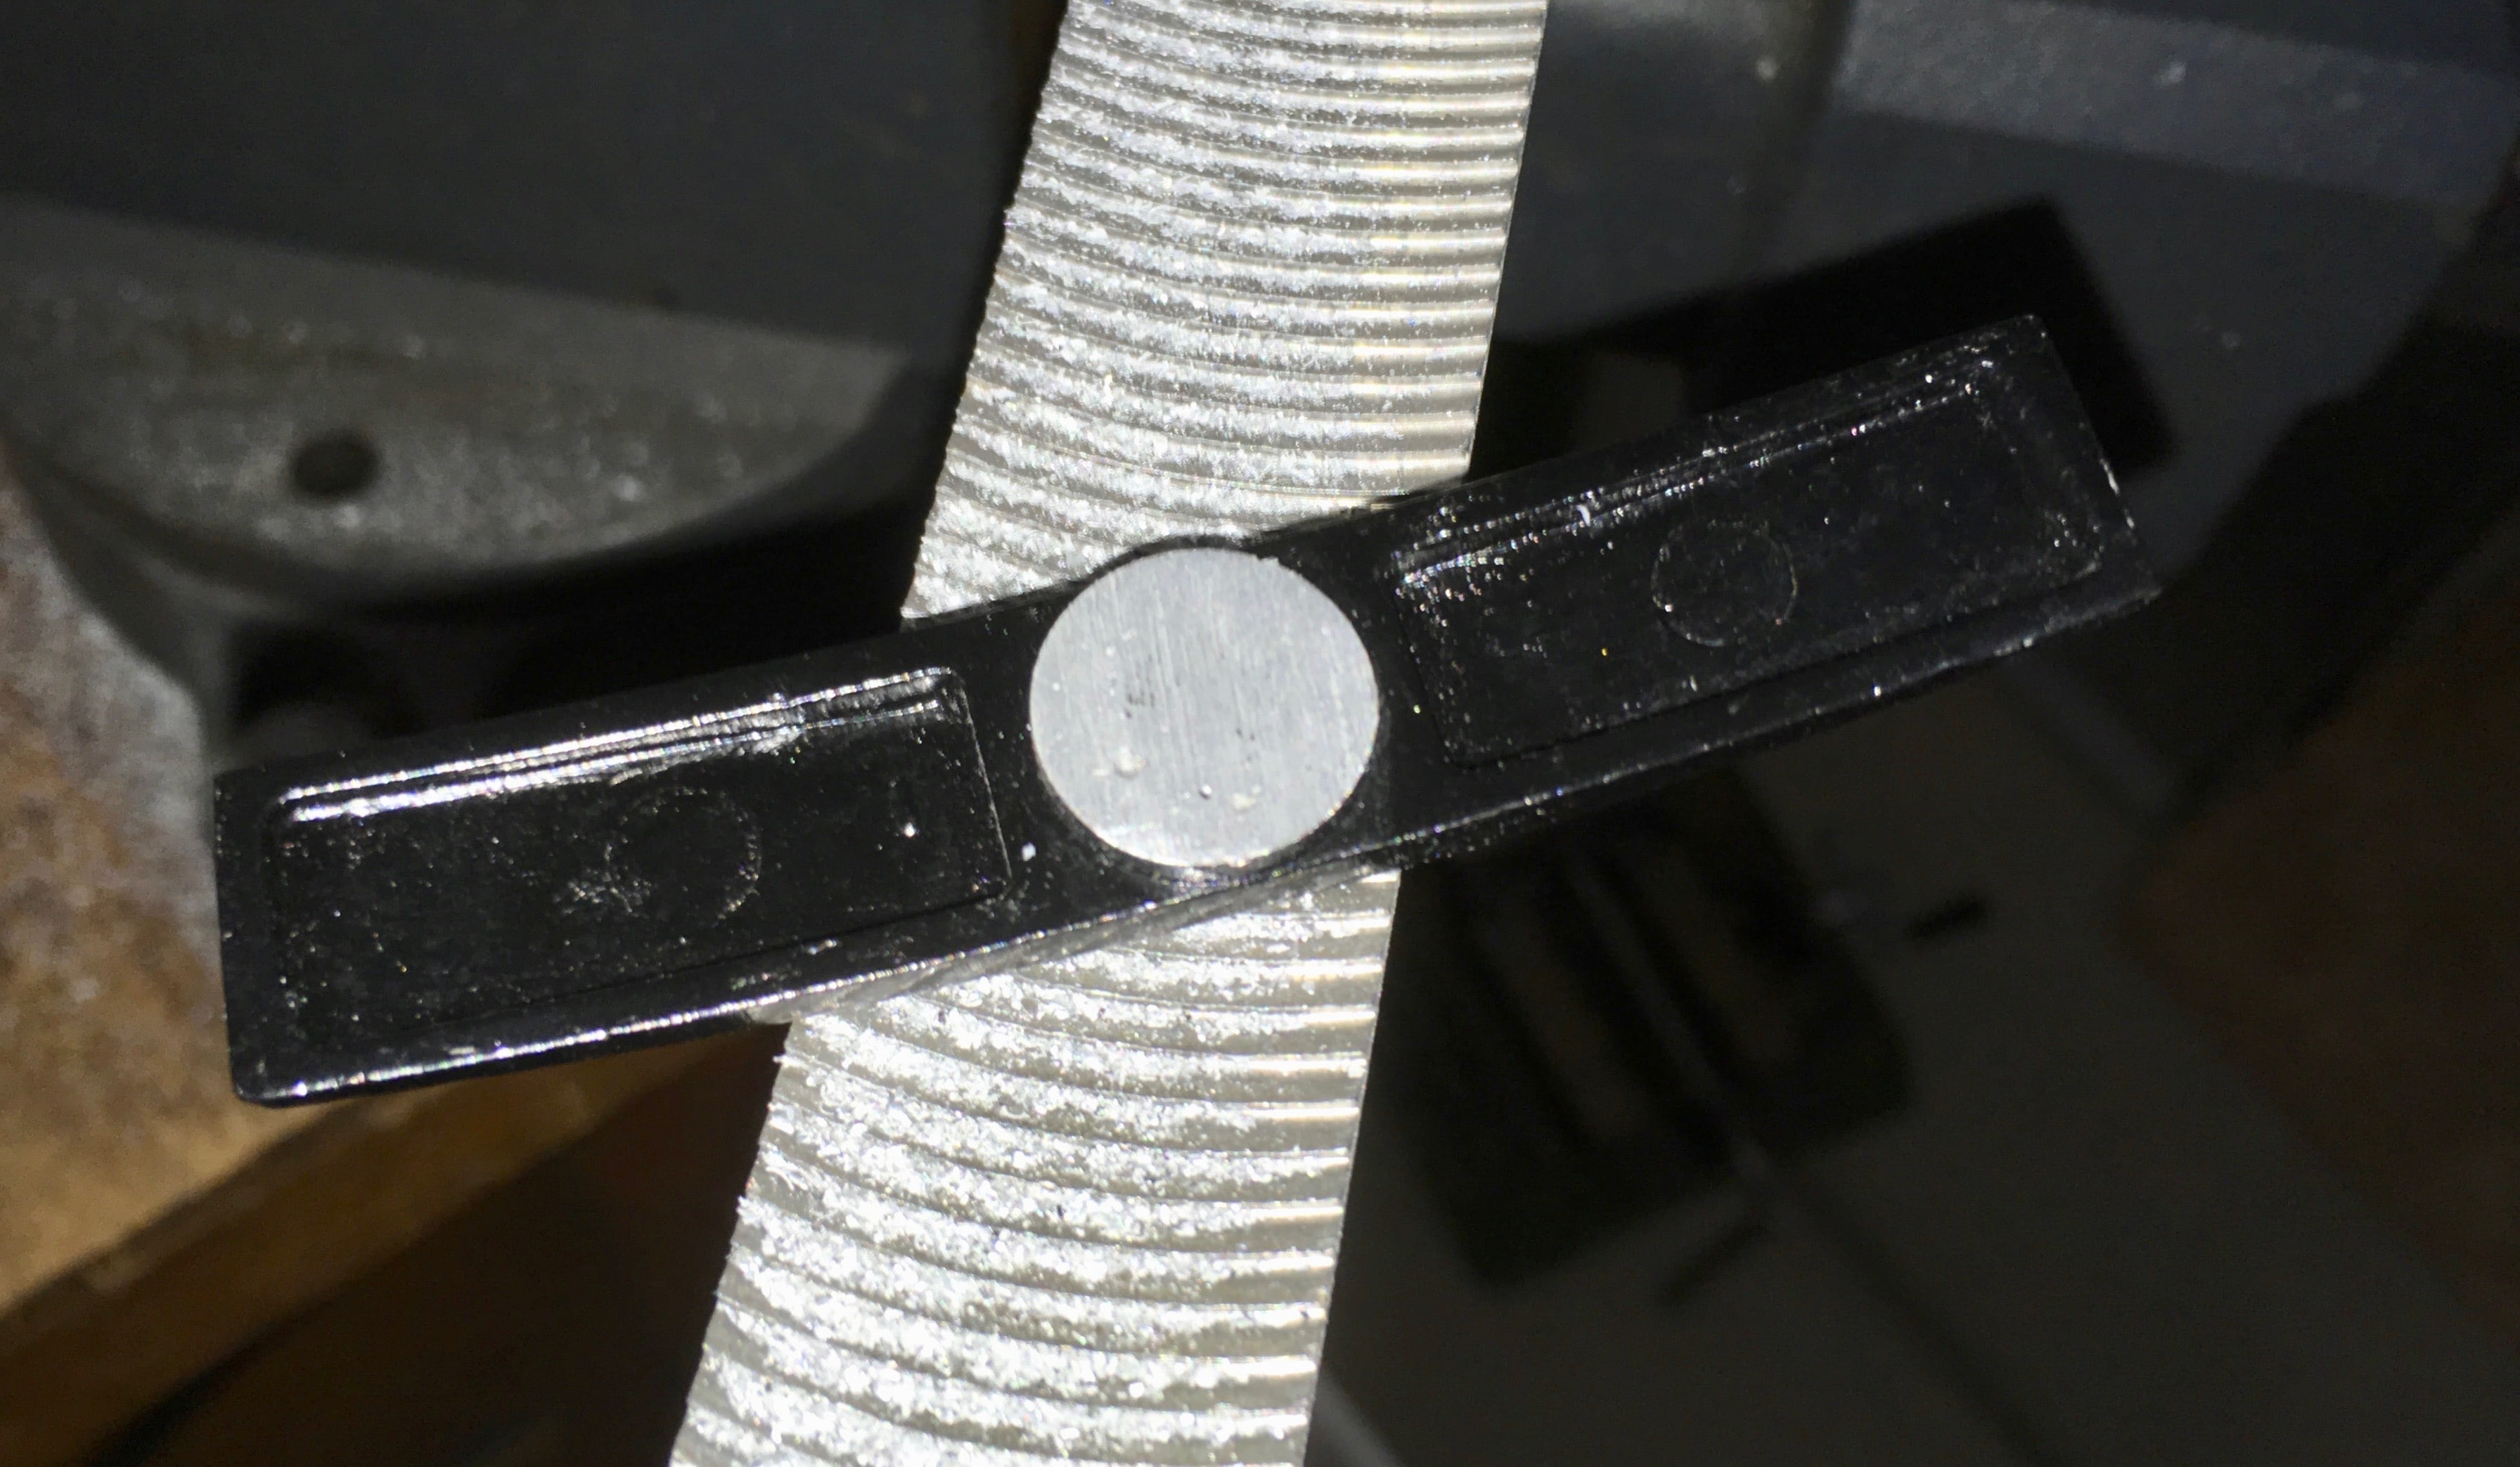
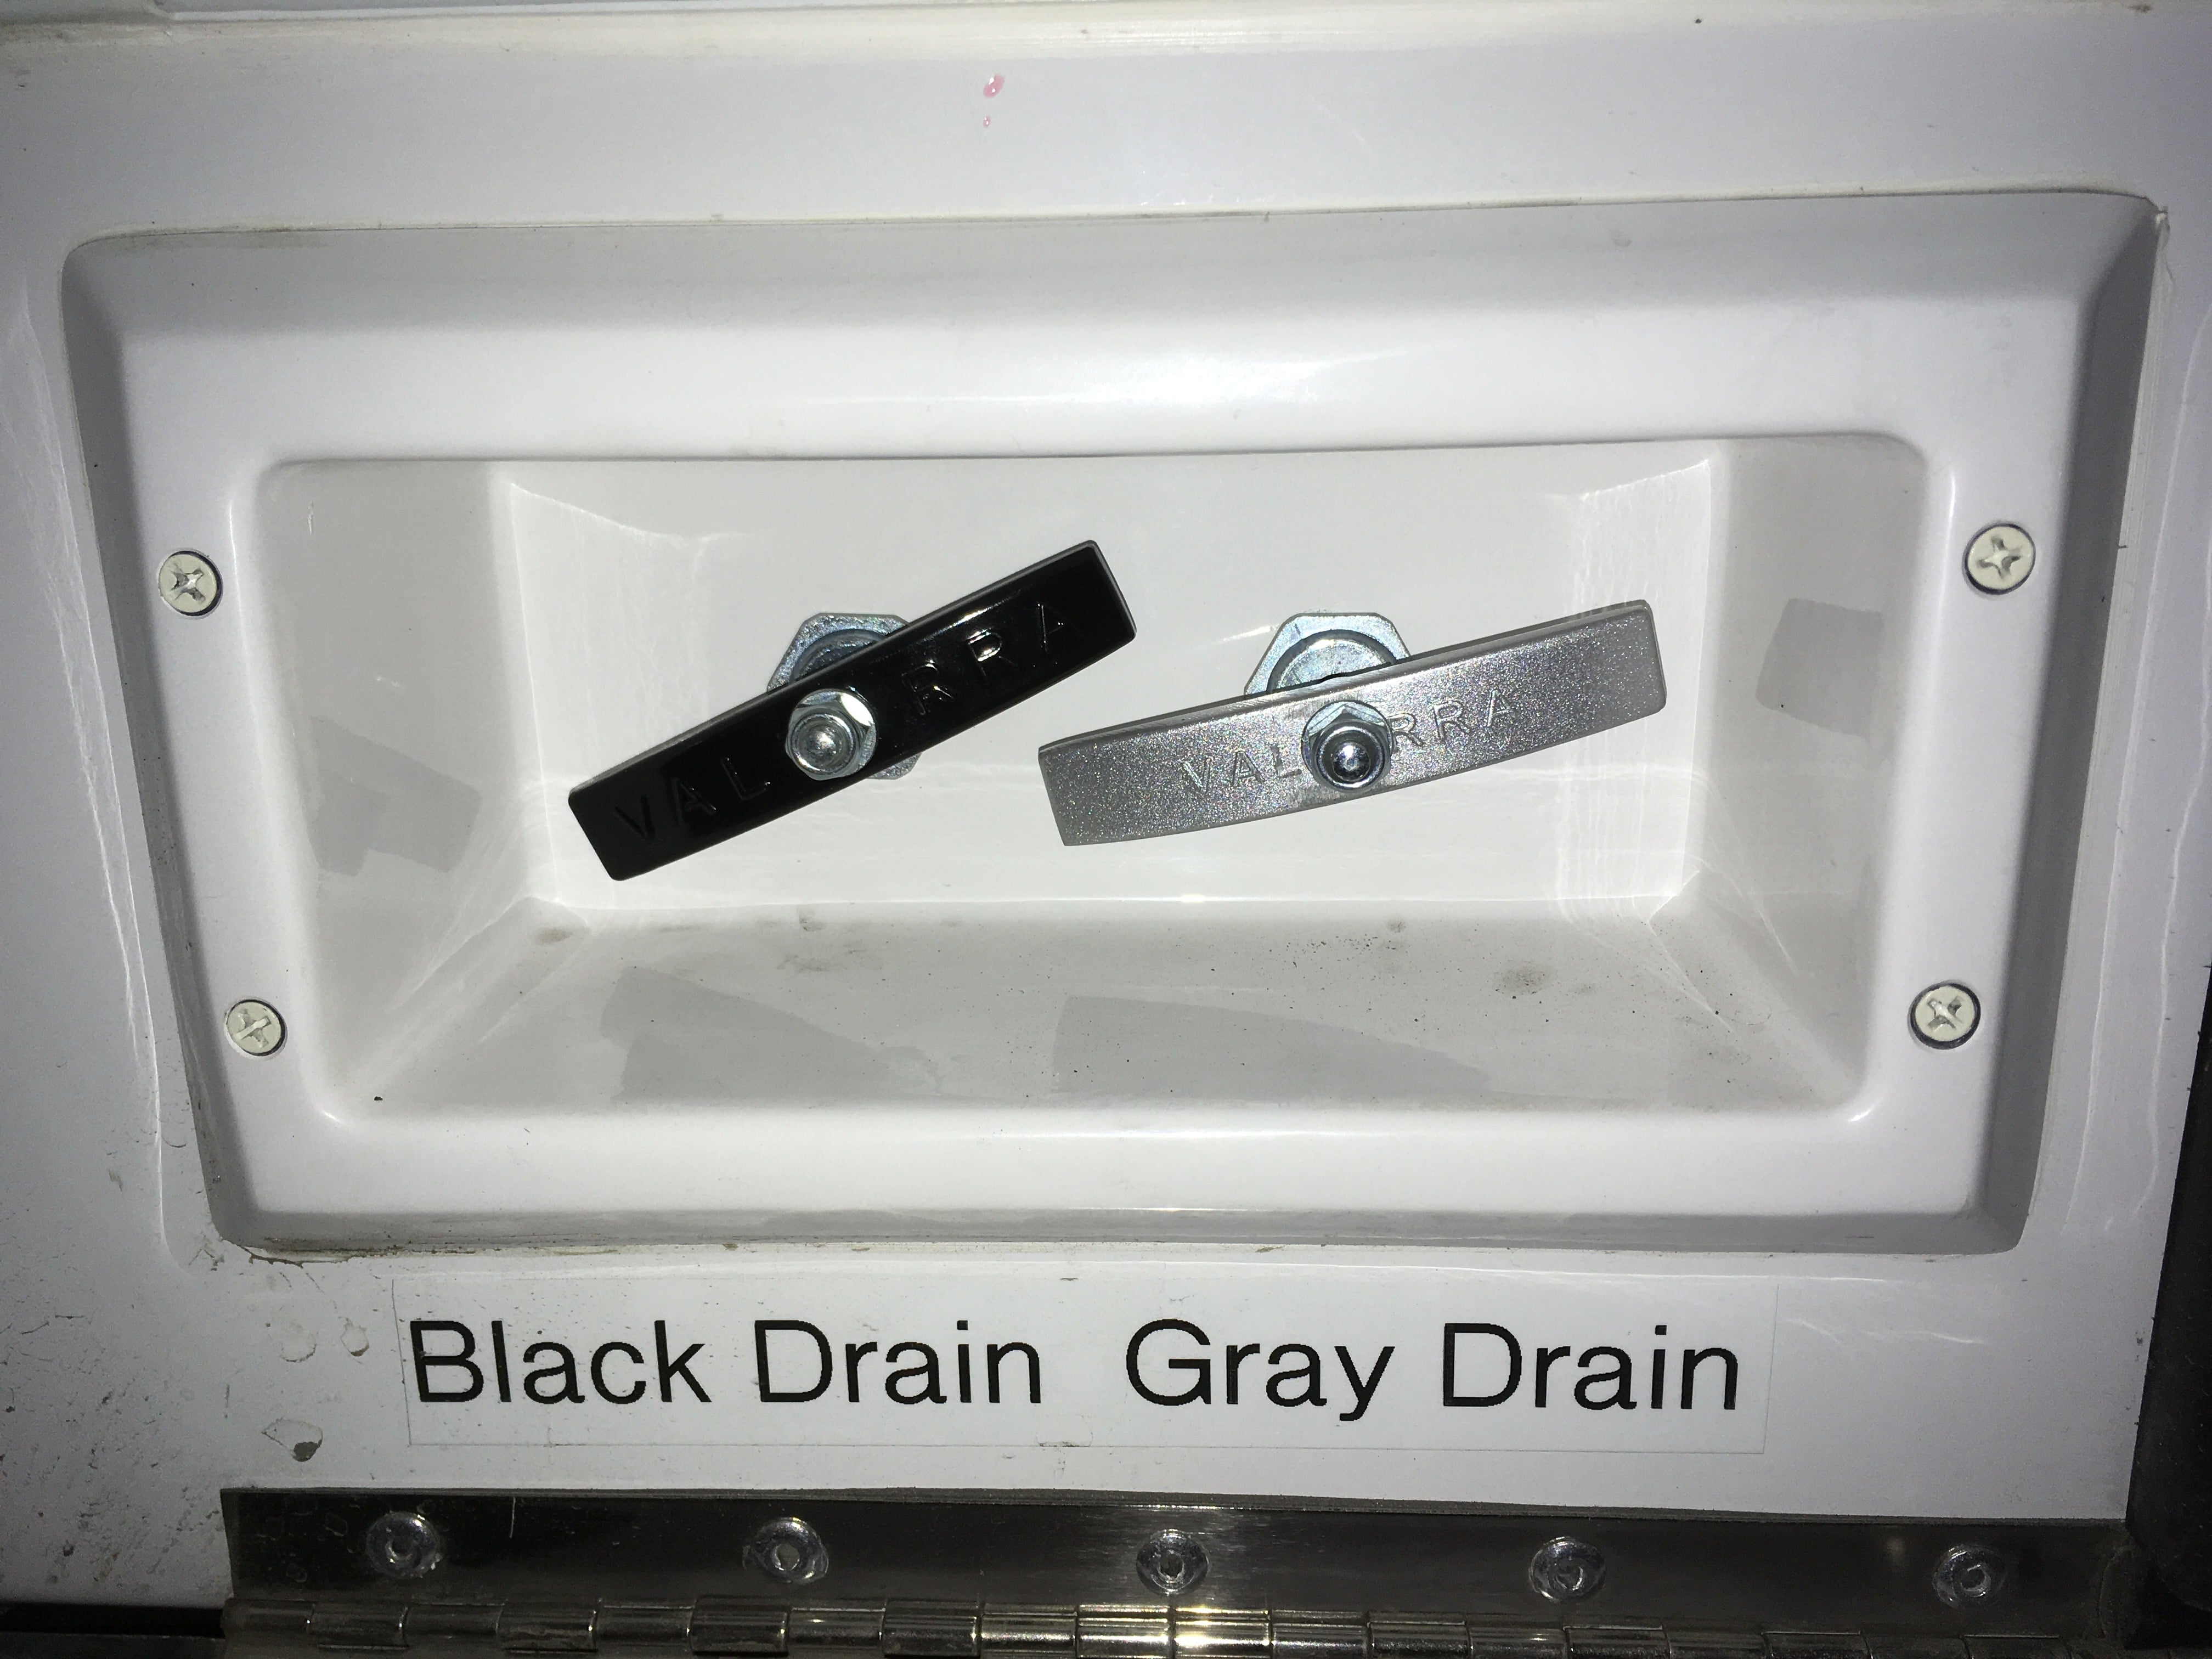
This is related to this thread, read more info here if you want to: ...http://olivertraveltrailers.com/topic/looking-for-a-threaded-waste-tee-handle-metric-6mm/ I never did locate a 6 mm threaded handle, so I modified the 1/4-20 threaded one I bought to make a silver colored Gray Water handle, and modded the other black handles to match. Here is the big reason to do this mod before one of your handles breaks off ... the dinky hollow roll pin through the handle is simply inadequate for the job. This one split into two long halves during removal: If your tanks are completely empty, it will make this job much easier. Don't accidentally dump anything nasty on the ground or get black water in your gray tank.... you will have to pull the rear handles out all the way to do this. Remove your old handles with a 1/6" pin punch and a helper (to hold a heavy block of wood underneath), after some really bad words. These handles are a pain to remove by yourself, and would be more so while camping. With a helper it doesn't take very long. Here are the threaded aftermarket and unthreaded Oliver handles for comparison. Secure a handle in a padded vise and cut off the excess shank with a coarse hacksaw blade. The finished handle needs to be 1/4 inch thick or less where the threaded rod goes through. File the cut side flat and true (90 degrees all around) and also take a little off the other side to provide a flat in the center. I used a large curved tooth mill file held in the vice and it worked well. Drill a pilot hole and then a larger one straight and centered, I used a 15/64",(just under 1/4"). I used a drill press just because it was there, but you could use a hand drill if you are careful to keep it aligned: Here is the finished handle with the cut off piece: And the other side after painting. I used DupliColor (brake) Caliper Paint - it sticks very well without primer, is really hard (contains ceramic) and it dries fast. I use it for all small paint jobs and am always happy with the results. Run the rear nut all the way down the threads, insert the handle, add a flat washer and a 6 mm Nylock nut. Clamp the shaft carefully with a small vice grip pliers to keep it from turning. Align the handle as desired, secure nuts. Done: Don't forget the one in the bathroom. This is one of those silly little things that takes a little time but virtually no money, as long as you have access to the tools, but it will save major headaches when your handle snaps off in your hand at the dump station, with a line of anxious campers behind you. John Davies Spokane WA
1 point


.thumb.JPG.dd838cdb3df463dab6a16861fa23a319.JPG)


-
Recent Achievements
-


")
")

")


