Leaderboard


Popular Content
Showing content with the highest reputation on 04/02/2021 in all areas
-
3 points
-
We’re heading out in a few weeks for KY, TN, AL and AR. We’re going to do some Bourbon trail touring. We’ll be home a few weeks in June the will be in Colorado the month of July. Our COVID shots are done as well. As far as I’m concerned we’re back to normal. Mike2 points
-
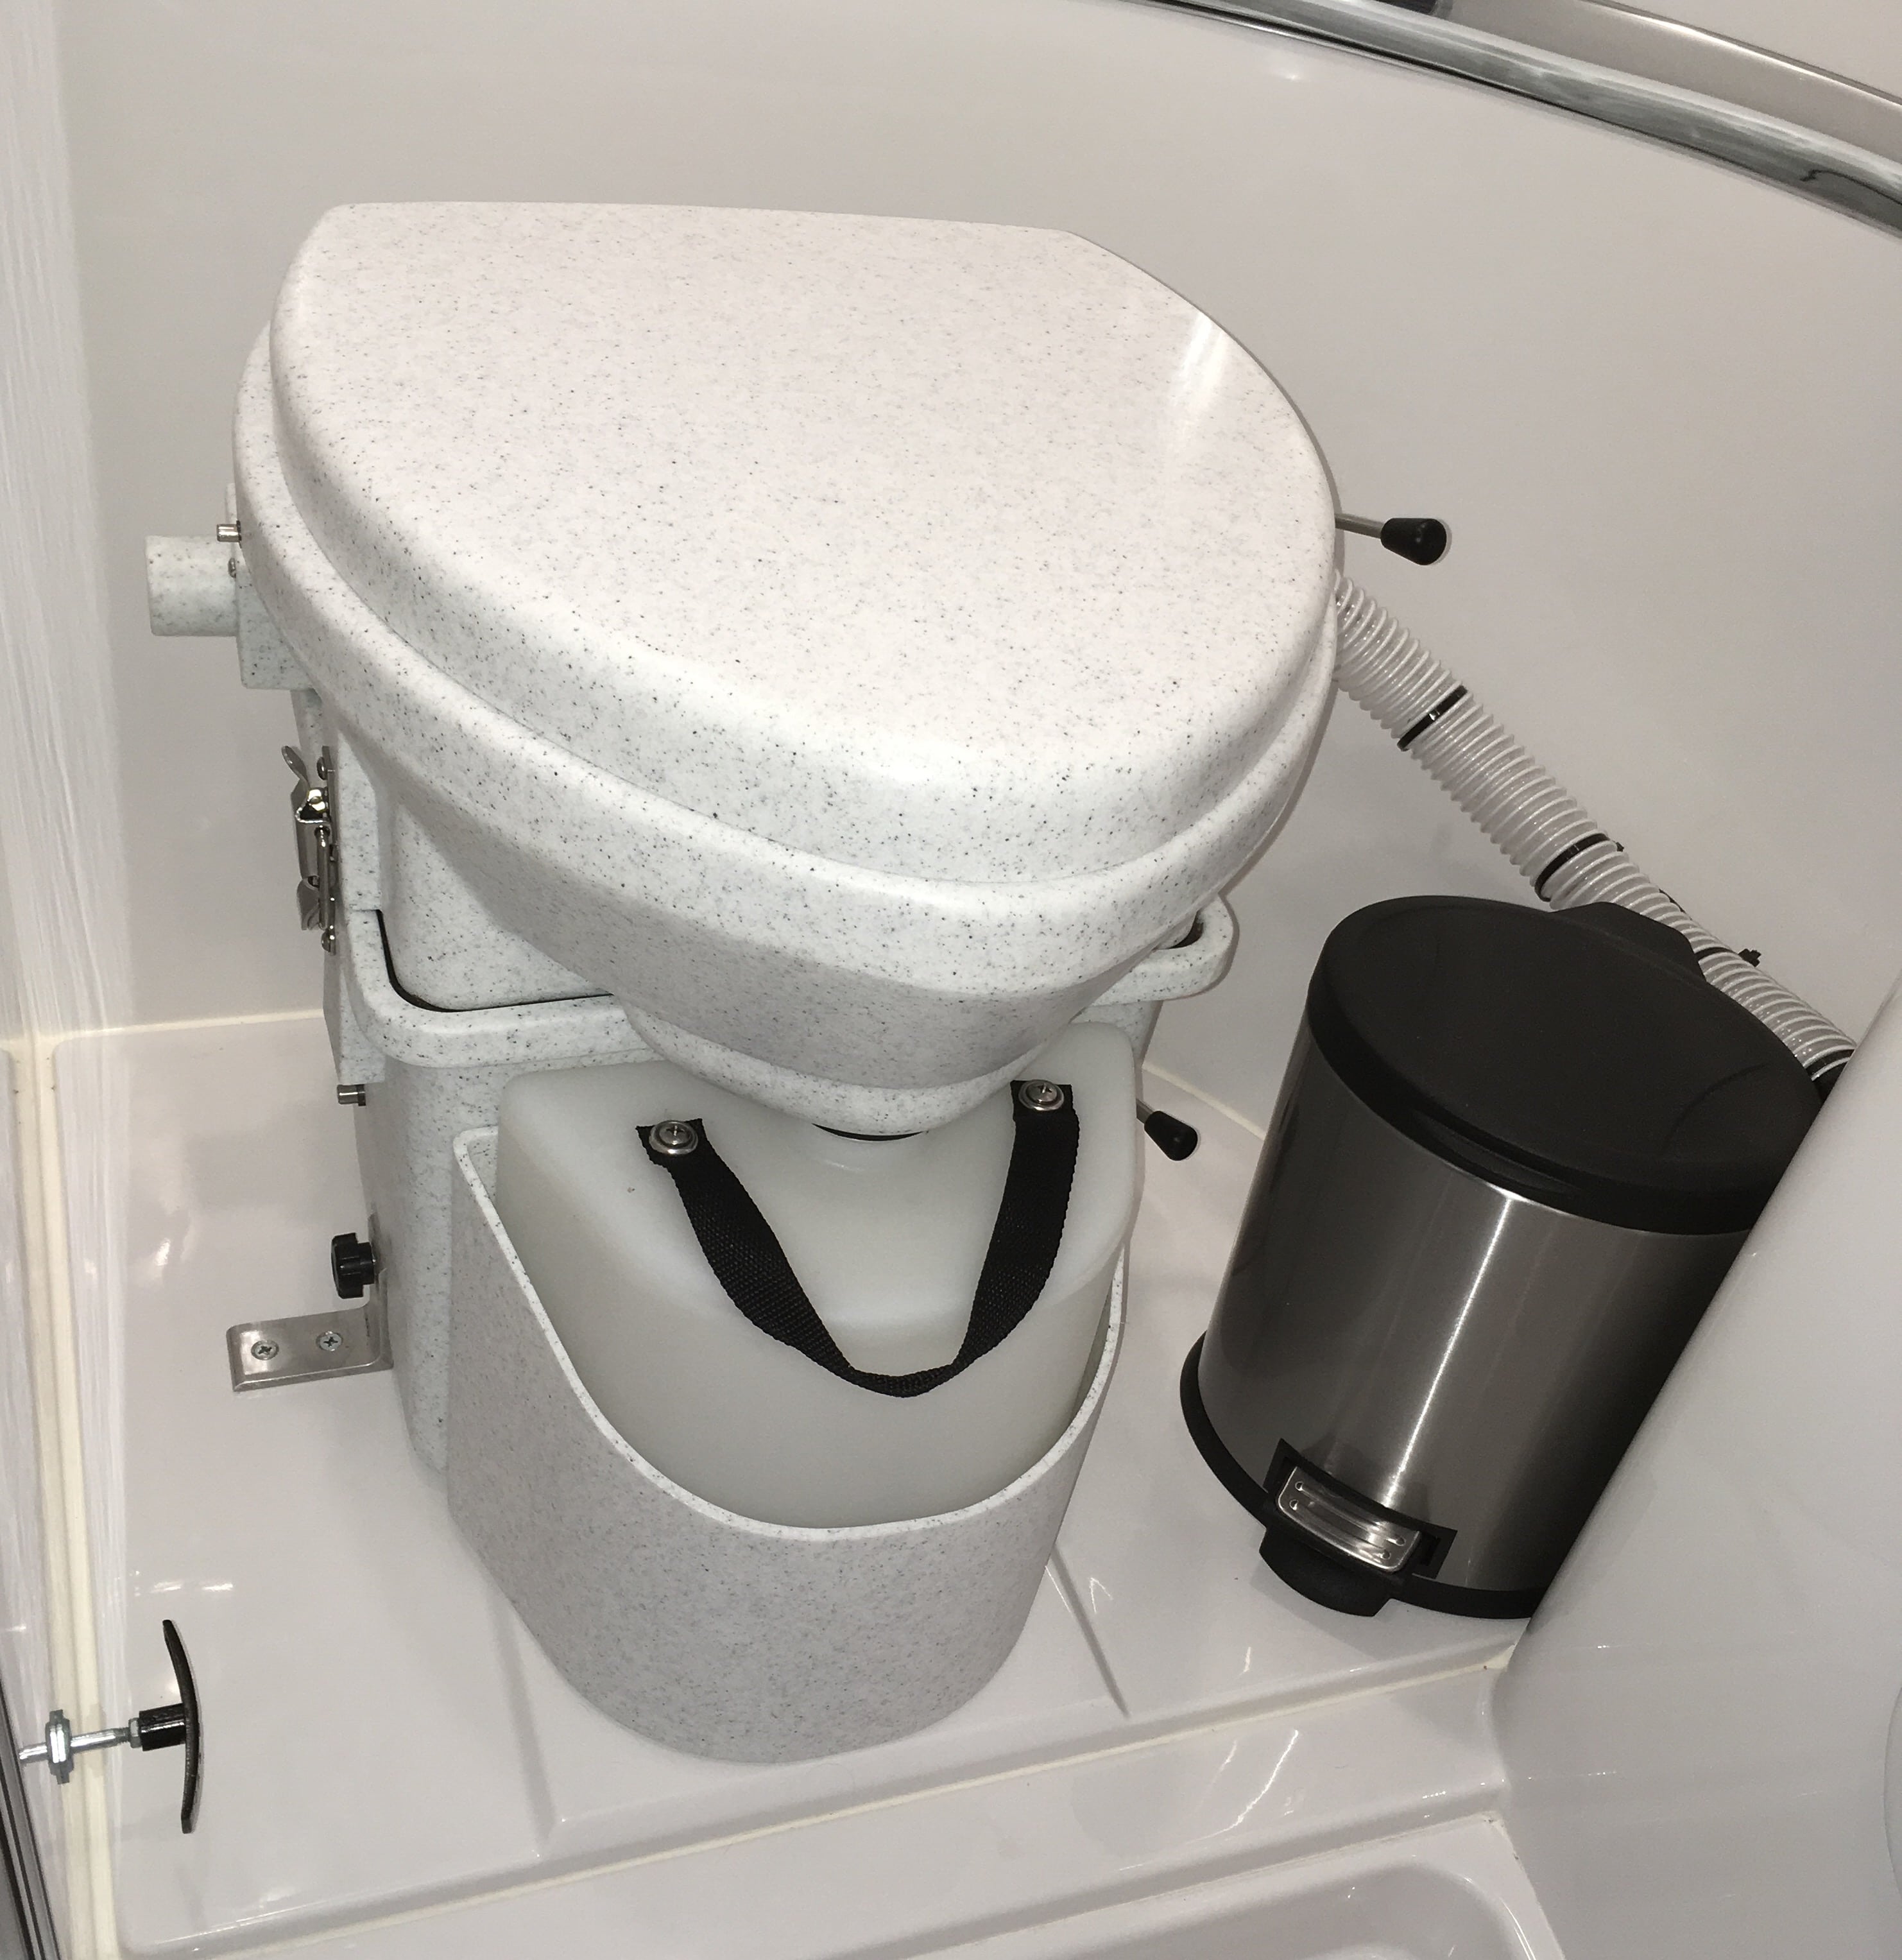
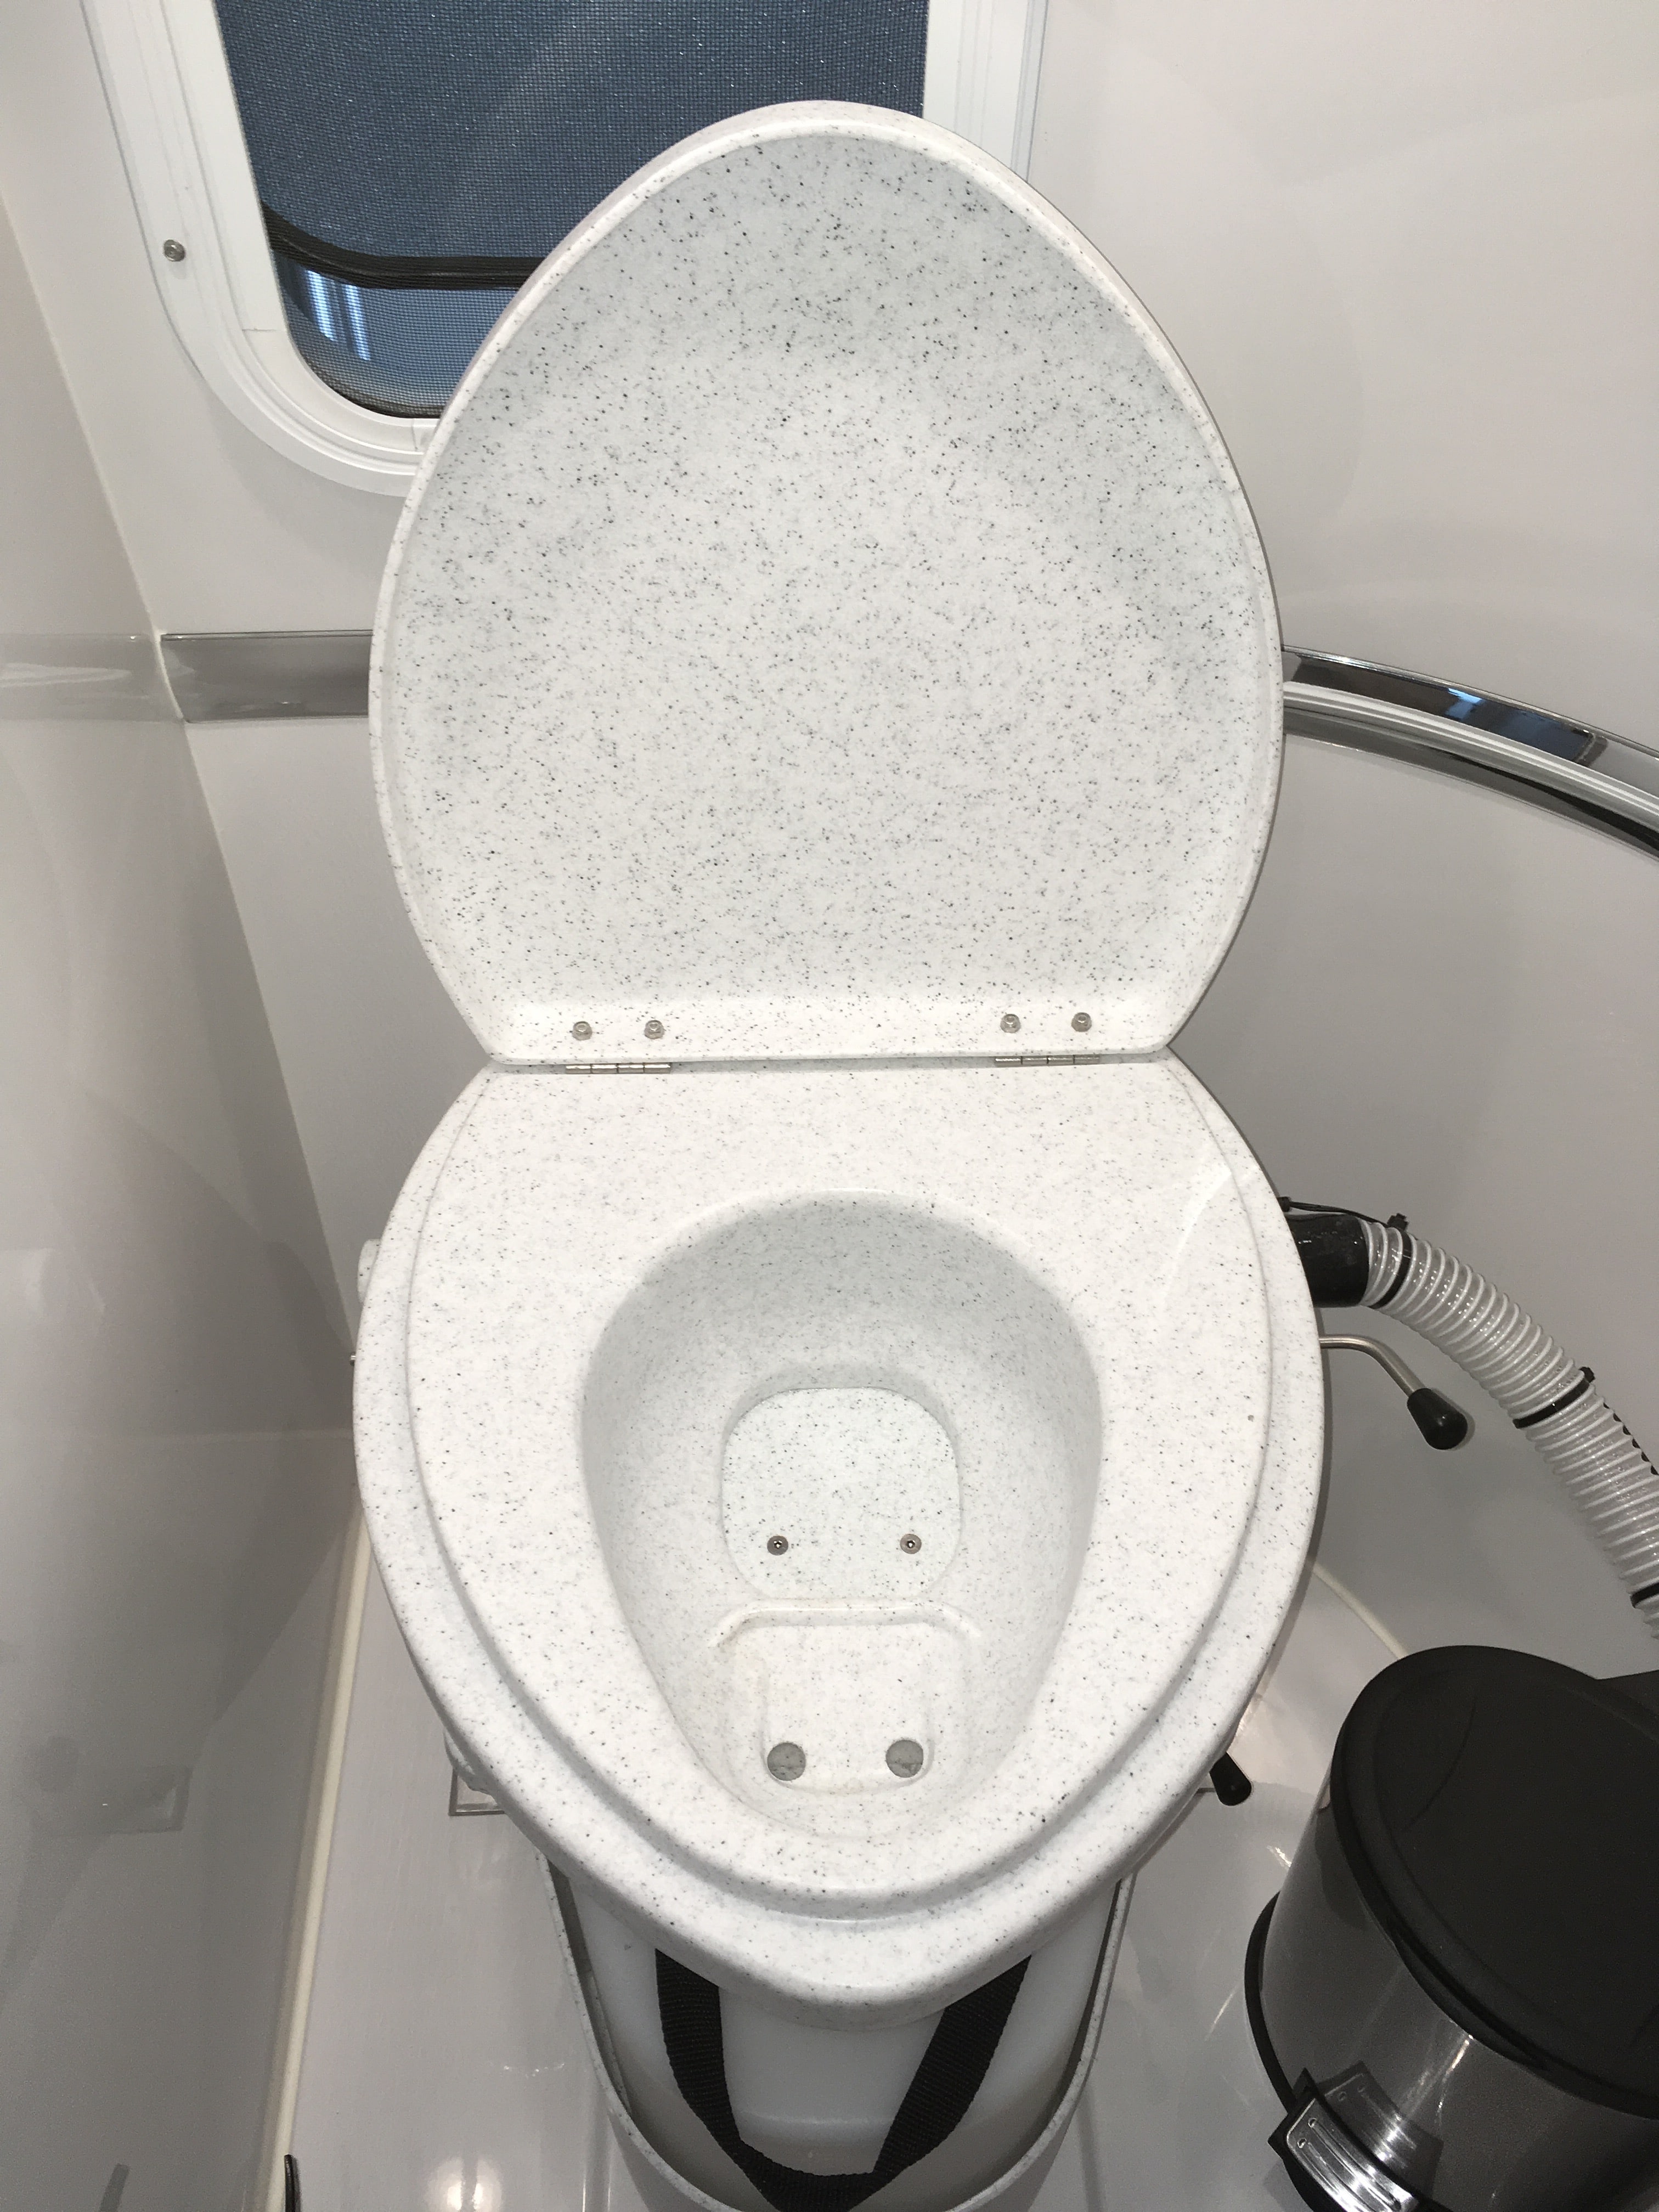
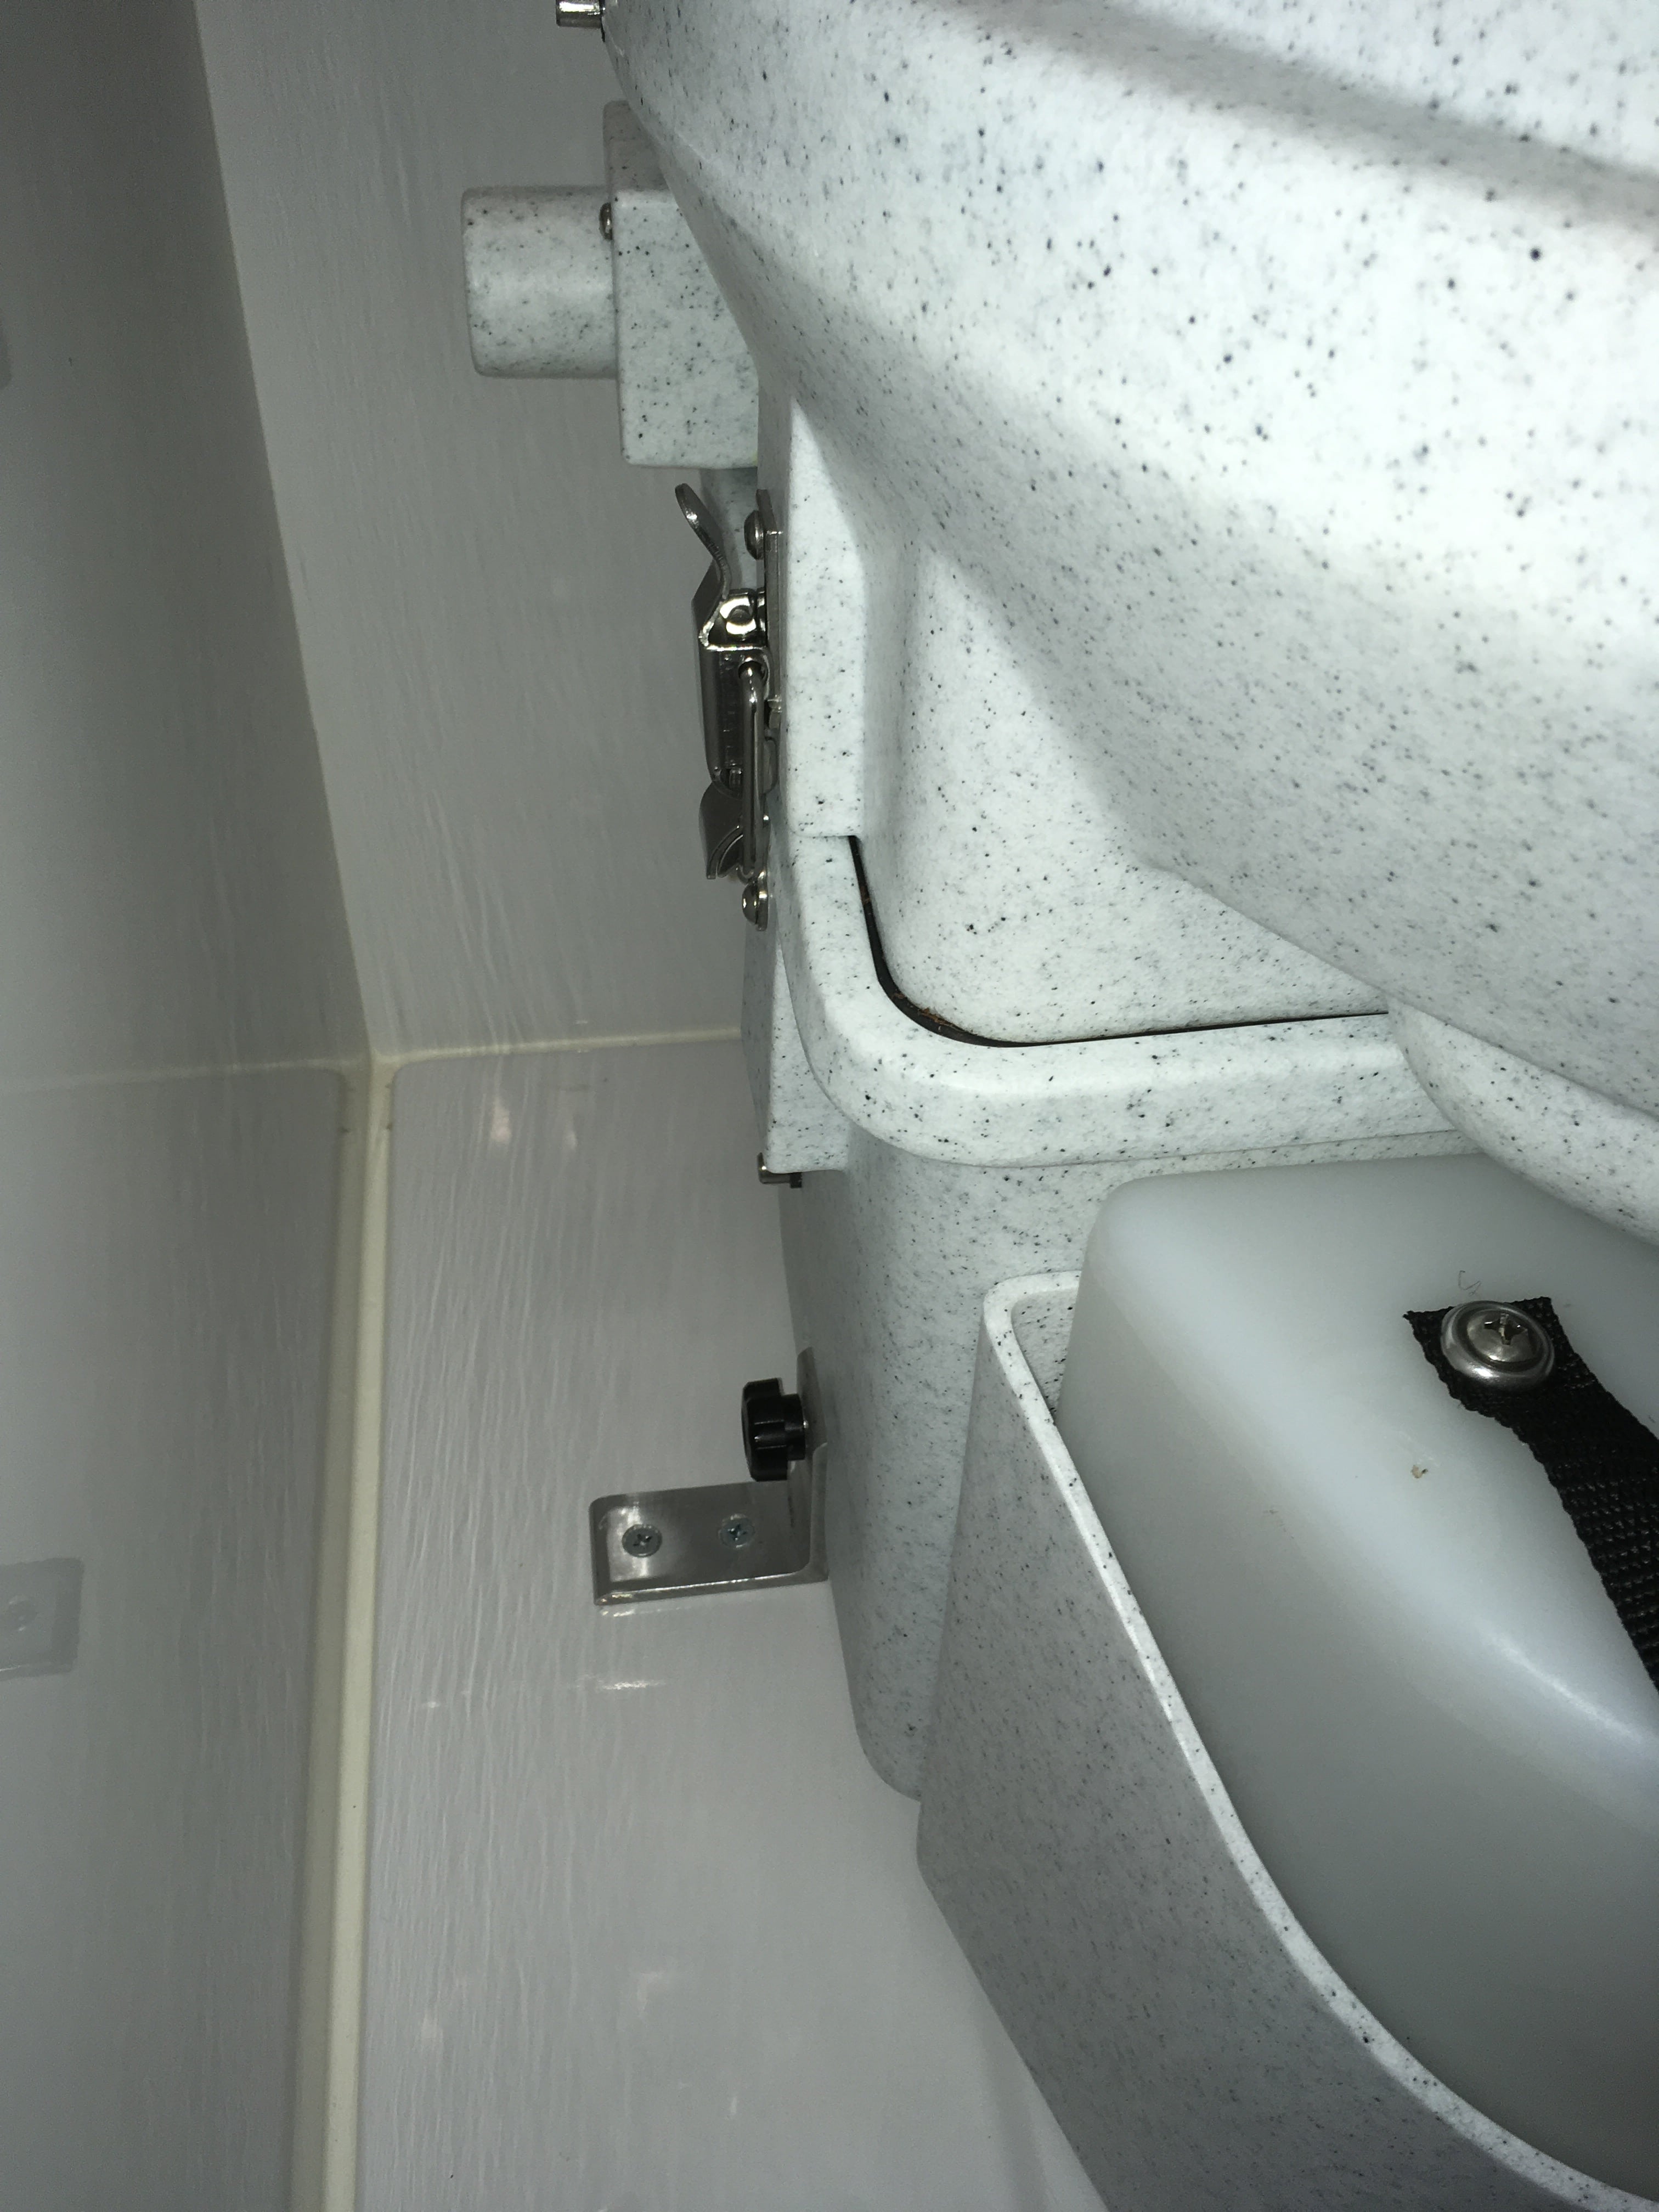
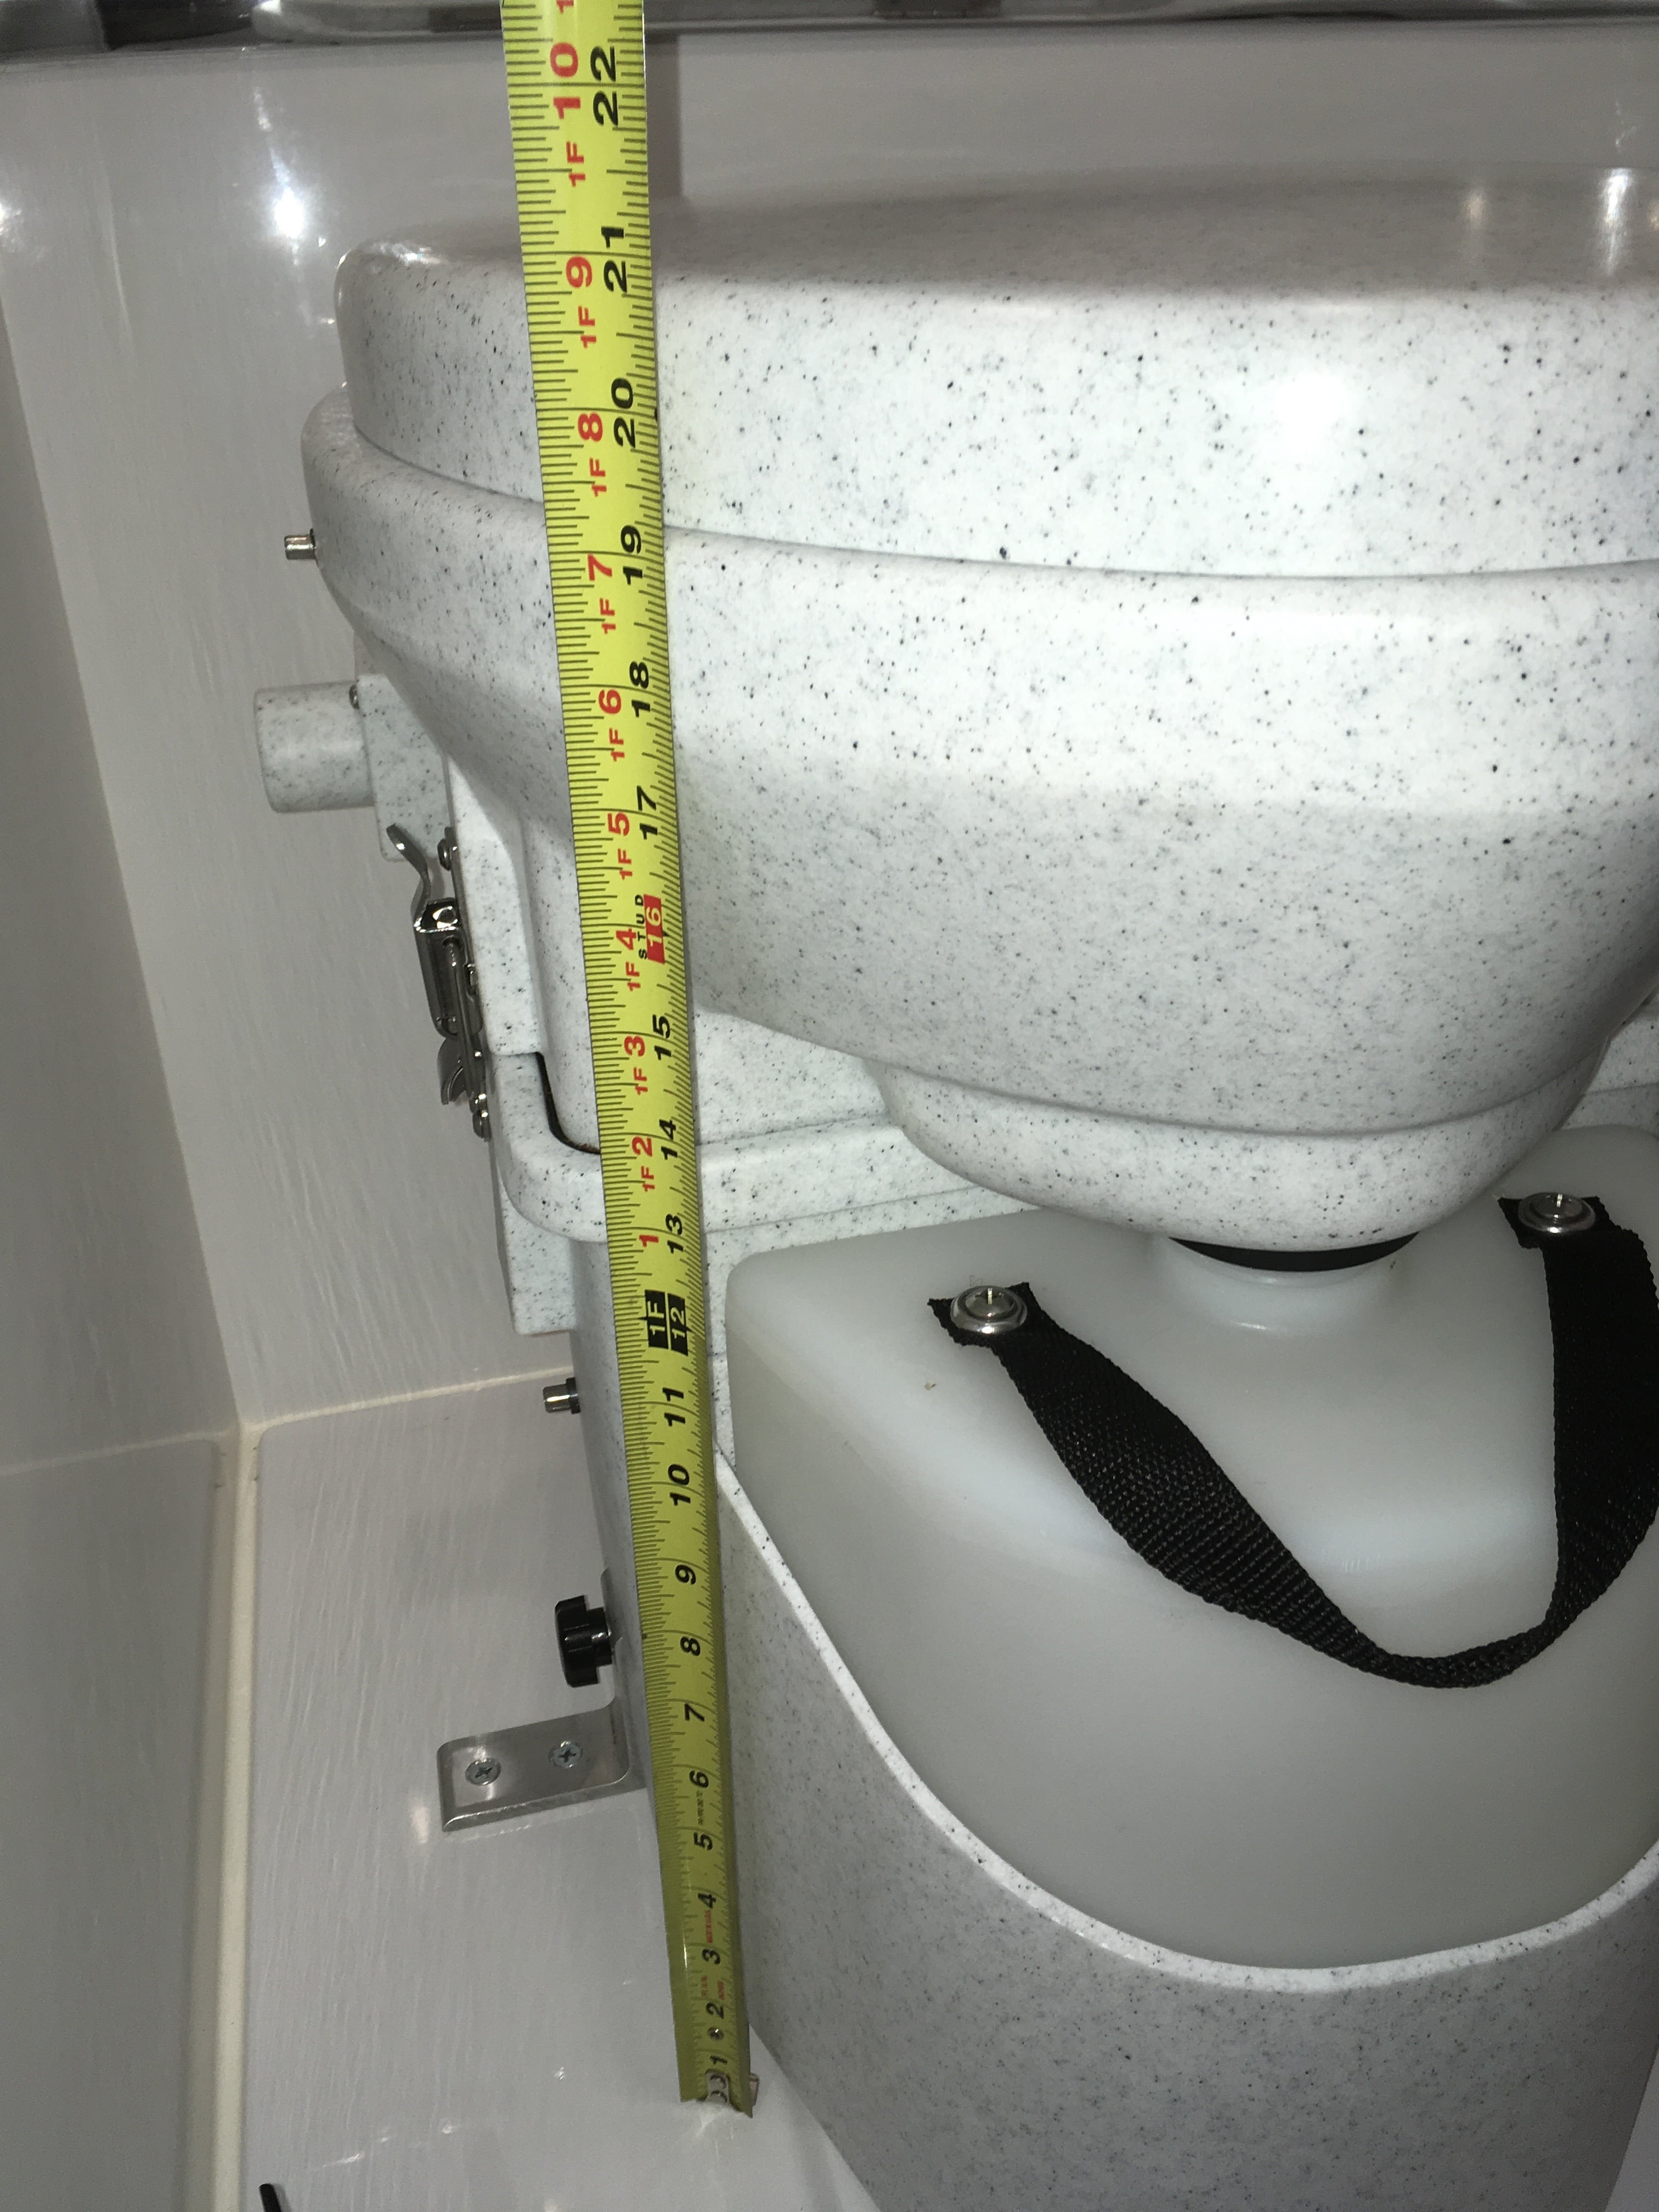
EDIT 12/10/23. Useful link: https://olivertraveltrailers.com/forums/topic/6720-natures-head-compost-toilet-troubleshooting-user-guide/ EDIT 06/06/23. This is an Oliver factory installation, not mine. One member has assumed that I did this. There are a number of threads asking about this toilet. I hope we can gather up a lot of the talk here in one place. I think there has been one other installation in an Ollie but there have been NO published pictures of any kind, that I have been able to find, even from the factory. This is baffling to me. I really wanted to cut the dump station umbilical. We routinely dry camp and finding an open station during a busy holiday weekend or off season is not something I want to face. With the NH toilet we can get rid of our grey water with a 3/4 inch garden hose. In many western states it is legal and encouraged to run a hose out to a nearby shrub and let your water trickle into the ground. The black tank, drain plumbing and vent system are all completely retained. The factory folks are extremely reluctant to delete these parts, since they are part of their certification. If you wanted to reinstall a regular toilet, it would be a very minor job. The fresh water line is even in place, next to the wall. You could sell the used NH for $400 and that would pay for the replacement conventional RV toilet, with a lot left over. An RV toilet is less than $200.... I chose to charge the base with coconut coir rather than peat moss, since it is a renewable resource and doesn't damage the environment. https://smile.amazon.com/s/ref=nb_sb_noss_1?url=search-alias%3Daps&field-keywords=coconut+coir I made the mistake of just dropping a dry 2 pound brick into the bottom, adding water and then letting it hydrate. I ended up with WAY too much material. You need to do this in a bucket, outside, and then transfer the expanded stuff into the base, and the leftovers into gallon zip bags. The correct height is even with the internal agitator centerline. Any higher and it becomes difficult to turn with the handle. It takes about two gallons, I did not measure. There are many online sources with info. To summarize: Sit to pee, everybody, so there is no splashing. The trapdoor stays closed and your pee goes forward, and then down into the reservoir. Which you pre-treated with a half cup of vinegar, to kill the odor. That part is easy. To poop, open the trapdoor, finish the job, wipe and close the door. Give the agitator handle two or three turns. The poop and paper will decompose rapidly once the natural process gets going, which may take a few days. The fan keeps a steady flow of fresh air into the reservoir and out of the trailer through the existing roof vent. I never noticed any bad odors except the first days, before I figured out that Oliver had installed the wrong fuse, a 1 amp, which had blown. Once I installed the correct fuse (2 to 5 specified, I used 3 amp), the fan worked as designed. The fuse is located in the main distribution panel under the dinette table, right row, bottom position (UN-labeled!). It is best to put only the absolute minimum amount of RV toilet paper into the base. If you put a lot in, it wraps around the agitator and makes it harder to turn. Only stinky paper goes down - the rest (damp with pee) goes into the small covered waste can to be disposed of weekly. The can came from Walmart, $10 I think. Cleaning is simple: spritz the area lightly with a dilute vinegar spray and wipe down with a disposable baby wipe, toss in can. Done. The residual vinegar and wipes control any odor from the can. The pee tank is big but it will fill up faster than you can believe if you have four people using it! Empty when it gets to within an inch or two from the top: Flip the two side latches, carefully rotate the top off the base, remove the pee bottle and cap it. Dump it in any approved location - a pit toilet or a rest stop restroom. Rinse with fresh water a couple of times and recharge with half a cup of vinegar. Reinstall into the toilet and close and latch the top. The pee will eventually form crusty yellow deposits. The fix, I have read, is to add gravel and water and shake it hard, then rinse several times. In two weeks of use I never noticed any significant deposits. The longer you let the poop decompose the better. If you can leave it over the winter, dump it out in the spring and it will be totally benign. If you need to empty it mid-season, remove the pee bottle and vent hose, unscrew the two hold down knobs and lift out the entire unit. Carry it outside and put a 13 gallon or larger trash bag on top, flip it over and empty the compost. Refill with clean coir to the centerline. There is NO need to clean it out. Any residual material will just help the next batch get started. The organic waste you can double bag and put in the trash, or if fully decomposed, it can be spread out in the woods, but not near a potable water supply or garden. The way to keep the smell in control is to keep the pee out of the main reservoir. It's the urine that makes a pit toilet smell so bad.... If you throw up or have a messy poop, you can add a little more fresh coir to help absorb the extra fluids. I keep a gallon bag of the hydrated stuff in the overheard cabinet (along with a quart of vinegar) and haven't had to add any extra. The fan has a dust filter that is supposed to be checked every few weeks, by removing two Philips screws. I think that is way too often in the clean environment of a fiberglass trailer, unless you have a dog that sheds. You can put your hand over the left (inlet) opening and feel a light suction. If that isn't present, you need to clean the filter. The pee bottle sits in a sealed cavity to catch overflows, This is a problem since when you take a shower, a bunch of fresh water gets trapped there. I intend to drill a couple of small drain holes in the bottom. I don't care if the pee bottle overflows onto the floor of the head, at least that way I will notice it! unless it is dark, and I am barefooted.... that would be bad 😉 This is why you want to empty the tank before it gets too close to the top. Agitator handle: ours fell off right away, the shaft has a set screw with lock nut. It is very easy to tighten correctly. I am not sure why the factory guy couldn't do it successfully. Spares: I intend to purchase a spare pee tank ($40), spare lids, and a fan.I already have extra 3 amp fuses. ... http://store.natureshead.net I intend to wire in a small LED in the wire harness to show that the fan has power. You can probably hear it running, faintly, if you are in a very quiet area and don't have bad tinnitus, as I do. The Nature's Head is a cool device, but it is really just a fancy bucket. A solidly built, very expensive bucket. I wish the price were about $250 instead of $800. That seems about right for what you get. OTH it is very rugged, and long time users seem to love it. My wife still has some reservations about using it, and we need to get a short step stool since it sits so much higher than even a tall toilet. This one might work well, and it might fit in close to the base with a bungee cord around it for travel: .... https://www.squattypotty.com/shop/poop-better/classic-ecco I am still learning, but I have no regrets at this time. Questions? John Davies Spokane WA
 1 point
 -
XANTREX :: There is a very helpful app that talks to the Bluetooth control panel and is avail for IOS and Android. ( We are IOS) The app allows easy monitor and control AND CHECKING FIRMWARE REVISION # !!!! I used the app to check Firmware versions and to set the max charging current. We are living at the end of long extension cord and by dialing down the MAX CHARGE CURRENT using the APP , we easily live without big voltage drops. Voltage as seen by the Progressive Elec Monitor panel the shines ever so BRIGHT RED thru the attic window every night so that when we go to sleep we must stuff a pillow case over it so we can sleep in the then almost dark considering the many little LED panel lights the Oliver is blessed with. but we love it ! XANTREX FIRMWARE :: I had no luck finding the Website firmware page/files/history/latest-ver etc in spite of the fact that the documentation indicates you just go to the web site and VOILA >> FIRMWARE . . . . I sent a message using XANTREX contact form and got a somewhat confusing and trying to be helpful but didn't help kind of reply and have not revisited that project yet. Judging by the state of the XANTREX website, the confused SUPPORT page response and many out of date documents on the website . . . the company is trying to save money on their Information Technology Budget. I think the XANTREX is good enough but my impression is that if someone were in a position to choose vendors that VICTRON is a better choice. ( i.e. Victron Energy MultiPlus 3000 with AWESOME !!! power assist !!!! ) Lots to sort thru . . . perhaps we can ALL at some point virtually sit down together and crowd source a QuickStart guide to the many and complicatedly delightful wonders of our modern Olivers !1 point
-
I’ve also been looking at the incremental upgrade cost on the current price sheet...turnkey when new is nice, but also wonder what two more years of lithium evolution will bring. Solar wet cell... (EZ Start and 3000 inverter skews it a bit) to AGM = $1200 to 390 Lithium =$5100 to 630 Lithium = $95001 point
-
If you never offer an option like this, you will never attract those buyers, who often have VERY deep pockets. Sooner of later the Old Fart market for Ollies will die off, and the younger ones will be looking at these trailers. This was not intended to be nasty, I am an Old Fart, pushing 70. I spent today exploring remote BLM land in the Washington Channelled Scablands in my Land Cruiser, with “Mouse” parked safely in a nearby manicured state park, because she will not go there, no way, no how. I have waypoints for glorious places I cannot camp in, unless I pitch my emergency tent.... John Davies Spokane WA1 point
-
So, the short answer, it depends. You need a good monitor, so you actually know how much power you use. And, you also have to know your comfort level, and conservation abilities, and desires. If you want to run ac off battery, it's a whole other ball game. That is probably the target market for 630 ah lithium. A generator is much cheaper.1 point
-
Conservatively, fifty or sixty per dark period. I would find it hard to use a hundred. I'm assuming you mean while boondocking, otherwise it would not matter.1 point
-
The author "are" probably referring to a pond of water aka, in some rural areas, as a tank1 point
-
We are pulling "2 Hobos" out of the barn (Hobo Hideout) at the end of April and will head south from VA. Stops include: Charlotte, NC to visit some friends. Beaufort, SC (my hometown) for a few days. Then on to Jekyll Island, GA to just to hang out on the beach. Next: St. Augustine, FL for five days of bouncing around FL to visit old haunts and some friends. After that we move up towards AL for the unofficial owner's rally with a stop along the way at a HH overnighter. We'll be at Lake Guntersville for four days and then head back to VA with another stop along the way at another HH location. Currently, I'm in the barn installing propane gas monitors, greasing the axles, checking tire lugs torque, etc. Next week I roll it out and dewinterize it wash it, then put it back in to wax and detail. Donna already has most of the camping cloths, seasonal decor, etc. in the trailer. We're anxious to get back on the road. We have had both of our Covid shots (completed 22 Feb). Big trip in the fall will be planned around a wedding in Nebraska so we'll be looking for suggestions of places to stay and see along the way from VA. We'll probably head west for a while either before or after the wedding. Probably end up in Wyoming/Montana area before turning back east.1 point
-
HA! My version, and I say this out loud to people and rap an imaginary cane hard on the floor as I say it: "Back in my day, we didn't have [insert newfangled thing]. We didn't have the number three. But by God we made do." Then I start talking about how my mom, in the Pleistocene Era, got a just-created "microwave oven" and we all stood 10 feet back from it when it was on, lest we end up glowing in the dark.1 point
-
This is the most timely post ever. I was just lying under the window of the Oliver last night "bathed" in the moonlight that was pouring in around the windows and thinking, "I should black those spaces out." Maybe I'll get some sleep then. And here's the solution. I've used the Reflectix to insulate our horse barn windows and buy it at Home Depot. I also used it to make a blackout shade for the window in the Oliver door and still have some on hand. I have never seen the white weatherstripping tape at our Home Depot in Santa Fe, so now that I know they carry it, I'll just order it through them. Thanks! (For yet another Oliver project...) Doris1 point
-
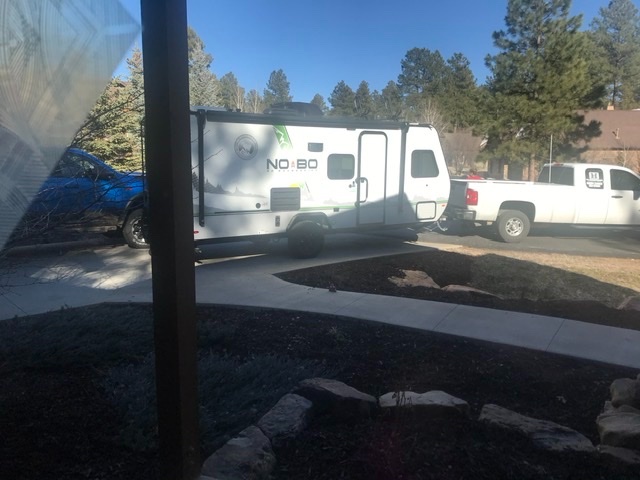
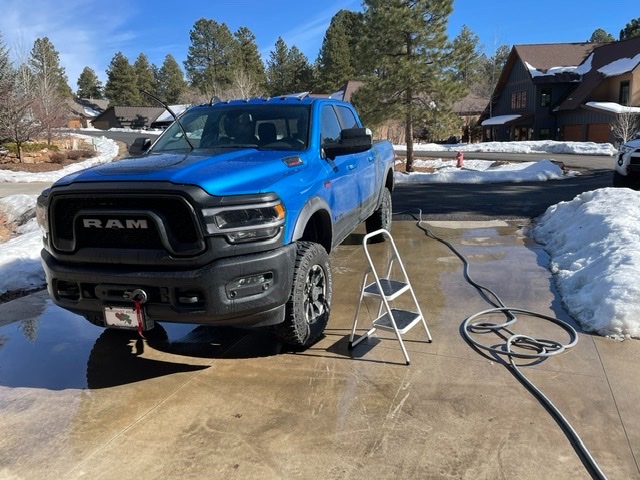
His No Bo (Forest River No Boundaries) isn’t a toy hauler, it’s got a queen bed and two bunks (his kids are 5 and 8). It’s under 4K pounds so should be easy to tow with his PW. The picture is the trailer being delivered from Houston a few days ago. This is the only truck picture he’s sent me. He’s in Durango.
1 point
-
Sounds like a great feature. But some of the old timers will weigh in..... 😆 ”Back in my day we didn’t need any of that new fangled technology. We used to push the trailer into the campsite by hand, barefoot, in the snow, uphill, at night, while fighting off wolves, with a beer in one hand...” 😆1 point
-
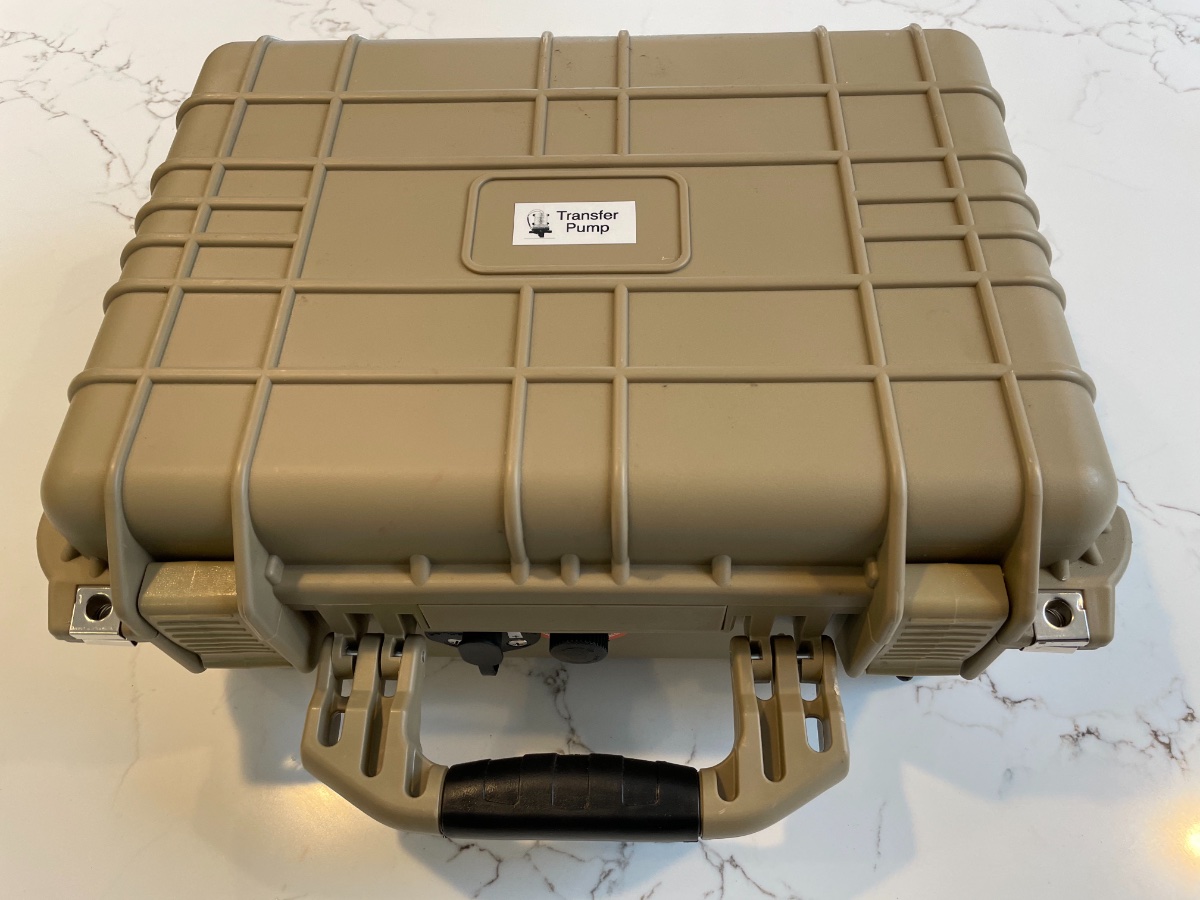
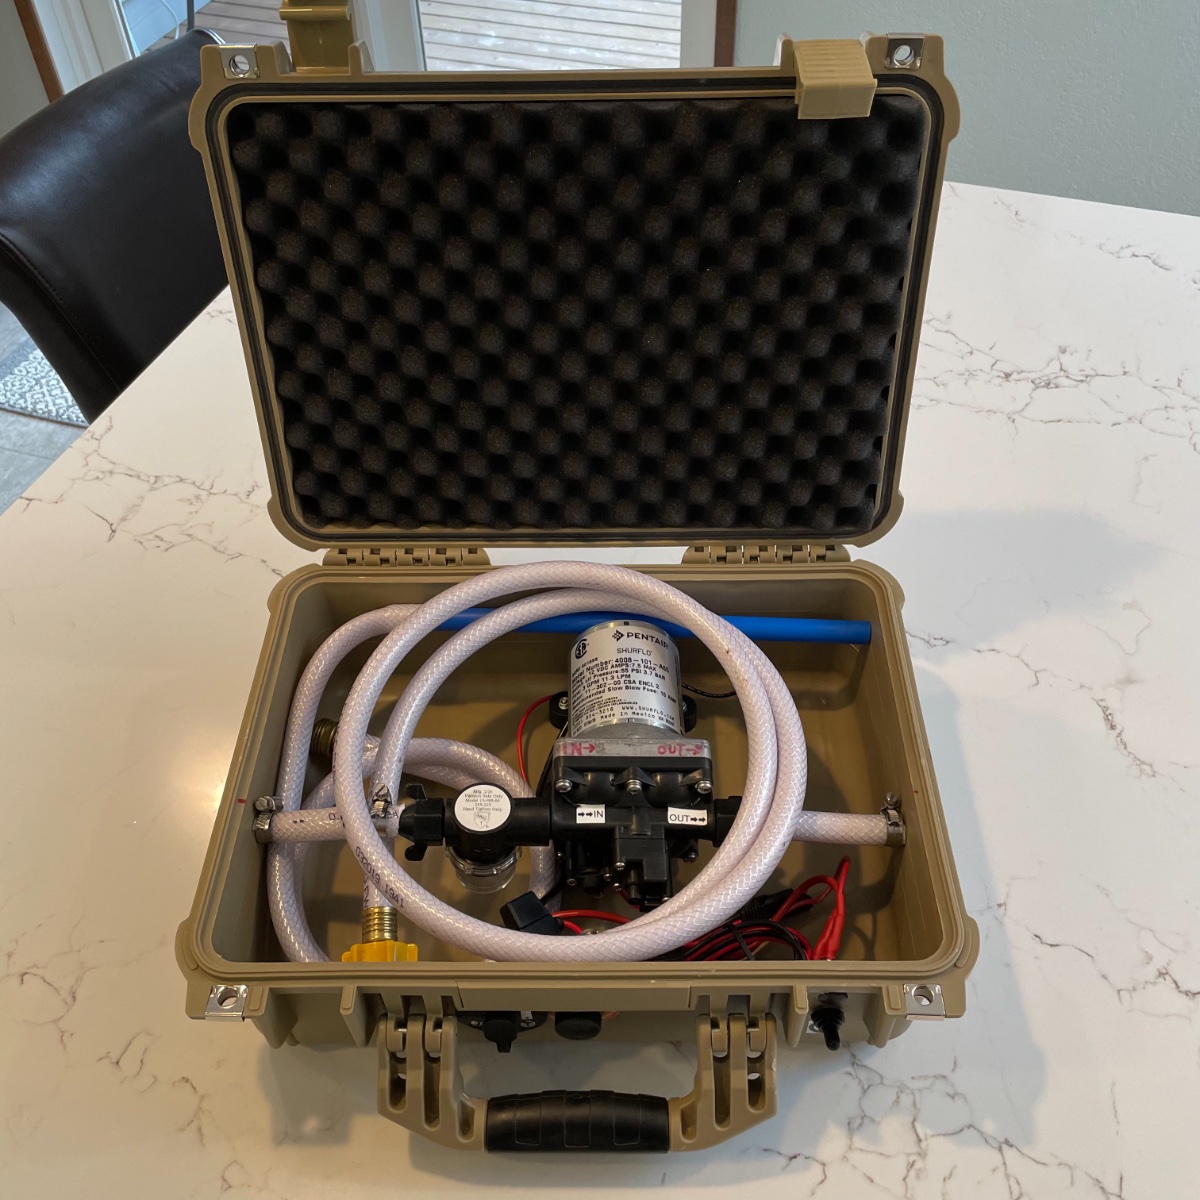
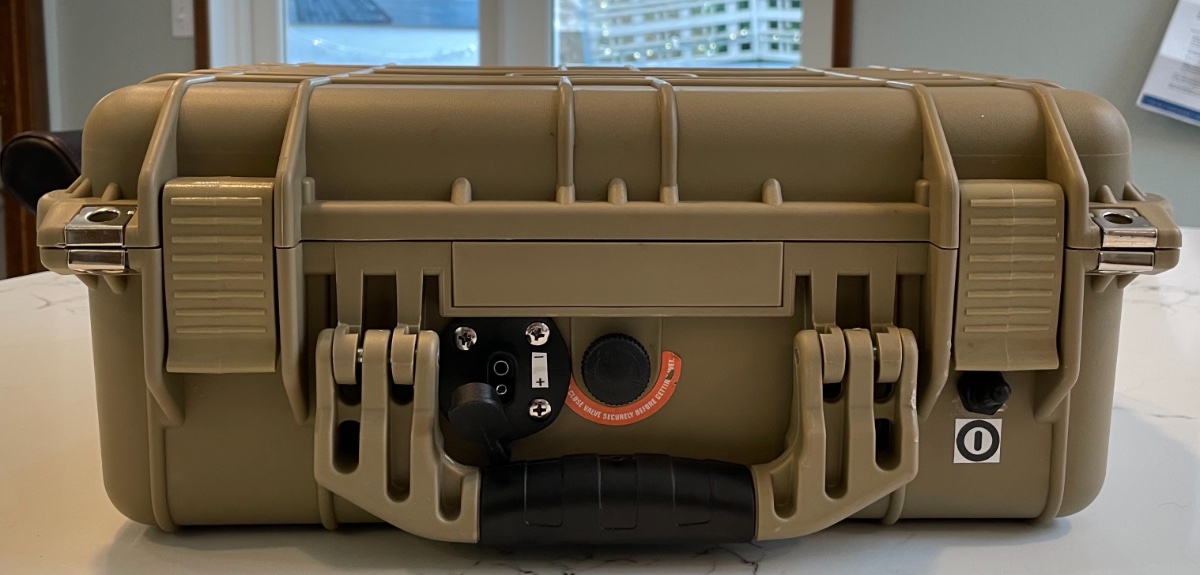
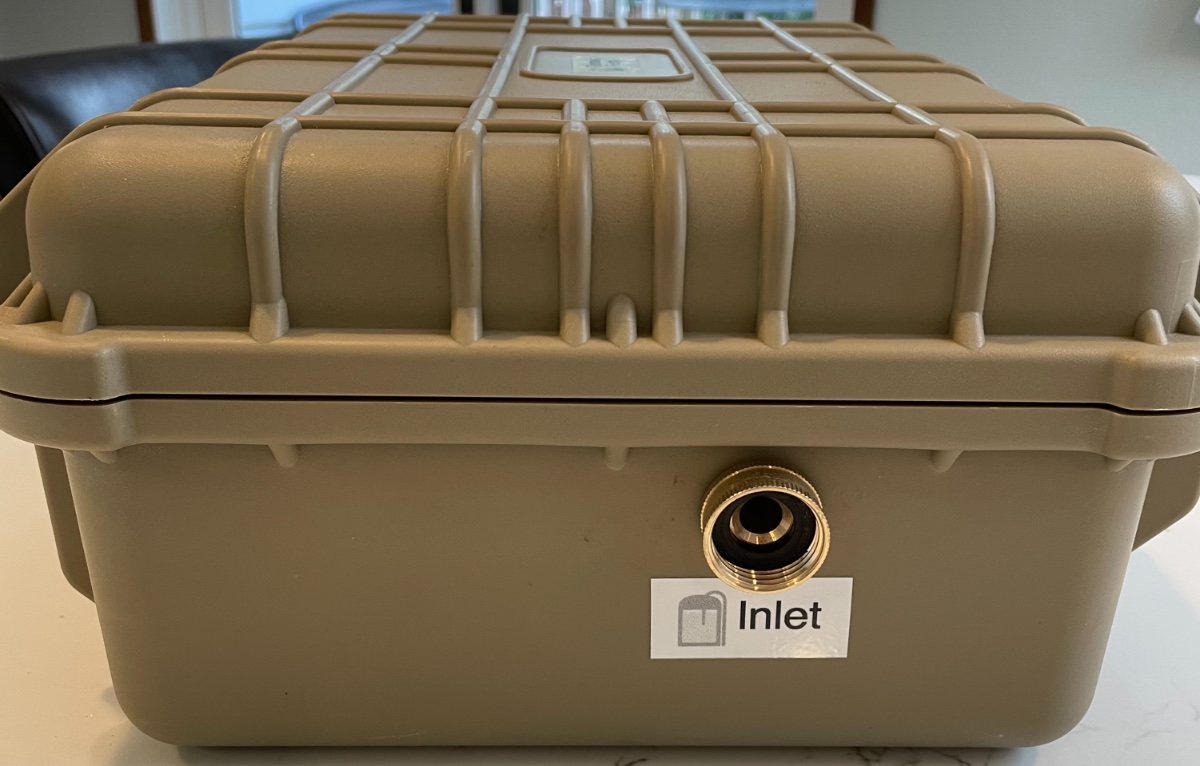
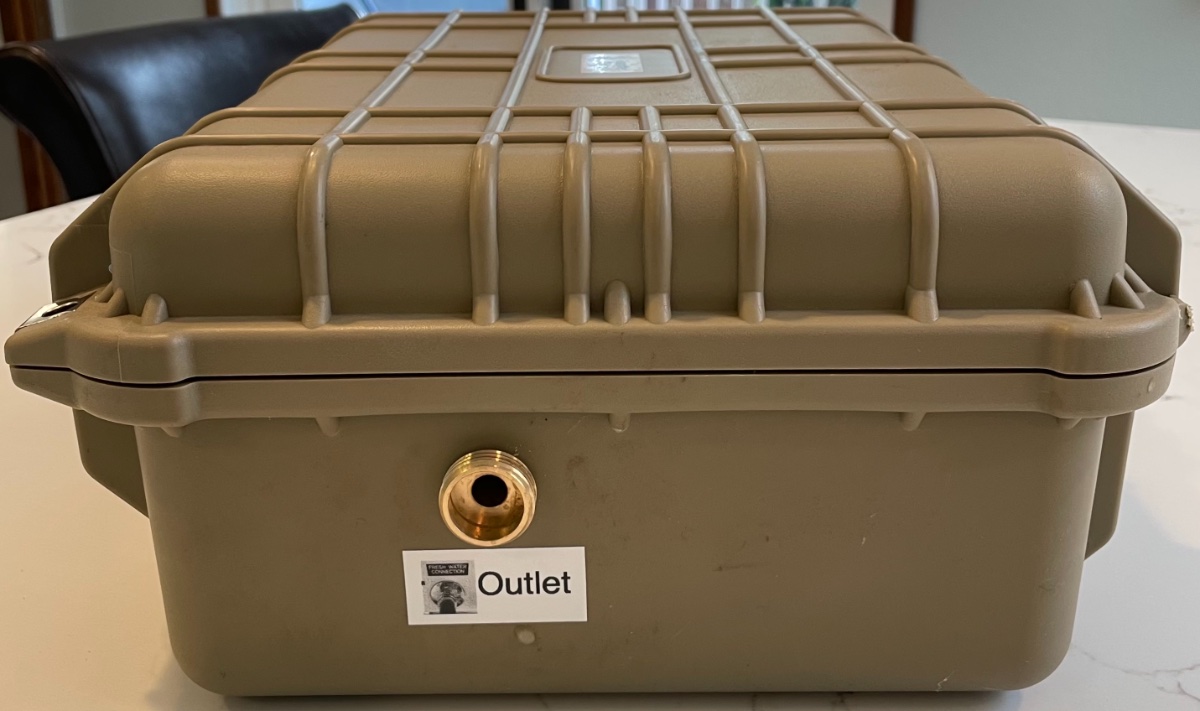
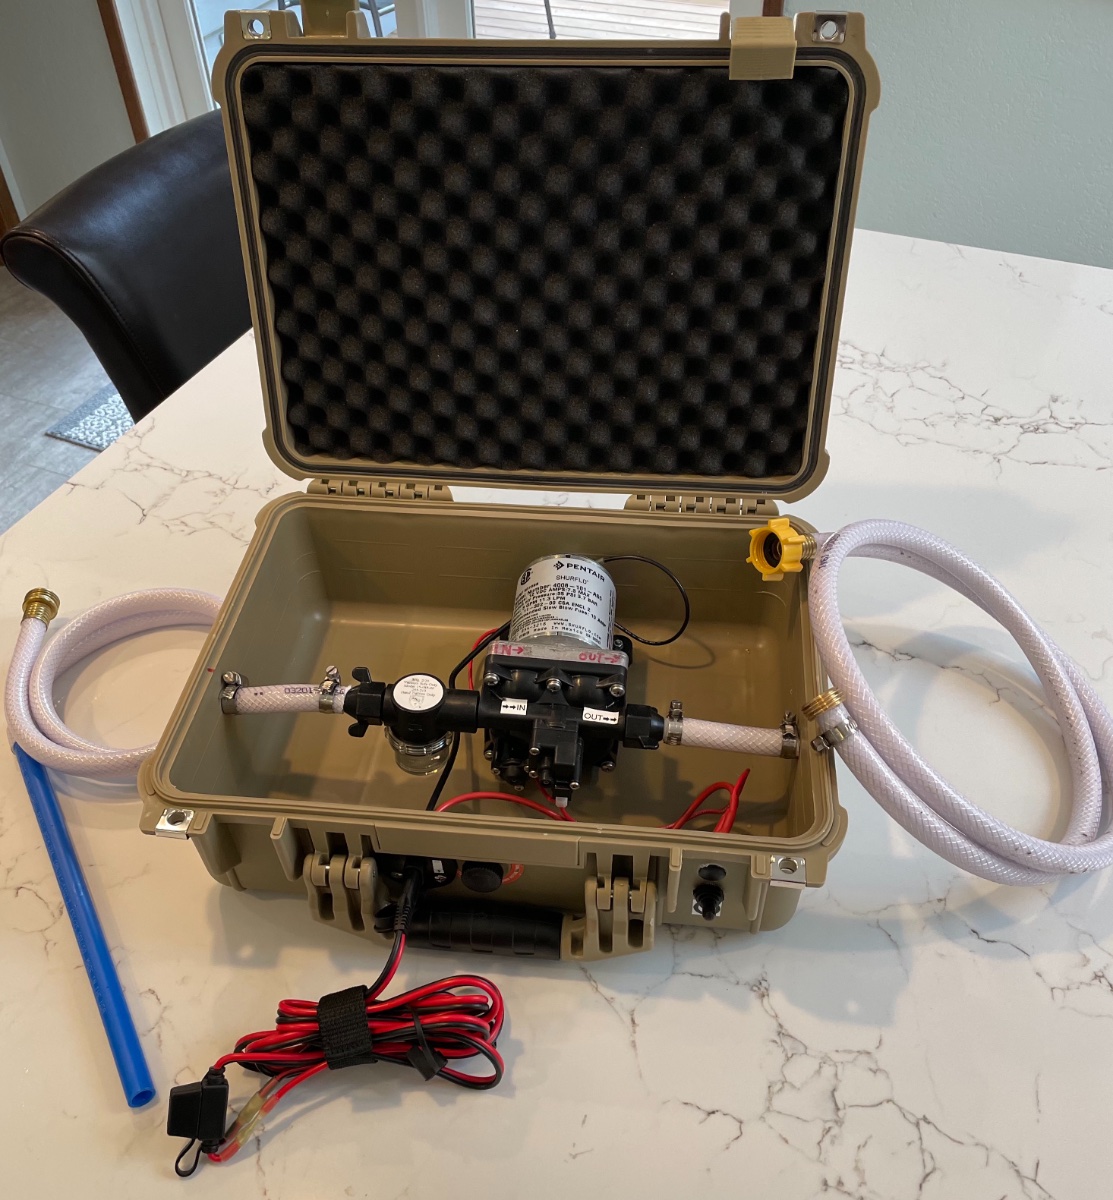
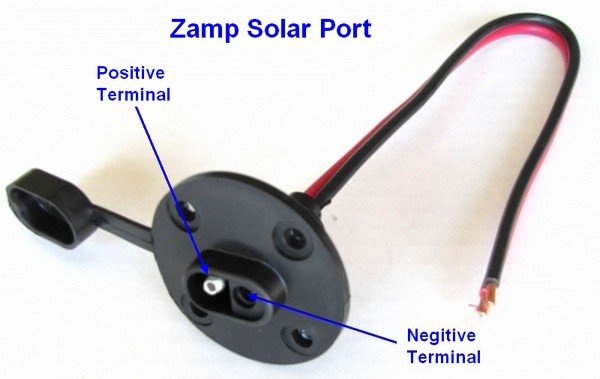
Here'a a fun project that provides you a backup 12v Pump for your Ollie. I bought a spare 12V Shurflo water pump to carry with me on our coming long long adventures around the US. I decided to build it into a water transfer pump that I could use for multiple uses and still have a backup pump. Some ways I can use this transfer pump: Transfer fresh water from portable tanks and bladders directly through the Oliver fresh tank port. (This is without using the boondocking port.) Use as a pusher pump for a bladder to the street side water port on the Oliver Use around the campsite as a portable pump for wash stations etc. Use as a backup pump should my main pump fail. Electrical Consideration: I designed this so it can hook it directly to the Zamp Solar Port on the side of the trailer as the 12V source. That SAE Zamp port has direct connection to the batteries in the Oliver. I wanted to make sure to create a fused connection, and also be sure to wire it to match the Polarity on the Zamp port. I put a matching ZAMP port on the pump case, and build the fused connection cable out of a pair of fused SAE solar cables. The fuze is closest to the Oliver's ZAMP port for safety. (Zamp also sells an excellent "replacement" cable that could be used for the project.) ZAMP Solar Port Polarity is reversed from typical SAE Connectors: Zamp wires their solar ports in a way that the + lead on the solar cable coming from the solar array is into the plastic covered end of the cable. (That's opposite normal SAE use. They do this to protect users from plugging into the solar array and touching the male exposed connector.) Here's a basic material list (if you want specific part numbers of connectors etc. PM me on the forum.) I bought all of the material from the combination of Ace Hardware, Harbor Freight and Amazon. Total cost $190.73 1) Case: $39.00 Apache 3800 Transit Case - : Harbor Freight ( Interior Dim: 14 7/8"x10 5/8" x 6 1/8") Fits pump perfectly bolted into the case without the bottom foam. 2) Shurflo Pump model 4800, $72.00 - : Amazon/RecPro 3) Inline Shurflo Filter Model 15-085-00 included with pump - : Amazon/RecPro 4) Basic Fresh water hose (white) - $17.00 : Amazon cut to use short pieces for pump connections and used the other pieces as the input side hose (with a rigid piece of 1/2" pex as the drop lead) and outlet hose with repaired male end connector. 5) Qty 1 - Inlet side Female Swivel Garden Hose Connector (barb connector style) $1.50 ea - : Ace HW 6) Qty 2 - Male Garden Hose Connectors (barb connector style) one used on outlet, one to repair the outlet hose. 7) Qty 4 - 1/2" stainless pipe clamps - $4.00 : Ace HW 8) Qty 2 - SHURFLO (244-2926 1/2" x 14 NPT x 1/2" Barb Straight Wingnut Swivel Adapter - : Amazon 9) Qty 1- Zamp Waterproof Solar Port - : Amazon 10) Qty 1 - SPARKING 6' SAE To Ring Terminal Harness Quick Connect/Disconnect Assembly & 10A Fuse + SPARKING 2' SAE Quick Connect Harness (this is to make the other side of the cable) - : Amazon 11) Qty 1 - Fastronix SPST HD 20 Amp AC/DC Toggle Switch with Weatherproof Neoprene Boot - : Amazon So here are some pictures of the finished project in the transit case. Case in closed ready for travel position: Case opened to show hoses and electrical connectors stored inside: Contents removed so you can see the pump connection setup: Hoses and electrical connectors shown beside case: Handle side shows DC connector (that matches the ZAMP port wiring) and on/off switch: Inlet side: Outlet Side: Assembly comments and learnings: 1) Pump body - originally I was going to mount it onto a pvc board but found that the depth of the transit case and height of pump worked out better if I could simply bolt into the case. I used 4 bolts with baking washers to secure the pump into the case. 2) Port locations - I tried to figure out a way for the ports to exit out the handle side of the box, in fact I bought some elbow connectors for the pump, but quickly found that they interfered with the closure clasps. As a result I went for a simpler straight side to side flow. 2) Electrical Switch Location - My initial hole for the switch ended up interfering with the closure clasp once the switch was installed and in the ON position. I decided to plug that hole with an automotive plug and move the switch mounting down a bit further. (See handle side view.) Pump Performance: 1) I used the pump yesterday to pump a 6 gallon container of my tank sanitizer solution into the fresh tank. The pump operated smoothly and the 6 gallons were pumped into the tank in 58 seconds. (The pumps spec is 3 GPM ...so it met that spec.) 2) I also tried the pump on the street side water inlet, and the pump would cycle on and off as I turned on and off the sink faucets. So another use is to hook it up to a bigger bladder tank external and use it as the main water supply. (*Note - The pump has a 55PSI max, and is factory set for 45 PSI working shutoff pressure.) The case stores nicely run the Oliver Elite II basement on top of my water filter holder. Possible upgrades: 1) I might add a stainless vent pair on the box so I can run the pump with the box closed. The vent would allow for airflow in/out and adequate cooling space around the pump body if running for a longer time. 2) Build a Zamp (SAE) to Anderson Connector so I can plug this into my truck power port's that I'll install this summer. 3) Try running this pump off of a small rechargeable 12v Lithium Battery bank. Make up appropriate 12v connectors. Questions and comments welcome. Craig Short Hull 505 - Galway Girl
1 point
-
So, most projects are complete. Last big two left: take the Oliver in next week to get the two fogged windows repaired in Hudson, and then, restock and reset the empty camper. I'm starting the reset with the cupboards, as in paper, plastics, cleaning supplies. I'll wait on the rest til the Oliver is back home. Sailing season is almost over. Let the camping begin!1 point
-
Our first trip is the first week of June just 50 miles away on the coast of Maine. It will likely be chilly and probably black fly season. We put the trailer away in the barn washed and waxed. We will just need to dewinterize, try all of the systems, and load up. We usually plan to head south in January every year but with covid we chose to stay home this winter. It felt right for us. We checked on the Ollie today as we are showing the trailer tomorrow to some folks that are thinking of ordering a new Elite Ii. "Beacon" was in great shape and ready for viewing tomorrow.1 point
-
Is the only option now the number of axles?1 point
-
Thanks. I know where the solar and inverter input cut offs are , ( port side upper storage, 30amp breaker forward of inverter, but where is the main battery cut off? Is that the breaker located outboard of the inverter? I had isolated the batteries from solar and inverter as a practice run at storage situations. While they don’t charge, their levels do slowly continue to drop, as all the things in the trailer that require 12v continue to sip power. Jason recommends disconnecting the batteries themselves when storing because of this situation. The LP alarm is hardwired to the battery, and will therefore keep drawing power even if you manage to turn everything else off..1 point


-
Recent Achievements
-


")


")


