Leaderboard


Popular Content
Showing content with the highest reputation on 11/20/2021 in all areas
-
We are picking up our Ollie for Christmas,,,DEC. 275 points
-
She is getting a tow to warmer climates5 points
-
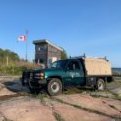
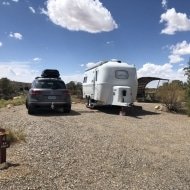
A new tow vehicle!4 points
-
“Mouse” is pretty well equipped for stuff, but I guess a clay bar and Rejex job for the outside, and maybe a couple of thirty minute mods…… I want to put in a power switch for the radio head to kill the panel lighting and parasitic draw, and grind off those nasty sharp corners on the inside bath door handle, I laid my head open on it a couple of months back and said a lot of nasty words as I bled copiously all over the floor. I am watching for a sale on Element E50 extinguishers, but those are not for the trailer. I am hoping that my son will 3D print a Land Cruiser 200 model for me, to match the Ollie model he made last year. If that happens I will update that thread with more pics…. John Davies Spokane WA4 points
-
Our Ollie is going to be bummed out this year considering the attention she got last year for her very first Christmas! This year she's getting a good bath, clay bar and two coats Meguiar's premium marine wax. Under the tree she'll find 3 cutoff valves (one for each of the lines leading to the outdoor shower and one for the fresh water intake line), some fuse labels as well as Timken bearing sets and seals. We're also going camping in December before Christmas, so she is getting a new red carpet runner and some Christmas pillows and lights to get us into the holiday spirit!3 points
-
Lithium!.... Batteries that is. LOL3 points
-
Each year, we watch end of year/black friday/ Christmas sales. Last year, we snagged some great deals. Solar panels,, etc.. This year, I'm watching for very little. Packing cubes. Some storage containers. We pretty much have all we need. I'm watching for January white sales, early, as 14 year old trailer towels are getting aged. And, a new, small fry pan.2 points
-
There was a pretty long thread about this awhile back. Perhaps this will help?2 points
-
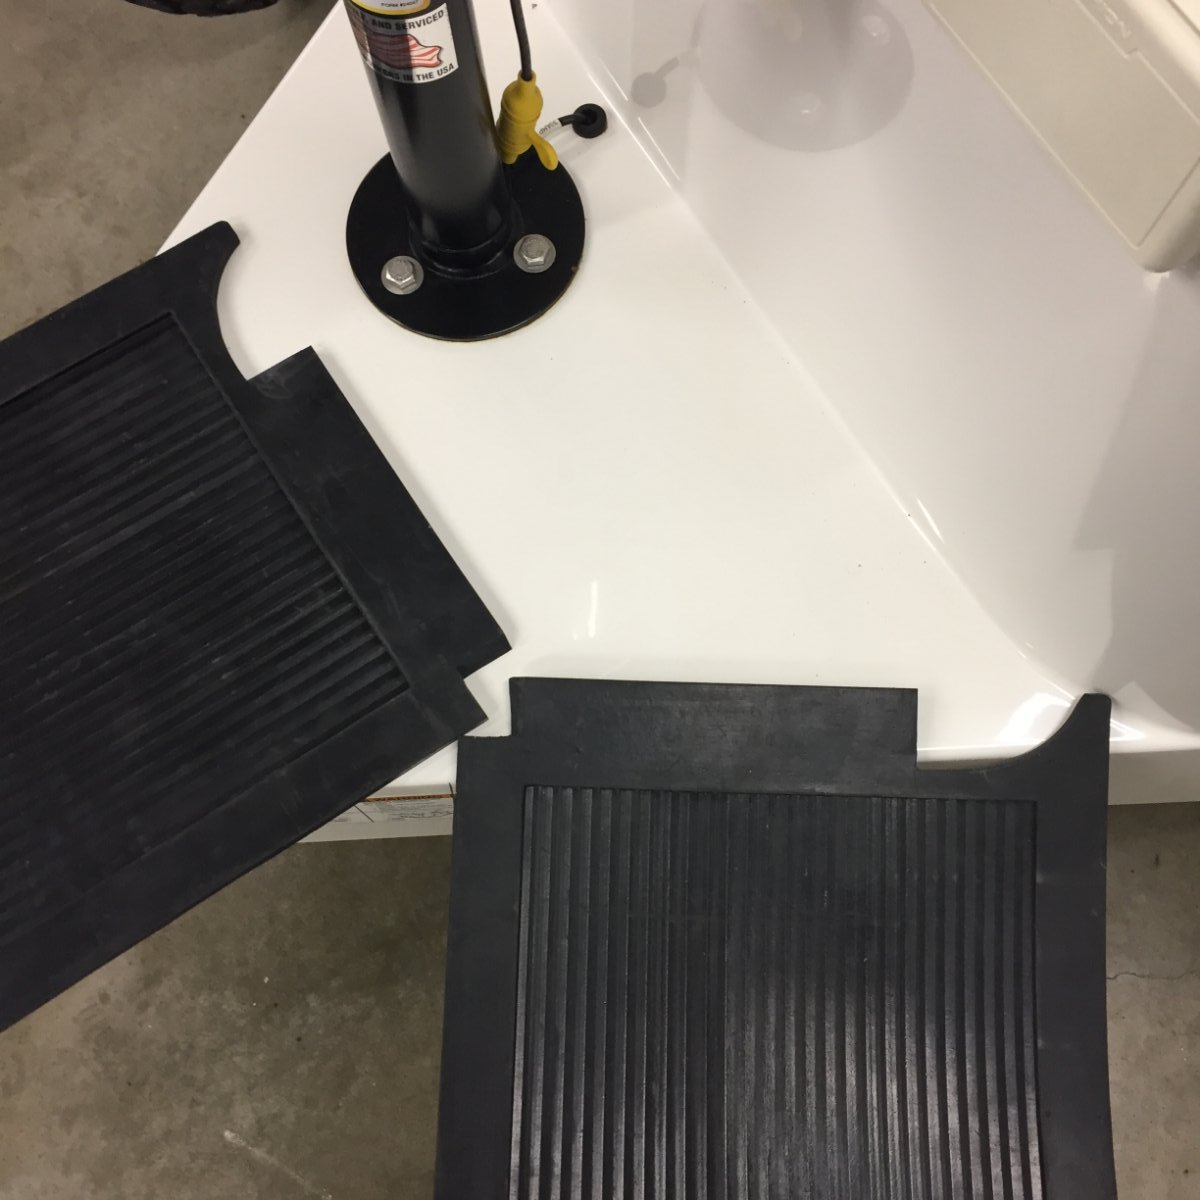
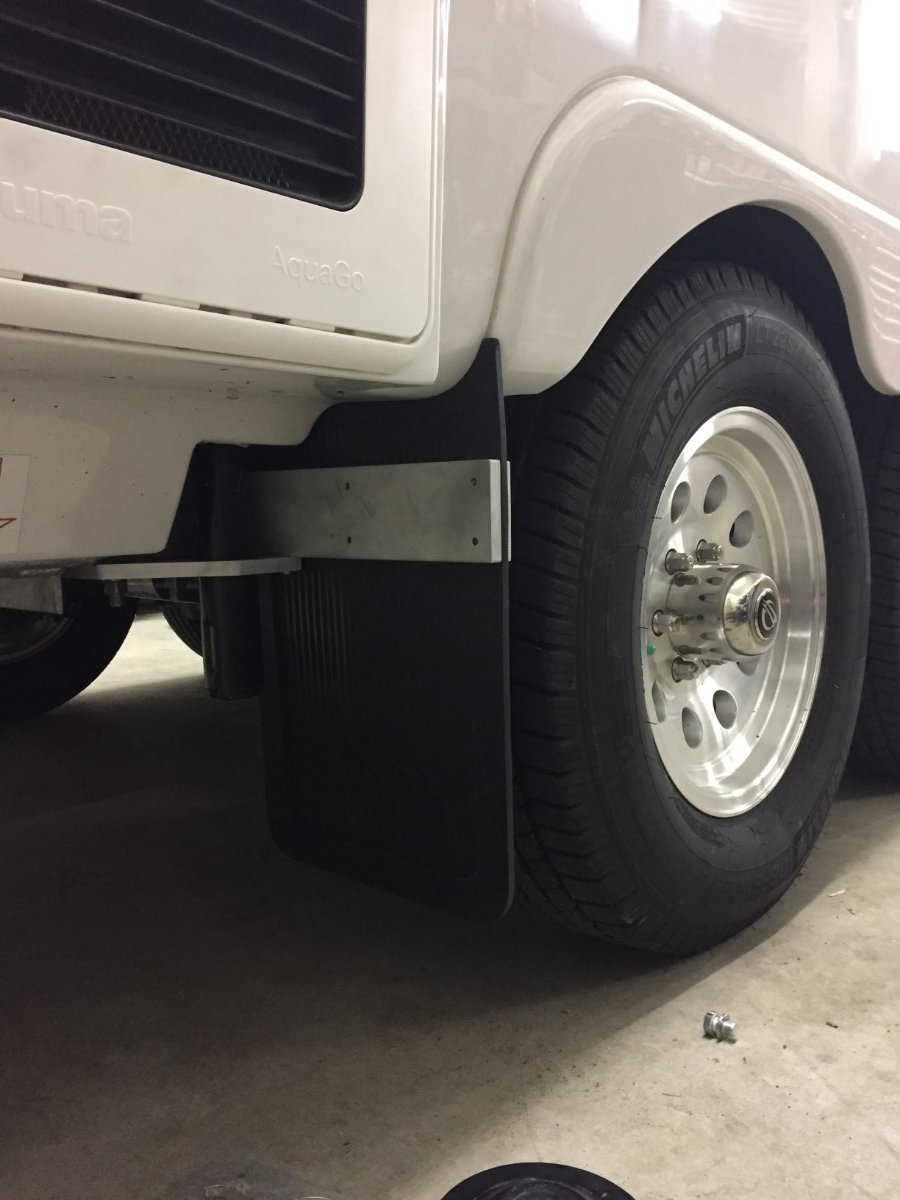
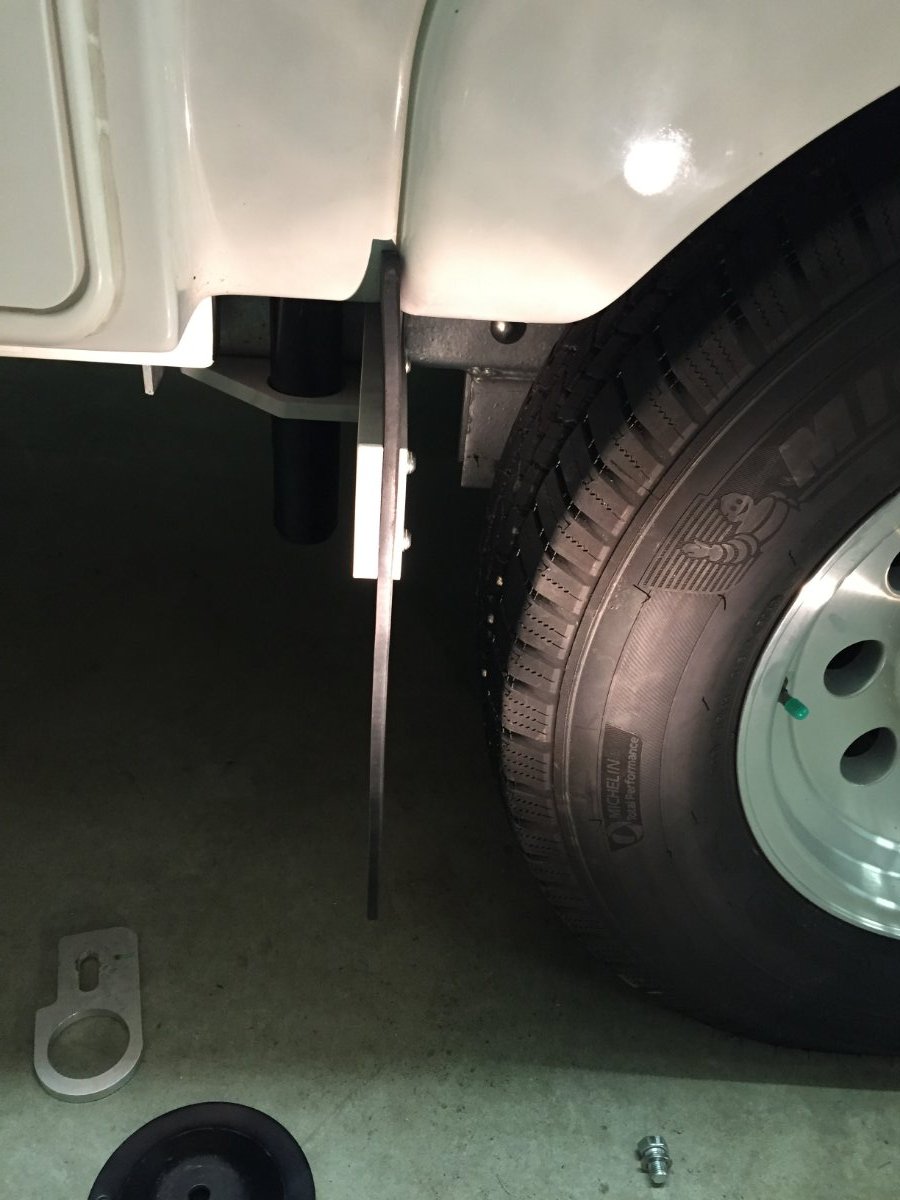
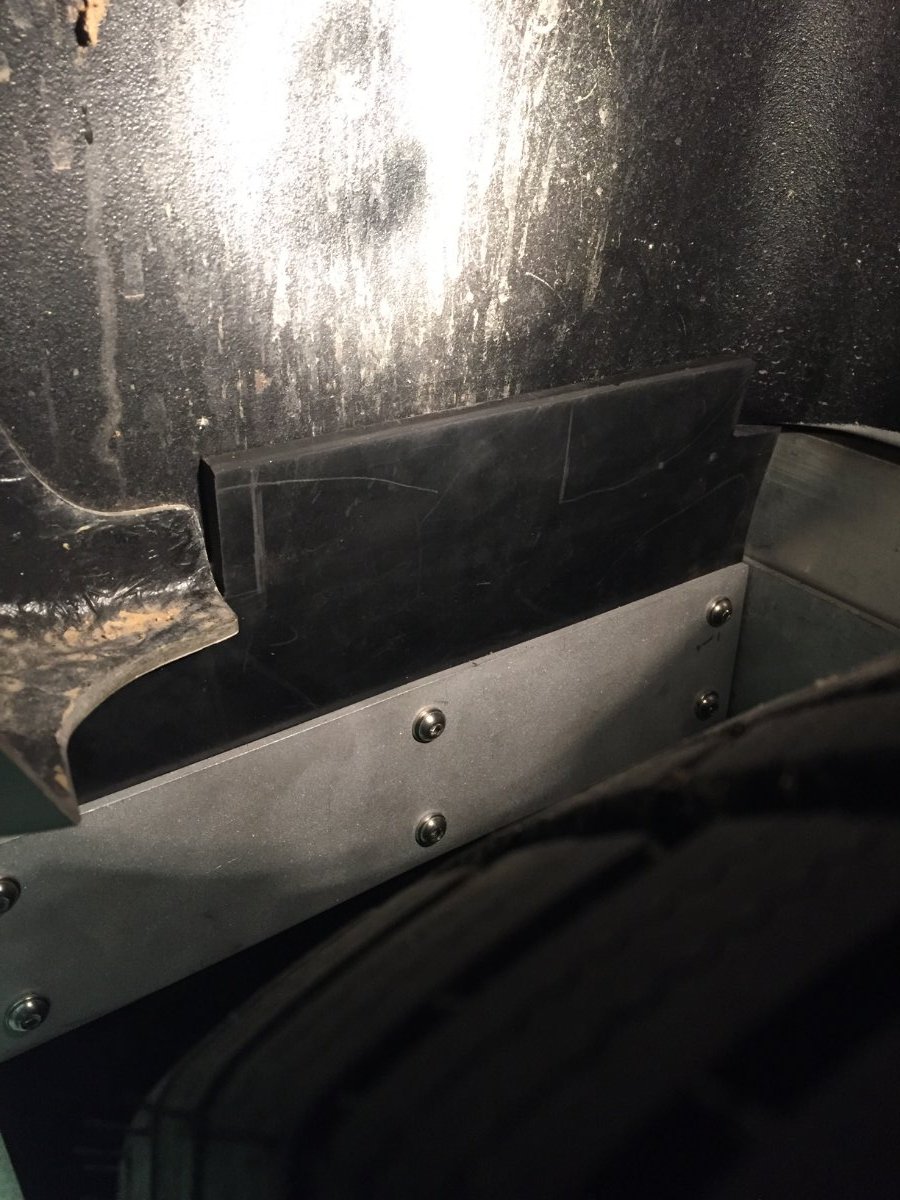
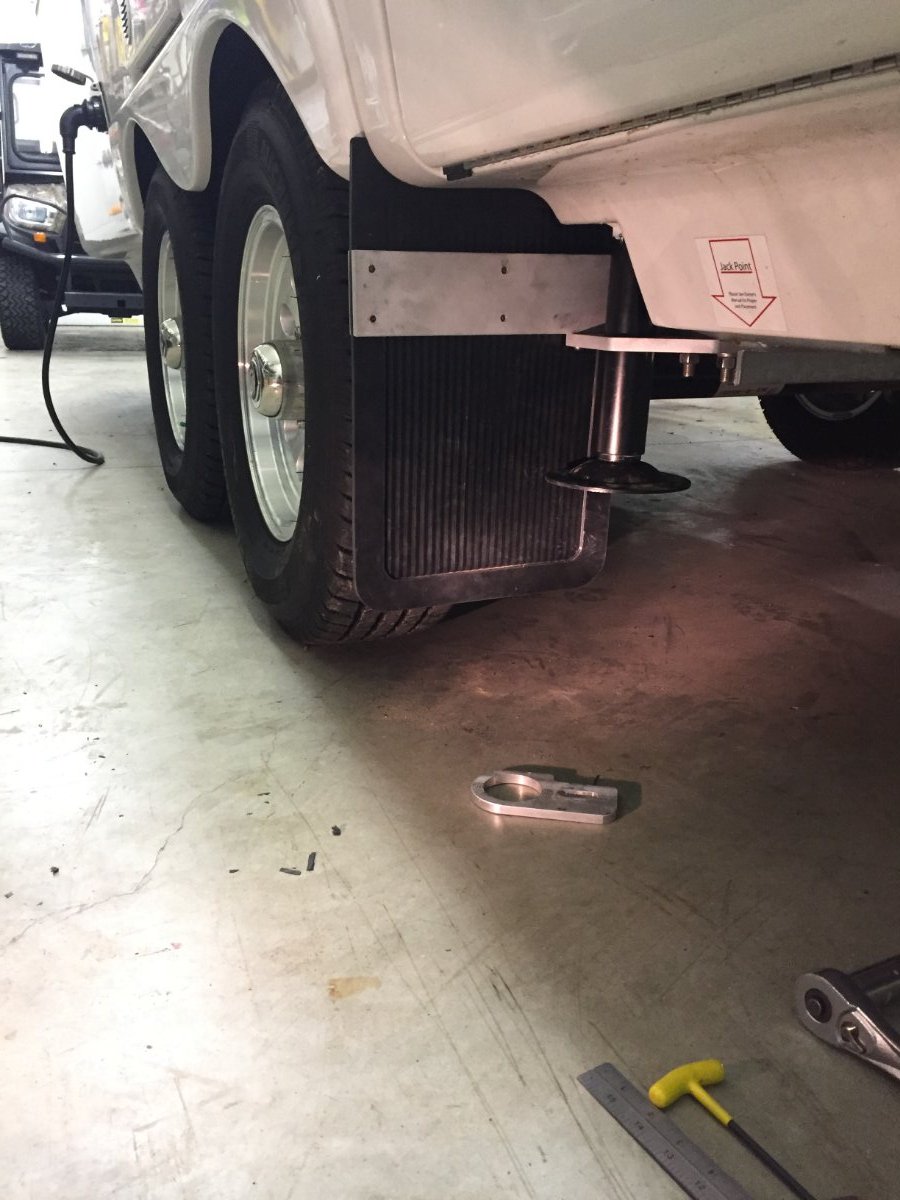
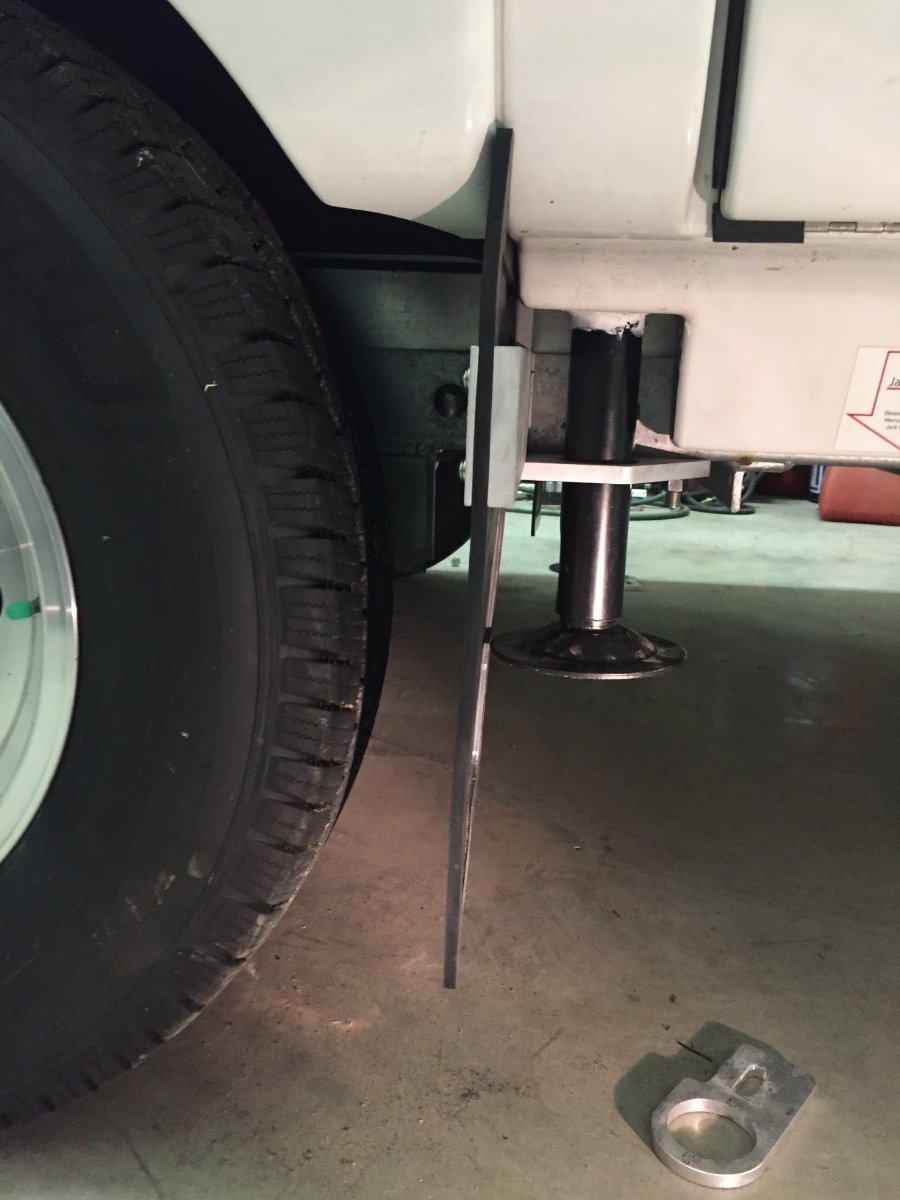
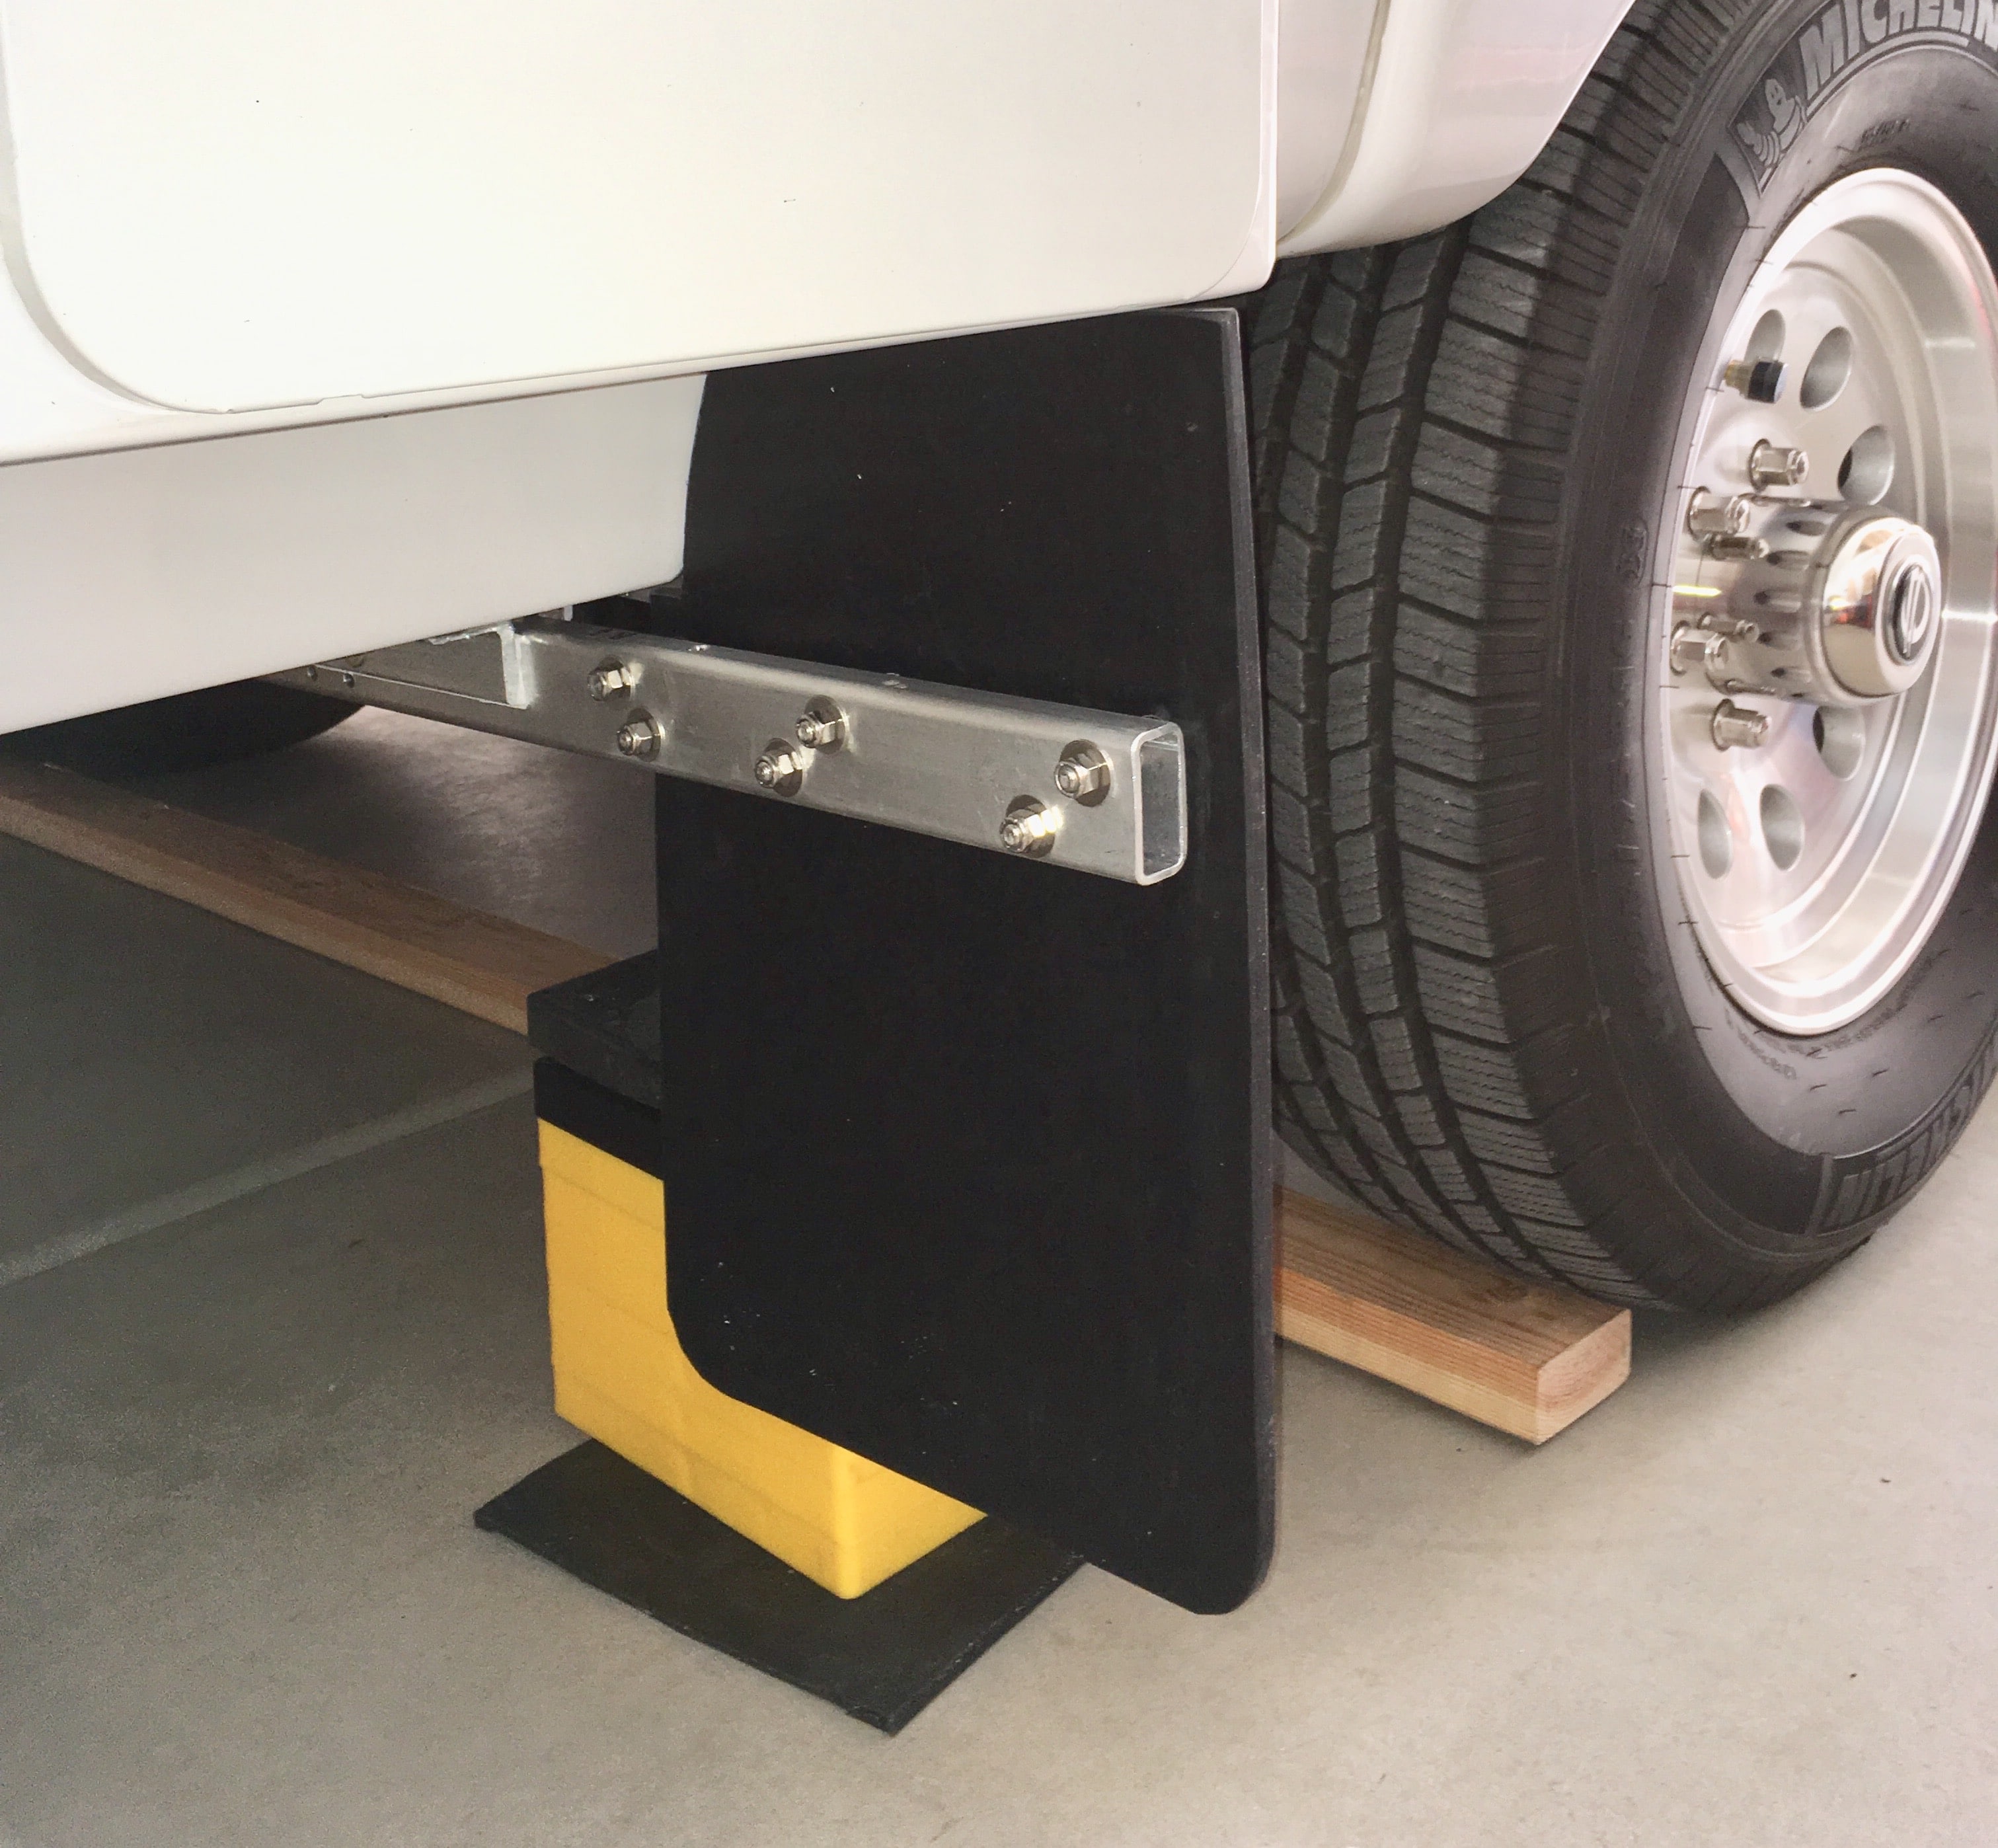
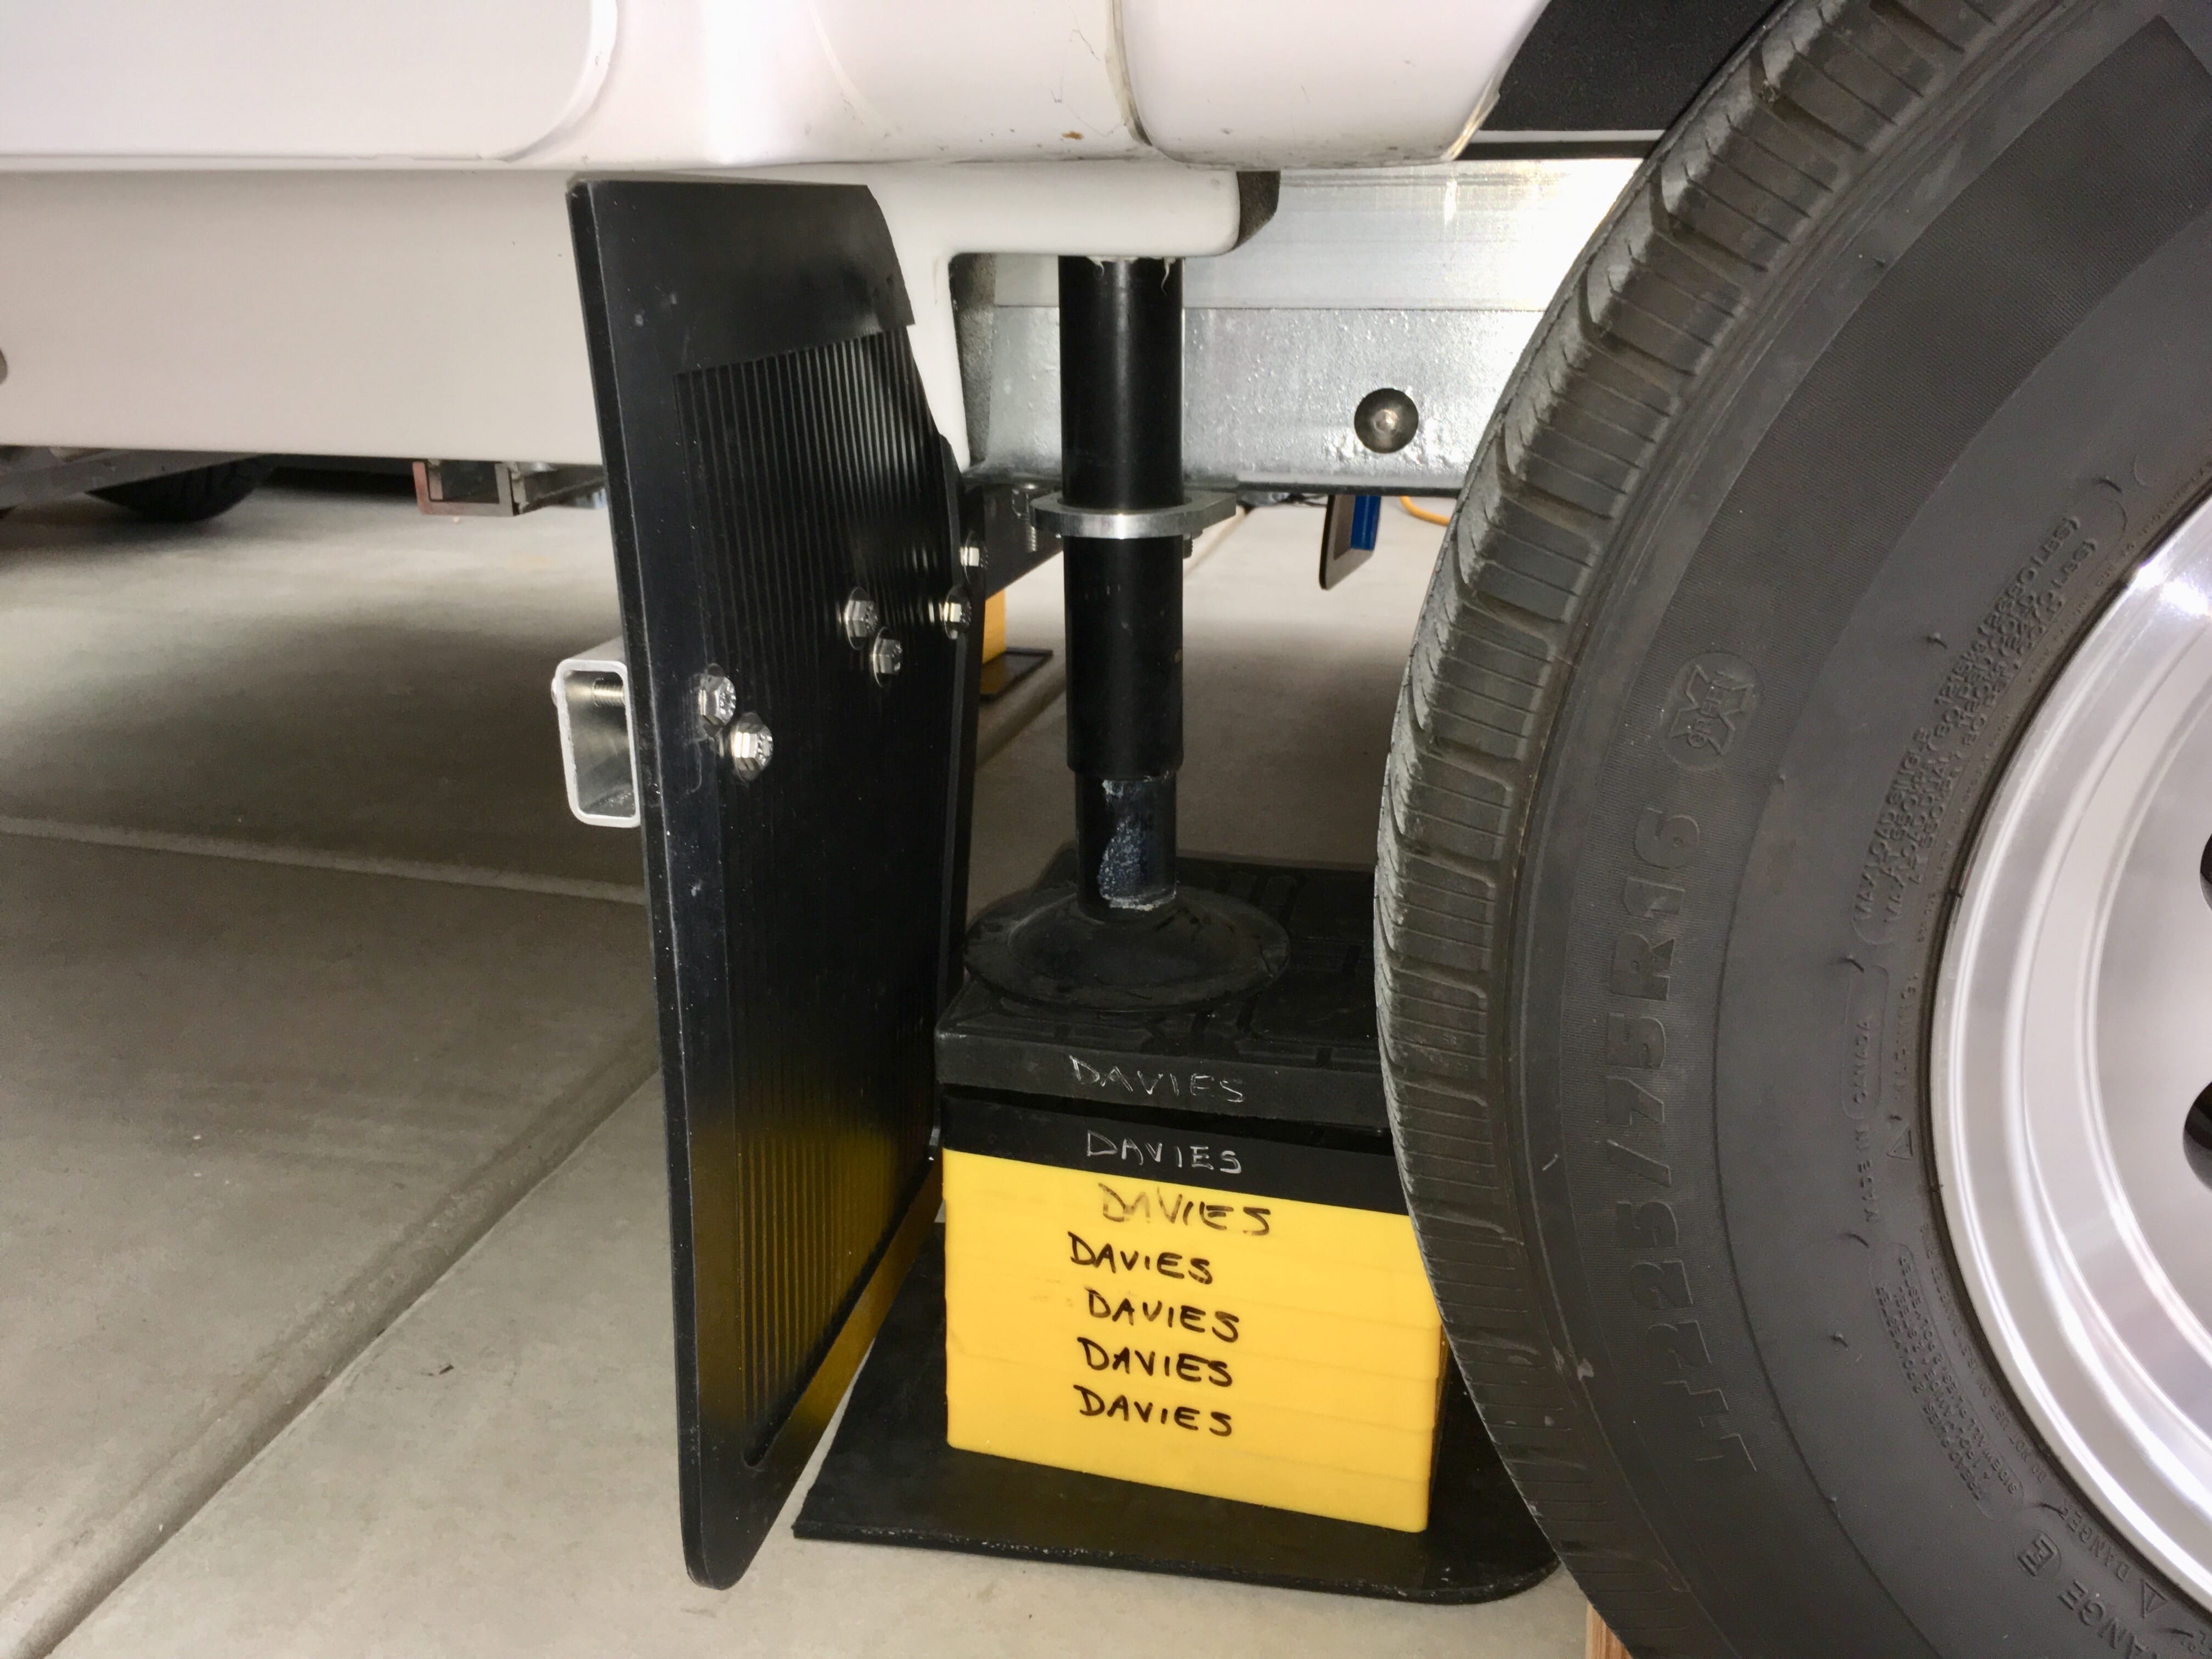
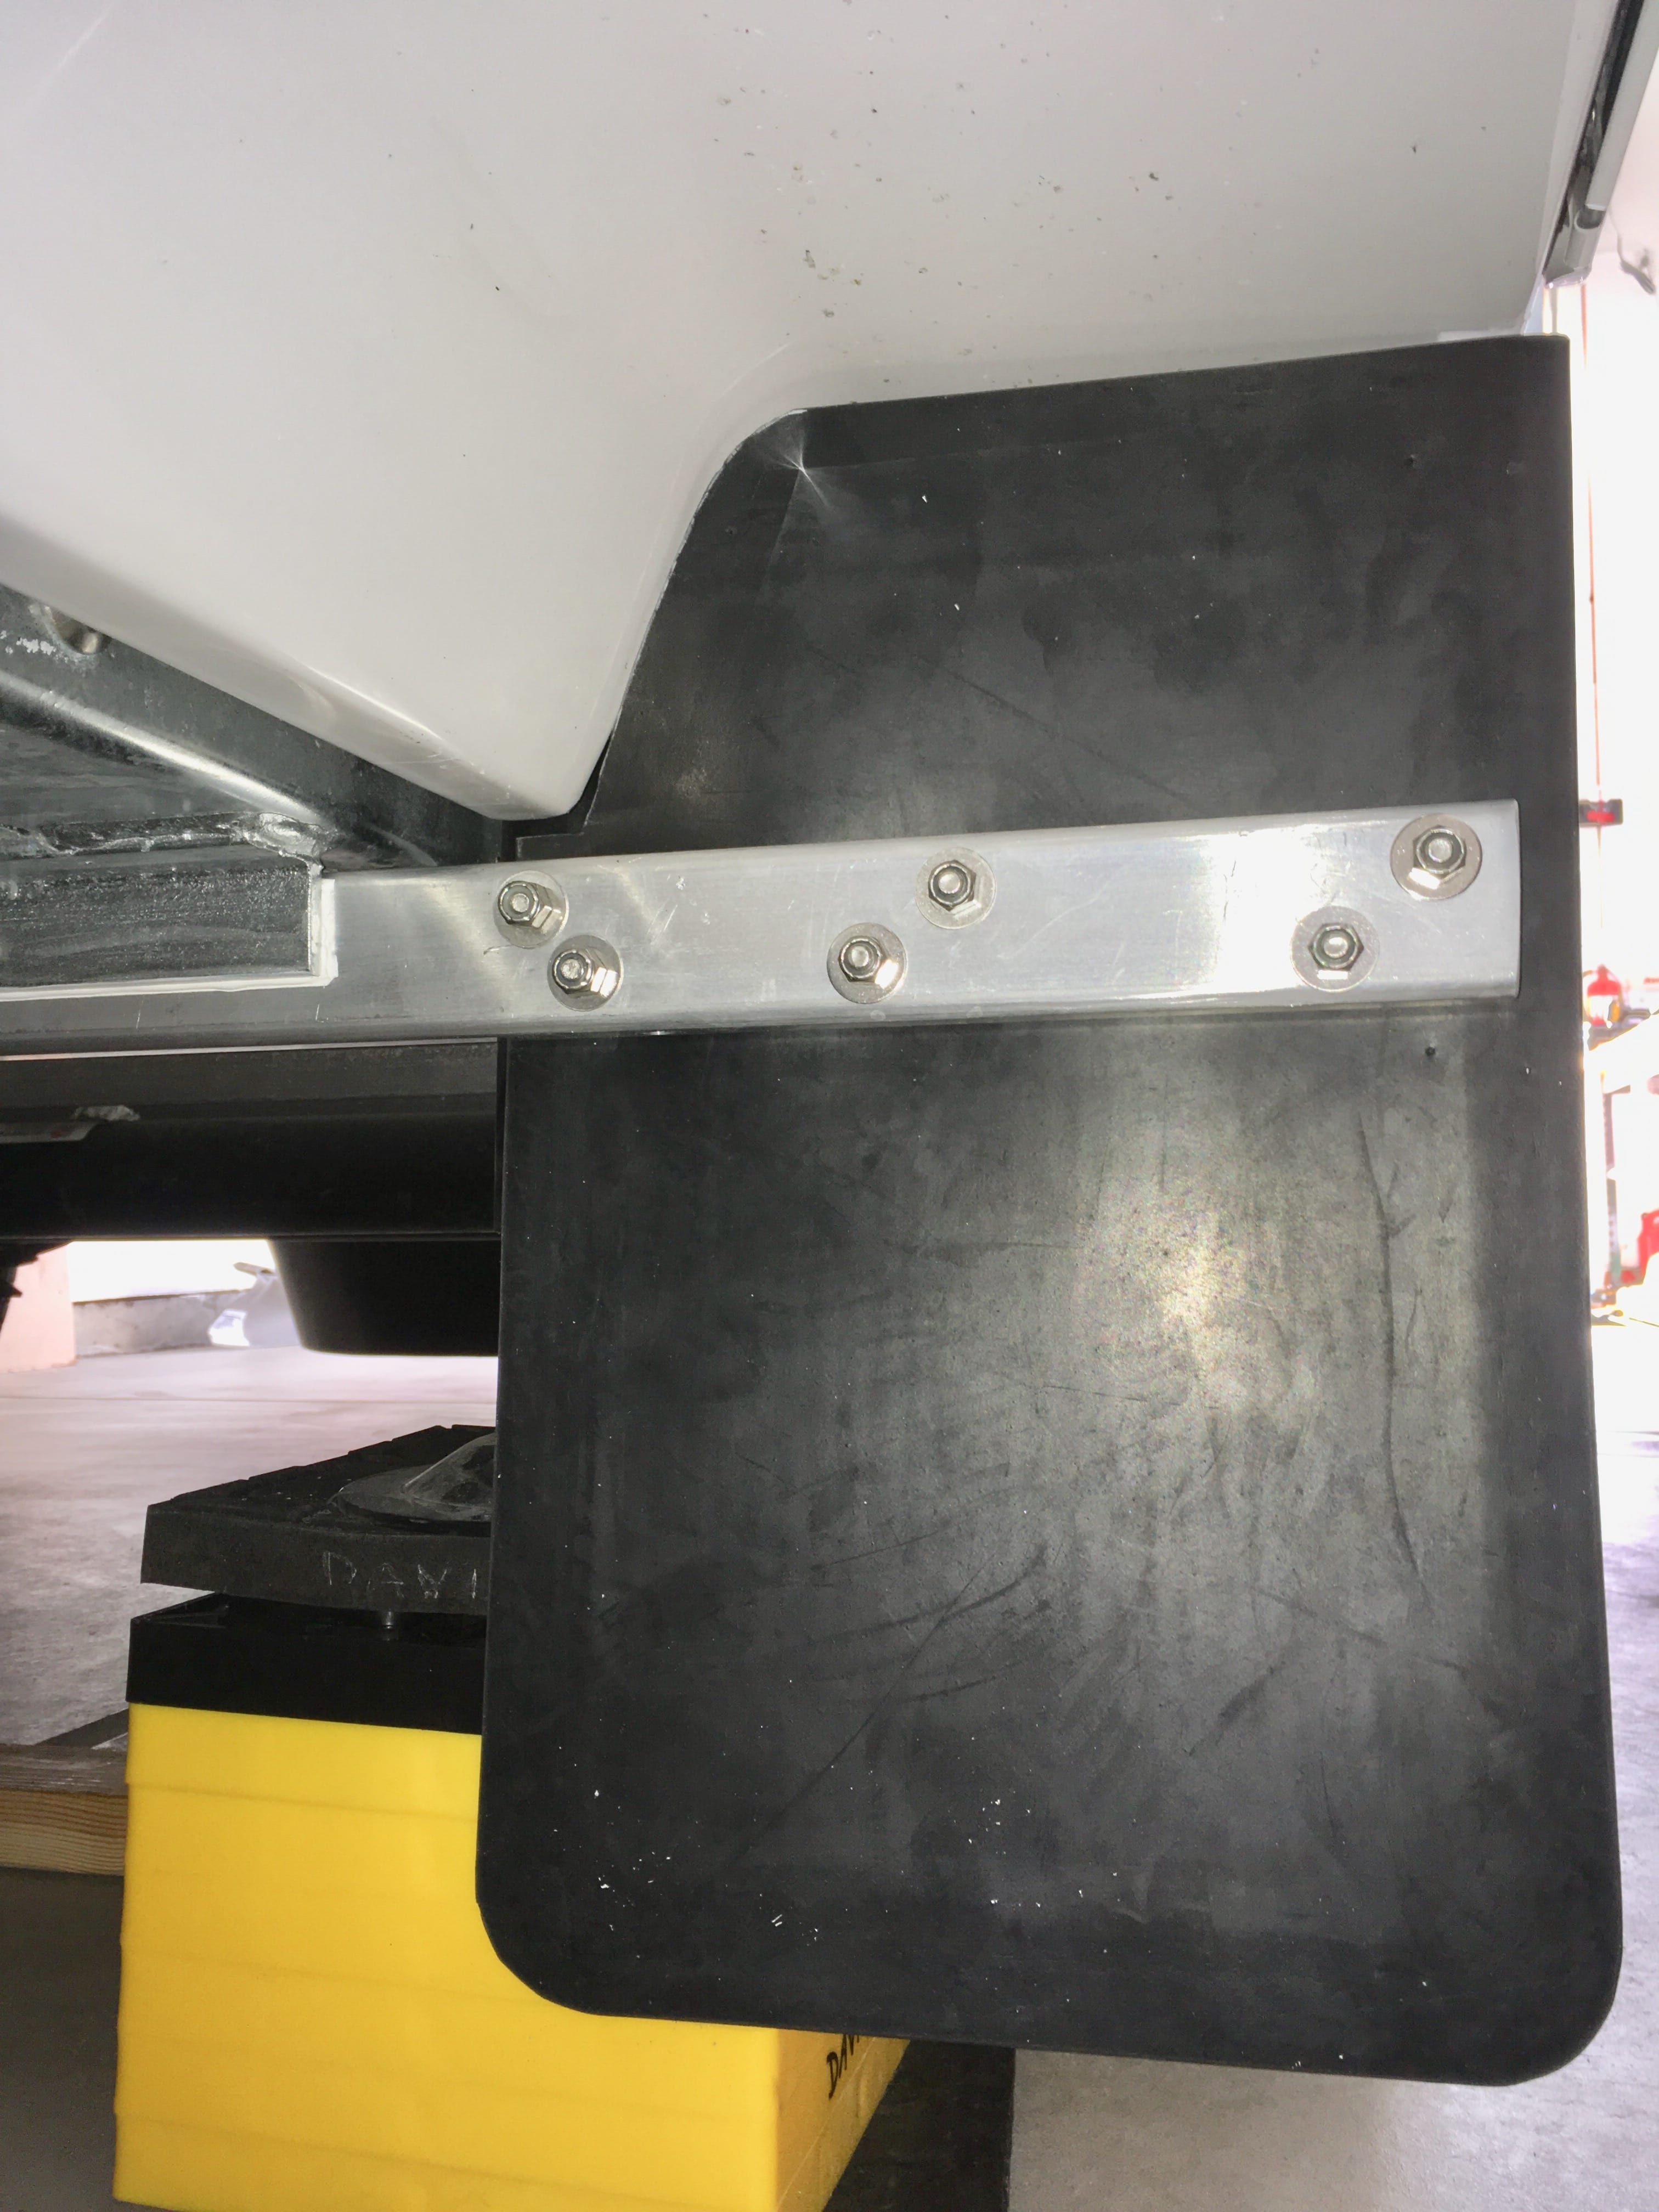
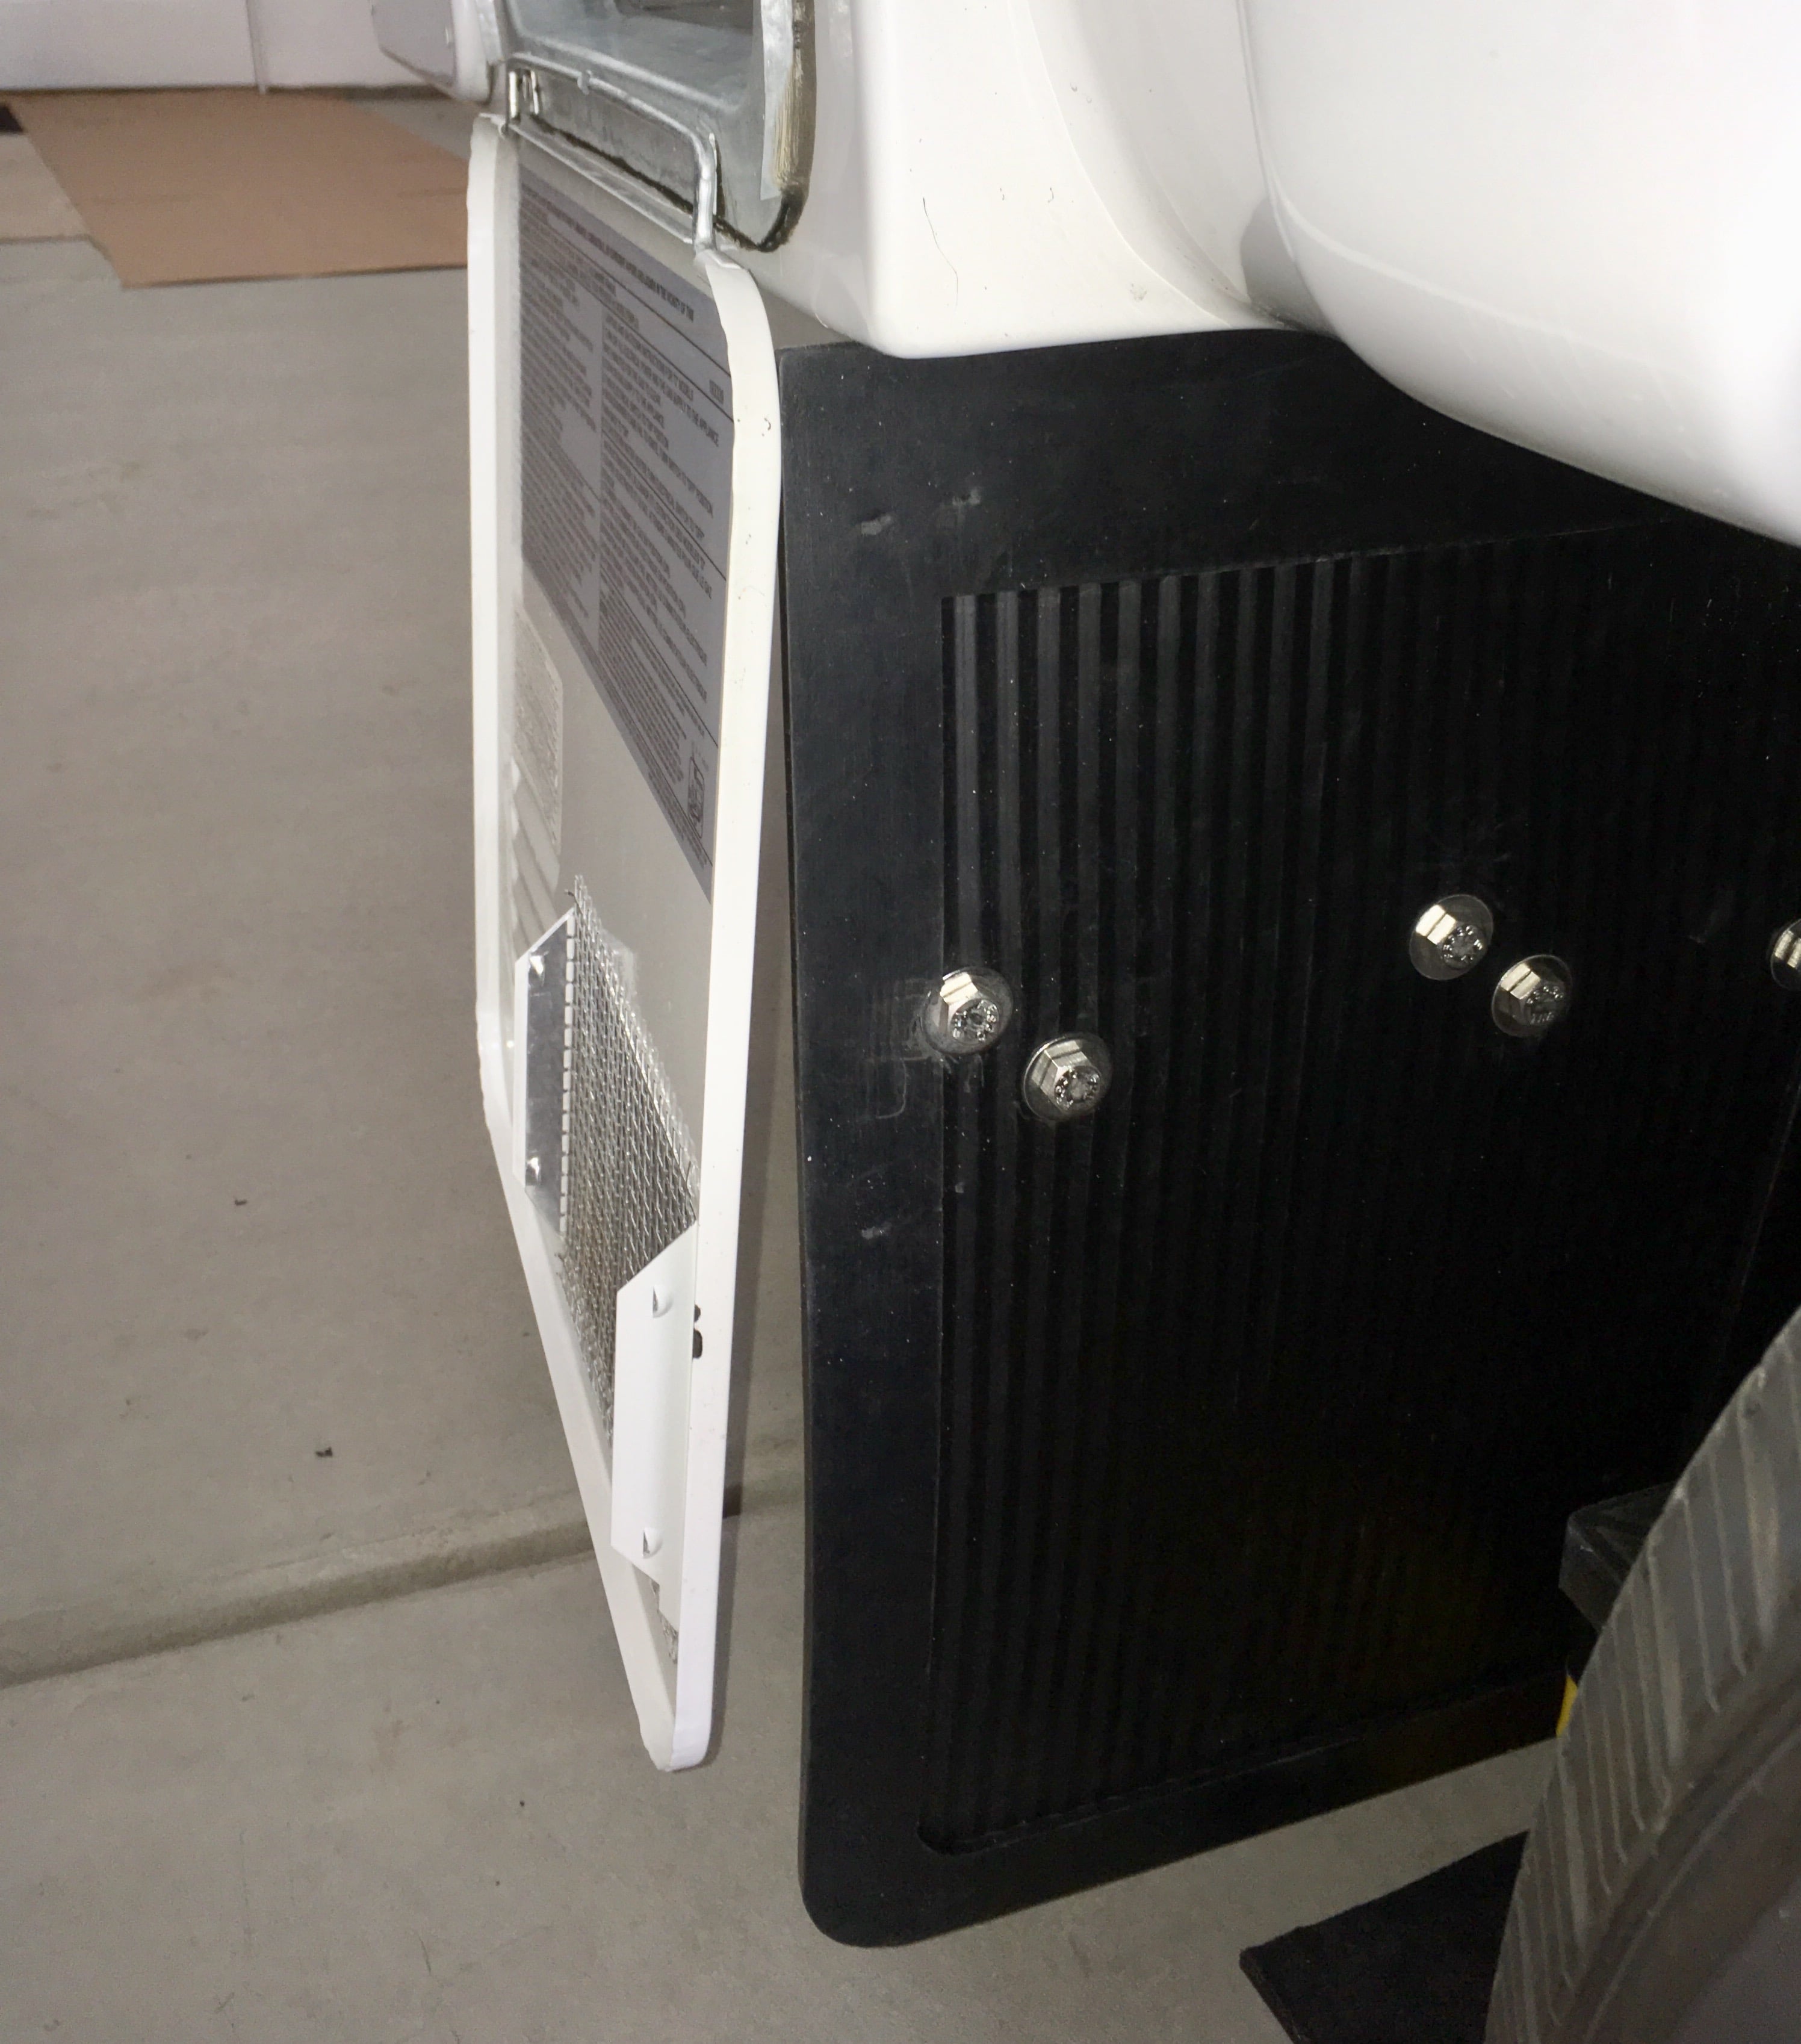
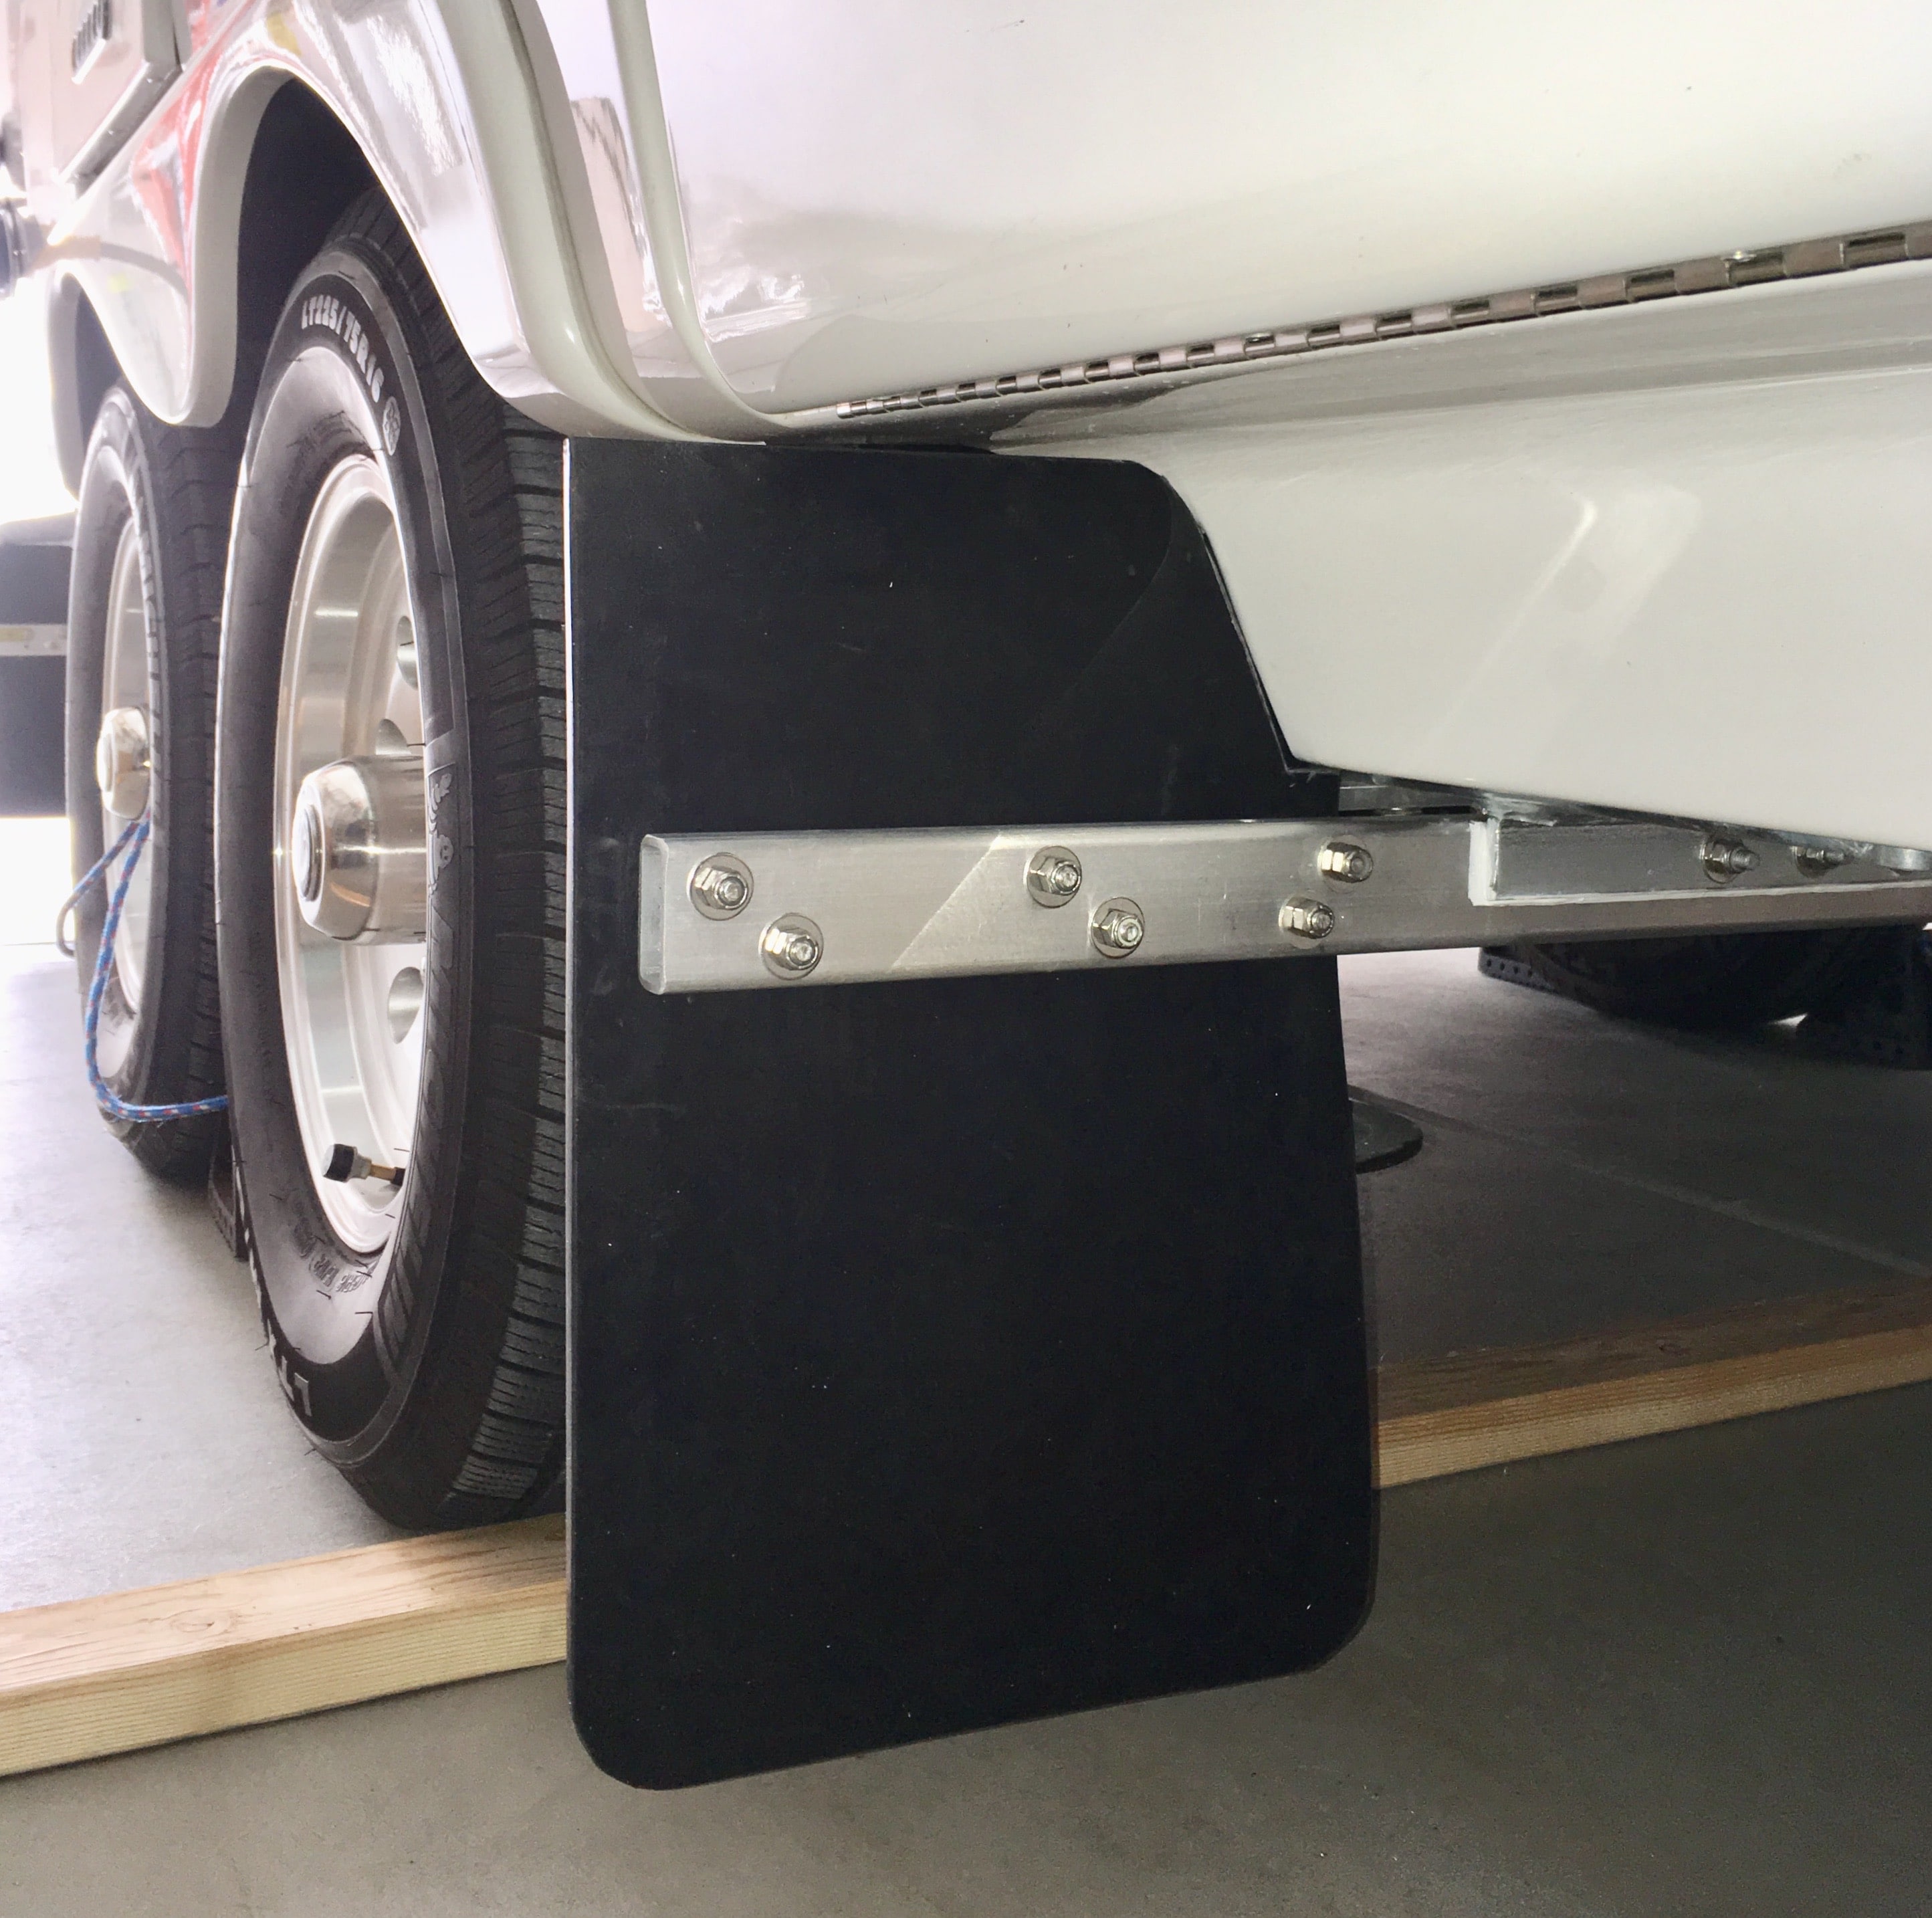
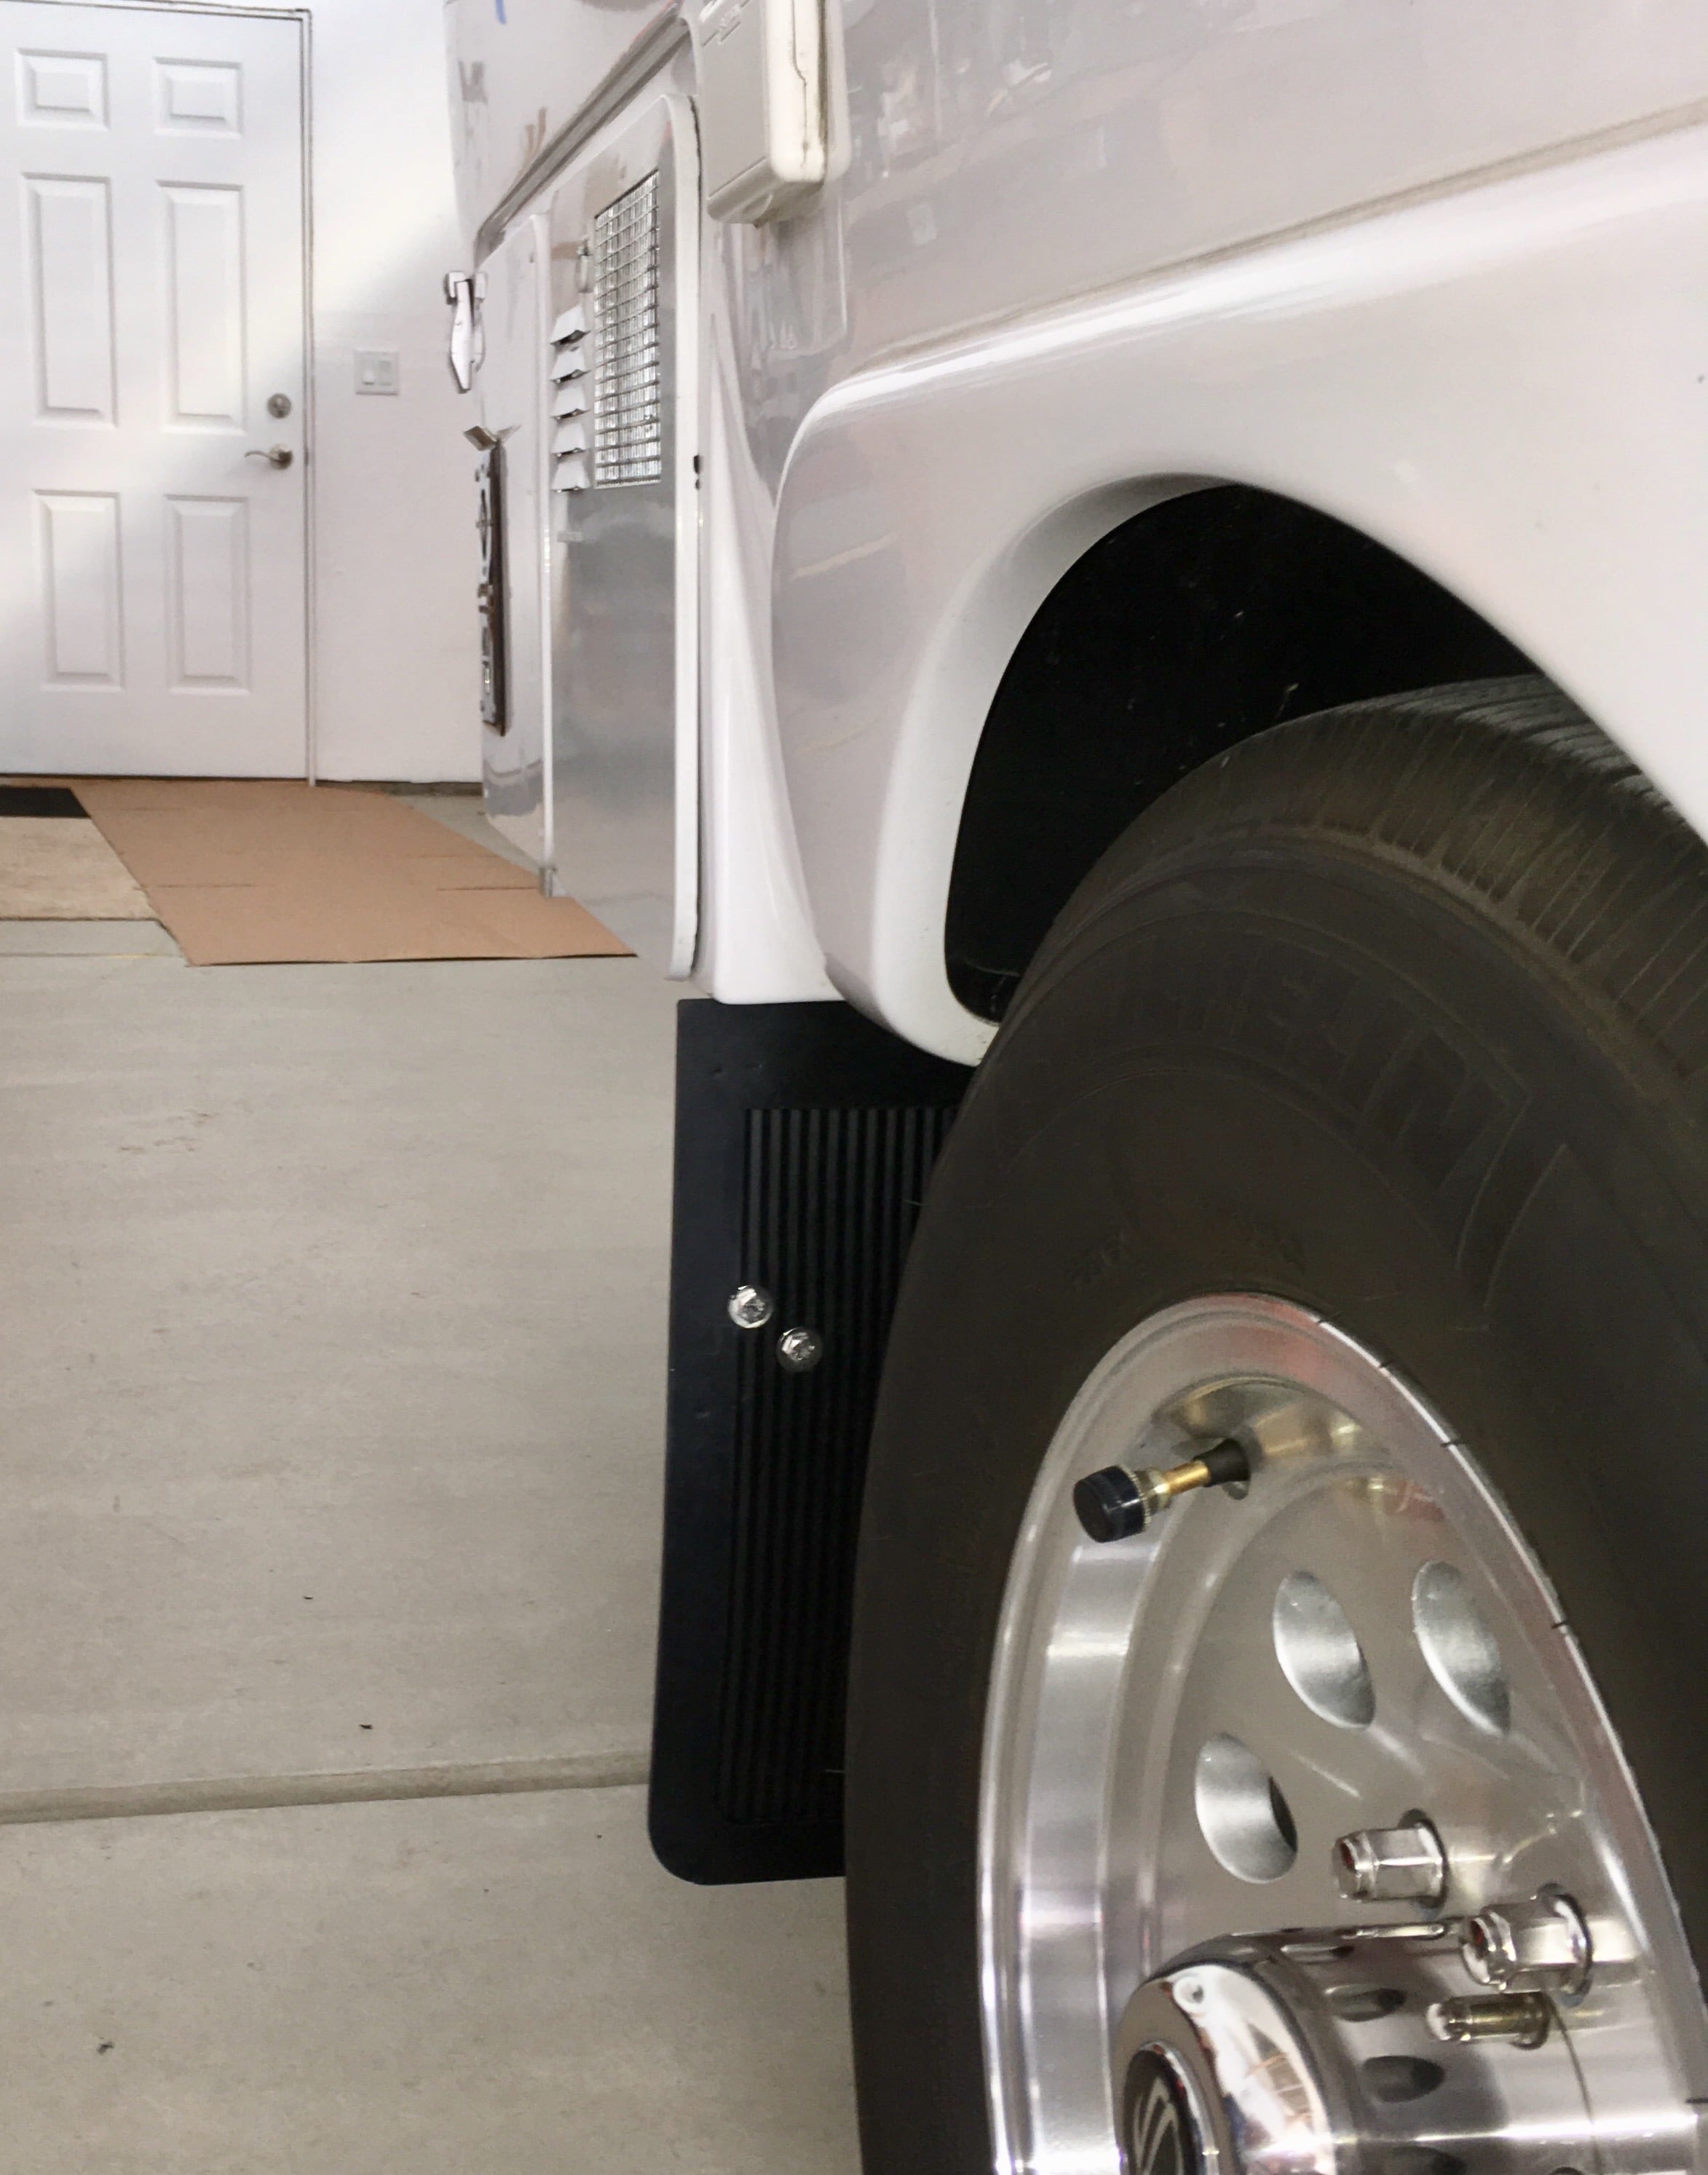
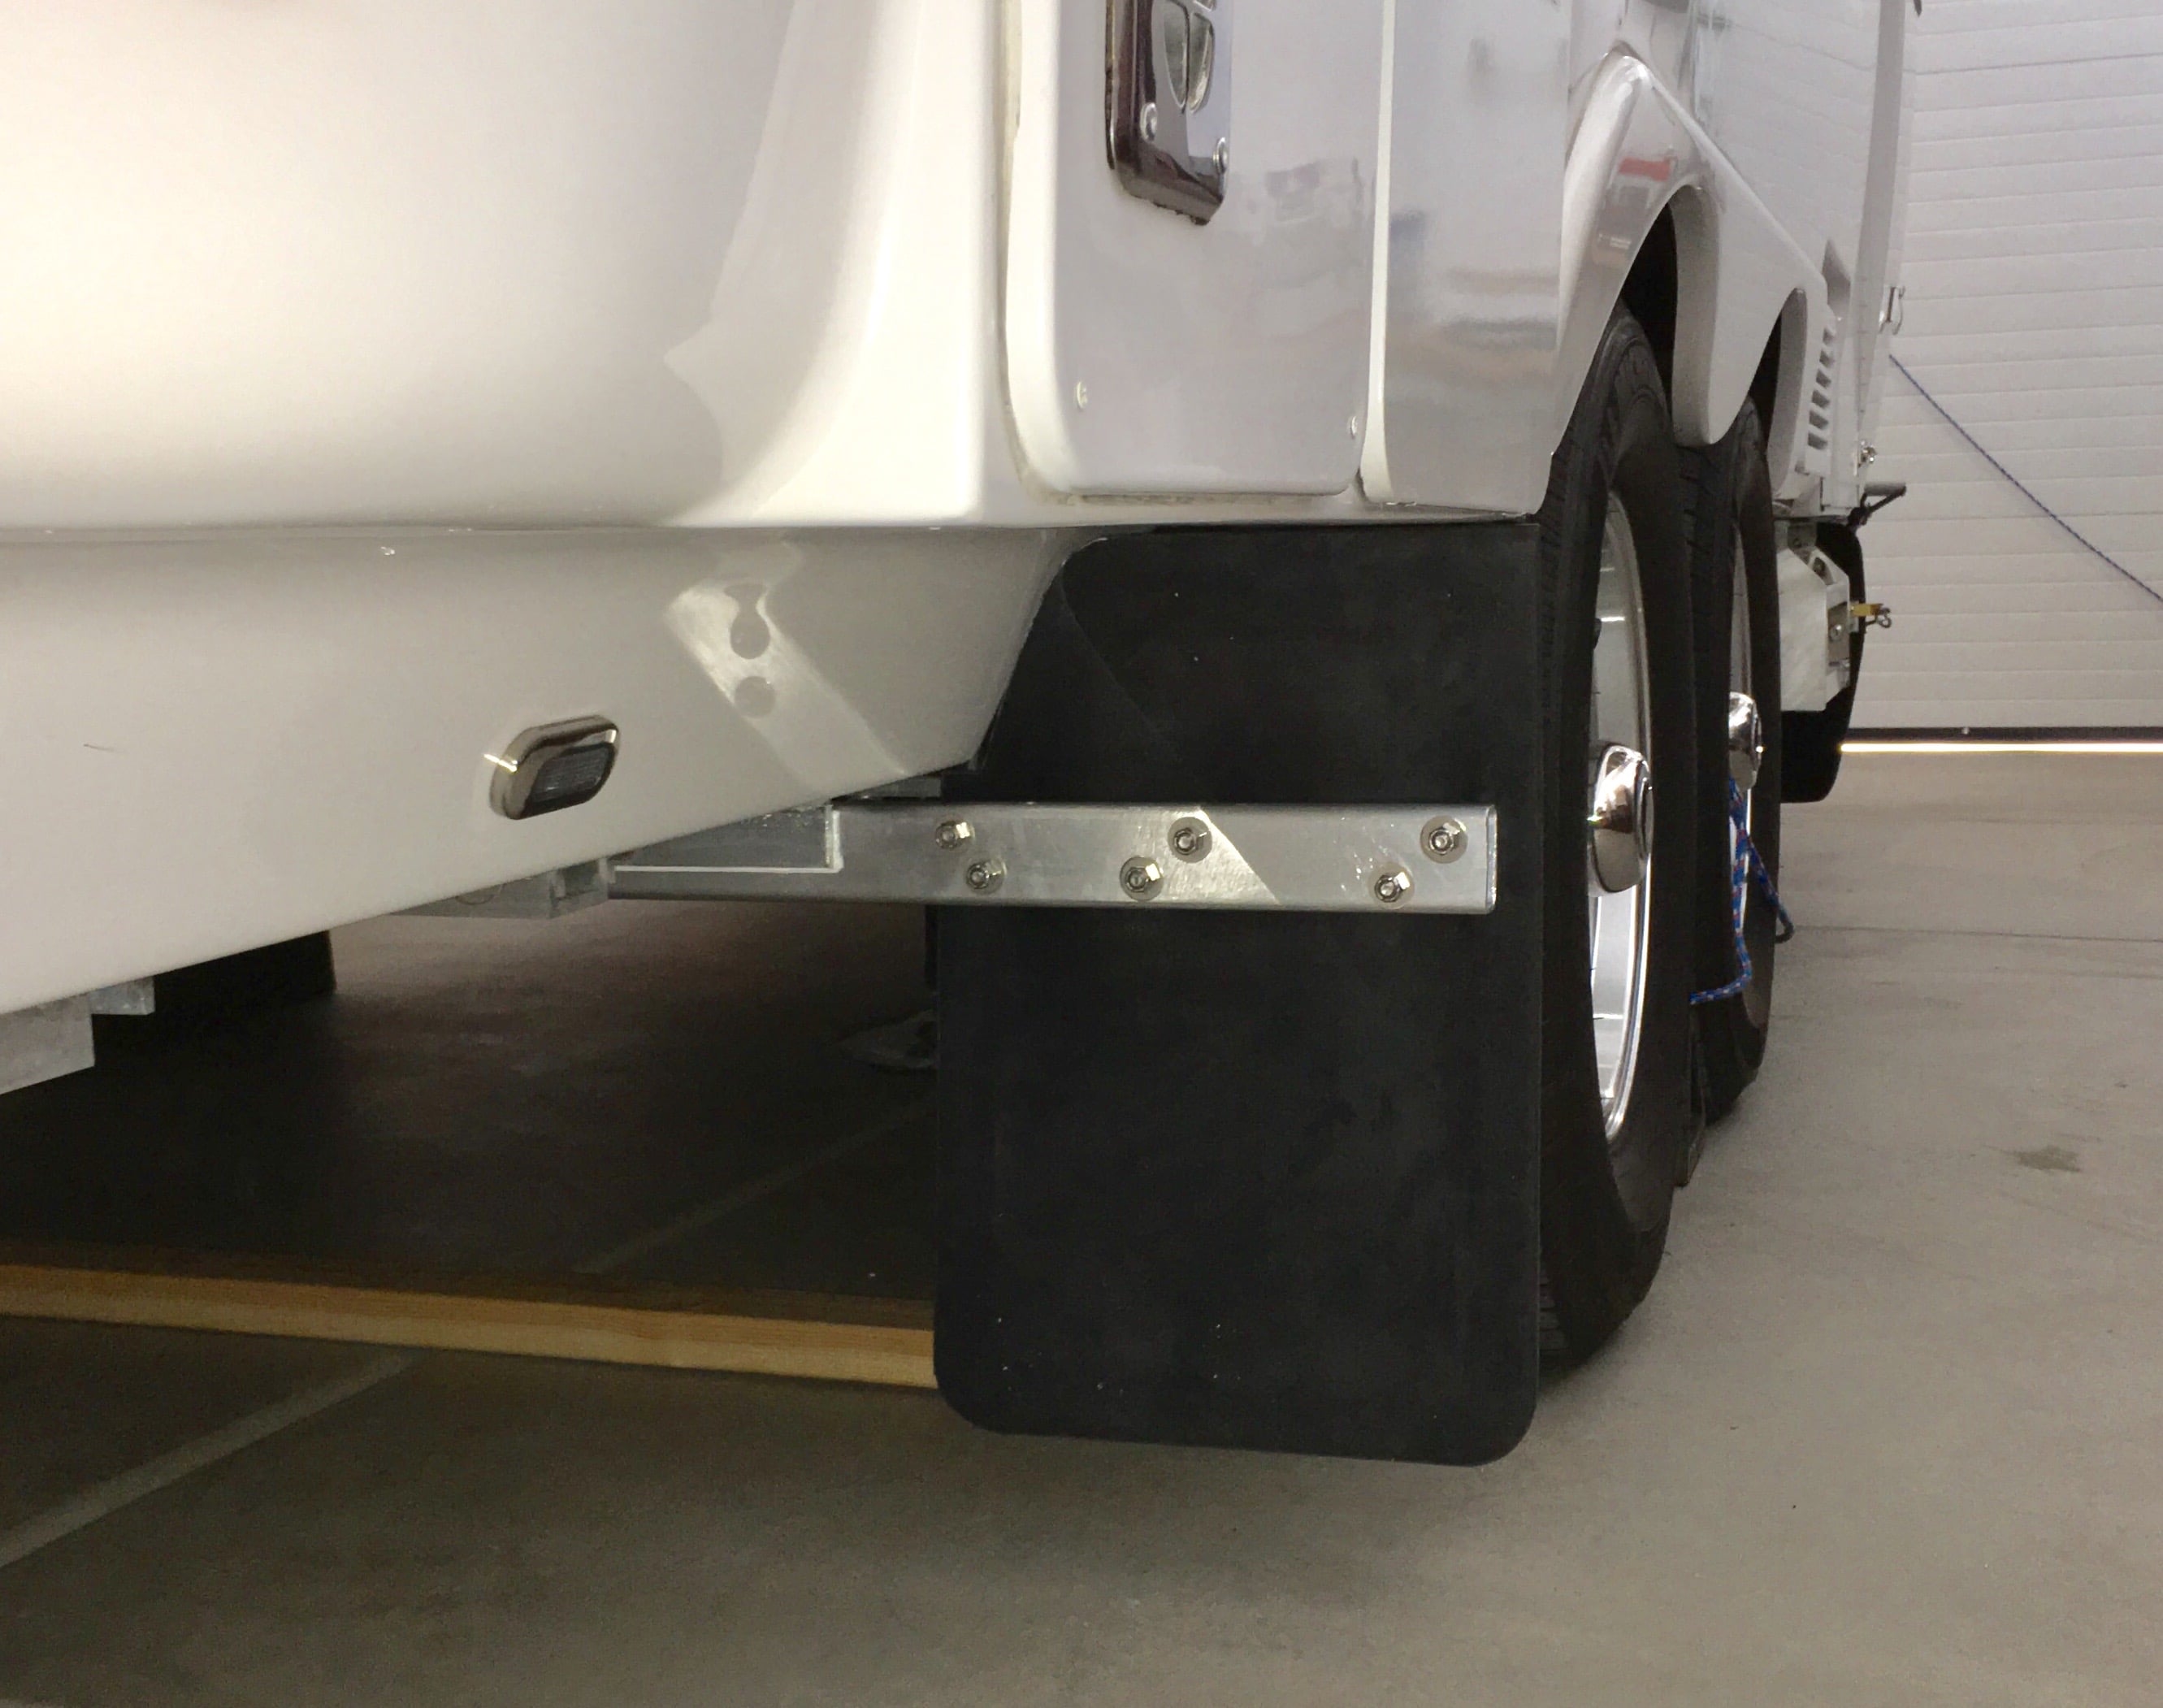
Sharing my modification to bring mudflaps closer to protect everything beyond the wheel well.
 2 points
 -
We're getting our OLLIE for Christmas! 😀 And all the accessories..... mb1 point
-
Ours got a wash & wax and a new Calmark cover aka - winter blanket! 😊
1 point
-
Oops, sure would love 1000 watts lol. Yep the bikes are tucked in out of site and the road grime being slapped around at thee back of trailers. Will fix the error1 point
-
Hey John, I did see your set up and that is exactly how they should offer an after build set up for people that travel North America. I've worked hard to make my TV into an Aussie clone as I really don't get North American style trucks with beds that dent so easily. I will be copied some of your ideas for sure. Great looking setup PerryG1 point
-
My TV is an old school GMC 5speed 4x4 with a 6.5 Detroit. We carry enough food for a month of travel. 140 days this year with the airstream. Needed a better trailer so here we are💯1 point
-
Good call on the heavier gauge. The idea is to have Oliver add everything for a door package less the panels. I want those add a port on the side of the camper that I can plug external panels into. Base camp at home has 600 watts of solar I can use. My truck has 200 and my buddies camp has many extra panels lasting around. Just not a fan of solar on trailers. Thanks for thee input on install. PerryG
1 point
-
Excellent work! Very impressive.1 point
-
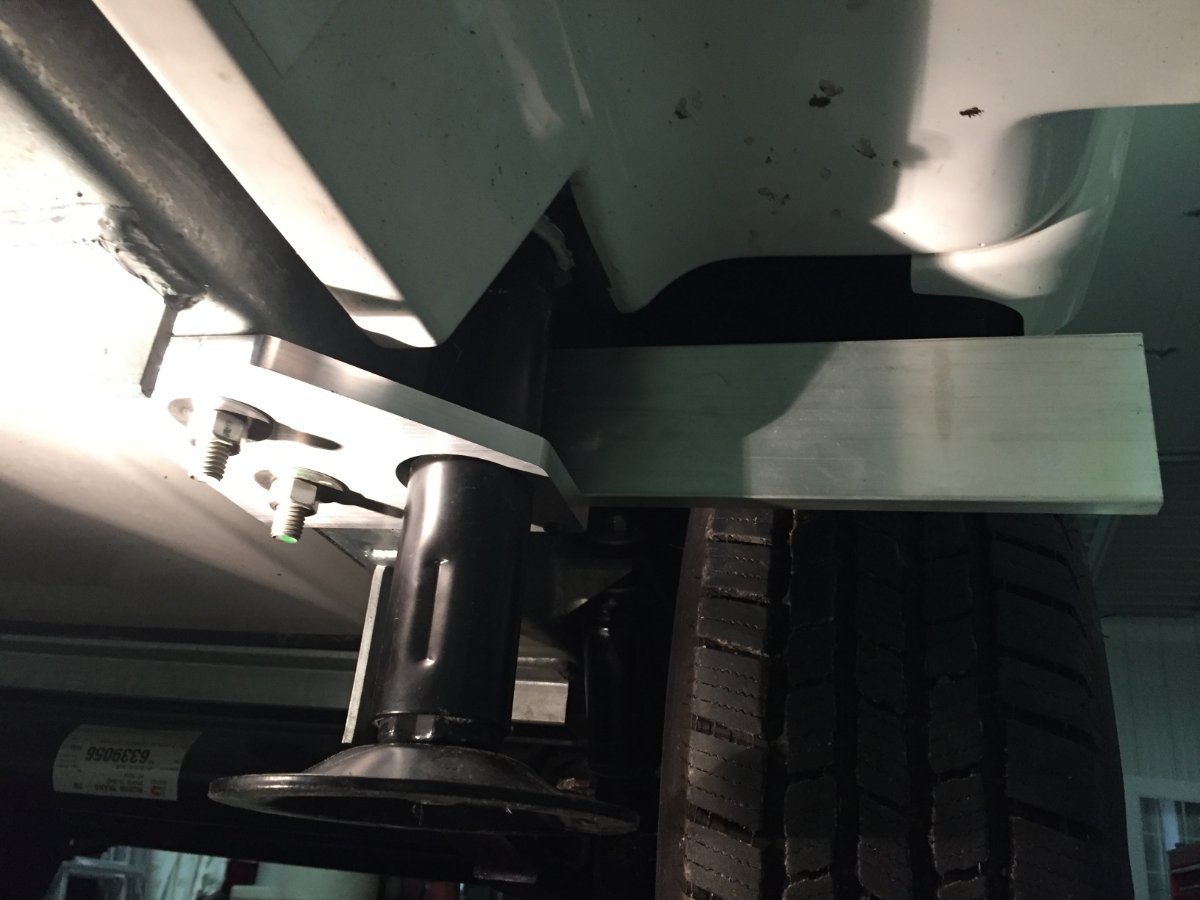
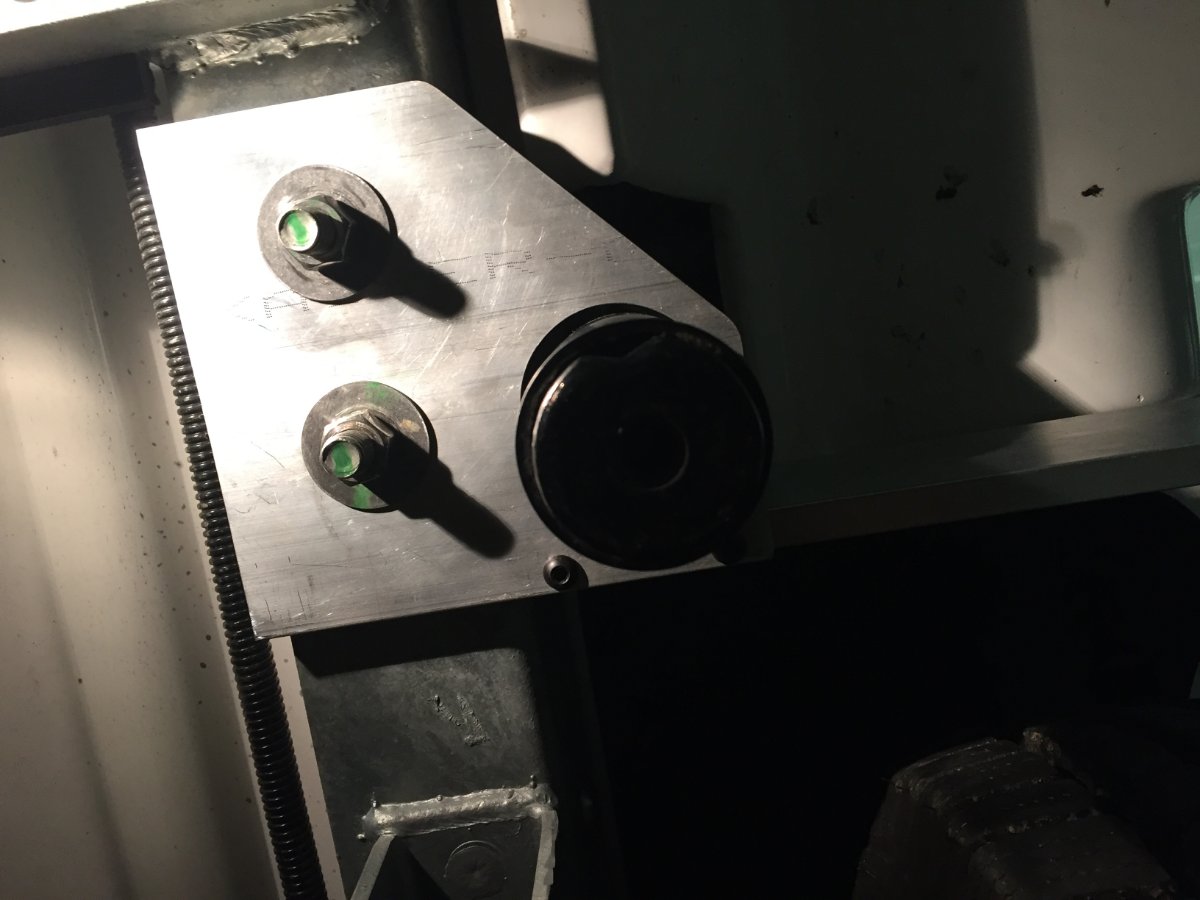
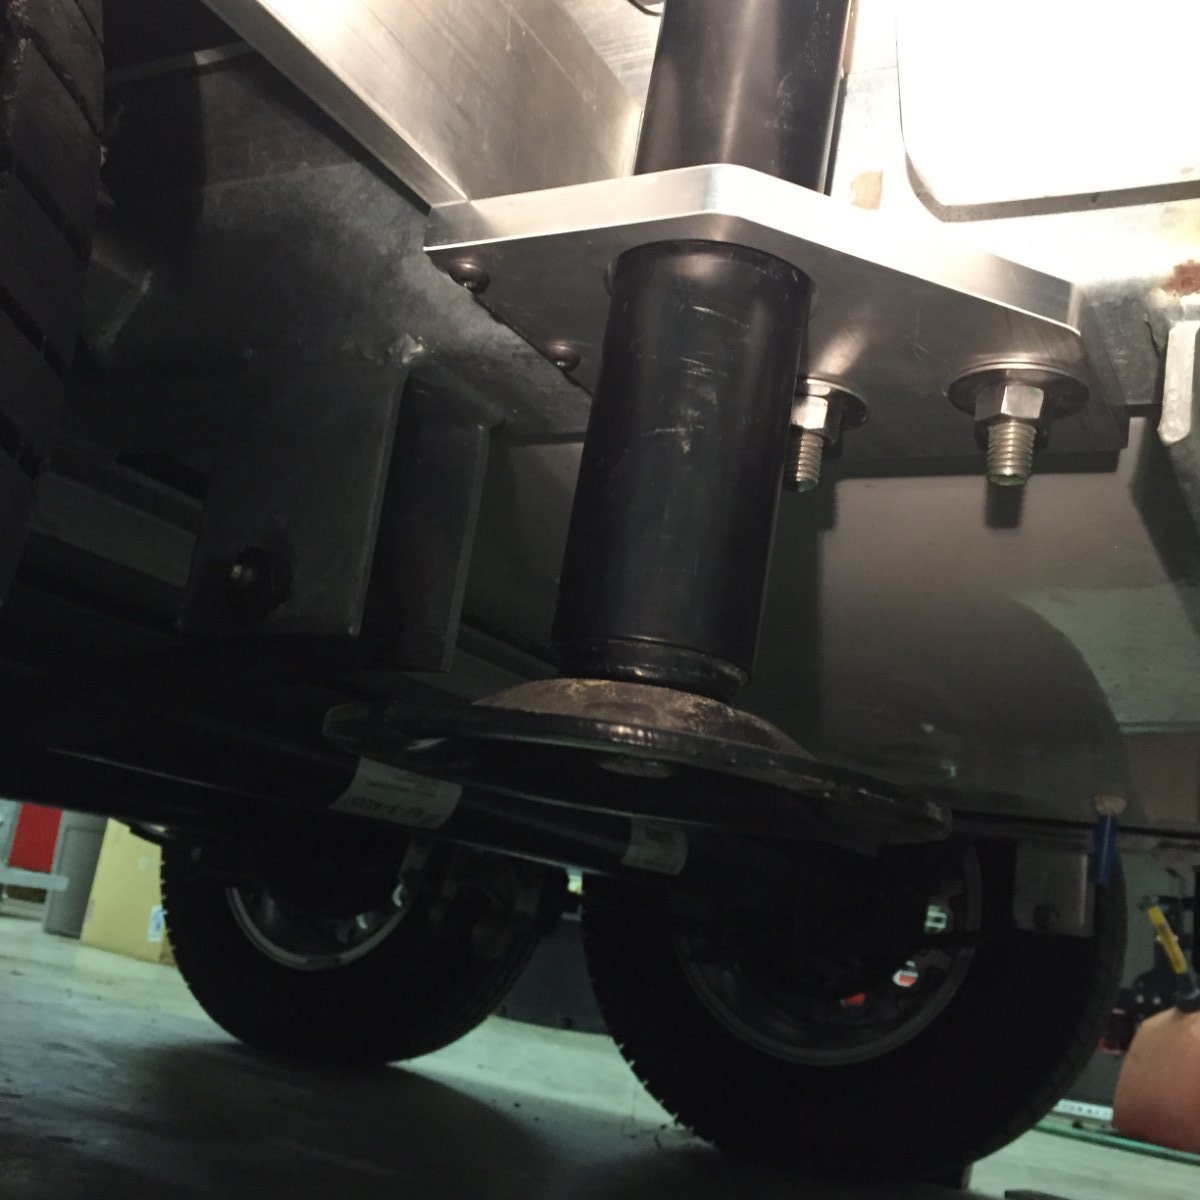
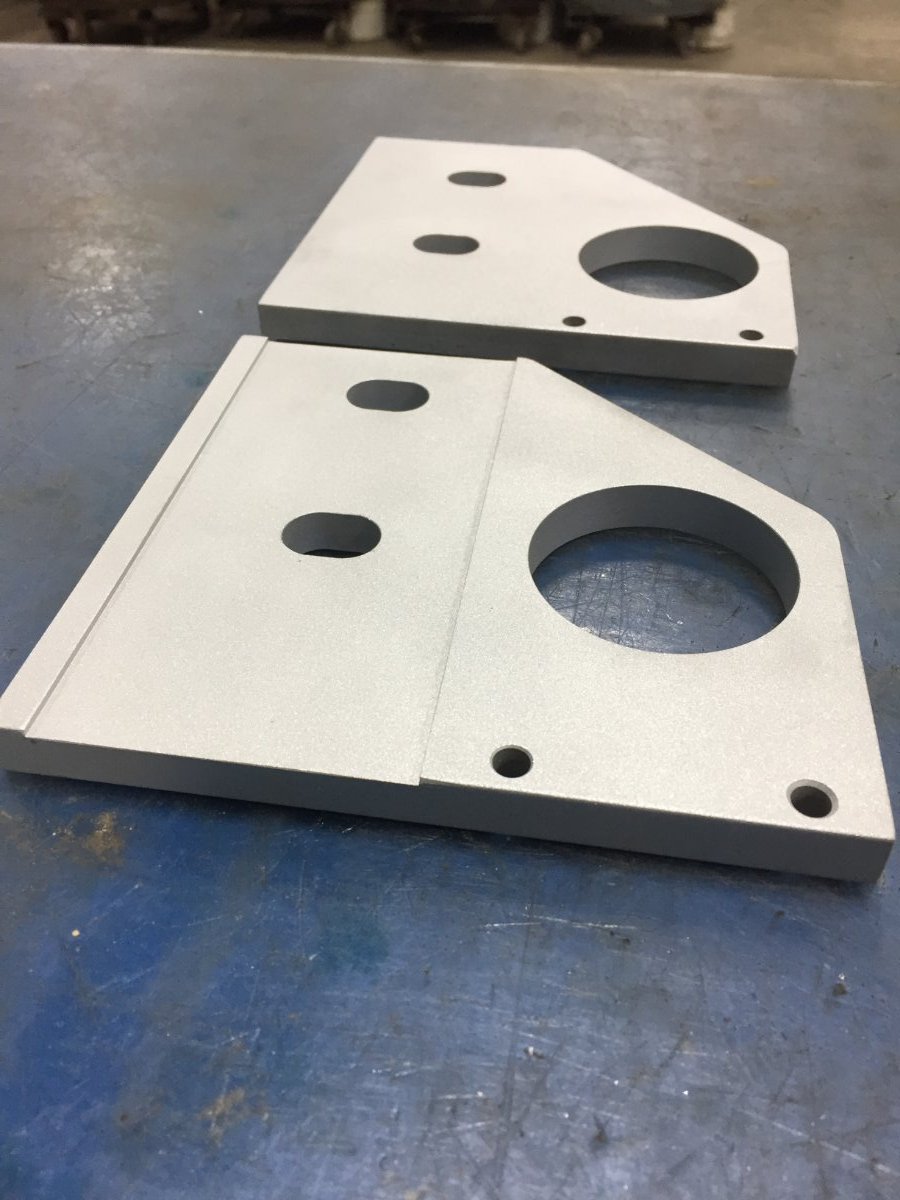
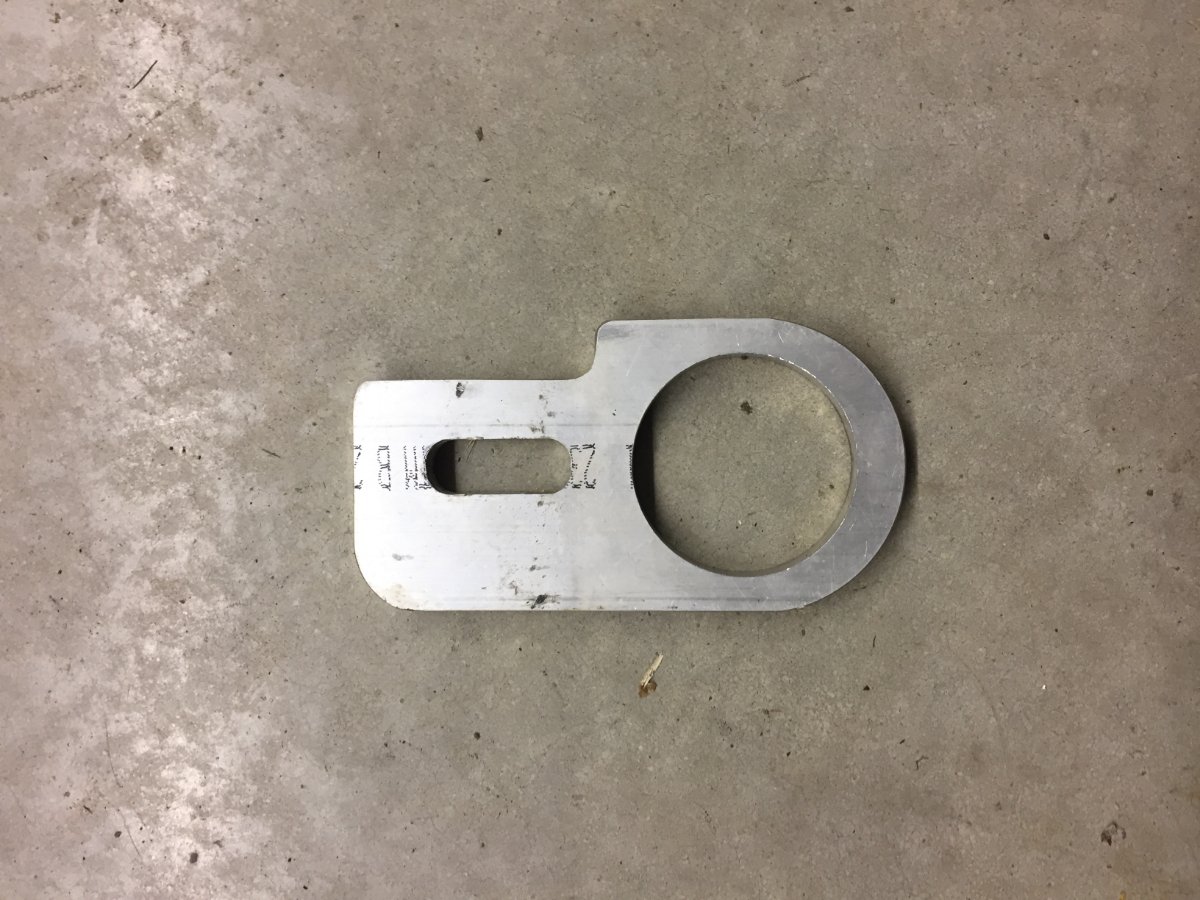
Yes this was done on a knee mill that I retrofitted with a 2 axis cnc kit. Now this is very helpful for making these pieces for this project but since there are only two pieces and the winter is long there is no reason why they could not be fabricated with hand tools similar to making the pieces out of wood. By this I mean drill press, band saw, drum sander, and the like. I'm very happy with the outcome of the project. Earlier this year I took Oliver into places that I probably shouldn't have, another words I was a little concerned at the time but afterwards all came out fine.Places like Rabbit Valley, Colorado and Moab, Utah, I'm talking a lot of deep ruts in the roadway and lots of rocks and the mudflaps survived with no issues. They do a great job of protecting the complete under side of the trailer beyond the wheel wells.1 point
-
I got a Ryobi handheld only because it uses the same lithium battery as my drill and other shop tools. However, I understand that Black & Decker makes a popular one. Bill1 point
-
https://www.amazon.com/gp/aw/d/B00IOEFBKS?psc=1&ref=ppx_pop_mob_b_asin_title Though I admit to rarely using it, mostly I just grab the broom. https://www.amazon.com/gp/aw/d/B01ASYZSVI/ref=ya_aw_od_pi?ie=UTF8&psc=1 It collapses and tucks away neatly in the closet using a single Command tool holder. John Davies Spokane WA1 point
-
Ollie will be getting a second coat of Meguiar’s flagship wax and a small rechargeable vacuum any recommendations?1 point
-
Perry, this topic has been around for many years and lots of people have asked your exact question. You need to contact Oliver Sales, if enough people push for an option, very often it becomes available. That is how it works…. I somehow thought that units exported to Canada required them, but I might be mistaken. The design posted here by Minnesota Oli is simply beautiful, but it requires machine tools and very good fabrication skills. You can do your own in an simpler way if you are reasonably handy. Several owners have copied this. https://olivertraveltrailers.com/forums/topic/2513-how-to-rear-mud-flaps-for-the-ollie/ John Davies Spokane WA1 point
-
Just ordered an Elite 2 and wondering why this is not offered as an option from the shop after the build? Most people that purchase these units will be pounding many road miles. Our is heading to Canada where the road are terrible. I'll be installing flaps for sure and would like to see Oliver add it as a custom install after the factory line. PerryG1 point
-
I just registered for the Rally at Lake Guntersville State Park. I plan to camp at site G21 in my Kimberley T3. Arriving on 5/18 and departing on 5/22.1 point
-
This may start a firestorm but.... I picked up an Elite II last December. Have driven it all over the eastern seaboard including the Adirondacks, Whites, Blue Ridge and Green Mountains. About 7.5k miles so far, all with a 2016 Chevy Colorado. I use the Anderson weight distro/anti wobble hitch and aside from the trailer brake system the only modification I did was adding Sumo springs (easy install). The truck is rated to tow 7,000lbs and my loaded trailer is running about 6,000 with a full fresh water tank. Pros: Great daily driver, gets 13mpg while towing, owned before I got the trailer. It handles fine, don't really feel fast passing semis, no sway or porpoising. Gets up to speed on highway on ramps without my ever having to stomp on the peddle. Cons: On hot days and extended mountain climbs the transmission can run up to 225 degrees which is fine but close to the edge. With a passenger, kayaks on the roof and a bed full of toys, I am pushing right up against my payload limit. Hits 5.5k rpms when passing on a hill which is acceptable according to manufacturer but I can feel and hear the strain. Takeaways: I feel the Colorado can safely get the job done in rolling terrain but there is little room for safety margin. The braking, drive train and suspension are rated to do the work (read up on SAE rating requirements). That said, is it really prudent to run against the capacities on a frequent basis? Will certainly effect the longevity of the tow vehicle and I worry about ability to handle an emergency avoidance maneuver. If I were limiting my towing to modestly hilly terrain and staying out of the mountains and willing to compromise on my payload options, I'd consider sticking with the Colorado. My new F150 (tow capacity is 11k lbs and the payload more then doubled) is due for delivery in December. Side note: I bought the Colorado with 18,000 on it for $30,000 and can sell it now, with 80,000 miles for $25,000. Even at the obscene price of the new Ford, considering the 0% financing and a more sensible match for towing, it's a no brainer. Gerry1 point
-
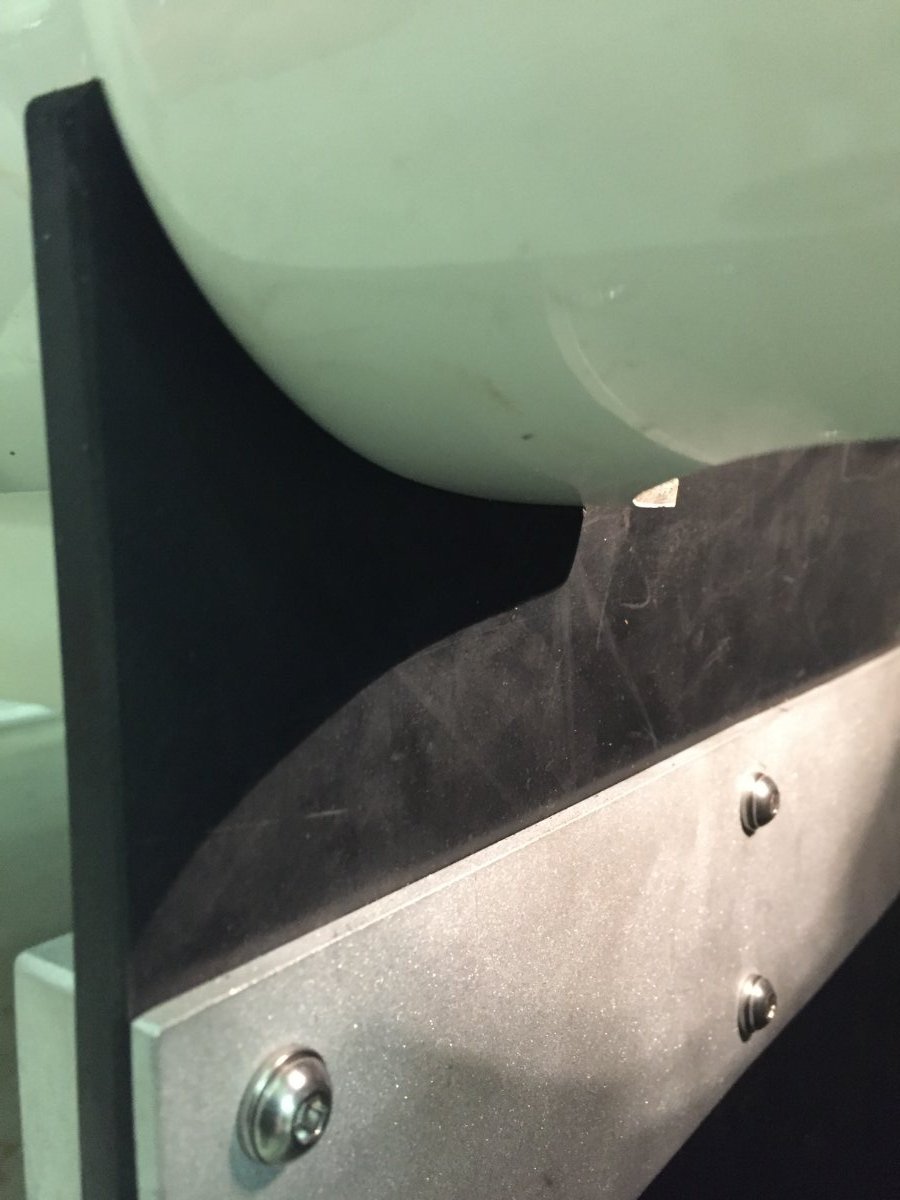
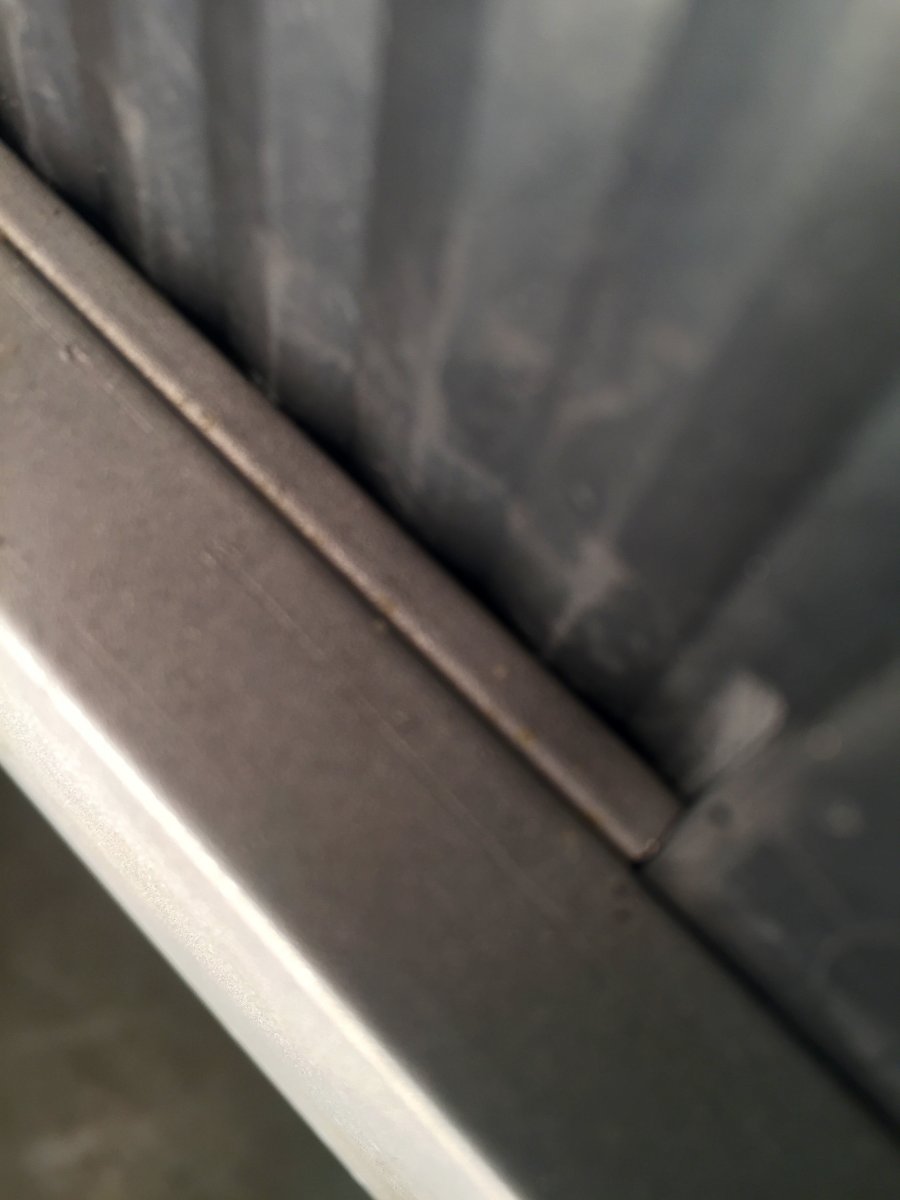
The flaps are easy to cut with a new razor knife blade. Level the trailer side to side! Once clamped into position, check that the flap is vertical along the outside edge using a bubble level, drill the holes 5/16". Remove and enlarge slightly oversize; this gives you a little wiggle room for final adjustment. Install the flaps with hardware specified in the other thread. Both flaps clear the jack, and also any blocks under it. The flap can easily be pushed back for extra room. The left flap: Clearance with the jack was tighter on this side. The jack was mounted about 1 inch further back on the frame rail. It still clears. And the flap also clears the cargo door when fully open. The bar has about 2 inches clearance with the door itself. The right flap again: The hot water heater door lies against the rubber when fully open. The bottom edge is 3.5 inches off the ground. I will see how this does, and if it seems to be dragging excessively, I can easily trim off a couple of inches. ***** I don't THINK that it would be possible to pinch a flap between a curb (or rock) and the tire when backing up! I will check to be certain, and if needed I may have to remove a little from the bottom. ***** EDIT 05/20/18: No worries about dragging, I have backed over a standard street curb and the flap folds forwards but does not get pinched. The flaps are very effective on gravel roads, but there are still rock strikes on the gelcoat above the front of the flaps, there is no way of stopping that. But behind them, the bottom of the hull stays much cleaner and relatively undamaged. I'll post a few pics outside when I next tow Mouse. This was a fun project. Fabricating the bars, drilling the subframe and installing them was time consuming and a little finicky. Actually fitting and attaching the flaps was quick and easy. I like how they look, and they should provide significant protection for the curved part of the hull, the puddle lights, water fittings, rear bumper and back of the trailer (from rocks pinging off the front face of the bumper). John Davies Spokane WA
1 point
-
In response to your questions, John, I chose the McHitch on the Kimberley and a Rhino hitch on the tow vehicle. I’ll tow it with a Ram 2500 diesel. Because of the passage of time, I’m sure the price for mine is not the price you’d pay today if you ordered a T3. I paid Kimberley $9500 for shipping from Australia and I think their cost to ship was around $17,000. All in, mine was around $155,000 plus the $9500 shipping charge. A lot of money, but it’s worth that amount of money to me. I think I have some chassis photos—I’ll see if I can dig them up and post them. Thanks for the tip on the Stone Stomper. Warranty claims will be handled by Kimberley USA—David Bates’ company in Ohio. He’s building a dealer network too. The company in Utah that was a big Black Series dealer dropped the Black Series and is all in with Kimberley. I’ve dealt with David Bates before—he sold my Conqueror to me. He is absolutely committed to supporting those of us who purchase Kimberleys. He’s an automotive engineer and a very skilled technician.0 points


.jpg.baf70cc1c46ffc013c8ef0279b4e1414.jpg)


-
Recent Achievements
-


")


")


