Leaderboard


Popular Content
Showing content with the highest reputation on 03/29/2022 in all areas
-
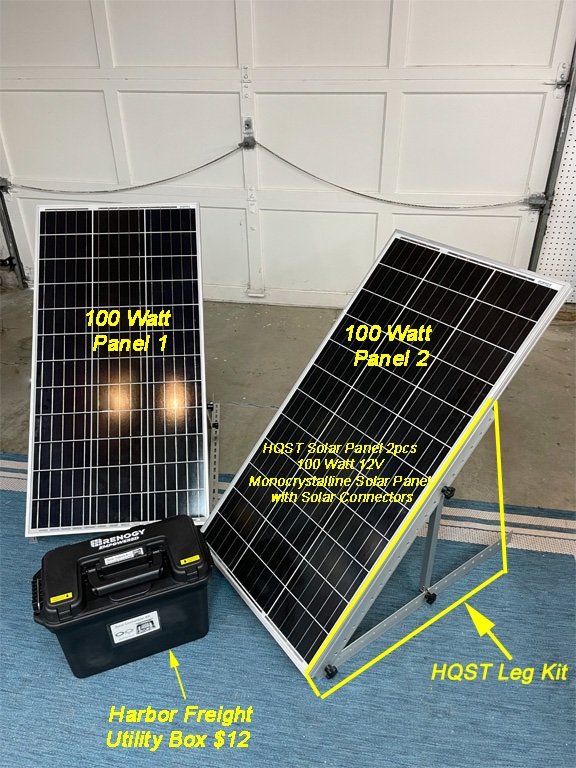
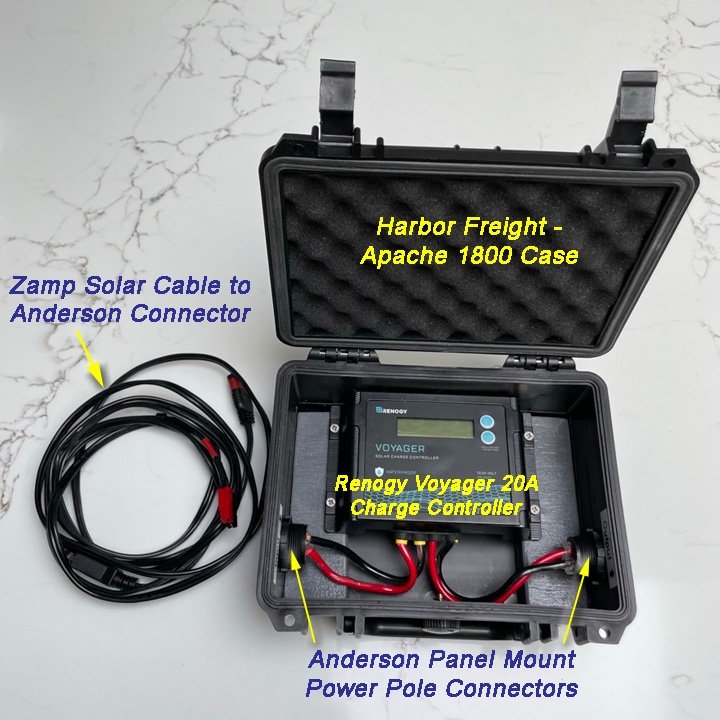
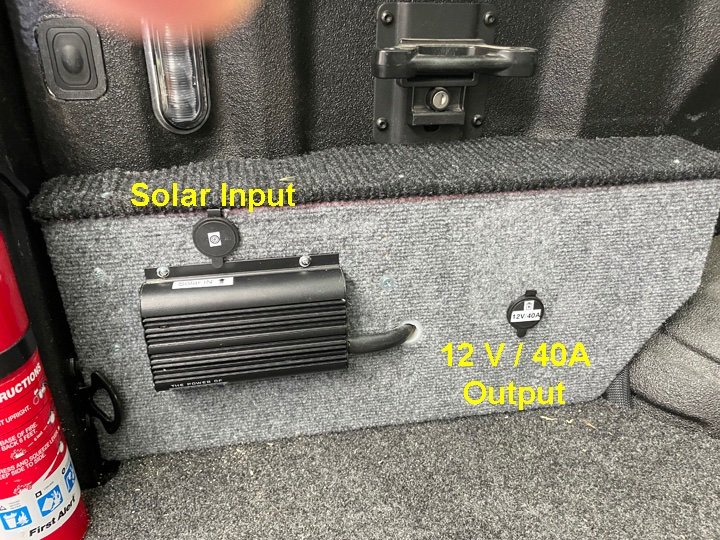
Portable Solar Upgrade: We are preparing for more trips where we will be camping in more primitive settings. In some cases we'll be in developed USFS campsites that have a fire pit but no water or electricity. To extend our stay and recharge our batteries without starting the truck or generator we've decided to pull together a simple external solar kit. We also want to be able to loan this kit to our family members who have other trailers with Zamp Solar input ports. Here's what's in our Kit: 2 - HQST Solar Panels - 100 Watt 12V Monocrystalline with MC4 Solar Connectors 1 - Renogy Voyager 20A PWM Solar Controller 1 - Harbor Freight Utility Case (For cables, adapters, and the Solar Controller) 1 - Harbor Freight Apache 1800 Waterproof Case (So I can leave the controller out in the rain if necessary) 1 - Pair - Solar Extension Cables with MC4 on one end (RICH SOLAR 20 Feet 10 Gauge ) 1 - Zamp Solar Cable (Modified to have Anderson Power Pole connectors on the end.) Misc - MC4 Y Cables, adapters and Fuses Cost: The total cost of this kit was < $300 ....a similar 200 Watt Solar Suitcase with controller is about $425.00. Our USE Model: Our kit is designed plug in to charge both the Aux Batteries in our truck bed and for our the main batteries for the Trailer. We also have made it portable so it can be loaned out to our kids and friends who also have a need for charging. Our F350 truck is setup with dual AGM batteries and has a Redarc BCDC1225D Dc/Dc Charter with Solar Inputs connected via 45A Anderson Power Pole Connectors. (Another whole writeup on that project is here: Link to Truck Power Port Project The Elite II units with Solar Options have an external Zamp Connector on the side of the trailer which is connected through a 20A fuse to the trailer batteries. That Zamp Port doesn't connect to the onboard Zamp Controller, so you need a second controller for external panels. In operation there are two way's we connect up the Solar Panels: 1) To charge the truck batteries, the panels connect directly to the Power Pole connector in the truck as it's connected into the Redarc Charge Controller. 2) To charge the trailer batteries, the panels connect through a Renogy 20A PWM controller to the Zamp Port on the side of the Oliver. System Overview Photo Repeated Below: All the components will fit into two cases, one for the solar panels & legs, and another in a utility box for the cables, controller and adapters. Solar Controller in a transit case: For Mobile and Loaner Use We want to be able to move the solar controller between various trailers in our family, so I decided to mount it inside a small waterproof transit case. The case has Anderson Powerpole connectors on both the solar input and controller output side of the case. These are nice connectors that are flush mounted into the box and include a dust cap for travel. Harbor Freight - Apache 1800 Transit Case $12 on sale Mounting the Controller: The Renogy Controller is mounted to a piece of 3/4" plywood cut in a U shape to fit inside the bottom of the transit case. This U shaped cutout helps hold the wire connectors up off the bottom of the case and gives room for the wires. I wired the Anderson Connectors using the 45 AMP pins to 10 AWG stranded wire. These wires are connected to the controller mounting screws via spade connectors. Case open to show the Renege Charge Controller and connections to Anderson Plugs Both the Input (Solar In) and Output (From the Charge Controller) use Anderson Power Pole Connectors Capable of 45A) The Carrying Case: All the cables, Y connectors, adapters, fuses and the whole waterproof case fit neatly into a Harbor Freight Utility Box. The Solar Panels and leg system along with tie down stakes will fit into a separate case to protect them during transit. There's even room left over for a voltmeter or other accessories like Crimpers or Cutters for solar troubleshooting. Harbor Freight Utility Box has storage in both the base and the LID area. Main Body of Box holds Cables and Controller in a waterproof transit case. The lid of the box also opens and has room for MC4 - Y adapters, Couplers and Fuses. In any case, hope sharing this give's some of you an idea for your own mobile solar upgrade. Craig Short Hull 505 - Galway Girl
 7 points
 -
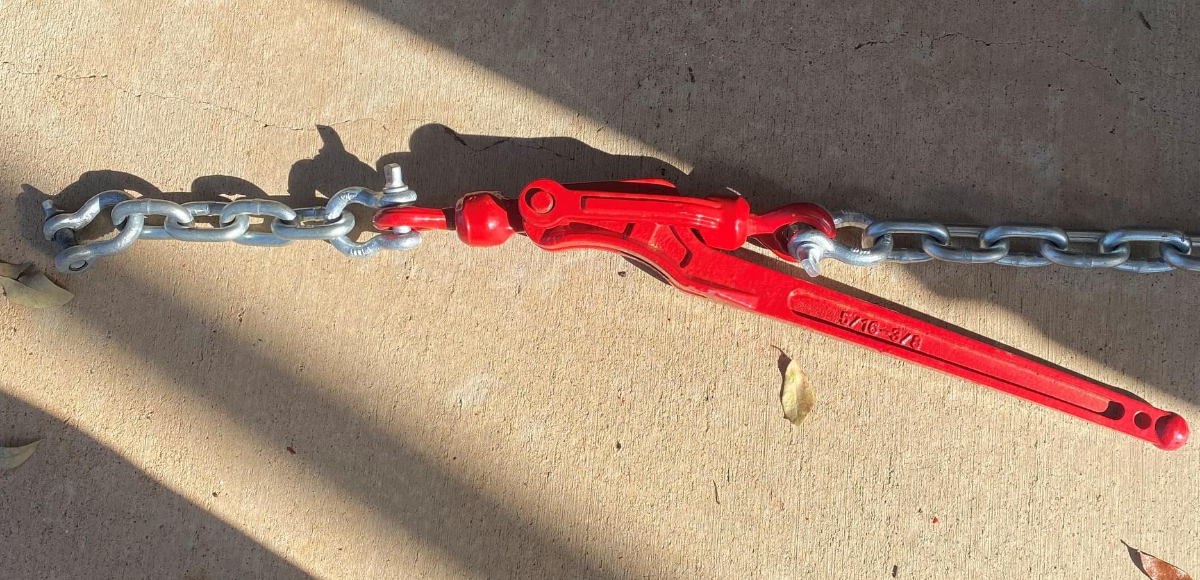
A while back, I had an idea for a hack to my Andersen Hitch to simplify hookup. The modification involves putting a chain binder in the two chains which adds slack in the chain when doing the hookup. If you're interested in it's operation, I attached a brief video explaining.
6 points
-
When I took my first camping trip with the new to me Oliver I was thrilled with the experience it gave me, and as I added more trips I started a mental list of things that I could tweak or add to the Oliver that would make that experience even greater. Today's post is addressing one of the items on that list concerning the windows and how they are limited to only being able to be open in fair weather conditions. Because they lean inward at the top of the window they can create problems in rainy conditions whether the window is opened or closed. When closed they have to deal with all the water that runs down from the roof and sidewalls, this can overload the drainage holes in the window frames which can result in getting the bedding wet. Many Oliver owners have installed rain gutters to help alleviate that problem, but there's still the problem of having the windows open while it's raining to mitigate high humidity or that closed in feeling. What I came up with for a solution I'm calling window eyebrows. I created a list of design parameters or considerations that I wanted to hit for this project. The first one was I did not want to alter the Oliver in anyway, that included the drilling of hole to mount the eyebrow to the windows, this really slowed my project down. I'm the type of guy that builds it in my mind before the prototype is built, I went through many different design ideas before I settled on this one. I designed a mount that clamps into the window frame and to spread the load out over a larger area I utilize three of these mount per window. The mounts are inserted into the window frame and the screw on the bottom is tighten which draws down the 5/16" diameter rod in the tapered slot which then spreads the mount to engage the ribs that are formed into the window frame that hold the rubber molding in place. I inserted a still picture in the following video showing that process. To remove the mount you have to take that screw out with the 5/16" rod and there is a hole on the bottom where that same screw is inserted and when tighten it releases the mount. The eyebrow itself is made of 3/16" thick x 5" wide x 29" long aluminum which has 3/4" of the outer edge turn down. I used a neoprene edging trim bought from McMaster-Carr along the length that mated with the Oliver, my hope was that it could be pushed tight enough to seal the water from coming between the eyebrow and the side of the Oliver making for a easy instillation. When I tested this in the rain it looked like it was going to work but after about ten minutes I noticed each window developed a drop of water by one of the mounts and it would fall and hit against the screen about every couple of minutes. So plan B I was forced to use a 1/4" wide weather strip tape between the neoprene edging and the fiberglass wall of the Oliver. There was one more problem, I had to incorporate a drip edge to the eyebrow to keep the water from following around the edge and falling towards the window. This eyebrow is fastened with two stainless steel 1/4-20 button head hex drive screws to each of the three mounts. This makes for a quick install or removal of the eyebrow, Here in Minnesota we had a warm up and it rained one day so that is all the testing I have been able to do, so time will tell if all is well with the design. As far as the rigidity of the eyebrow I'm extremely pleased you can literally grab onto them and push and pull with no flex of the eyebrow. EYEBROW.mp45 points
-
Note: This information is specifically related to the Xantrex Freedom 2000w or 3000w Inverter/Chargers. Inverter - What is it and how does it work? An inverter produces 120V AC power from a 12V DC power source. The easiest way to think about this is 12v power x 10 = 120v. This is not exactly accurate as it takes slightly more power but this is the easiest way to do a quick conversion. For instance, a laptop might be rated to use 3 amps when plugged into 120VAC but when used through the inverter it would equate to 3a x 10 = 30 amps. The importance of this is because while on shore power your energy is endless. When using the inverter, you are limited to the battery’s capacity. Battery capacity varies from battery to battery. Charger - What is it and how does it work? The charger uses incoming 120VAC power and steps it down to 12VDC power. The charger is setup with a specific charge profile based on the type of batteries and the number of batteries that you have. Each and every battery has a charge profile set by the battery manufacturer. The charger has 3 stages of charging: Bulk Charge, Absorption Charge & Float. In Bulk charge it will supply a set amount of voltage, typically 14.0 - 14.6 volts and a large amount of amperage to replenish your battery charge quickly. The length of this stage depends on the battery type, number of batteries, charge profile and *incoming power. Absorption charge is a timed charge cycle. It keeps the voltage high but lowers the amperage going into the batteries. Once in Float charge mode it drops the voltage right above the batteries resting voltage to top them off & maintain them. Note: When in Bulk Charge rate it is passing the max amount of energy allowed to the batteries. With Lithium batteries this is a large amount of amperage which generates a tremendous amount of heat. During this stage it is normal for the fan to run at a high speed which causes it to produce a lot of noise. *Amps setting based on battery type & number of batteries. Shore Power *Incoming Power The camper is designed for 30 amps however smaller power sources can be connected using adapters. It is important to understand that the camper and the inverter/charger are setup for 30 amps and when using a power source smaller than 30, it may result in poor performance or failure. House: When you are connected to a regular home receptacle, you are connected to a 20a or 15a circuit, unless you had a dedicated 30a receptacle installed. You also have to consider that the circuit most likely is not dedicated to the camper which means other appliances inside your house are running on that same circuit. When connected to a house circuit you may also experience failure at the circuit breaker in your hose. If this occurs, you have overloaded your house circuit meaning you are requesting more power than what it is rated to provide. You would need to locate a dedicated circuit, a circuit that is not being used, or turn off some of the appliances to lighten the load. Generator: When you are connected to a generator the incoming power depends on the size of the generator. We recommend at least a 3000w generator which will provide about 25 amps of power. You can use a smaller generator however you will again be limited to how much power it can provide. Note: When using a generator, because it is not grounded, it is recommended to use a Neutral Ground Plug. Without the plug you would be required to turn off the surge protector, which we DO NOT recommend. WARNING: Using an undersized or long extension cord may result in poor performance and failure. When using an extension cord it is important that you use the appropriate size & length. A 100ft extension cord will have voltage loss resulting in heat buildup at the power inlet which can cause the inlet & cord to melt. We recommend using a 10ga/25ft max extension cord. Flow of Power Solar & Shore power have their own path to the batteries for charging and they work independently of each other. The battery is just the storage device for the energy whether that energy comes from Solar or the Charger via shore connection. See pic below for path of power The red arrows indicate the direction of power with both stopping at the battery bank. NOTE: The Inverter/Charger has two connections to the AC Panel as shown above. One connection comes from the Main power supply to the input side of the inverter. The Input side is what supplies 120vac power to the inverter/charger. Once the inverter/charger has the incoming power it passes it through the output side back to the AC Panel on a split bar to allow AC power to any breaker located on that side of the panel. The inverter/charger also uses this same power to charge the batteries. When not connected to 120vac power and the inverter is turned on it pulls 12vdc power from the battery bank and converts it to 120vac power, sending it down the same output connection in order to supply power to the AC panel on the split bar. Caution: We do not recommend leaving the inverter on. The inverter will pick up the AC load within seconds if something happens to the incoming 120vac power but this will start to pull from your batteries which will cause the batteries to drain without your knowledge. Solar vs Charger Solar collects and charges at 12vdc whereas the Charger uses 120vac incoming power to charge at 12vdc. The difference is in the amount of amps supplied to the battery. The max amp output that the solar panels can provide is 18.8a per hour however this is dependent on the sun, while the charger can put out up to 150a per hour depending on the charge rate setting in the charger. Bottom line is that a shore power connection whether it be at a camp ground, your house or a generator will always charge faster than the solar. Areas highlighted in light blue below are the primary settings to review. Please make sure you locate the appropriate battery column for your camper build. Below are some links to the Service Knowledge Base articles. *These links may require login credentials as some of the articles are posted for Oliver owners only and cannot be viewed without an account. Xantrex Inverter Settings Inverter/Charger - Battery Charge Profiles Xantrex Inverter - Error 20
4 points
-
I buy much of my small anderson parts online from Powerwerx Anderson Connectors They have a good selection of tools, parts etc for many projects. Craig3 points
-
Very nice! I’ve been considering something similar. Boats often have rain guards above porthole windows but I haven’t found any long enough for the Ollie windows except for the Ollie bathroom window. So now I’m looking at re-purposing automotive sunroof wind deflectors to use as window rain guards on the Ollie, if I can find ones long enough for the Ollie windows.
2 points
-
We picked up last week and asked about the refrigerator and if trailer would be dewinterized. It was still winterized and refrigerator was off. This worked out fine as we were able to test refrigerator on all three modes. We used propane first as this cools the fastest. We also learned how to dewinterize which is super simple.2 points
-
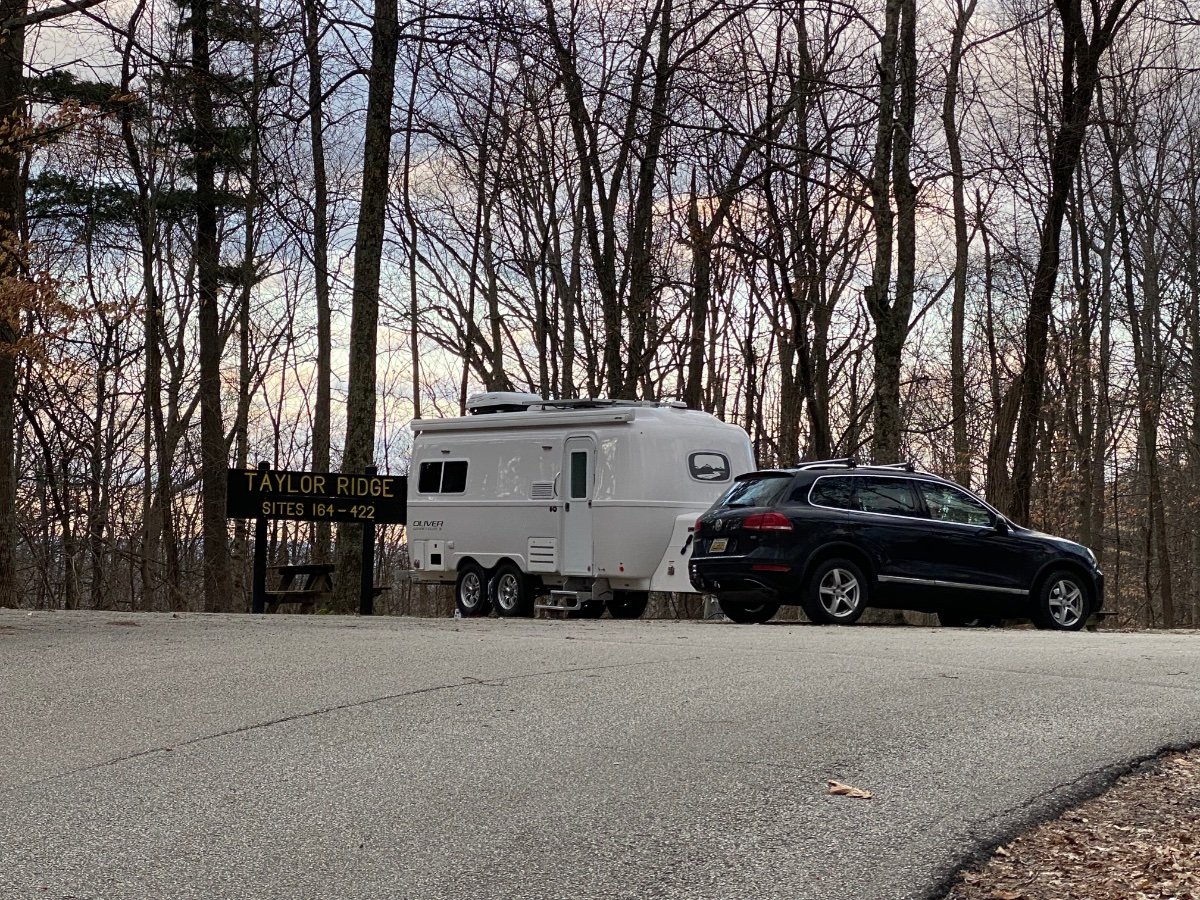
Hello Oliver family. After a long wait, Hull 1047 has launched. Our time at the Mothership was well spent. Ryan’s walkthrough was thorough and very helpful. Jason and the crew did an amazing job getting us all set up and ready to go. We took advantage of pickup checklist made by Forum regular Fritz and it was much appreciated. Happy to report we found zero deficiencies. Pre-pickup night was spent at an AirBNB less than a mile from Mothership. Spent first night on site without issue. We are currently camped in southern Indiana east of Bloomington. Temperatures are in the 30’s but Ollie is snug and cozy. She towns beautifully. My biggest learning curve is the brake brandishing process and brake control settings. A work in progress. We will spend a couple of days here in Brown County then back to Northern Michigan. Next planned trip is rally in May but I May have a hard time not getting Saunter out ubefore then.
2 points
-
I picked up this bearing driver set from McMaster Carr. Lists country of origin as United States. A little more expensive than the comparable set at Harbor Freight but I try to buy Made in USA when possible, even if it costs a little more.
2 points
-
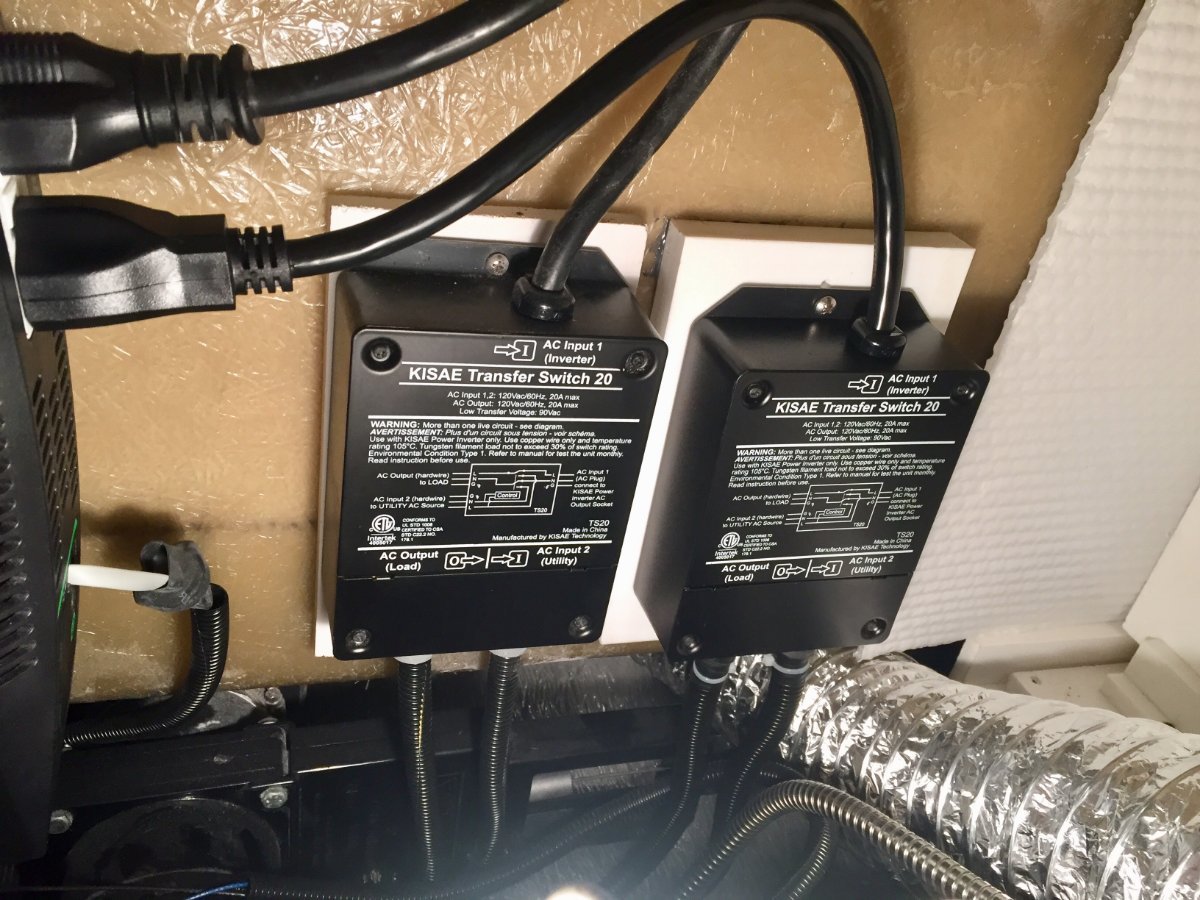
Besides the huge improvement in the sound level there is also another area where it surpasses the Dometic AC that I had replaced. The Houghton with the compressor running draws 10 amps while the Dometic was pulling 16 amps. So I decided to install a second transfer switch for the air conditioner to test it running off the batteries. It was 11 o'clock in the morning on a cloudless sunny day the temperature was 88 degrees. I had my batteries 400 Ah fully charged with 340 watts on the roof and 230 watts remote ready to feed it. I set the thermostat at 70 degrees and turned on the AC. Once it brought the temperature down to 70 I noticed it was cycling four minutes on with the compressor and four minutes off. I left it running until about 5 o'clock and was surprised to see that the batteries were at 97 percent. So I was happy with those results but time will tell if that is the norm. I put the picture in to also show it's nice low profile. Paul
1 point
-
Nicely done!1 point
-
Count us in as an interested party if you decide to sell these. We've been looking for something like this. Brilliant!1 point
-
Yeah, the price on this was high but I’ve also bought plenty of cheap Harbor Freight stuff to offset it. 🙂. Here’s the company that makes the set sold by McMaster Carr. An interesting history to the company. https://www.lislecorp.com/
1 point
-
Very impressive piece of engineering to address a complex problem. Do you have plans to produce these for sale to other OTT LEII owners? I am interested.1 point
-
I will always look to buy USA made. But the cost delta has to be reasonable. In this case it is a tool that will get used annually. McMaster Carr cost is $51. For the current on sale Amazon Chinese Knock-off the cost is reduced to $19 (See below). Double the cost is is beyond my "reasonable line" this time. GJ
1 point
-
what a great mod. Simple appears heavy duty. I would also lock the levers to the chain for safety. I’m sure Anderson would not approve and your warranty is out the window. Still a great mod hope it works well for you. Thanks1 point
-
Terry - I think this is a great idea. And, I think that your idea of placing a "safety wire" or "securing device" of some sort on the handles is a good idea. The reason for this is that as you drive down the road and hit a bump, there will be some compression and slack created in the chain as the tow vehicle and trailer "bounce" at different times. When the "bounce" creates slack in the chain it might be enough to allow the handle to come loose thus creating undesired slack until you stop for put the handle back in its tight position. Bill1 point
-
You put plenty of thought and work into this portable solar system. Nice work!1 point
-
I’m taking the same approach. I’m keeping the knock-off Timken sets and some grease in my spares/tool kit as an emergency set to use on the road if ever needed. I’ll use genuine Tinkens from an authorized distributor when all the bearings eventually do need replaced. Excellent. But be sure to have a couple cans of break cleaner (I like CRC RED), rags and tools too!1 point
-
First - be safe! Second - have fun! Third - let us know if we can help! Fourth - have plenty of cold beer available at the Rally! 😁1 point
-
There was quite a bit of plastic shaving in the filter -- I assume I must have hit some rough roads that shook things loose that didn't shake loose when I first set sail. Cleaned that out and it does seem to have helped a little bit but see attached video. I'll order a rebuild kit today and maybe film the service to post here after I'm done. VID_20201226_135906.mp41 point
-
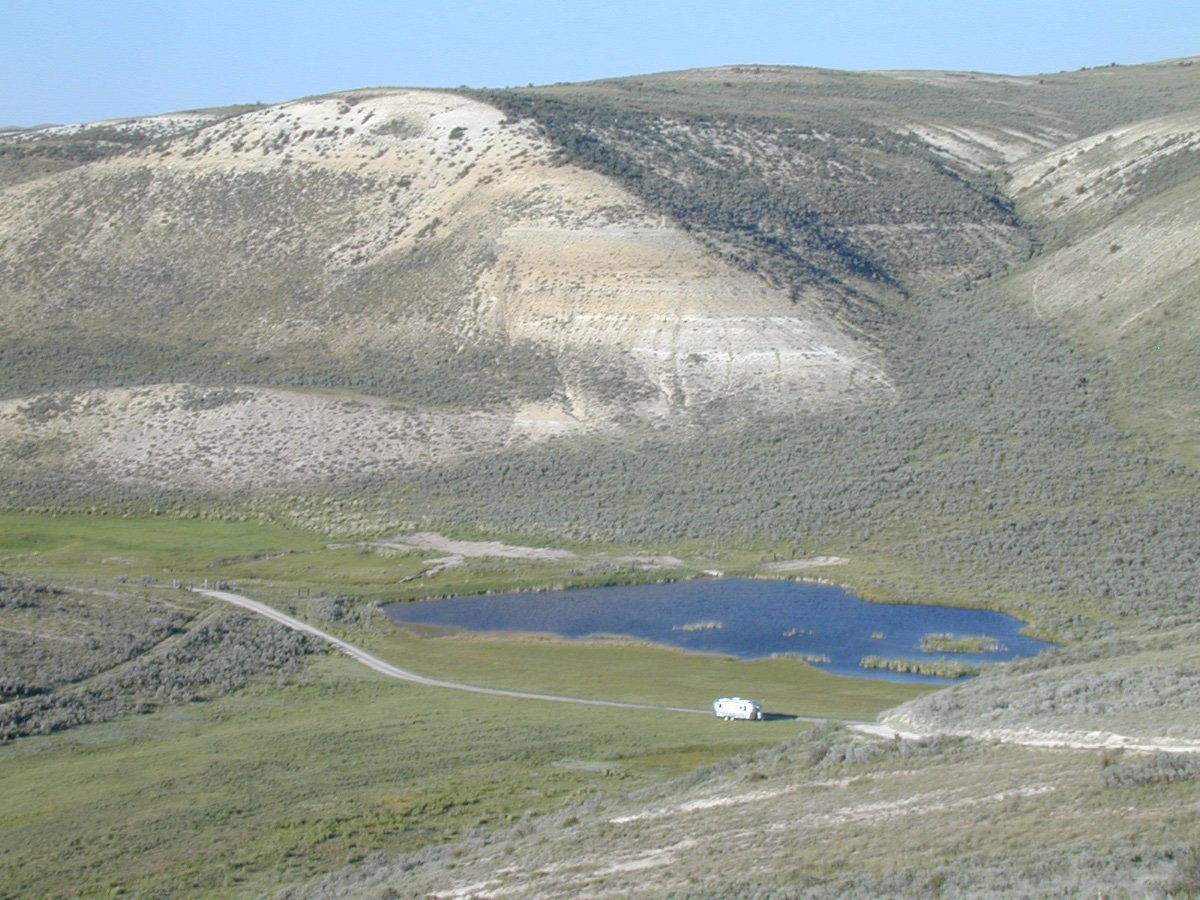
You cannot get LOST on the Prairie, only confused. "Where am I" is not what the family wants to hear. They are already terrified. OK? North is where it always has been. Same with the other directions. Find Landmarks and know what direction they are from where you are presently. Have whoever is following the map follow the road. You will also see it on the Tow Vehicles GPS... sometimes. Your clearance is better than most of ALL AIrstreams. We have a 3 inch lift to make up for the low clearances. It is the Length that gets you into trouble. Dragging the rear... is for tired hikers and for low clearance trailers. Olivers... you will have to work at dragging the bumper. Travel in twos. Safety in good company, Too much company, three or more... too many different likes and dislikes. You cannot fly fish in the desert. You cannot swim in the Yellowstone River... unless you want to drown in Montana. Those kinds of others... Have company that likes to do what you are doing. We have not found anyone... once and we never see them again. 🙂 It is hard to describe. OK? Planning? Nope. Not at all. We do not know where we will be going or getting lost at. RV Parks for those owners who like RV Parks and tourism. We have our trailer to Explore and create an Adventure, if we planned or did not plan to discover unknown 'ends of the road'. Next time going in the Rocky Mountains region. No Plans. Plenty of DeLorme Atlases. Food, Water, a couple good hats in the event one blows off the cliff, and comfortable sandals, shoes or boots. I climb with my sturdy Sandals for decades. My mountain boots had their purpose...now they hold the floor down in the closet. Not inspired, yet? That tells me you are not interested. That is good for your safety and comfort. This is not for everyone. Maybe less than 15% of trailer owners. Crowds? Only if you are giving away Free Flathead Cherry Pie along the Yellowstone River... I am only showing you those photos to discourage some from trying this. If you saw only the 'End of the Trail 'photographs... I would have to find a small place to camp, as everyone and their ATVs and idling Generators... it is NOT the End of the Road. It is the Bye Bye beginning. You can do this. Well, maybe after a few mistakes, but the best is out there for everyone. Take a deep breath... if you coughed... maybe the dust will not do you well.
0 points


-
Recent Achievements
-
")

")

")


")
