Leaderboard
Popular Content
Showing content with the highest reputation since 03/19/2024 in Posts
-
To Oliver Owners and Valued Customers, The Oliver team and family greatly appreciates and values our current owners and individuals that are considering the purchase of an Oliver. Without you the organization and Oliver brand would not be what it is today. As most of you know, Oliver Travel Trailers is going through a transition period and some of the decisions have created some questions and potential uncertainty as it relates to the direction of the company. Oliver is paying attention, listening, and monitoring all of the feedback and comments on the forum, social media, emails, and phone calls. Oliver Travel Trailers’ intent is to be very straightforward and honest with our owners, potential customers, and employees. Integrity is the foundation of the Oliver brand. Oliver feels an official company update is appropriate to help clear things up. The following are some key facts: The rumor that Oliver Travel Trailers is positioning the business to sell is absolutely a false statement. The Oliver sales team is still actively working with all new and existing customers to answer questions and assist in the purchasing process. If you are interested in purchasing an Oliver or have questions, please contact us directly. The Oliver service team is still actively providing technical support to our Oliver owners to ensure issues are resolved as quickly as possible. If you have technical support needs, please contact us directly for assistance. The decision to close the service department at this time has not been received well by many Oliver owners and potential customers. Oliver leadership is listening and plans to have discussions on this topic next week. Oliver will update our owners in the coming weeks regarding any changes. Again, Oliver Travel Trailers truly values the voice of our owners and potential customers. We’re listening and we care. Oliver Travel Trailers isn’t a prefect organization, but we are committed to ensuring our brand, our owners, and our future customers have a product and customer support that is the best it can be. Thank you for being part of the Oliver Family. Rodney Lomax Director of Operations Oliver Travel Trailers Sales & Service23 points
-
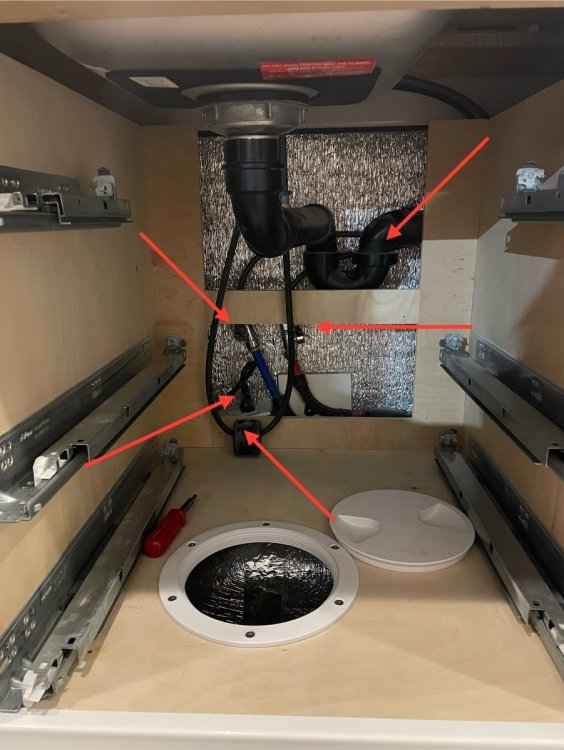
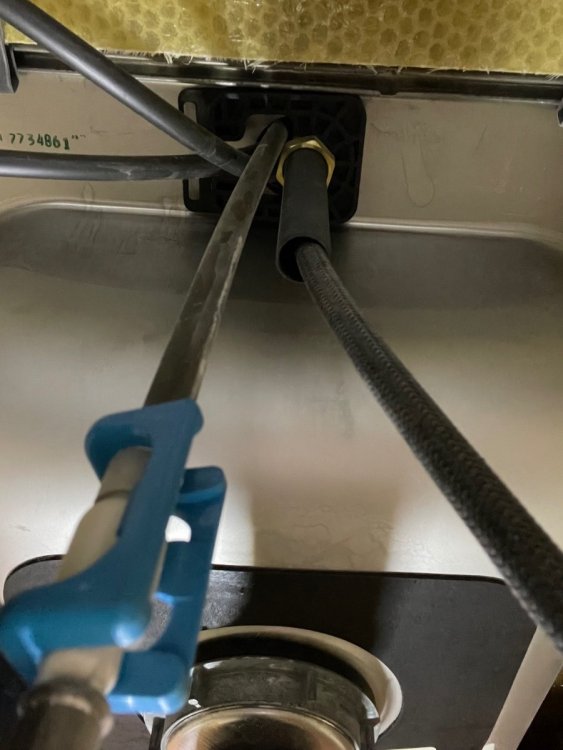
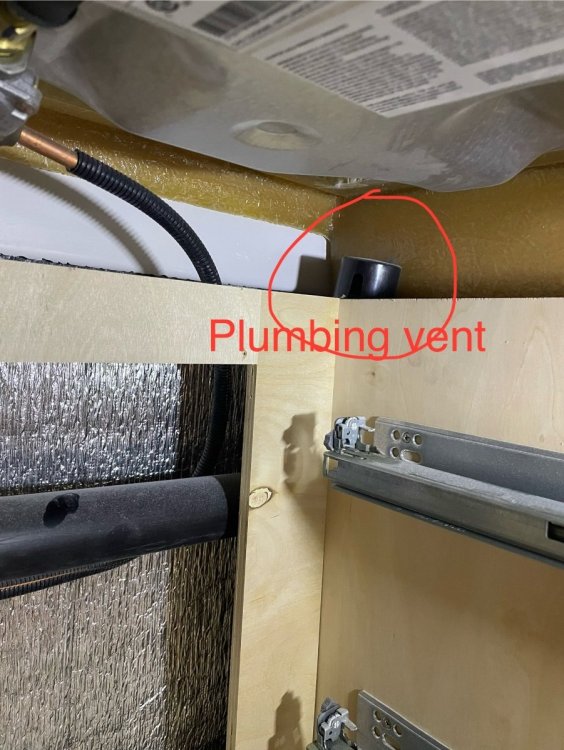
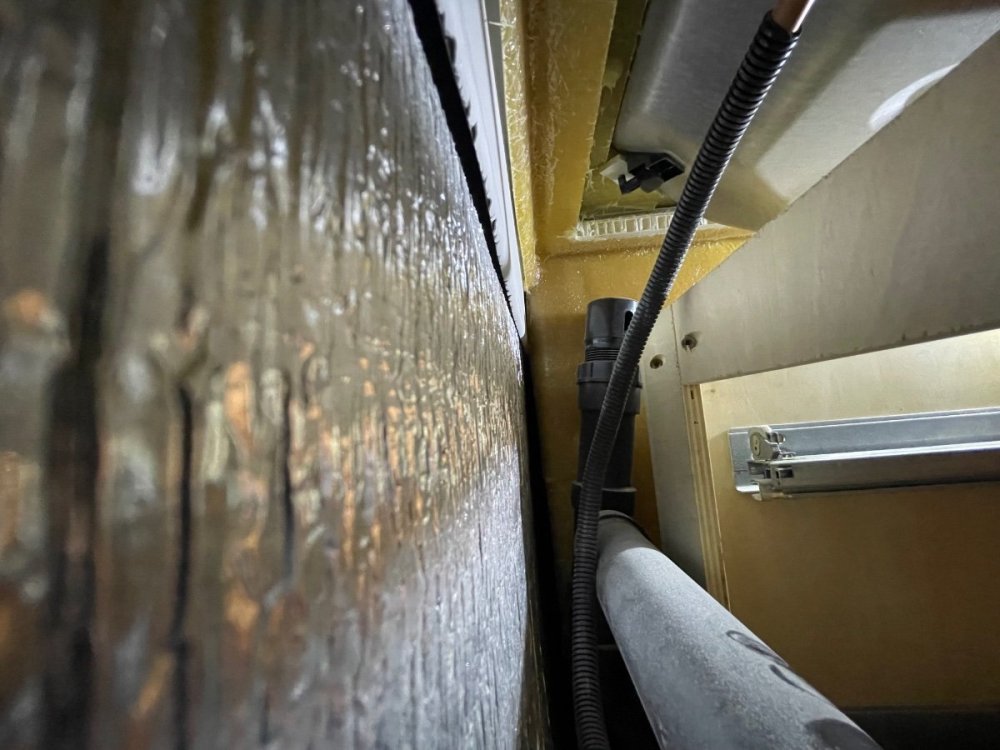
Summary: Check under your kitchen sink I walked up to an Oliver at a campground one time to introduce myself. I noticed water running down the curb side rear stabilizer. After exchanging greetings I brought the leak to the attention of the owner. After looking under the curb side bunk and finding nothing I suggested that he look under the kitchen sink for the source of the leak. Upon removal of the drawers he found water soaked plywood caused by a loose coupling on the kitchen sink drain trap. Since then I have tried to check mine occasionally to ensure that it is tight and to look around for any other problems. Today I found that the quarter turn stop on the hot water was not completely open. It had probably been like that since we took delivery. Anyway, I opened it and improved the hot water flow at the sink. Occasionally remove your (kitchen) drawers and check on stuff down there -tightness of the drain coupling -quarter turn stops fully open -refrigerator plug plugged in -hose weight located between back of drawers and rear of cabinet carcass -hose not twisted -any sign of moisture -anything rubbing against something -and especially that blue clip on the faucet hose assembly. There was an owner that heard water running underneath her sink when she turned the faucet on. Turns out that blue clip was missing and the hose had completely separated. We have a 2018 OEII, hull 313. Some of this stuff has probably changed. The round port was added after production to access a loose clamp on the exit end of the fresh tank overflow hose. It sure is useful for checking below the cabinets. There is a plumbing vent under the back right corner of the range. It is supposed to let air in and not let grey tank smells out. If you are smelling something foul (grey tank odors, not black tank odors) and you can’t locate a leak you might have a bad plumbing vent.19 points
-
I would like to add that the value of this forum is as great as factory service in helping me solve occasional problems. For example, this past weekend I ran into what I thought was a serious issue but quickly found that someone else had experienced the same issue and provided the solution on this forum....and poof! Problem solved. Interestingly, the original problem while reported to factory service was only solved by the owner himself. Given the outstanding expertise of our factory service folks, this was a rarity but proved once again the value of this forum. Do we have RV tech shortages? Yes. Are RV techs typically paid poorly by dealerships with lack of training? Yes. Are there risks with the new service model? Yes. But, do we still have each other and this forum? YES!14 points
-
I’m new to the Oliver community, just 7 months into my new-to-me LE1, so take my thoughts with a grain of salt. I offer them with some humility, honestly. Here’s my thought: I'm surprised at the negativity about the developing Oliver sales and service model. My own service experience is quite limited to a week in Hohenwald a month ago - we’d timed it to launch our current 5 week camping trip. Our planning went back to a service request 4 months ago. When the date came, we traveled 2 days to get to Hohenwald, and then had to find accommodations for 4 nights for me, my spouse and our dog to wait out the 3.5 days our upgrades and annual servicing would take. We were happy with the results and the knowledgeable team we met, but would have been much happier if a regional Oliver dealer was available for a “drop it off and come back in a few days to pick it up” kind of servicing last winter. The jobs we had done (lithium & Truma AC upgrades & annual servicing) would have been well within the ability of a competent and well trained regional dealership. When the dealership expansion was announced, I did contact such a regional Oliver dealer in lower Va. They told me they had not yet been trained for servicing, so I kept my March appt at Hohenwald in place. I thought, “Training dealerships has got to take some time. Check back with the regional dealer in a year and they should be up to speed.” That seems (to me) a reasonable expectation for the Oliver community, with widespread benefits for Oliver owners like me in the years ahead. From what you all are repeatedly saying about the Oliver family and team, I’d have a high confidence that they share that goal. If everyone’s experience with the Oliver team in the past has been so widely appreciated, why not give them the benefit of the doubt? In the meantime, I feel confident that I have a backstop if I get caught - you all. I’ve been a regular reader (if an infrequent poster) in the Oliver forums over the last half year. I’ve seen you all step in again and again to help people like me, who are trying to make something work better, or fix something broken. The generosity, creativity, competence, and enthusiasm of the Oliver owners was a factor in my purchase. Were I in Oliver management, I would hope for your partnership in making this expansion as seamless and fruitful as possible. i suspect as a newcomer to the Oliver community I’m missing something here - maybe it’s the longstanding friendships that have developed in the Oliver community. Maybe it’s something else. I just hate to see a much loved team with a first class product and a devoted family of owners fracture like this when some (well deserved) trust and some months of patience and a “let’s do what we can to make this work” attitude could make a good thing even better.14 points
-
We have our first grandchild and his name is... Wait for it... Oliver! (He's going to love our trailer when he's old enough to read!)14 points
-
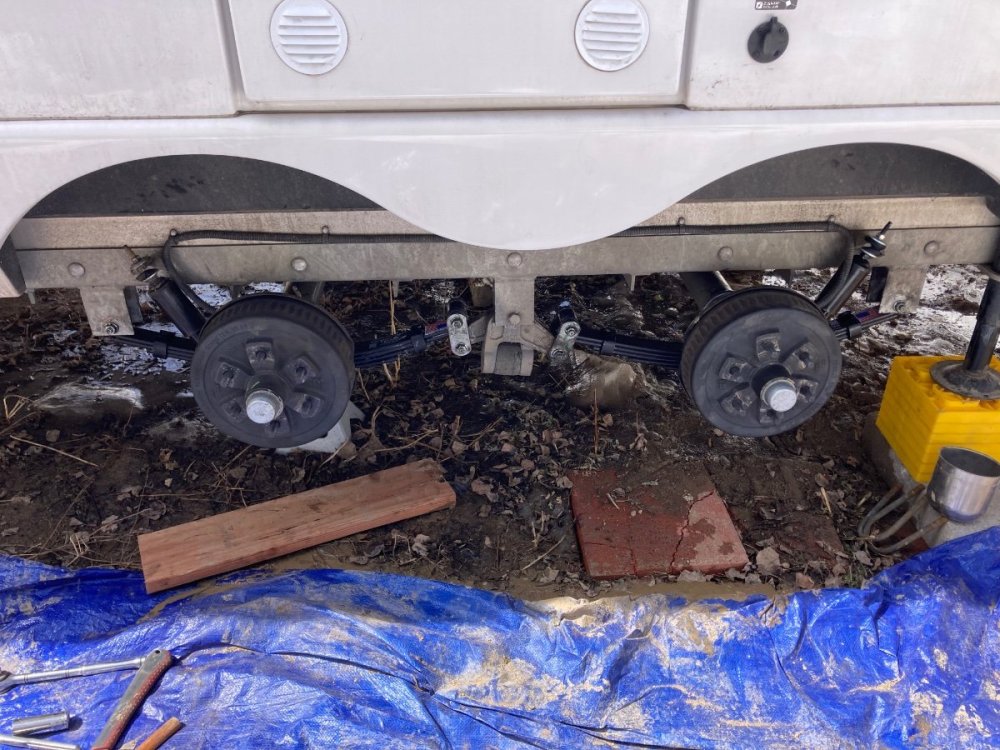
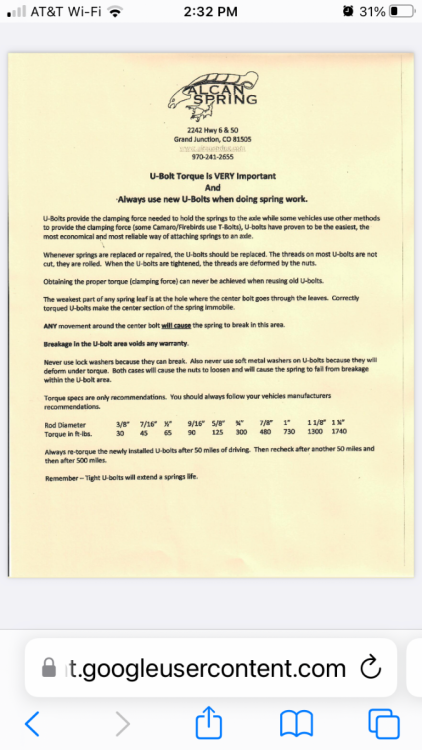
We departed the ABQ area mid-morning and are now boon docking near Amarillo, FYI. Even saw another Oliver enroute, "Buck and Ollie"! This thread has been very informative for us regarding spring packs. Perhaps owners will become more attentive to the "dirty side" of their Olivers - as the undercarriage and specifically, the running gear, might be overlooked for some. It's definitely not as sexy as other areas of the OTT, for sure. But, it's where the rubber meets the road that concerns us. It would be good for everyone reading this thread to crawl underneath an learn what type of axles they may have. We learned that 3500# axles can be either 2-3/8" or 3" diameter at the same weight rating. Each takes a different size of U-bolt. As noted in an earlier post, each has a different torque specification as well. As responsible owners, we should know what U-bolts we're riding on and what the respective torque specs are. Here's a good one: During our spring-pack R&R, we noticed that on the last set of U-bolts, there weren't any washers! At some point in our Oliver's life, the U-bolt nuts were installed and torqued without them. You can't get an accurate torque value without washers. We never noticed this condition until just last weekend as we were finishing up. Just another thing to look for when you're crawling around under there... @Patriot's well thought out approach to have a spare spring pack/U-bolt kit on board is rock solid. Especially, considering the Dexter 5-year warranty implications. Good on you, brother. Please note: If U-bolts are replaced, either by emergency durning on the road conditions, or by modification/upgrade in controlled conditions - please mind the torque procedure. Specifically, re-torque after first 50 miles, then at 100 miles, finally at 500 miles. Check torque settings annually - easy enough to do at the same time you're servicing your EZ-Flex suspension, wheel bearings, and doing your shock absorber inspection. We completed the first 2 torque drills today while headed eastbound on I-40 towards Amarillo. New U-bolts actually stretch until finally torqued after the 500 mile check. We'll be doing the 500 mile check tomorrow. It's amazing how much additional tightening was needed to meet the torque specs on the first 2 inspections. Bottom line, loose U-bolts can cause spring failures. Very strong left to right wind conditions while towing today, the Casablanca was rock solid back there - like always. The peace of mind is well worth the effort we went through over the past several days performing this mod. Happy Campers all! Cheers...13 points
-
I’ve been quiet about this issue, I don’t like it and wish it wasn’t the path forward. I don’t know of any of the moderators that thinks this is “good for Oliver owners”. I’ve missed the “many” favorable comments by my fellow moderator team. I think it’s being blown out of proportion by some. In 8 years I’ve been back to Hohenwald for service work just once, a two day drive. Everything else was done by me or a local RV repair shop. We’ll still have technical expertise that we can access from Oliver. I’m going to watch and see how this plays out. Oliver management is not abandoning owners, my experience over the years is that they go out of their way to ensure owners are taken care of. Mike13 points
-
I wanted to reach out to everyone regarding this issue. We have been made aware of the issue and are currently investigating. At this time it appears to be a single incident but we will be continuing our investigation.13 points
-
My ALCAN springs arrived yesterday (Wednesday) and my RV tech installed them yesterday PM. His torque wrench failed so I brought him mine this morning so he can finish up the job. He liked the ALCAN springs and there were ZERO issues installing them. He also confirmed that at least one set of the original Dexter springs were starting to flatten out. Meaning (to me) they were on the way to failure. I will also state that the original springs had only about 5000 highway miles on them and ZERO off road miles. We depart tomorrow (Friday) for a six week, 5300 mile trek around the US so I'll report back how they ride. I did lower my PSI in the tires to 48 PSI to help soften whatever uptick in stiffness there may (or may not) be with the new springs. I'll also report what difference (if any) there is on additional lift the new springs may have provided. Paul (2 HOBOS) hull 41413 points
-
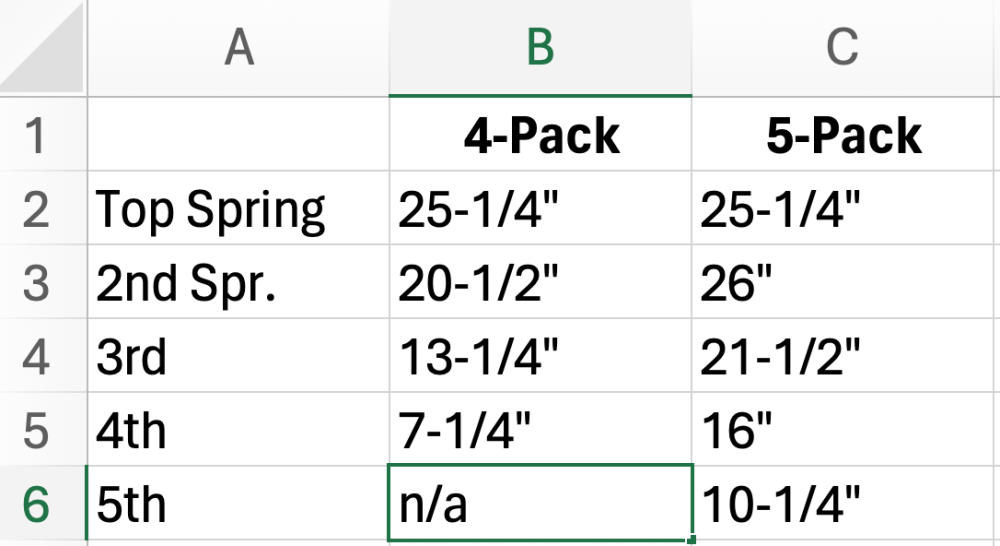
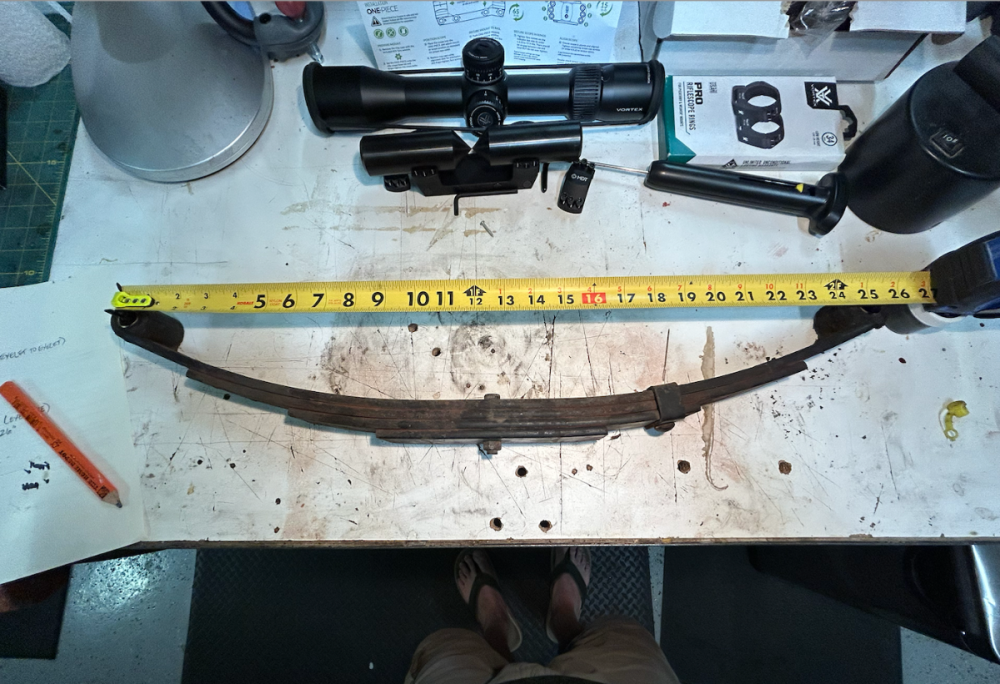
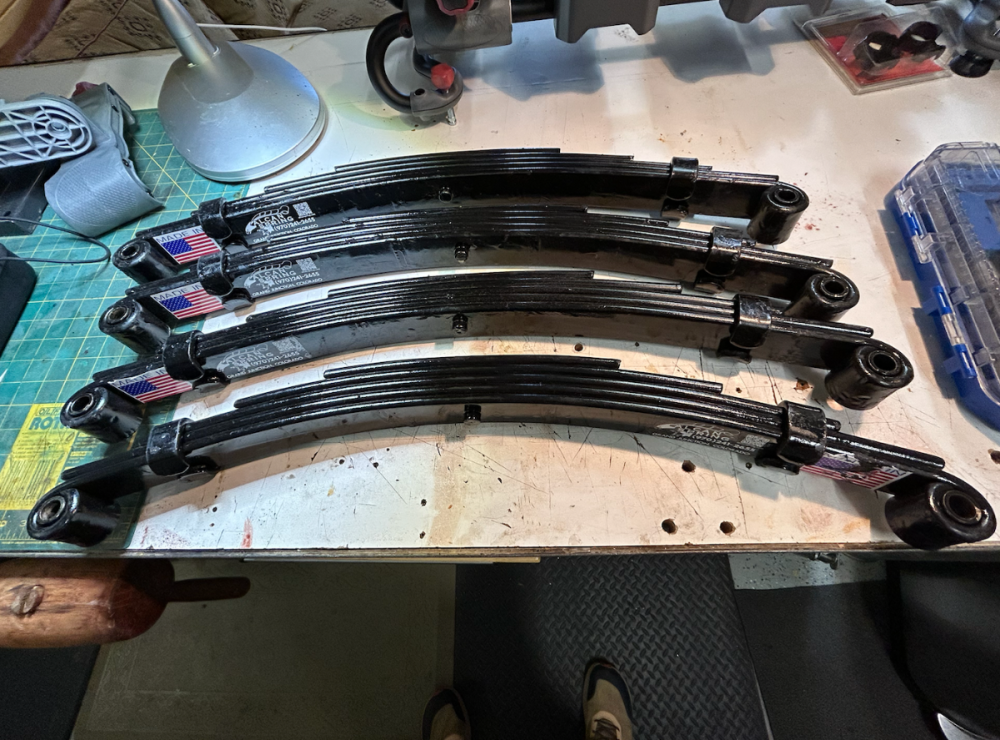
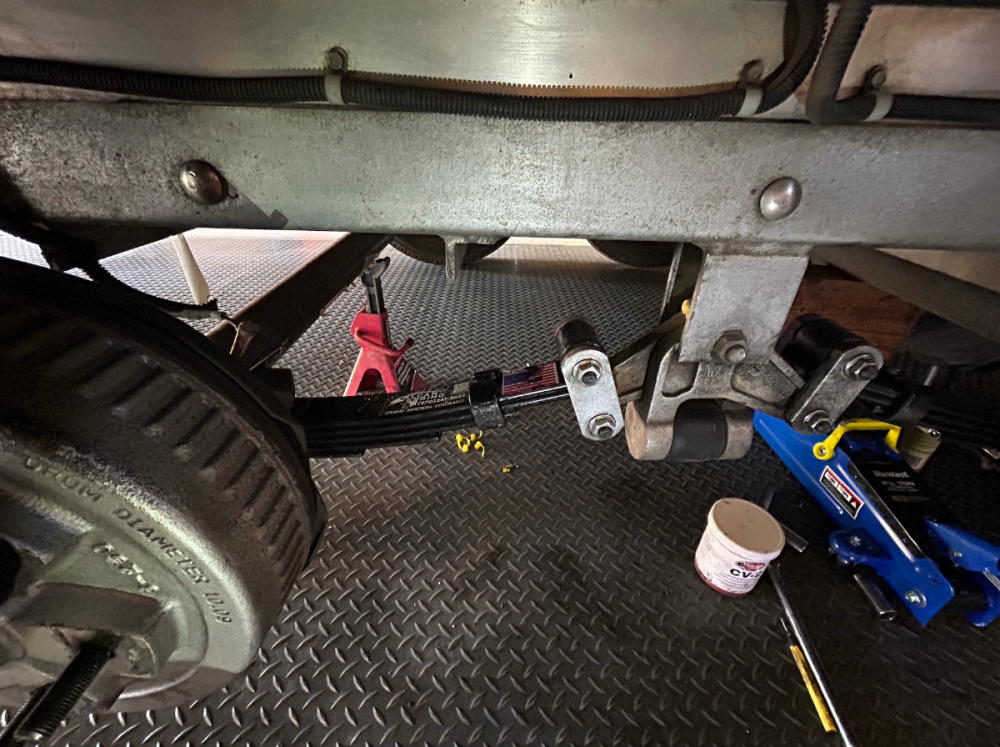
Hey, John: There's at least 4 or 5 "reported" broken springs from reading these forums. Obviously, no clue how many haven't been reported here. But I've learned that there are some good reasons for switching out the 4-packs to higher rated 5-pack springs. Let me summarize: 1. Spring Rating: There's evidence that the Chinese-made "AxleTek" 4-packs, although rated at 1,750# may actually less than that rating. Mike at Alcan informed me of this. The 5-packs are rated in the 2,250# range. So, the 5-packs have somewhere in the range of 500# more weight rating. Can an owner "feel" the difference? I tried. My wife drove me around our country road neighborhood for several miles before and after swapping out springs. FWIW: I couldn't "feel" any difference. 2. Weak Area Near Eyelets: Of the reported broken springs - the break occurs within a couple inches from the eyelet on the top spring - this break is near the end of the second spring which is about 4.5" from the eyelet. On the 5-packs, the second spring extends beyond the center of the eyelet about 7/16" on either side - doubling the spring material where reported ones break. To experience a broken 5-pack spring - the break would have to take-out the two top springs. That's likely why there's never been a reported 5-pack break. 3. Bushings: The bronze bushings in the Chinese-made spring eyelets are measured at 1/16" thickness on my springs - the replacement Alcan spring bushings are right at 1/4" thick - 4x the material, which will take much longer to wear out. Also, to get that 1/4" thick bushing into that eyelet the outside diameter of the eyelet must be made larger. The OD of the AxleTek eyelet is 1.34" while the Alcan eyelet is 1.53", giving the 5-pack eyelets a more robust configuration. 4. Steel Composition: The Chinese steel is of unknown pedigree - unless someone wants to pay for an NDA test (which I'm not interested in) we'll only know subjectively that their steel sucks compared to the recognized high-quality of US-made steel. 5. Comparative Weight: OK, the 5-packs have one extra leaf, right? How much more do you think that extra leaf weighs? I weighed both - the Chinese AxleTek is right at 10#; where the Alcan comes in at 18#. Here's why: The total length of spring material in the 4-packs is 66-1/4" versus 99" for the 5-packs, or 49% more material in the 5-packs. 10# versus 18# = an 80% increased weight for the 5-packs. Above shows the eyelet-to-eyelet measurement of the 4-pack top spring. Each subsequent spring length was measured straight across from end to end. Notice the "flattening" of the arc of the 4-pack. The other 4-packs were flattened like this one. JFTR: We never even come close to the 7k# GVWR of the OTT on any of our excursions. 6. Price Point: New 5-packs/U-bolt kit will cost owners approximately $800 plus shipping from Grand Junction, CO. I'm in NM and shipping was $110. FYI: No tax if purchased outside of CO. For us it was a no-brainer. One of the last issues we want to handle is a broken leaf spring in the middle of a boon docking location in the middle of EBF somewhere. Cheers!12 points
-
12 points
-
UPDATE: The 500-mile torque inspection was actually a 527-mile torque inspection at a QT in Wichita Falls. The process is now taking only a couple minutes longer than it takes to fill up our 30+gallon tank in the Tundra. Still amazed how the new U-bolts stretch - each nut took several quarter turns to reach the target torque value! We'll be check them every 1k miles for a while. Interesting Side Note: Speaking with Mike/Alcan yesterday on a particular boring stretch of HWY 287 somewhere near Electra, TX, we learned how springs are "weight rated." Evidently, there are several algorithms used by spring manufacturers that rate springs once several parameters are uploaded. Keep in mind that ll algorithms are not exactly the same - some are more accurate than others. Values for steel type, width, thickness, alignment pin size, eye-to-eye length, etc., all determine the weight rating. Alcan uses a highly rated program with a reputation in the industry as being very accurate. Turns out that virtually all RV manufacturers, industry-wide, use spring packs that either just barely meet RVIA standards or don't meet them at all (depending on the algorithm program used to rate the springs). When Alcan ran the dimensions of the Chinese-made AXLE TEK spring used on my Oliver, it was "quite a bit less than the rated 1,750# target", according to Mike. IMO, this issue goes back to DEXTER and not necessarily Oliver - because, as I understand - but could be wrong, the axle kit (including the spring packs) are supplied by DEXTER. But even if the AXLE TEK spring packs were tested to and achieved the 1,750# target at manufacturing, after some time (not necessarily road miles, but age) - those springs will flatten (all 4 of our's did) and they will not be able to meet the target rating going forward. This is due largely to the low quality metallurgy of Chinese steel. Labor costs, environmental regulations, and manufacturing standards in China are much less, if exist at all, as compared to the US steel industry. With a suspension travel of barely 2" (just measured it) before the top of the U-bolts smack into the my Oliver's aluminum frame, I want to be sure the springs are doing what they are there to do. So owners that find themselves crawling around underneath their rigs, this is another inspection point - if your suspension ever "bottomed-out" it will leave an imprint on the frame from the top of the U-bolt. That's a good indicator your spring-packs have flattened and need attention. Also IMO, the choice between Chinese-made and US-made leaf springs for travel trailers depends on the specific needs and priorities of the manufacturer or end-user, including considerations of cost, quality, and supply chain reliability. For businesses emphasizing cost control, the Chinese-made springs may be appealing, whereas for those prioritizing quality, safety, and supporting domestic industries, US-made spring packs might be the preferred option. So, mindful owners should think about: (1) having their running gear/suspension inspected, and/or (2) upgrading their suspensions if needed, or (3) never approaching their 7k# OTT max GVWR, or (4) towing slowly only on pristine roads, or (5) not worrying about it and see what happens down the road. Sorry in advance for my rant, it's just my $0.02...12 points
-
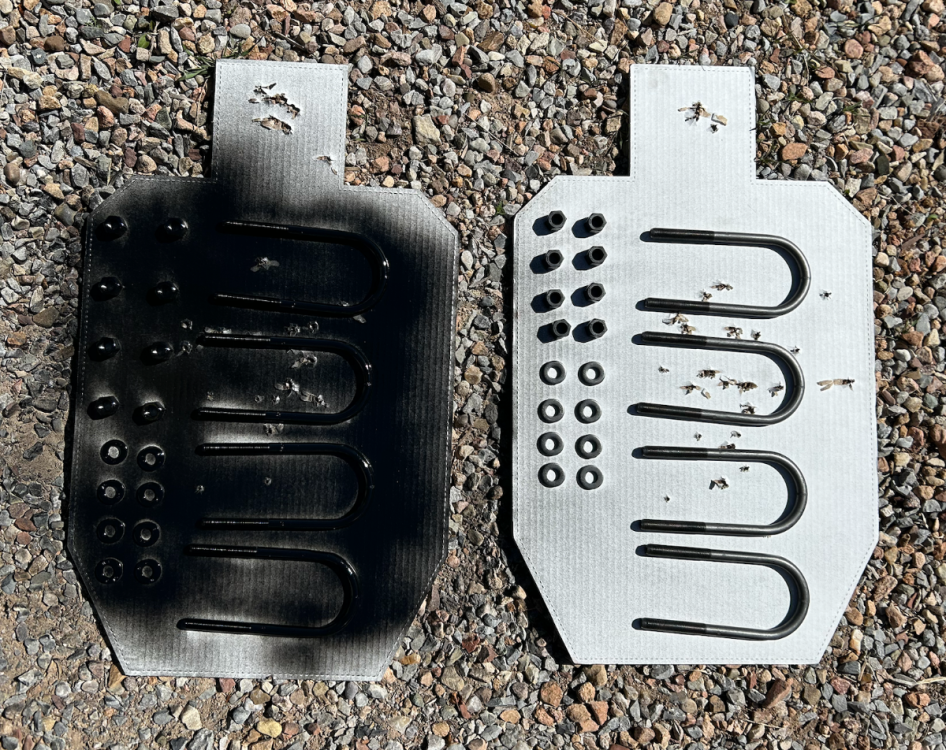
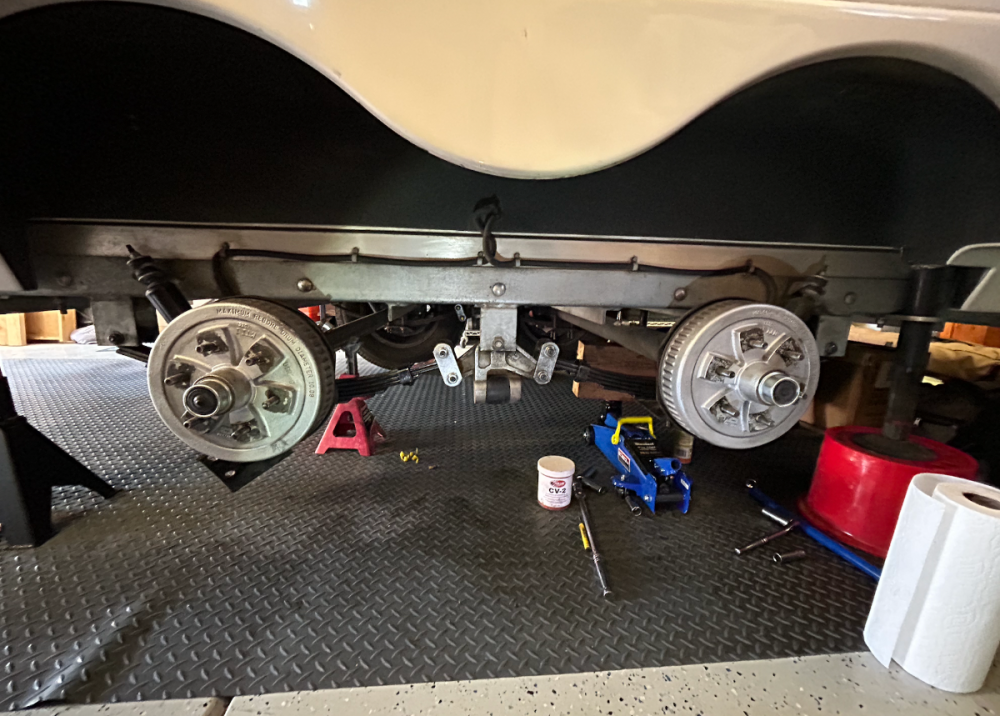
Good question, John. Due to prior commitments, the process is still underway, worked on it for a couple hours yesterday, plan to finish it up this morning. After speaking with Mike/Alcan, here's a high-level List of Instructions for the leaf spring R&R. 1. Break loose the wheel lug nuts on all wheels; 2. With the OTT connected to the the TV, raise enough that wheels are just high enough to spin and that 4 jack stands can be placed in front and to the rear of the running gear on the OTT frame; 3. Lower OTT onto the jack stands - wheels must still be able to spin; 4. Remove wheels; 5. Pick a side to start. Place a jack stand under front axle about 2 feet inboard of wheel assy. - use a floor jack under the spring plate to raise the axle just enough to adjust the jack stand under the axle, then lower the floor jack so the axle rests on the floor jack. There should be very little tension on the suspension at this point; 6. Remove the lower shock absorber nut and push the shock up and out of the mounting hole on the spring plate, use safety wire to hold lower shock outboard and away from spring plate - helps with aligning the spring plate later on; 7. Remove the 4 U-bolt nuts/washers; 8. Remove the spring plate (at this point - we wire brushed the plate, cleaned with acetone and rattle-canned it with RustOleum, set aside to dry for later); 9. Remove the forward wet bolt from the frame mount - this allows the spring pack to drop; 10. From the Dexter center shackle, remove the corresponding Dexter shackle nuts and the outboard connecting plate - the inboard connecting plate will be removed with the wet-bolts still "press fitted" into the plate. Keep as is and ChemKlean the shackle plates, wet bolts and nuts for later assembly; 11. Throw away the cheap-ass Chinese made spring pack. (OBTW: Our's weighed 10lbs even as compared to the Alcan 5-leaf spring pack of USA steel at 18lbs! We still have the fourth spring to replace today - but the three removed so far were definitely starting to flatten.) 12. Check the centering bolt head on the Alcan spring pack so it fits into the corresponding centering hole in the spring plate. We had to file the corners on a couple of the bolts to get the correct fitment. 13. Insert the "now cleaned" shackle components to the Dexter center shackle assy. Connect Alcan spring pack (this would be the rear-most spring pack bushing for the front axle), bolt on the outboard connecting plate. 14. Check the forward wet bolt after cleaning by connecting your Lock'nLube and squeezing grease through the journal (be sure to do this with all wet-bolts). Thoroughly grease the spring pack brass bushing and wet bolt. Ensure the wet bolt can fit through the brass bushing - tap in gently using a socket over the grease nipple. 15. Lift the forward end of the spring pack and place a floor jack under at mid-point (where the spring plate will be placed in a later step). Lift the Alcan spring pack up to the forward spring mount on the frame. Ensure the centering pin on top of the Alcan spring aligns with the centering hole on the axle's spring pad. 16. Insert the forward wet-bolt by raising/lowering the floor jack and tapping the center shackle fore/aft until the bushing aligns with the mounting holes. This is a step that takes some patience. We had to use an alignment bolt from the outboard side of the mount to get the wet-bolt through from the inboard side. (NOTE: The wet-bolts have splines near the head to keep them from spinning once tightened in the shackle plate - we oriented them so the grease hole on the wet-bolt faced "UP"). 17. Place your U-bolts in place over the axle (we painted ours just to keep the rust down to a minimum - plus it looks way cooler). Place the cleaned and freshly painted spring plate in place. Install new U-bolt washers and nuts - using an "X" pattern, tighten the U-bolt nuts slowly pulling the spring plate up and into position. Use a flashlight to check that the Alcan spring centering bolt is aligning with the centering hole in the spring plate. We tied the lower shock outboard and away to a wheel lug with safety wire to make this alignment easier. 18. Install lower shock to spring plate; 19. Torque all nuts to specs. 20. Move to same side rear assy. and repeat. 21. Move to opposite side and repeat front and rear like steps 1 thru 20 above. There's probably a few extra things I did (removed, inspected, and re-packed wheel bearing, for example) but these are the key steps. Very satisfying procedure. It's worth the peace of mind knowing your running gear is in order! More to report later after complete and test driven. Cheers!11 points
-
10 points
-
Don't know how many of y'all ever rode in the OTT under tow, but I've done it a few times just to check what needs attending to. I try to convince my bride to keep the speed down -- with little success...😜 FWIW, I rode in the back for the last several miles yesterday on our way back from the eclipse adventure.... From a qualitative perspective, the ride was interestingly noisy, solid/stiff - but not like a buckboard.... It was not appreciably different than the ride I took before changing out the springs. Don't think it would comfortable for more than a few miles, IMO. I checked the torque settings for each of the U-bolt nuts after logging 1,895 miles on the new springs over the last 9 days - all good, no more stretch. Probably a good idea to keep doing so every 5k miles or at least annually. Not to highjack this thread, but: Regarding frame cross member welds - visually inspected all yesterday and photographed each weld to set a baseline for our records. All good. I'm suspecting that the broken welds reported in a parallel thread could be caused by an inexperienced welder at the factory and not a design flaw. I also suspect that Oliver engineers designed the frame to withstand "normal" usage (that may be difficult to define, however). Like other owners, we routinely, yet carefully, travel over unpaved and unimproved roads with a full fresh (empty black/gray) tank without issue - I believe this practice is within the design limitations of the trailer. We'll definitely keep inspecting the cross members after such trips... Thoughts?10 points
-
I get the daily RVgeeks newsletter email and this morning had an article on Oliver trailers. It looks pretty well researched. RVgeeks Oliver Article Mike10 points
-
Scuba Rx, that ASI 0240 sounds pretty good. Especially interesting it can be used as a tooling lubricant. I will try that. What I have been using with great success is Debond, and it is even more expensive! So I think it's going to cost you Geronimo John! Debond The big problem with silicone from a refinishing point of view are the oils it contains. You can clean it off with solvents and plastic razors to where the gelcoat looks pristine, but when you spray the surface with water, it still beads up all over. This is caused by the silicone oils having penetrated the pores of the gelcoat. Not completely removing these oils will interfere with the full bonding of any sealant you want to use, including silicone! You have to break out some 1000 grit automotive sandpaper and wet sand it out with the solvent of your choice (in my case, Debond). When it's all gone, I hit it with some finer grit (1200-1500), then a good polishing cleaner. The gelcoat will then look great, and be ready to be sealed, and most importantly, the sealant will adhere to the gelcoat! All this work is why I never use silicones to begin with, except in some rare instances. Also, if you do any finishing in your shop, be extremely careful to keep any rags, pads, sandpaper, or anything that was used cleaning your silicone problem separate and away from your regular shop supplies. Silicone contamination in your shop can be a total disaster for the finisher. Good luck! Dave10 points
-
I see that many owners think that Oliver Travel Trailers is a big money maker or at least a profitable venture. OTT is only a small slice of the parent company, Oliver Technologies Inc. There are at least nine more divisions besides OTT. They also make the Safe-Step walk-in tubs. They make a whole line of items for the mobile home industry. These are the parts that most people see in Hohenwald and know about. They also have other manufacturing facilities around the country making a multitude of other products. Some of these are owned by the company and some are ventures fully owned by individual family members. As far as houses go, the family has different residences all across the US and I'm sure if any of them want a house in Bermuda they can get it. I knew Jim Oliver personally and he was proud of the Oliver name and everything he put it on. He instilled in his family that same desire to produce a quality product that could last longer than a lifetime. I'm going to say that the company is going to be fine and they are not planning to sell.10 points
-
I don't know about "consensus" but basically the article in your link reflects old Boy Scout advice from long ago. In the over eight years since I bought Twist I have only left it once due to lightening/storm. Every situation is different, terrain, trees, likely direction of the storm, availability of studier shelter, potential protection for the Ollie and my truck, etc. Certainly one thing in the article that is very important (IMO) is one or two sources of "automatic" weather warning information. I use and app on my "burner" cell phone called "Severe Weather Alerts" and I always carry a NOAA Weather Alert Radio - both have automatic alert features. One additional point - if it is possible and you have a good sense of where/what direction the potential storm may be coming from - point the Ollie with either its front or back towards the storm. Since many of these severe storms also have high winds, the Ollie's aero will help if placed in this orientation. Bill9 points
-
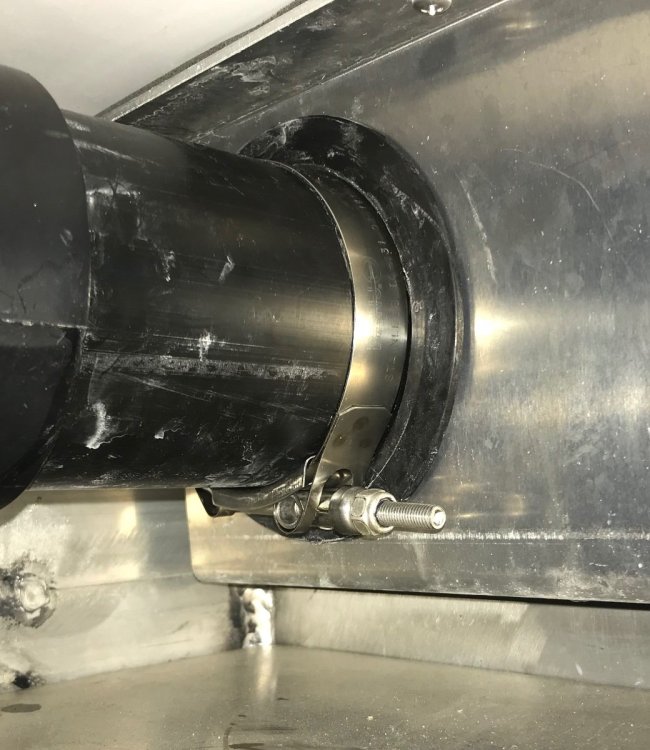
@Geronimo John look inside the rear bumper. There is a rubber seal around the sewer pipe where it goes into the lower left rear of the trailer that will become dislocated and permit dust intrusion. Reposition the seal and place a clamp around the sewer pipe to keep the seal from slipping back out of the hole. I used a Stainless steel Banjo TC-331 just snug. Not tight.9 points
-
Just by way of an "UPDATE": We pulled into a nice Harvest Host location yesterday afternoon at the "BAR-Z Winery" in Canyon, TX about 20 miles south of Amarillo near Palo Verde SP. We've logged just over 1,400 miles since R&R efforts of the AxleTek and ALCAN spring packs. A prior-to-departure torque inspection revealed no more "U-bolt stretch" as the nuts met target torque specs. For us, at least, our higher level of confidence in the running gear and general peace of mind knowing we've got 2k#-rated 5-spring leaf packs under our 3.5k# axles was worth the $'s, time, and effort in this upgrade, FYI. Cheers from a couple "Happier Campers"!9 points
-
@MAX Burner After talking with @rideandfly I went out to the Ollie Hangar and rolled up under “XPLOR” and took a good hard look at ALL the frame/chassis welds. All appear to be solid. Like anything thing else a regular visual inspection should be a part of regular maintenance checklist. “Stack of dimes”. ✅9 points
-
9 points
-
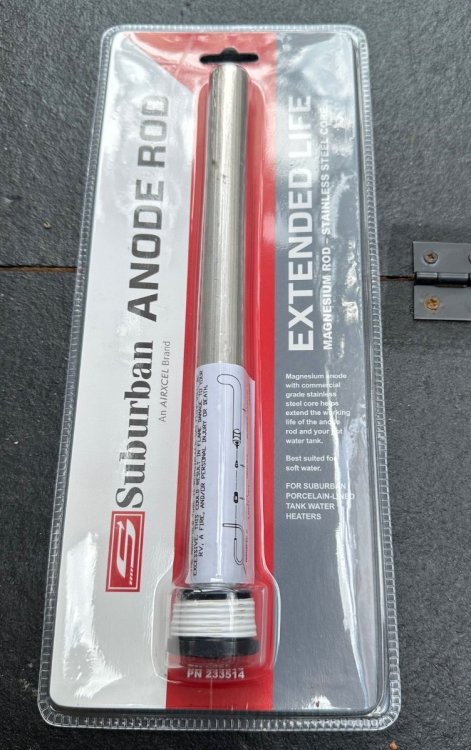
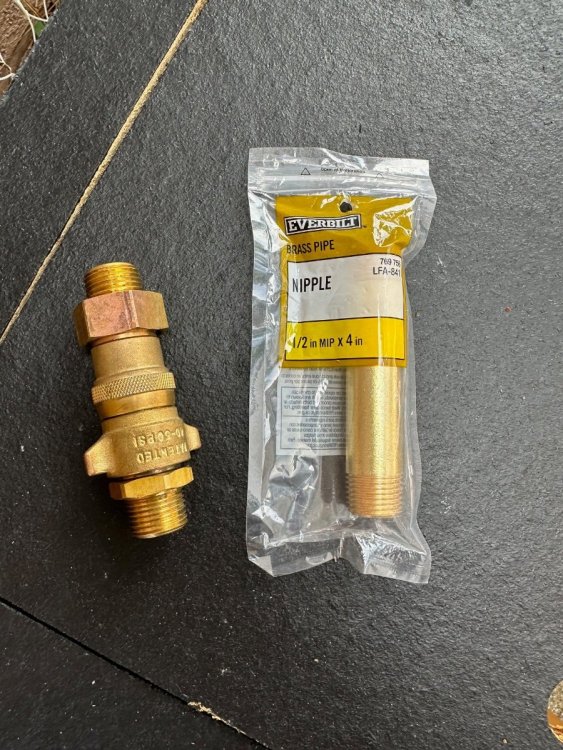
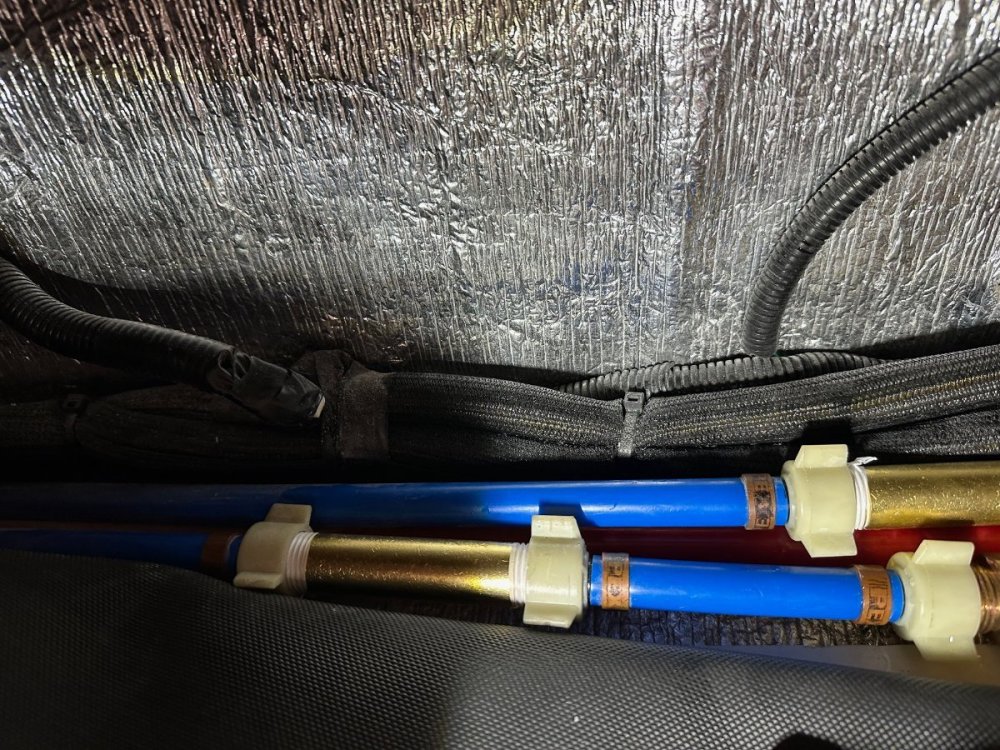
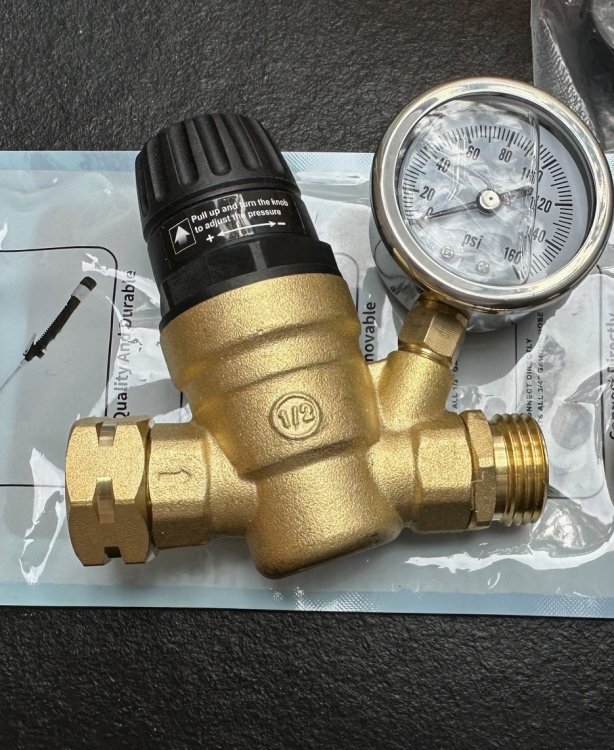
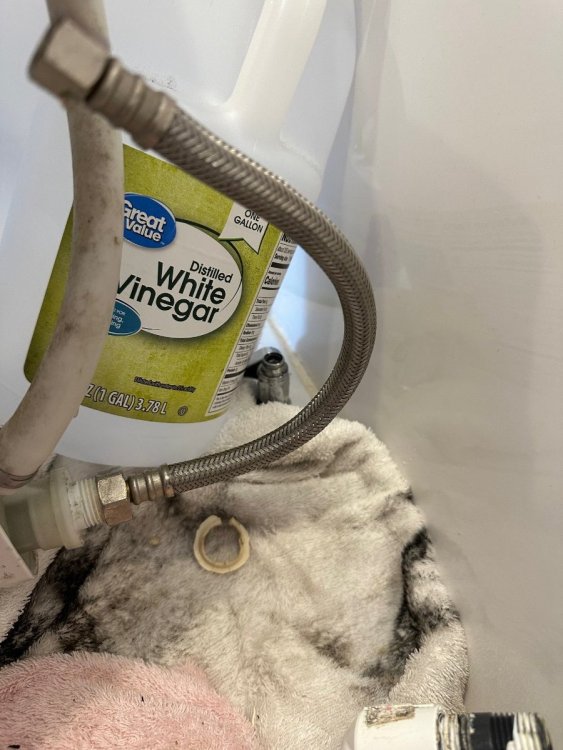
So I think I have fixed 99.9% of my issues. After cleaning the flow restrictors/pressure regulators that helped a lot but I decided to replace them with a hollow pipe (got it at Home Depot, I'm sure there were other ways to do this but this was simplest for me) so there is no restriction. I purchased an external pressure regulator and have that set to 55psi and will use that going forward. I also replaced the faucet head in the bathroom and I have great flow/pressure almost everywhere now. The one place I think the flow/pressure could be better still is the toile. I did try cleaning the filter/screen as was suggested in an earlier post, but I couldn't figure out how to get the filter/screen out so I poured vinegar down the tube and let it sit for a few hours but it didn't seem to help. It's good enough though. The bowl doesn't hold water for very long so have to look into that. The last thing I found which I am sure contributed to a lot of my problems was the anode rod was way overdue to be replaced and water heater was full of scale/buildup. I flushed out the hot water heater, which took a while for stuff to stop coming out and the water to be clear then put in the new anode rod and tested the system and everything is working like new again. So what I have learned from all of this is it's very important to use a water softener and/or flush the lines regularly to avoid buildup. As I said earlier, I do think the cleaning the flow restrictors/pressure regulators made the most difference, when on city water, but I think its best to just replace them. That's probably why they don't have them in the 2018 and newer units. Be sure to use an adjustable external regulator just to be sure. When using the internal water pump cleaning/replacing the screens on the faucets or the faucet head itself made the difference. I did start with the faucets before moving onto anything else and that's what you need to do when diagnosing this kind of problem and remember to confirm you have the same problem on city water and you do with the water pump. I hope this helps someone who finds themselves in a similar situation.9 points
-
9 points
-
When I met with Operations Manager Rodney Lomax on November 14, 2022 (while the few issues we found with our Hull #1291 after delivery were being promptly addressed by the Service Department), I told him: "Whatever you pay Jason Essary, it's not enough." One year+ later, my view has not changed.9 points
-
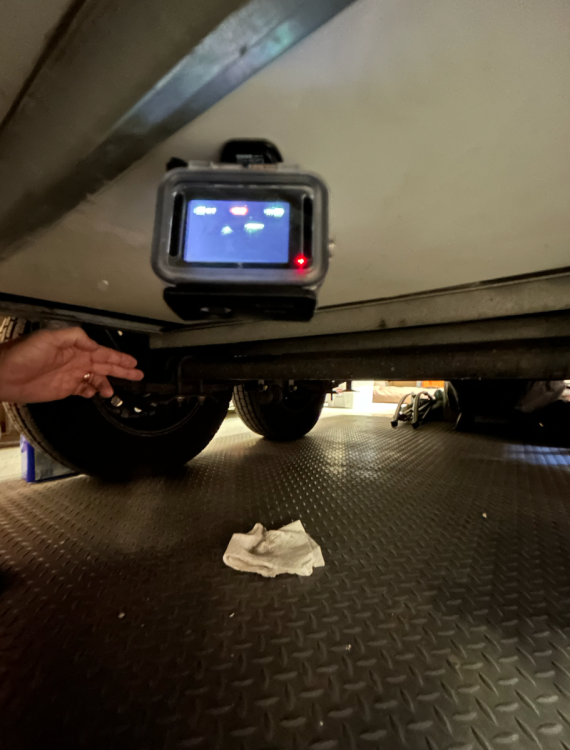
Well we got off to a rather late start - forgot I had a 9am PT session for the rotator cuff repair from a few months back. Anyhow, didn't get the shop opened until 1030-ish. Thinking about Chris's old-school suggestion using clay - which seems brilliant, I came up with an alternative. Short of buying an accelerometer from Amazon and obtaining objective data of the suspension system - mounting my GoPro to the undercarriage amidship seemed to be a logical path forward costing $0. We do "cheap" and "free" like champions. So, instead of having D drive around the neighborhood with me in the back playing the "rock and roll rider" - went ahead and captured GoPro video of the curb-side forward wheel assembly while trying to hit every pothole in the area. The thought process is that traveling over the same route at the same speed with the 4-pack springs first, then the 5-pack after the install might show a different deflection of the suspension.... Not 100% objective but comparative for sure. Just need to upload two comparative vids of the before and after... Started off by degreasing and painting the new (one-use) U-bolts, nuts, and washers with a healthy coat of RustOleum to keep things tidy underneath. For the most part, this is a straight forward plug-and-play R&R effort. The new springs are several pounds heavier and definitely a bit higher drop than the Chinese-made 4-packs: So, the street-side springs are successfully replaced with the new 5-packs... The curb-side springs go in tomorrow - then we'll follow-up with a short before/after GoPro ride vid. ...but now, its time for a cold one! Cheers, ALL!9 points
-
Coming from a background of over the road trucking (40 yrs) I’ve experienced several spring failures, to all the people upgrading to heavier rated springs just be aware your axle assembly is rated as a complete unit,if you change one thing you need to make sure the other components, spring perch, shackles, axle tube,wet bolts etc.. can handle the extra stress. It’s been my experience most spring breaks happen from a sharp impact ie: deep pothole, curbing the trl, etc.. and to the shop that has never had a spring failure I call b.s. Steve9 points
-
As far as mounting the panels, the combiner box and, the interconnect wiring…. I paid Oliver service to do that. I bought the Zamp panels from Oliver and since they know exactly where the aluminum plates are located in the outer roof, they mounted the panels as well. All other wiring and solar controls ScubaRx and I installed. I had to look the other way and bite down on a broken arrow when the first hole was drilled into my new camper but have since gotten over that trauma.8 points
-
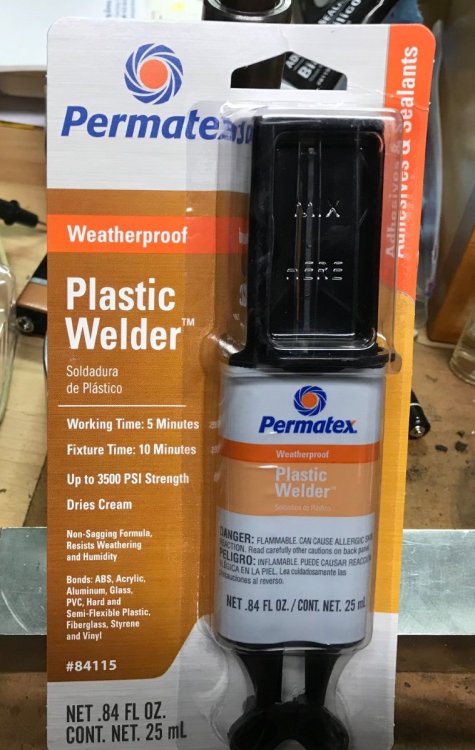
I think Oliver uses a material that is used by the boating industry called starboard. Others may have the correct name if this isn’t correct. I have used vinyl trim board readily available at Lowe’s and Home Depot in various widths and thickness. I also use an epoxy by Permatex that is very high solvent content and actually melts into both the vinyl board and the fiberglass surface and is much like fiberglass resin. 8 points
-
Thanks for the confirmation of Oliver Travel Trailers' continued dedication to Oliver customers, past, present, and future. "Transition" is a common event in the life cycle of businesses as they mature and grow. With OTT's strong heritage and dedication to building a quality travel trailer that, with proper care, will last a lifetime, you have brought value to the market and joy to many individuals and families throughout the nation. I wish you and all employees of OTT all the best as your company evolves into the future.8 points
-
Jill took this as we arrived - Great Sand Dunes - sorry for the length - sort of IMG_2936.mov8 points
-
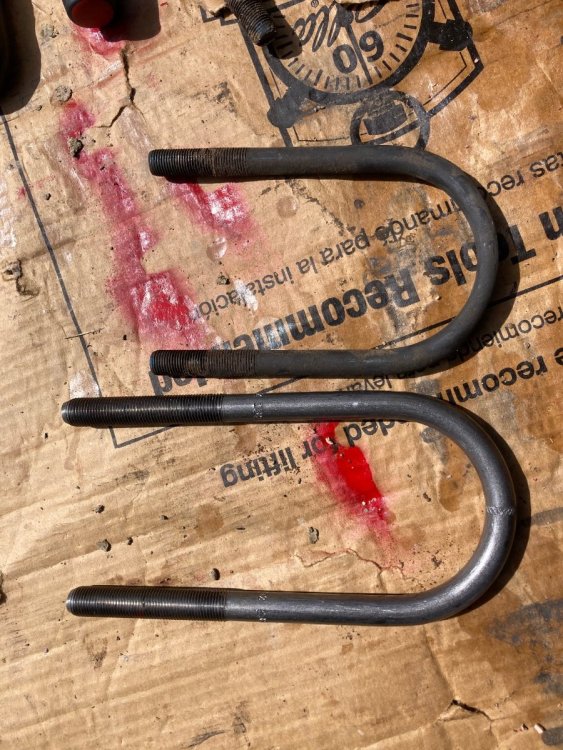
First side is swapped. Old Chinese Dexters will go to the recycler and bring scrap value…maybe enough for a soda pop. A few observations: 1) I put a set of calipers to my 3500# Dexter axles and they are 3” dia. Ubolts provided by Alcan are for 3” dia axles fit perfect 2) Alcan ubolts are 9/16” rod vs. the smaller (1/2”?) that were stock on my trailer. No worries installing as the holes in the spring retainer plate are large enough to accommodate the larger bolt diameter 3) Alcan ubolts are longer to accommodate increased spring pack height (5 vs. 4 leafs). About 1-1.5” of thread extend below nuts. I plan to leave but you could cut the excess off if it bothers you 4) Torque specs from Alcan for 9/16 ubolts is 90 foot lbs. See attachment 5) Two of my shocks were blown so I am replacing them A Irwin squeeze clamp works wonders for compressing and installing the shocks after the springs have been bolted in 6)reversed the wet bolts so that the zerks point inward even with a 90 degree lock-n-lube fitting it was a PITA before hoping this will be easier 7) the front springs were still in “ok” shape but starting to flatten. one rear spring had snapped and the other was bent 8)the parts for my trailer were sourced during COVID and at the height of demand for RVs. I cannot help but ponder if the RV frenzy and skilled labor shortage during this time played some role in my broken spring and the quality of the other one that was bending. Oh well, just glad to be safe and be replacing the stock springs before heading out in a month for another Season of seeing this great Country Very straight forward swap. Heck, I did it on a tarp in melting CO permafrost. Cannot imagine doing the swap inside on concrete. 🤪 That would be Lux.8 points
-
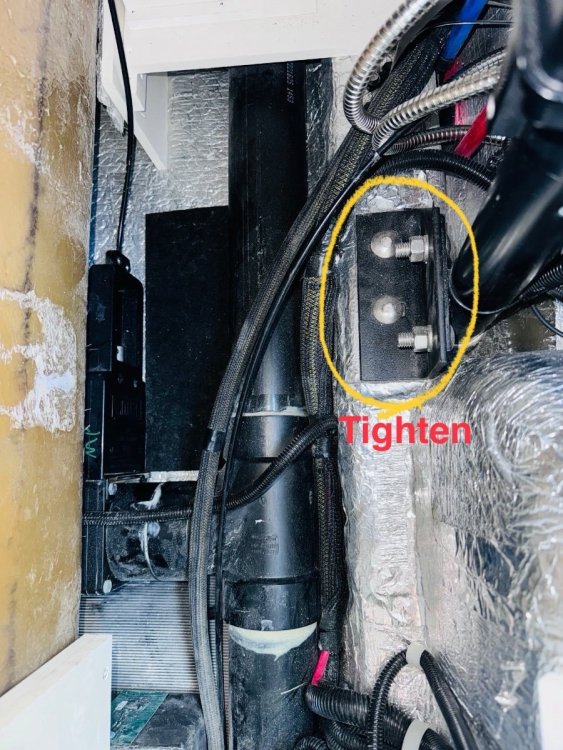
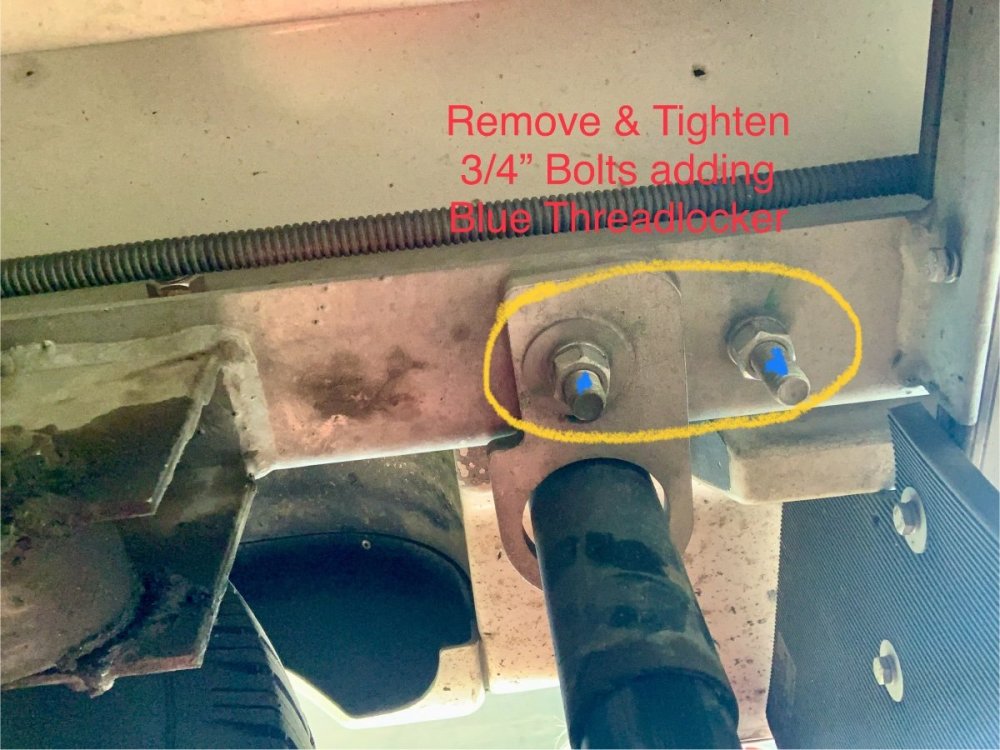
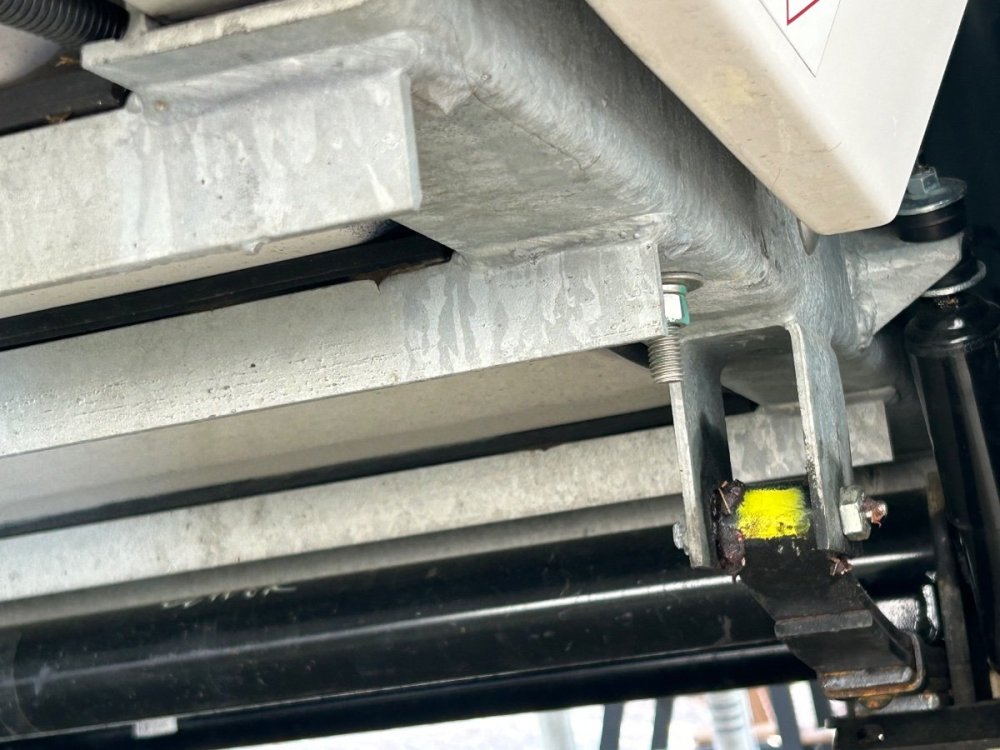
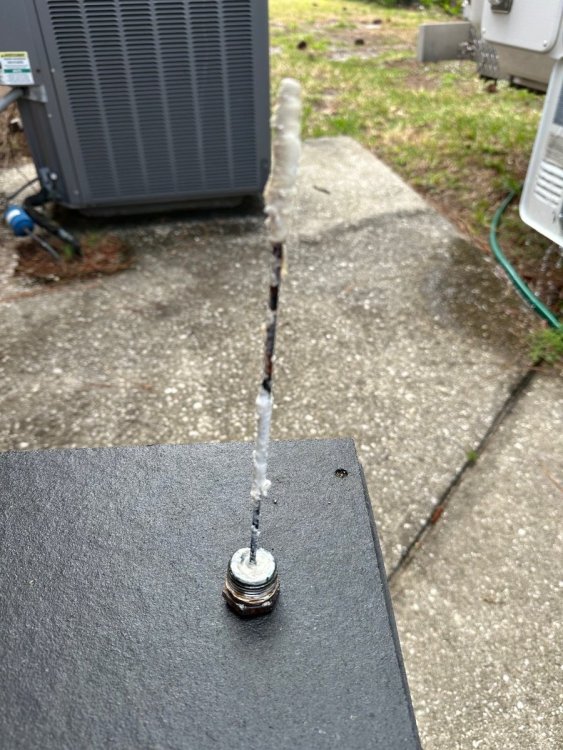
If you see water dripping from this bolt under the front center of your trailer look for a leak under the bathroom sink In my case it was a split in the sink tailpiece. The split was on the side not visible so I didn’t find it until I removed the tailpiece. I couldn’t find this style of tailpiece at any of my local hardware places including Lowe’s because most tailpieces are made for sinks with built in overflows. I finally found a tailpiece that would work at a place that had an old supply of mobile home parts. It was plastic instead of metal but it worked great. I will order another tailpiece, either this one or a metal one, to put in my parts box. Installed pictures. The stopper is better than the rubber plug used before I cannot understand why the factory puts that fixed caddy under the bathroom sink. Sure, it’s no problem to remove and replace, but the fiberglass won’t stand the removal and reinsertion of the screws many more times. And when you remove, replace, and recaulk the caddy you have to wait until the caulk cures enough before you can use the shower. I will be installing a marine deck hatch in its place.8 points
-
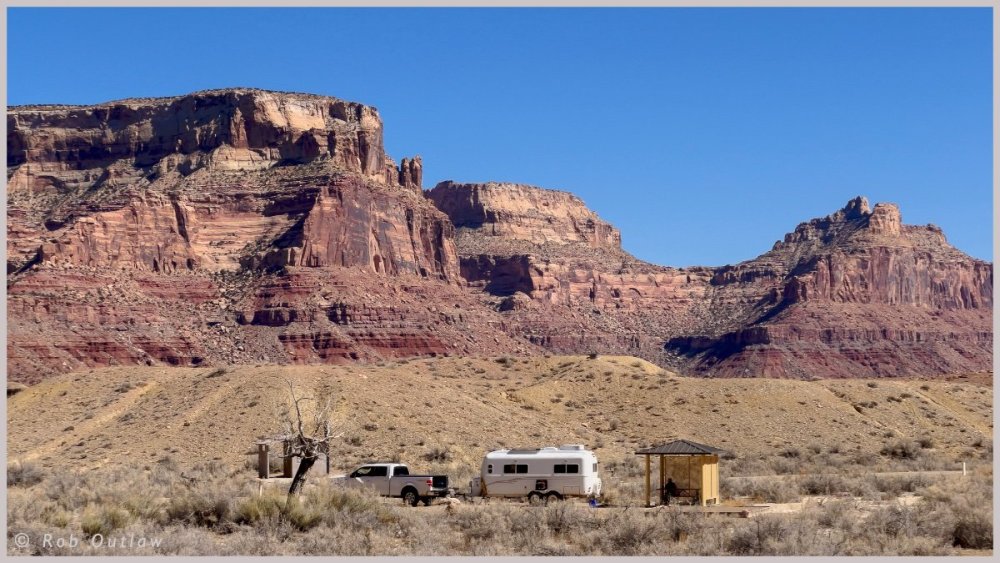
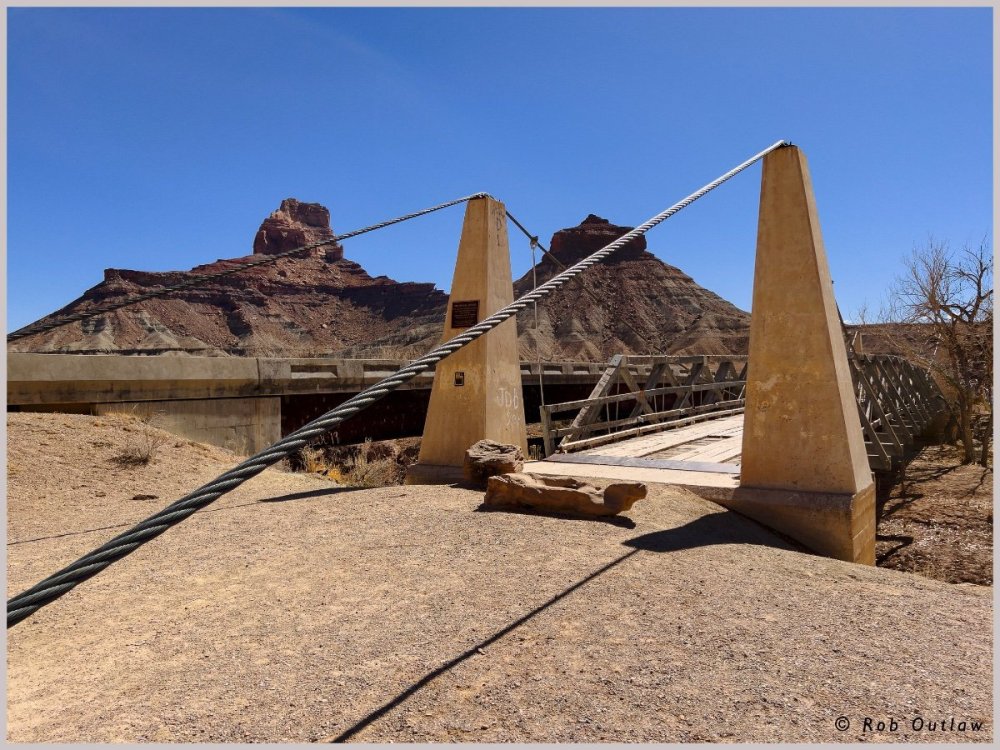
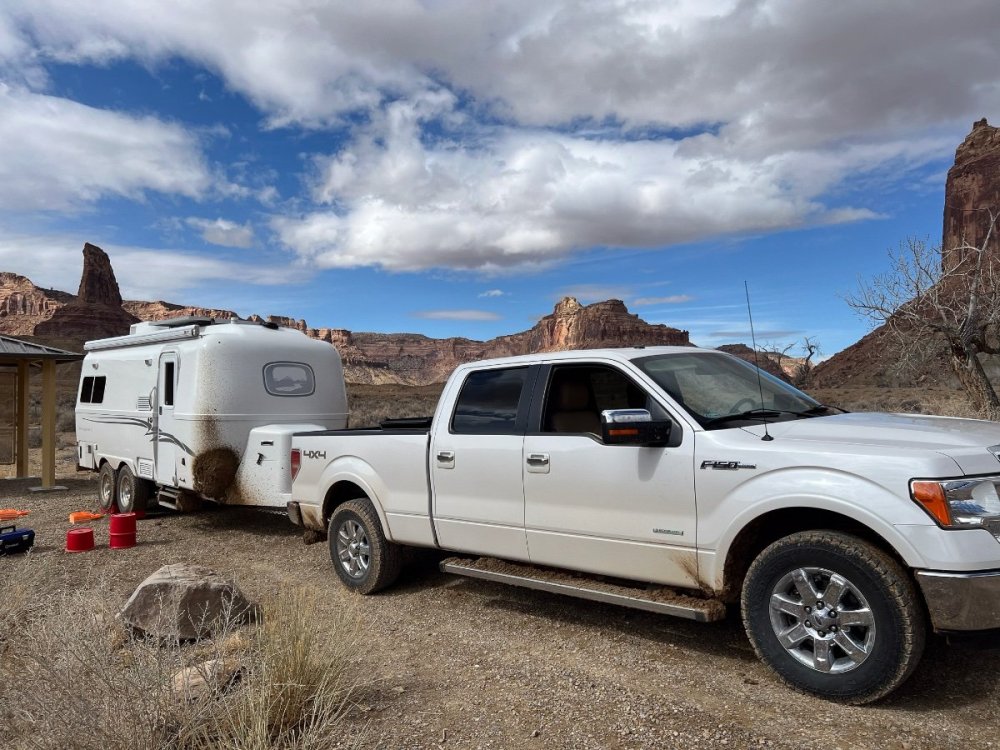
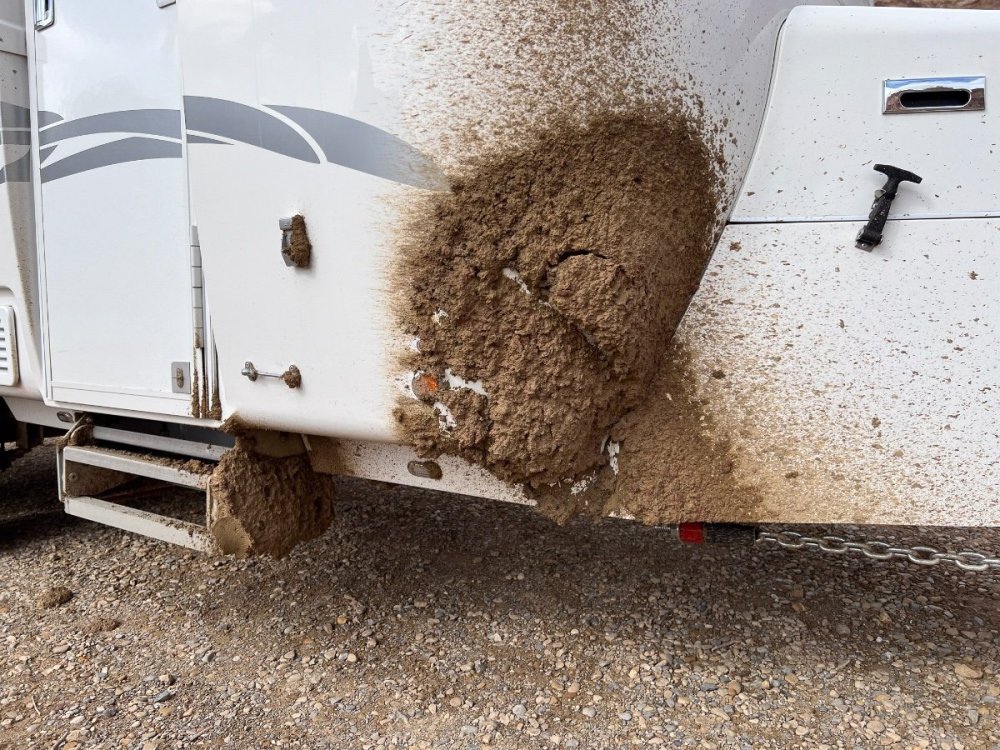
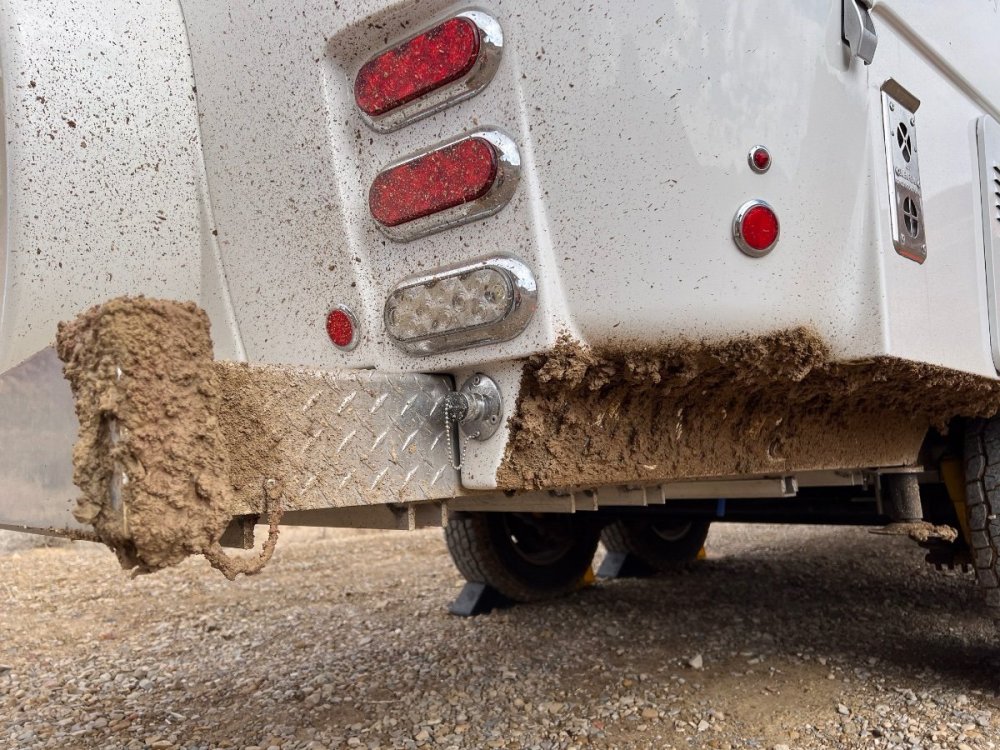
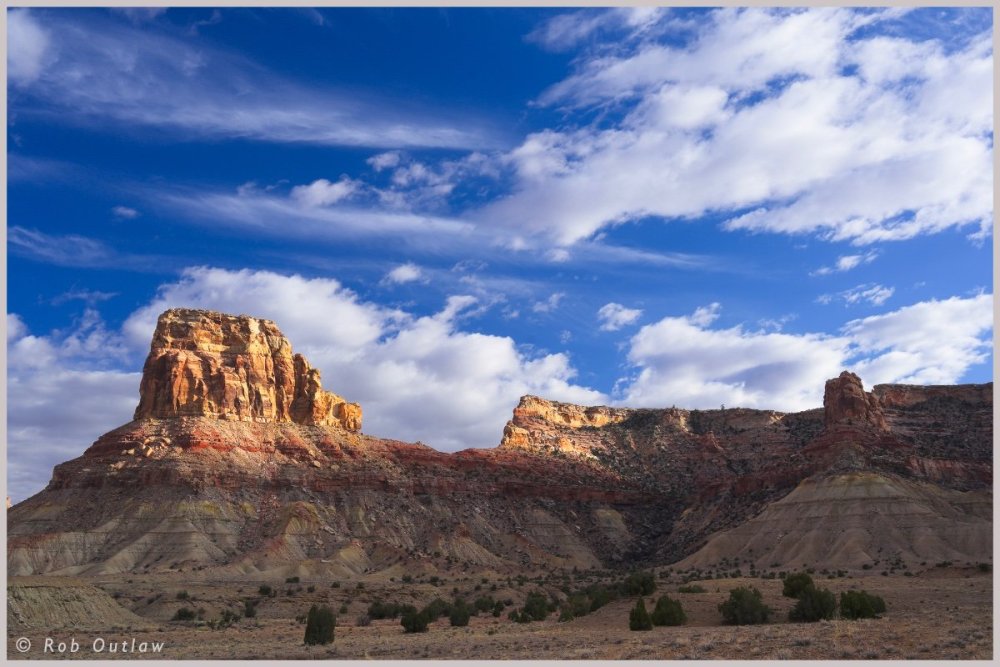
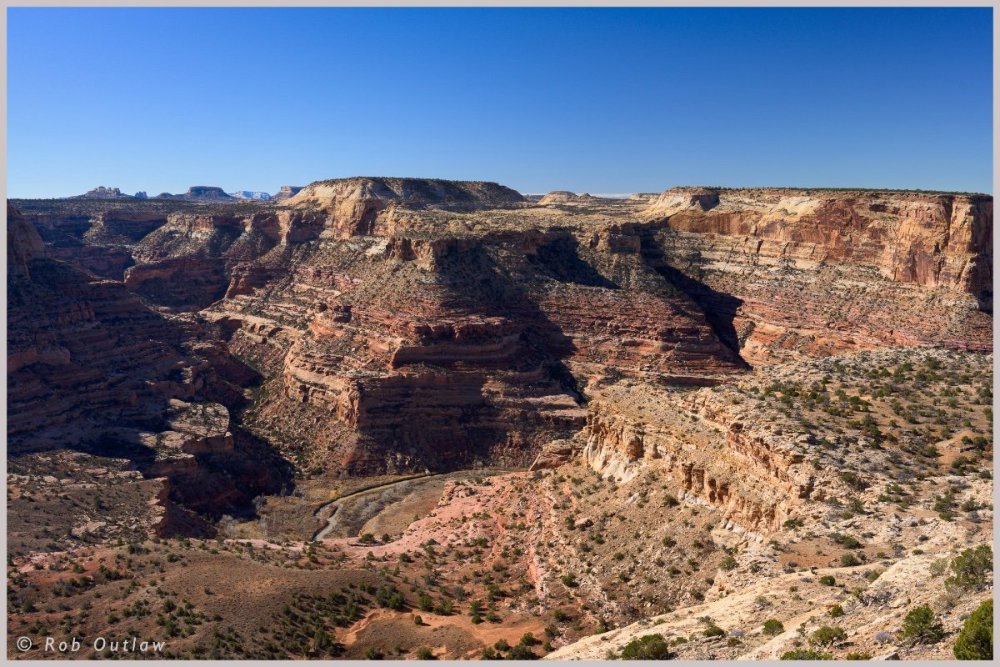
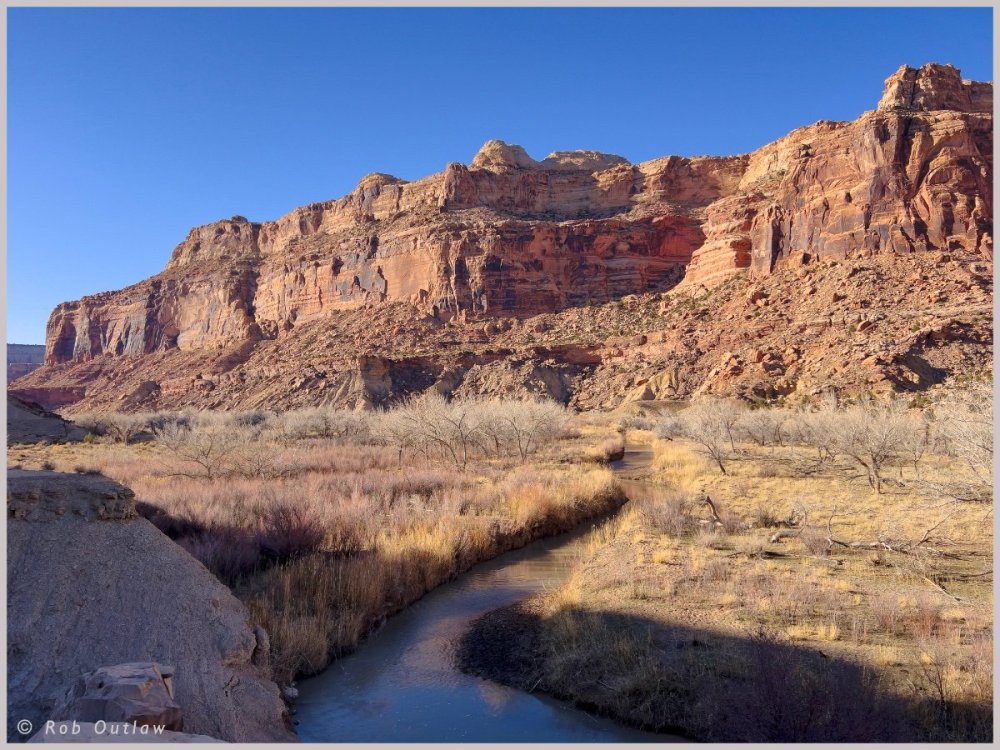
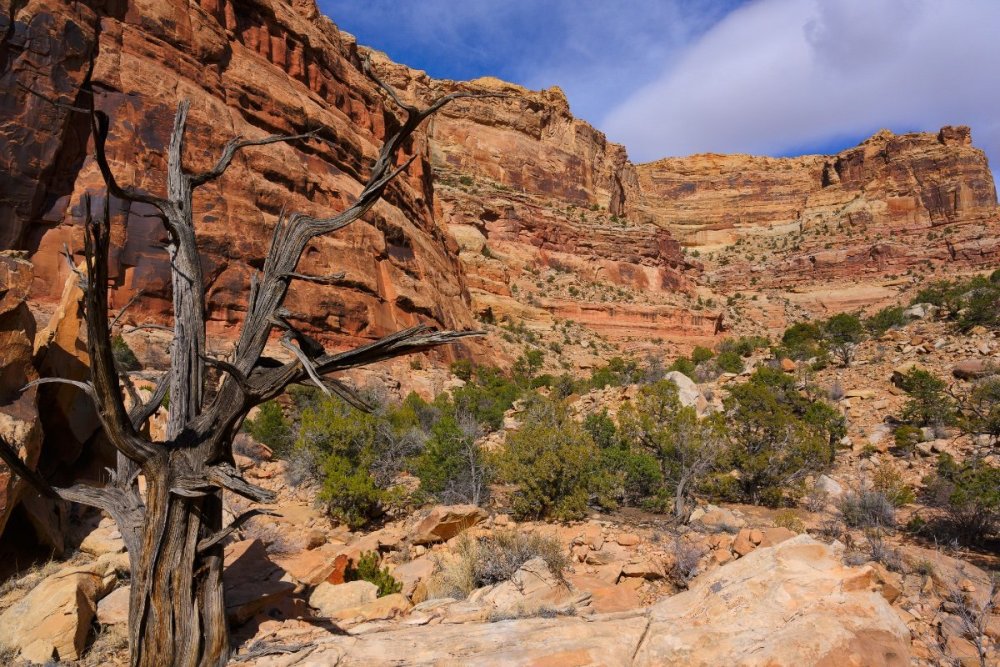
We just returned last week from another camping trip down in the southwest. Great time, with great hikes and weather although the first few days were a bit more chilly than normal. Hit some of our past best hits, San Rafael Swell, ST George Area, and finally a new one which has been on my bucket list for a long time, Valley of Fire State Park in NV. Beautiful place but have to say we were surprised by the crowds even in mid week. Thought I might share several pix including a few taking on heaps of mud while traveling down 25-30 mile gravel roads in the outback. Thanks BLM campground at Swinging Bridge shot of mud bath mud was inches thick, started falling on its own weight. Once this stuff dries it is hard as a brick. Took over an hour of pressure washing and $20+ to get most but not all of it off swing bridge now retired swinging bridge pictographs8 points
-
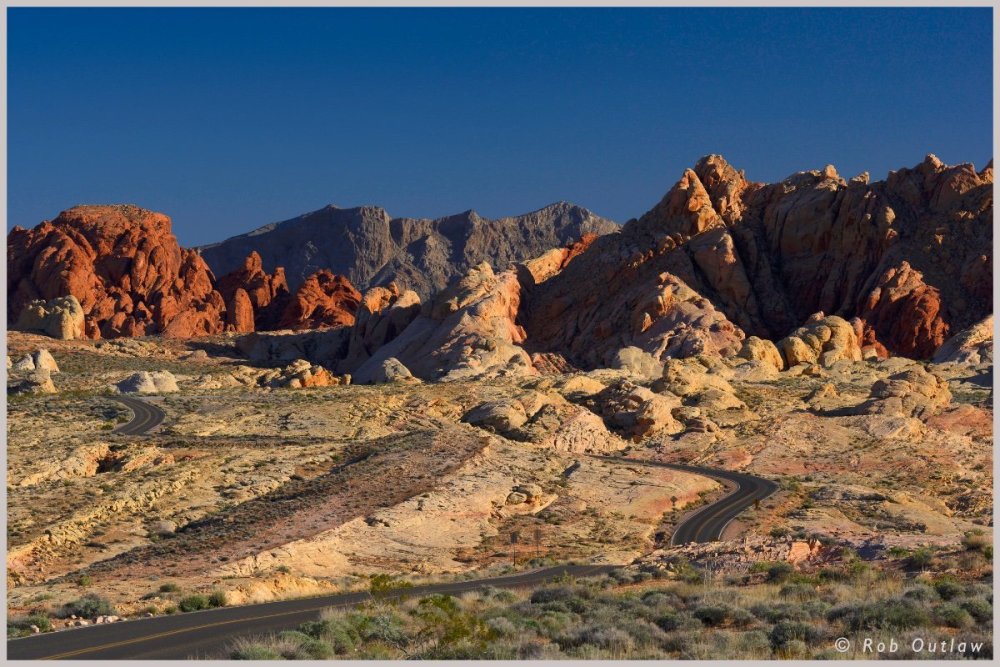
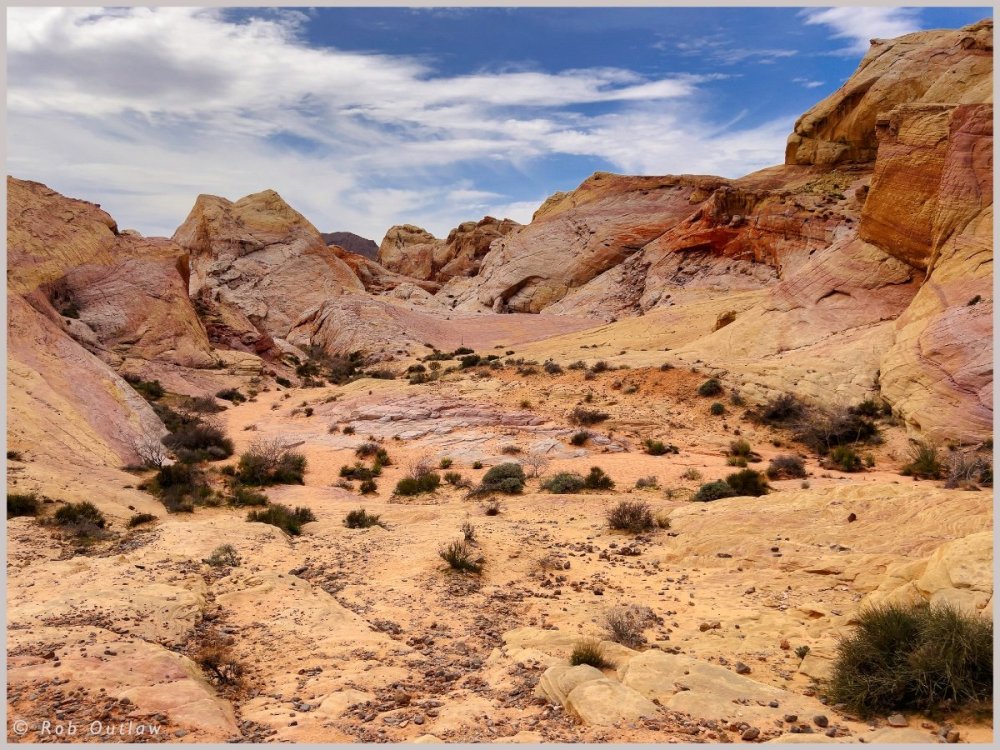
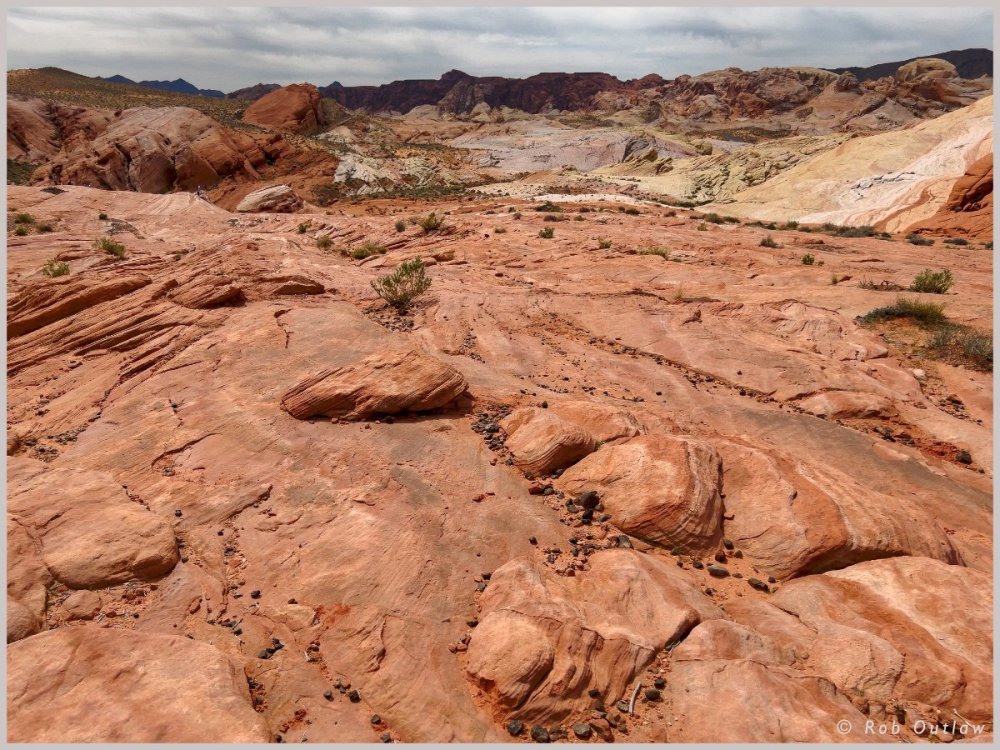
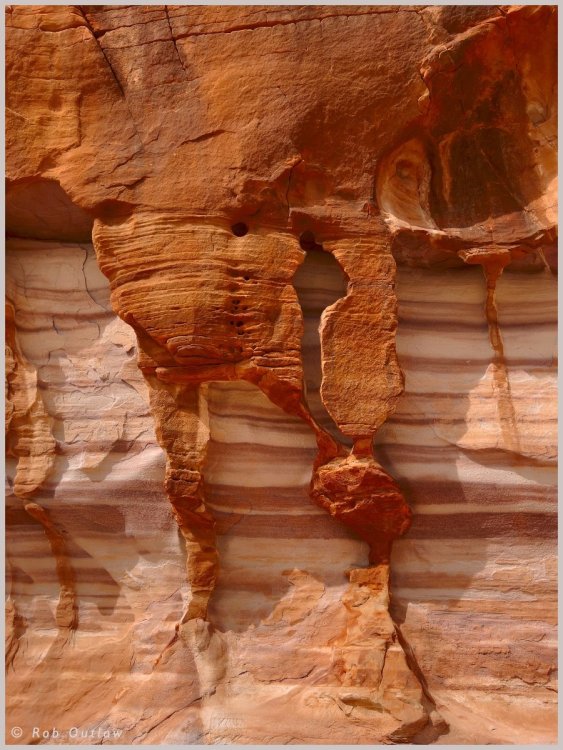
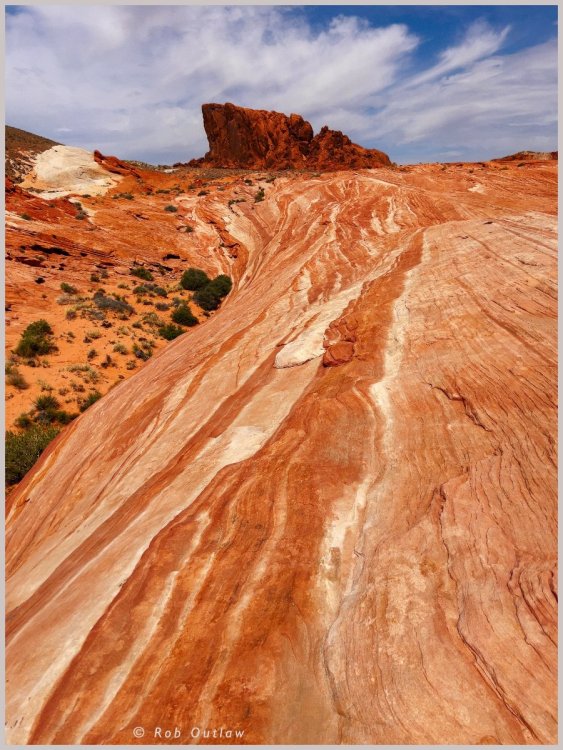
It appears a lot of you are familiar with Valley of Fire State Park but thought I would upload a few images from that part of our recent trip. First two images are with my Nikon Z7 and the remainder with iPhone 13 Pro in RAW mode for anyone interested in the technicals White Domes Road view to the south White Domes Road view to the north White Domes Loop trail with remnants of old movie set Trudi taking a break on the hike Detail of sandstone geology One of the many petroglyphs found along the Mouses Tank trail. Fire Wave Trail Firewave trail and Pastel Canyon End of White Dome Loop trail8 points
-
Ok. Enough. I started this thread and I think it should end now. Everybody has a different level of comfort doing their own work, assessing cost/benefits, etc. Nobody seems to know for sure exactly what's going to happen. Nobody's been proven right, nobody's been proven wrong. We'll all just have to wait and see what comes next. There's no need for besmirching anyone's character or integrity. MODERATORS, can you lock this thread?8 points
-
............ and all of that was stated in Jason's message to the owners. I must be missing something. "Our customer support team will still be available to assist with any questions and work with you and our dealer partners to get any services you need resolved." "However, we will continue doing major repairs, including fiberglass and aluminum, at our Plant Facility." "If you have any questions or require further information regarding this update, please do not hesitate to contact us or call us at 1-888-526-3978. We are always here to assist you."8 points
-
From past experience, I suspect that OTT will be updating us on this spring issue. My recommendation is that if you must replace your springs now, do so. But if you have the luxury of time, I suggest awaiting what OTT's investigation reveals. But DO take some time to inspect your springs. I have taken the liberty of plagiarizing all I could find info about our spring replacements. Additionally with the assistance of MaxBurner (Art) we have incorporated his replacement procedure into the attached DIY MS Word document. . For the attachment, If you find any info that we collectively have missed, please PM Art and I and we'll make it better. If of wider concern, post it here in the forum DYI - OE2 Replacement Springs Replacement with Art's Install Procedure (1 APR 2024).docx Good luck, GJ and MaxBurner.8 points
-
It’s been a few years and I may not be remembering the specifics exactly but, when we were looking for a camper I took an entire week of vacation and spent the week in Elkhart, Indiana. We toured just about all of the manufacturers. It seems like they all had service facilities and several free campsites available. All of these manufacturers have multiple dealerships as well. I’m hoping that once the dust settles, Oliver will be able to justify reopening their service center. I’m sure that they are scrambling right now trying to figure it all out. We’ve only owned our LEII for seven years and known the Olivers for seven years as well. We have also spent time with the service team early on. In my experience the Olivers and every team member that I have ever had the opportunity to meet have always had the highest integrity and I’m sure that they will get it all sorted.8 points
-
@JEssary I think this is a terrible decision by Oliver, and a disappointment to us. We took delivery of Curiosity one year ago tomorrow, and have had zero problems during the 7700 miles since. However, there was always that security of Oliver's famed customer service in mind in case something did occur. And that service was a large part of our buying decision. Oliver's reputation was built on the care after the sale, and that set it apart from any other manufacturer. Now, with no factory sales or service, it would appear the same as any other builder to a prospective buyer. Look at every YouTube review of Oliver, with clickbait headlines of "Is It Worth It", or any RV blog review of Oliver. The praise of Oliver's service is always highlighted and almost as legendary as the quality. Any time a prospective buyer comes to this forum or the two Facebook groups and asks about Oliver, Oliver's quality AND service department are, without exception, heralded as what makes Oliver better than any other trailer. I think that this decision will have a sizable impact on future sales, and on resale value of current owners' trailers, and trust from those owners. From my reading, many owners look forward to their annual service trip; almost like a pilgrimage. I can't imagine looking forward to a trip to a giant RV store. Here in northern Ohio, my closest authorized service center is 433 miles away, and has stellar sales reviews on Google. However, the service reviews are fair at best, with typical complaints of long waits and shoddy work. More concerning are a couple claiming no service on trailers not purchased there, or even parts sales. The next closest is 461 miles, only 100 miles less than going to Hohewald. Color me disillusioned...8 points
-
https://www.bestmaterials.com/detail.aspx?ID=20596&utm_source=google&utm_medium=cpc&utm_campaign=(ROI) PMax Shopping - Low/No AOV&utm_id=18030280001&utm_content=&utm_term=&gad_source=4 https://www.chemical-concepts.com/product/american-sealants-0240-cleaner-remover-14-oz-net-weight-can/?utm_source=googleshopping&utm_medium=cse&srsltid=AfmBOop8hPEz53xgukj9M1jJ5fHGXYcHM-KH_hwxWI5aSBtTGkVdMxnFYds (states on back order)8 points
-
When we bought our 2008, there was no Oliver Setvice department. We took a fly, anyway, after literally looking at hundreds of trailers, dozens of brands, for our "last" trailet. It has grown to be the best of the best. Jason and crew aren't going anywhere, they're instead expanding the knowledge base to the hand-picked, quality, small dealers. And,expanding the radius, for now, so people can get quality service much closer to home than Hohenwald. Imo. That training takes time, and face to face. Support will always be there. Even during the hiatus, we always got support. This is not your average company. Heart is there.8 points
-
I started in photography back in the mid 60's when everything was manual. No auto exposure or focus. My first camera did not even have a light meter. Had to use a hand held one and set the camera's aperture and shutter speed from that. Manipulating either or both to create different effects. Bought 35mm film in 100 foot rolls and wound my own cartridges in total darkness. It was all black and white. I thought I was Ansel Adams. I even lugged a big 2-1/4 square camera and tripod to the top of Sentinel Dome in Yosemite to duplicate AA's picture of the old Jeffrey Pine growing there. Here's Ansel Adams original: Unfortunately, unbeknownst to me, the tree had died during an extreme drought three summers before despite the rangers best efforts of hauling water to the top every day to try to save it. So all I have to show for my trek up the dome is a picture of a dead tree. Oh well, it was a famous tree.8 points
-
OK, First day on the road with the new ALCAN springs and can say there was no appreciable difference in ride. That said, I did note there was slightly less side-to-side rocking of the trailer as we traveled down low speed side roads which is where I would normally detect that in the past. ALCAN warns that the 7/8 U Bolt nuts need to be checked and re-torqued at 50/100/600 miles. I can attest that the nuts certainly needed tightening. I have one more tightening to do. Easy to do BTW. U bolts are easily accessible just laying down next to the trailer. Use 7/8" deep set socket and set torque setting to 90 ft lbs. Ten minute job. Nothing inside the trailer appears to have been negatively affected by the upgraded springs thus far. I'll continue to report as we move along.8 points
-
As I said earlier, only the Elites made between 2007 and 2009 were delivered with the 5000 pound couplers. The next Elite built by Oliver was Hull #073 delivered in 2015 and was equipped with a 7000 pound coupler. The current standard OEM for both the Elite and Elite II is the 7000 pound coupler.8 points
-
I can't imagine what the first bath in 67 years must feel like - no wonder you like it.😂8 points
-
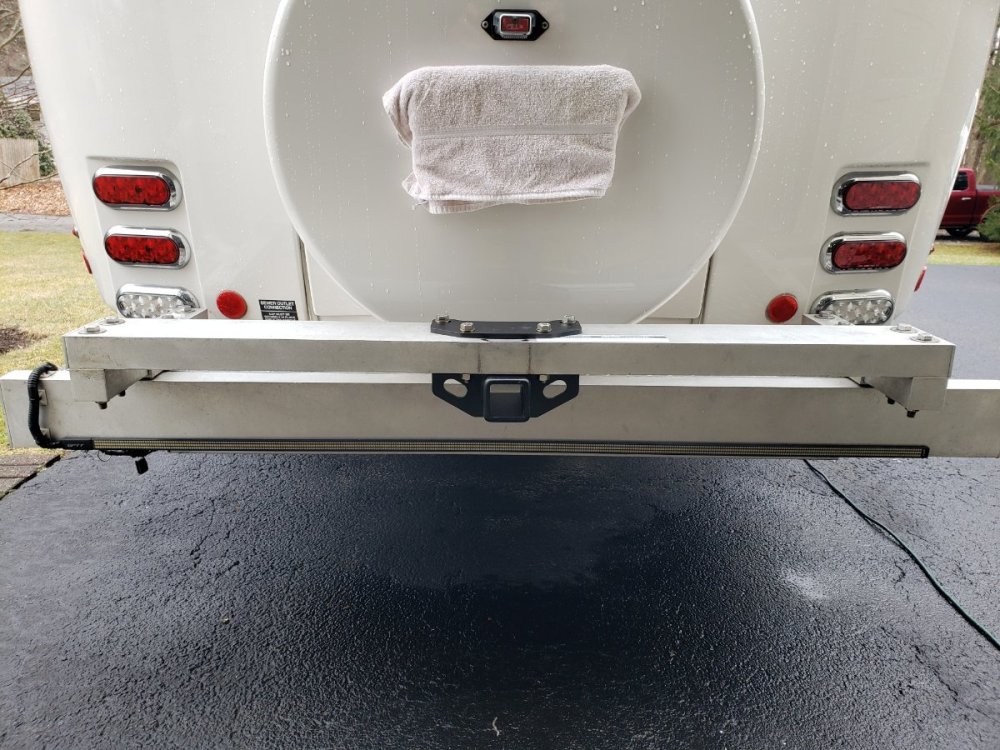
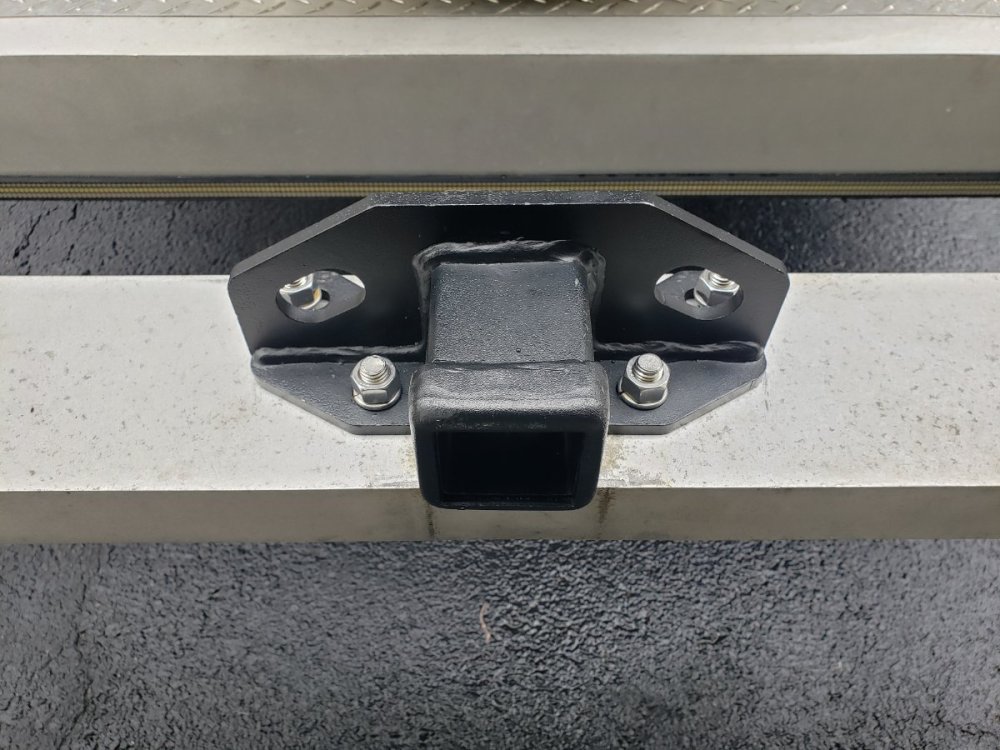
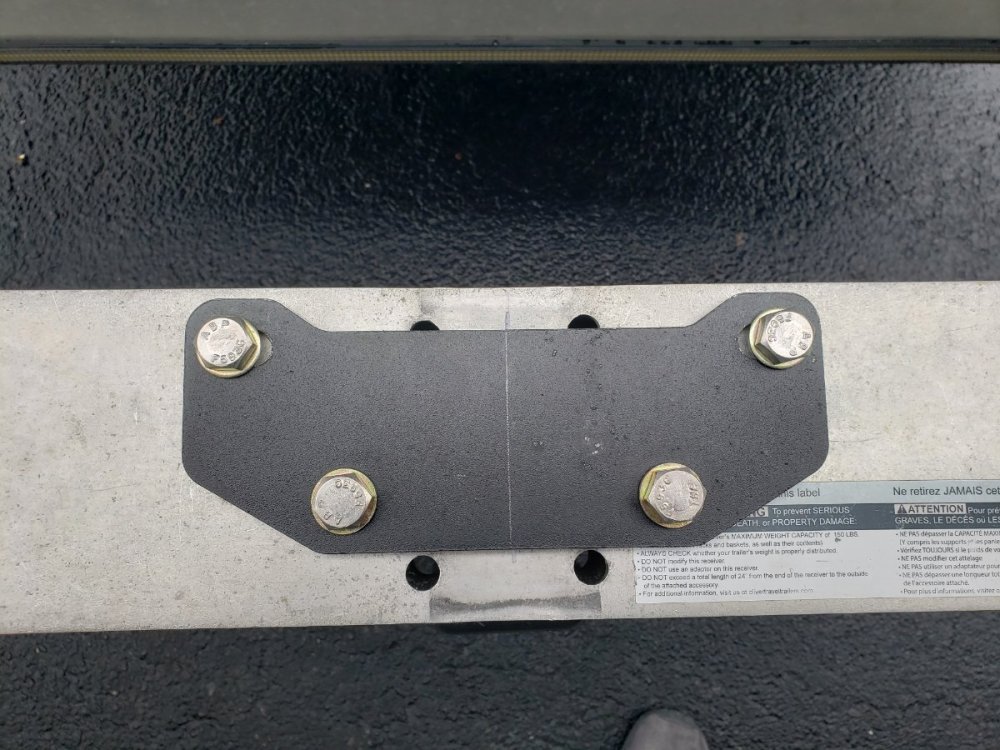
Our 2021 OEII came with a 2" hitch mount rack receiver but the installation was (in my view and with respect to a lot of other good work done by the prior owner of our trailer) not quite up to 'factory standard'. In fact the U-bolt-based attachment method distorted the receiver shape just enough to make installation, and especially removal, of our 1Up hitch rack next to impossible. So I sought to improve upon it. After some research I settled on a receiver ostensibly designed for use on certain Lexus GX460 models: https://www.amazon.com/dp/B0BRKR1Q4X Drilling and attachment was straightforward given a drill press, a decent 1/2" bit, appropriate measuring tools, and a center punch. The aluminum is relatively soft and drilling oil was not used. I have not been able to get all the chips out of the interior, but did not try too hard to remove an end cap and access the box section beam interior that way. The hardware is 3 1/2" x 1/2" stainless with stainless and yellow zinc washers. We have not tested the setup on the road yet, but static fitment went fine. The receiver and backing plate are fairly heavy; according to the retailer, about 10 pounds. This item is designed for towing, when attached to a GX460; it is likely overkill for this application, but that's OK by me. A side benefit is the receiver has safety chain mounts through which a cable lock could be passed. I discussed this with Jason and he indicated the factory were considering offering a 2" receiver option moving forward. Our bike rack is 2", our cars and TV have 2" receivers, and use of an adapter was not appealing to me. In hindsight I might have painted it white, or silver 😀 Enjoy! Tim7 points
-
That would be me and it was about 8 months: Check your frame, any damage? Welds good? - Mechanical & Technical Tips - Oliver Owner Forums (olivertraveltrailers.com) Something I found just after we purchased our used hull. I would not think to bolt this. Just find a welder that can work aluminum. We had two frame braces broken on the curbside. I found a local guy who runs a metal salvage yard and does metal artwork. He charged me $75 and I gave him $100 cash. Doesn't look as pretty as the original, but they have held. Make sure your trailer tires are below 50 PSI!7 points
-
7 points
-
Recent Achievements


