DonnaDuane
-
Posts
151 -
Joined
-
Last visited
-
Days Won
3
Posts posted by DonnaDuane
-
-
Thank you Bill. As I said, I never used it because the picture was so bad. I got inspired by others to take it off and apart to see if I can breath new life into it. I found an amazing quantity inside. Even the desiccant bag was soaked through. Do you know anyone who is using the new Furrion Vision S system? It sounds a whole lot better, but at $600+ I wanna know it's significantly better.
-
I'm interested in replacing my original backup camera with a new Furrion Vision S. I'm hoping the better day and night vision it's supposed to provide will want me to use it. The original was nearly worthless at night, and now it has a cut cable and damaged antenna due to vandals. Anyone here retrofit their Ollie with a Vision S system or is using one that came with a newer Ollie? I'm interested in what it takes to retrofit and if it actually works as well as Furrion claims. Thank you, Duane
-
Hello Oliver Buddies, I’ve been away for quite a while. Since it’s been nearly a year since we took delivery of our demo Elite I, I decided it would be prudent to repack the wheel bearings. It seemed simple enough. I’d done it on my cars before, so felt confident this would go smoothly. I watched the Dexter how to video and several others on YouTube. Looked up the part numbers and ordered everything from etrailer.com. Got the first wheel off no problem because the lugs were dangerously loose (So glad I didn’t wait for that pending disaster to happen. ) Next I removed inner seal and compared it to my new parts. Yikes! New parts were ALL too small, so I take the entire hub to local parts store. They measure the seal with calipers, search for 10 minutes to find on their shelves, and sell me two for $38.50. Existing bearings were still in perfect condition. Went home to install repacked bearings and new seal. It went in the hub fine, but when I tried to slide it back on the spindle, it just wouldn’t go. I pushed and pushed. I checked brake pad clearance and nothing worked. So, I took it off only to discover I’d damaged it. Then I discovered it had a smaller ID than the original. Went back to parts store. They blamed it on measuring while still on hub. They were kind enough to refund my $38.50 and find another parts store down the road that had what I needed. Got to other store, showed them old one. They walked directly to shelf with matching seals. Sold me both for $7.50. Got home. Put it all back together with ease. I still don’t know the correct part numbers for bearings and races so I can reorder them to carry for an emergency while on the road. If you do, please tell me. Thank you
-
 1
1
-
 2
2
-
-
John, this time of year is pretty dry around here, so no bugs to contend with. We got enough sun to keep the batteries charged, by some sites had less, so if you want that, you may have to drive around to find the best site. There are many back in sites that easily accommodate an LE II. Be sure to check the website for all the details on campgrounds and what they provide first though. There are gazillions of public campgrounds to choose from here.
-

Donna and I went Summer glamping for the first time last weekend. We camped at Camp Creek Campground in Mt. Hood National Forest. It's the closest campground to Timberline where I train on the Palmer Snow Field throughout the Summer. We had a fabulous time being in the forest, going on hikes and dining at local restaurants. Our next adventure is yet to be determined, but we're excited about our week in Sisters Oregon in September for the Sisters Folk Music Festival. Happy travels everyone!
-
6
-
-
I've successfully replaced a broken Bathroom Door Mirror. It was pretty darn easy, however I'm going to provide step-by-step instructions below for anyone who has any concerns about how to do it one's self.
Note: Be very careful handling glass! It's possible to get severe lacerations, if you're not reasonably careful. You may want to wear some light work gloves with silicone grippers on the fingers. Mirror has Safety Backing which is intended to keep broken mirror from having exposed sharp edges, but it's not perfect.
1) Order a new Safety Mirror w/Safety Backing in these dimensions 18.5" X 61" X 1/8" from your local glass store. I don't recommend picking it up until you have the broken one removed and can bring the Plastic Backing Board to provide added support for the new mirror when transporting it home.
2) Remove door from Ollie by unscrewing the 4 screws on the hinge side of the door inside the bathroom. When the last screw comes loose, be ready to carefully lift the entire door and hinge assembly from the fiberglass door opening.
3) Place the door on a open, flat surface. Begin by removing the 2 screws that hold the door handles to the frame, and set those aside. Next, remove the plastic door latch by removing it's screw, and set aside. Next, there are 4 screws, one per corner, that hold the aluminum frame together. It probably doesn't matter where you begin, but I started by removing the two screws on the long side opposite the hinge. Set screws aside, and begin to gently work the aluminum frame from the mirror, the 1/8" plastic backing, and the silicone seal that holds the mirror in the frame. Once off, set aside. Move to either the top or bottom frame piece, Loosen until free, the screws that stay connected to the hinged frame piece. Carefully remove top and bottom frame pieces. Finally, remove hinged side from mirror.
Note: Be sure to notice how the one piece silicone seal is placed on the mirror edges. Notice how it fits on the corners. You'll want to duplicate that exactly with the new mirror, if you want it to go back together easily.
3) Remove Silicone Seal and set aside. Carefully remove Plastic Backing Board from 1/8" mirror. It was glued to the mirror, so it may take some gentle prying. Mine came off easily because the glue was no longer holding them together.
4) Take Plastic Backing Board to glass shop to glue or tape to new mirror before transporting. Make sure your vehicle has a flat space long enough to support entire mirror. It would be a bummer if you hit a bump and it broke before you got home. New mirror cost me $130
5) Begin reassembly by removing tape if it was used to keep backing board on mirror. Place Silicone Seal on new mirror exactly the way it was on the broken mirror. I recommend starting with the hinged side first. Very gently work the mirror, backing board and silicone seal into the hinged frame piece such that the top and bottom frame pieces will fit perfectly to the 45 degree angle cuts. This allows for perfect screw and threaded holes to align perfectly.
6) Gently press top/bottom frame pieces onto mirror/backing board/silicone seal such that they match perfectly with hinged piece. Screw the top and bottom screws from the hinged side into the top and bottom pieces.
7) Now install the other long frame piece until it matches perfectly with the top/bottom pieces. Once together, install the two screws you set aside.
8) Now you can reinstall it into the trailer. Simply lift into place such that frame holes align holes in fiberglass opening. Replace screws till tight.
9) Lastly, reinstall Aluminum handles and Plastic Latch.
Voile! You have a new mirror which you will never allow to break again because you learned your lesson the first time, as I did LOL.
-
12
-
2
-
-
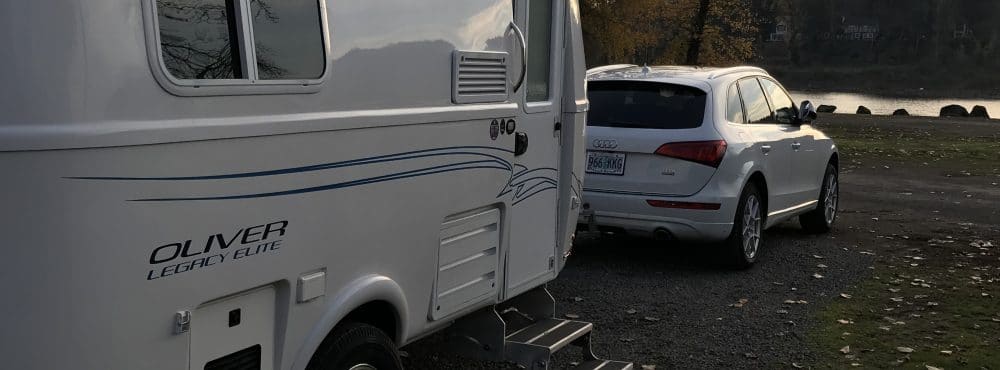
Don't know why you have the loss of function on your Q7. Our Q5 with the single axle Oliver Legacy Elite works fine. There is a couple in SLC, UT that pulls a Elite II with a Q7 without issue. You might want to talk with them.
We thought about Anderson Sway till we learned 1) it doesn't add a thing in terms of handling. Our Ollie pulls like a dream in the worst conditions without it. 2) Audi will void their warranty if you put one on because it puts too great of forces on the frame and can damage the frame. 3) After speaking with the people from SLC with the Q7 about how great their Elite II pulls without one, it was obvious to us it's a waste of money.
Our Q5 probably squats 2" when hooked up. Thought about installing air shocks, but found that to be a bit too complex to install. I'm conscious of loading my ski gear, luggage and generator over the Ollie axle so tongue weight is less than maximum allowable. Been pulling it with all gear plus 32 gallons of fresh water darn near every weekend this past Winter to ski areas around the Northwest, on snow/ice, in blizzards, and have had zero issues with towing performance.
You might speak to another Audi mechanic/dealer with towing experience. Good Luck.
-
I'm looking for a step by step instructions for uninstalling a broken mirror and reinstalling a new mirror in the Bathroom Door. If you have, or know how, please forward to me. I've got a local glass company with the mirror, but don't want to undertake this without some instructions for taking the door apart.
Thank you,
Duane
-
I got the 00088 88P compressor for $56 on Amazon. I use the Anderson Leveling kit in a bag that includes leveler, chocks, jack pads and doorstep in a bag.
-
1
-
2
-
-
- Popular Post
- Popular Post
1. Always turn Propane tank valve on VERY SLOWLY, otherwise the force of rushing gas can cause safety valves on furnace, frig, or hot water heater to shut that appliance down. Only remedy is shot of gas, reset appliance, then turn gas valve VERY SLOWLY. Seemingly faulty appliance has always worked after that.
2. Always lock bathroom door before driving even the shortest distance. Otherwise it will be broken for sure from swinging open.
3. Never camp between other RVs that run generators with exhaust pointed towards your Ollie. The CO detector will go off. NEVER ignore your CO DETECTOR!!! You might die in your sleep.
4. Never run propane appliances while driving. They can cause gas explosions at gas stations.
5. Viair Air Compressor makes winterizing water lines and keeping tires at proper pressure a piece of cake
6. Anderson Leveling wedge is worthless on ice and snow. They need a studded version.
7. Boondocking in Winter requires a decent and quiet generator. Solar power is gone for perhaps weeks. I recommend the Honda 2200i.
8. Protect front lower sections of shell from rock chips with plastic coating. Tow vehicle will spray a ton of gravel into it, especially in Winter. The folks who applied 3m film to my Audi are doing my Ollie.
9. Keep Drain hose attached to outlet in rear bumper and simply cap the end. This is way easier and cleaner than taking it apart each drain cycle. And always drain Black then Gray for odorless hose
10. Dehumidifier is a must when Winter camping. Otherwise condensation runs amuck everywhere.
11. Hoppy Rearview Mirror Level on front of Ollie saves tons of time. And, your head doesn’t get nearly as wet running in and out and in and out etc, etc in the rain and snow to get the darn trailer level.
12. Use other Ollie owners for tips and advice, especially for Set Up and Departure Checklists. They are valuable beyond belief.
I’ll add more as they happen. Happy travels
-
13
-
4
-
After camping this weekend at another cold ski area with no frozen water lines, I think what caused it to freeze was lots of slush accumulated and froze solid around the front and door. In fact the step wouldn’t open because it had so much ice on it. No slush to drive through this weekend. Now we have freezing temps in Portland (very rare) for more than a week, so I winterized it for the first time. Much easier than I imagined. So glad I got a Vaeir air compressor. Shocked by how much water was still in lines when we blew them out. Refilling each line with antifreeze was a breeze with Donna’s assistance. Now we can sleep easy while it sits out in the cold.
-
Been trying your idea for 3 hours to no avail. Any other ideas?
-
That’s a fabulous idea! I’ll try it when I return to the Ollie this afternoon. The furnace and Truma are on while I ski so hopefully all will be ok.
-
<p style="text-align: left;">I’m happy to report that since getting new circuit boards for furnace and MaxxAir fan, my winter Camping at ski areas has been going quite well, until now.</p>
After setting up last night, I discovered I have hot and cold water to kitchen, but only hot to bathroom. No cold water to toilet or sink. Could that line be frozen? I’ve had the furnace on since arriving so don’t understand why everything else works. Any ideas? Outside temp is 18 F.
-
Oh and you also reminded me I have a ventilation fan in the shower I haven’t been using ‘cause I never looked up to notice it. Thank you one more time LOL
-
Hallelujah! Steve I cannot repay you enough for all you’ve done for me. Simply pulled the fuse and it was off.
Thank you
-
1
-
-
I have a model 7000 with rain sensor. But I think when I heated this place up , condensation formed inside the fan lid and dripped down onto floor and I believe into circuit board of fan.
I also got dripping water from around the Zamp Solar Charge Controller. Does that thing generate heat that would result in condensation forming around it?
-
I’m unable to check or change anything. The touchpad on the unit doesn’t respond nor does the remote. I just took the screws out to reveal wiring and circuit board. Tried like hell to pull wiring connectors apart but failed. So fan is still running. Thankfully hatch is closed, fan is moving slowly and moving air up. Circuit board showed signs of water exposure so I’m pretty sure it’s cooked. Any other ways to cut power to it without killing power to essential other things?
-
hello gang. Thank you all again for your valuable support as I learn to RV in the Winter. Here’s the latest issue. Since it snowed a week ago, the MaxxAir fan has dropped condensation into Ollie. Furthermore, it stopped working all together. I’m pretty sure water got into the control unit. When I walked in this afternoon after skiing, the fan is running, even though I didn’t turn it on, AND I can’t get it to turn off.
Do any of you know what I need to do? There’s no fuse for it.
Thank you,
Duane
-
Seadawg, I never intended to bypass the switch permanently. Only to test for a faulty switch. All is well now since I cleaned the connectors and reconnected them.
-
1
-
-
Thank you Steve and Ken!!!!!!!!
Good news! I disconnected the sail switch to see if I could get the furnace to ignite by bypassing it. I saw dirt on the connection, cleaned them off. Decided to reinstall and retry startup before bypassing. Furnace fired right up!? Jerry’s RV thinks it might have simply been a reset of the system when I disconnected the switch, so if it fails again, I’m likely going to get a Dinasour Board to replace the original.
-
OK gang, here’s the latest. Furnace (generator running) worked fine all night long BUT quit inexplicably this morning around 7am. Thought I’d run out of propane, but when went to fill, the two only needed 3 lbs to top off. Hooked everything back up. Turned furnace and thermostat switch off. Opened tanks slowly. Turned switches back on. Fan cycles on for 30 seconds, then off with no ignition. Jerry’s says they’ve had problems with this particular furnace before and had to replace them. What do you think?
-
Yes for sure. I brought them jars of my homemade jams as a small token of my appreciation today.
-
1
-
-
Oops almost forgot! (That is until the furnace stopped working tonight!) The furnace will stop working if trying to run off batteries at 50%. The fan requires shore/generator power,or well charged batteries. When the sun went down, so did the batteries. But, hooked up my little generator at all is working and well again. Looks like a good nights sleep tonight ?

Rear camera foggy imaged due to moisture inside camera lens
in Mechanical & Technical Tips
Posted
Getting to the camera is easy. Just stand on the bumper. The vandal probably thought it was on as they crawled under the fence to steal a cargo box from the top of another person's van. Thanks for the thoughts though.