Search the Community
Showing results for 'Painted cowboy transport'.
-
I'm looking for something to glue to the inside lower shell of my trailer to mount (screw) my Victron MPPT controller to. Anyone know what Oliver uses? Many items are attached throughout the trailer using that stuff. It's about 1/2 inch thick and painted? white. Any help is much appreciated. John
-
My local Dexter rep told me the yellow paint swatch is to quickly identify a particular spring in their warehouse. I noticed the painted end is also where the leafs are steel banded together.
-

Made in USA leaf springs
MAX Burner replied to Mountainman198's topic in Mechanical & Technical Tips
Good question, John. Due to prior commitments, the process is still underway, worked on it for a couple hours yesterday, plan to finish it up this morning. After speaking with Mike/Alcan, here's a high-level List of Instructions for the leaf spring R&R. 1. Break loose the wheel lug nuts on all wheels; 2. With the OTT connected to the the TV, raise enough that wheels are just high enough to spin and that 4 jack stands can be placed in front and to the rear of the running gear on the OTT frame; 3. Lower OTT onto the jack stands - wheels must still be able to spin; 4. Remove wheels; 5. Pick a side to start. Place a jack stand under front axle about 2 feet inboard of wheel assy. - use a floor jack under the spring plate to raise the axle just enough to adjust the jack stand under the axle, then lower the floor jack so the axle rests on the floor jack. There should be very little tension on the suspension at this point; 6. Remove the lower shock absorber nut and push the shock up and out of the mounting hole on the spring plate, use safety wire to hold lower shock outboard and away from spring plate - helps with aligning the spring plate later on; 7. Remove the 4 U-bolt nuts/washers; 8. Remove the spring plate (at this point - we wire brushed the plate, cleaned with acetone and rattle-canned it with RustOleum, set aside to dry for later); 9. Remove the forward wet bolt from the frame mount - this allows the spring pack to drop; 10. From the Dexter center shackle, remove the corresponding Dexter shackle nuts and the outboard connecting plate - the inboard connecting plate will be removed with the wet-bolts still "press fitted" into the plate. Keep as is and ChemKlean the shackle plates, wet bolts and nuts for later assembly; 11. Throw away the cheap-ass Chinese made spring pack. (OBTW: Our's weighed 10lbs even as compared to the Alcan 5-leaf spring pack of USA steel at 18lbs! We still have the fourth spring to replace today - but the three removed so far were definitely starting to flatten.) 12. Check the centering bolt head on the Alcan spring pack so it fits into the corresponding centering hole in the spring plate. We had to file the corners on a couple of the bolts to get the correct fitment. 13. Insert the "now cleaned" shackle components to the Dexter center shackle assy. Connect Alcan spring pack (this would be the rear-most spring pack bushing for the front axle), bolt on the outboard connecting plate. 14. Check the forward wet bolt after cleaning by connecting your Lock'nLube and squeezing grease through the journal (be sure to do this with all wet-bolts). Thoroughly grease the spring pack brass bushing and wet bolt. Ensure the wet bolt can fit through the brass bushing - tap in gently using a socket over the grease nipple. 15. Lift the forward end of the spring pack and place a floor jack under at mid-point (where the spring plate will be placed in a later step). Lift the Alcan spring pack up to the forward spring mount on the frame. Ensure the centering pin on top of the Alcan spring aligns with the centering hole on the axle's spring pad. 16. Insert the forward wet-bolt by raising/lowering the floor jack and tapping the center shackle fore/aft until the bushing aligns with the mounting holes. This is a step that takes some patience. We had to use an alignment bolt from the outboard side of the mount to get the wet-bolt through from the inboard side. (NOTE: The wet-bolts have splines near the head to keep them from spinning once tightened in the shackle plate - we oriented them so the grease hole on the wet-bolt faced "UP"). 17. Place your U-bolts in place over the axle (we painted ours just to keep the rust down to a minimum - plus it looks way cooler). Place the cleaned and freshly painted spring plate in place. Install new U-bolt washers and nuts - using an "X" pattern, tighten the U-bolt nuts slowly pulling the spring plate up and into position. Use a flashlight to check that the Alcan spring centering bolt is aligning with the centering hole in the spring plate. We tied the lower shock outboard and away to a wheel lug with safety wire to make this alignment easier. 18. Install lower shock to spring plate; 19. Torque all nuts to specs. 20. Move to same side rear assy. and repeat. 21. Move to opposite side and repeat front and rear like steps 1 thru 20 above. There's probably a few extra things I did (removed, inspected, and re-packed wheel bearing, for example) but these are the key steps. Very satisfying procedure. It's worth the peace of mind knowing your running gear is in order! More to report later after complete and test driven. Cheers!- 284 replies
-
- 11
-

-

-

-
Our 2021 OEII came with a 2" hitch mount rack receiver but the installation was (in my view and with respect to a lot of other good work done by the prior owner of our trailer) not quite up to 'factory standard'. In fact the U-bolt-based attachment method distorted the receiver shape just enough to make installation, and especially removal, of our 1Up hitch rack next to impossible. So I sought to improve upon it. After some research I settled on a receiver ostensibly designed for use on certain Lexus GX460 models: https://www.amazon.com/dp/B0BRKR1Q4X Drilling and attachment was straightforward given a drill press, a decent 1/2" bit, appropriate measuring tools, and a center punch. The aluminum is relatively soft and drilling oil was not used. I have not been able to get all the chips out of the interior, but did not try too hard to remove an end cap and access the box section beam interior that way. The hardware is 3 1/2" x 1/2" stainless with stainless and yellow zinc washers. We have not tested the setup on the road yet, but static fitment went fine. The receiver and backing plate are fairly heavy; according to the retailer, about 10 pounds. This item is designed for towing, when attached to a GX460; it is likely overkill for this application, but that's OK by me. A side benefit is the receiver has safety chain mounts through which a cable lock could be passed. I discussed this with Jason and he indicated the factory were considering offering a 2" receiver option moving forward. Our bike rack is 2", our cars and TV have 2" receivers, and use of an adapter was not appealing to me. In hindsight I might have painted it white, or silver 😀 Enjoy! Tim

-
The newer rearview cameras that are installed by Oliver have a built in "hood/cover" that helps protect the camera from sun and rain and (perhaps) some glare. However, those of us with the older cameras no such "protection" is built-in. So, after seeing another one of these cameras where the owner (sorry, I do not remember just who that was) fabricated a hood/cover, I thought that I would try to do the same for my camera. I had some reasonable flexible plastic sheeting laying around the workshop that had originally been used during the installation of a "ceiling" under part of our decks on the house. I believe that the product was called "Underdeck". Anyway, using a bandsaw I cut out a rough shape and then used a heat gun to soften the plastic sheet such that I could hand mold it into the basic shape I wanted. Next, I refined the rough shape again using the band saw and then started sanding until I was basically satisfied. A bit more molding of the cover using the heat gun - note that I actually used the camera as a base for this "final" molding but was careful to not let the camera get too/very hot for the obvious reasons. Then it was a bit of hand sanding - this is not really that difficult given that the plastic is fairly soft. Perhaps the "final" detail of the project was the most difficult - the placement of the holes that aliened the outside bracket with the plastic hood with the holes in the camera body. Note that the bolts that attach the bracket to the camera body are not very long and with the added material of the plastic hood being involved there is not much room for error on this step. Finally, when I was satisfied with how it looked I spray painted the underside of the hood with ultra-flat black paint so that glare/reflection would be reduced. Questions? Bill p.s. Note: In the pics below it really doesn't show, but, the top of the hood does not rest directly on the top of the camera. This allows any heat from the camera and/or the sun to be dissipated such that neither should be subjected to too much heat. l This is the hood that I copied. I reduced and shaped the edges of mine such that there would not be any interference by the hood with the camera angles out to each side. The above is the camera mounted prior to making the hood. TopTop Back Front
-
It would be hard to say that the Older Oliver's were "made better." They were certainly made more slowly, taking an average of about 3 months of actual construction time. This was partly because the company was in a state of constant flux. They were always coming up with better ways of building them but basically they were still built one at a time making each system as they went along. It took them over 3 years to make the first 49 trailers and there were no two exactly alike. There were also some major setbacks during that early 2007-2010 run that caused Oliver to make some tough financial decisions including one that involved a recall of every trailer they had built up until that time and another that shut their doors for four years. Find me at the rally for full details. And the owner's must of been a major pain in their ass as we were always changing our mind throughout our builds. Poor Robert Partee, the former sales manager and, to many of us, the face and voice of Oliver, it was he that had to field our numerous requests and then find a way to try and make them happen. But, to his credit, it seems like he always did. The one thing he balked at and staunchly refused to entertain was my request to have my first Oliver painted green. To paraphrase his response, "No frickin' way, Buddy..." The main thing that differentiates a brand new 2024 model and my 10 year old 2014 model is the amount of innovation and improvement Oliver has poured into the trailers through the years. Solar was a relative new frontier in 2014 and now there is hardly an Oliver sold without it. Who would have thought that in this short decade we'd go from choosing between Flooded Lead-Acid batteries or upgrading to AGMs to now trying to decide how many hundreds of amp hours of Lithium we can't live without. The new 2024 Oliver Elites and Elite II's are, by far, much slicker than those built even a couple of years ago let alone those built a decade or more ago. Many people have been very happy with their trailer and have kept them for many years. Proof of this is seen in the number of units that are still in the possession of their original Owners. For the past few years I have been assisting Anita compile as accurate a list as is possible on the provenance of the older trailers and the people who have owned them through the years. We have been using early company data as well as records I compiled myself with information gleaned during the early days. To date, the Oldest Trailer still in the Original Owner's possession we found to be Hull # 007, delivered in early January of 2008. It was delivered to some guy named Bond.... 😄 just kidding about the name.
- 284 replies
-
- 10
-
-

-
-
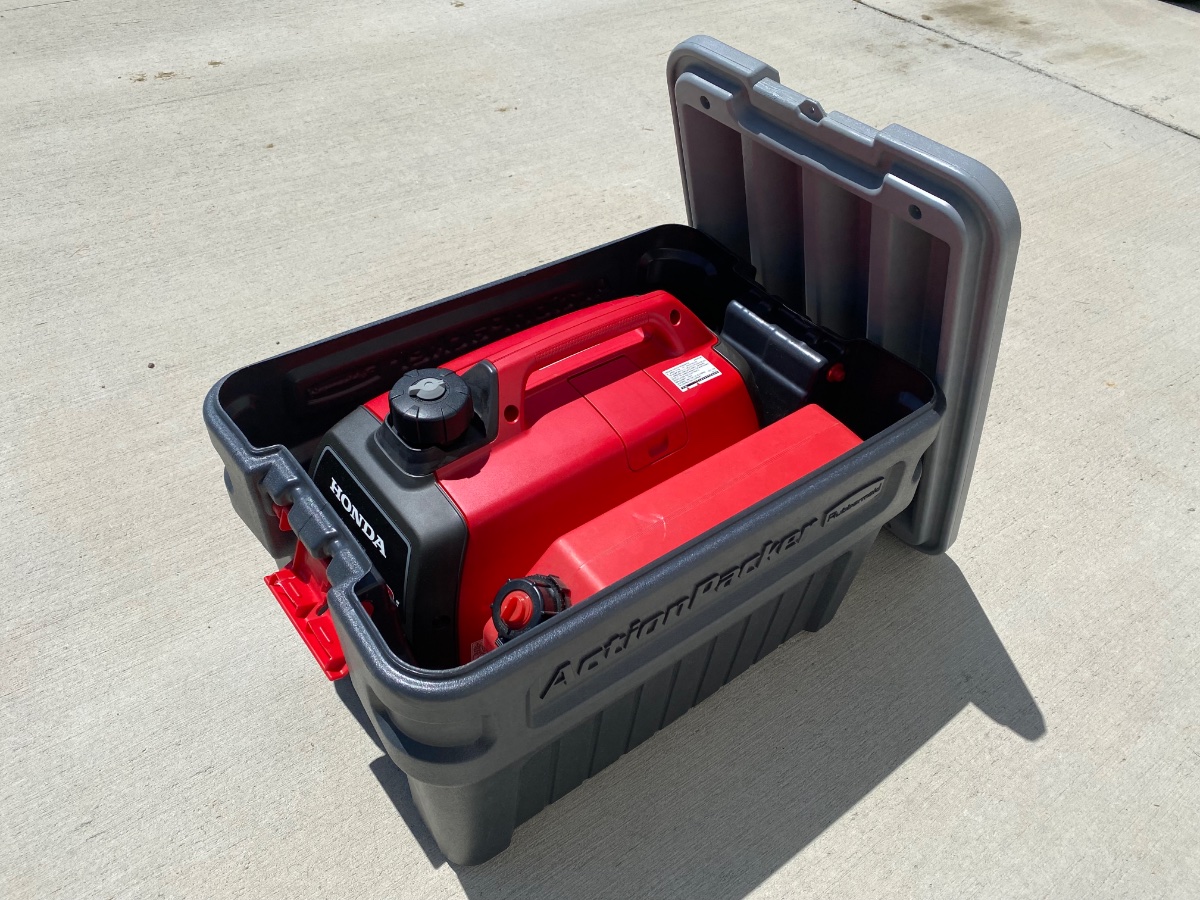
Oh so close. Looking for a good storage bin option for transporting the Honda EU2200i generator in the truck bed (with a bed cover) to keep things clean and organized. I don’t have the front Ollie basket, plus I want to keep the generator under the truck bed cover away from prying eyes. I tried one of my 24 gallon RubberMaid Action Packer bins and it’s ALMOST perfect for the generator, a 2 gallon RotoPax fuel container, and an extra quart of oil, with a PIG Mat in the bottom of the Action Packer to absorb any oil or gas drips (but I doubt the Honda will leak anything). Holds things nice and snug, EXCEPT for the height. The inside ribs on the double walled lid interfere with the generator handle and gas cap. Might be time to get out the knife and modify the lid by cutting away one full rib, and also adding a small vent hole in the lid for fume venting. Of course for running the generator it will be removed from the storage bin, and allowed to cool down before putting it back in the bin.
-

Starlink dish mount on Dometic awning brackets
RoadKingsofGA replied to RoadKingsofGA's topic in Ollie Modifications
Thanks! I re-read my post and it could use some editorial corrections! We can't take credit for the bike rack mount. It was put on by the previous owner to solve the issue of needing a 2" receiver. It's certainly stable as it's well bolted! I can add pictures of that if you would like. I believe it had it custom fabricated and painted or powder coated. We added O-ring screws at the corners to allow us to tie down gas cans when we carry them. -
Not sure about that particular one. Was it a private transport? Not sure. But I have seen them leaving our facility wrapped. Oliver really does take everything into consideration. I have never seen or heard of anyone at Oliver doing a "half-job" on anything. Ever. That's the Oliver Difference.
-
With the tremendous effort that OTT expends in their make ready process, I'm surprised that they don't "Shrink Wrap" their trailers for transport. GJ
-
I just completed installation of a Victron Smart Orion 30 amp isolated DC to DC charger after reading all the great information provided in this forum by MAX Burner, and others. I really appreciated all their groundwork and details, so I wanted to share some of my experiences in the hope that others will find it useful. I used #4 AWG wire for ease of installation and for better termination options. BatteryCablesUSA recommended their “Jumper Cable” wire and it was the best deal I found at $197 for 55’ x 2. It consists of a black and red cable joined together like zip cord, and it’s flexible enough to lay flat under it’s own weight. Their lugs and heat shrink were also reasonably priced. I sheathed the full length of the cable with 3/4” braided cable sheath for extra protection and good looks (Amazon Keko 100’ roll for $21.) I seized the ends with Amazon XFasten fabric Wire Harness Tape (5 rolls for $14.) BatteryCablesUSA also recommended Anderson SB50 connectors, instead of the larger #4 AWG rated SB120 connectors that I originally planned. They said that #4 AWG wire would fit in the SB50 #6 AWG contact pins, which it did. I used Trailer Vision covers for the Anderson SB50 connectors. A TV-201426-50 surface mount receptacle with hinged cover plate was installed under the truck bumper. It has a red LED power indicator that I discourage from connecting because it’s on all the time and annoyingly bright. They also offer a flush panel style mounting. The sheathed cord on the trailer side got the Trailer Vision TV-328993-50 plug cover. It has a protrusion that catches on the mating receptacle’s hinged cover to stop it from pulling out. It’s similar to how the 7-pin connector ports hold the plug in. It also has a LED power indicator that’s more useful because it’s only on when connected. It uses a compression gland for the cable that I filled with black RTV. Powerwerx company sells Trailer Vision parts, Anderson connectors, and other accessories for reasonable prices. Get at least 4 extra #6 Anderson pins for connecting to the Victron compression terminals as explained later. Powerwerx also sells the “PanelpodSB,” which is a surface panel mount Anderson SB50 housing for $11.99. I mounted one on the Oliver’s cargo box for “parking” the Anderson connector when it’s not plugged into the truck. It keeps with my existing theme of parking places for the 7-pin cable and RAM rear view camera cable. They also sell a tethered cap to keep it clean when traveling. The engine compartment wiring was straight forward. I connected the cable’s red wire to a 60 amp terminal post fuse on the battery positive. The black wire terminated to the battery negative. The trailer half of the sheathed cable went through a penetration behind the LP tanks. A hole was drilled through the trailer wall next to the existing penetrations with a 1-1/8” step bit. The sheathed cable passed though an Amazon PA66 1” nylon cable gland ($7.99 for two.) I used a short piece of heat shrink over the sheathing where it passed through the gland and filled the gaps with black RTV. The shelf under the bathroom sink has to be removed for access to the inside cable penetrations. From there the cable can be simply pushed under the floor to the rear dinette seat where the Victron was mounted. The Victron has some great safety features that will automatically reduce, or shutdown, the output if it gets too hot or the input voltage drops too low. It’s important to take this into consideration because it would likely happen while driving, and you wouldn’t know it without constant monitoring. Voltage drop especially comes into play with the new smart alternators that lower voltage output to save energy. The Victron’s default voltage settings account for this. However, due to the longer run of cable needed with travel trailer installations, the cable resistance can cause enough voltage drop where it can go below the default settings and cause the Victron to derate it’s output. I calculated the voltage drop for different wire gauges at 35 amps (nominal input current) and a cable distance of 53’ x 2. The results don’t include the connector and termination losses: 1.46 volt drop for #6 AWG 0.92 volt drop for #4 AWG 0.58 volt drop for #2 AWG Per Victron’s instructions, a 0.6 voltage drop can cause a “Voltage Lockout” with the default settings. There are many factors that can affect this, and fortunately the Victron defaults can be adjusted. To account for my voltage drop, I decreased the “Start Voltage” from 14 to 13 volts, and the “Shutdown Voltage” from 13.1 to 12.8 volts. These setting were recommended by “Offgrid Power Solutions,” on a You Tube video called “Victron Orion-Tr Smart DC-DC Charger settings.” Cooling is also an important consideration for the Victron because they create a lot of heat, and they derate charging current 3% for every degree above 1040 F. That’s almost 50% performance loss at only 1200. Maximum operating temperature is 1310, where I believe it shuts down completely. This is why I installed cooling fans (but also for the fun of it.) Amazon’s ”Sound Original” low profile blower fans (two for $9.99) were the right size, they had bearings, brushless motors, and a good mounting configuration for this application. The Victron was mounted on 1/4” standoffs to keep its cooling fins off the mounting surface, and it also helps the fans to distribute air more evenly. I used a Normally Open, 1040, 5 amp, thermostat switch to control the fans (Amazon Uxcell KSD9700 (2 for $5.49). The fans get power from the input terminals on the Victron so they can only come on if the truck is connected, and the temperature is over 1040. The thermostat switch resets at 860. The Victron was mounted on a painted plywood board that was attached to the forward battery compartment wall. It’s an easy to reach, out of the way location. I used 4 rubber well nuts that stay in place by themselves, but regular nuts and bolts could be used. The sheathed #4 cable was terminated to the Victron’s input compression terminals, with the fans power leads. I struggled at first with the Victron’s compression terminations, the wire wouldn’t fit, and I couldn’t find #4 square ferrels. So I was pretty pleased to discover that Anderson pins can be filed down to fit perfectly. Just be sure to cover the exposed barrels with heat shrink. The negative output of the Victron went to the main chassis ground post under the rear dinette seat where there is a 2/0 cable going directly to the battery negative. The positive output was connected to the line side of a Blue Seas 60 amp fuse block, from there it went to the line side of the existing inverter’s DC circuit breaker, which is jumpered to the battery positive with a 2/0 cable. With the TV at idle and the lithium batteries around 60%, the Victron output was 35.8 amps as measured by a clamp-on amp meter. The TV input was 42.5 amps. This calculated to 84% efficiency, which is close to Victron’s 87% claim, which I assume is under perfect conditions. I really liked the looks of the sheathed cable and Trailer Vision plug and receptacle,. The hinged receptacle cover will keep the dirt out when not towing. The plug and receptacle are locked together more securely with the Trailer Vision covers, otherwise the Anderson connectors can be fairly easily pulled apart and they might not stay together on a bumpy road. Cheers, Geoff
- 2 replies
-
- 12
-
-
-
 Our 2022 Oliver is our 4th trailer: 1 travel trailer and 2 fifth wheels prior. Our main goal in moving to a molded fiberglass trailer was to reduce potential roof leaks and the damage they can cause. Ease of towing was a secondary reason. When it comes to the molded fiberglass trailers, Oliver has no equal, as you'll find when you see one in person. (Note that Olivers are heavier than their molded fiberglass competitors, requiring a more substantial tow vehicle.) What we've found to be the Oliver's strengths are: construction materials, size/maneuverability/ease of towing, the lithium/solar package (love this), and sound proofing (the double hulls and dual pane windows can really block outside noise at night). Service has also been better than most RV manufacturers. Weaknesses have been various errors made during its construction and the inherent limitations of its size (limited storage, smaller tanks, etc.), but we understood that we were downsizing. To be 100% honest, our Oliver has not been as trouble-free as we had hoped, perhaps because it was a COVID-era unit. I've detailed our problems in this forum so I won't repeat them now. Fortunately, Oliver service has largely lived up to their reputation in addressing our issues quickly and we're starting to enjoy our trailer more now. Also, to be honest, we've heard far worse from many people who bought non-Oliver RVs in the same time period, so I suppose it was still a net-positive for us. There's only one other manufacturer I would consider today, and they're brand-new, so it remains to be seen if their reality can match their promise. How do you plan to transport your sea kayaks while towing the trailer? Rooftop on the truck?
 -

Inexpensive Helpful Modifications
jd1923 replied to Wandering Sagebrush's topic in Ollie Modifications
I'm with @Mike and Carol for under $20 each, never liked parts painted over! Spend half that amount on paint anyway. And thanks Mike, I just added these to my wish list! -
Oh, what a wondrous noise that Beech 18 makes! When I was a kid, Grimes Manufacturing in Urbana, Ohio, manufactured lighting for commercial and military aircraft. They had a 1953 Beech C-45H transport (the military version of the Beech 18) that they purchased in 1963 for aerial testing of their lighting systems as the Grimes Flying Lab. It would have strobes and lights all over it, looking like a UFO. According to their web page, it currently uses 75 lights. We'd see and hear it flying at county fairs, holiday events, etc. It still flies around Ohio's Indian Lake every Labor Day during the lake's "Ring of Lights" flare lighting event, with thousands of road flares around it. I love hearing it fly! https://n8640e.wixsite.com/grimesflyinglab
-
Happy Thanksgiving to ALL! Chris is making her usual magic in the kitchen today. We should get a fire going in the fireplace! Listening now to classical music. We're going to take some time this long weekend to plan some upcoming camping trips (for Dec, Feb and April). All I've been doing is working on our Oliver, and more so on the truck. We need to get out again! Mid December we will travel to some warmer parts of SW AZ. Starting with a few nights at Burro Creek Campground, we will swing through Quartzite for a night or two, on way to Yuma (I need to work in a dental visit in Los Algodones). You can dry-camp at the Quechan Casino (Indian Territory right there on the boarder). Interested in the Kofa National Wildlife Refuge, perhaps there is camping there, or other BLM boondocking between Yuma and Quartzite. Will hit Wickenburg on the way back, eat lunch at Cowboy Cookin' and boondock again at Vulture Mountain. Final stop at Lake Pleasant Regional Park, located in the NW Phoenix Valley. There is always day-of dry-camping available, empty your tanks and fill with decent fresh water. We've been to some of these spots, but never in an Oliver! Now that I wrote it, I believe we have most of our first plan done!
-
 I solved our e-bike dilemma with a folding model and carry bag, easily transported in the TV under cap and staged on a front-mounted bike rack, as needed, when at camp. Bagged e-bikes shown behind the DuroMax generator. Front-mounted bike rack in use. Secure storage. Additional security and protection at night and/or inclement weather. Staged for day use. Easy transport to trails at distance from camp. Bike rack in travel mode.
-

Centramatic wheel balancing rings
topgun2 replied to rich.dev's topic in Mechanical & Technical Tips
Actually I also prefer dark and I don't think that this issue you are talking about has much to do with "preference". Indeed, one could argue that almost anything would help prevent "popped rivets" versus having nothing to help balance the wheels. But, that is not what I'm saying. Also, one could argue that "They have also been around in the transport truck community for years with very good results." Perhaps this is also true - but - if the transport truck community had such great results, I would suspect that virtually every major transport truck company would be using these things and I simply don't see that. But, then again, I don't hang around truck stops anymore than necessary. I'll add here that there must be a reason that the major vehicle manufacturers in the world don't seem to be using this tech. Too expensive? Doesn't work well? Doesn't work any better than "old school" methods? How about racing vehicles? Simply put - I don't know but I'm still going to wait to see and I've already been waiting for at least twenty years. Bill -
On my 2023 F-150 there are no "cross hairs" but there are guidance lines and the ability to "zoom" in once you get close enough to the hitch. The biggest "problem" is that with the bulldog hitch painted black (from the factory) it can be difficult to see. This is particularly so if the pavement is asphalt and/or the lightening is not that great. This is the reason that MB (above) painted a white stripe in his bulldog. I chose to simply paint the entire front end of the hitch. However, my first attempt painting it was with fluoresrsent orange paint. This didn't work too well in that the paint faded in the sun. Therefore, I switched to "hammered silver" and the results are great as it is easy to see in virtually all lighting conditions. Bill
-
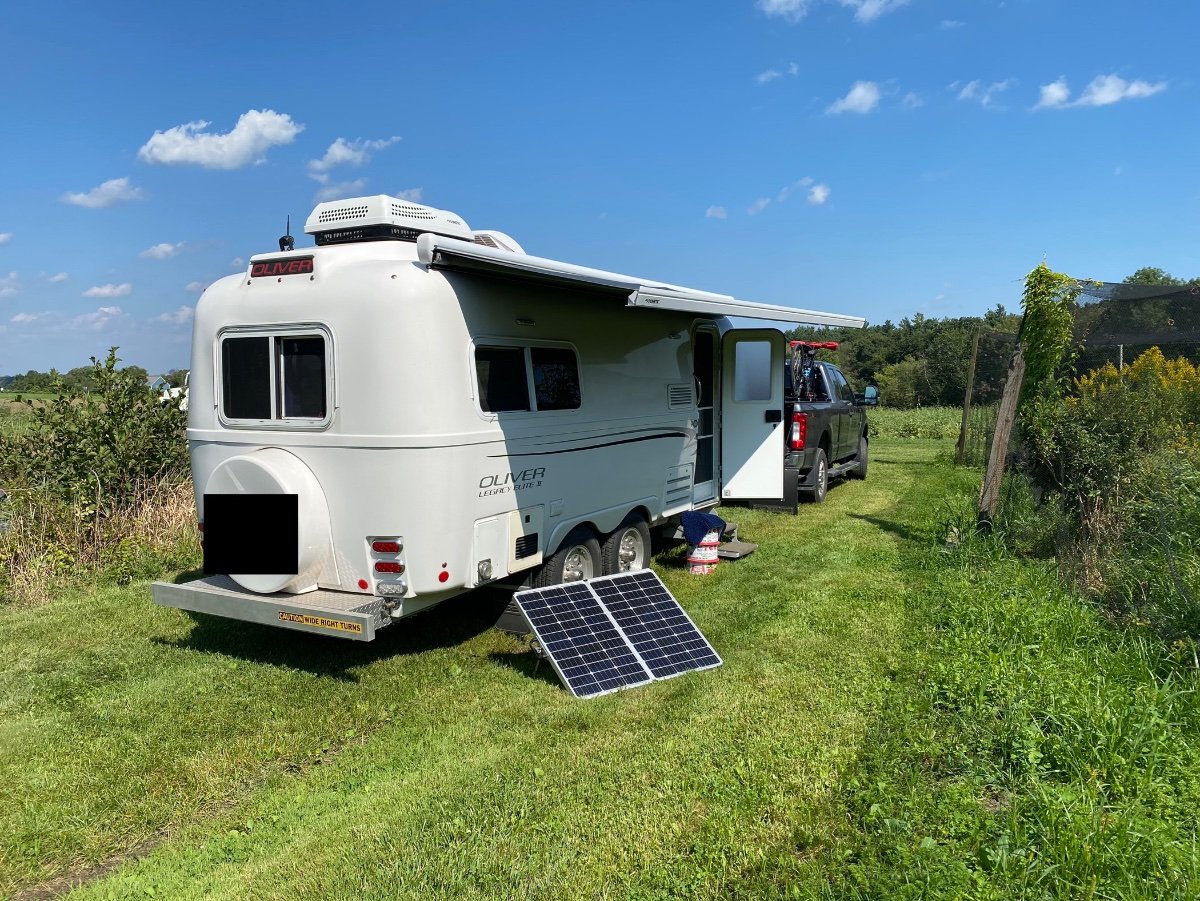
Art and I are both using the same solar panel and have connected them up this past summer using the Z-amp 10 AWG Solar Panel Connection as shown in his picture. Down the road when I get past all the Priority A and B mods, I'll likely remove the Solar Charge Controller and make it portable as John D. did several years ago (See his post for details.) Short version is he sits it on top of his street side tire and runs a short cord into the batteries. But with just using the Solar Suitcase as stock, it's not a high priority. However, if you want to extend the (10') stock cable, then the JD upgrade mod would be more beneficial (B Level Mod). My only regret is that I purchased the single 200-watt solar suitcase vs. two each 100-watt solar suitcases. For my purposes, the smaller ones would transport better in my short bed TV. They would also be easier to move around and get out of the TV bed. This may require some smarts for connecting two of them up to a single charge controller. But likely Renogy already has this covered. GJ
-
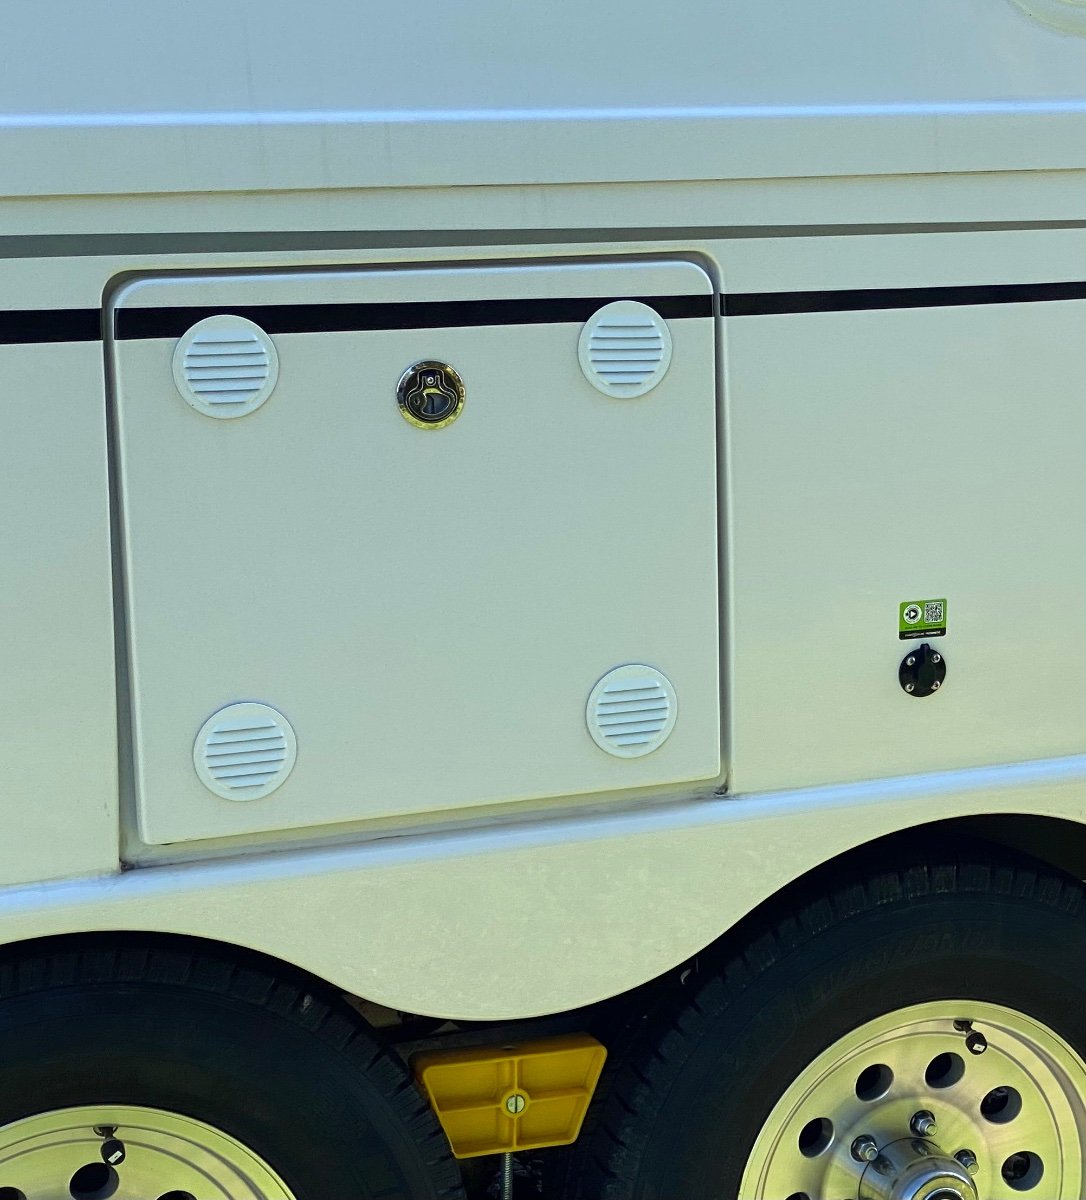
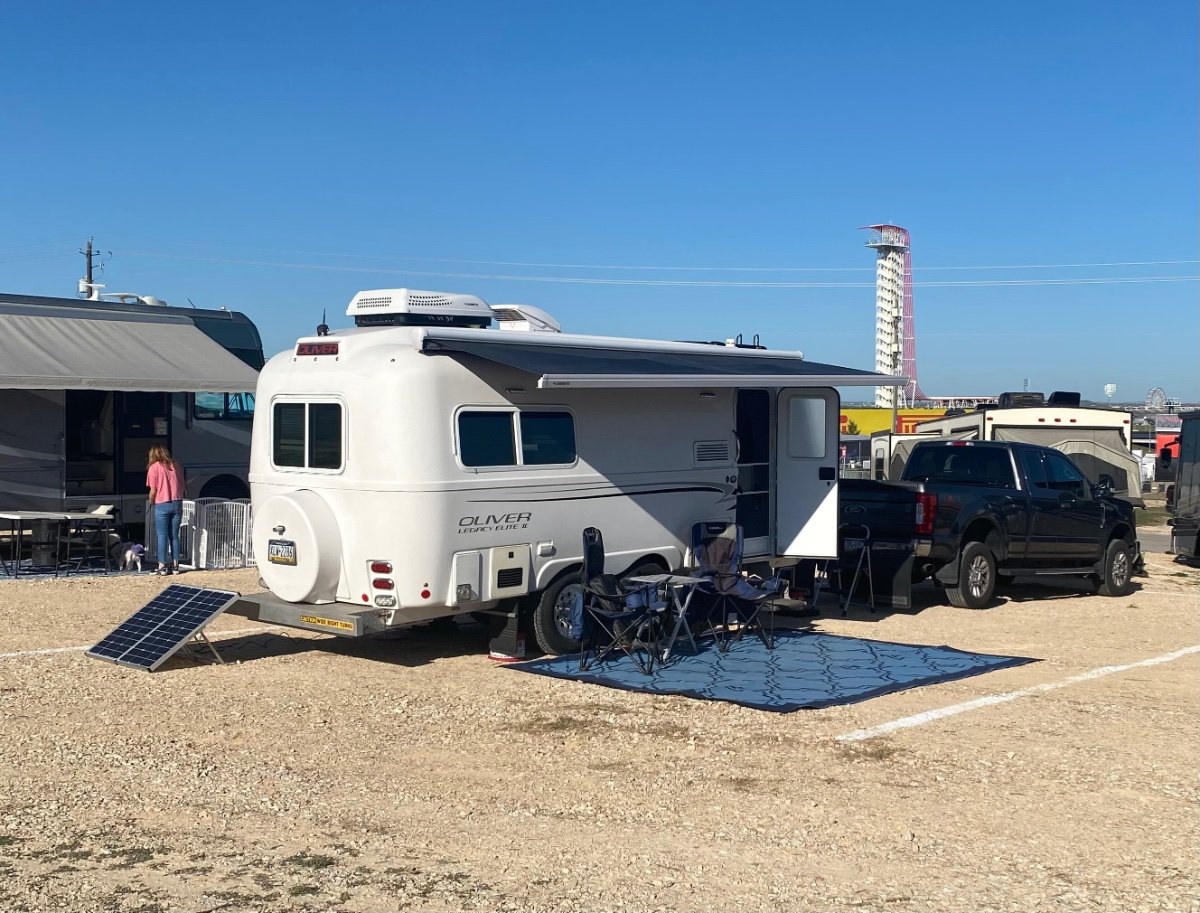
I added a Zamp port to our Oliver, on the hull near the battery compartment, since it was an easy location to access the correct locations for the positive and negative connections to the trailer 12vDC system, and used a portable Zamp 140 watt panel with an integrated charge controller. It worked very well on trips for our stays at Harvest Host locations, and our recent stay at the Circuit of the Americas track in Austin TX (plenty of sunshine!) for the Formula 1 race, when no power hookup was available. The 140 watt panel was about the biggest that I would want to carry. They are “portable” and they do fold up into a nice suitcase style carrying case but they can still be heavy and bulky to transport.
-
Greenbelt is nice, and walkable to the train station. We've also stayed at a regional park, (pohick bay) and used Franconia station, but that was many years ago. Used to be a "trolley/jitney" from the spr8ngfield mall lot. Lots of parking there. If the trolley doesn't run anymore, uber could work. It was quite lovely there. Deer around and in the campsite most nights. In the country, but a few miles to the metro, probably a 40 minute metro ride to the national mall. Ride discounted for off peak hours. If you're thinking about pohick, I'd call and ask about parking and transport. Greenbelt is just a walk down the road, and across the highway, to the train station, then transfer to the metro. I liked pohick much better than Greenbelt, camping wise, but convenience is in Greenbelt favor. We haven't camped in either for at least ten years. Times change.
-
Hey, @Badger: Like mentioned above - there's really no option for a permanent mounting location other than the cargo basket or perhaps a covered aluminum lockable cargo basket. @Patriot has a well thought out mounting arrangement for his 3300W Honda, FYI. However, if you could give us an idea of your OTT's general configuration such as: Solar output (Watts)?, Inverter output (Watts)?, Battery bank storage capacity (AmpHrs), GENSET output (Watts), etc., we could help you with ideas of how to transport, use, and secure your GENSET. For example, when boondocking - our GENSET will stay locked in the TV and will likely not see the light of day unless there's many days of cloudy, dark, nasty WX where the solar modules can't keep up with replenishing the battery bank and they'll need "topping-off" using the generator. Everyone's OTTs are configured slightly differently and owners have their particular "style" of camping - this combination tends to drive different uses of their GENSET, if even needed at all. At a high level, there's no "right way" or "wrong way" of doing what you're asking - but we need more details to give you our suggestions. Glad you've reached out to the forums - there's a ton of expertise here and owners willing to share their ideas... Cheers!
-
It's a minor issue, but sitting at the dinette or lying in bed we found the touch lights can be glaringly bright. I discovered that a 4" PVC sewer-pipe connector has a flange that is the ideal diameter for slipping over the touch light to create a light shade. To create a shade I cut off the flange from a connector using the band saw. This is the cut end that slips over the light... This is the finished end that becomes the bottom of the shade: The shade slips over the light and stays in place with a friction fit, but a bit of 3M double stick tape provides insurance: Dinette touch light, without shade: Dinette light, with shade: Galley lights, with shades: Shade installation does not appear to have any effect on light operation--they still turn on and off by touch. I suppose that the flanges could be cut with a hand saw (hack saw, coping saw?), which would likely require some additional filing and sanding. Also, the shades could be painted white, but for now we've stuck with plain black.
-
Thanks John, and I appreciate the tip on preserving the integrity of the material. Per the link you provided I think I’ll paint the frame with a PVC furniture paint. Like any PVC you buy at the big box store, this has scuffs and stains on it so it’d look better painted anyway and would shield from the sun. Regarding the CAD software, I subscribe to AutoCad LT. I believe it’s around $400 if paid annually and there’s no contract. If you let it expire you retain your account and can renew at any time. You also have the option to pay monthly at a slightly higher cost if you only want to use it occasionally. I don’t know if it’s Mac compatible. There are other 2D and 3D software products out there that are cheaper but being an old dog I didn’t want to have to learn a new system. It works for my needs. Oh and you can transpose the image colors when printing.
-
The blocks on my cover never came off, but after seeing a few owners have issues, I secured all three blocks with white pre-painted aluminum trim screws (available at any hardware store like Lowe’s, etc., but I had some in my garage parts stash from a previous house project). Drilled through from the outer surface of the cover and into the aluminum block and then threaded in the screw. With the white painted head on the screw, it’s barely noticeable on the white fiberglass.


.jpeg.217b76468693ffc6e4451c8627dc100a.jpeg)