Search the Community
Showing results for tags 'mods'.
Found 4 results
-
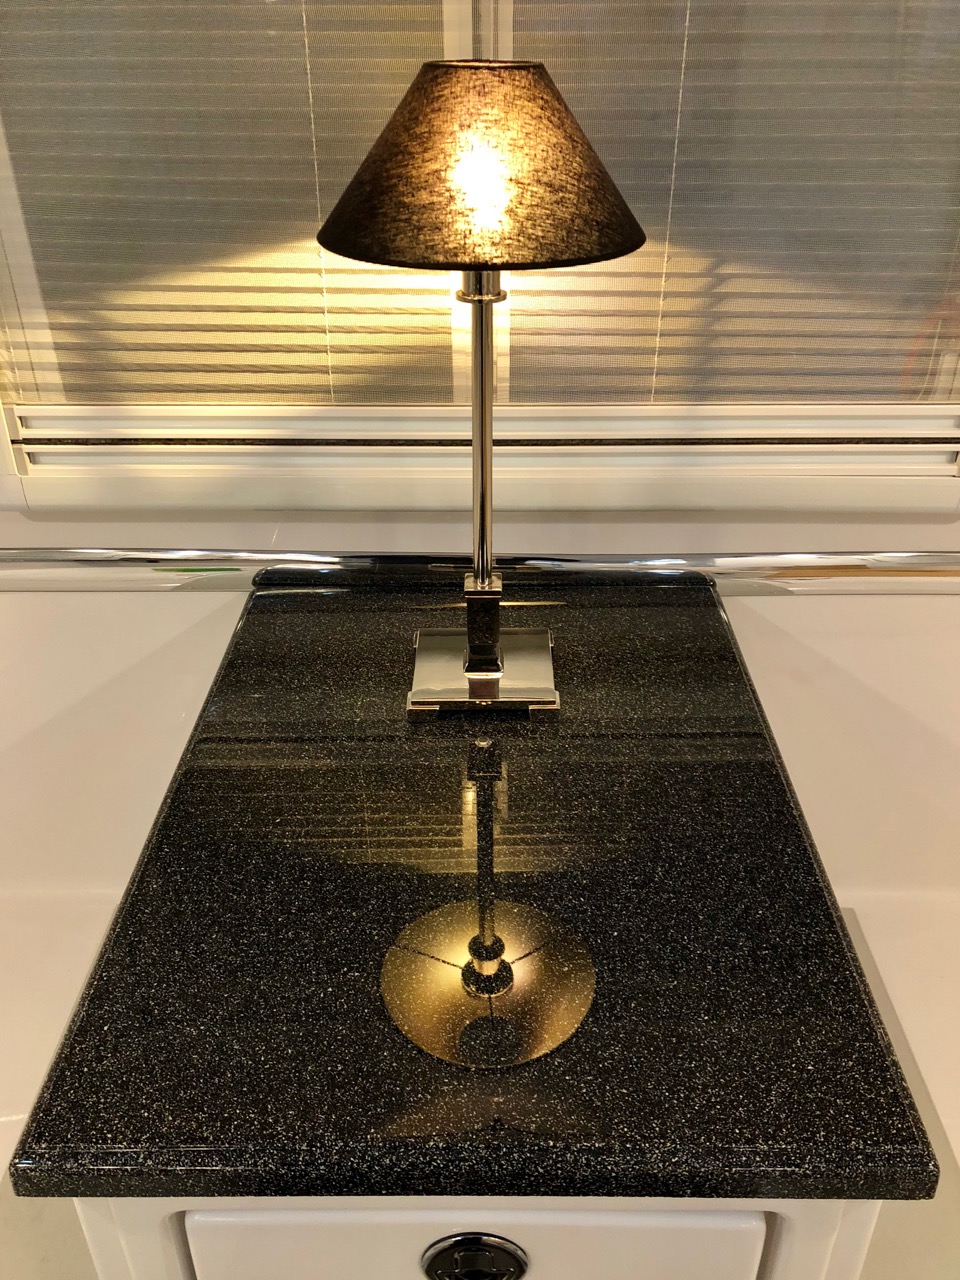
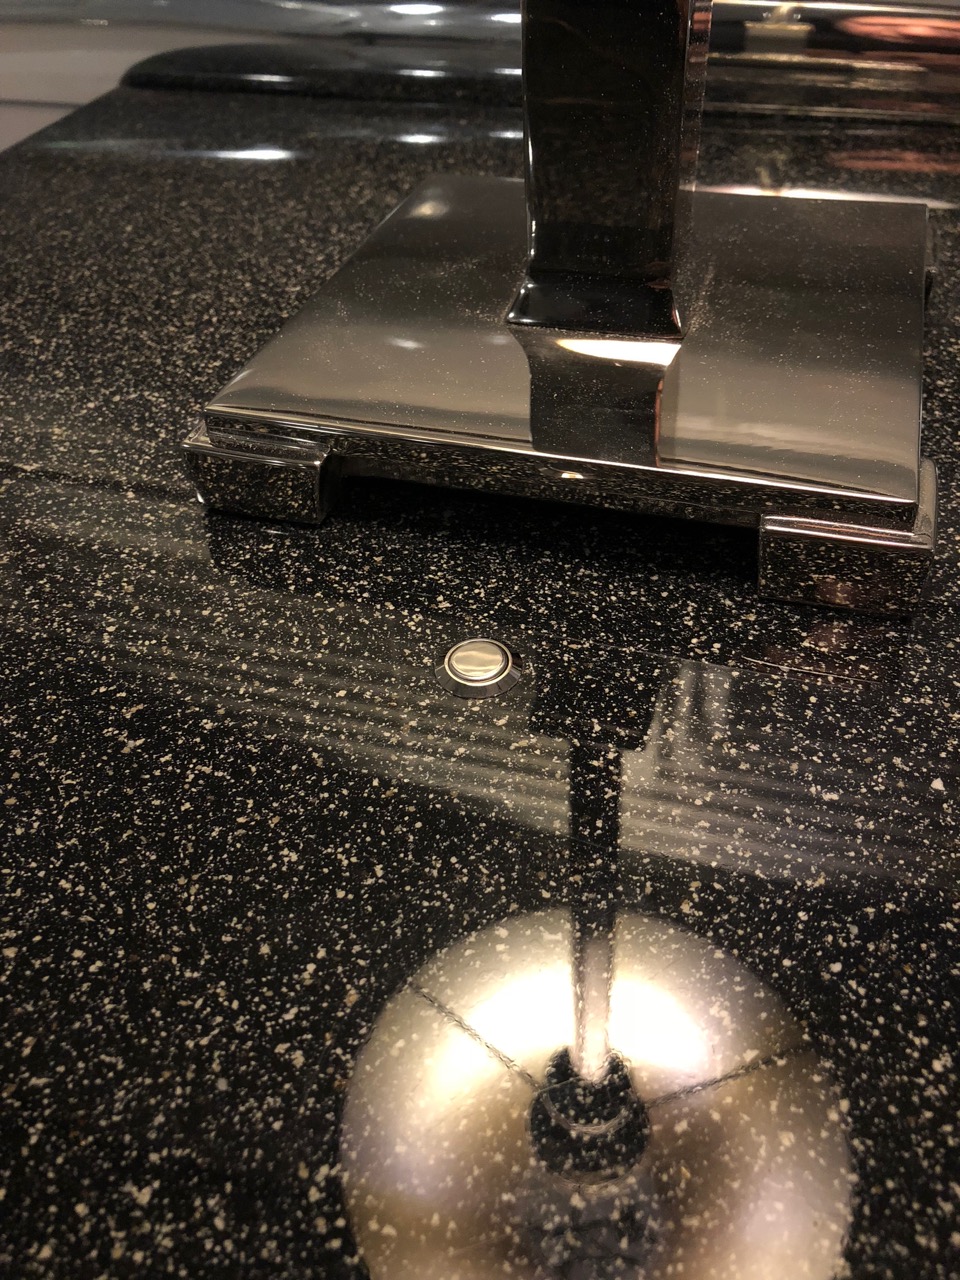
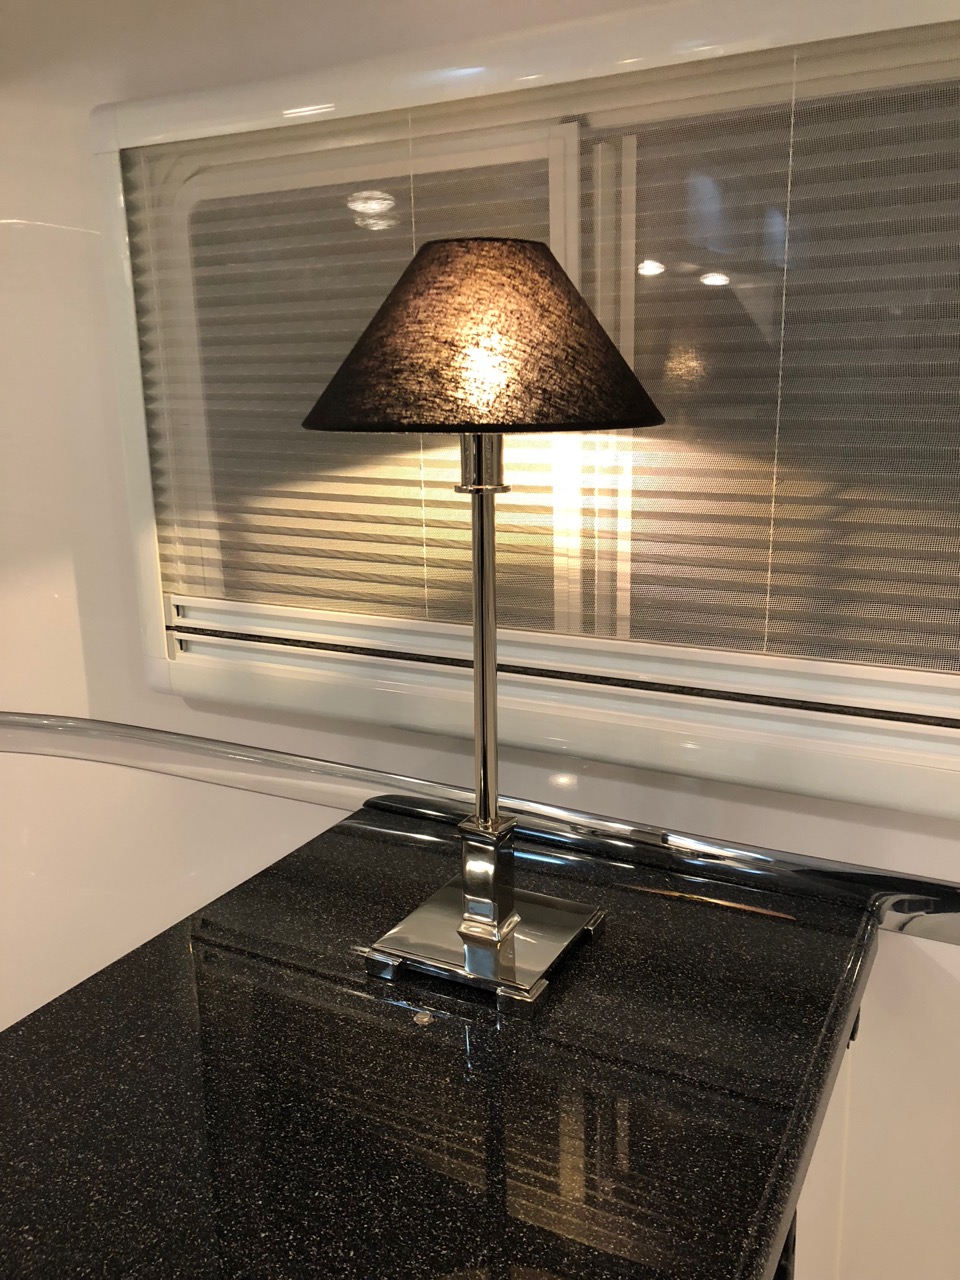
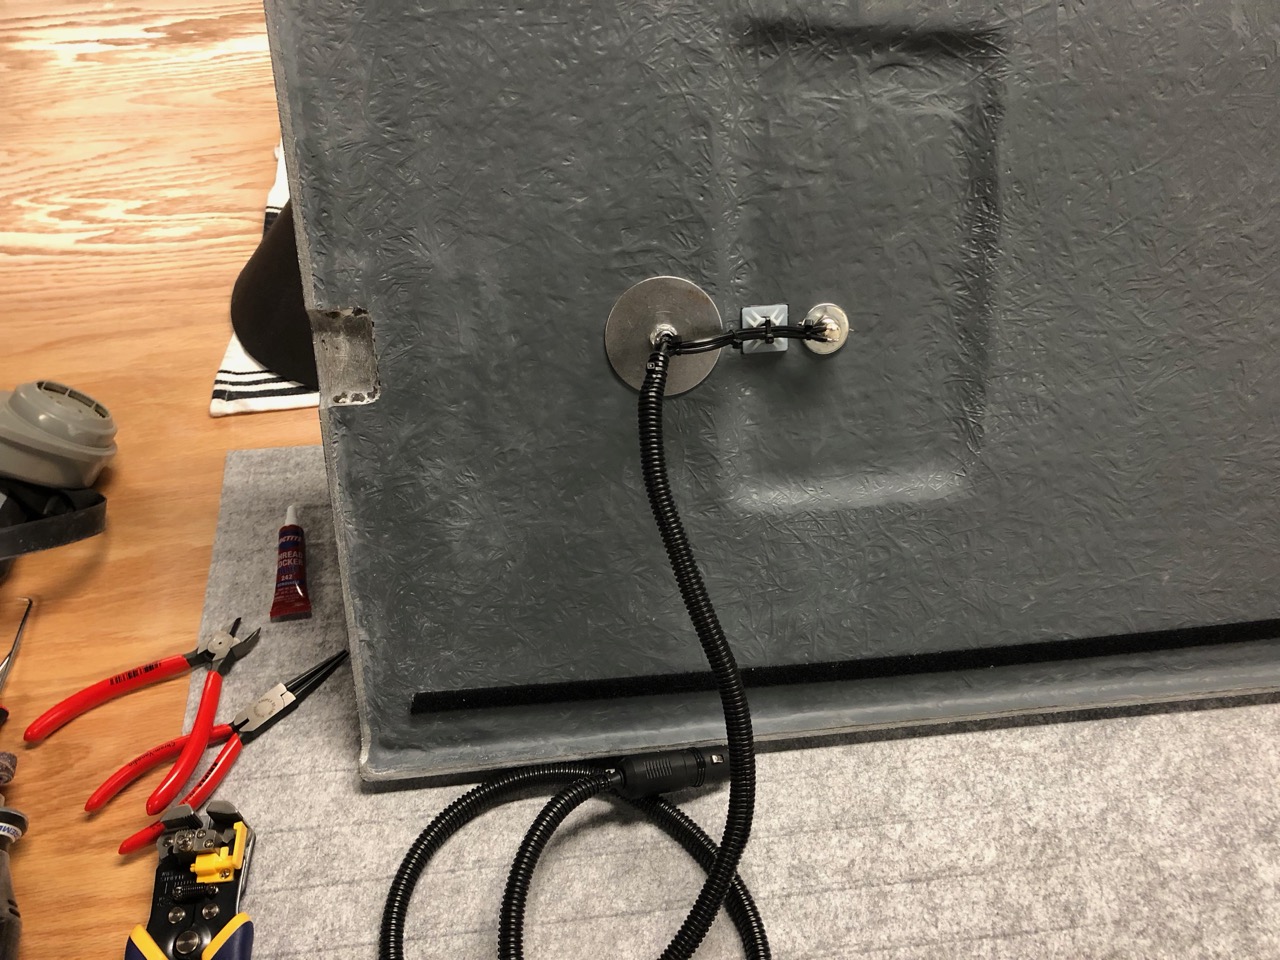
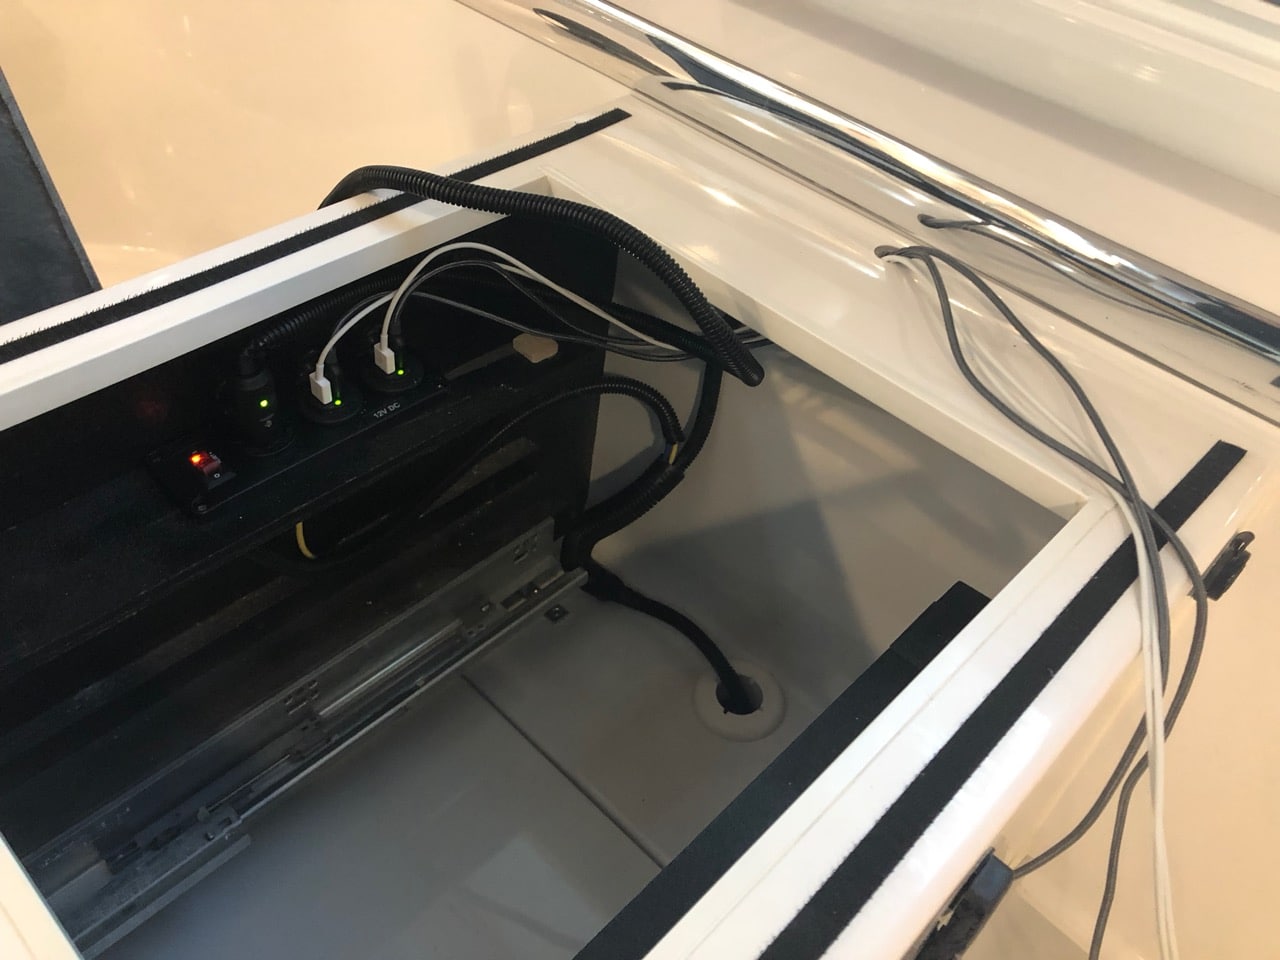
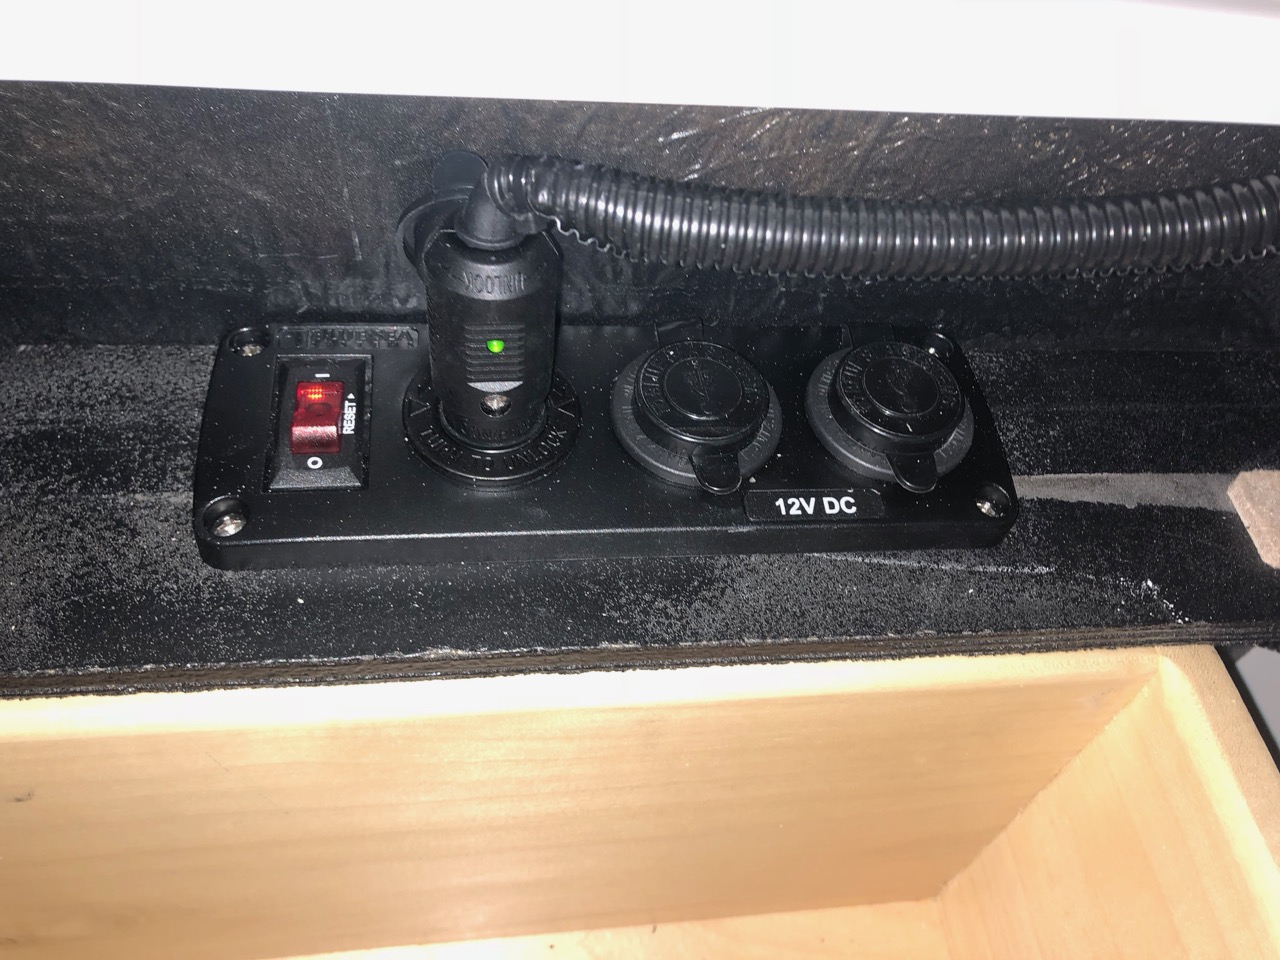
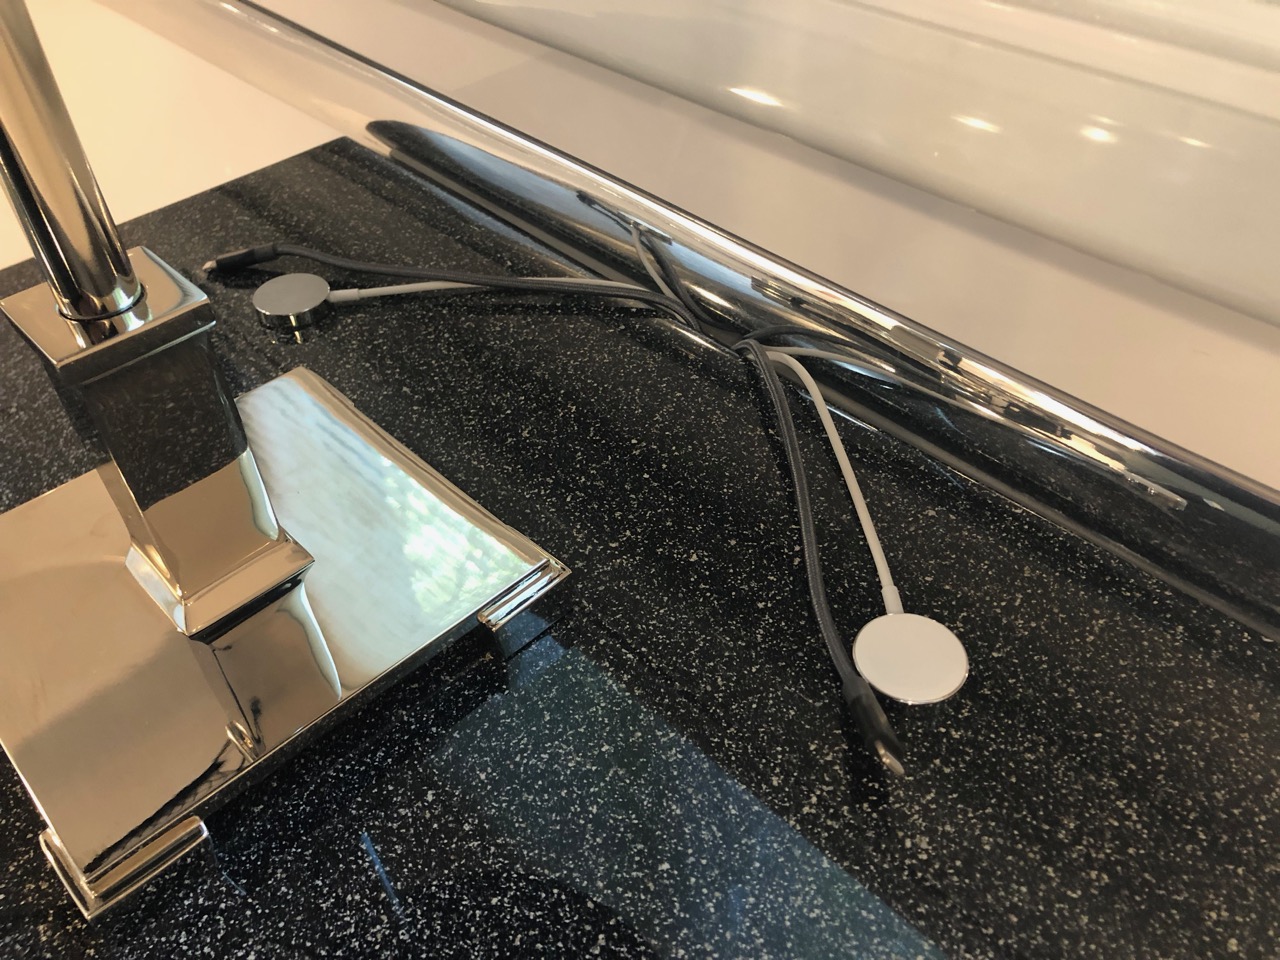
One thing we noticed the first few nights sleeping in the Ollie was that there's not a convenient light or light switch that can be reached from the bed. If you're on the curb side, you can sit up and flip a switch if you remember which one to flip but otherwise you have to get out of bed to turn on or off the lights. I loved the cool table lamp that @scubarx installed in the Outlaw Oliver, so I added a lamp to the list of to do's. My list of requirements for the lamp were: that it be 12 volt so that I didn't need to be plugged in or have the inverter on to use it; that it be securely mounted but easily removed; that all the wiring should be hidden and everything look completely built in; that the bulb have a nice warm temperature (I'm a believer in having only low temp lighting on for at least an hour before bed); that it have a switch that's easily accessible while lying in bed; and that the lamp itself should be high quality, able to withstand bumps and vibrations, and last the life of the trailer. So, with all that in mind, I first picked out the lamp. We went with the Petite Candlestick Lamp from Restoration Hardware. I would have preferred something a little bit more modern, but this one was the right size and has an Art Deco feel to it that I think goes fine with everything else we've done and with the trailer itself. It's way too tall as it comes, but dismantling it and cutting it down to a reasonable height for the trailer is pretty straightforward. I've gotten several lamps from Restoration Hardware, and they've all been super high quality and this one is no exception. They have a yearly or twice yearly half-off sale on lighting, so if you get one from them, be patient and wait because they're arguably overpriced at retail. Secondly, I found these bulbs on Amazon, which you can get in warm white or daylight, whichever you prefer. That's really all you need to convert a lamp to 12 volt these days, apart from swapping out the plug or direct wiring it to the trailer. I went with a lighter plug since I wanted to be able to remove the lamp. You can get those anywhere, but I highly recommend a locking marine style plug because the quality difference is substantial. Third, you'll need a socket for the plug if you go that route. I was fortunate in that I had asked Oliver to provide us with USB ports on the nightstand, so I already had 12 volt power run. If you don't, then you'll need to tap into the wiring behind the breaker panel on the right side of the attic and then run your wiring down to the basement and then up through the base of the nightstand. Shouldn't be too difficult but I can't say for sure since I didn't have to go that route. But I did need the socket, and while I was at it I wanted to add some USB ports inside the nightstand as well. (That's actually what I'd asked for, but Oliver placed the outlets on the side of the nightstand instead. Easily accessible, but otherwise you've got to deal with cords getting in the way of bedding and a little green light shining in your eyes.) So I ordered a combination outlet panel by Blue Sea off Amazon. It has a pair of dual USB sockets and a lighter outlet, and also has a switch and circuit breaker inside. It's a really nice panel. Finally, I decided that a little chrome push button mounted to the table top in front of the lamp would make for a great switch. This one was perfect. So, how to mount the lamp to the table. Steve and Tali had the genius idea of glueing magnets to the base of their lamp and to the underside of the table top. I experimented with that but just couldn't get it to work. Maybe the table tops are different or thicker, but I just got a really weak hold even with some super strong magnets. So instead, I decided to bolt through. Since I had the lamp apart anyway, I just swapped out the threaded rod holding it together with one that was a few inches longer than what I needed. (The way the original rod was made it couldn't be cut down.) When I put the lamp back together, I left the extra rod sitting out the base at the bottom. Then carefully drilled a ½" hole where I wanted the lamp, put the rod through the hole and screwed it in. I got the biggest washer I could find to distribute the load on the tabletop. Then I drilled another ½" hole just in front of the lamp and mounted the switch. The switch is just a tad mushy for my taste, but it's acceptable and I like the way it kind of disappears in all the reflections on the top. Underneath, wiring it up was a simple task and the only tricky part was that I had to solder the connections to the switch, and I've never developed good soldering skills. But it works. I added a few zip tie mounts with VHB tape to hold the wiring in place out of the way and keep it from vibrating too much. The switch connection is a bit exposed, so I think I might paint some plasti dip on the leads. Finally, I added the lighter plug, leaving plenty of slack in the cord, and covered the cord with wire wrap to protect it. In the nightstand, I removed one of the little shelves that hold the tray in place and mounted the outlet panel there. The panel is a bit too wide, but it's a good spot for it, so I cut a little notch on the bottom of the tray for it to fit back. I just unclipped the wiring from one of the USB outlets Oliver had installed and clipped it to the new panel. I'll probably run a jumper back to that outlet even though I doubt we'll ever use it now. I don't like the angle of the wire coming out of the plug, so I'll need to add another zip tie mount or something there, but I was down to the two I used on the top so I'll need to get some more. I then cut a scallop out of the back of the tray to run the wire, and any other cords we might have for charging stuff in the tray. You'll also notice in the pics that I drilled a hole in the back of the nightstand for USB cords to run, and ground out a little notch in the bottom of the top for the cords. I think I need to grind out a notch along the back as well, since right now I have to pull the top out a bit for the cords. And that's it. Pics...

- 8 replies
-
- 8
-

-
- lighting
- table lamp
- (and 4 more)
-
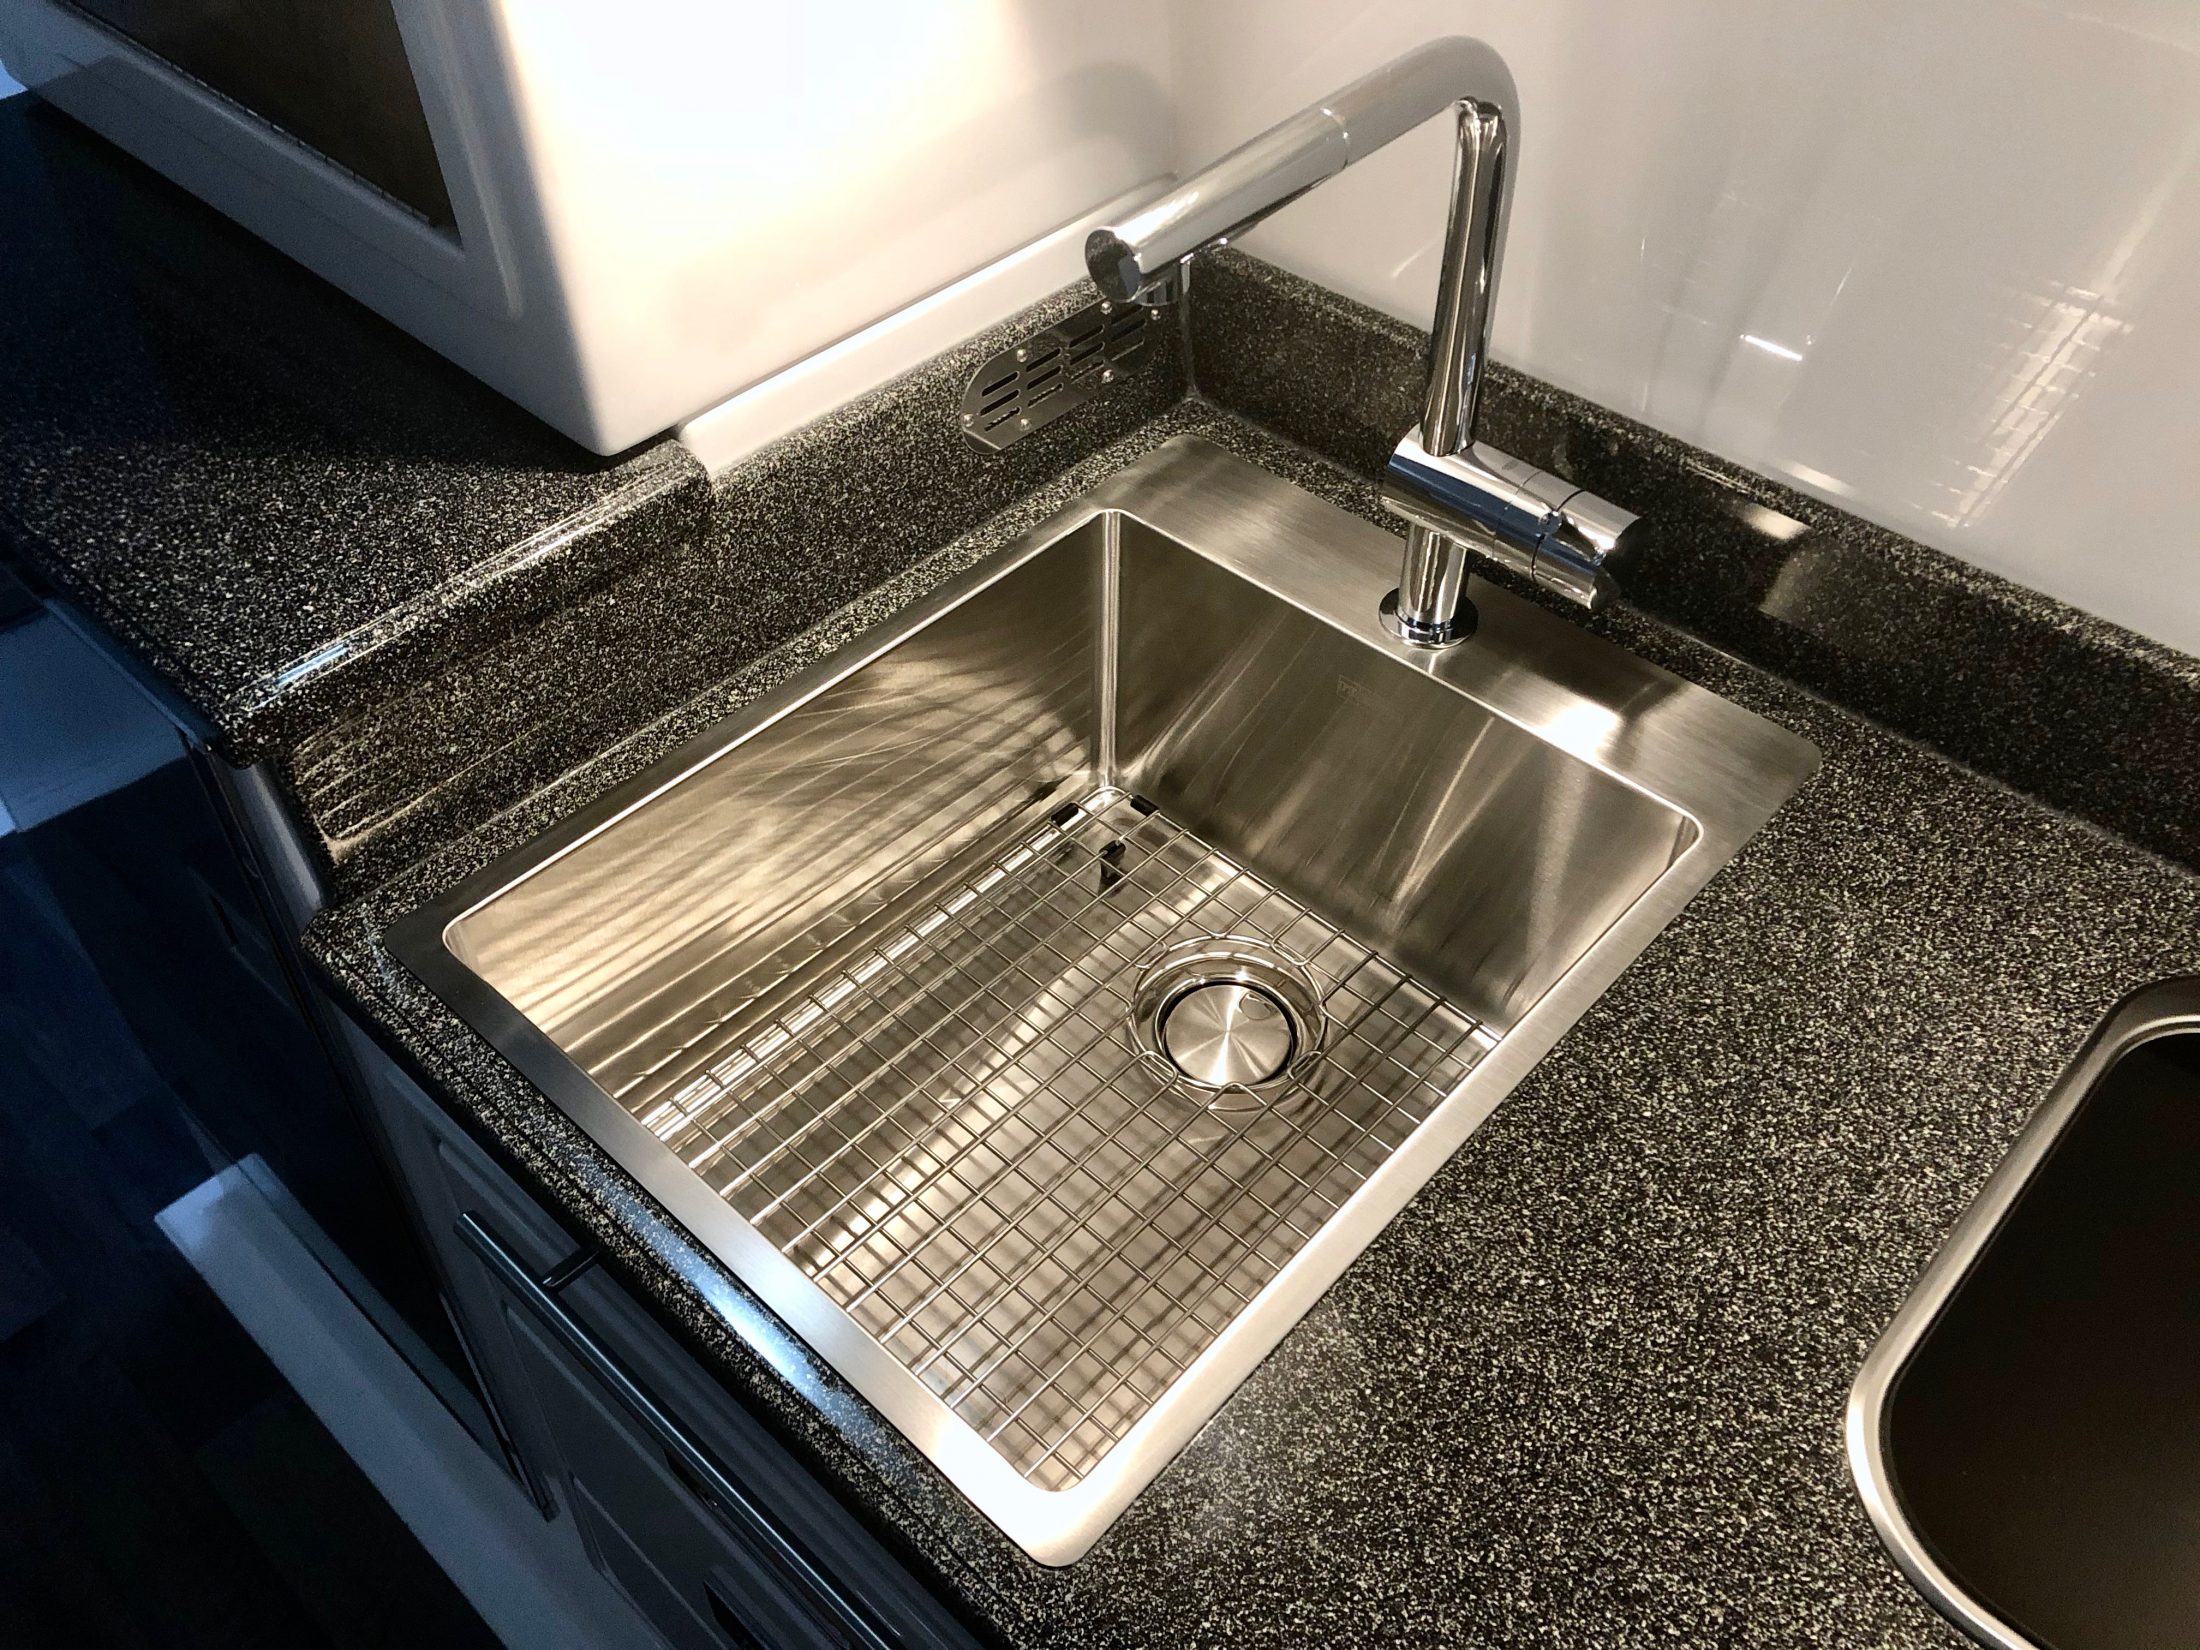
This, I like - I never cared much for Oliver's sink and faucet choices and I'd actually planned to supply them a sink and faucet to get installed on the line. Unfortunately the one I wanted wouldn't work and I was having trouble getting the proper dimensions from Oliver, so I just let it go and figured I'd replace it later. Well, that was a good idea until I realized that the cutout Oliver made for the sink was way too big for any of the bar sized sinks that I could find. And all of the full sized kitchen sinks were too big to fit. But finally I stumbled across this oversized bar sink from Franke. It's the 17" Franke Vector. Overall, it's the same width as the existing sink, but the lip is narrower, so the bowl itself is a bit wider. Mainly the sink is much longer and deeper. In overall volume, it's over twice as large as the original sink, but takes up no more counter space. Can't beat that. And because it's farther forward and 3" deeper, it doesn't splash all over the place like the original. In fact, I can even turn the faucet up all the way without it splashing over the front of the sink, which is novel. I like the Franke sinks in that they have the straight sides and look of a modern zero radius sink, but they do add a slight radius to the corners so that you can actually keep them clean. Installation wasn't too hard. I'd rate it 7/10. The difficulty was that I had to modify the base cabinet for it to fit. There's a wood brace running across the top front that is screwed to the fiberglass beneath the drawer trim, which had to be cut out, and also a portion of the left side of the cabinet. That sounds like a lot of structural support to remove, but the cabinets are mainly tied in at the bottom and I ran it past Jason beforehand to make sure I wasn't looking at it wrong. I have to say that the cabinets are stoutly built, and I'm not at all worried about it. The second problem I ran into was that my countertop wasn't perfectly flat. It bowed down in the middle slightly which wasn't apparent until I installed the sink. But I was able to temporarily shim the counter against the top of the cabinet while the silicone seal dried and then I glued PVC blocks around the perimeter of the sink to both hold it in place and to level the counter. The Franke sinks have an odd installation clip that wasn't designed with hollow core fiberglass in mind, so the blocks were necessary anyway. It's not going anywhere now. Of course I lost use of the flip out drawer but I hated that thing anyway. I glued a few ½" blocks to the front of the sink and then fixed the drawer front to the blocks with heavy duty velcro, just in case I ever need to remove it for some reason. The sink depth worked out perfectly with the existing cutout on the back of the middle drawer to clear the drain. I thought I was going to have to get a Hepvo trap to make it all clear but Oliver actually places the trap behind the cabinet, so no problem. I did have to get the narrowest profile elbow I could find to attach to the drain basket, so I had to go with cheap plastic rather than PVC, but such is life. At the end of the day, however, I decided to use a different drain basket that was a bit deeper, so I had to make the drawer cutout about a half inch deeper after all. The faucet is a Grohe that I found on sale at Home Depot for about half price, so that was a nice find. It has a really nice feel to it and unlike the sink, was a cinch to install. Grohe has a trick installation method that allows you to work from above so that one person can do it without crawling under the counter a hundred times. Oliver's hot and cold lines are convenient to get to and there's an access panel in the back of the cabinet that can be removed if you need more room to work. The only issue I ran into was that the counterweight for the sprayer was getting caught up on everything that's packed in the back of the cabinet. To fix it, I made a tube from some flexible plastic sheeting that I had lying around and just slid that over the sprayer hose. Now the hose slides easily inside the tube and as a benefit, the weight won't bang around inside the cabinet while traveling. So that's about it. I've learned that I don't have the patience or foresight to take progress pictures Like John does, so my description will have to do. But I'm happy to answer any questions.
- 16 replies
-
- 28
-
-

-
 Thanks to the new narrow panel size that Zamp designed to fit Airstreams, I think you could make it work. No TV antenna, of course, like the 480W system. The trick would be to straddle the AC and MaxxFan with the narrow panels. There's just enough width between them and should be just enough length to maintain the Penguin II clearance requirements at the back of the unit. Here's how it might work. The three panels at the front are what Oliver will do for a 480W system - all I did was add the two narrow 80W panels to the rear. Worst case, they'd just need to use a low profile plumbing vent to slide the panels forward enough, or slide the AC back a bit, just to maintain the AC clearances. Add a couple Zamp 200W portable panels, and you've got yourself a 1kW mobile power station.
-
Hello everyone! Wifey and I are considering purchasing a Legacy II Elite and selling our 2012 Casita 17 Spirit Deluxe. We have spoken to Karen in Sales and had a delightful visit with Larry (Mountainborn) while checking out the Oliver when he and his wife were traveling near us. I really like the looks, functionality, solid construction, and quality control of the Oliver. Wifey and I realize that this is a significant investment, too. So, we are doing the research and asking questions. I will read every word of this forum. Are there other "Oiver" Forums? I have regisered with the Oliver Blog to continue our research. Specifically, we are curious about the topics, concerns, mods, things that fall short, cause problems or worry, are a hassle, or things that Oliver owners wish for/could be improved with their Oliver. For example: How well does the refrigerator work at keeping things cold in 100 degree desert-like temperatures? Is the awning sturdy and strong? Towing issues? Ground clearance? Outside storage? Is the Mach 8 noisy? Maintenance issues? Using a generator? Comparision to other trailers (Airstream, Bigfoot, Escape, etc.)?, etc. etc. We are interested in learning about using and enjoying the Oliver in a "real-world" trailering scenario. We have no interest in bashing the excellent Oliver travel trailer, but we do want to hear genuine, honest opinions and ideas. We want to hear about what you don't like or wish you could change about your Oliver . We especially want to hear from Oliver folks that have used their trailer extensively. This is how we learn and this will help us make a much "better-informed" decision. We are not looking for a "deal-breaker" that would stop us from getting an Oliver. By the way, we use Good Sam Roadside Assistance, mostly camp in parks (state, COE, commercial RV) and usually have FHU or at least water and electric. We boondock only occassionaly or when necessary. Thanks everyone and we anticipate hearing your ideas, opinions, comments, and observations.