Search the Community
Showing results for tags 'shades'.
Found 2 results
-
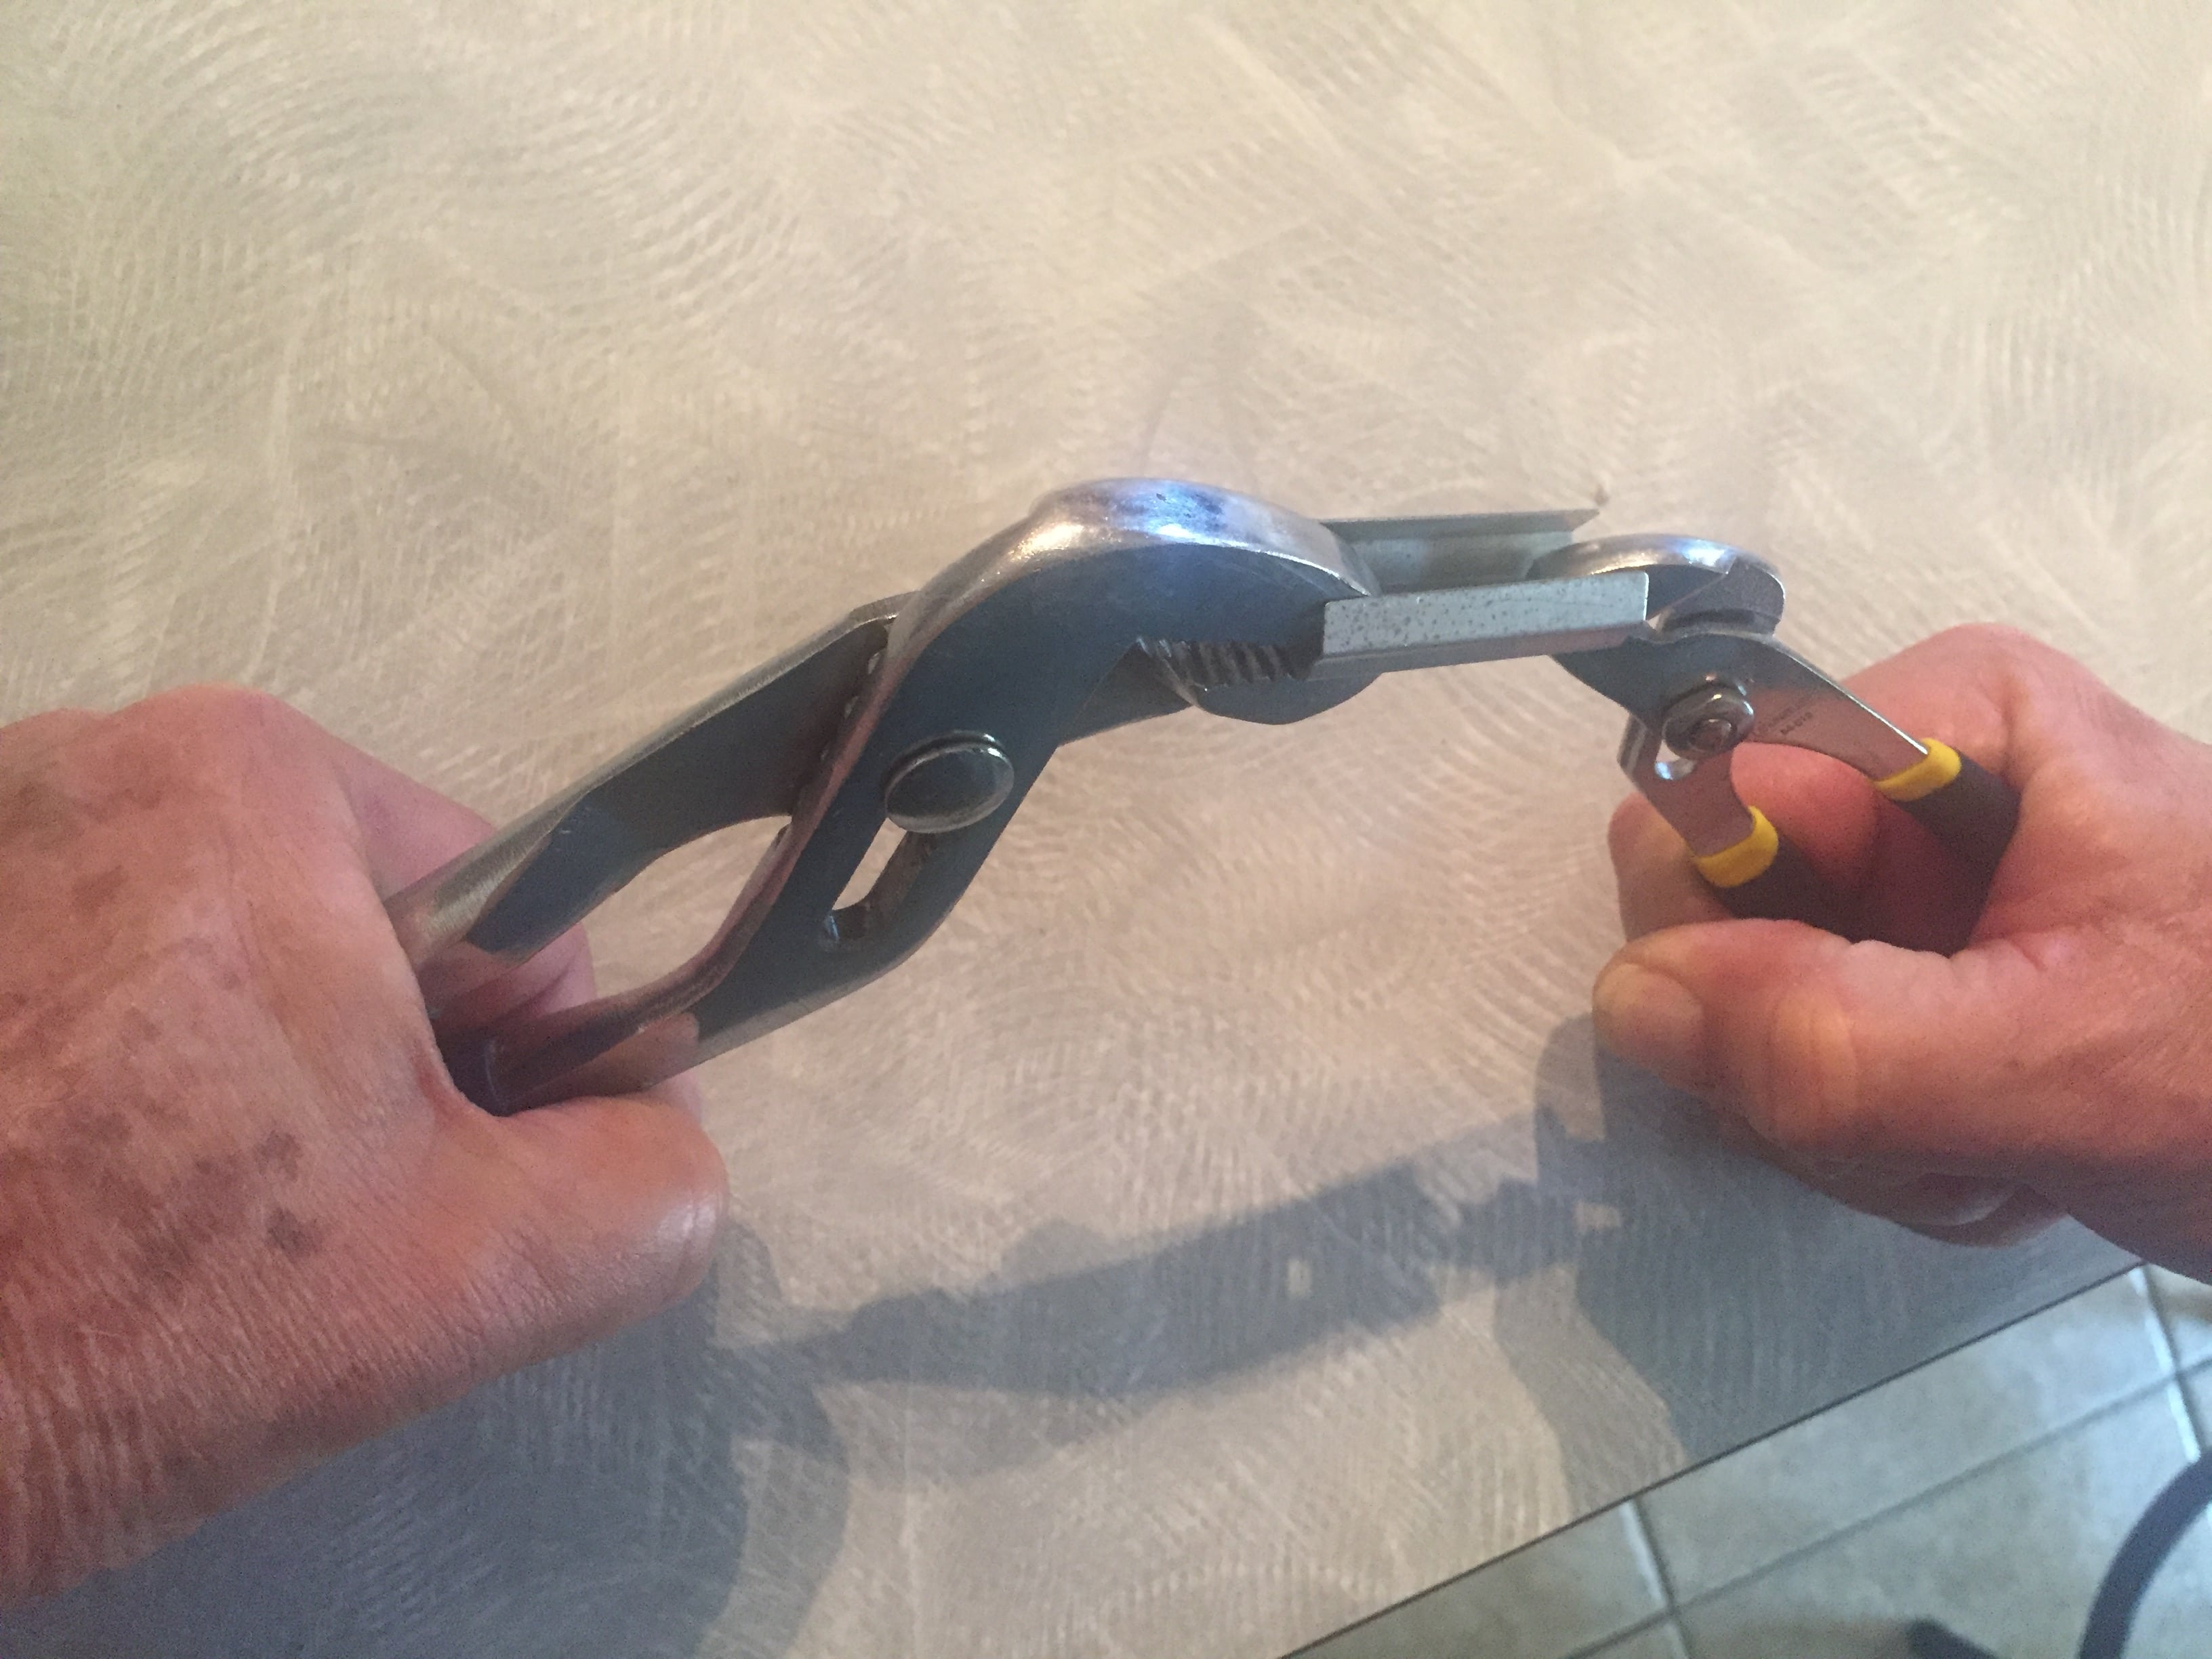
The issues: 1. We wanted to flip the shade frames to allow more privacy when needed. With the “night” shades on the bottom--instead of the top--one can raise them up so that one can still view the outside world without having to consider that someone outside, would get a nice view of one’s midsection as one walks about the cabin. 2. We wanted to increase the “grip” of the shades so that they would better stay in place. Sometimes our blinds would slide down after being pulled in place. Since we figured that the “night” blinds are heavier than the “day” blinds, we thought this extra grip was even more important if we were going to reverse them. 3. We wanted to better secure the shade frames to the interior wall. Our frames have frequently come loose from the clips that are meant to hold them in place, actually falling off a couple of times. We tackled the second issue first. Someone on this forum or one of the Oliver Facebook pages suggested retying the strings to the springs on the top and bottom of the frames to increase the tension. (If you pull the frames off of the clips holding them to the wall, you will see those springs and the strings.) This proved very frustrating. (I think you will agree if you attempt this task; you might also appreciate the nimbleness of the worker who accomplished the initial tie job.) I thought there must be another way to increase the tension. There seemed to be enough space on the corner of the frame to insert an object that would stretch the strings around the corner and thus increase the tension. I came up with placing those do-hickies that are used to secure screws in drywall on all four corners of the frame. This seemed to increase the tension just about the right amount. (One nice thing about those do-hickies is that they have little grooves into which the strings can sit.) Next, we tackled the third issue. After looking at the clips and how they fit into the groove in the frame, it seemed to me that spreading them out wider might make them hold better. So I unscrewed them from the wall and went at them with a couple of vise grips, pulling the sides of the clips out just a little bit. (The clips are surprisingly strong.) With a little effort, I was able to smack the frame back into place with the palm of my hand, upside down from the way they were originally placed at the Oliver factory. (One should be careful to make sure that the lips of the clips are centered in the groove before applying much pressure so as not to damage the plastic of the frames.) I hope the photos I upload here help portray the process. I have just completed this project on the window over the dinette. The frame is flipped, it seems more securely attached to the wall, and the “grip” of the “day” and “night” shades is stronger. I plan to do the other four frames soon. I apologize for my Cro-Magnon approach to the project. Unlike some folks on this forum, who are retired engineers, mechanics, and the like, I am a relatively unhandy retired academic and musician. But I thought that I would post this in case another Ollie owner wanted to tackle a similar project, perhaps having dealt with similar issues.

- 35 replies
-
- 12
-

-
 Issue: Daylight shows through night shade "appears as if material is cut". Models Impacted: Many of the white window "night" shades may have been affected between 6/13/17 - 12/01/17. Information: The new white window shades were impacted with a fabric issue regarding the night shade that appears as if the material or fabric is slit/cut but is actually an improper manufacturing of the night shade process to keep daylight from showing through the fabric. Anyone who experiences small specks of daylight showing through the nightshade will need to contact Automotion for information on warranty replacement. Shade Measurement: Elite I: 18.5' Camper Dinette Shade: 49.75" x 20" Side Bed Shades: 31.75" x 20" Rear Shade: 38" x 21.75" Elite II: 23.5' Camper Side Window Shades: 49.75" x 20" Rear Shade: 38" x 21.75" Resolution Contact Information: Auto-Motion Shade Inc. Ewa Zajch Tel. (905) 470-6198 (Ext. 0022) Ewa Zajch <ewaz@automotionshade.com> *Please be sure to include size and quantity of each shade needed.