Just Joe
Members-
Posts
15 -
Joined
-
Last visited
My Info
-
Gender or Couple
Male
My RV or Travel Trailer
-
Do you own an Oliver Travel Trailer, other travel trailer or none?
I own an Oliver Travel Trailer
-
Hull #
769
-
Year
2021
-
Make
Oliver
-
Model
Legacy Elite II
-
Floor Plan
Twin Bed Floor Plan
Recent Profile Visitors
The recent visitors block is disabled and is not being shown to other users.
Just Joe's Achievements
-
Thank you for your research and detailed instructions on how to complete this modification. In that the goal was to reduce the noise of the blower as much as possible without significanrly affecting the operation of the AC, I also tried using the low speed wire (red wire) instead of the high speed wire (black wire) as you noted could be done. The amperage draw and blower motor operating temperature were both actually lower when using the low speed wire (red wire). I imagine this is because the low speed windings in the blower motor were specifically designed for lower speeds to begin with, versus the high speed winding which you would have to dial back even further to achieve the same noise reduction results.
-
Just Joe started following Looking for details about Oliver’s new bathroom door design
-
Looking for details about Oliver’s new bathroom door design
Just Joe replied to Snackchaser's topic in Ollie Modifications
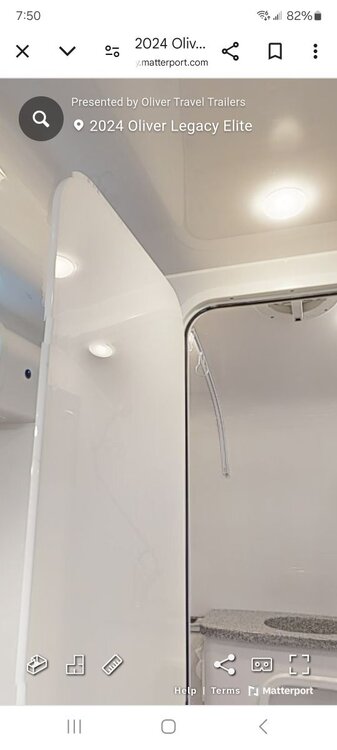
Definitely keep us posted. From the photo of the door on the OTT website, it looks like it could be made of a PVC or a dense foam-core material. It appears that it may be taller too which is great as i have already taken the top metal frame off of ours since I was tired of always scraping my head. The top corners of the door opening have also been cut rounded similar to the exterior door. The rounded corners would likely help prevent cracks in the bulkhead panel that some owners have reported in the past. Thanks, Joe -
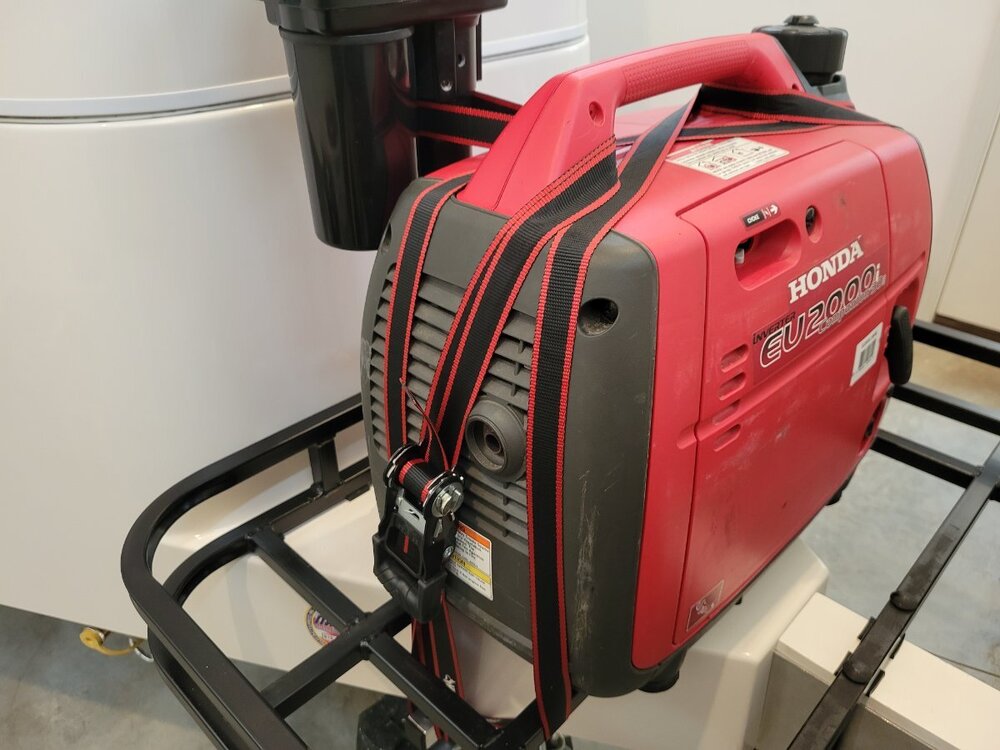
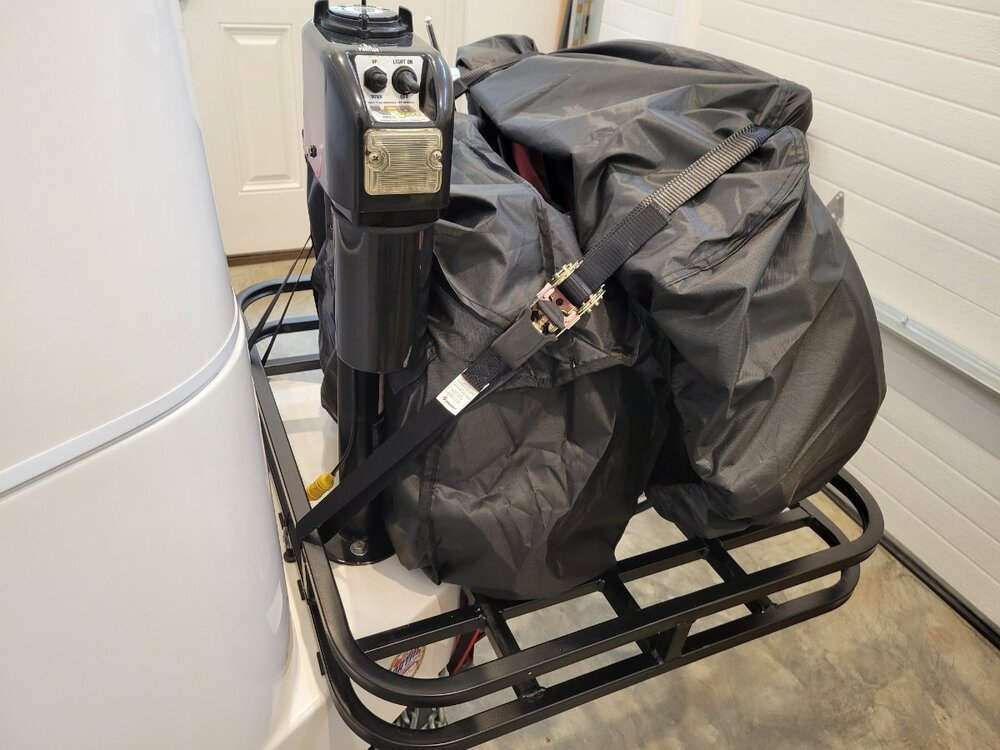
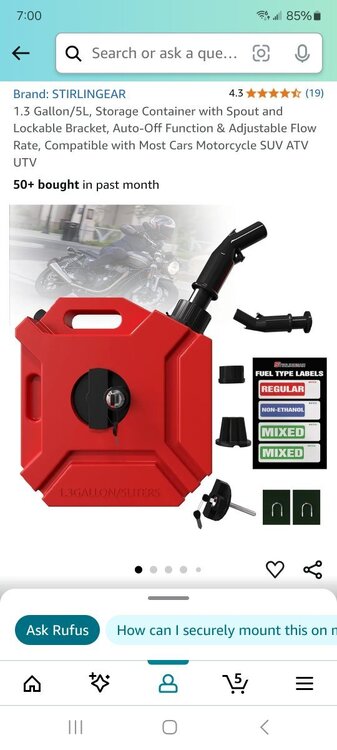
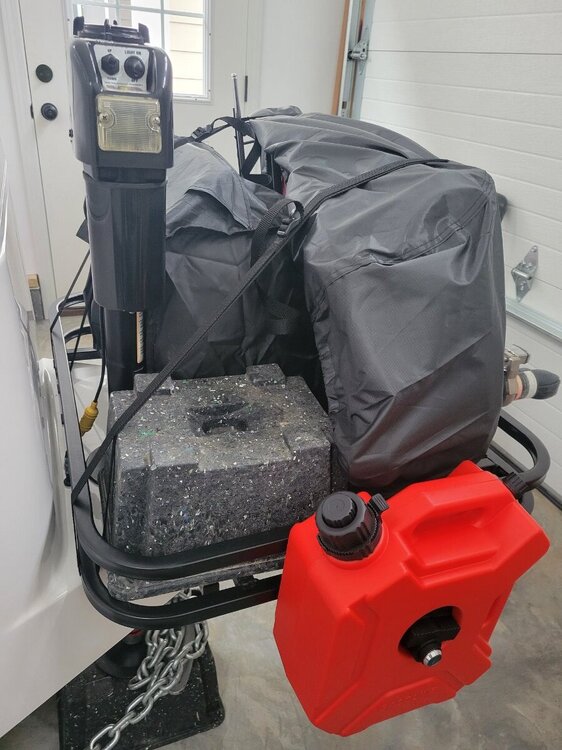
I want to first thank all in the group for indicating their concerns, and offering suggestions. I removed the side mounted gas cans, and upgraded to four substantial ratchet straps. The ones that I used around the generator have large hooks on each end. I crisscrossed the straps over the generator and wrapped them all the way around the tounge and hooked them to the main framing under the tounge on both sides. I also slid the generator over so it is now centered on top of the main framing and I looped one of the straps around the jack pole for added stability since the generator is now right next to it. I will watch for any wear on the straps and reroute them as necessary. Although we don't use our generator often, we wished we had it on a 45 day summer trip we took up the east coast into Canada in 2023 as there were a lot of overcast days when our solar panels couldn't keep up with our tired batteries. We took it with us on a 70 day trip back up North this year and used it about 20% of the time when the weather didn't cooperate and we were without hook-ups. Lifting it in and out of our truck's bed got old real quick. Letting it travel on the tounge of our Oliver will make things a lot easier when I need to pull it off and use it. For now, I will use the 2.5 gal no-spill gas can that I bought before this year's camping season and keep it secured inside our truck's bed as I did this year near the tail gate. I travel with the generator and gas tank empty and only fill them up at the end of the day when we get gas for our truck just before checking in at campgrounds where we won't have an electric connection. Prior to checking out I pour any remaining gas in the generator into the can and then into our truck. This way I'm not traveling with any gas in the generator, or in the gas can, and we are always using fresh gas when we need to use it. The basket that I have installed extends forward the same length as the Sea Biscuit basket and it is only 2" wider on the sides. The corners are rounded, although not quite as far back as the Sea Biscuit basket. The basket that I have left enough room for our dog's fold-up stroller which was the other item I found difficult to be pulling in and out of our truck's bed. I will confirm my ability to make sharp turns before heading out on our next trip. The quality of the Sea Biscuit products is unquestionable and I may switch out my basket for one of their containers in the future when our dog is no longer with us. For now, my wife always acts as my spotter when we're pulling in and out of campsites to keep me from hitting something so she can let me know if I'm getting too close to our truck's bumper. Thanks again for all your input. Joe
-
7 pin plug cradle (also keeps it dry).
-
-
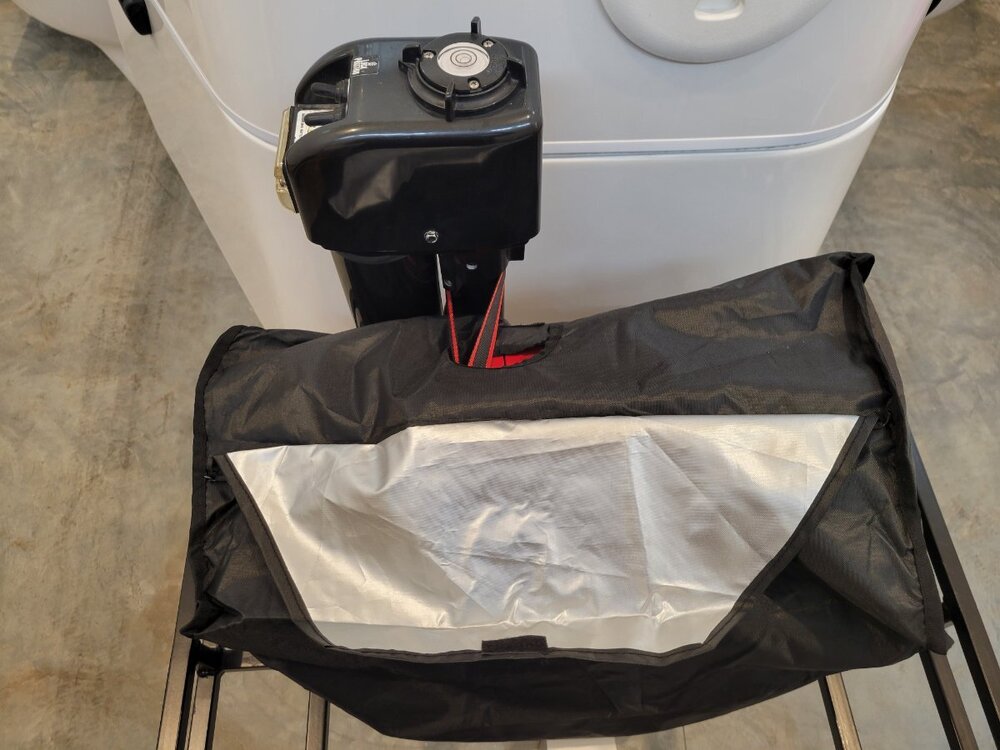
I wanted a front storage basket that my generator could travel in that would also have enough extra space for a couple other items. This basket fits over top of the jack so there is no wasted space behind it, and I didn't have to drill any holes in my LEII to attach it securely! I used two pieces of heavy guage 1" aluminum pipe across the bottom of the tounge and four 8" bolts that are through bolted to the basket on the sides. I used square rubber spacers between the rack and the fiberglass tounge which allows cargo straps to secure items in multiple locations. An added bonus is the basket framing is spaced perfectly to allow the rubber feet on my generator to fit securely over it (I did stick four more rubber spacers to the bottom of the generator where it straddles the basket framing. The basket, the generator, and the other items add about 100lbs to the tounge. I will be offsetting this added weight with a receiver style bike rack I will be adding to the rear of our LEII (more on that in a future post). I measured how tightly I will be able to now turn (especially while backing up), and I should be fine. I am very happy with this storage basket and the price! 😊
-
Yes, the foam insulation was added in the indentation under the stick-on foil covered insulation. It was cut to fit the area where the sliding vent is located. All the work was done from inside the camper except the compressor blanket which is installed under the exterior AC cover. It's too bad that the Dometic unit only has a two speed fan motor; a lower speed setting like the Truma unit has would likely reduce the sound below 60dB. Joe/769
-
The compressor does make a little extra noise that the blanket helped to dampen a bit. However, it made the least amount of difference of the three things that I did, but every little bit helps! The attached blanket is the one that I used. It was a challenge to get it wrapped around the compressor. Joe/769
-
We don't use our AC very often, but when we do it would be nice if it didn't scare the dog and stess-out the cat. I didn't want to buy one of the newer (quieter) models just yet, so I looked into how I could insulate the stock Dometic unit better and achieve a noticeable reduction in noise. It took a 3-step approach, but I got it down to 65dB which is a significant reduction from the 75+dB level before. I took the attached dB reading in the center of our LE2 right under the front of the AC unit. I have attached photos of the 3 items that I added; (1) dense foam insulation to fill the hollow area to the rear of the return air intake vents between the roof-top unit and the ceiling panel, (2) I added a .4" layer of stick-on foam insulation over the very thin layer that came on the inside of the ceiling panel along with another piece of dense foam between the the center sliding vent cover (which is right below the fan motor) and the added layer of foam insulation (I did this so the cool air would be directed out the 2 side vents, and the front and rear vents instead), and (3) I installed an AC compressor noise reduction blanket. We are very happy with results!!! Joe/769
- 14 replies
-
- 13
-

-

-
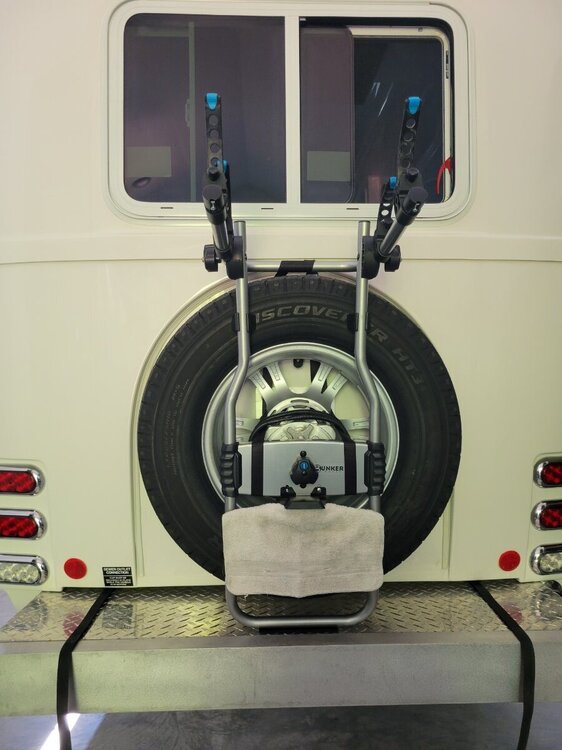
I too was concerned, so before proceeding I crawled into the basement and there is just under a 1'x 3'x 1/4" backer plate that the approximately 1' spare tire mounting plate is through bolted to with 4 - 1/2" bolts. Since the spare tire does not rest on the bumper box when hung on mounting plate (there is a couple inch gap between the tire and the box), the addition of the bike rack actually adds back the support of the Oliver cover by resting on the bumper box. In addition, I added the two ratchet tie down straps to absorb any stress of the assembly pulling away from the camper even though I didn't detect any movement when pulling on the rack. The weight is now being carried by three points (the massive mounting plate, the rack resting on the bumper box, and the angled ratchet straps). We stay on good roads when we travel, but I will still be checking everything regularly. I will update my post after a few trips to report what I experience. Thanks, Joe/769
-
This post included everything from the original Facebook post. What you described is what I did. However, there wasn't a way to drain the shower into the black tank since it is too low, but we don't use the shower so that wasn't an issue. Everything works fine and we often dump a pot of dish water down the vanity drain so we don't fill up the grey water tank too fast. Joe/769
-
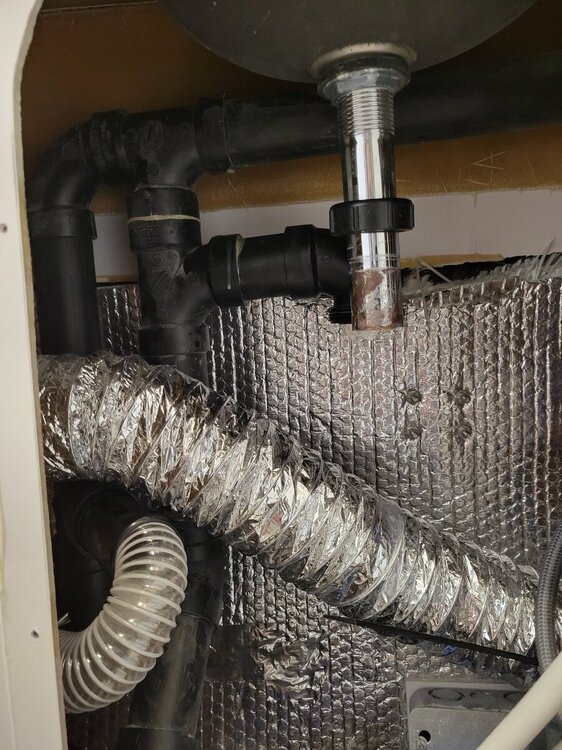
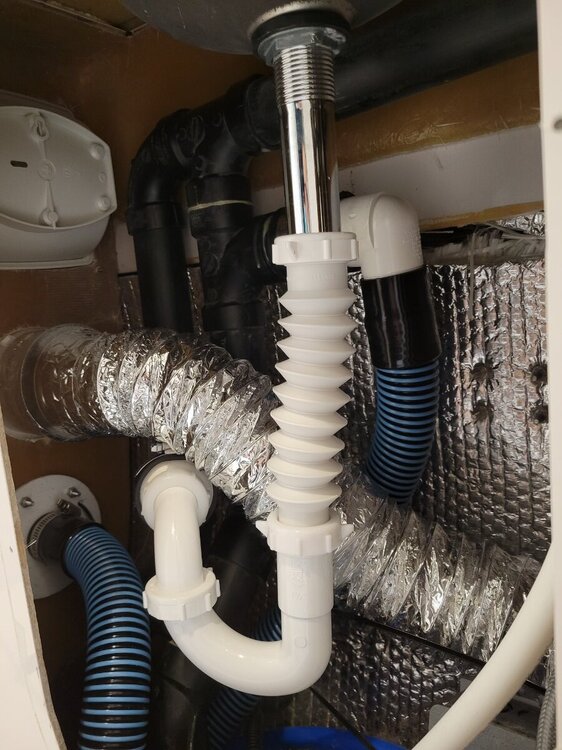
(Originally posted on Facebook one year ago. This modification has really worked out well.) Since we have a composting toilet and the black tank was sitting unused, I decided to reroute the sink drain in our bathroom to the black tank. This will allow us to stay put longer with 50% more holding capacity. Pictures are before and after replumbing. Joe/769
-
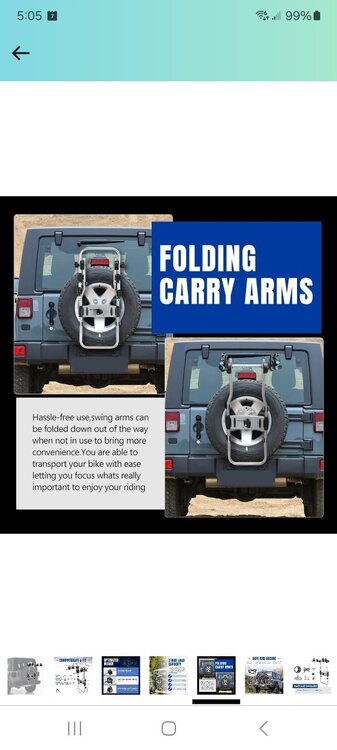
For anyone who doesn't already have a bumper mounted system, this spare tire mounted bike rack is a great option for taking along two standard bikes. There are even holes already in the rack for a license plate bracket. The fully assembled rack was $120, and the license plate bracket and a two-pack of 1" ratchet tie down staps were each $10 on-line. I simply reversed the center mounting plate so that the bottom of the rack would curve toward the camper and rest on the bumper box for additional support. I used the additional staps for additional support, but they really weren't needed. There is a keyed twist lock included with the rack and I'll use one of our cable locks wrapped around the bikes. Our bikes are less than 30 lbs each, so the entire assembly appears to be well supported and secure. Joe/769
-
I think that I may try using the attached bike rack with it adjusted so it rests on the bumper box for additional support. The spare tire bracket is massively strong like other fittings on my 2021 LE2, so I believe that it should work just fine. Since I will need to take off the spare tire cover, I'm going to use a separate license plate lighted bracket attached to the rack. I measured my two standard bikes and their tires will be just above the hinged bumper when hung on the rack. Any thoughts? Thanks, Joe/769

