QuestionMark
-
Posts
84 -
Joined
-
Last visited
-
Days Won
5
Posts posted by QuestionMark
-
-
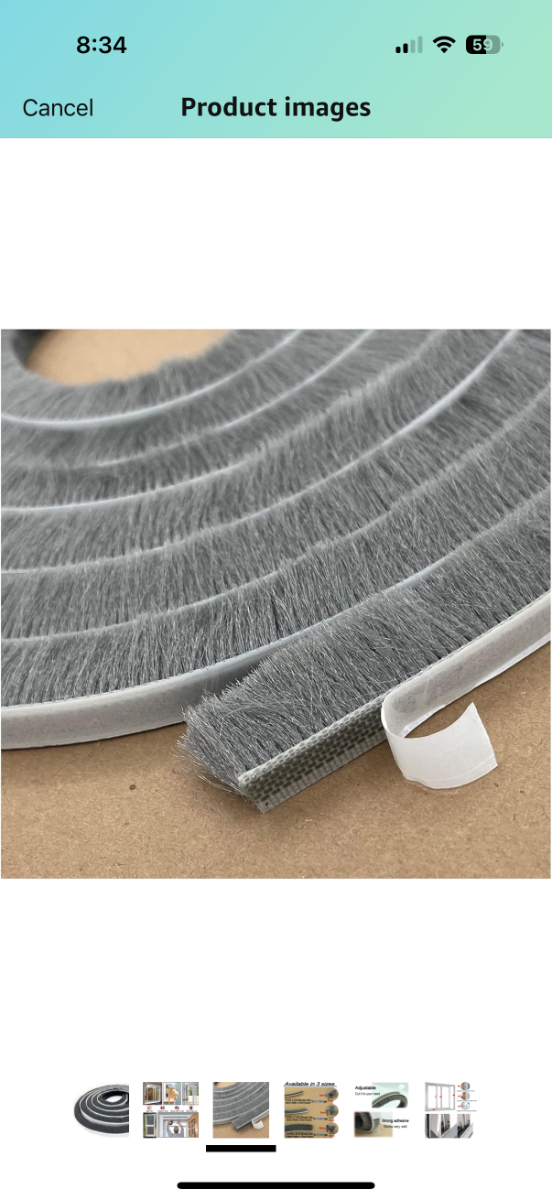
Close your screen while standing inside and look at the top curve in the screen door meets the frame. Keep the actual door open as you will not be able to see the gap with the actual windowed door closed. You will clearly see a gap where the door does not meet the frame for the screen door. I think it is just a side effect of the frame being mounted to the curve surface of the trailer. I would not try to bend the screen door to match as I think it would collapse the thin door frame. Simple enough to just add the furry seal. I looked at several different year models while at the rally, including the two 2025 ones on display and the all had the same gap. Hope that helps.
-
 3
3
-
-
15 minutes ago, Tony and Rhonda said:
@QuestionMark Thanks for the suggestion and product link. Did you stick it to the inside of the screen door or the door jam. Or maybe on the screen door edge. I'll give this a try. Thanks again!
On the screen door. I will take a photo of it next time I go out to the trailer. Also, when in Alaska we asked the locals what was the best way to get ride of the mosquitos once they get into the trailer as they are extremely hard to "get" with all the curved surfaces in our trailers. Answer we got and we have since proved it works great is "Windex spray bottle on mist. Knocks them right out of the air and it smells good at the same time". Also, helps keep the trailer all nice and shiny inside when we wipe it clean. LOL.
-
5
-
-
Yes, I have noticed that all the screen doors on the Oliver trailers (many different year models) do not match the curve in the fiberglass. This is what I used when going to Alaska to keep the mosquitos out.
It is weather stripping (furry stuff that is on the screen door from factory). I just put some on the opposite surface where it does not meet. Worked well and still on the trailer 2 years later.

-
 1
1
-
2
-
-
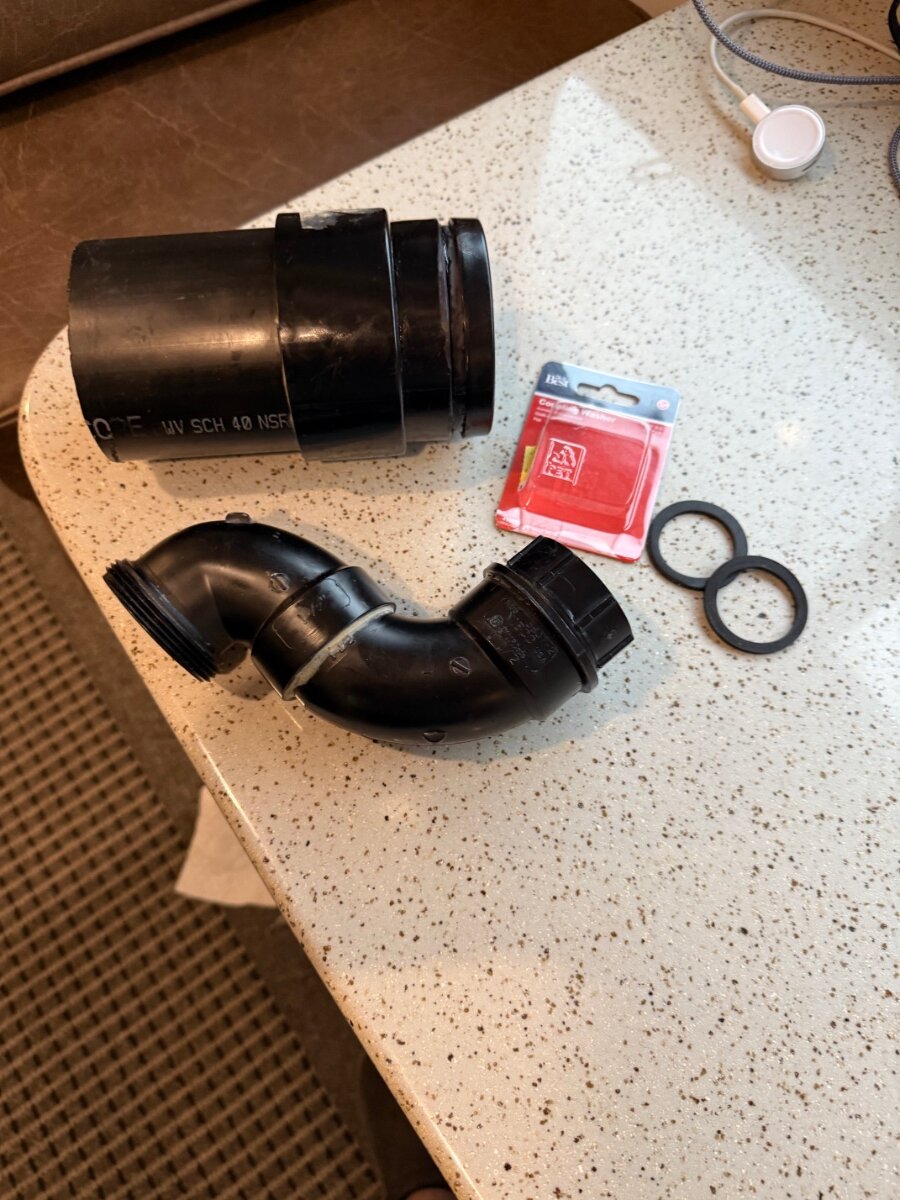
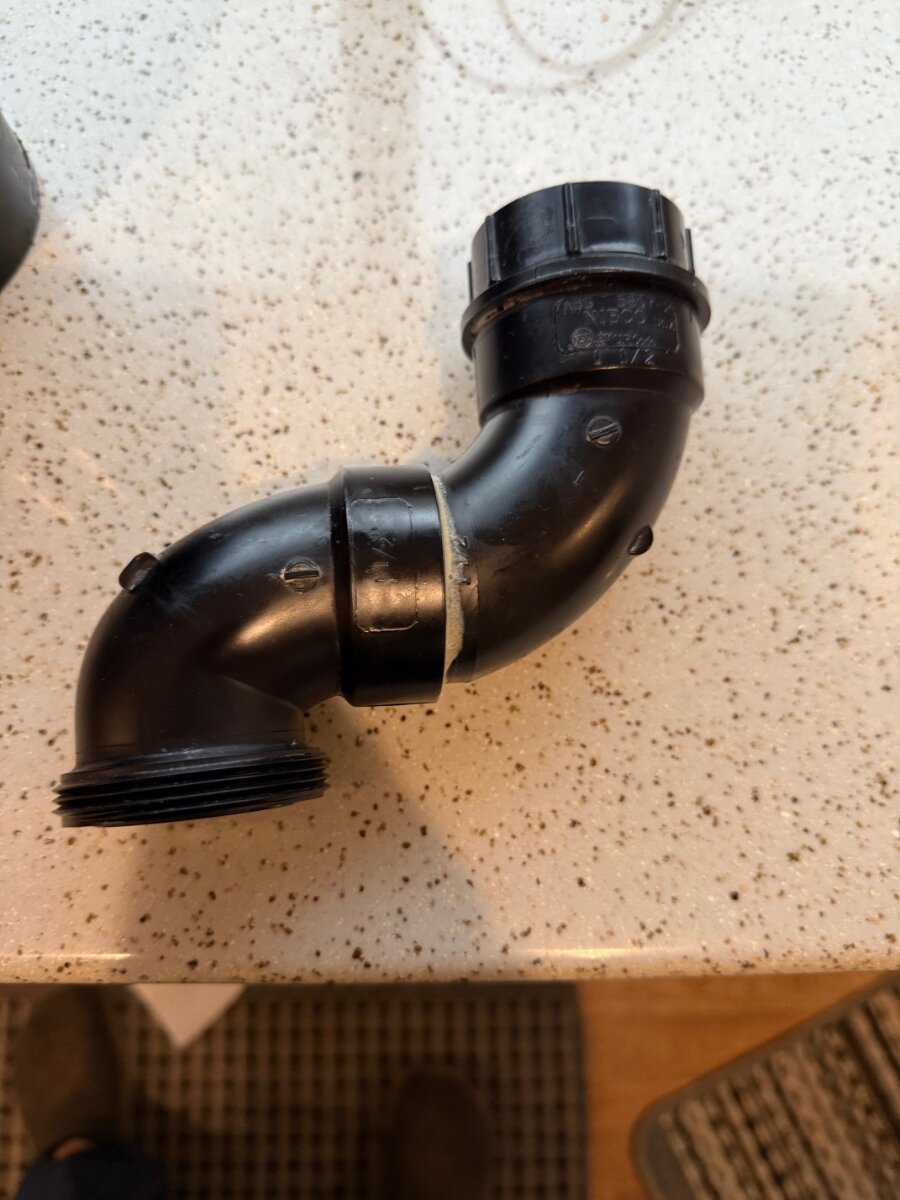
Happy to report I was able to source a new gasket for the connection between the Shower drain and the ABS piping. It is called a "Coupling Washer 1-3/4" OD 1-3/8" ID" and can be purchased at a local hardware store for less than 2 bucks. Upon replacing the coupling washer and reinstalling the p trap with a little bit of pipe dope on the lower connection, I am happy to report it no longer leaks.
BTW: I did have to remove the 3" Black Tank connection to provide me with enough room to get the p trap out and back. Also recommend you get a small strap wrench to loosen and tighten the drain p trap as it is really hard to reach and twist.
In case anyone else find that they need the adaptor fitting that goes into the poly black tank, I was able to cross reference a partial part number and come up with the name as an ICON Technologies Limited Model # 12511 Holding Tank Fitting 3" Hub Fitting. It is available on Amazon for less than $10 or on camping world's website for around $5.
Also note that Oliver service indicated that they have changed this drain design several times since 2017, so your setup might be much different and require other parts.
-
3
-
-
Just discovered I have a similar leak at the lower threaded fitting below the shower on the downstream side of the p trap. Any update on how to proceed? Called Oliver and they indicated they can't really help me source new PVC pieces so I can fix myself. The larger PVC is for the black tank drain that inserts into the black tank. Has an o-ring section that appears was broken due to over tightening during the build. Not really an issue for us as we have compost and do not use the black tank for anything. Would like to replace with new if I could find the PVC piece and rebuild to it would be as good as new.
As for the p trap, not sure if it is leaking at the lower fitting or has a hairline crack somewhere. The hard to find piece is the connector that attaches to the shower drain. Any advise would be greatly appreciated.
Will head to a larger hardware store (Lowes and/or Home Depot) to see what I can find to rebuild.

-
2 hours ago, Jason Foster said:
Im surprised Truma sent you one directly. I assumed they only ship them to Truma authorized installers.
The site listed above and one other were the only ones I found that would sell it directly. The Omnioutdoorliving was $1,000 less than the other. I found them both with a simple google search for a DLE60C Aquago. Hope it helps anyone else who needs a replacement and does not want to wait for a service center to get to you. I registered it once installed so I get the 1 year warranty with no issues.
-
1
-
-
Figured I would post here in addition to my post on FB group for those who might want info and not on FB.
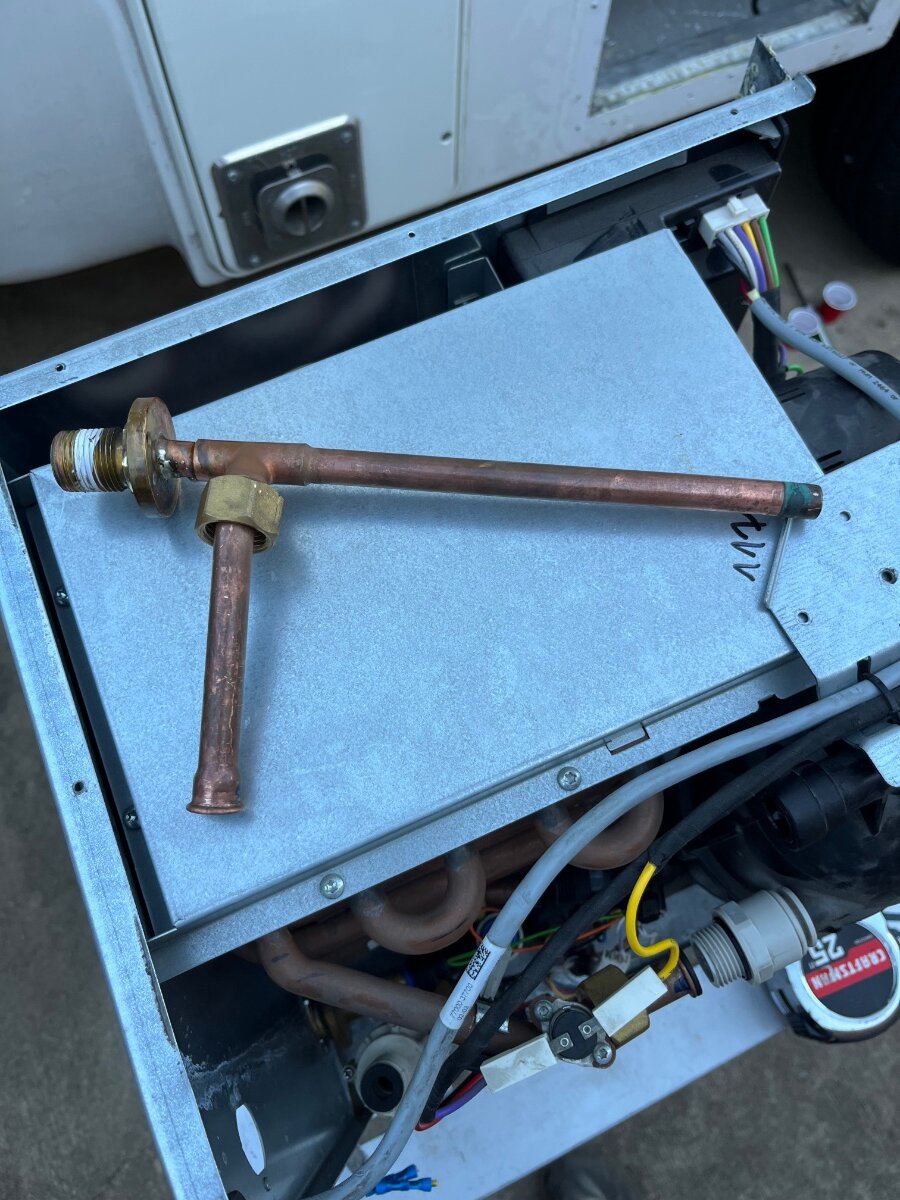
In addition note that the copper is an odd size and uses push-to-connect fitting on tank so I was unable to rebuild.
From all appearances, I looks like a factory defect along with Oliver not installing the screws that hold the copper tubing secure to the back of the unit. Not sure why they would have removed or is the unit had been worked on before we acquired the trailer in 22.
“”””””””””””””””””””””
Hull #293 here. Just replaced our Truma myself as the internal outlet copper line had a factory defect that finally started to leak (see photo). It made if for about 7 years until it started to show a drip after traveling. Oliver service did not have time when we were there for the twin bed conversion. I took a borescope and could see it was not the mixing vessel or tank that Oliver service said is common repairs for leaks. Was a fairly easy removal of the old unit and simple enough to take off the cover to look more closely. Perhaps someone would feel confident trying to repair the crack but I decided to not risk future problems and just replace the unit with a new one. Purchased online from omnioutdoorliving.com for ~$1,399 and it arrived the next day shipping directly from the Truma warehouse in IN. Shipping was free as well! Could not have asked for better service. Bought a roll of butyl tape to seal the new unit to the Oliver as was done at the factory install in 2017. Installation took about 30-40 min and the new unit works flawlessly. Now I have an older unit for parts if I ever need it in the future. Looked at other options for a typical water heater and determined it would be about half the cost. Wife said she really liked the instant hot water so I went with the exact replacement. Individual choice, so your call on path forward.
-
1
-
 1
1
-
-
F43, Mark and Cyndi, Texas, “The Shuttle”, Hull 293
-
1
-
-
On 4/11/2024 at 7:22 PM, Geronimo John said:
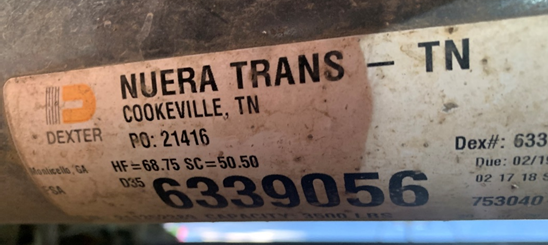
IF your Axle Decal looks like this one, You may want to read the rest of the below.
From what I can figure out, Red Neck Trailers was “Integrated” into Nuera Trans which was “Hoovered Up” into Dexter. The original Red Neck Trailers is still in business as is Nuera Trans. All flying the Dexter flag.
As clearly printed on a Dexter Label, they were made by NUERA TRANS likely in Cookeville Tn. So don’t waste your time calling Dexter for a "Build Sheet". The correct terminology is to request the Configuration Info associated with 6339056. The Dexter Customer Service could not pull up this info. So instead, call this knowledgeable contact that has been in her job with all three name changes::
Christy Gillentine | CSR
Dexter Distribution Group
christy.gillentine@dextergroup.com
direct tel:: (931) 739-4034
An alternate would be Denise Ameling via E-mail: <denise.ameling@dextergroup.com>
Please keep in mind that these contacts are ONLY for NURA TRANS labels axels. If your label is not like the one above, the regular Dexter Customer Service is by far the way to get your axle info.
The Nuera Trans Axles (I.E. Really Red Neck Trailer axles that were sold under the Nuera name) were purchased without springs. The springs were sent to them for assembly. They are the Chinese made PR4B springs. Christi stated that if the springs are flattening out, then they were undersized for the application. After they flatten out, then they generally fail as was originally reported on our thread. She stated that the PR4 springs with their thicker steel (2,400 pound rated) would be a better choice.
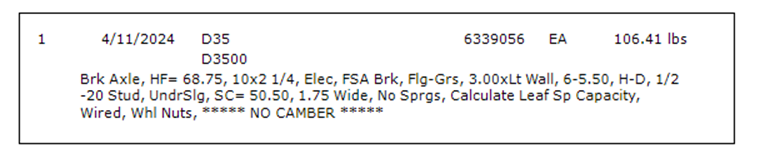
Here is the CONFIG INFO for this Config Number for my rear axle on Hull 342. If you have the same number on yours, here it is:
Note it states “No Springs, Calculate Leaf Spring Capacity”.
GJ
John,
Our stickers look almost the same with (Hull 293) the 6339056 number listed. Just checking to see if you happen to notice that the numbers etched on the Axle tubes are exactly the same. Sadly, I was not able to secure both stickers as the trailer has traveled many miles and I was lucky to get the one. I did take your advice on writing the Nuera contact to see if I could get a configuration listing and perhaps an answer to the dual L/N numbers on both axles.
Thanks again for all your input.
-
1
-
1
-
-
7 hours ago, Galway Girl said:
Live in the west and in mountains 6.7l f350 gets 12.7 mpg and on east coast flats 13.8 mpg. Overall 80k is 13.5 mpg towing EII.
Thinking my mileage is slightly better due to me having the 3.31 differential. Rig runs low rpm’s while traveling highway speeds and the trailer is so light I really do not need the higher ratio diff. Also run with hotshots every day treatment (EDT) added to the tank with each fill-up.
-
1
-
-
2020 F250 w/ 6.7 diesel. Towed around 60K miles so far and averaging just shy of 16 mpg while towing all around the US and Canada (Alaska, Maine, PEI, etc.... Another benefit is you get a much larger tank on the diesel (over 400 miles between fill-ups) and can utilize the fuel discount program "Open Roads" to save on every gallon of diesel. In addition you get to use the much nicer and larger commercial truck lanes when filling up. Only complaint my wife has had is that the fill rate on these commercial lanes is much faster and she hardly has time to utilize the facilities (bathroom) before I am ready to go 😀.
-
4
-
 3
3
-
-
Did the same thing a few weeks back. Will miss having the original Michelin Defenders as they were not really showing much wear after 50k+ miles. I went with a set of Bridgestone Dullers as Defenders not being produced any more.
-
4
-
 2
2
-
-
Check out this old post here on the forum (Toshiba EM925A5A-BS):
-
We took our time and stayed one night at Liard Hot Springs, two nights at Whitehorse, Congdon Creek Campground @ Kulane Lake, Harvest Hosted @ Delta Junction and the to Fairbanks/North Pole KOA. Was a great trip and enjoyed every part of the drive minus some of the smoke along the way.
-
Howdy Mark,
Welcome to the Oliver Trailer family! Don't ever hesitate to ask questions on this forum as there is a wealth of information that is freely shared by all.
Mark and Cyndi
-
1
-
-
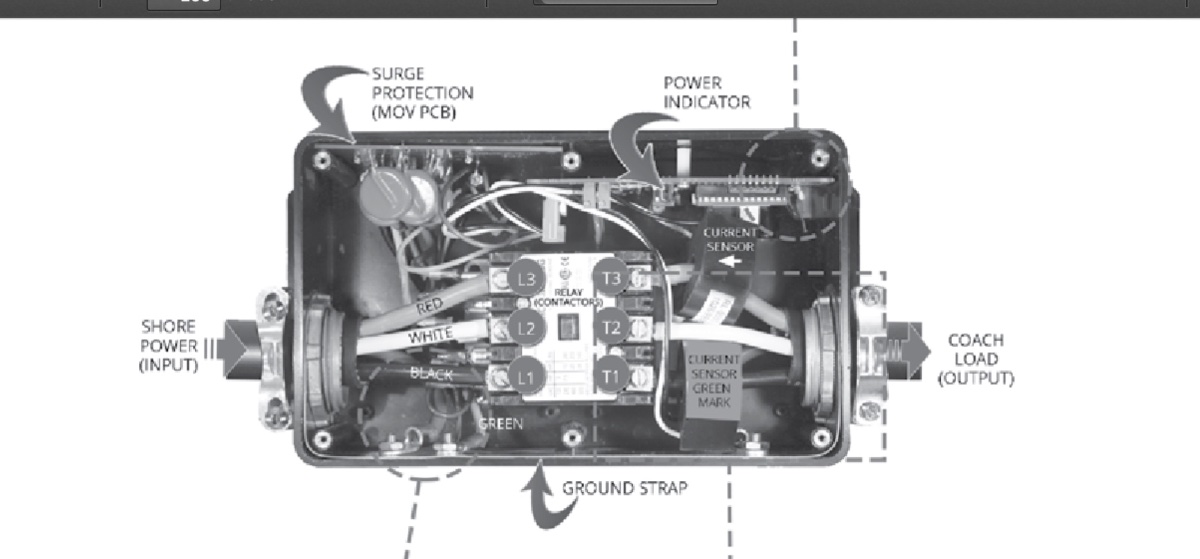
When I had this happen it was the EMS relay not pulling in once the power was confirmed good. Called Progressive Industries and they sent me a replacement unit to install. Upon additional inspection, it appeared the coil wiring shorted out thereby not allowing the magnetic force to develop pulling in the switch. All was good once replaced. I now carry some 10g Wago 221-612 wire clips with me so I can wire around the relay if it happens to me out on an extended trip. Not idea, but I have a WatchDog power checker I use before connecting to the power anyway. When bypassing the relay one would have to connect L3-->T3, L2-->T2, and L1-->T1 with the Wago connectors to bypass the relay directly under these connections. Once your new unit comes in you would just replace the whole unit. I looked everywhere for a replacement relay to carry with me but the part number on the relay came up empty on multiple google searches.
This is the Wago Connector mentioned above. You will need to carry 3 with you to bypass relay, if needed.
-
2
-
-
11 hours ago, Gliddenwoods said:
Morning "Hobo" & "QuestionMark",
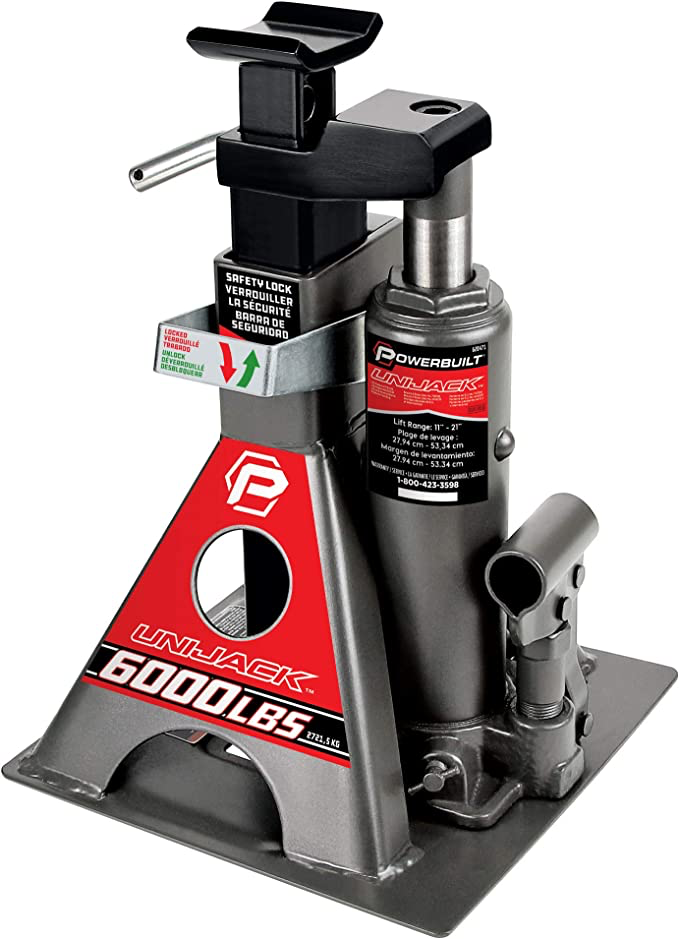
Do you have the 3,000 or 6,000 lb model? If you have the smaller of the two do you have enough maximum reach? If you could do it over would you buy the larger model for greater maximum reach in uneven terrain situations?
Thanks for your thoughts in advance.
I have the 6000 lb model as well. No experience with the smaller version.
Here is the link on Amazon for the one I purchased that is same as the link in the summit racing link: https://a.co/d/4PuME
-
12 minutes ago, hobo said:
We carry two of these: https://www.summitracing.com/parts/pwb-620471?seid=srese1&gclid=EAIaIQobChMI4LnMqZqN_AIVGPjICh0OsQgDEAQYAiABEgIzYfD_BwE
Being a jack stand, it's much more stable than a plain jack. I can easily lift one side to the trailer with these to do any repair or maintenance work necessary; and when camped, I use them on the front corners of the frame to mitigate the wobble when walking around inside the trailer using just slight pressure against the frame. I wouldn't leave home without them. At the rally last year, they were used by another owner while doing a spring repair.
This is the Jack stand/ jack we carry with us. It has worked great anytime we needed to lift the tire. Highly recommend.
-
4
-
-
Would highly recommend you take time to visit Lost Maples and Garner State Parks as both are excellent parks.
-
Having driven the F150 V8 5.0 pulling the LE 1 and now pulling the LE 2 with a F250 6.7 I can honestly say there is no comparison between the two and the overall reduction in driving stress with the diesel 6.7 has been a big win for us. Our F150 pulled the lighter LE 1 trailer fine and got between 13 and 17 mpg with varying hills and/or head winds. The best number we got was when driving the Natchez Trace Parkway (50 mph and no stop signs for hundreds of miles) during our last trip home from the Oliver factory. So far, we have put about 10K miles on the F250 pulling the LE2 trailer and have been averaging around 16-17 mpg going speed limit speeds on our trip back to Texas from Oregon and a couple of trips to Colorado. The biggest win for me along with the additional torque the diesel engine provides is the awesome range we get with the larger fuel tank and higher fuel mileage (over 600 miles). I have only had to fill up the DEF two times since purchasing the truck about 12K miles ago given that the DEF was low when purchased. We have offset some of the fuel costs via our fuel discounts we get via the OpenRoads program, Good Sams and the Bucee's 5% fuel discount for local purchases as we have 6 locations near us. Overall, I would say we use about the same as we did using our F150 to pull the LE1 as we currently do pulling the LE2 with the F250 from a cost basis. One additional lesson we learned during our trip to the Grand Canyon in the F150/LE1 was that the 5.0 engines does not like the lower octane fuels sold in AZ as their normal grade. As a result of excessive engine knocks, we had to purchase the premium or mid-grade to keep the engine knocks down to a minimum.
If I had to purchase another Truck today I would definitely go with the Diesel 6.7 as it has been flawless for us. In addition, the exhaust break on the F250 has been wonderful when going down those steep grades in the mountains as well. From all my reading tho, you need to stay on top of having the oil changes done regularly as well as the fuel filters changed about every 10-15k miles.
-
2
-
-
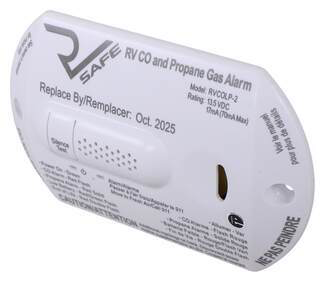
I just replaced the one in our new older trailer with a alternate brand. The one used in the 2017 Oliver was hard to find (Atwood) and about 40% higher in price. The installation was easy enough as one of the two supplied faceplates covered the existing hole and only required a pilot hole for the new screws. Below is the link to the one I installed. No more alarms in the middle of the night!
https://www.etrailer.com/RV-Gas-Detectors/RV-Safe/RS34FR.html
-
3
-
1
-
-
2 minutes ago, Ray Kimsey said:
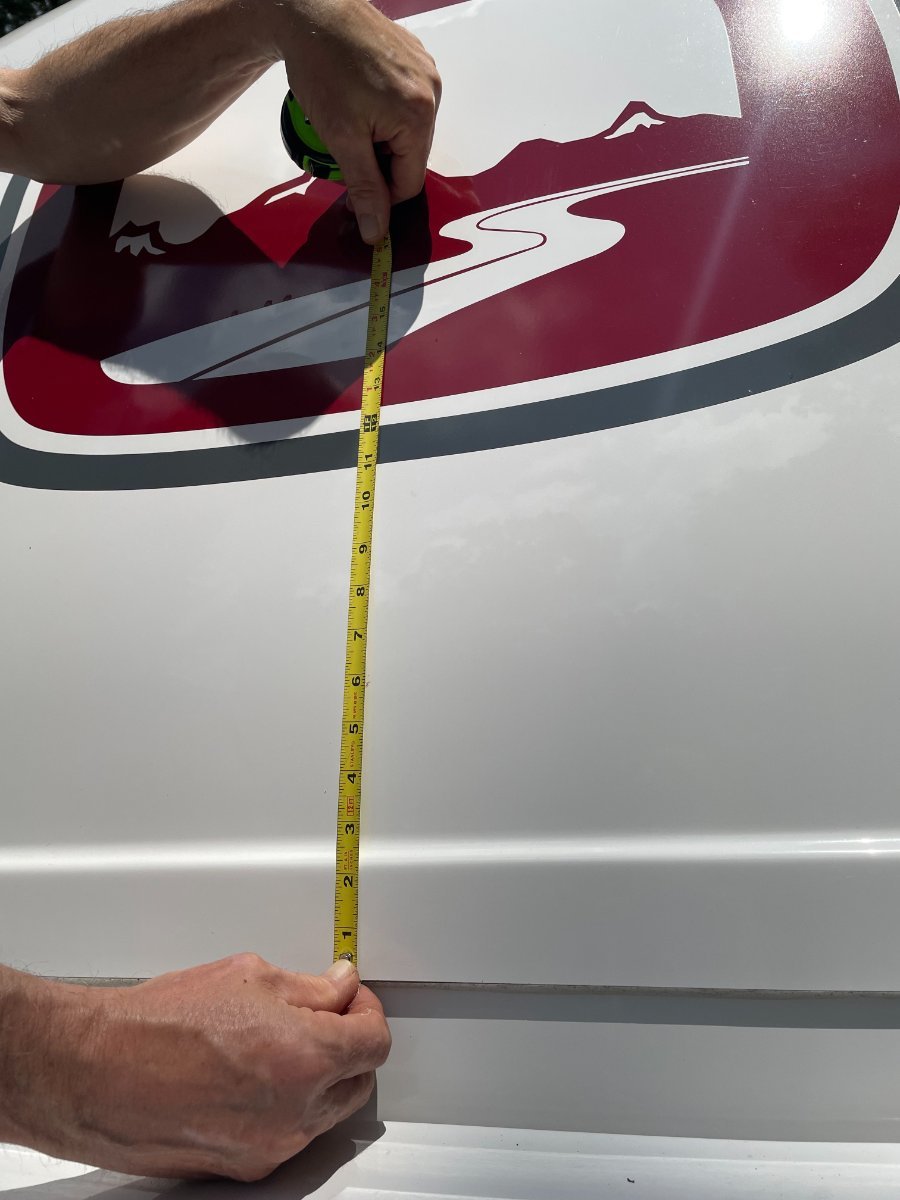
It is roughly 10 and 7/8 inches up from the bottom of the seam on #676
Thanks! Never dreamed someone could answer so quick.
-
1
-
-
As many of you already know, my wife and I recently had to replace our Hull #664 trailer with a slightly older Hull #293 due to a rollover accident. We have really enjoyed the step-up to the larger trailer and really like some of the "older" features such as the cabinet latches. Since purchasing, we have slowly upgraded the trailer with some of the modifications we had made to our LE1 such as the black window seals. The previous owner had elected to not have the front and rear "Oliver" symbol decals installed. Unfortunately, my wife and I found that we really missed having them on and have had several people confuse our LE2 with a Casita whereas we had never had that happen with our 2020 LE1 with the decals. Good news is that Oliver parts had our colors of our side stripes (Midnight Metallic and Silver) in stock and were slightly over $200 for a complete trailer set (minus the side stripes).
Question for the experts out there: Do you happen to know the measurements on the placement of the Decal on the Front? I just want to make sure I don't have it too low or high and not match other trailers at a rally in the future. Thanks in advance.
Also, if anyone has some expert advise on installing decals I would be open to learning before going off on my own. LOL
-
At all of the places I have used the card at, the TDS card is your "credit card" that is used at the pump. Basically, swipe card, enter pin, select if you want to purchase DEF (not discounted) after filling up with diesel. Complete the fill and hang the pump handle up. That's pretty much it unless you selected DEF and you would then fill up your DEF tank with the other nozzle. As for the discounts, the amount varies at each location. You have an app "OpenRoads" that will show you the locations and amount of discount at each location as well as any transaction fee (usually around $0.40) that might apply. So far our discounts have ranged around $0.20-$0.60 per gallon. There is no cost to use the program so we see it as a win-win. The stores we have used the card are are mostly LOVES, Allsups, 7-11 truck centers, Stripes, etc. There are no Flying-J or Pilots in the program so we use our GoodSams discount at those locations.
Here is the link to their FAQ page: MyOpenRoads FAQ Page
-
1
-
1
-


 This is the Wago Connector mentioned above. You will need to carry 3 with you to bypass relay, if needed.
Shock absorbing material on steps bracket coming out
in Mechanical & Technical Tips
Posted
Following this as we have the same issue on 2017 LE2.