
ScubaRx
-
Posts
3,242 -
Joined
-
Last visited
-
Days Won
167
Posts posted by ScubaRx
-
-
This is the ladder we bought in 2013 to carry in the new Outlaw Oliver. It was not the cheapest nor the lightest nor the tallest but at 10 1/2 feet it is sufficient for me to use for anything on the roof that might need to be done on the road. At home I use a much more sturdy stepladder. When washing the trailer we actually stand on top of scaffolding that we can roll around while using. We store it against the bathroom wall inside the closet and it has ridden some 25,000 miles without incident. It has served all of our needs (though they have been few) for the past 2 1/2 years.-
 1
1
-
-
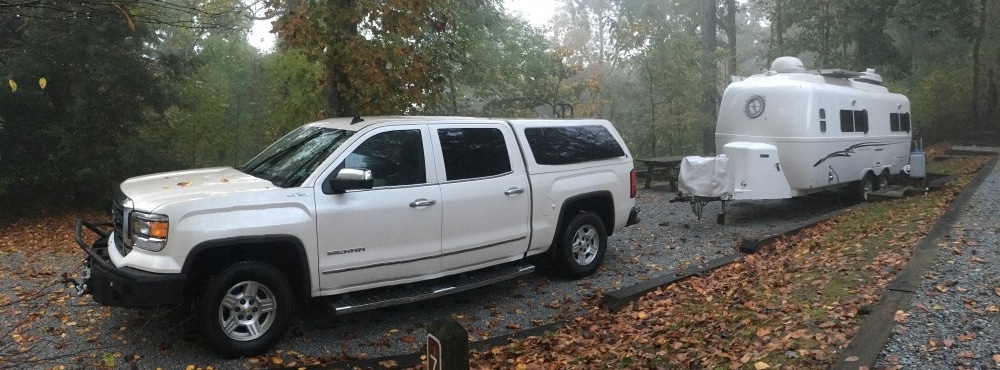
We are currently camped at Amistad National Recreational Area on the Texas/Mexican border. Four bucks night, not too shabby. We are still on our way to Quartzsite, Arizona. We will leave this area tomorrow headed West. We are still undecided on whether to go through Big Bend National Park. We were there this time last year so it's not like we have not ever seen it.
-
1
-
-
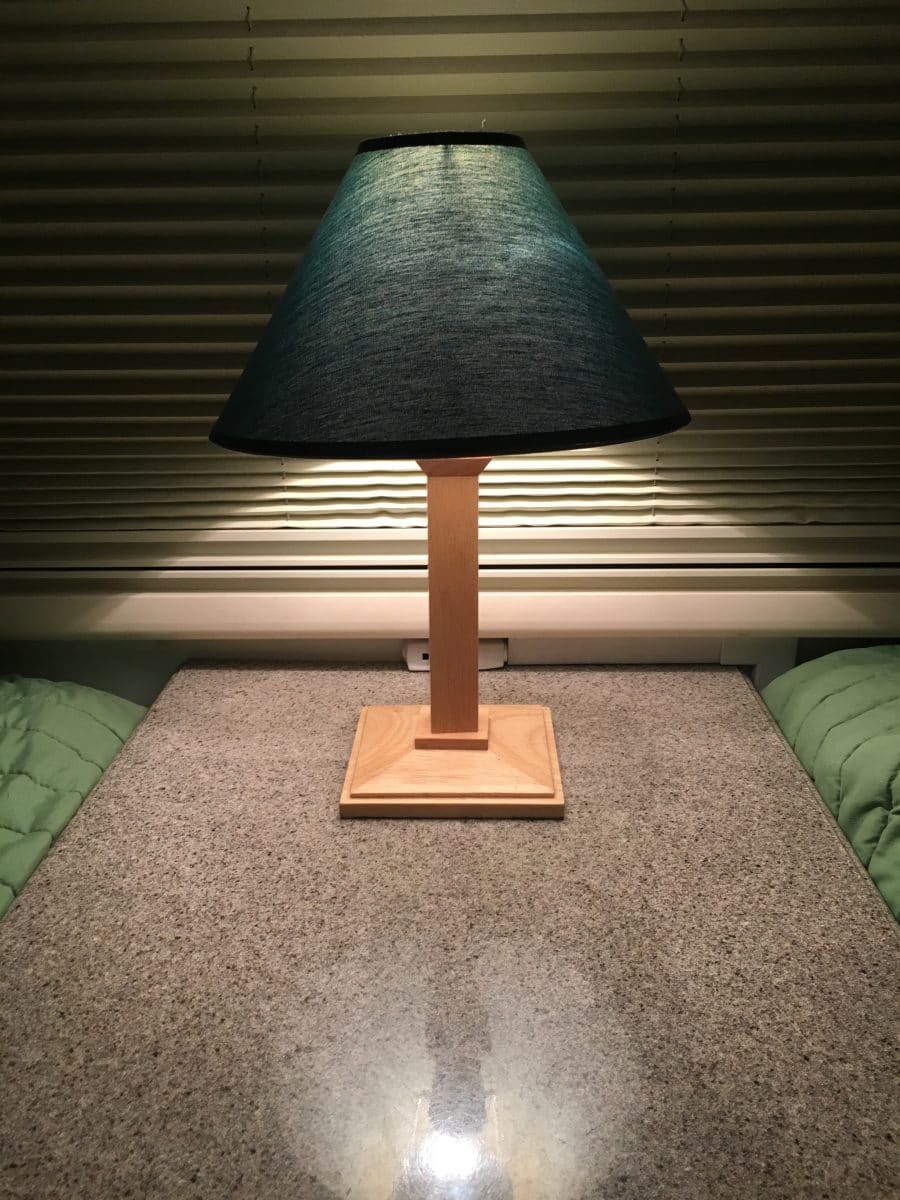
Where do you buy them from? Also – looking at your lamp on the nightstand – did you convert a lamp to 12 v or find one somewhere or does the inverter have to be running to use it?
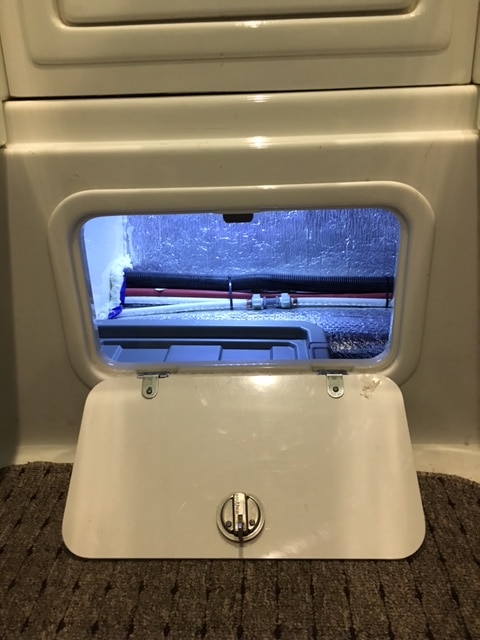
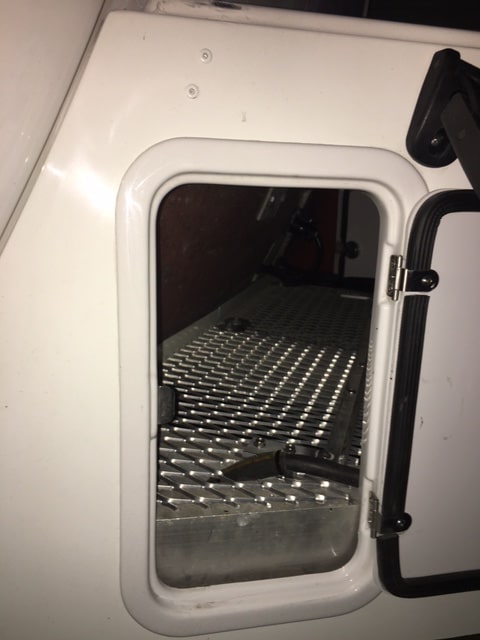
The hatch frame and doors plus all the hardware came as a unit that I got from Oliver. It is the same cabinet door that is used in the bathroom of the Elite II. They perfectly match all the other cabinet doors used by Oliver.
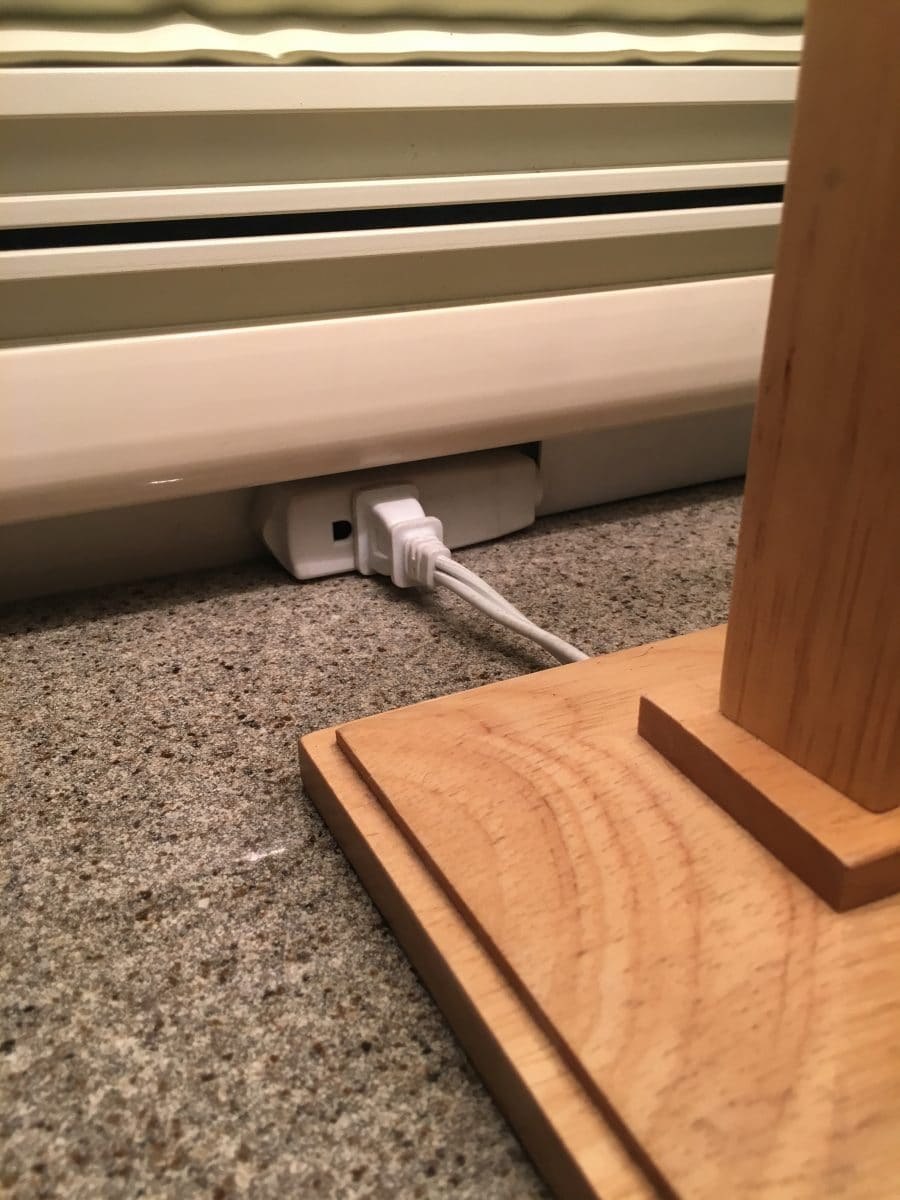
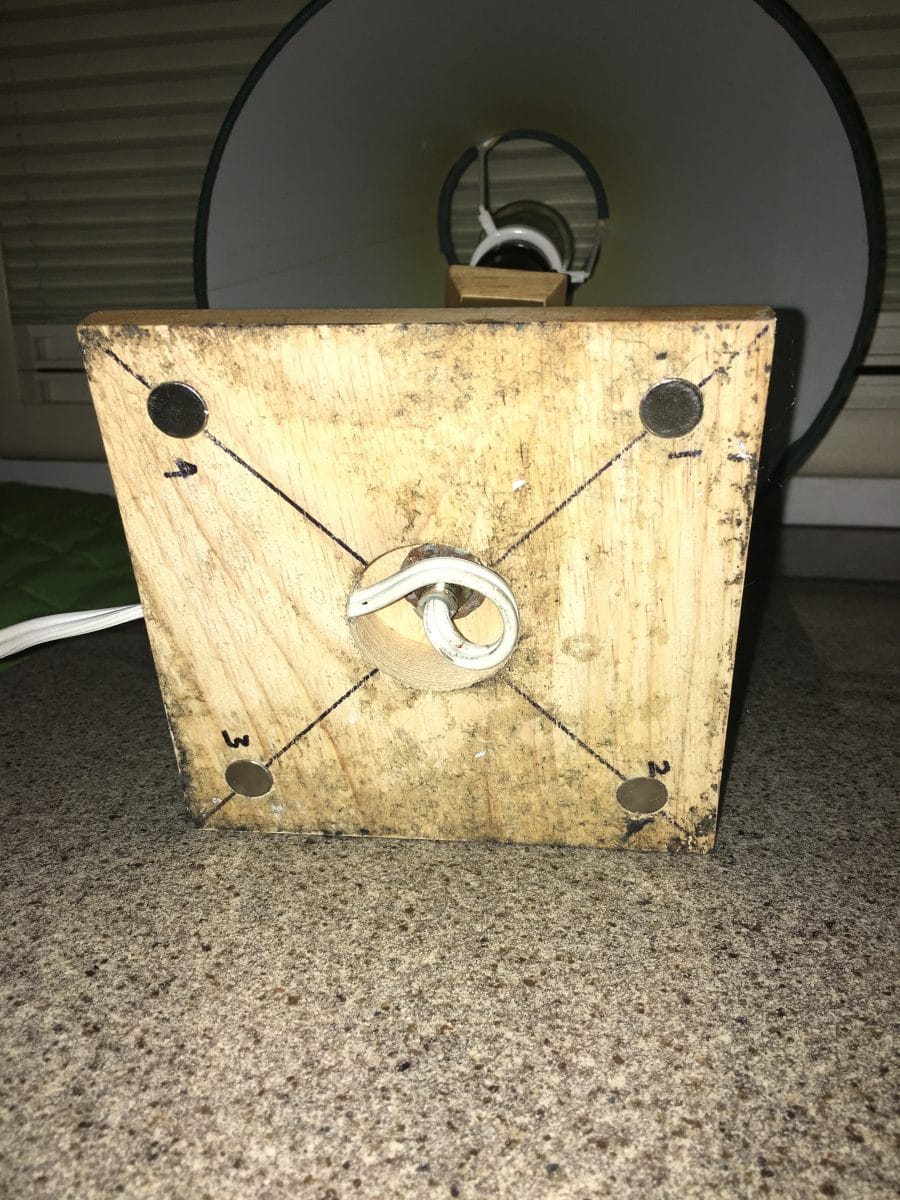
The lamp mod was done last summer. We found the lamp at a flea market in Muncie Indiana while visiting one of our daughters. I think we paid three dollars for it. My original plan was to convert it to twelve volts and use an LED bulb. Admittedly, I didn't look too hard but was unable to find an LED bulb that gave the ambience of the old incandescent bulb that was in the lamp when we got it. I merely ran 110 V to the area between the top of the nightstand and the bottom of the window shade casing and just plugged the shortened cord in. The lamp is held in place with four rare earth magnets sunk into the base that align with four more mounted under the top of the nightstand. It has never moved during our travels, yet is easily removed if you have a need to take the top off the nightstand. It is powered from the inverter when we are not plugged up. We only use it for looks. I did wrap and a set of LED lights around it for Christmas, however.

-
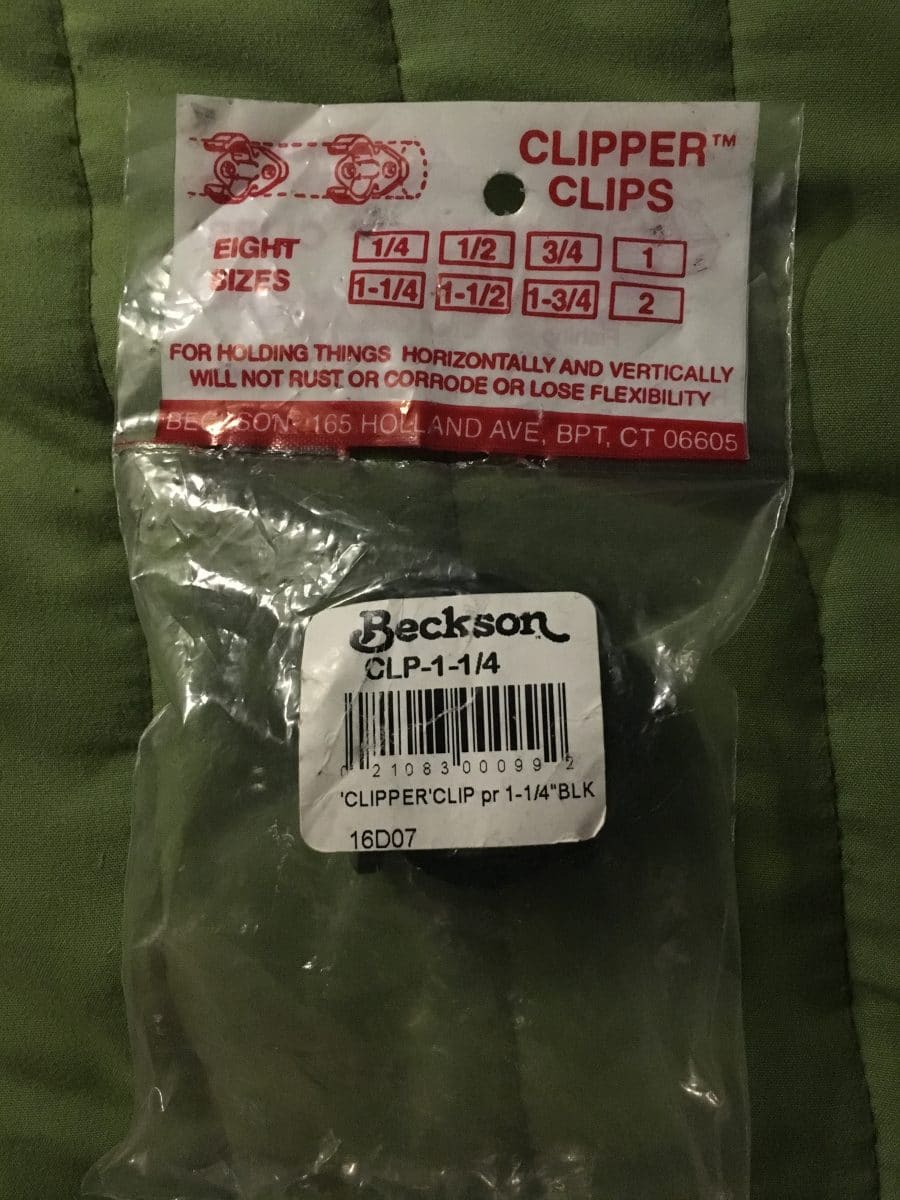
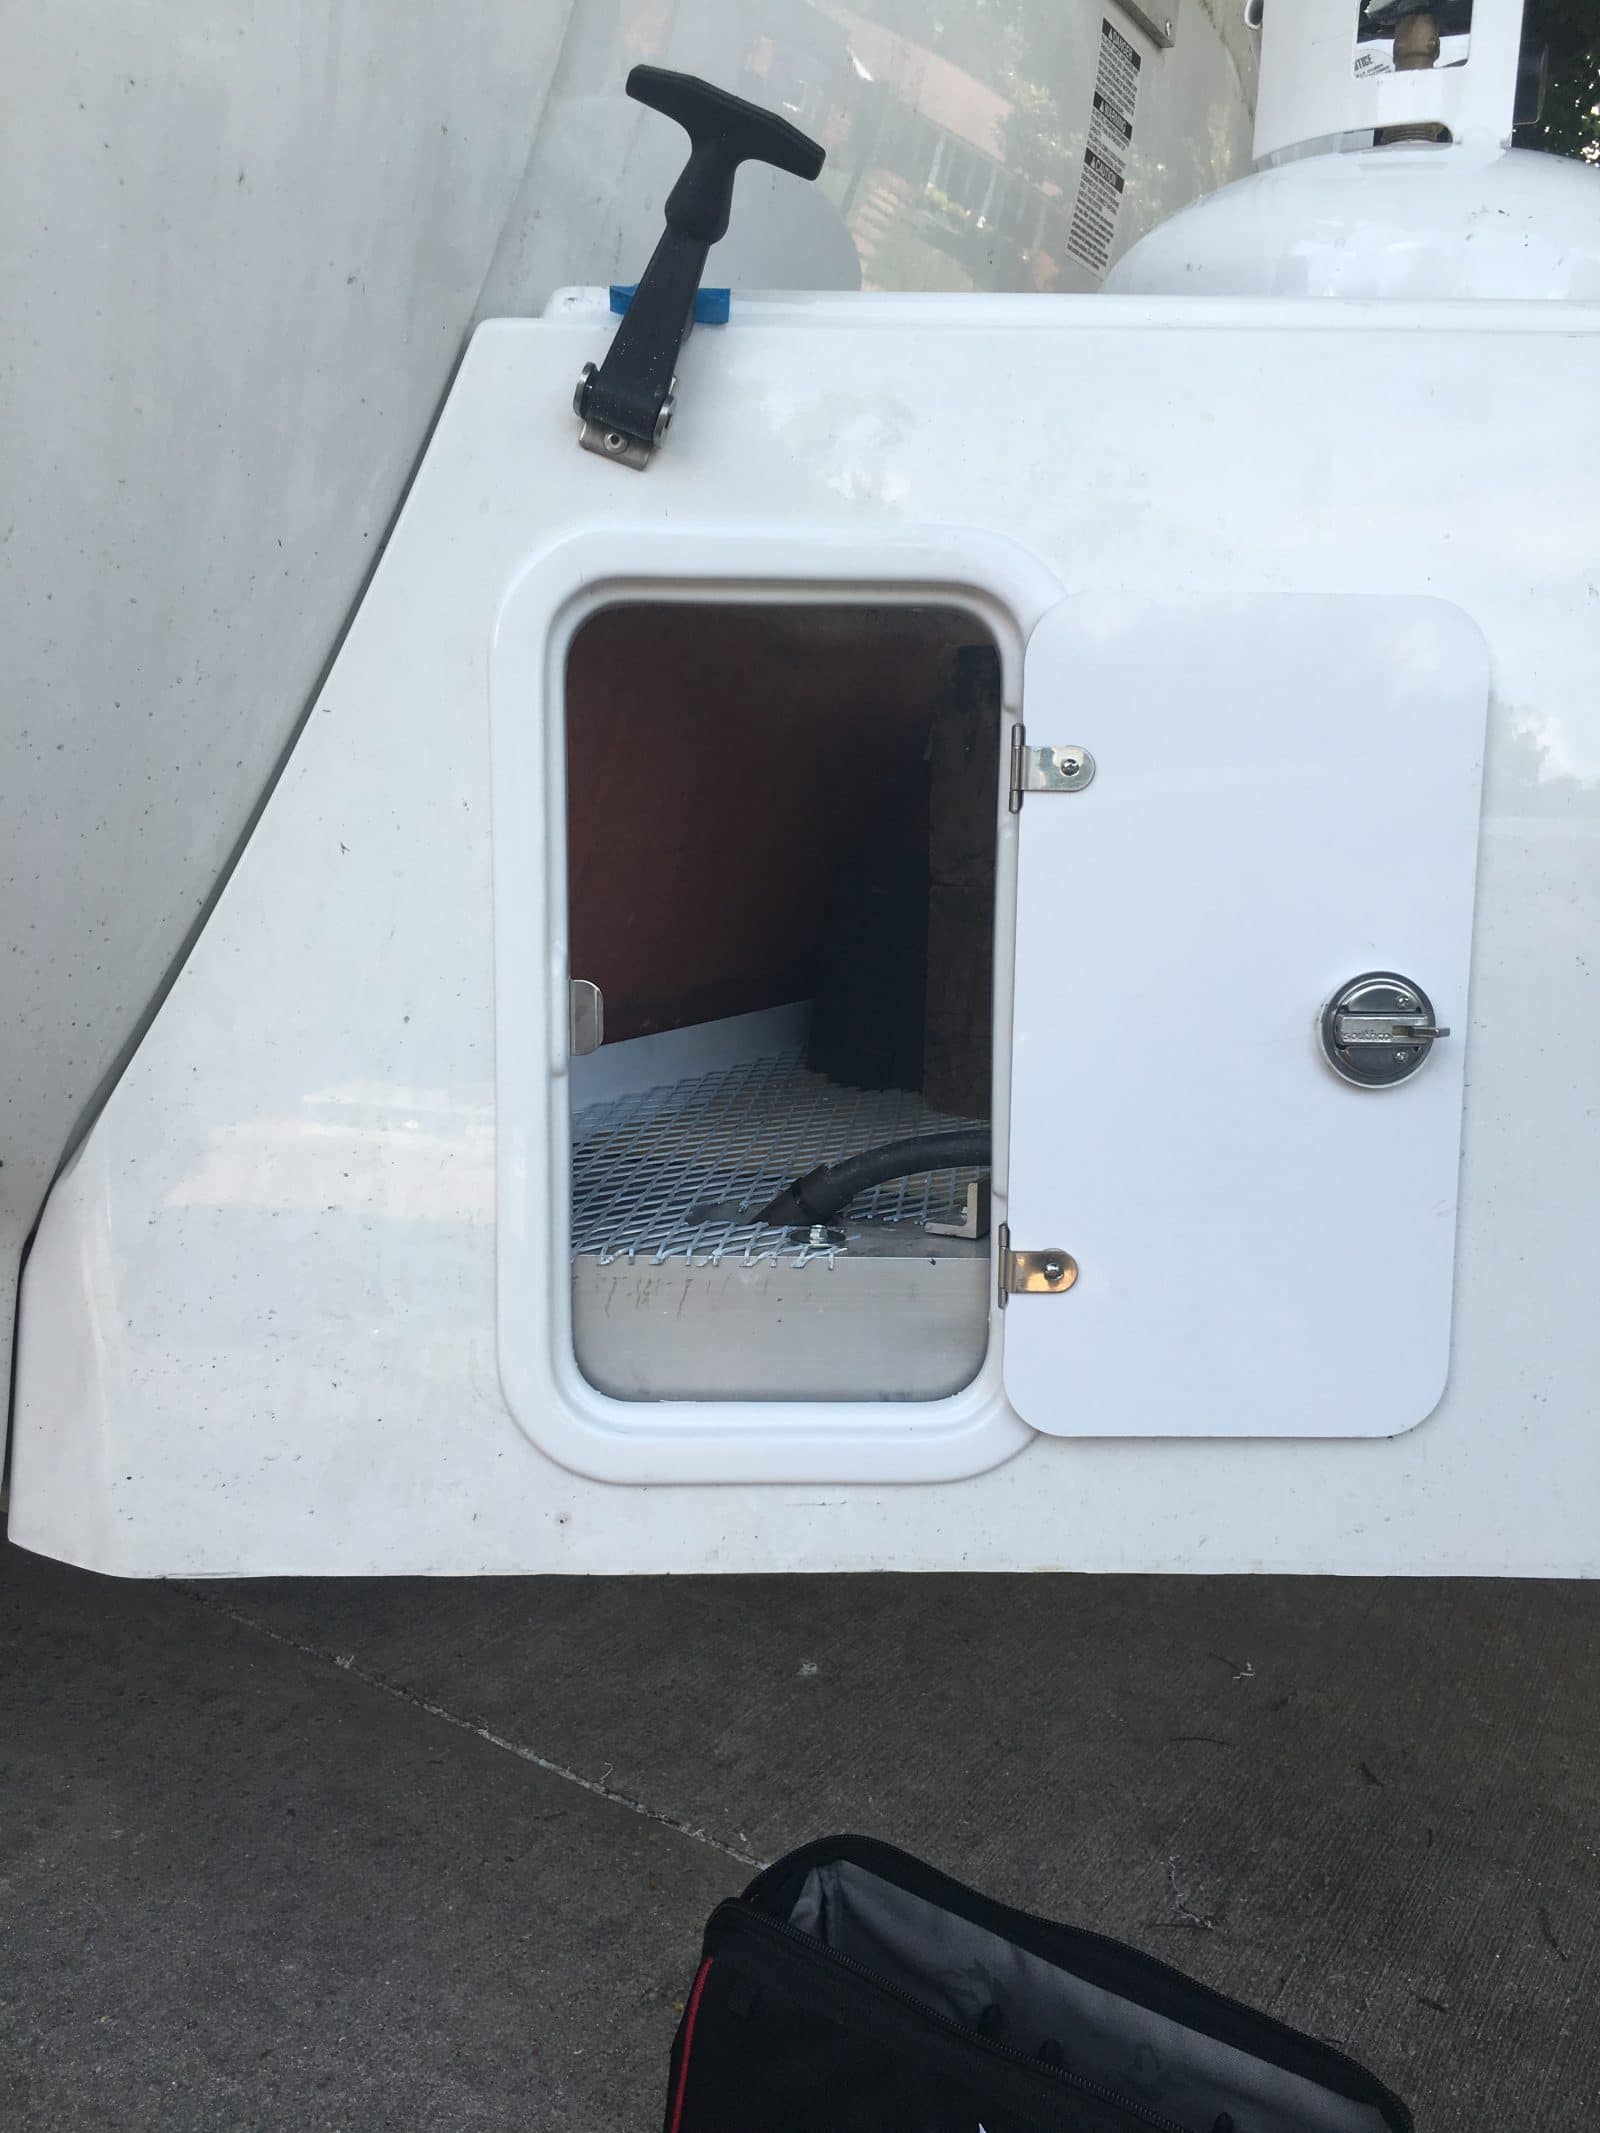
The dimensions of the opening for all of these hatches that I have used in the various places are 13.5" x 7.25"
-
John, they do not pivot and they are secured with a couple of screws. According to their advertising blurb they are made of poly carbonate and do not stretch or lose their spring. I can personally say that they have held our flag poles and table leg for several thousand miles without incident. I do not know if this qualifies for anything like a long term endorsement.
-
See, that gives me a great idea for our trailer – we’re doing the twin beds, but with a table, and now I know where to hide the table posts.
It took me forever to find a source for the clips to hold different size tubes. These are the ones that I ended up buying. There are eight different sizes available. You will need The 2" size for the table posts.
-
Oh, that’s interesting – is it the curved Rafter Pro or something different?
No, the included rafter is straight. It is, of course, adjustable in length. There are brackets mounted inside the closet for its storage.
-
...Does the center rafter come with the awning? I to have had awnings bow in the middle from rain.
Yes, there is a center rafter that is included with the awning that is installed on the Oliver. You will not need another rafter for the Fiamma Privacy Room.
-
1
-
-
...Ours is schedule to start tomorrow, but that is a holiday(?)...
Not in this neck of the woods. The Oliver crew will be hard at it.
-
1
-
-
Well, you have to hang your flag somewhere.
And there you go. You have now been awarded and extra 10 bonus points. Now go back and look at the pics in the previous posts about the lower access doors and you'll see where we store the flag poles.
-
Thanks Pete, many of the above mentioned lubricants are available here locally in a tube but it is hard to find any of these in a can. It seems that the tubes would be somewhat harder and messier to use. In addition, any left in the tube would probably end up as waste. Has anyone found an approved grease that is available in a 1 pound can? I think this makes more sense for repacking hubs.
Tubes are what grease guns use. You continue to grease the bushings occasionally, as regular maintenance, by greasing through the zerk fittings with a grease gun. Why would a can of grease be better? When originally installing the heavy duty bushings, or greasing the bearings, you can get the grease easily from a tube or from a can, but the can won’t work with a grease gun.
Sorry, I inadvertently changed the subject without the obligatory ding. DING! I was thinking and talking about repacking the hubs.
-
C'mon Bill, you missed Canoe12's point completely!!!
-
1
-
-
-
1
-
-
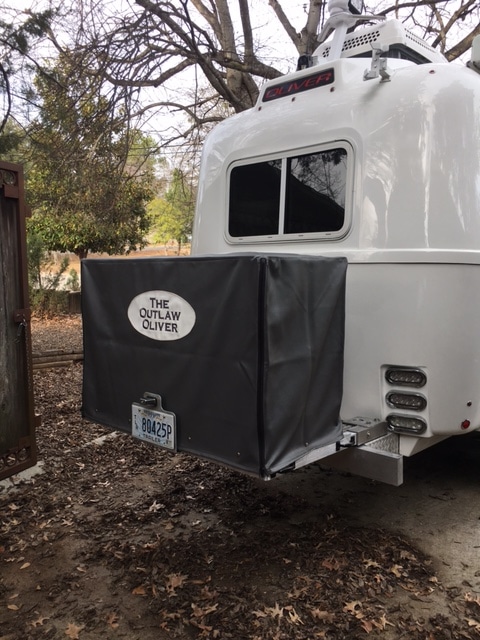
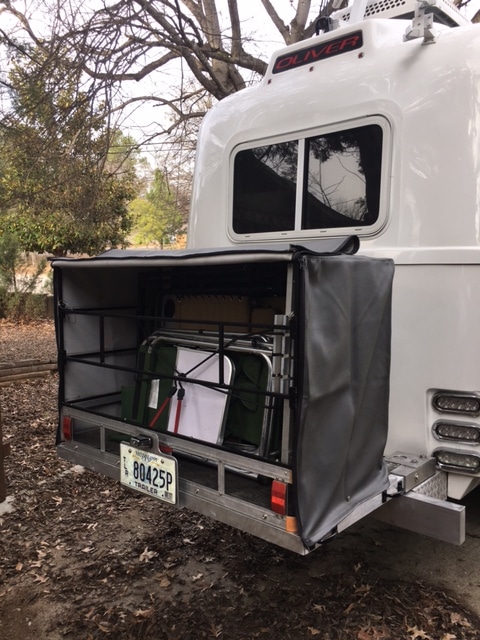
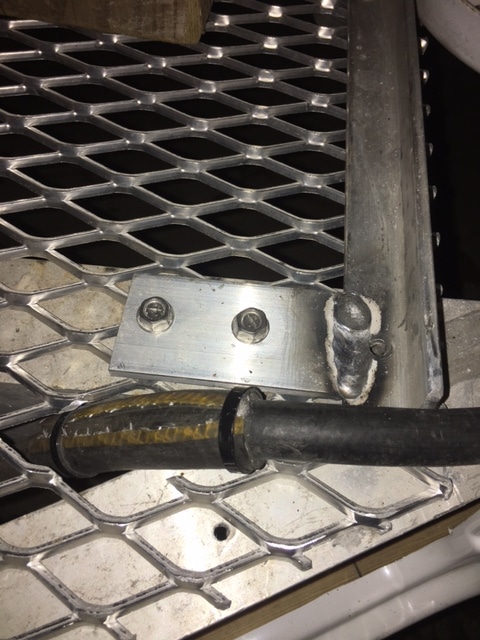
Here are some follow up pics of the rear basket mounted and ready to travel:
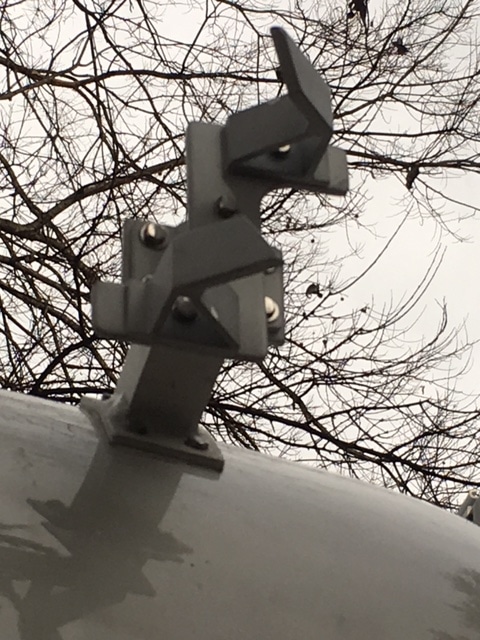
Pop Quiz for extra credit, what is the plate with the hole in it and the weird gizmo for? Look closely you can see them in the previous pics.
-
..Saw the pictures of hatch installation you showed in the other post, but close ups and measurement would be a great help…
I will be happy to provide, but I'm now quite sure what measurements you need...
Thought only one hatch on the starboard (left) side would be all I needed. However in looking at pictures again I didn’t realize there was a 7 pin connector in there on the port (right) side. Seeing, my experience, they could get knocked loose by objects in there bouncing around and also with open mesh floor it is subject to moisture and corrosion. Will have to look at possibly looking at a way to build a guard or hasp to hold it on. A hatch on the other side makes a whole lot of sense to assess the plug… What is the inside opening of the hatchWe've never had any problem with anything moving around in there while we are traveling. Not saying it couldn't happen but there's really not anything that could get knocked loose. The 7-pin connector is secured with a large wire tie and there is not a reason I've found to need to access it very often. Since everything we store there (chocks and blocks) is subjected to the weather while in use we don't worry about moisture and corrosion. We like the two hatches for the ease of storing since there are chocks and blocks coming from and going to each side of the trailer. The 7-pin connector is already in the weather with no floor at all in that area so I guess (theoretically) it is actually some better off with the added protection of a mesh floor... just kidding.
-
1
-
-
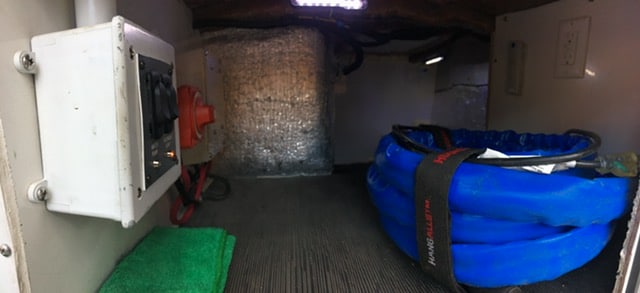
Steve, I am curious to know if you ever thought about mods to the basement? Since it is not a pass thru space, reaching items at the far end can be a challenge. Even the lighting could be improved? Any thoughts? Buzzy PS – Great pics, nice work!
Buzzy, thanks for the inquiry and the interest. I did these mods to the basement a long time ago. Some were actually started during construction:
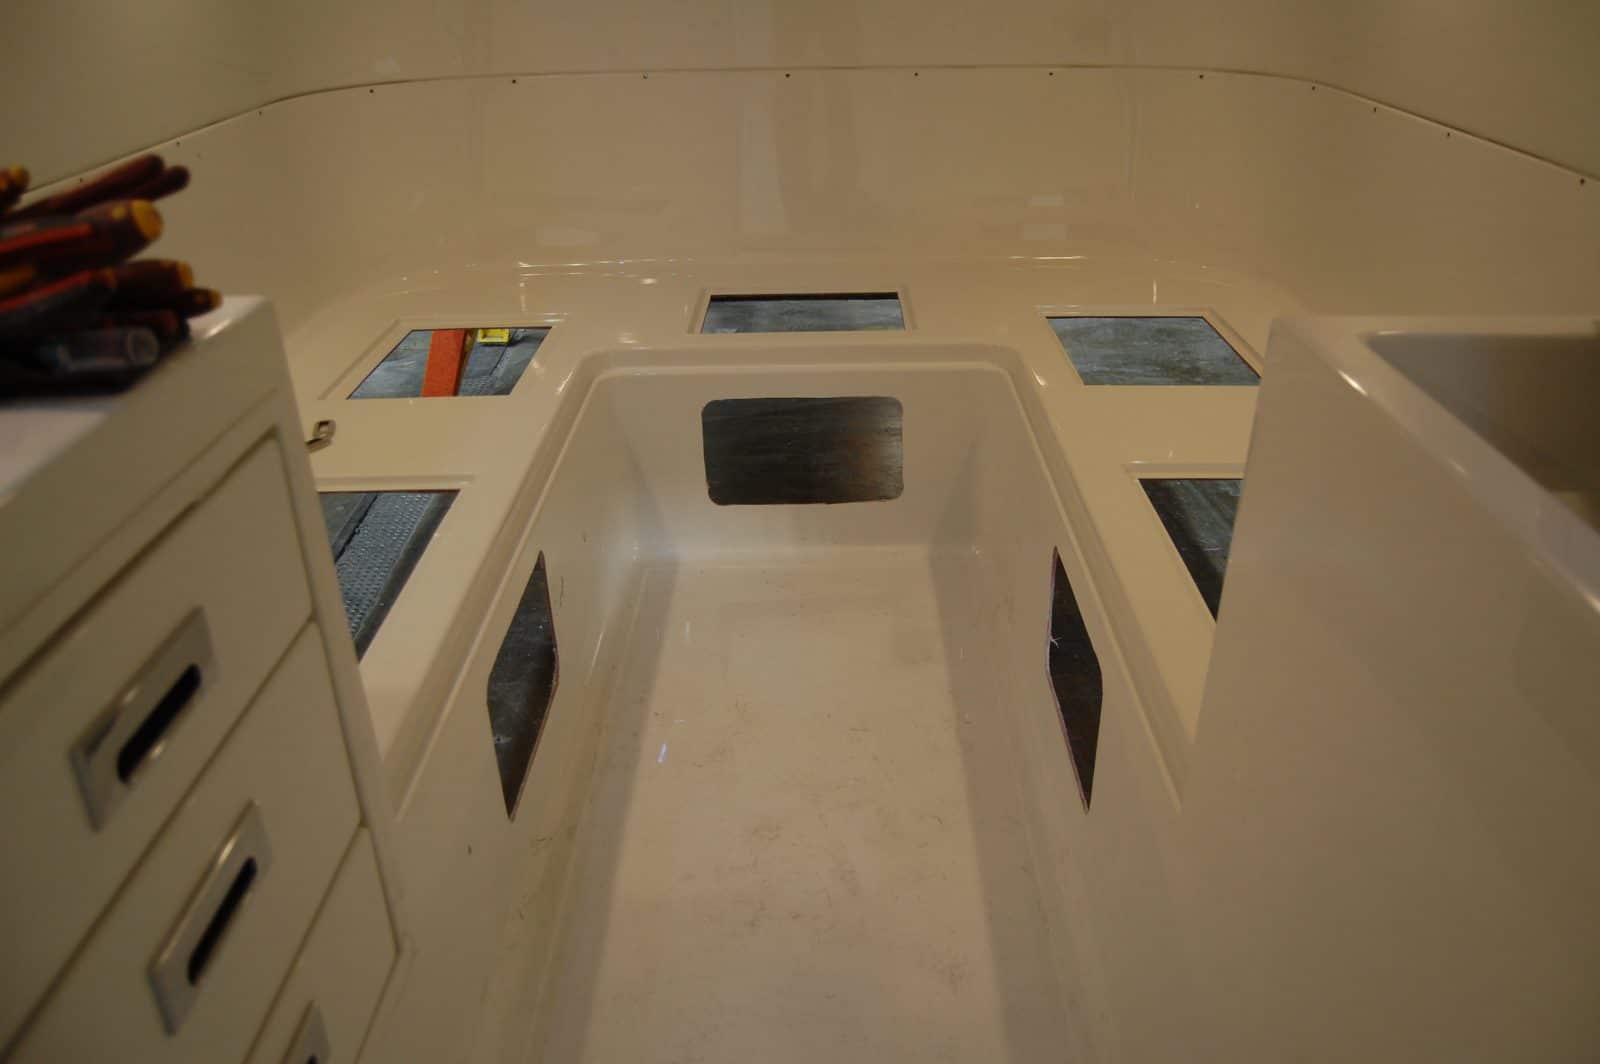
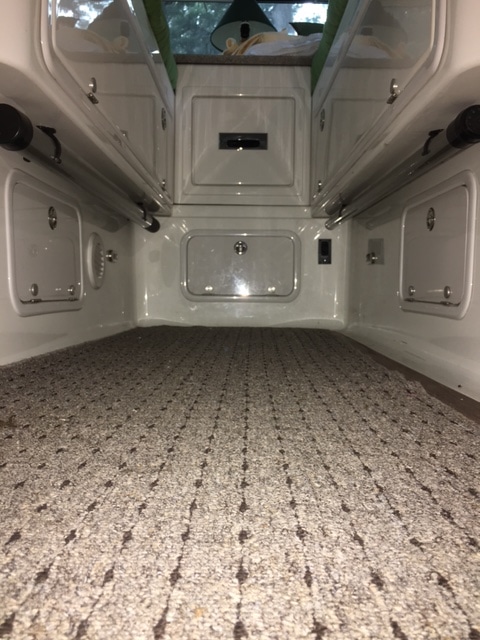
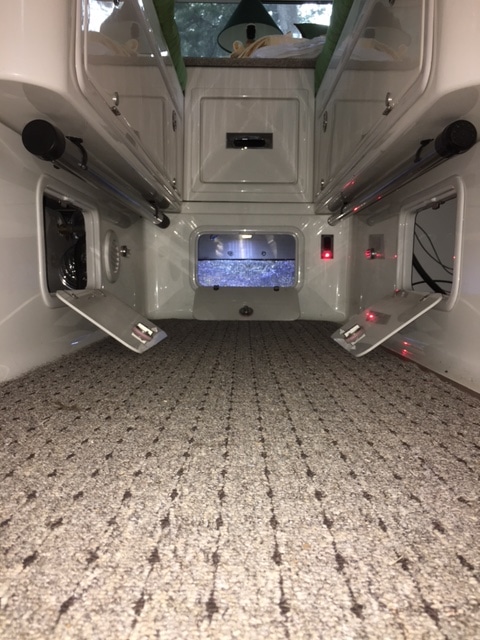
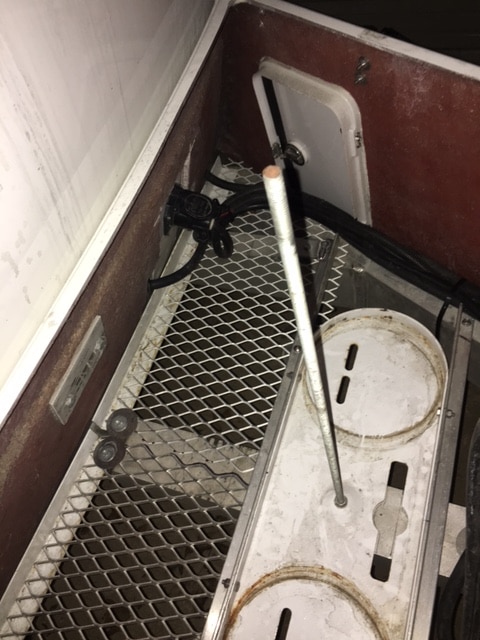
Here you can see where we cut holes in the inside bottom shell to receive hatches (again, these are the same as that one in the bathroom.) The one in the rear under the nightstand is to access the basement. The one on the starboard side is to access the valves at the pump that control the alternate tank fill system and the valves at the floor that drain the water lines. The one on the port side is only to satisfy my OCD Libra need for everything to be symmetrical and balanced.
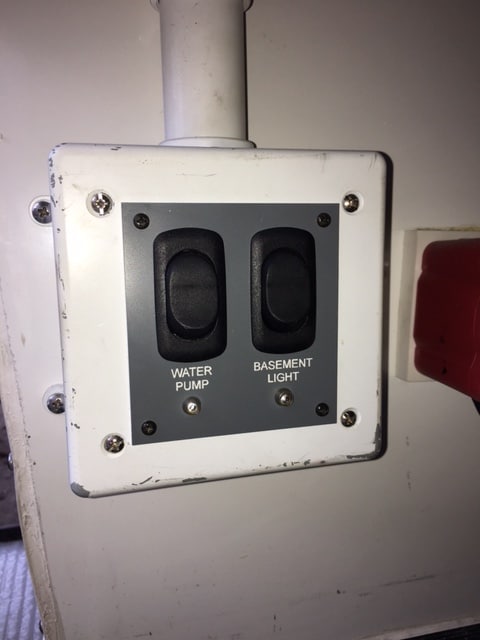
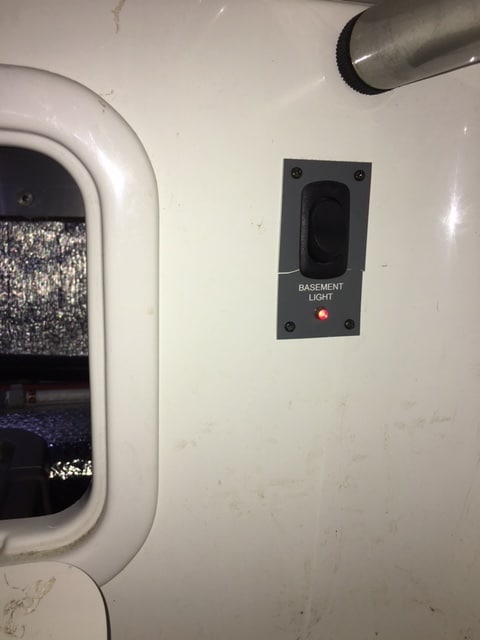
I added two lights to the basement area. They are controlled by a set of 3-way switches, one located right inside the basement door:
and the other located to the right of the interior hatch on the inside under the nightstand:
-
3
-
 1
1
-
-
I’ll look at mine and try to figure out which screws you are referring too that broke. I was in there recently to install 30lb tanks and add a quick disconnect fitting, but didn’t see any problem. I don’t really like the self drilling screws they use though. Those bathroom cabinet doors and the extra space are brilliant!
This pic should show you the old screw hole and the fix that I did. I generally do not use self drilling screws, rather drilling the proper size hole and using a sheet metal screw. In this case, I went with larger than original screws and used two on each side as opposed to the one that was originally used.
-
1
-
-
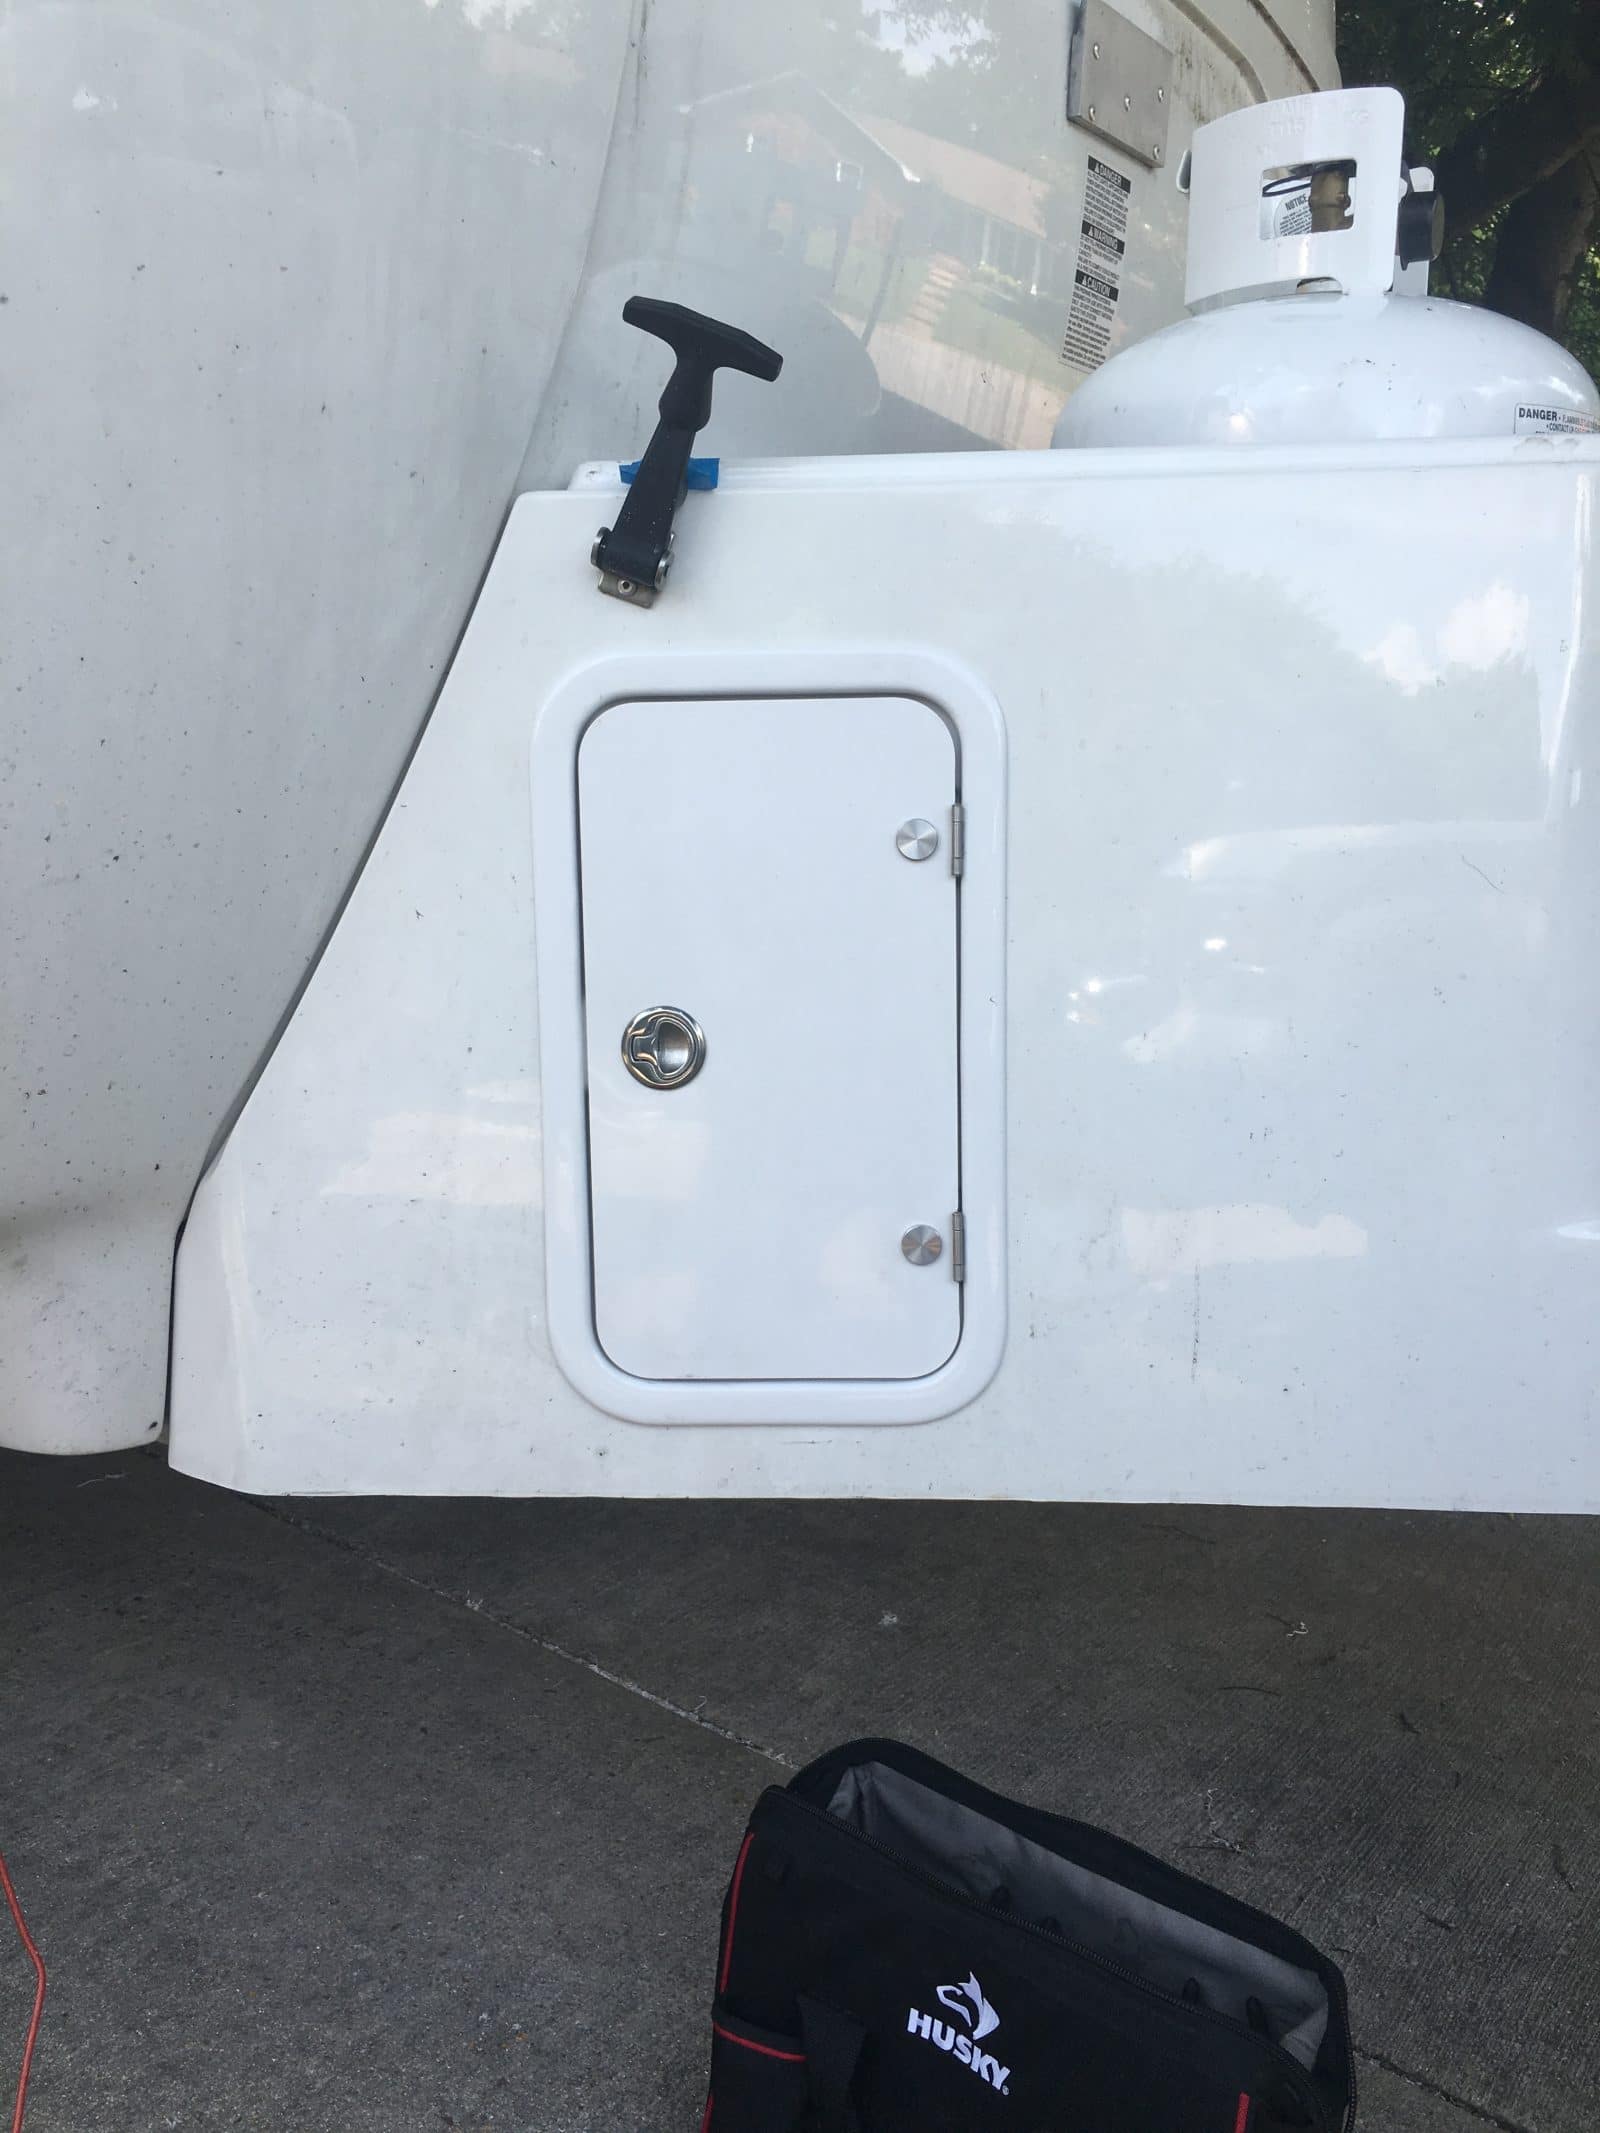
Thanks to those who have asked about the extra storage space that I created under the nose cone and behind the propane tanks. For anyone interested please see a new post I created in my Mods of the Outlaw Oliver thread here.
-
2
-
-
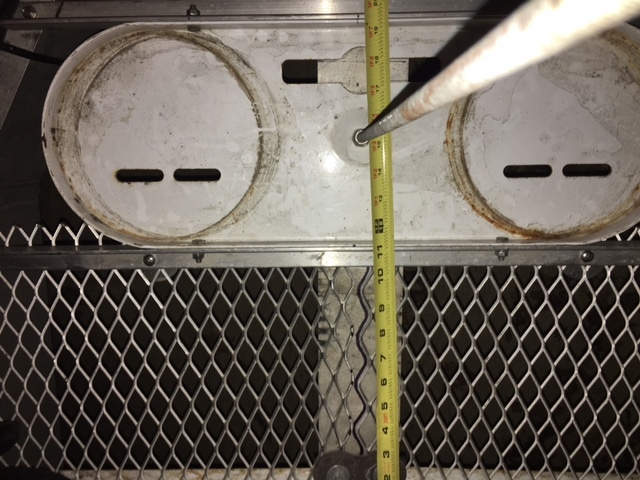
For those who have asked about the extra storage space that I created under the nose cone and behind the propane tanks. The first thing that I did was to remove the propane tanks and the tray that they sit in. I found that the rear screws into the frame that hold the tray down were both broken off from (I assume) the inertia and weight of the tanks leaning forward during braking. The tanks really could not go anywhere because they were obviously hitting the front of the cover, but they idea of them just rattling around in there was a little disconcerting. I re-drilled the holes and replaced the screws only to find them broken again after our next trip. You can see what I did to rectify that matter in the pictures. I’ve had no trouble with them since. I recommend that everyone check these screws to see if you’ve incurred the same problem. The mesh in the floor is aluminum and it is the second one that I've installed. The first was steel and, even though I painted it, it rusted - badly and it looked terrible. Don't waste your time with the steel.
I included some measurements that will show how much room was gained. The outside doors are from Oliver and are the same doors as is on the cabinet in the bathroom. I will be happy to share how these were mounted for anyone that has that interest. I am currently in the process of putting lights in this area and one that will illuminate the foot of the front jack.
-
7
-
1
-
-
Since this topic seems to have inadvertently caused some dissension among our ranks and at the request of several participants, I have decided to close it. I know nobody meant to offend anyone and I hope no hard feelings have developed between the owners that regularly post here.
-
1
-
-
...If you’re a cooking nerd like me...
As a connoisseur of the culinary arts, I am sure you have already anticipated the amount of cooking you will actually do in the inside of your Oliver while camping. Most people report that they cook actually very little on the inside.
The induction cooktops make perfect sense if you are plugged up to electricity all the time. We find that we are rarely plugged in and I personally would not want to deplete our batteries trying to use them for cooking. In addition, I would not want to have to carry the portable unit plus cookware that is compatible.
-
1
-
-
Thanks Pete, many of the above mentioned lubricants are available here locally in a tube but it is hard to find any of these in a can. It seems that the tubes would be somewhat harder and messier to use. In addition, any left in the tube would probably end up as waste. Has anyone found an approved grease that is available in a 1 pound can? I think this makes more sense for repacking hubs.
-
...We debated it, and decided to play it safe with the 12V. You get a bigger fridge if nothing else, but it will use about ¼ of your battery capacity per day while boondocking, so that’s the obvious tradeoff...
Let's assume that one has the 4 Trojan AGM's and has a total of 400 amp hours, just so I understand, is that ¼ of that total (100 amp hours) or ¼ of the usable (50 amp hours?)
-
Little Buzzy is now at the Rainbow Bridge with all the Oliver dogs that have gone before him. Our Storm and Maggie, Pete's Oscar, Mountainborn's Dillon and others I'm sure that I overlooked and are missed by their owners just as much as we all do ours.
Just this side of heaven is a place called The Rainbow Bridge.
When an animal dies that has been especially close to someone here, that pet goes to The Rainbow Bridge. There are meadows and hills for all of our special friends so they can run and play together. There is plenty of food, water and sunshine, and our friends are warm and comfortable.
All the animals who had been ill and old are restored to health and vigor. Those who were hurt or maimed are made whole and strong again, just as we remember them in our dreams of days and times gone by. The animals are happy and content, except for one small thing; they each miss someone very special to them, who had to be left behind.
They all run and play together, but the day comes when one suddenly stops and looks into the distance. His bright eyes are intent. His eager body quivers. Suddenly he begins to run from the group, flying over the green grass, his legs carrying him faster and faster.
You have been spotted, and when you and your special friend finally meet, you cling together in joyous reunion, never to be parted again. The happy kisses rain upon your face; your hands again caress the beloved head, and you look once more into the trusting eyes of your pet, so long gone from your life but never absent from your heart.
Then you cross The Rainbow Bridge together....
-
1
-


Lug nut size
in Mechanical & Technical Tips
Posted
In addition to the one for the lugs on the Oliver I also carry a socket of the correct size for the lugs on the truck. I also have one specifically for the nut that attaches the hitch ball to the stinger and one that fits the sacrificial anode in the water heater. You would also find it handy to have a wrench large enough to hold the flats on the bottom of the hitch ball if you ever have to tighten the nut while on the road. Without said wrench it will be almost impossible to hold the ball in place while tightening the nut.