

csevel
-
Posts
213 -
Joined
-
Last visited
-
Days Won
5
Posts posted by csevel
-
-
15 minutes ago, Mike and Carol said:
Does the leak increase frequency if the water pump is turned on? If your backflow valve is not functioning 100% it could be letting fresh water flow back and drip from the fresh water inlet. I had to replace the fresh water backflow valve because I had similar symptoms. Mike
The drip did not significantly increase when the pump was activated. The DH looked while I ran the pump. If I have to replace the backflow/check valve...what size is it? There are soo many to choose from on Amazon!
-
1 hour ago, mossemi said:
@csevel is the leak/drip visible from the outside or the inside? Hose connected or not? Are you trying the fill the fresh water tank?
Mossey
The leak is visible from the outside only and the hose is NOT connected. I'm not trying to fill or anything actually..the tank was full. I just noticed it dripping when I was walking around the trailer.
-
 1
1
-
-
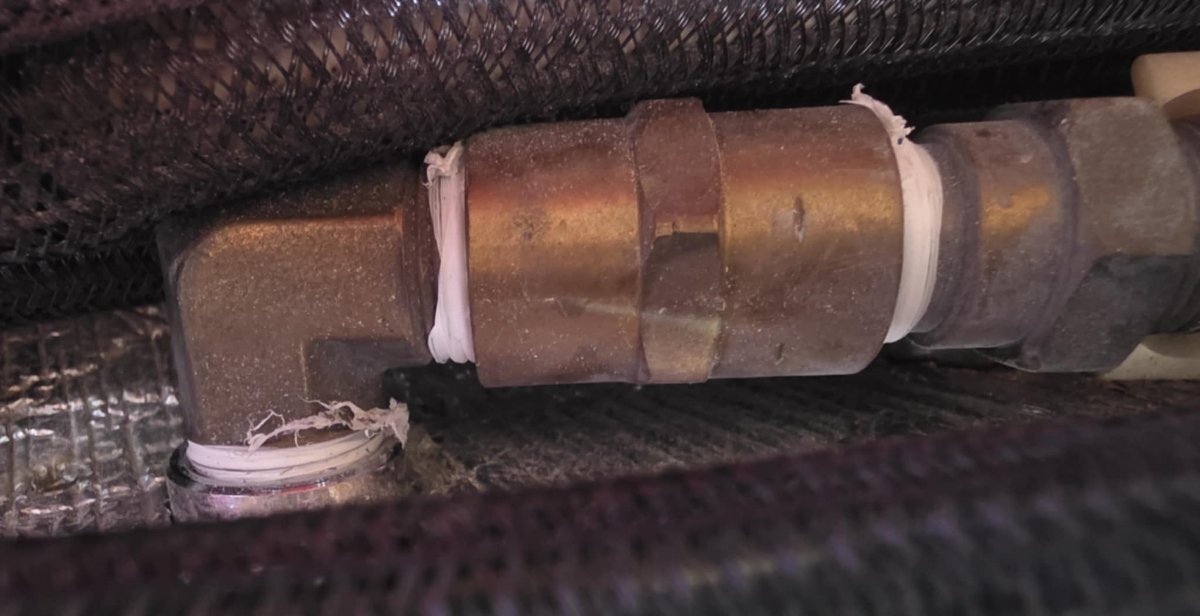
Over the last week or so, I've noticed a drip from the fresh water inlet. It drips about every two seconds. I tightened the fitting with a 1/2" Allen key but it did NOT solve it. I don't exactly know where to look next!? Any tips, links and/or advice appreciated! Here are some shots of my pump set-up and the basement (what I think are the hot and cold check valves)...

-
Posted - then sat with it and figured out my problem..YAAAAY! - MODERATORS you can remove if need be 🙂
-
8 hours ago, Geronimo John said:
Claudia:
I recommend you cut and paste the above in to the Amazon Reviews. It is to the point and honest.GJ
Way ahead of ya.. done and done like
-
3
-
 1
1
-
-
I want to remove the roof-top omni antenna as I simply do not watch television while camping (or even at home, lol) I removed the television as one of my first mods on the ILOVHER and now I'd like to remove the antenna; it's just personal preference. It's a bug collector and it spins and rocks uncomfortably up there and snags on the cover. In addition, someday I'd like more room for solar panels. We download and play movies in inclement weather on our tablets and listen to music on a BOSE blue tooth speaker so FM channels aren't necessary either.
I realize I may want to keep the antenna and/or wiring if I ever sell, but I'd still like to remove it, save it and cap it off.
Does anyone have any suggestions or tips to remove it and/or what I could possibly use to seal the holes and/or cap it off?
Thanks in advance,
Claudia
-
1 hour ago, topgun2 said:
That 90 degree turn around the windows puts a bunch of stress on the channel.
Still, no excuse for a product using inferior bonding tape.
Having said this - before removing the entire thing and reinstalling, I'd suggest trying a bit of E6000 on the places that are detached. Hold in place for 24 hours with blue painters tape and don't go crazy on the E6000 if you care about how the repair looks.
Bill
Too late, but that's a helpful tip. The product (which I have seen many iterations of on Anazon) was also of a cheap rubber/plastic material. The color was off too and I simply knew in my gut I was making a mistake installing it. At least it came off easy and I can start fresh! Seriously hoping the Trim-Loc is better overall.
-
1
-
-
I managed to easily rip the gutters off before trash day in 50 degree weather. They came off without hardly pulling and very little tape to scrape off. I hope the Trim-Loc will be a better product.
-
1
-
-
15 hours ago, SeaDawg said:
So, has anyone used the recpro product? We've always used ez rv gutter, so I can't comment on recpro product.
I think the EZE RV Rain Gutters is the product that was used originally on my Oliver by the previous owner. The least expensive I could find was $145 for 50 feet.
I ordered 25' of the Trim-Loc from Amazon for $65; hopefully it will be the same quality
-
5 hours ago, Geronimo John said:
The referenced site indicates purchases of 250 feet.
How to Order a Drip Rail from Trim-Lok
Trim-Lok’s Drip Rails are easy to order. Go to our drip rail product page, choose your color, and choose your quantity of 250-foot boxes of the plastic drip rail.
GJ
Since this is not my first, second OR third try... I'll be really good at it so line up ten or so Ollies and I'll simply do them all!! LOL
-
4
-
 4
4
-
-
4 hours ago, ScottyGS said:
Search on this on Amazon. They sell 25' lengths. I put the trim lok site link in my reply because it was the company site. If memory serves you can do one LE2 with a 25' length, but you have to be careful.
Scotty
Trim-Lok Drip Rail, White – 1/2” Height, 25’ Length – PVC Plastic Rain Gutter for Cars, Vans, and RVs, Easy to Install Flexible Drip Rail Molding to Control Water Runoff, Durable 3M Tape Included
Thank You! I plan on using about 31 feet or so because I want to bring the ends down alongside the windows like John E. Davies so two rolls for me!
-
2
-
1
-
-
35 minutes ago, SNY SD UP said:
Claudia,
There a number of threads out there on this MOD.
In one, Mike (and probably Carol helping) added their Drip rail, and as they were applying it, on a warm day, used some Blue Painters Tape to hold it in place, as they worked along. I will let Mike tell you why he used 'Tape'.
The next day (Mike commanded the SUN GOD to change its axis, so the other side of the trailer would be in the SUN. While he was waiting,
Carol re-oriented the trailer so the other working side was in the sun, and they could continue in this life-time. Thus avoiding a Galactic Calamity...
"my words, not their actions") I believe they removed the tape the next day after each application, and did not have any issues with it.
I do not remember which vendor of the 'Drip Rail' they used.It was a very informative thread, with lots of comments as to the experiences of others.
Sorry to hear of your unfortunate experience, we are almost in the part of the year, that projects like this will have to wait until warmer days.
Kind Regards, As the CAMPING Season transitions.
Bryan
I'm aware of the posts and did in fact do my install on a hot day with tape. It sat for three days in warm weather... My Casita had drip rail as well so it's not my first attempt...Just wanted to help new owners be aware of the bad product.
-
 2
2
-
1
-
-
8 minutes ago, ScottyGS said:
You want the Trim Lok Drip Rail with the 3M backing tape.
https://www.trimlok.com/plastic-extrusion/drip-rail
The 3M adhesive is awesome. Put it on #145 in 2016 and still doing the job. I would actually be afraid to take it off now for any reason. It's part of the trailer.
Good Luck
Scotty
Unfortunately, the Trim-Lok Brand in white seems to be sold out on many sites. May have to go direct.
I Agree.. Taking it off twice should be fun times 😞
I actually think it prevents having to re-caulk the top of the windows.
Claudia
-
1
-
-
Just a heads up, I recently had to replace the window rain gutter trim around my windows because the original trim was never brought down far enough along the edge of the window and they were starting to peel and come off exposing the 3M tape and simply not doing the job intended and leaving longer black streaks than I like.
DO NOT PURCHASE THIS PRODUCT FOR YOUR OLIVER: https://www.amazon.com/dp/B0D98165TN?ref=ppx_yo2ov_dt_b_fed_asin_title&th=1
It's horrible.
It was purely my decision to go ahead with the install even though the color was a bit off and not nearly the quality of the original gutter.
The tape is crap and even though I installed on an 85 degree day and let it sit for days, the rounded corners lifted on the first rain and it looks awful.
Again, I knew that there was a chance that I'd have to peel it all off and start over..but I took the gamble.
Just know, it's an inferior product. The lower price point should have tipped me off...
I'm hoping this product is superior at more than twice the price:
Let me know if you have had better luck with RecPro. My research suggests the original product was made by Essential Products called EZE RV Windshield Gutter, but I can't find it anywhere.
Live and Learn,
Sigh,
Claudia
-
5
-
-
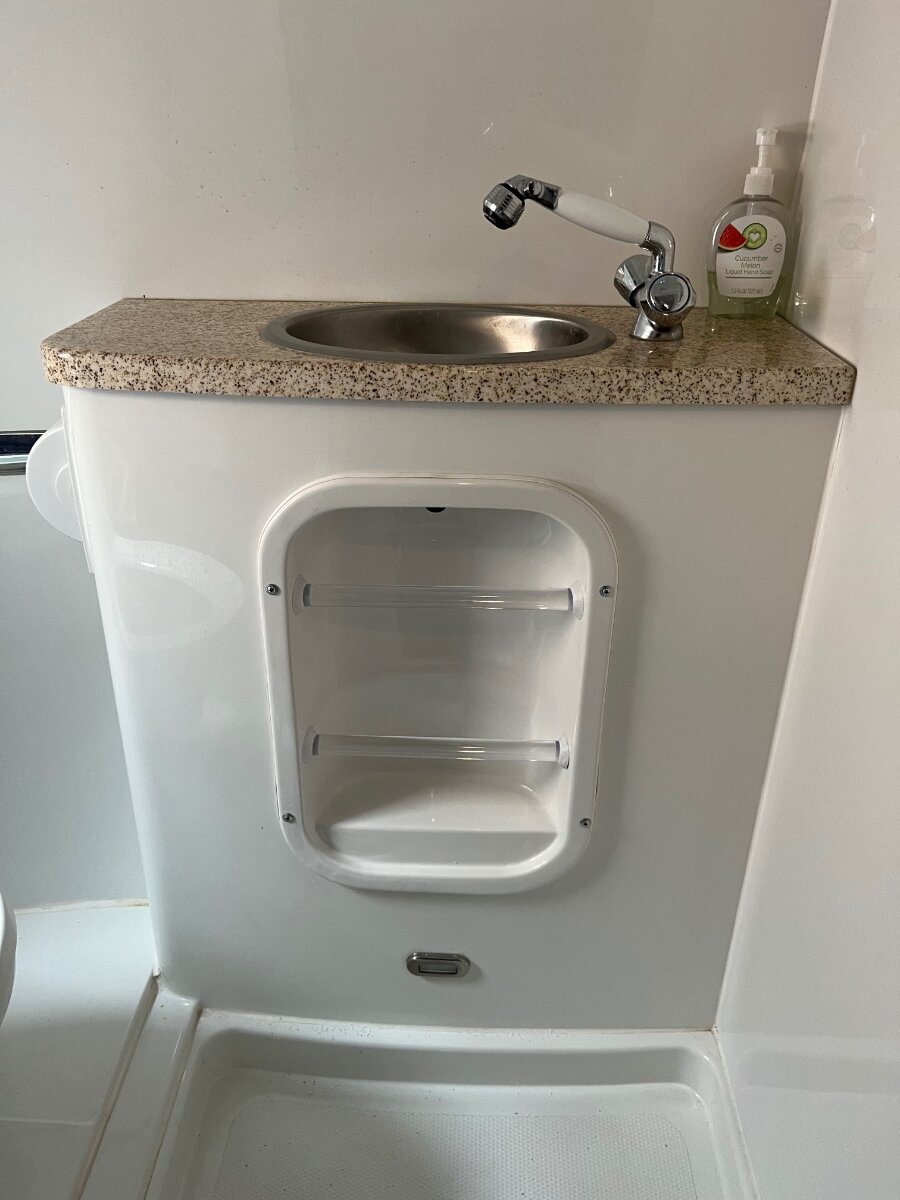
I spent some time under the sink trying to locate any loose fittings and found nothing. I did find out that the black tank from under the dinette seat was a contiguous open area (which I simply did not know) so any smell I had under the dinette was in the sink area too except not as pronounced. I decided to just leave well enough alone and spray OdorBan everywhere as per Ronbrinks suggestion in my original post, including the valves. I put some https://bit.ly/3BLgPdG in there and haven't had smell since. Not sure if warm weather will reactivate it next year but I'm really glad I opened the area up! I may want to change out my faucet someday, check p-traps etc.. and it was pretty simple to do.
Thank you for the gasket material you gave me at the rally, however, I didn't end up using it as I thought it might be too hard to place around the perimeter of the cubby.
I used this instead: https://bit.ly/3A0quwj It's channel shaped and easy to route.
Everything went well. I used the original screws and snap caps even though I had bigger ideas in the beginning. For the number of times I'll actually go in there, it wasn't necessary to use plus nuts and get all crazy. So far no leaks and it looks stock.
Good Luck Steve! Let me know if you find anything more.
Regards,
Claudia
-
1
-
-
20 hours ago, Jason Foster said:
I see that the Andersen Rapid Jack goes to 5 3/4 but it doesn't have the stop wedges. Might be something to try when 4 inches just isn't enough.
I have the Rapid Jack and a regular Andersen leveler. I purchased an extra chock directly from Andersen. I tend to find the best campsites that are always unlevel!
-
1
-
2
-
-
8 hours ago, rich.dev said:
I’m looking for a short hose to draw water from my water bladder through the boondocking port into the fresh water tank, do you maybe have a link to the silicone hose?
I have been using this hose with a quick connect fitting and I love it.
https://www.amazon.com/gp/product/B0894GMDWP/ref=ppx_yo_dt_b_search_asin_title?ie=UTF8&th=1
-
2
-
3
-
-
So sorry for your loss but how exciting to order a new Oliver! I went through a whole process with National General Insurance for Agreed Value and it took forever. I hope in the event of a loss of our ILOVHER that the insurance will be there. Good to note all of your documentation was helpful.
-
2
-
-
Just to follow up on this post...
I finally scraped away the caulking from the towel bar in front of the bath vanity to investigate whether I had a detached vent pipe. It wasn't nearly as much a chore as I anticipated...took all of 15 minutes! To my dismay there isn't any loose pipes or fittings. There is a faint black tank smell in that area but I was unaware that the space around the black tank is contiguous with the space under the dinette seat...so any smell I have there would also be inside the vanity. I'm still perplexed as to why there is a smell at all but I'm assuming my sniffer is just overly sensitive.
I'm happy that I tackled this as I'm going to use a gasket around the towel bar (thanks Steve Morris) to prevent water intrusion and keep it accessible for the future in case I purchase a new faucet. I'm just going to use the original screws and snap caps to secure it down since I don't anticipate going in there very often.
-
1
-
6
-
-
On 9/10/2024 at 12:08 PM, Steve Morris said:
Claudia, let's get together and take a sniff in each other's trailers this weekend. We've been chasing a similar very faint odor, but I haven't gone to the extent that you have yet. I too regularly flush the black and gray tanks with the Calgon/Pine~Sol mix. I use a macerator pump at home, so take extra time and several fill/flush cycles of both. Still, there's that slight, lingering odor.
I bought but haven't yet used a roll of the edge seal for the bathroom vanity. I'll bring it with me and we can see if there's enough length for both of us.Yeah, I guess I'm going to have to tackle this project to be sure the vent pipe is attached. I wasn't looking forward to tearing it apart but I guess it will be more accessible for a variety of other things that could come up. I'm considering using plus nuts and white thumb screws to make it easy to open up in the future. I appreciate the offer for the gasket material! We'll chat this weekend!
-
1
-
-
14 hours ago, jd1923 said:
Actually, @Frank C did it first and best, quite detailed using u-clips. Mine was a quick job but the part re mine I like is the rubber seal, inexpensive part too!
What do they say? Imitation is the sincerest form of flattering? LOL..I am considering using plus nuts and white thumb screws for my installation...but am going to practice using them first! Thanks for the link to the gasket material!
-
2
-
-
15 hours ago, mountainoliver said:
Along with everything else that has been suggested, recheck the toilet flange to make sure that it isn’t cracked. Mine started to smell on occasion and a little at a time then gradually became worse. I found out that the cheesy plastic flange was cracked, allowing sewer gas to escape and eventually liquid as well. I replaced mine with a stainless steel flange and fastened it down using all six available mounting holes with #14 stainless screws.
I removed the entire toilet as in #2 of my post and there were no cracks in the closet flange.
-
58 minutes ago, jd1923 said:
Looks like you’re going to have to open it. I put mine back with 4 screws, drill 5/32” holes, rubber washers and a white rubber seal, no caulk. https://a.co/d/5G5pVZd
I've seen your mod and it's truly something that Oliver should consider from stock! It was on my list..Brilliant!
-
1
-
2
-
-
1 hour ago, Mike and Carol said:
One more thing to check (I speak from experience here), open up the area under the sink in the bathroom. In the back on the left you’ll see where the vent pipe connects to the black tank. On our trailer it was not glued, just stuck into the hole on the top of the black tank. It had come out and was sitting on top of the tank off center so part of the hole was open. The vent pipe is now epoxied into the black tank. Mike
I was sort of trying to avoid opening that area up. Looks like I have another mod on my hands!
-
1
-


Fresh Water Inlet Leak
in Mechanical & Technical Tips
Posted
The tank was full when I noticed the leak so, no. I'm going to try John's suggestion today!