
DanielBoondock
-
Posts
263 -
Joined
-
Last visited
-
Days Won
7
Everything posted by DanielBoondock
-
Some things I’ve found out that will be of interest, a lot of it from consulting with various AI’s which have gotten really good and more reliable than humans Trailer Cover I’ve debated getting a cover, but that’s more for the traditional trailers with leak prone seams that need protecting. Other than cost and difficulty to get on/off there’s a ‘greenhouse effect’. I’m seeing it now, I’ve got a tarp on the roof to keep morning dew off while the graphene cures. Already in the morning that inside ceiling gets hot. A cover bakes the trailer, better to graphene coat and no cover which lets moisture evaporate and radiate heat UV Protection What about preventing chalking? Hands down SiO2 without or without graphene is the best solution. Gel coat is rather porous, providing a perfect base for the coating to adhere to and it perfectly seals and prevents basically 100% UV protection. Just make sure to refresh it every few years, depending on use and climate it can last up to eight Graphene This is an additive to a regular SiO2 coating and solvent. By itself it can’t coat, but as a dopant it greatly improves the performance in many ways Which brand? Glidecoat. Originally made for marine applications it’s Elite level protection for your Oliver. Additionally its rated multi-surface, get the 30’ kit and you’ll have plenty to coat all the aluminum too, and probably much of your truck Why? Basically its the best protection for this trailer other than garaging it. Even then it’ll be easier to travel, you want to get bug guts off, droppings and sap because they eat the gelcoat. But after this treatment they just wipe off. Looks great too. And its cheaper than the alternatives. Garaging is expensive (and rare out West) and you want protection on the road anyhow. CalMark covers are near $2k and a pain, and this only requires minimal upkeep and maintenance. Total cost and tools was around $1k + sweat equity, or you can have CGI do it. Application The CGI Detailing is the best method, which is roughly Do a deep, deep clean For heavily oxidized trailers use a rotary polisher and heavy cutting compound Then (and for trailers in good condition) use an orbital polisher working in 2x2 or 3x3 squares with Inox Cutmax, four dots on a particular pad. Three passes, Wipe off Go to 6-4 polishing compound, same method IPA wipe off, two towel method Coat Lots of particular details here that are important, highlights Moisture must be managed. The solvent uses humidity to cure, but actual moisture will ruin it. Working outside is fine - I’m doing it - but I time it to periods during the day and cover the trailer at night for the first 48 hours to avoid morning dew and be out of the sunlight so it doesn’t flash off too quickly. Don’t wash the trailer with soap for at least a week. Do two coats, three doesn’t add anything In general use a two towel method and rotate pads. It took me two days do the roof, partly because I think it’s on the ladder so lots of moving that around, fiddling with the odd areas, and getting used to it. Next I’m taking three days to do the sides and back. First day to compound, second to polish and coat one side, final day to do the other side. Much easier outside as can pop the awnings to avoid any sun. Then finally I’ll take two days to do the front as that’s the most important
-
I’m graphene coating the Oliver, just completed the roof. Basically following the CG Detailing method, which they graciously provide if you dig for it. They don’t come out West so I need to DIY which is a ton of work but satisfying. If there’s any interest I’ll provide details and tips
-

Made in USA leaf springs
DanielBoondock replied to Mountainman198's topic in Mechanical & Technical Tips
On all the models? Last I saw it was mentioned only for the Apex. Yeah as I talked about on the other thread, watching the suspension in action for a good hour its pretty obvious that while the 1750's are sufficient, they're not adequate. They're working but it looks like there's no extra margin, hit a good bump and they quickly bottom out. -
I looked over my footage, not worth uploading. I was holding the camera, there’s too much camera shaking from holding it to be useful. Second it’s not long enough, you’d need an hour of watching the footage to see it, and ideally you’re also seeing the road too. In other words, ideally you’d be watching it while driving. It’s not something that jumps out at you, it’s not obvious as first glance. Initially I was thinking “move along, there’s nothing to see here”. But after 45 minutes or so of watching a story emerged which I wrote about above. It took that long to see the pattern, which I’d characterize as … Trust your suspension. Baby it, inspect it, religiously do your maintenance and inspections. It’s doing its job but is taking a hell of a beating. After this I’m going to religiously inspect before every drive. Upgrade it with the best components you can (Alcan) Factory suspension is clearly undersprung (Alcan) And now I am going to carry all these Dexter parts as spares on the road Trust your trailer, don’t underinflate your tires The Oliver is built like a tank - that’s why we bought it right? As detailed above the aircraft carrier is the best description. I’ve seen other suspension drive videos with conventional trailers and you can see them rattling and moving. In fact there are RV tech videos talking about the need for those panels to move relative to each other, ideally with a good angle bracket covering the edge. The Oliver is nothing like this from frame to body. Nothing is meant to move, it’s stiff like crazy, and from what I can see at best only very high band/high frequency vibrations make it through. But in a fiberglass four body trailer like this they’ll just damp themselves away. Avoid porpoising as best you can All the shaking going on inside the trailer? It’s that. Comparing that from the side mirrors to the underbody cam was night and day. Clear that any internal trouble comes from that Somewhat related, I had my Anderson installed from the factory. They recommended slightly slack chains. It’s bothered me ever since, how could these possible be doing any weight distribution? Didn’t get any response here about it but consulted Gemini which was clear that the chains need to be tensioned for WD to occur. So this trip I tried it, lifted the truck back end a couple inches, tightened the chains and then lowered. End result was the truck towed a bit better. I run a heavy trailer with a 700 lb tongue.
-
Made in USA leaf springs
DanielBoondock replied to Mountainman198's topic in Mechanical & Technical Tips
In case you’re not following my other thread where I mounted a trail cam such that I can watch the suspension Based on my observations of the Dexter in action, run, don’t walk and get yourself set up with five leaf Alcan. -
Towed it back home after a trip. The following observations are preliminary pending what I see after I install the Alcan. They’re not scientific or measured in any way, but my impression from watching the trail cam for an hour over a variety of road conditions. Having said that I’m pretty confident of the patterns I’m seeing. I’ll try and post good video captures before/after so you can make up your own minds (I got some video from this trip but I really need a phone mount), but for now here are my impressions … Suspension Run, don’t walk and get yourself set up with a set of Alcan 5 leaf! For reference I started as an Alcan skeptic to agnostic, now I’m a raving convert. The stock suspension is undersprung, I’m convinced of it. Confident I’m seeing that the springs have too little travel and bottom out too quickly. After this I can’t unsee it, just sitting there parked they’re too compressed. Alcan’s assessment that for this trailer you need five leaves is 100% accurate, and for an engineer to say that is as strong an endorsement I can make. The stock suspension works, that’s the best I can say, but they’re not performing as they can (or should). I’m really curious to see the Alcan’s in action but I have no doubt it’ll be better than this. Five springs? All the way. Tire Pressure Stop underinflating your tires! Its ruining milage and stressing your tires. It’s perfectly clear the suspension is doing what it’s supposed to do and absorbing the bumps and rattles. Whatever makes it through that doesn’t matter and there’s little you can do about it anyhow. This is most obvious on hard, quick impulse hits like going over a pothole. That suspension is getting brutalized! But it’s taking it, I can see it rattling around like crazy but I’m not seeing an ounce of rattle making it to the hard mounted camera. Think of it this way, imagine a 7 thousand pound weight going down the road. Lots of mass and momentum right? Hard to get it to move out of a straight line according to Newton, correct? But it’s got a spring connecting it to the road which is designed to move and quickly. What I see is 100% clear - the trailer plows ahead like an aircraft carrier that doesn’t care one bit about the road, while the suspension is getting beat to hell. By the way I’m able to judge the trailer vibration I think by how ‘steady cam’ it is, and compared to the road/lines/etc as a reference. Basically it looks like an actual steady cam, while the suspension is rattling away and moving all over the place, while the trailer just isn’t seeing it. If you see stuff getting knocked around inside it’s the porpoising. That’s the biggest trailer movement I could see, with a little minor waddle, but road rumble isn’t making it up there much as far as I can tell. Tank drain Kind of an interesting one. I opened the fresh drain valve and it continued to drain intermittently for over an hour, from 30%. Going from a stop would always get a gusher. Anyhow FWIW - feel free to keep your Dexter’s and low pressure, but I wouldn’t touch it after seeing it in the real world.
-
Yes of course, it’s always operated correctly but two times at night it had this issue, only in high cold temps That’s what I’m doing? 😅 Sorry but that’s the point of this, I’ve taken care of other pressing tasks on the trailer and am getting to it (along with my breakaway controller which isn’t charging) JD I’m trying to to diagnose this, of course it could be the 12V but 32 years of debugging tells me that’s not the first thing to look at. It’s a rare event that only occurred in a couple special circumstances so it’s not like I can test and measure. At any rate I live near the Pacific ocean where temps don’t get cold enough to test. … a bunch of good points brought up, thanks … The nearest Truma center is 4 hours away and want you to leave the trailer until they can look at it in their queue. Not optimal. I know this because I’m chasing an issue with the blower fan intermittently rubbing. At any rate I’m looking into this now and gathering information so that IF I need to take it to the Truma repair I have conclusive evidence of an issue. I guarantee that if i took it now they’d say it’s fine, because it might be fine. At any rate with this thread I’m also looking to see if anybody else has experienced this.
-
Couple times on our March trip back from the factory the cabin heater got stuck. No heat, loud fan blowing. Consulting with Gemini I found the following, that its probably a lockout state caused by an ignition failure. The heater is running the fan full blast to clear out the ignition chamber of unburned propane. Can be caused by a low 12V line (not the case here with the max battery pack), or a propane line drop. Low nighttime temps cause the propane to contract and lower the pressure, explaining why it only happens then. Another possibility is moisture in the tank. Being new to the trailer and it being middle of the night I didn’t catch an error code, but most likely due to this. Possible fixes to prevent are to … Go to a place that can put a little methanol in the tank prior to filling to act as an antifreeze (a bother) Wrap the tanks (30lb on mine) in a heating blanket (expensive at $500+ each) The propane lines are set to 11” pressure by RV regs, so increasing that isn’t an option. Being out West we frequently travel between temperature extremes so I’d like to be generally prepared to prevent this from happening again. I’m wondering if there’s a low cost way tank heater blanket solution? Or other ideas, we have 30 lb tanks.
-
Nifty solution. I’ve been mooch camping at a relatives out in the country a lot this year and have been working with grey water similarly. I charge the house batteries off the truck, fresh water from a garden hose off the well and since we’re composting it’s just a grey water dump of biodegradable dirty water into a ditch. Super easy and convenient, if we had a black tank toilet it’d be a big problem with lots of long drives to a dump station. Anyhow about an outdoor shower, especially with dispersed camping and such, aren’t you taking a shower in the dirt? We’re camping in a mowed field essentially under a big old oak tree, I’ve got the ground pretty well cleaned up, but I have to be careful with the water hoses and such as any water into the dirt creates a muddy mess. I’m happy with the wet bath and just squeegee and towel dry it down, but an outdoor shower would be a dirty mess unless I had some kind of raised platform. Even then I’m still creating a mudbath around the trailer.
-
You read my mind, I anticipated there would be interest lol .. I made sure to wrap this up by the last Dexter trip GM just dropped an Surround Recording feature via OTA, but it ‘only’ records four cameras front/back/sides, so ill have to have my wife point a phone at the screen Just thought I’ll check the trucks App Store and see if there’s a screen record..
-
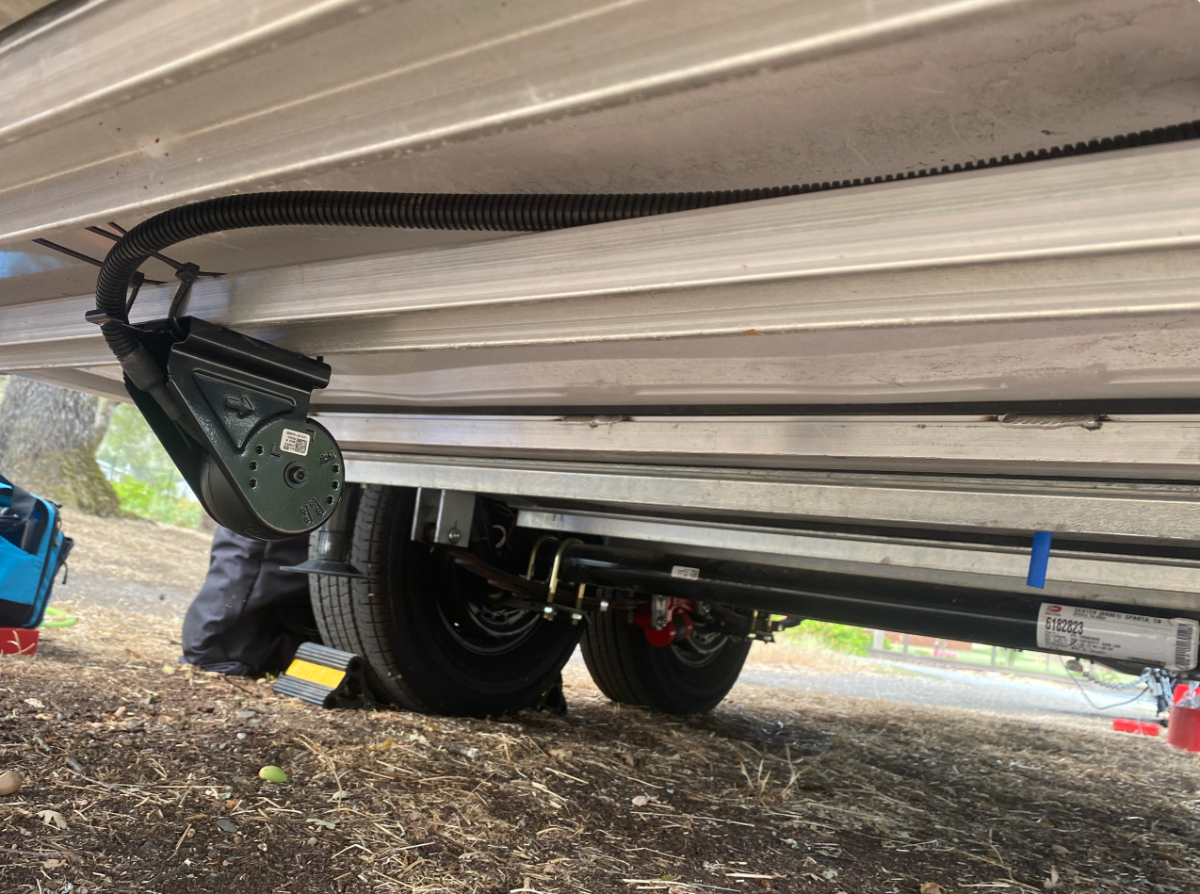
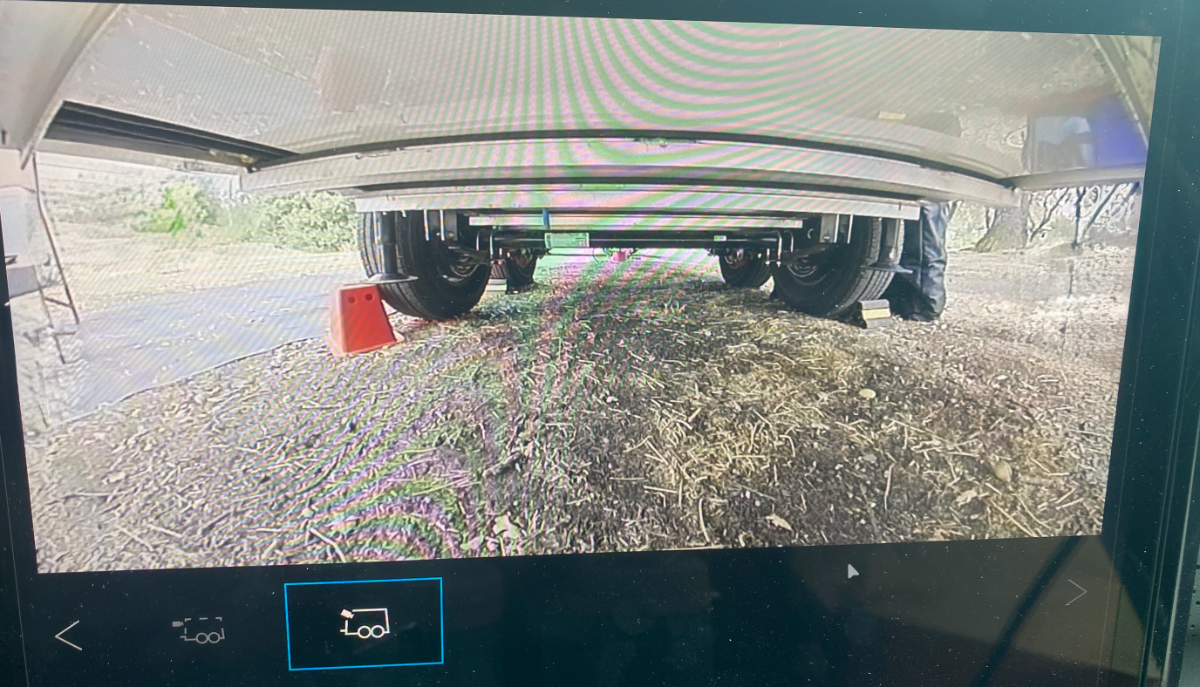
Trail cam! The Sierra EV has one of if not the biggest screen in the industry, massive 17” tablet, and GM’s got IMO the best cameras in the industry. Anyhow I can have two trailer cams, I’ve got one on the back for transparent trailer etc. I put the second on as a trail cam Spent a long time thinking about where to put it. Up top is pretty well covered with the other cameras, I realized the ground was the weak spot. Use cases you all will be familiar with Shows levelers/chocks etc. When driving on/off levelers it’s impossible to tell where you are and I often overshoot and bung them up as there’s few inches of margin with dual axel When offroad, or even parking lot speed bumps, will be really nice to see them coming instead of guessing for known obstacles. Sometimes I have to drive over a curb too Fun and a good idea to keep an eye on the trailer suspension Backing up to a stop. At my park I have the cement parking stop placed where I want it, but I can’t tell where it is until I hit it. Installation was ridiculously easy. This and only this cross bar was perfect as its the only one not holding anything up, so I could simply zip tie to it. And of course they have these genius cable runs on the two edges.

-
Made in USA leaf springs
DanielBoondock replied to Mountainman198's topic in Mechanical & Technical Tips
Congrats - the following March here 🥳 Wasn’t planning on it. As noted the Alcan are beefier, and basically don’t see a reason to mix and match. But also as mentioned it’s a good idea to keep them as spares, in fact I’ll keep the whole set as a spare until eventually I probably get sick of them kicking around and recycle 😅 VERY good tip, was not aware of that thanks! -
Made in USA leaf springs
DanielBoondock replied to Mountainman198's topic in Mechanical & Technical Tips
Thanks for the encouragement! Good tip on the impact wrench, that’s the tool I was looking for. I already have a DeWalt mini vac and a leaf blower for the trailer so will add the mid impact wrench and 3/4” thin walled protective socket, plus a general impact socket set for using on the trailer AI is helpful here to pull out the tips from the forum, here’s the ones that stand out Make sure the shackles point up when assembling or it’ll have to be redone Do one side (driver) completely both axels first, then the other side, so the opposing side is aligned and secure Tighten U-bolts in a criss-cross Align the wet bolts with the grease holes horizontal, and seat the splines (e.g. rubber mallet) before final tightening Shocks Leave the compression strap on the Bulldogs until assembled and on the ground, then clip off to uncompress Be careful about compressing but not squashing the shock end bumpers Torque Bulldogs to 40 ft-lbs and the rest to Alcan specs (provided) Do all final torque settings while the trailer is on the ground and ‘loaded’, not hanging in the air Use the impact wrench only for loosing and spinning on the nuts, always use a torque wrench for final setting. Don’t use the impact wrench on the wet bolts -
Made in USA leaf springs
DanielBoondock replied to Mountainman198's topic in Mechanical & Technical Tips
Thanks JD, yeah been busy, sandwich generation stuff … Thanks for the reminder about your post, taking notes, I’ll probably PM you once I’ve compiled them if you don’t mind correcting my homework That sounds more like it! I don’t mind doing it, shouldn’t be hard for old engie’s like us but I’m getting pulled in ten directions at the moment so just wanted to pay somebody. Anyhow I’m mooch camping supporting some family again in a couple weeks so I’m thinking I’ll just do it then. Yeah at this point it’s been enough effort spent talking to people I’m ready to call it sunk costs and just git ‘er done. I’ve got a couple good jacks, stands, a DeWalt torque/breaker bar, and as JD says there’s the rear trailer jacks. And hey saving myself $400/$900 I can pop for another tool or two for ‘free’, hmmmm …😅 -
Made in USA leaf springs
DanielBoondock replied to Mountainman198's topic in Mechanical & Technical Tips
OK, so I ordered the springs in springtime and made an appointment in July when we’d be in Utah near Grand Junction. But then they got a series of wildfires all throughout that area, my wife has PTSD from us going through them at home, so we cancelled the trip. Alcan wanted steep fees for holding on to them until we could come again next spring, no good (I had already paid for the springs per their requirement when you order). So I paid to have them shipped out figuring a local trailer suspension shop would have no problem with it. Wrong - they won’t install ‘customer supplied parts’. They want to sell you the parts themselves, sigh … OK so then I’m trying my local garage, near where I store the trailer with easy access. Great folks, used them for lots of stuff, but they don’t normally do trailers. Gave them all the information, they thought it looked doable for $1500, but I should check if they’re ballpark. AI search of this forum gave more like 300-500 or so. He said $900/minimum at a upcharge for (again), customer supplied parts and wouldn’t do it for less than four hours @ 250/hr. Grrrrrrr There’s another shop I can try locally, or I could take them BACK to Alcan next year, but I’m getting frustrated and thinking about just installing the damn things myself. I’ll troll the (38 page!) thread for DIY install. Anyhow feeling down at the moment, looking for advice thanks -
Interesting choice. Cushioning the pitch seems like a good idea, that's the main reaction I get at my hitch. The Anderson is designed to constrain yaw to prevent sway. I get none of that, and the truck has antisway built in with rear steer wheels. You don't get any weight distribution, but the Anderson doesn't do much of that anyhow as far as I can tell, don't know why they advertise it as a WD hitch.
-
The manual wants you to use bleach and the boondocking port to use the pump to pull diluted bleach through into the tank. Disadvantage is its a bit of a pain, and I’d prefer a better alternative to bleach. So instead I’m using the Sani-System packets which use a mixture of ammonium chlorides. It also has the advantage that it can be run through the water heater. Regardless of your sanitizer, looking for pros/cons of this approach. Instead of the boondocking port which requires futzing around with valves which is a pain, I got this https://www.amazon.com/RV-Inline-Sanitizer-Easiest-disinfect/dp/B08F2QTQ5T The picture is deceiving, it’s a neat little inline container that the bleach/NCl can be poured into, that then is attached to the (for me) streetside port direct to tank. Then just run the faucets through the system. No messing with valves, much quicker and easier. However, are there parts of the system that are not being sanitized? I guess the answer is yes - the curbside port, which I rarely use. I guess I answered my own question, it really should go through the curbside. Anyhow comments are welcome …
-
Made in USA leaf springs
DanielBoondock replied to Mountainman198's topic in Mechanical & Technical Tips
That’s only three years old! Any idea why they got so bad, previous owner didn’t grease? -
From the new weekly update Jason said it kind of oddly - they've been selling from the factory for years and that's how I got it as as West Coast dealers are sparse - but I think he means they're no longer going to sell through dealers. My guess would be the cost of the trailers and customization. One of the 'closest' dealers to me is a couple day drive over to Utah. I talked to them, but of course they didn't stock what I wanted so it was a custom order with a big downpayment. And the sales guy wasn't super helpful, I wanted the big 640 Lithionics which he pushed back on. "Those are too expensive!" 😅 Odd thing to say, my finances are my business, and I'm glad I got them even with the EV. Anyhow got tired of trying to work with them and just went straight to the factory as there was really no advantage to the dealer.
-
I've got a Mitsubishi I had installed in my garage/office. Looked at doing it myself, doesn't appear to be a big job, but at the time the price was good to have the experts do it. I think these come with precharged lines too so you don't have to get the vac pump and mess around with all that. I'd be cautious about having multiple registers/heads. I worked with them about putting a second in the bedroom ... I don't recall the limitations now, but I remember the upshot is that its better to not do these hydra installations.
-
These look pretty awesome, thanks for the tip! The '26's don't have touch lights, but plain jane bright white which cheesy little switches. Olivers have a huge amount of lighting for a small trailer but I use them all. Getting to choose your temp is amazing! How good is it, which one did you choose? Otherwise the remembering the state is a huge feature too. Choosing blue for a nightlight is absolutely brain dead though, it should have been deep dark red to preserve night vision and not wake you up. Blue is a morning light and is the clue to your brain that its time to wake up. Oh well ...
-
Made in USA leaf springs
DanielBoondock replied to Mountainman198's topic in Mechanical & Technical Tips
I’ll call (probably), but still won’t change the axels. I’m at 0% gain on the freeways now and only go up to an exciting 0.5% when in traffic. Don’t use the brakes much basically -
Made in USA leaf springs
DanielBoondock replied to Mountainman198's topic in Mechanical & Technical Tips
OK. Yeah the Alcan guy on the phone asked if I also wanted to install new axels? “Uh, no, why?” I explained that they were D52’s with the spring derate, to which he replied that the brakes were (maybe?) different. Like I say he didn’t seem confident of that and I wasn’t really buying it, I think from our discussion we can conclude that we believe it’s just a stock D52. -
Made in USA leaf springs
DanielBoondock replied to Mountainman198's topic in Mechanical & Technical Tips
Right The question is whether these have gimped 3500 brakes, maybe the conversation is getting a little mixed. Just realized I misinterpreted what scuba was saying, I thought he meant that a 12” drum means a different brake than the standard D52, but on re-reading I think he means that’s just a D52. Those drums look like they’re 12”, and from the label we know 26’s have D52’s derated to 3500. Long story short I think these are stock 52’s with the on paper derating due to the springs. Speak up if I’m missing something
-
Made in USA leaf springs
DanielBoondock replied to Mountainman198's topic in Mechanical & Technical Tips
Dunno, what do you think?