All Activity
- Past hour
-
Try calling Xantrec tech support rather than Oliver.
- Today
-

DC-DC Charger Installation - Oliver LE2 and RAM 1500
Grizz000 replied to Grizz000's topic in Ollie Modifications
Thanks for your kind words. Your comments about the DC-DC charger are great and my thinking as well. The 40A just keeps coming as long as you are hooked up and running. We boondock multiple days at a time quite often and I'm thinking I could even hook up in camp and charge via DC-DC if solar is inadequate and if for some reason I don't want to (or can't) run my generator to recharge. I still haven't totally ruled out adding roof solar at some point, but I'm on the fence about it since the vast majority of our camping is in areas with lots of shade. Our hull is prewired for it and has the embedded mounting plates. So far, our suitcase panels are good for accessing the sunny spots. Thanks for the link. I love reading the AC posts and your data is impressive. I figure our AC will need to be replaced at some point (already 7 years old) and I'd love to have a high efficiency AC that could run from the battery bank for an extended time. We are in the humid south, so this can be a taller order at peak summer temps, but we could expand our current 400Ah battery bank as well. -
 Mike Robin Thorne joined the community
 -
 Flora Reviewed the Teslong website and found what seems to be a qauitly wifi scope for $50 (WF150D39L3 Wi-Fi Inspection Camera with 3.9 mm Camera). It uses your phone or computer's screen vs purchasing a more expensive scope with an integrated screen. Looks like good quality and compact solution for traveling. https://teslong.com/collections/inspection-borescopes
 -
Flora https://teslong.com/collections/inspection-borescopes Teslong makes a variety of quality scopes ranging from $100 to $150. The heads on these scopes are general smaller, larger screen, better images, cables are generally more supple/ easier handling, can record video and snap pictures vs low cost scopes. You can get scopes at amazon and home depot starting at $29.
-
Geoff, Your offer to help is appreciated. I was able to find and reconnect the loose wire. You are correct, not much room behind pantry switches. As stated above, I found pulling the tank monitor face plate provides a generous opening to access the switches and wiring in front of pantry.
-
 After reading this thread and some of my own struggles, it seems like a lighted scope is a good idea for the Oliver kit. I know there have been recommendations listed before. Can anyone point me in the right direction?
 -
 I read two issues here, the vent cover does not stay closed, and the hose comes loose? The vent cover has louvers that do not tightly close, I'm surprised that mine have not broken as many times as they have been kicked. I don't have a fix for that. However, if the hose is coming loose, you can add new screws. It was originally fastened with screws that went through the hose and into the plastic vent. Then taped. I was able to get the screws out, but it was near impossible to put new ones back in the tight space. Rather I put screws in from the inside of the vent and was able to get tape on using little pieces. See the picture:
 -
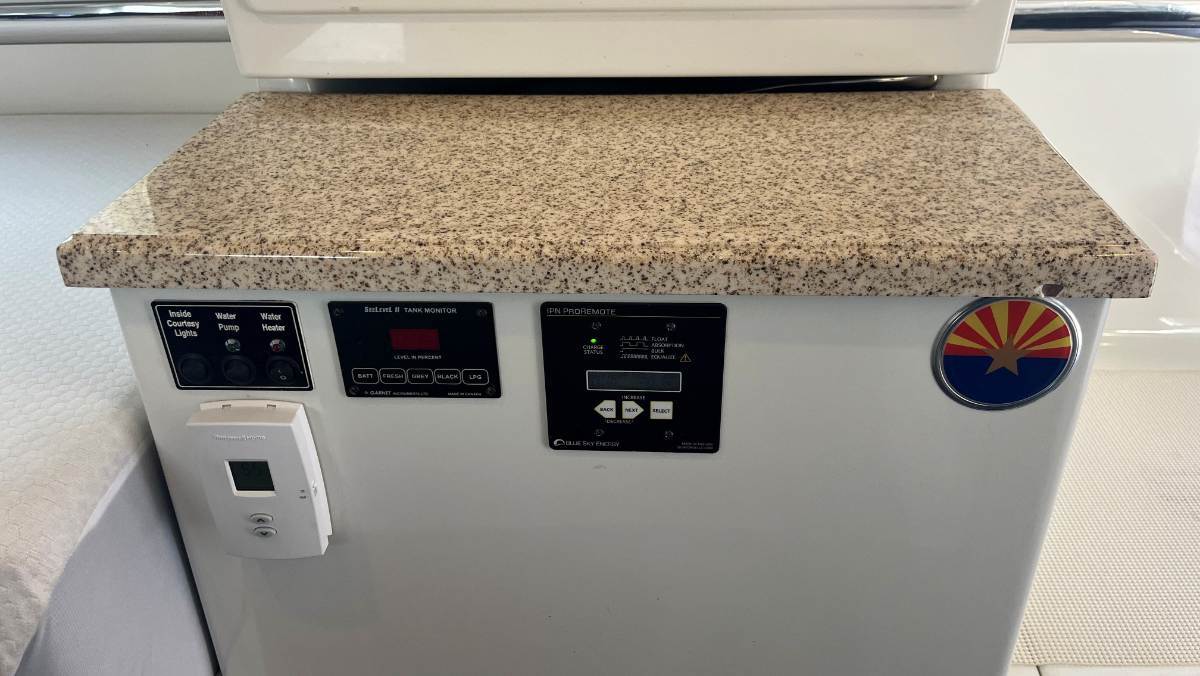
jd, I learned a lot today. I was looking for a red wire because the center wire at other end (courtesy light toggle switch by the door) was red and not labeled. Using a scope, I started by looking up from the basement. I had pulled out all three toggle switches just below the Pantery (hot water, water pump, courtesy lights) to pull on the various wires to identify and exclude them. Accessing and scoping from the basement was unsuccessful and difficult at best. I had success pulling the plate with the tank monitors next to the toggle switch plate. Removing this place gave me a nice size cut-out enabling a good angle to maneuver the scope. I was still looking for a red wire when I came across a loose gray wire (same color as the other two wires going to the courtesy light toggle). The loose wire was labeled T46 and did the trick.
- Yesterday
-
Hey Chris, Looks like you have plenty of good advice and help available, but I'm happy to help out if still needed. There is not much room behind that pantry switch, but it should be fairly easy to find that disconnected wire and pull it back through. My trailer has just a single switch for the courtesy light, not a 3-way. But regardless, it's a simple circuit. Drop me a message if you need extra help and I can stop by. Geoff
-
 I should have realized earlier it was the other 3-way switch by the pantry. You may get lucky if the wire is close. If not, I believe you can reach up there, or see up there and below, from the basement opening under the bed. Another Idea is if you have the SeeLevel monitor like ours pictured, remove the 4 Phillips screws and there may be a larger opening to grab the wire.
-
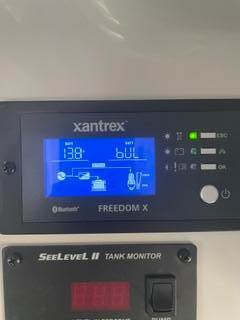
I tested the DC in line fuse for continuity (which was ok) and verified that there is 12 V at the terminals in the inverter. The Xantrex manual doesn't indicate the presence of an internal DC fuse and that an external fuse is necessary. I did replace a blown fuse in Victron MPPT 100I20 charge controller and the batteries now appear to be charging from solar power. Without shore power, there is no display (or alarm) on the inverter display and the inverter will not turn on with the power button. With shore power, there is the following display without an error message. Is there some reset procedure for the inverter or it is toast? What does it mean that there's Shore power display but none on DC, even though I've confirmed 12 V at the inverter? I will call Oliver in the morning but I appreciate the input and suggestions> Tim
-
 With shaking they come loose, I get it, the camper shakes. The hose and cover under the drawer has nothing behind it to add tension and keep it closed tightly and I would like a permanent or semi permanent fix, any suggestions? Might come to butyl tape but I am not crazy about that.
 -
Absolutely not. And they never will because of the safety issues. IF you are towing with a real truck (not a 1/2 ton or, most likely, even a 3/4 ton) then the front of your truck is the place for your motorcycle.
-
jd, not such a thing as access to below the Pantery into the space behind the battery compartment on my trailer to the. I should be able to fish the center red wire with a scope.
-
DC-DC Charger Installation - Oliver LE2 and RAM 1500
jd1923 replied to Grizz000's topic in Ollie Modifications
Excellent work, Jeff! And happy to see a new Forum Member share such a great project providing such detail. I installed ours March 2025 and we love this mod more than most! The Orion XS 50A DC-DC charger is the best possible upgrade for charging LI batteries. You need a whole lot of solar capacity and a lot of time sitting around the campsite, fussing with panels, and you won't get anywhere near the average 40 Ah per hour towing this installation will provide. If interested, read my comment re running our A/C all day, towing just 2 hours, using only 20 Ah because the Orion provided most of the power needed. If I towed another 30 minutes SOC would have been 100%! We do have 320W rooftop solar but it was a cloudy/rainy day. https://olivertraveltrailers.com/forums/topic/11177-furrion-chill-cube-–-product-review-and-installation/page/3/#comment-126555 Those of us who boondock 1-3 nights at a time, moving often, don't need much else. Add an efficient A/C and Orion DC-DC charging will allow you to stay cool anywhere/anytime! We added 400W suitcase solar and wish I had saved the money since we rarely use it. We connect our Orion DC-DC charger every time we hitch the Oliver! You love your Orion installation now. You'll love it even more after you benefit from it on the road! 😎 -
Top kitchen cabinet above the microwave just behind the light switch panel. I reposted this picture taken by @Ronbrink when Ron installed his fridge vent fan. Lots of wires in there but not too many RED ones!
-
As others have done, I recently completed a Victron Orion XS DC-DC charger installation between my 2023 Ram 1500 and 2019 Oliver Legacy Elite II, Hull 514. The attached write-up covers the truck and trailer wiring, Anderson SB120 connection, cable routing, fuse locations, Victron settings, parts list, photos, and lessons learned. I thought I'd share in case it helps anyone considering a similar project. Happy camping! Oliver and RAM DC-DC Charger Installation FB pdf.pdf
-
 BluegrassRetiredChick joined the community
 -
jd...Shiver my timbers and no kidding an access panel in the bottom of the Pantery? I would have never known. Thanks, another great tip.
-
Cool, easy fix! Empty the kitchen cabinet and remove the access panel. You should find it easily but be careful not to disturb the other wires too much! 😎
-
jd, thanks for the pic,,..yep my center red wire is missing / not connected to the toggle switch and floating somewhere in the wall..... I have the use of my neighbor's scope, hopefully I can find the center red wire. Should be / could be a quick fix ...maybe? Few would take the time to pull the toggle switch and send me the pic You are the best !!!
-
Oh Man, Geoff has the knowledge and the tools, and since I did the prework, he will understand my post! 😎
-
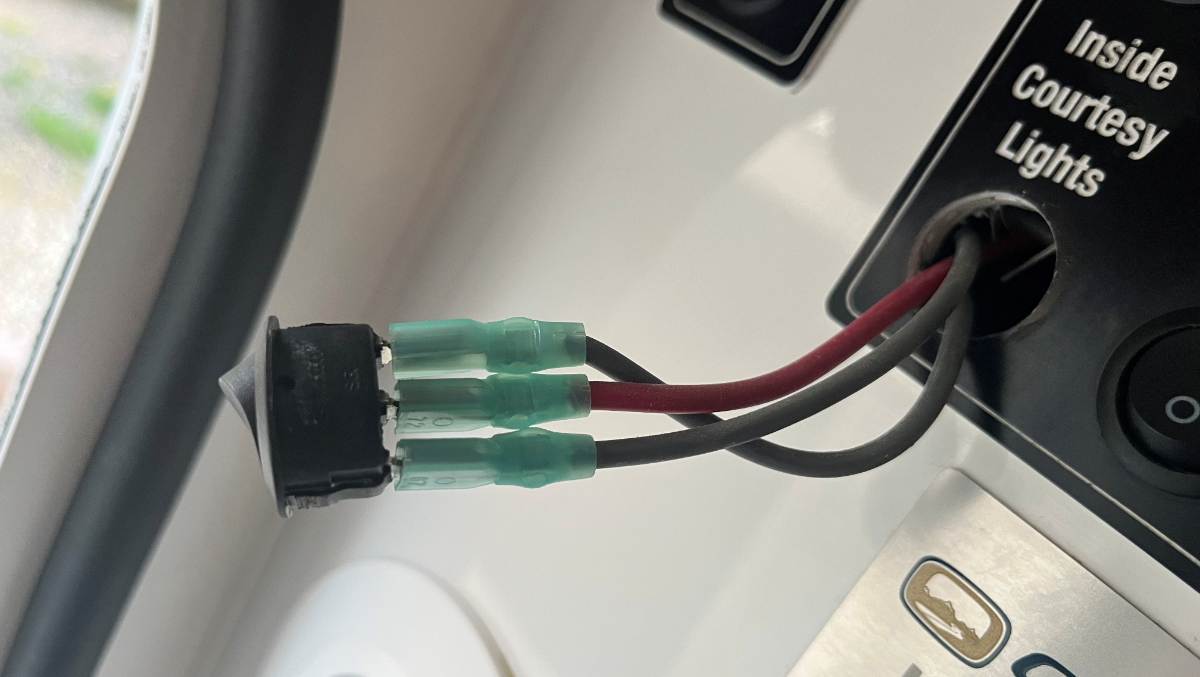
OK, so forget the jumper and I'm hoping you have a multimeter. If not, get one ASAP! On the main switch, the one at the entrance, the center RED wire is 12V+. The two gray wires will carry 12V+ based on the position of this 3-way switch. When down as pictured the red is connected to the upper gray wire which carries power to the bedside switch. This allows the secondary switch to turn ON when activated. When the switch is turned ON, the center red wire is connected to the bottom gray wire which will turn the Courtesy Lights ON. Set the multimeter to the Continuity setting, which looks like a ground symbol. In this position, you can touch the two leads together and it will make a sound like an alarm. The main switch should show continuity between the middle 12V+ lead and the top lead when OFF, and show continuity between the middle lead and bottom lead when ON! RE the bedside switch you could just use a jumper or you could test for continuity in the up/ON position. I understand this is a lot and I can get on the phone with you tomorrow if you like. BTW, as you can see in this picture, not a spec of fiberglass dust and these spade terminals were so tight I had trouble pulling them back just a 1/16" to get the multimeter leads to connect to metal. If this is above your head, start looking in the basement for wires disconnected at the lights. Best wishes, my friend! JD
-
Geoff is a wizard. In fact Geoff's home is about a 1/2 hour from mine. In this case, my neighbor has offer me the use of his scope. I should be able to fish the center wire from inside the hull. thanks for your help
-
I have done some research on-line and have learned each three way toggle switch will have three wires attached. The toggle switch for the inside courtesy lights located under the Pantery has only two wires attached. Seems the middle wire is floating between the fiberglass wall below the Pantery and behind the battery compartment. I don't have a scope. Does anyone have experience fishing a wire from between the walls of this compartment? any coaching will be appreciated.
-
Taylor, I'll go out and look at mine... In the meantime the real expert here, he who turned his water pump 3-way switches into 4-ways to add another switch for the outdoor shower is our friend Geoff! Maybe @Snackchaser is online?!