Leaderboard


Popular Content
Showing content with the highest reputation on 06/06/2017 in Posts
-
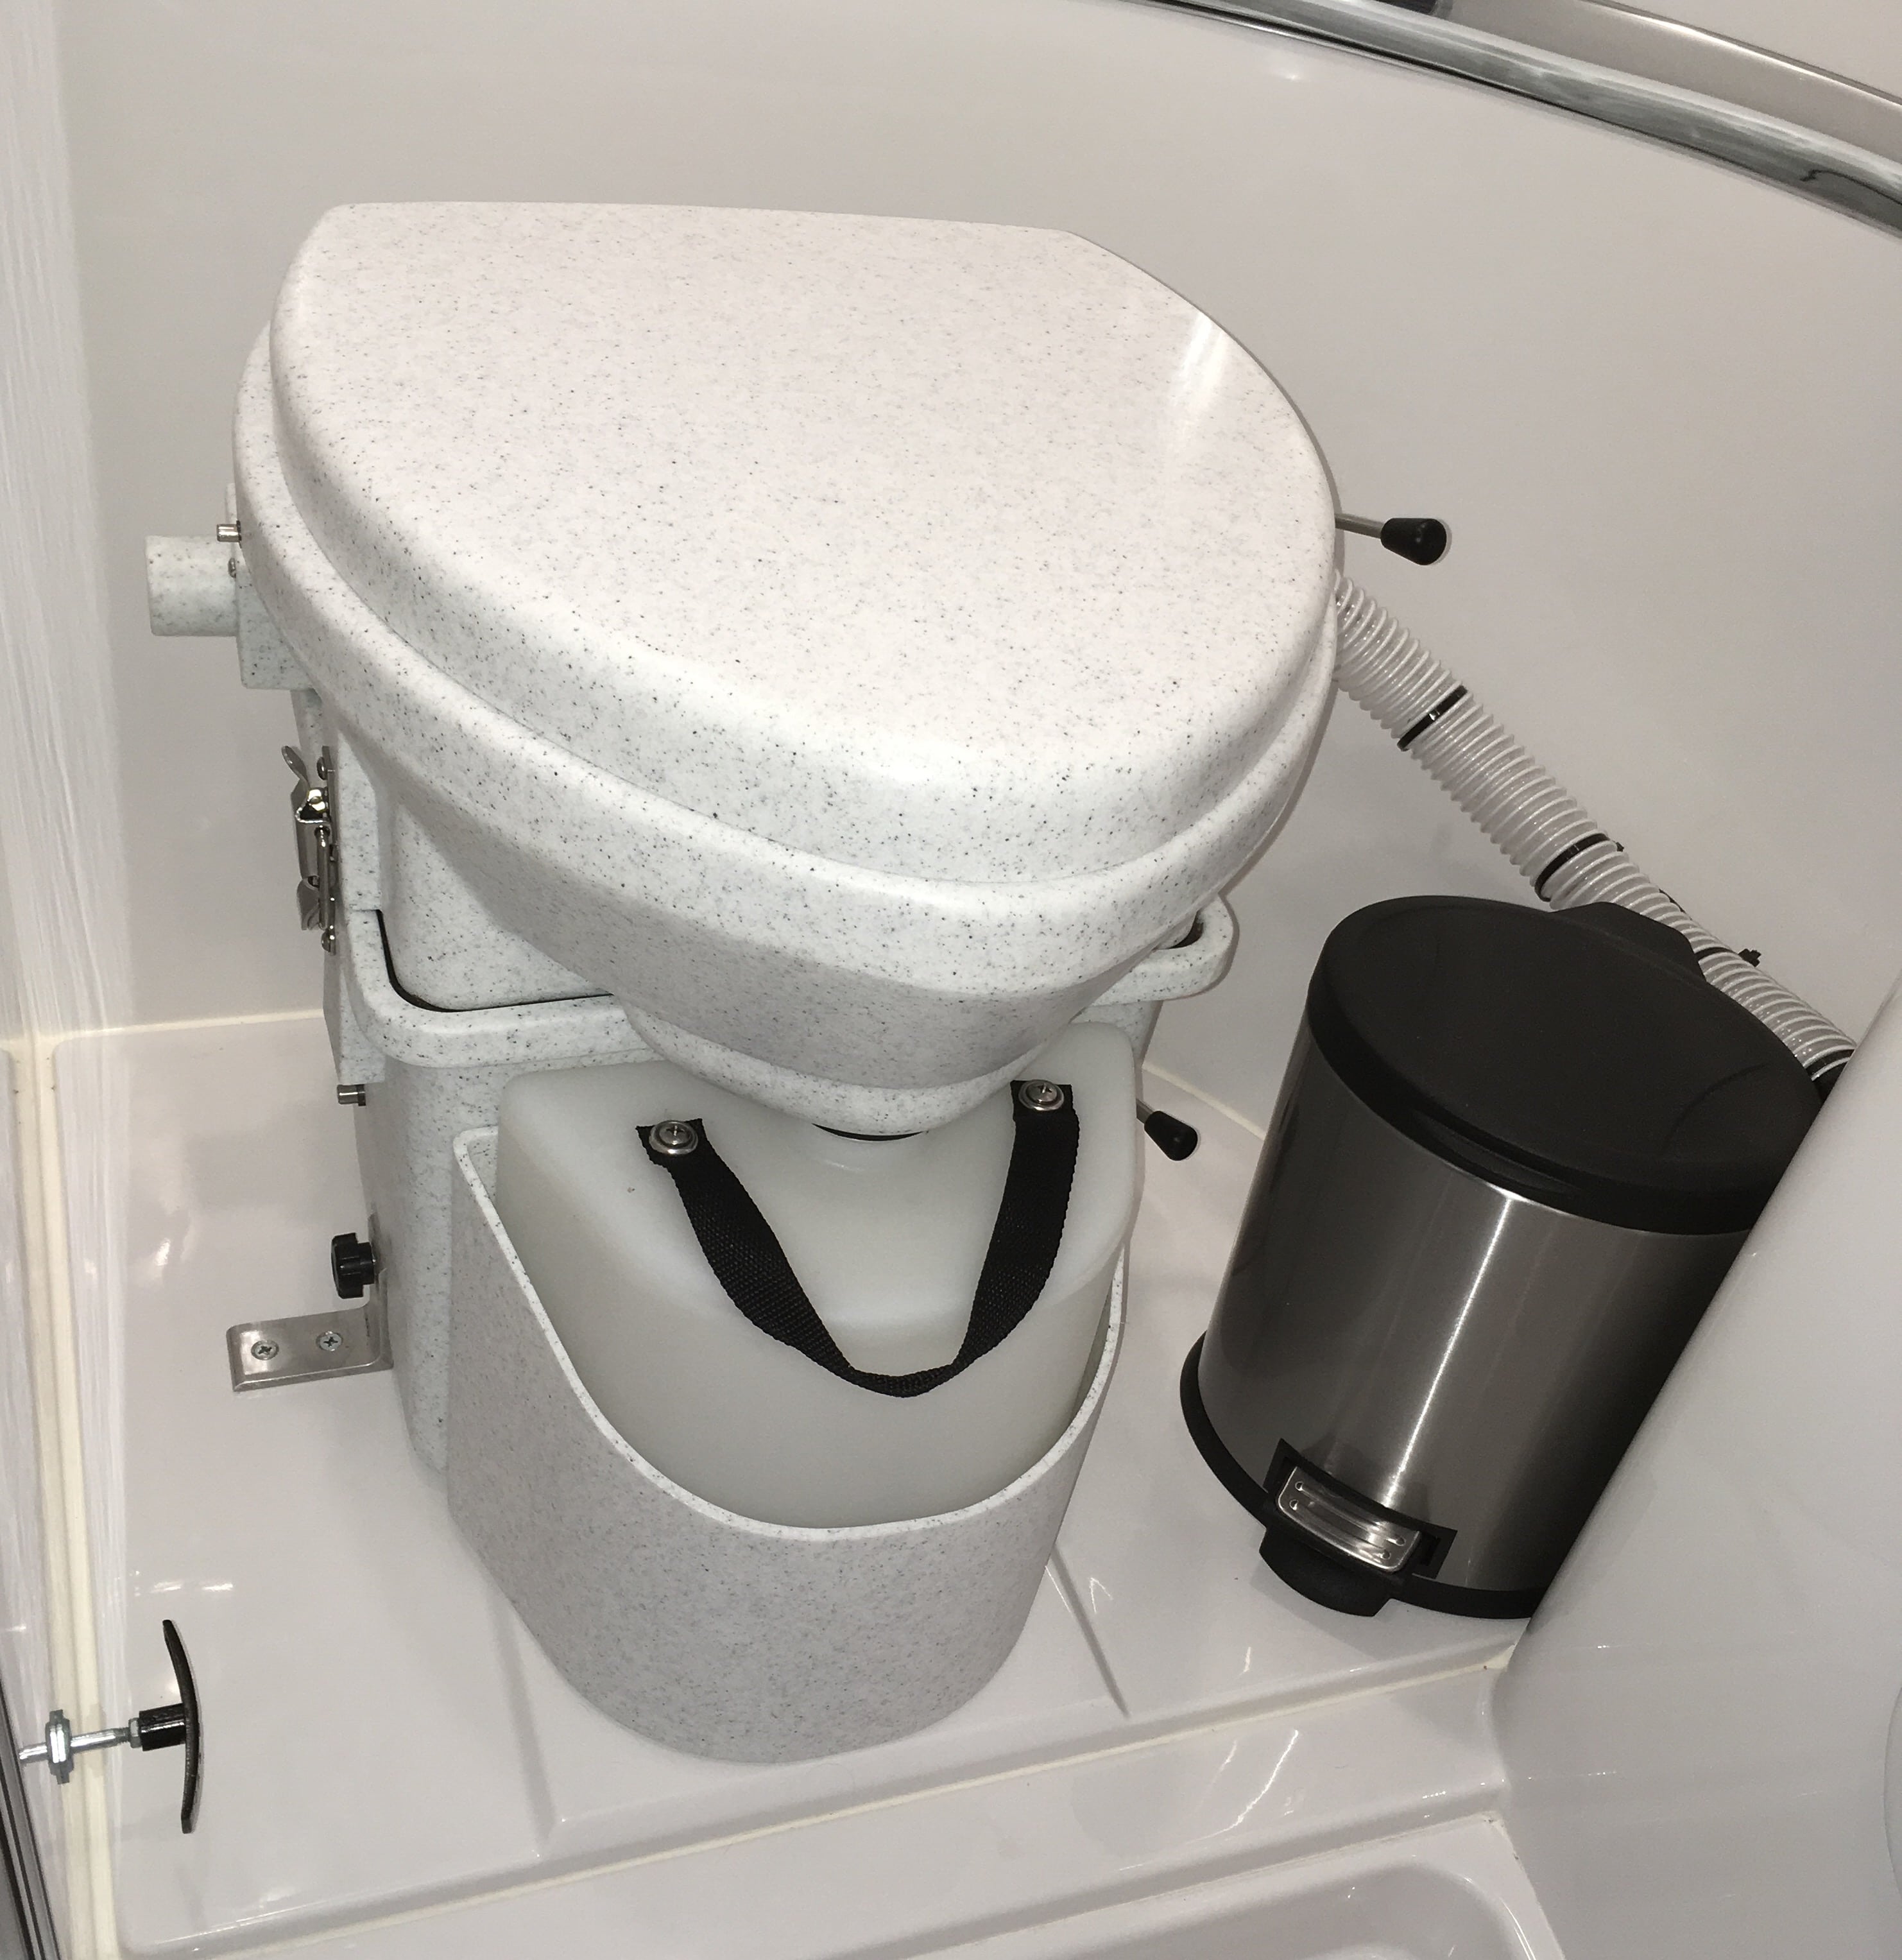
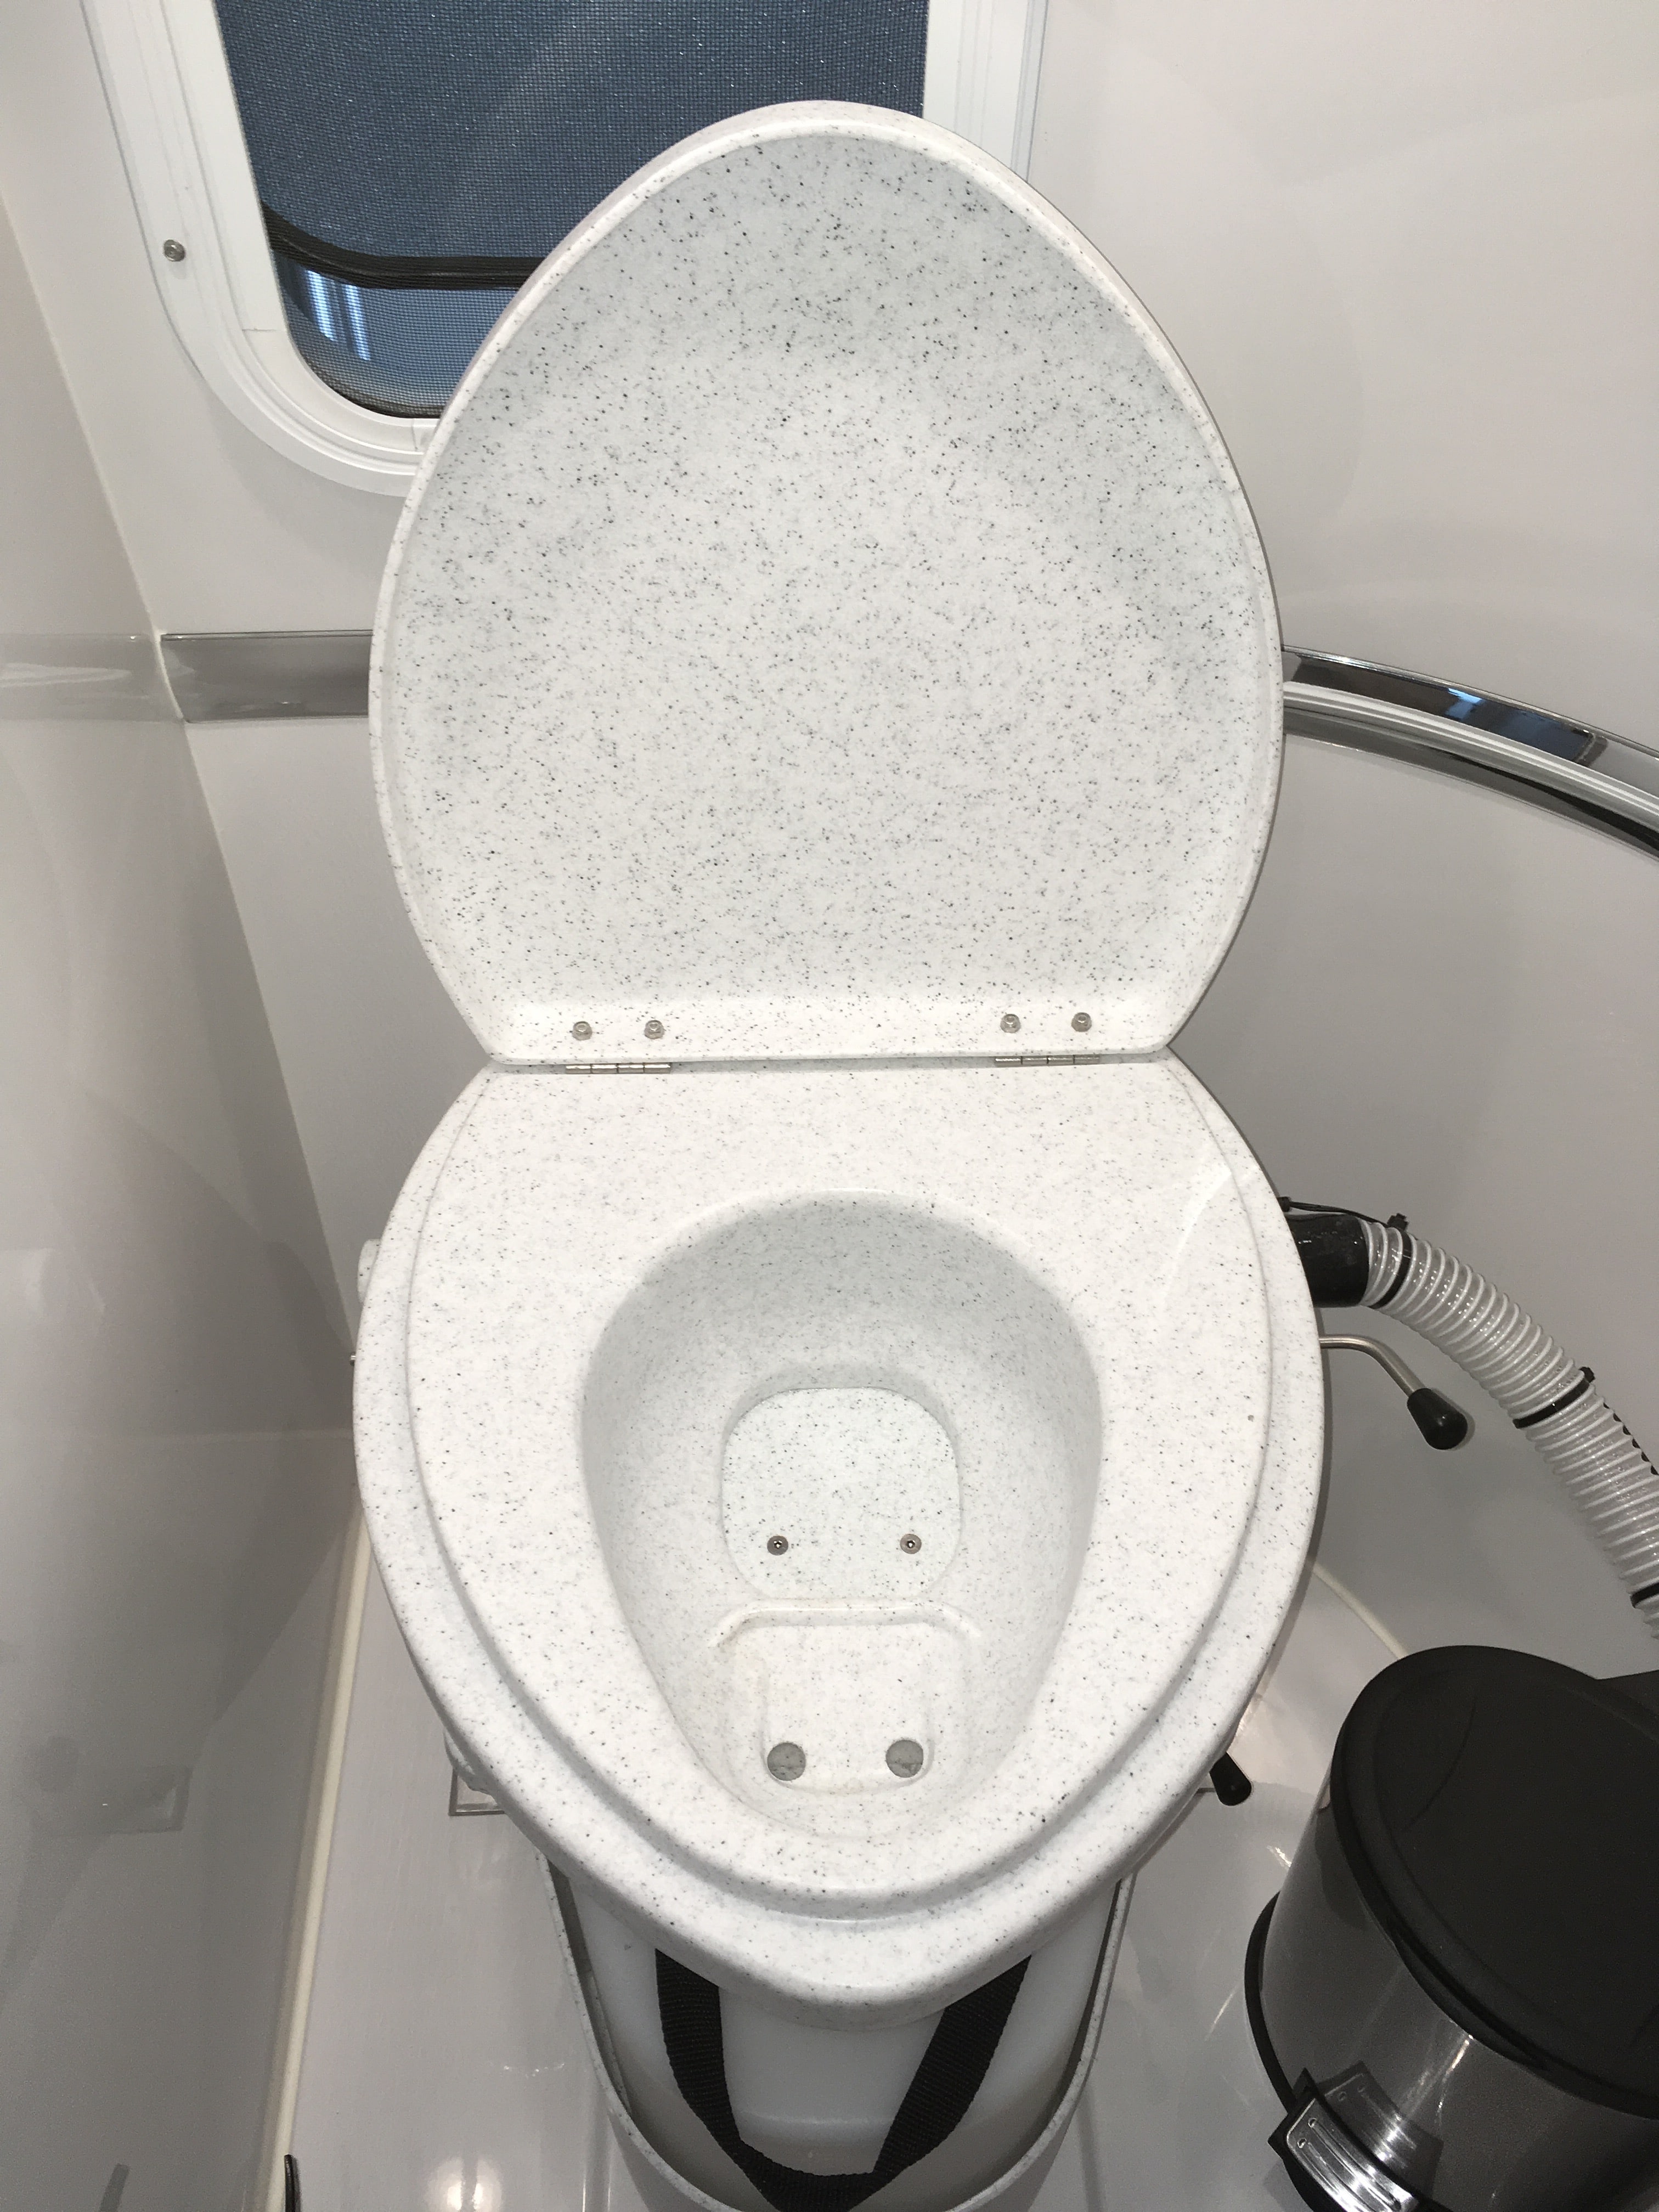
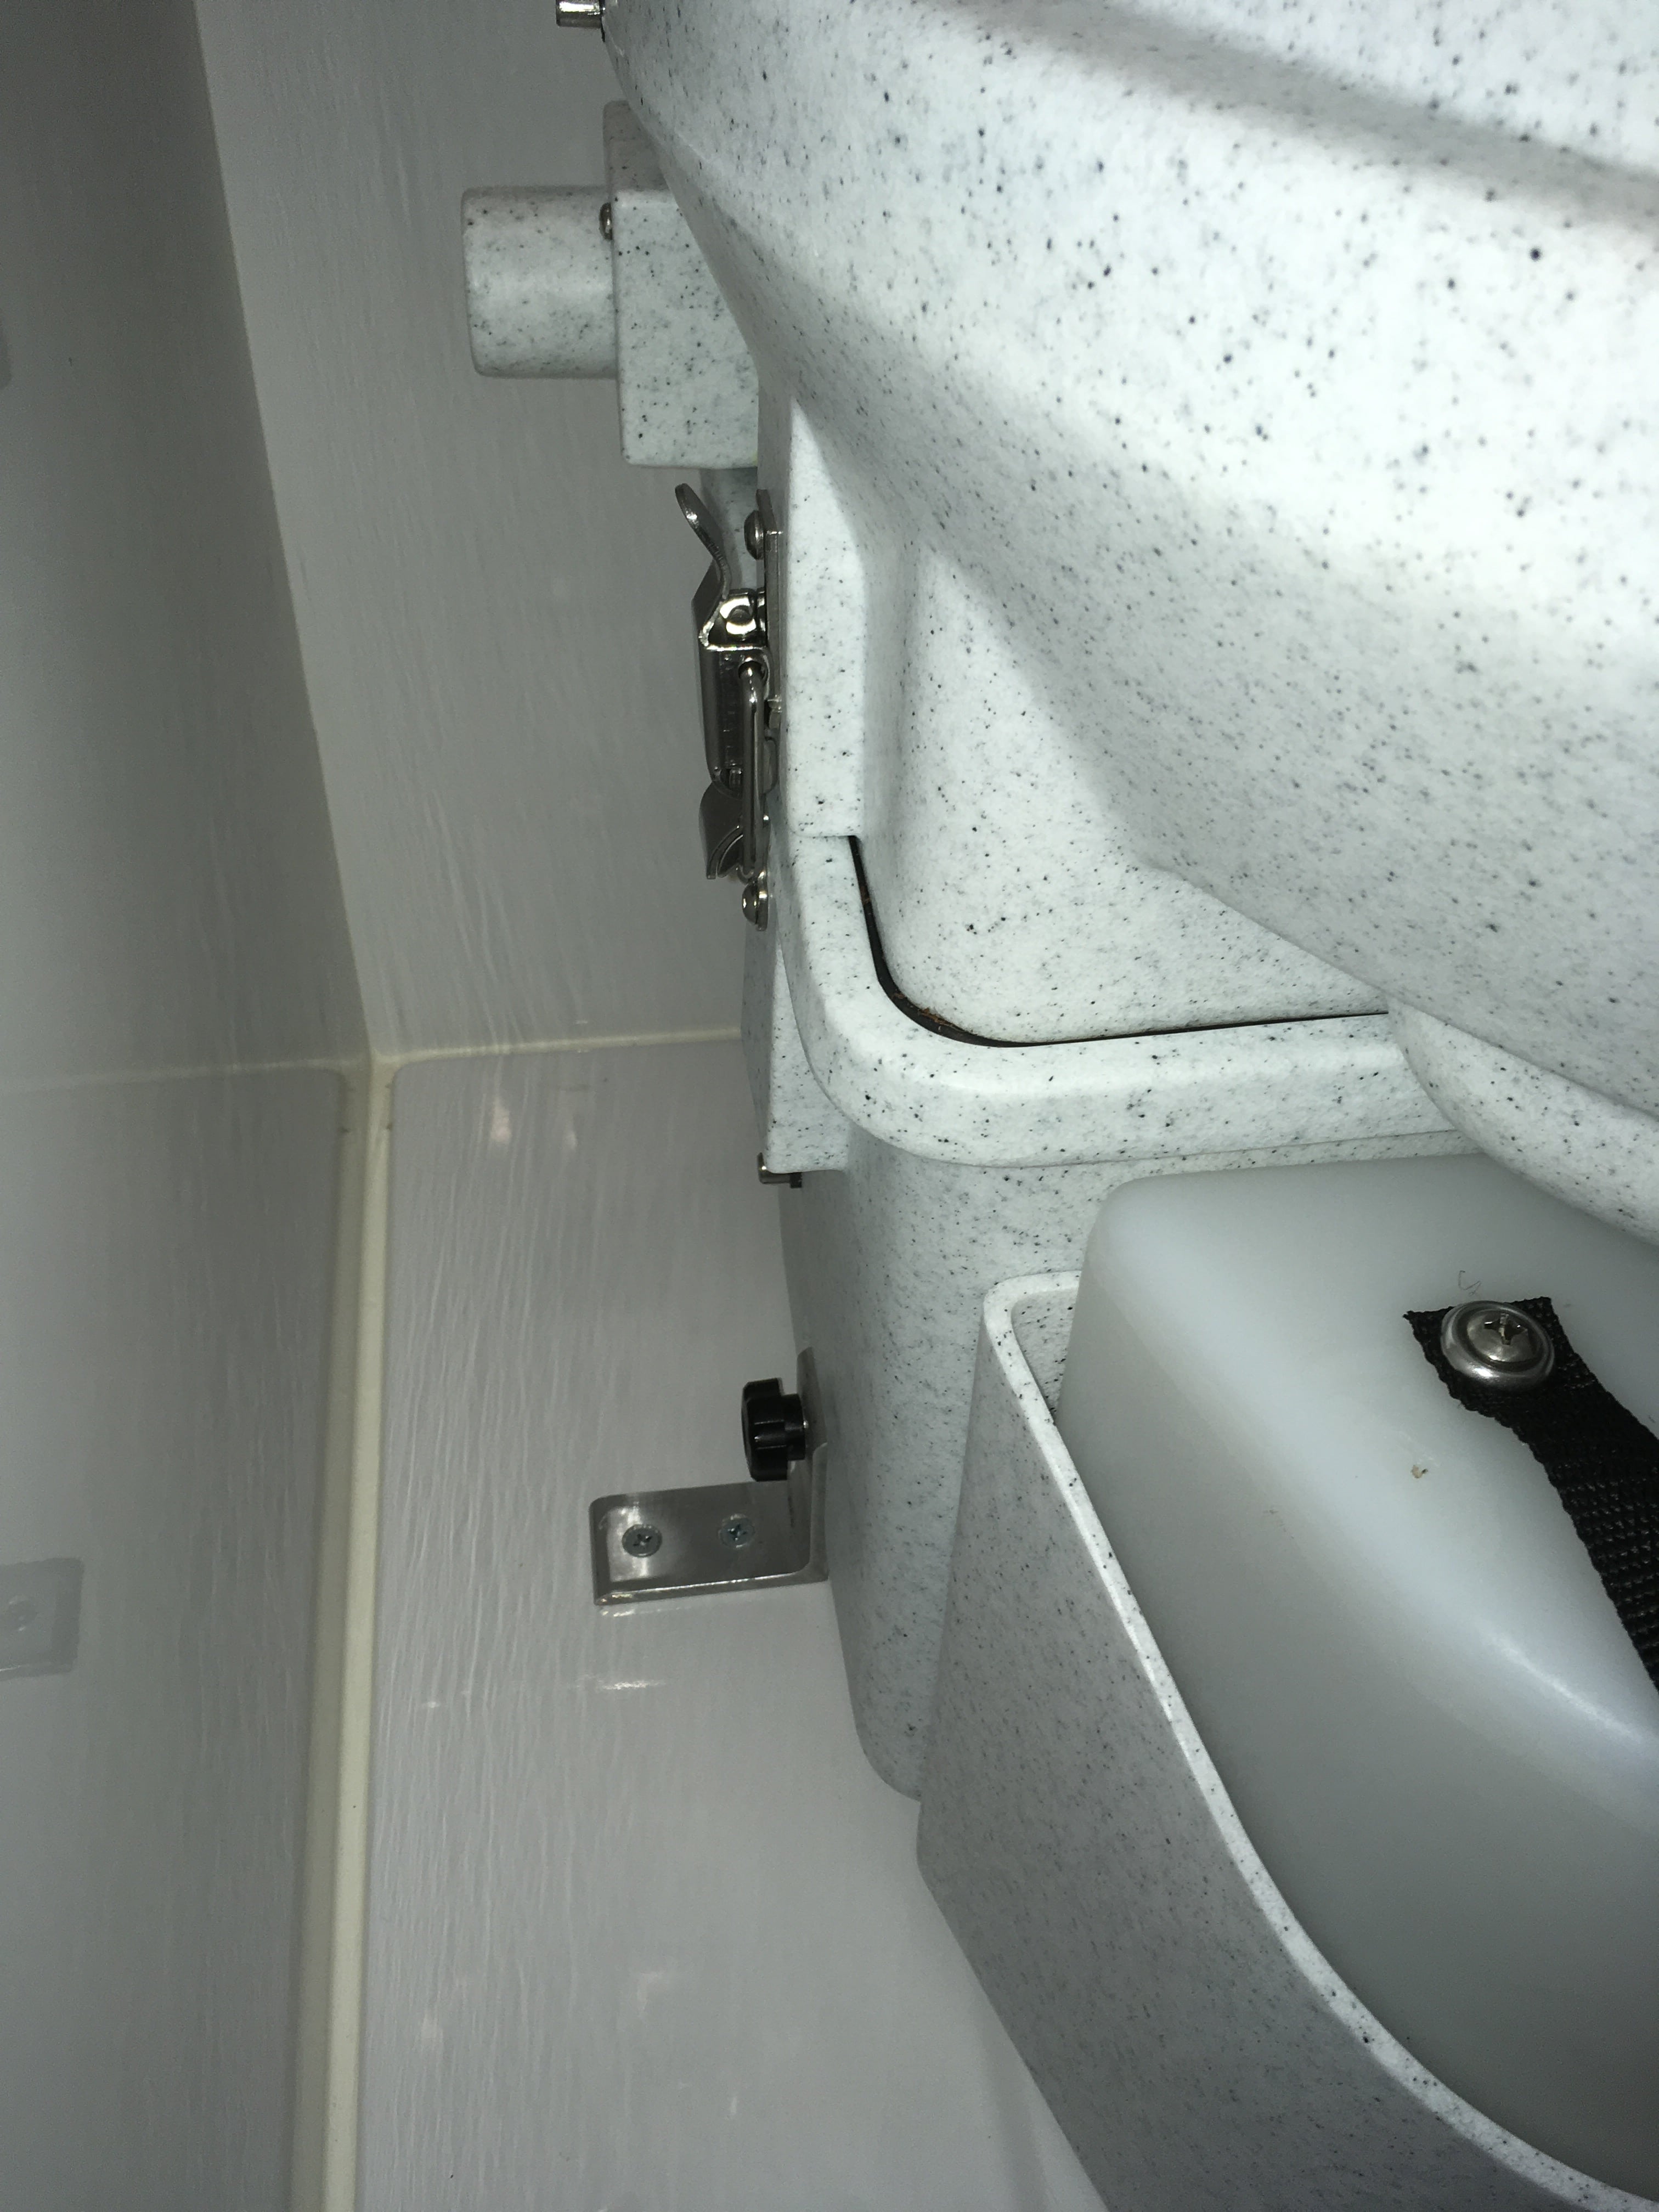
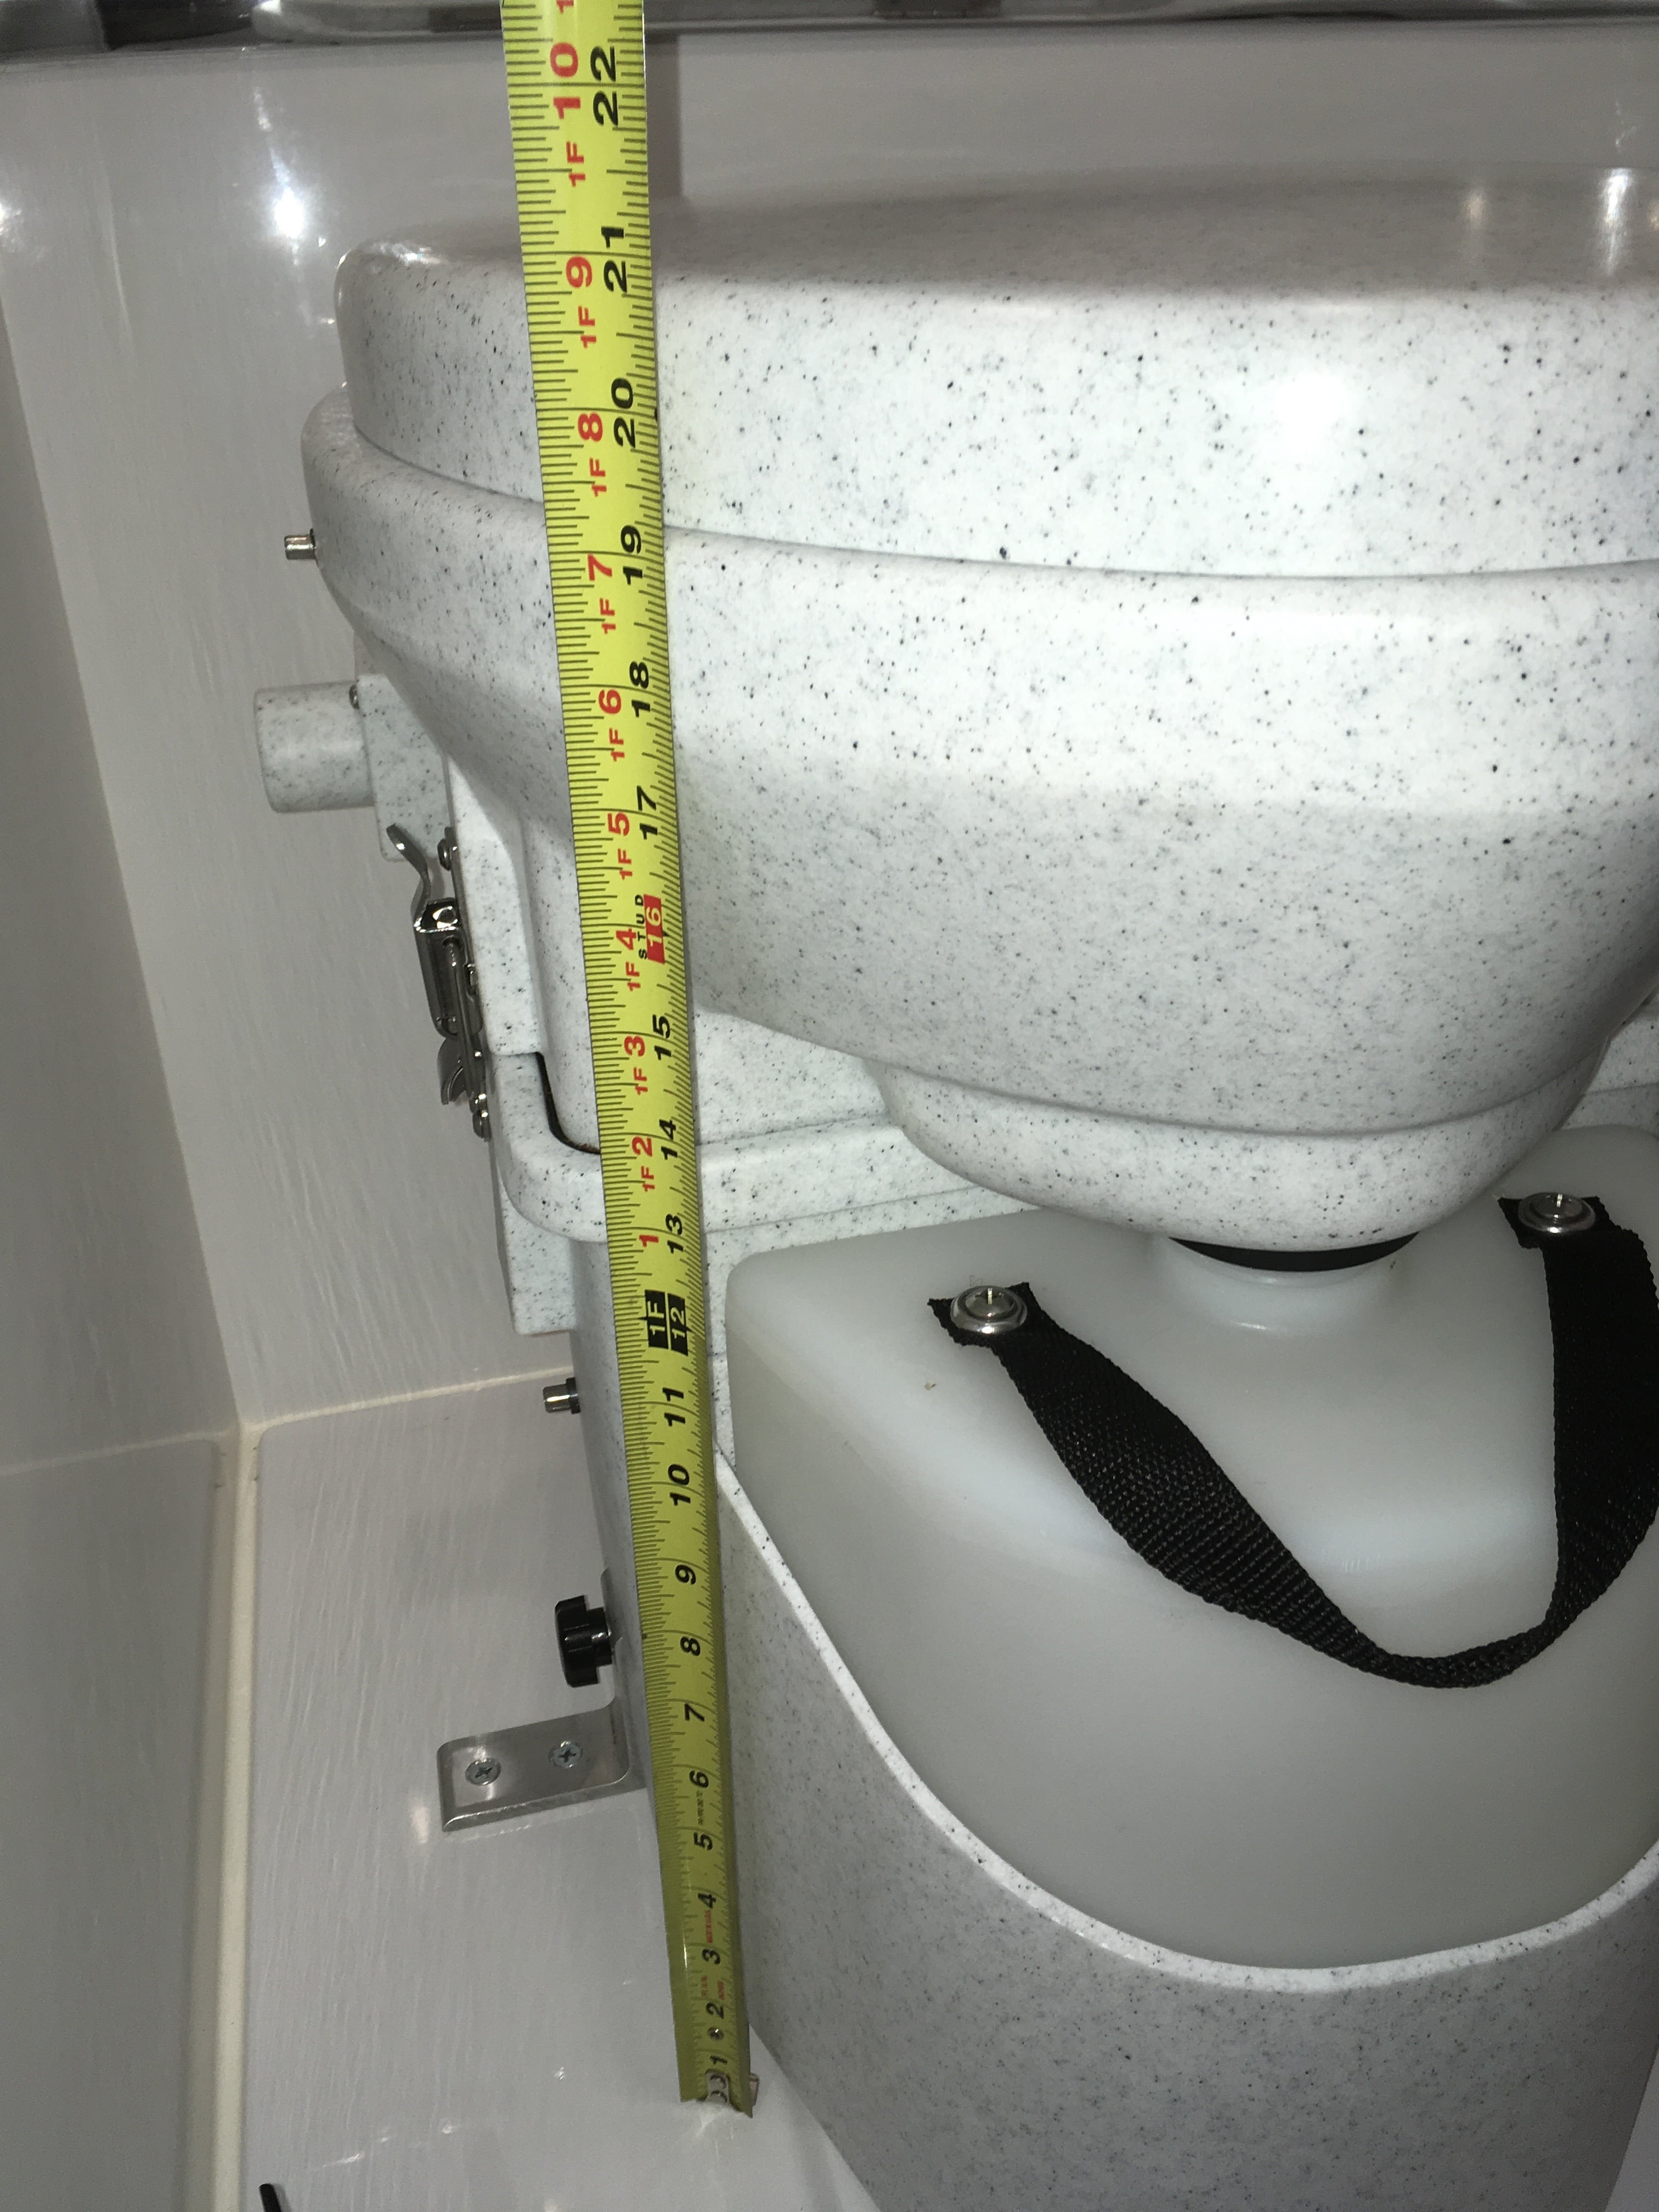
EDIT 12/10/23. Useful link: https://olivertraveltrailers.com/forums/topic/6720-natures-head-compost-toilet-troubleshooting-user-guide/ EDIT 06/06/23. This is an Oliver factory installation, not mine. One member has assumed that I did this. There are a number of threads asking about this toilet. I hope we can gather up a lot of the talk here in one place. I think there has been one other installation in an Ollie but there have been NO published pictures of any kind, that I have been able to find, even from the factory. This is baffling to me. I really wanted to cut the dump station umbilical. We routinely dry camp and finding an open station during a busy holiday weekend or off season is not something I want to face. With the NH toilet we can get rid of our grey water with a 3/4 inch garden hose. In many western states it is legal and encouraged to run a hose out to a nearby shrub and let your water trickle into the ground. The black tank, drain plumbing and vent system are all completely retained. The factory folks are extremely reluctant to delete these parts, since they are part of their certification. If you wanted to reinstall a regular toilet, it would be a very minor job. The fresh water line is even in place, next to the wall. You could sell the used NH for $400 and that would pay for the replacement conventional RV toilet, with a lot left over. An RV toilet is less than $200.... I chose to charge the base with coconut coir rather than peat moss, since it is a renewable resource and doesn't damage the environment. https://smile.amazon.com/s/ref=nb_sb_noss_1?url=search-alias%3Daps&field-keywords=coconut+coir I made the mistake of just dropping a dry 2 pound brick into the bottom, adding water and then letting it hydrate. I ended up with WAY too much material. You need to do this in a bucket, outside, and then transfer the expanded stuff into the base, and the leftovers into gallon zip bags. The correct height is even with the internal agitator centerline. Any higher and it becomes difficult to turn with the handle. It takes about two gallons, I did not measure. There are many online sources with info. To summarize: Sit to pee, everybody, so there is no splashing. The trapdoor stays closed and your pee goes forward, and then down into the reservoir. Which you pre-treated with a half cup of vinegar, to kill the odor. That part is easy. To poop, open the trapdoor, finish the job, wipe and close the door. Give the agitator handle two or three turns. The poop and paper will decompose rapidly once the natural process gets going, which may take a few days. The fan keeps a steady flow of fresh air into the reservoir and out of the trailer through the existing roof vent. I never noticed any bad odors except the first days, before I figured out that Oliver had installed the wrong fuse, a 1 amp, which had blown. Once I installed the correct fuse (2 to 5 specified, I used 3 amp), the fan worked as designed. The fuse is located in the main distribution panel under the dinette table, right row, bottom position (UN-labeled!). It is best to put only the absolute minimum amount of RV toilet paper into the base. If you put a lot in, it wraps around the agitator and makes it harder to turn. Only stinky paper goes down - the rest (damp with pee) goes into the small covered waste can to be disposed of weekly. The can came from Walmart, $10 I think. Cleaning is simple: spritz the area lightly with a dilute vinegar spray and wipe down with a disposable baby wipe, toss in can. Done. The residual vinegar and wipes control any odor from the can. The pee tank is big but it will fill up faster than you can believe if you have four people using it! Empty when it gets to within an inch or two from the top: Flip the two side latches, carefully rotate the top off the base, remove the pee bottle and cap it. Dump it in any approved location - a pit toilet or a rest stop restroom. Rinse with fresh water a couple of times and recharge with half a cup of vinegar. Reinstall into the toilet and close and latch the top. The pee will eventually form crusty yellow deposits. The fix, I have read, is to add gravel and water and shake it hard, then rinse several times. In two weeks of use I never noticed any significant deposits. The longer you let the poop decompose the better. If you can leave it over the winter, dump it out in the spring and it will be totally benign. If you need to empty it mid-season, remove the pee bottle and vent hose, unscrew the two hold down knobs and lift out the entire unit. Carry it outside and put a 13 gallon or larger trash bag on top, flip it over and empty the compost. Refill with clean coir to the centerline. There is NO need to clean it out. Any residual material will just help the next batch get started. The organic waste you can double bag and put in the trash, or if fully decomposed, it can be spread out in the woods, but not near a potable water supply or garden. The way to keep the smell in control is to keep the pee out of the main reservoir. It's the urine that makes a pit toilet smell so bad.... If you throw up or have a messy poop, you can add a little more fresh coir to help absorb the extra fluids. I keep a gallon bag of the hydrated stuff in the overheard cabinet (along with a quart of vinegar) and haven't had to add any extra. The fan has a dust filter that is supposed to be checked every few weeks, by removing two Philips screws. I think that is way too often in the clean environment of a fiberglass trailer, unless you have a dog that sheds. You can put your hand over the left (inlet) opening and feel a light suction. If that isn't present, you need to clean the filter. The pee bottle sits in a sealed cavity to catch overflows, This is a problem since when you take a shower, a bunch of fresh water gets trapped there. I intend to drill a couple of small drain holes in the bottom. I don't care if the pee bottle overflows onto the floor of the head, at least that way I will notice it! unless it is dark, and I am barefooted.... that would be bad 😉 This is why you want to empty the tank before it gets too close to the top. Agitator handle: ours fell off right away, the shaft has a set screw with lock nut. It is very easy to tighten correctly. I am not sure why the factory guy couldn't do it successfully. Spares: I intend to purchase a spare pee tank ($40), spare lids, and a fan.I already have extra 3 amp fuses. ... http://store.natureshead.net I intend to wire in a small LED in the wire harness to show that the fan has power. You can probably hear it running, faintly, if you are in a very quiet area and don't have bad tinnitus, as I do. The Nature's Head is a cool device, but it is really just a fancy bucket. A solidly built, very expensive bucket. I wish the price were about $250 instead of $800. That seems about right for what you get. OTH it is very rugged, and long time users seem to love it. My wife still has some reservations about using it, and we need to get a short step stool since it sits so much higher than even a tall toilet. This one might work well, and it might fit in close to the base with a bungee cord around it for travel: .... https://www.squattypotty.com/shop/poop-better/classic-ecco I am still learning, but I have no regrets at this time. Questions? John Davies Spokane WA
 1 point
 -
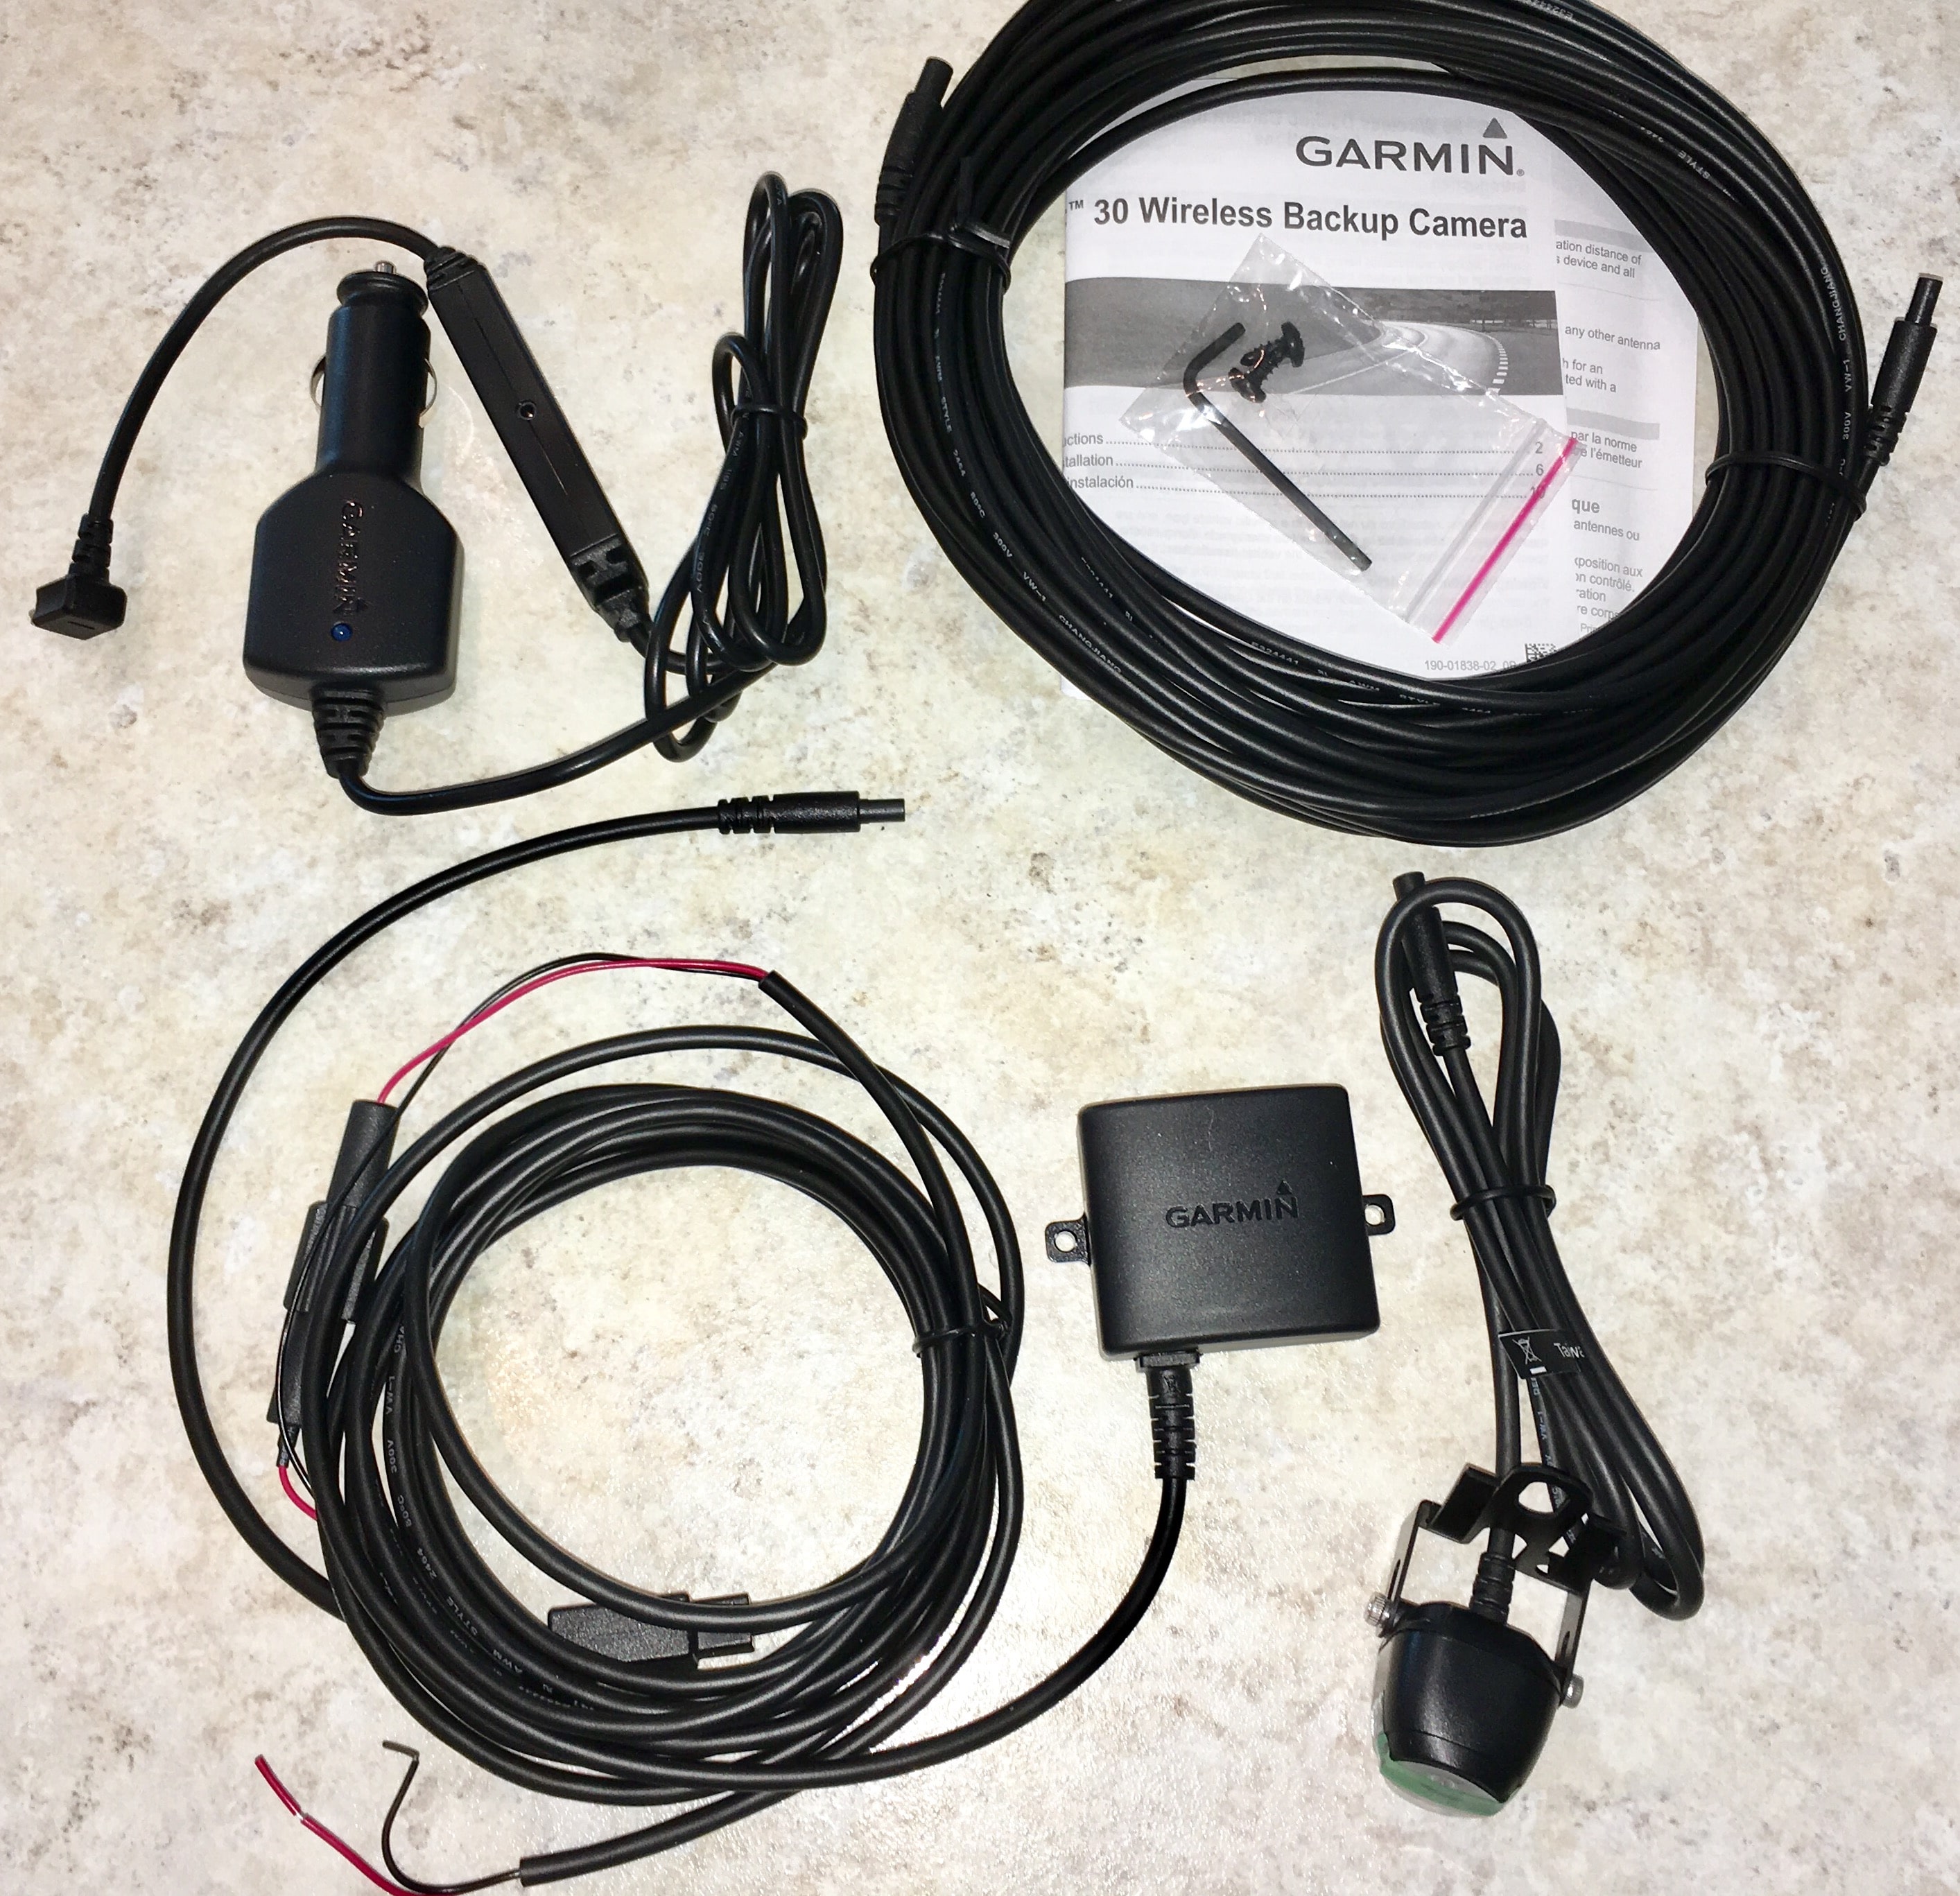
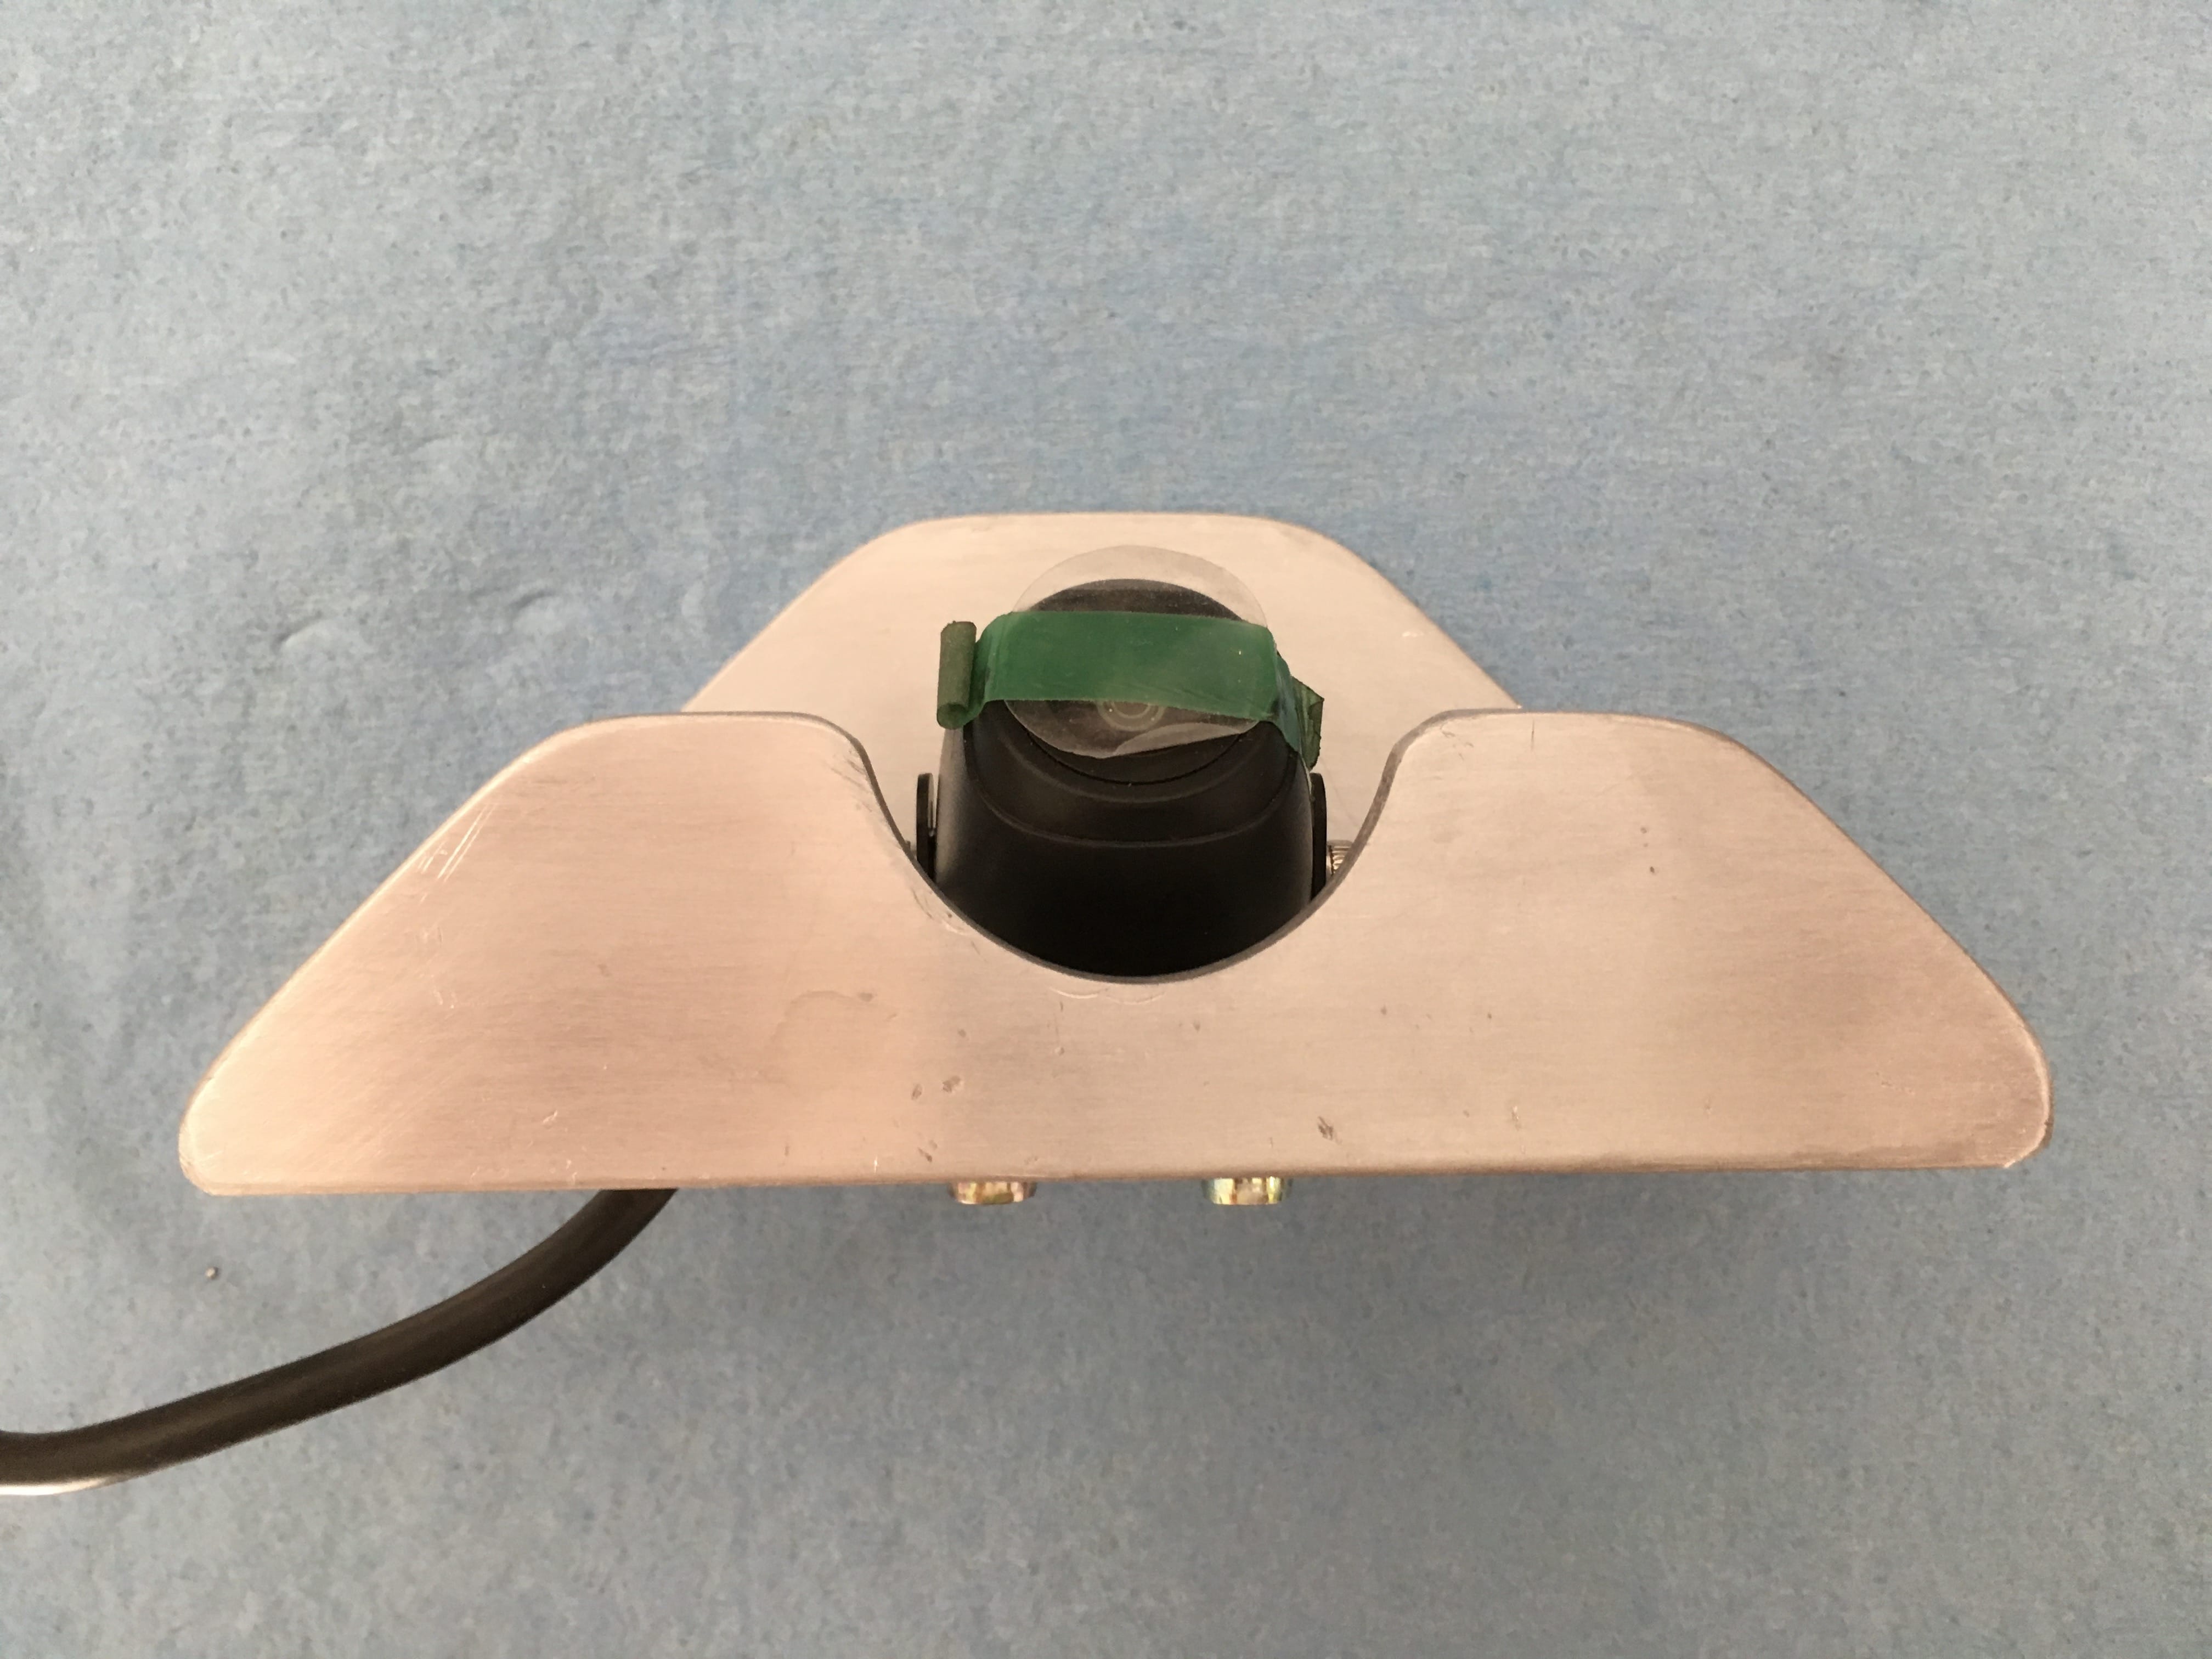
Installing a Garmin wireless camera with protective guard, to communicate with a Garmin GPS in the tow vehicle (mine is a RV660LMT). Here is a teaser shot: I had to take several deep breaths before I started drilling holes in the hull, but after the first one it was easy. The trailer is pretty dirty, I haven't been able to wash off 3000 miles of road grit yet. Lots more coming soon. John Davies Spokane WA
1 point
-
We DO have that interagency senior pass and use it often. Best $10 I ever spent. Sadly, we left Yellowstone this morning. We are overnighting in nowhere Montana planning to hit the Glacier National Park sometime tomorrow. Most of the later pics at Yellowstone were beyond what this phone can do we did see hundreds of bison, dozens of elk, five mountain goats and two black bears we missed the wolves somehow here is a pic from the east entrance
1 point
-
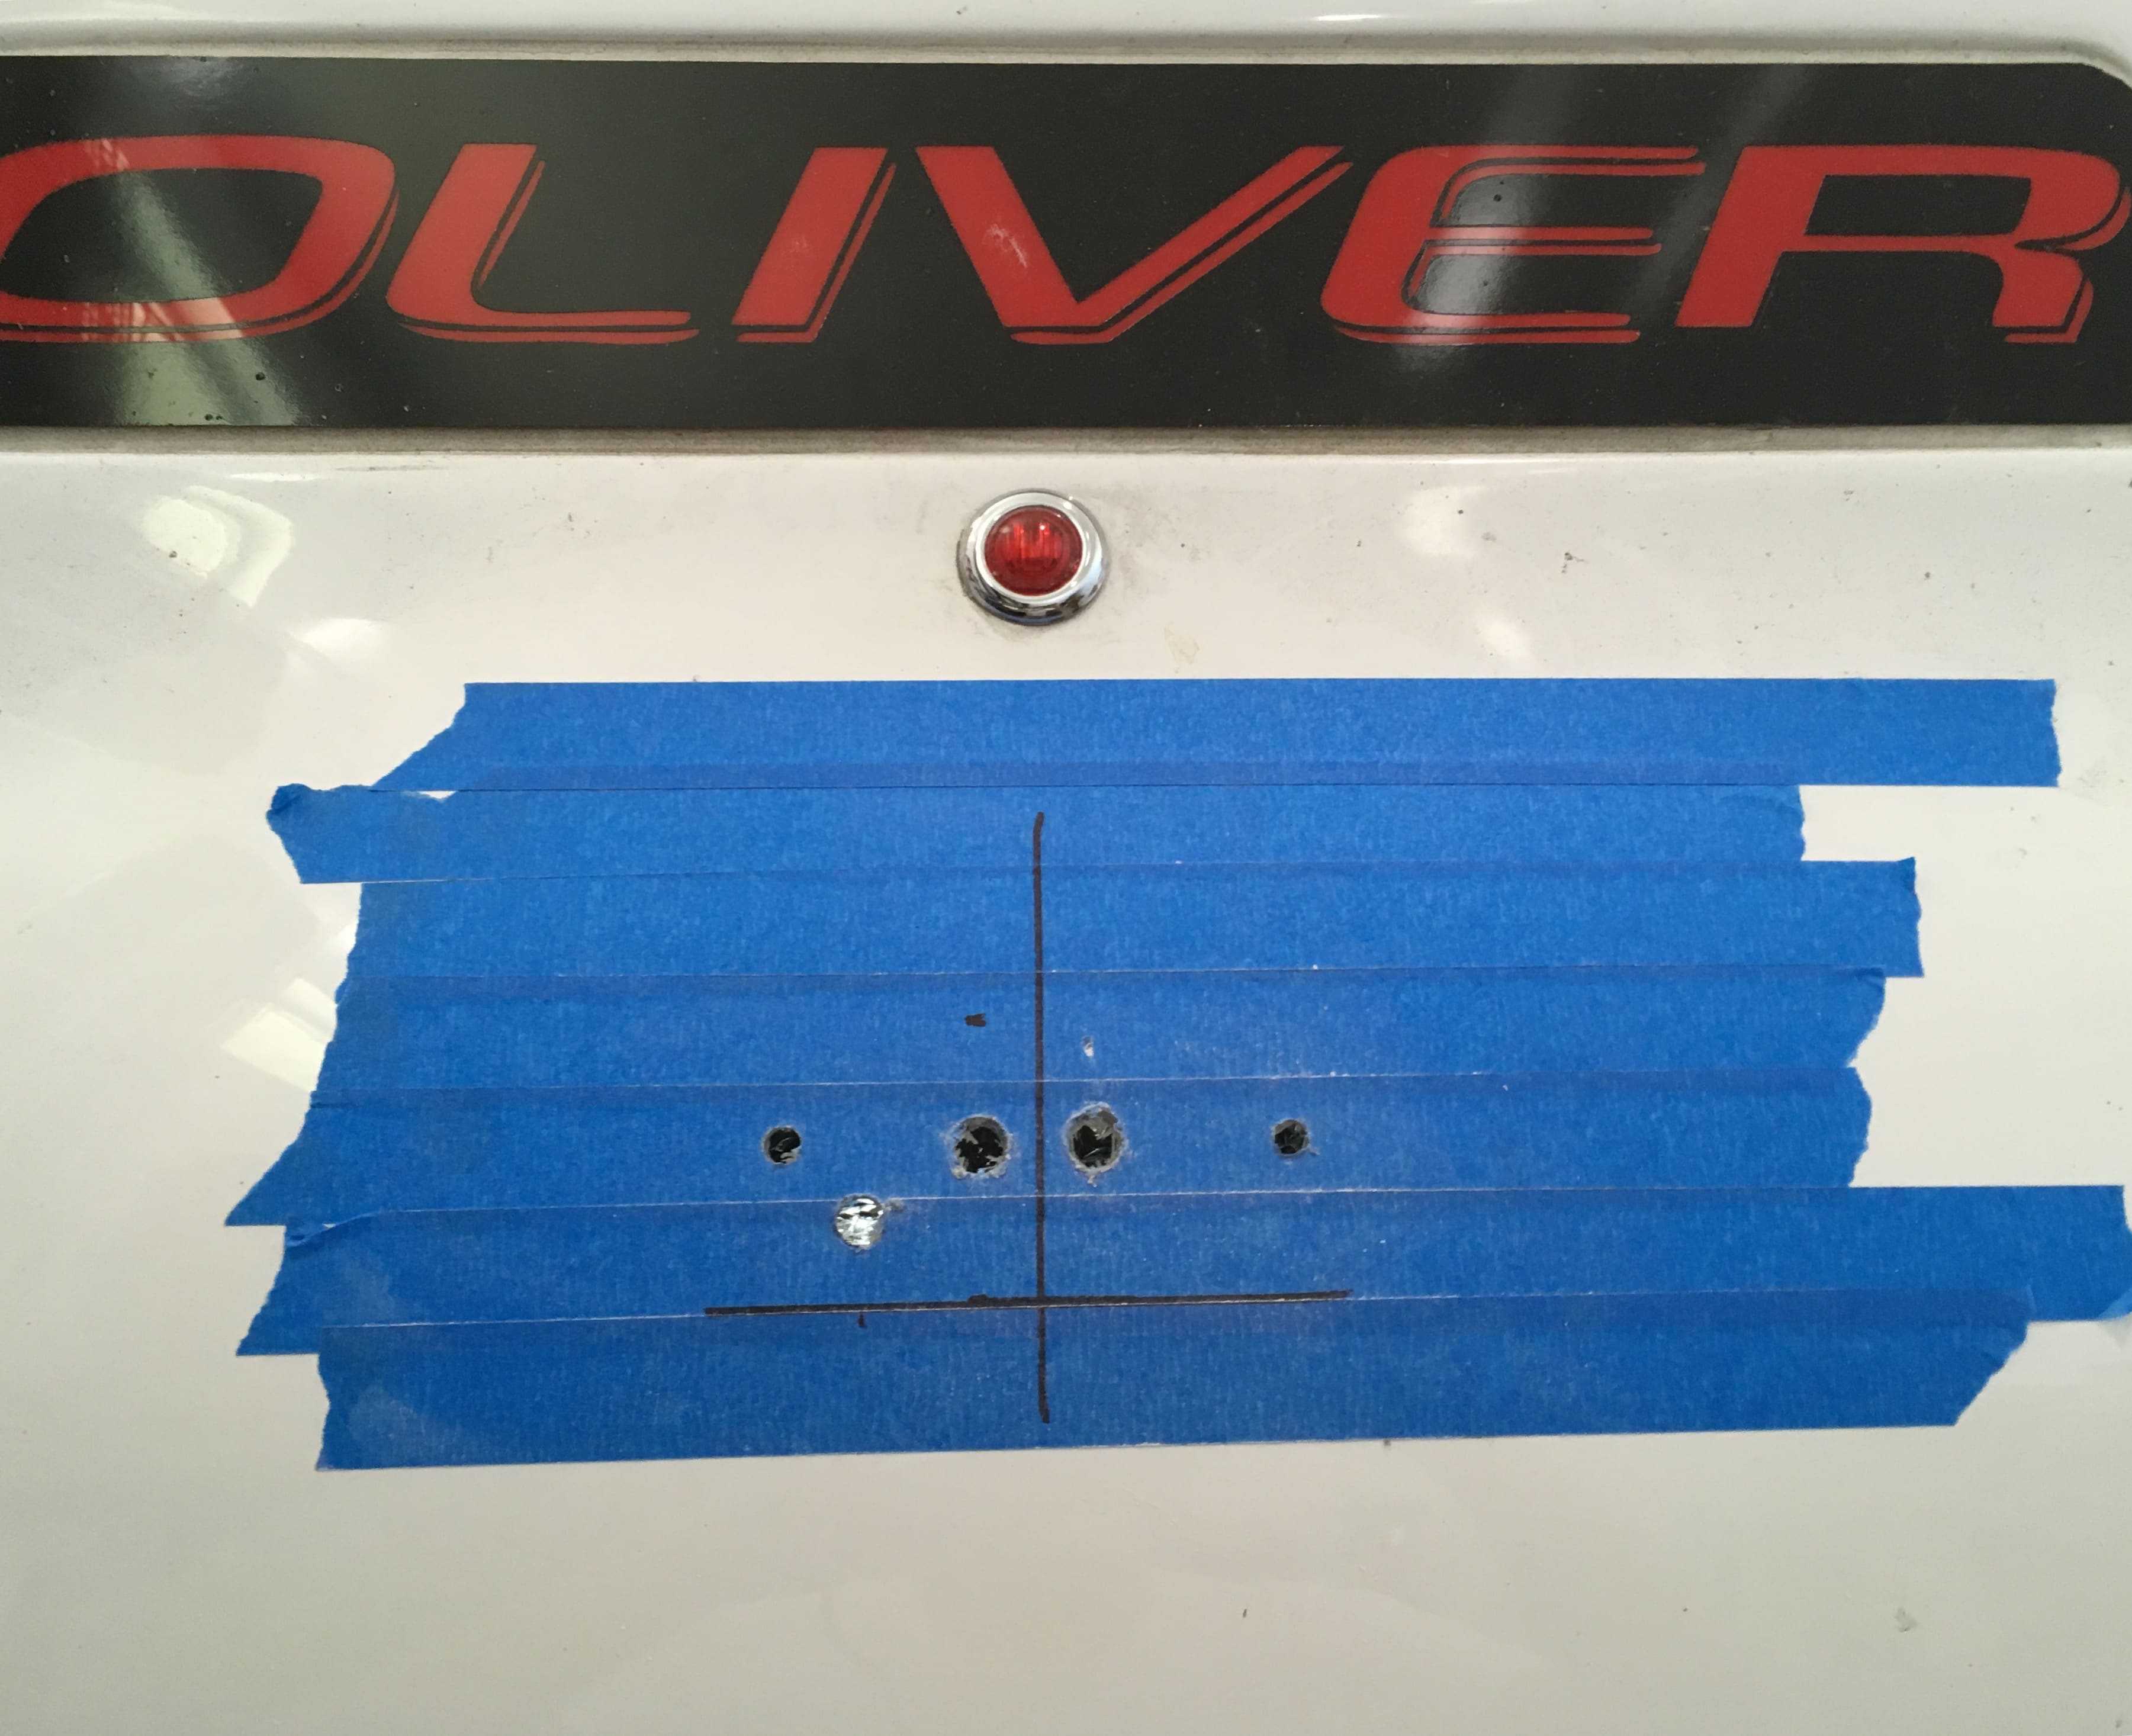
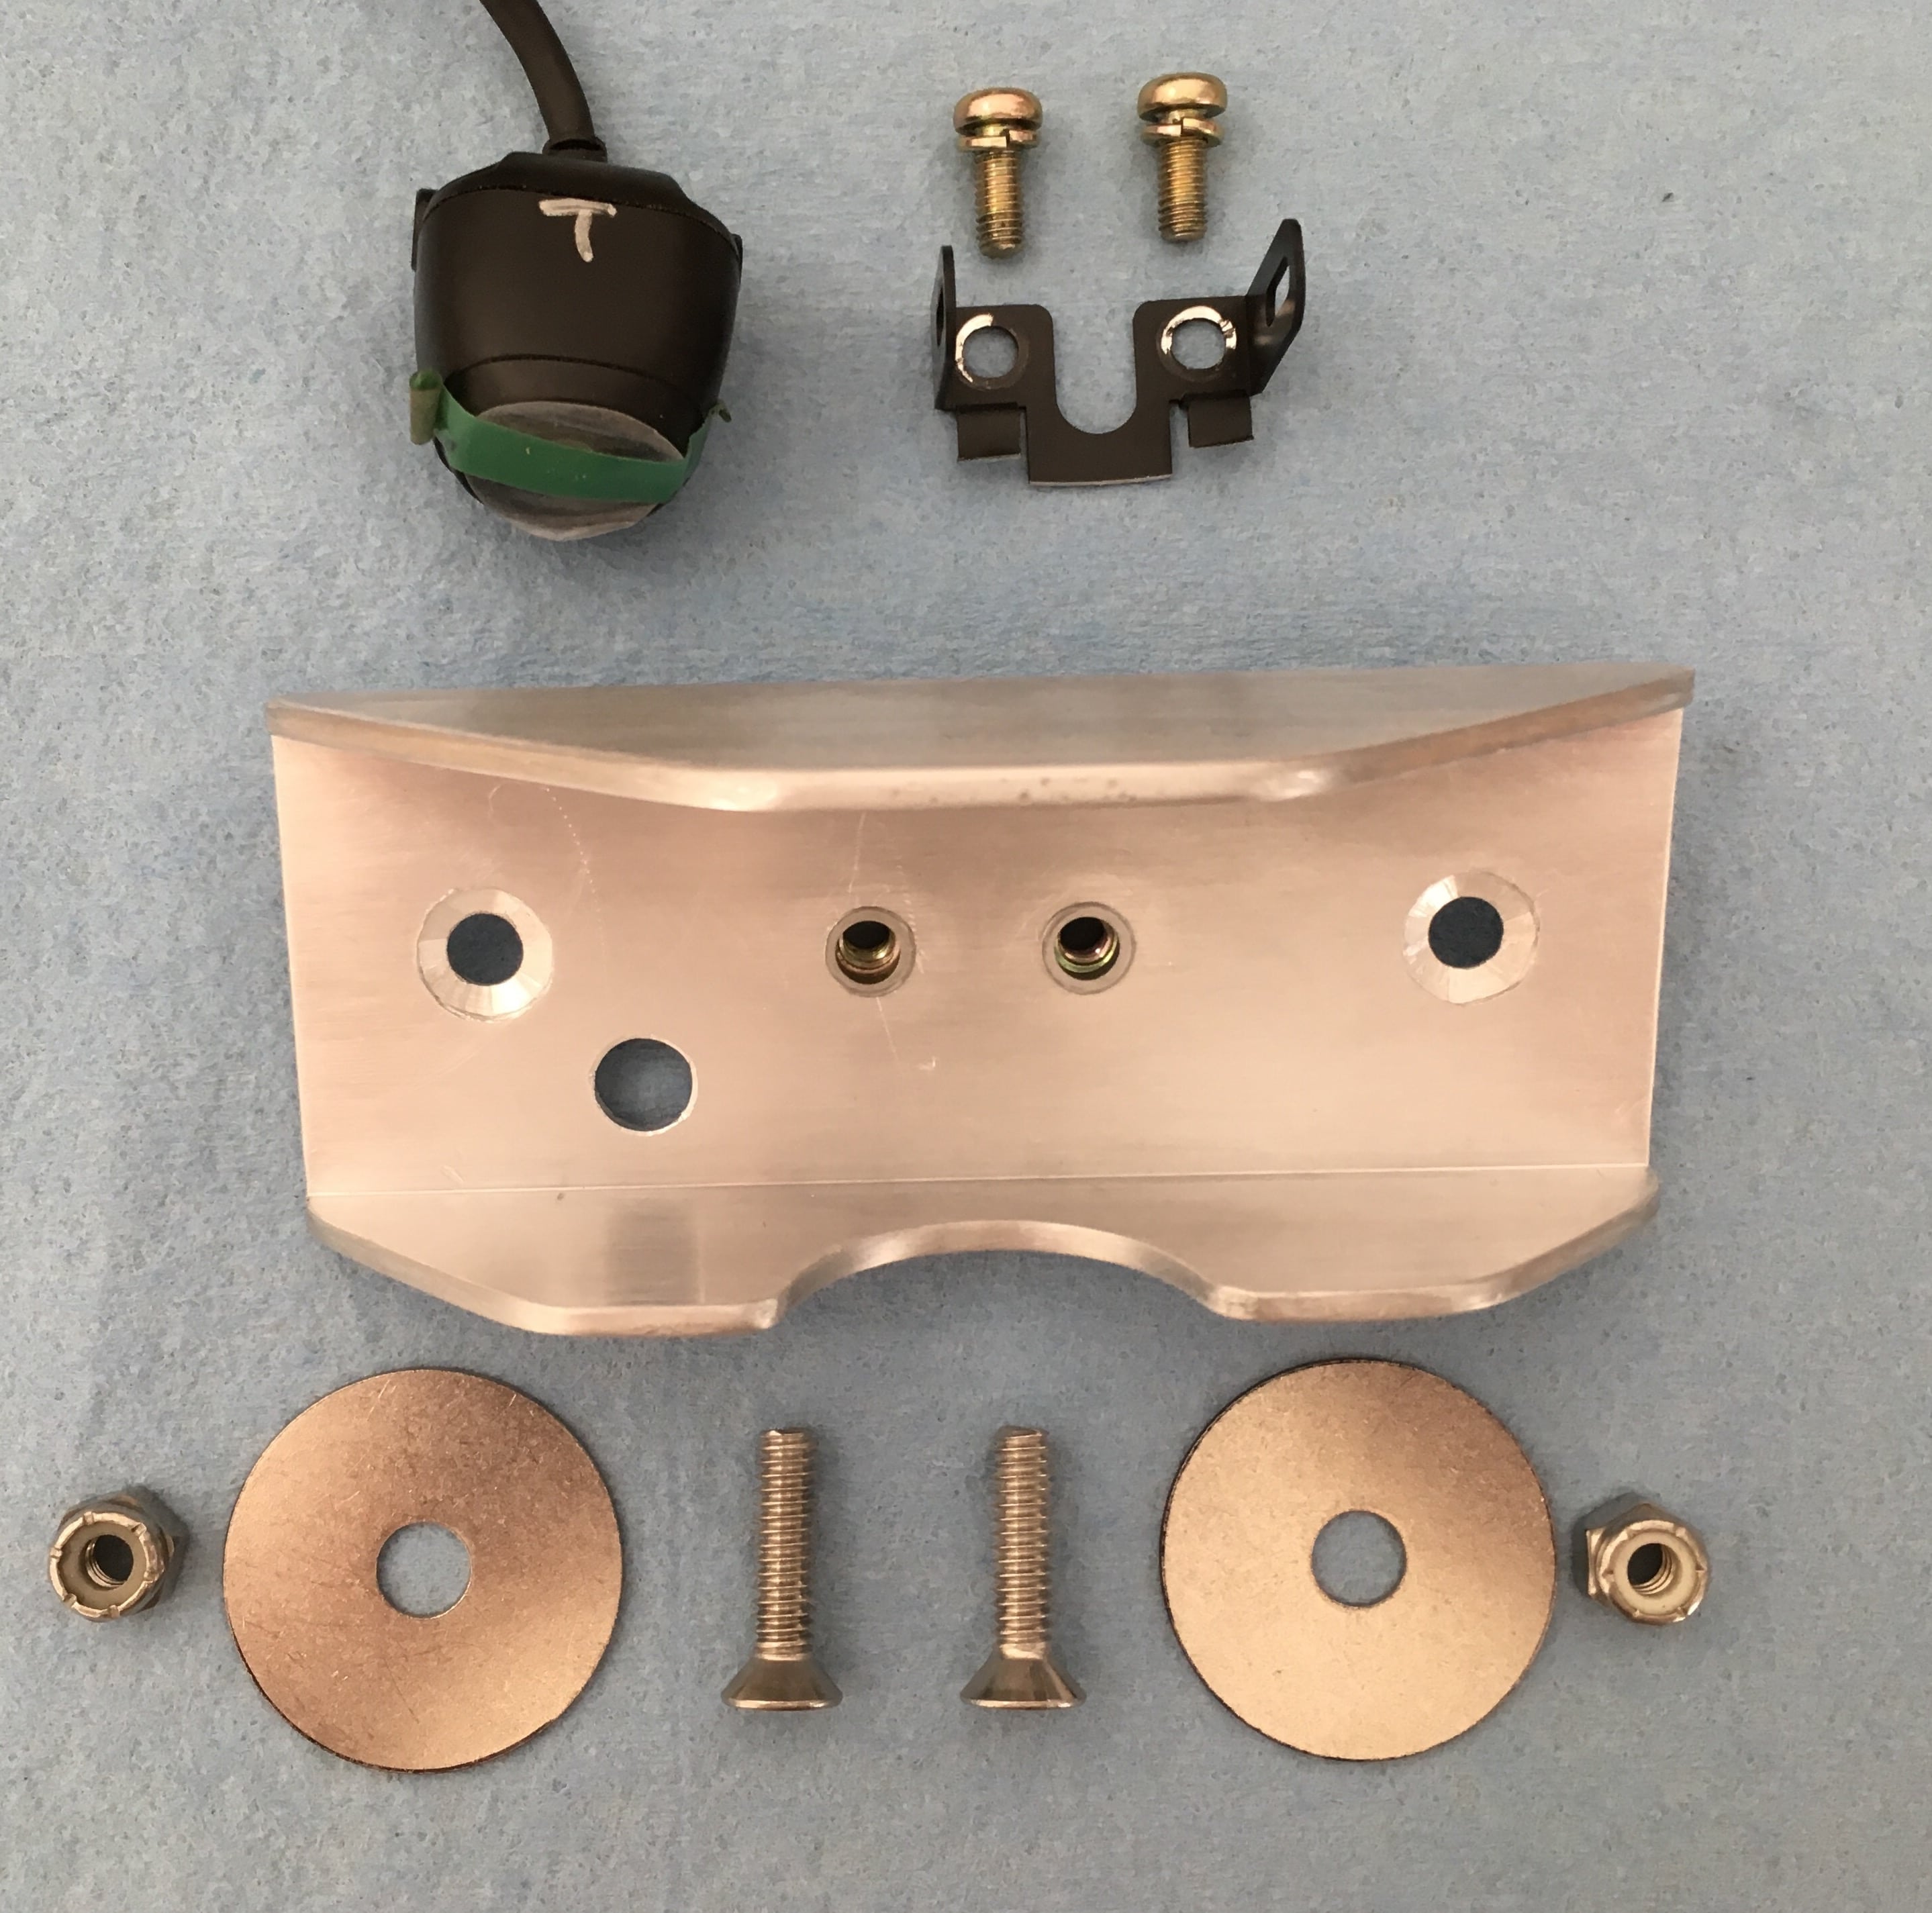
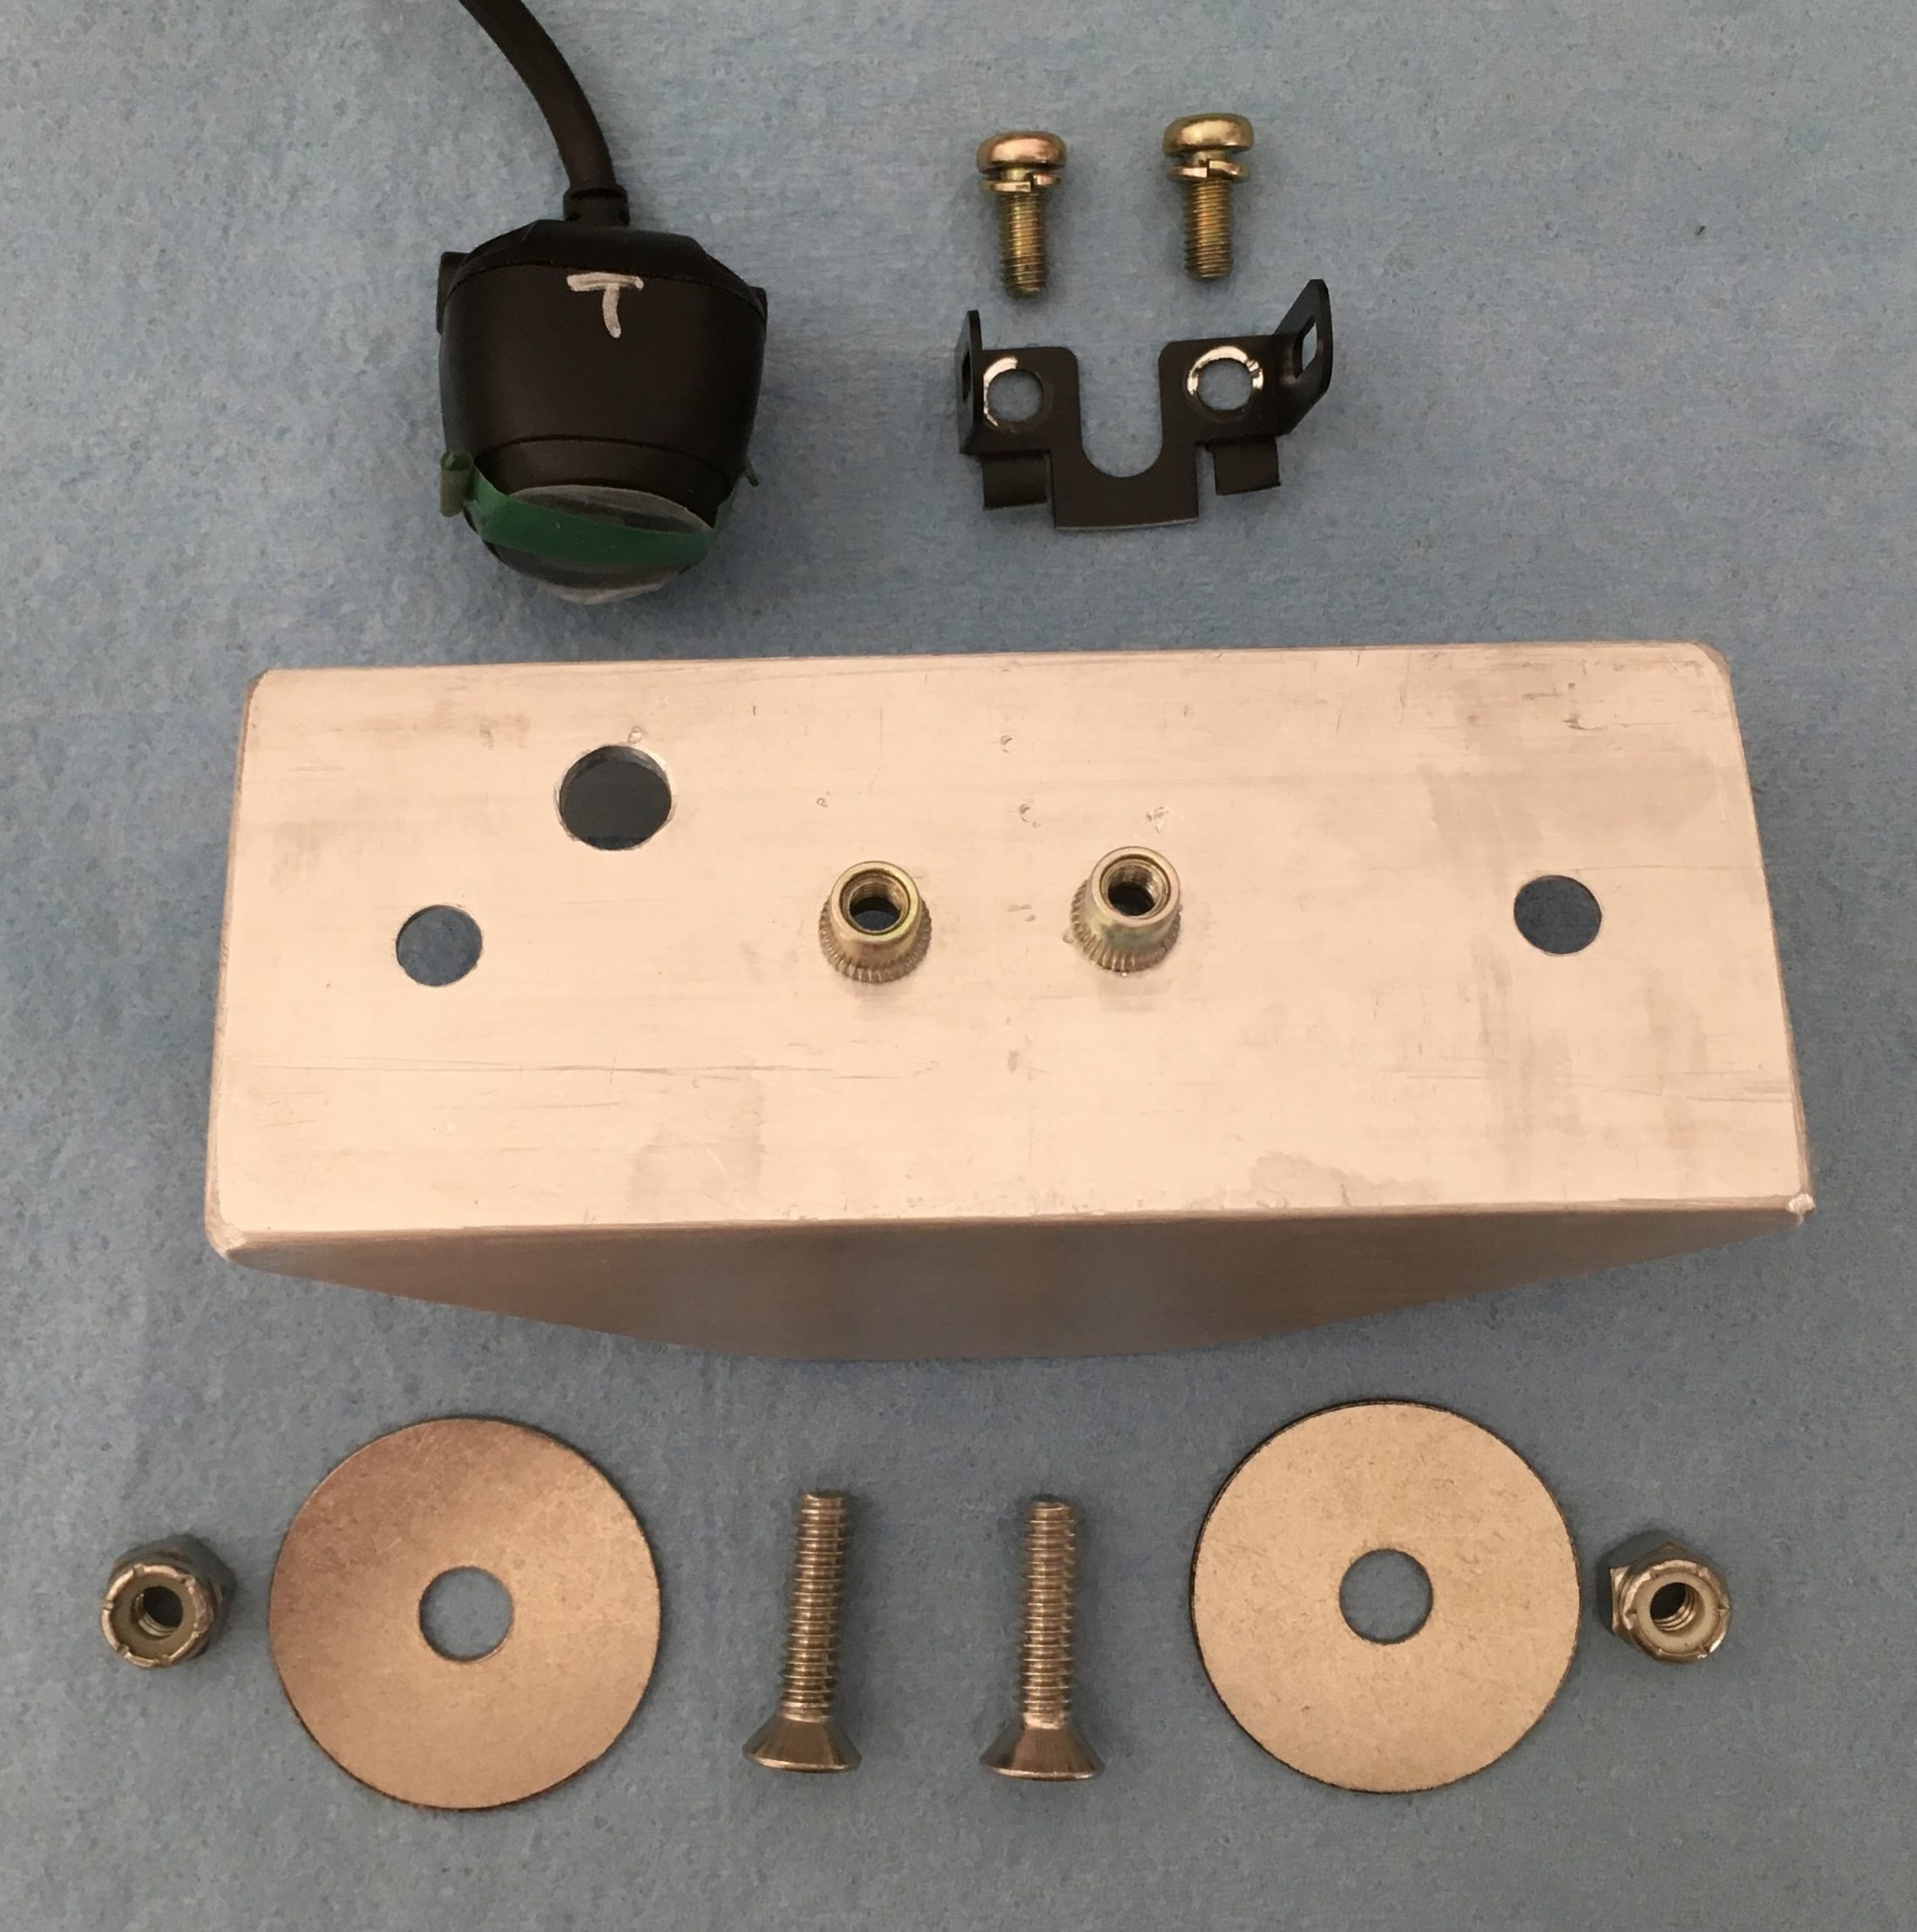
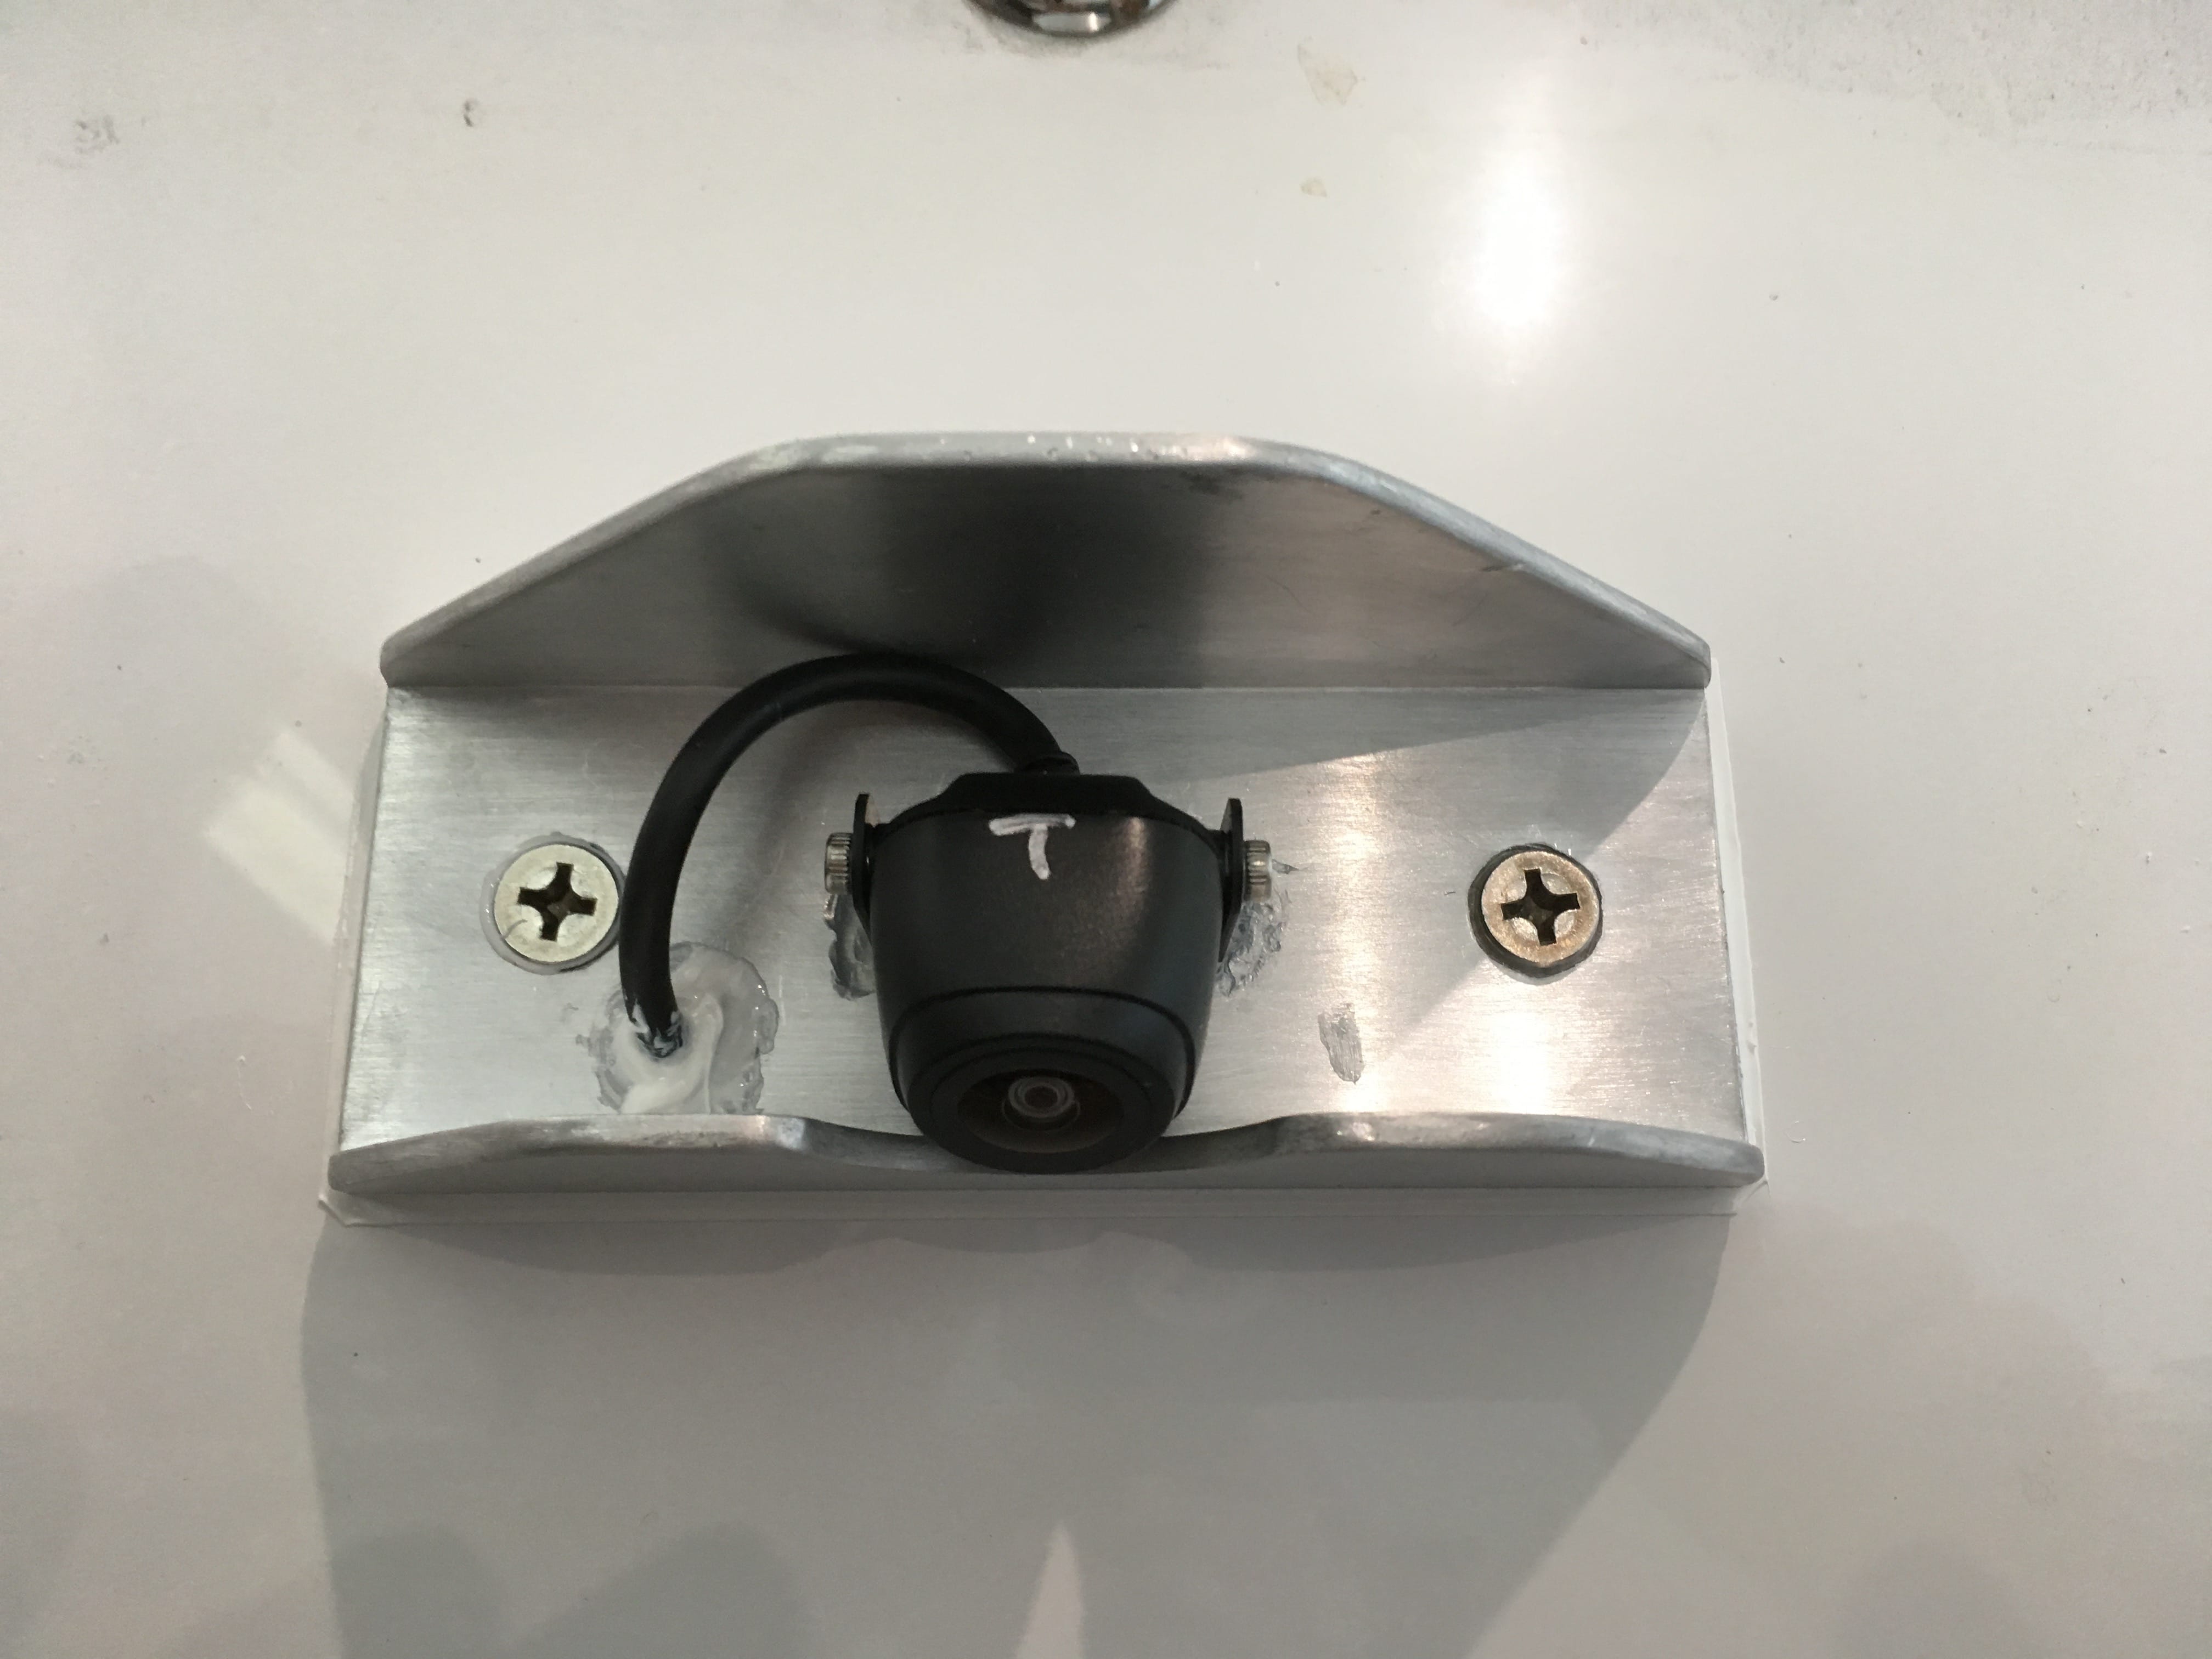
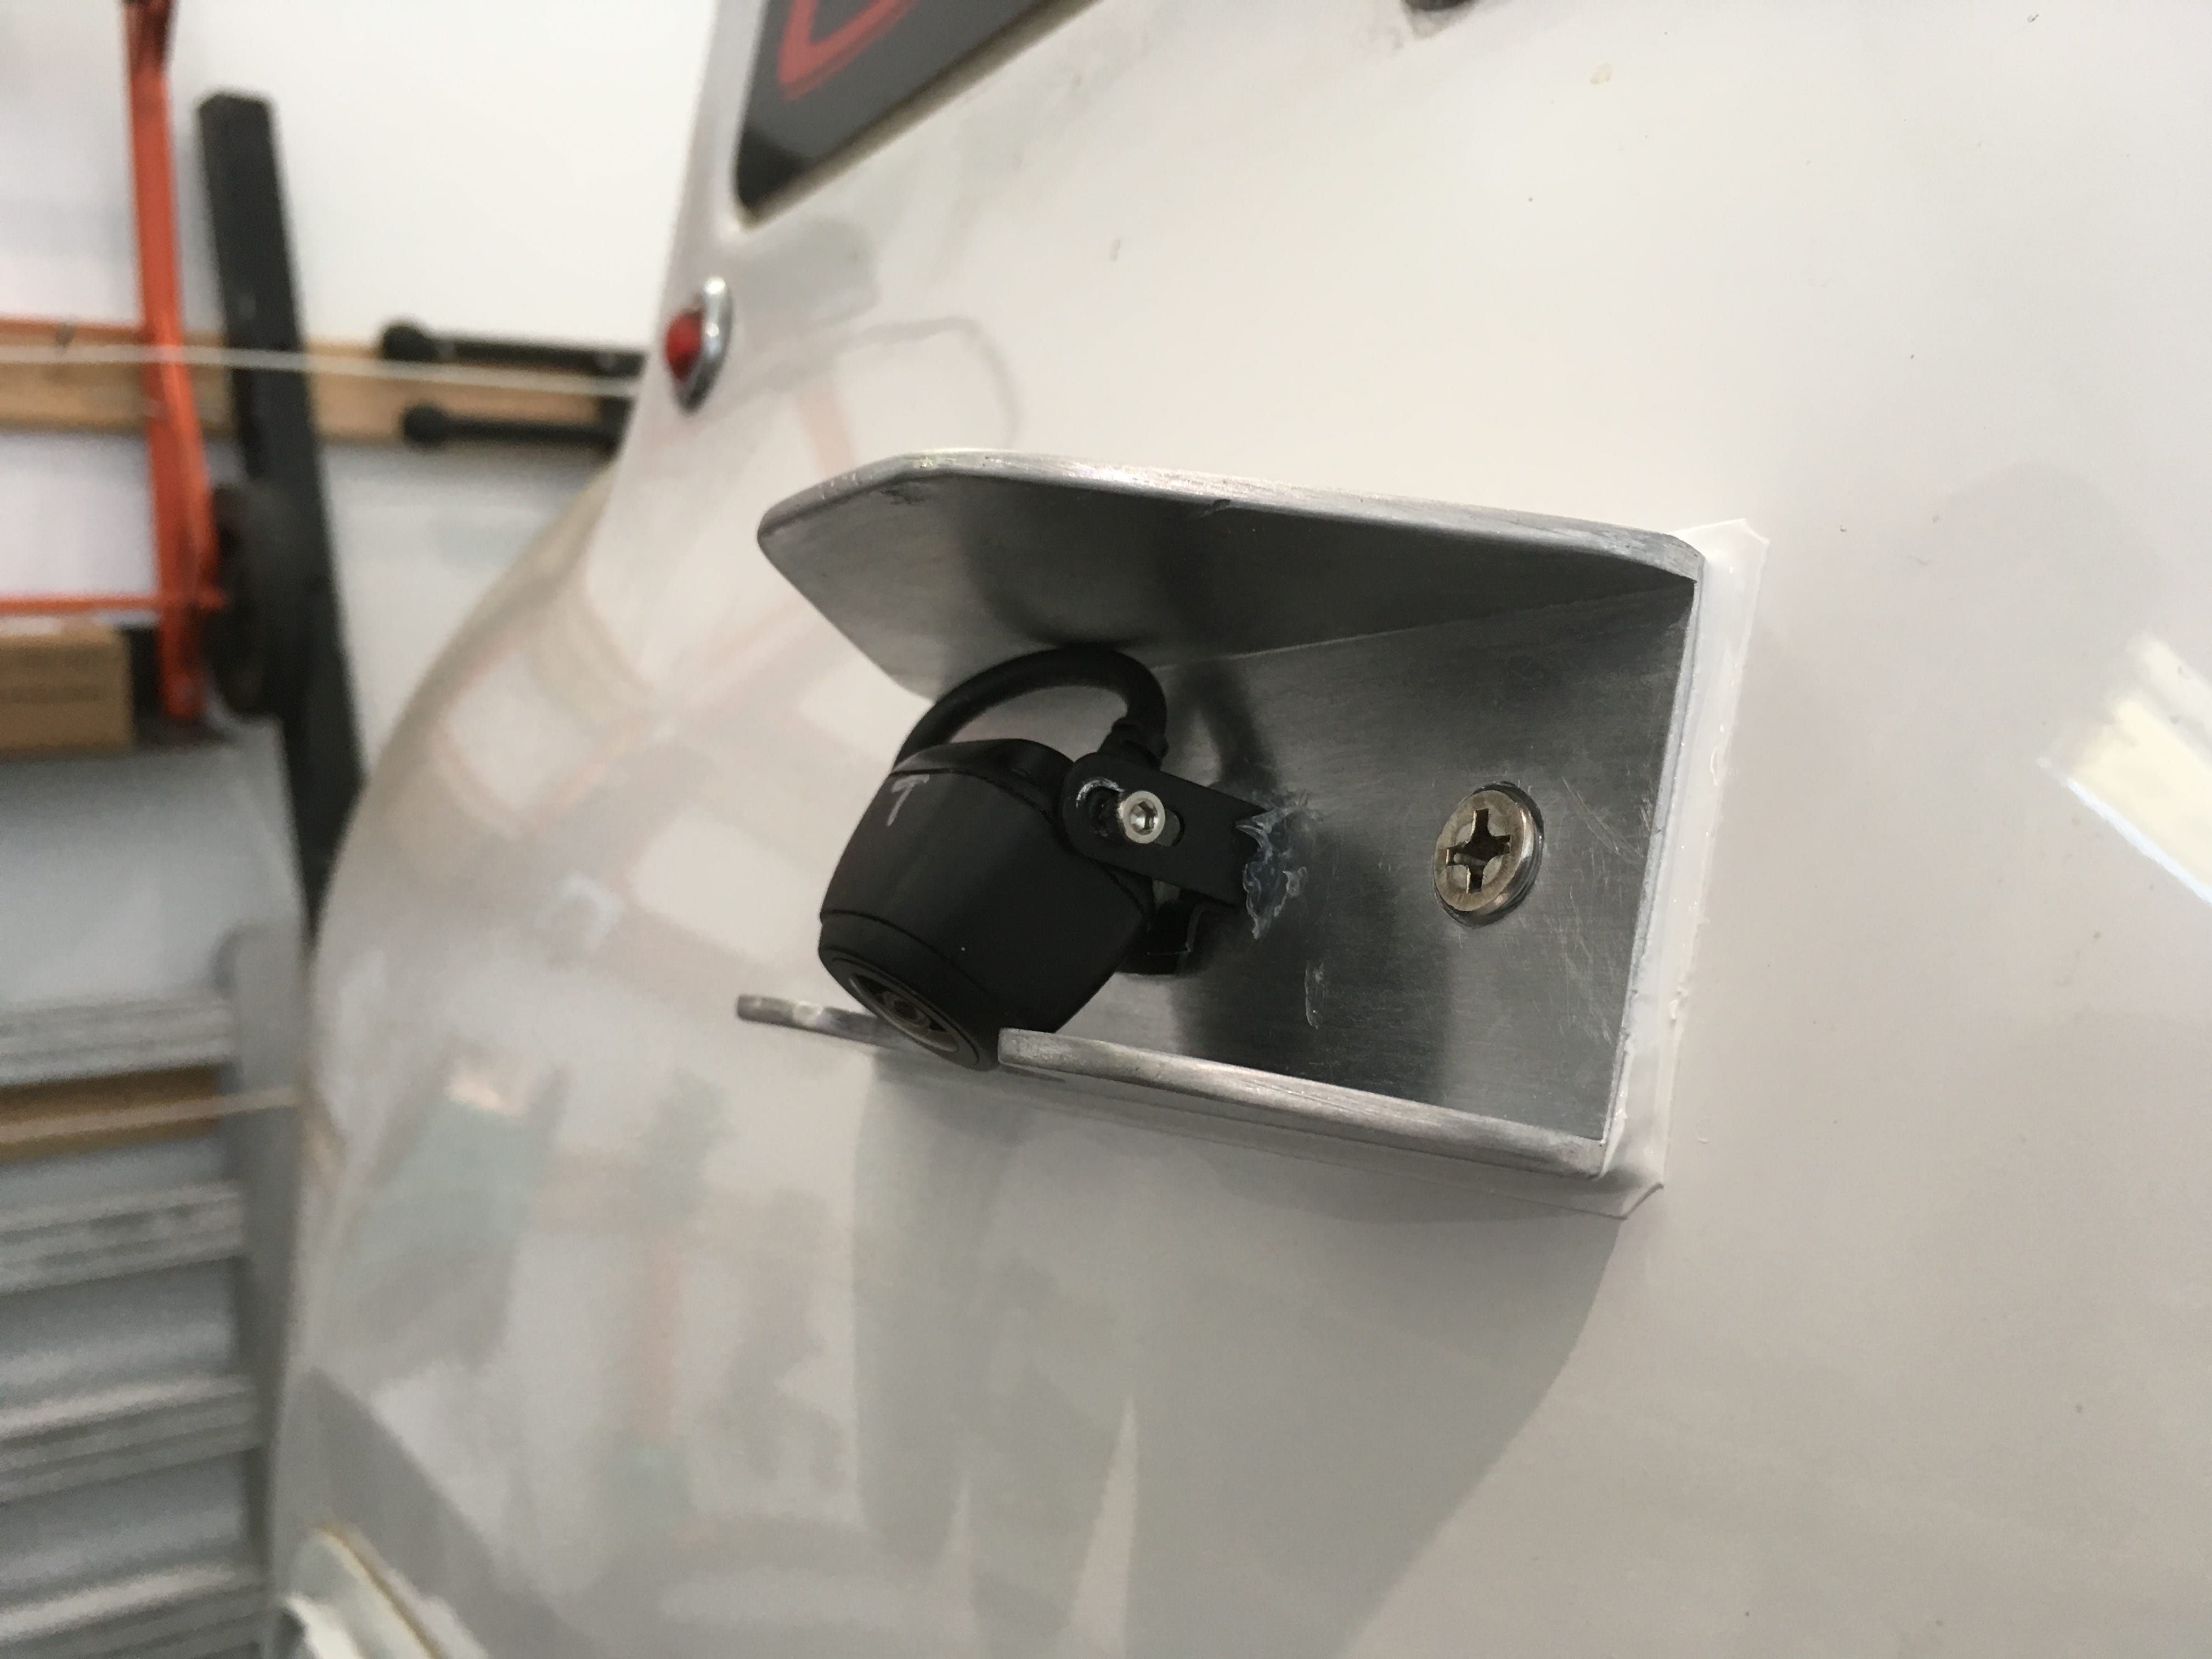
For mounting the transmitter, I was originally going to run dc power and the Garmin antenna coax to the front closet, but in looking at the limited access at the entry door I decided it was going to be too much of a pain, so I settled on the small wiring compartment immediately aft of the head, street side... It has easy access from the 6 inch round port in the head cabinet. Running the coax is easy since there is a continuous wiring "trough" all the way along the left side. The only tricky part is behind the pantry insert. Access to the inside of the rear wall of the hull is easy once you lower the two side panels and pull down the insulation. Revealed to you is more crappy wiring ;( There is 6 inches of free hull area below the LED riding lights and lots of room to maneuver if you stand on a small step stool. I laid everything out carefully using a bubble to align with the trailer cross belt line, and positioned the bracket on a relatively flat part near the bottom of the available space. This will get the camera up high where it can get a good panoramic view and also be up and out of the way. The camera and mount are delicate, but in the mount I fabricated they are well protected from a wayward branch or hail stone. I ordered the 50 extension cable that is optional, since the camera pigtail is only about three feet long. I wish they had shorter ones available. The material is 6064 T6 (tempered aircraft grade) aluminum, from a 2x2x10 inch a scrap I picked up at the local metal supplier for $4. I wanted a full shield on top to divert rain and objects, and also a smaller lip on the bottom to protect the underside. I can easily access the camera and adjustment screws from the sides. I added a crescent cutout so that the camera could point down far enough and still be protected. All work was done with a hacksaw, file and hand drill, with finish work on a bench top belt sander. It's very easy material to work with. The camera and bracket can easily be removed from the mount without disturbing that part, in case the camera fails. I used 5 mm steel threaded nutserts and metric Philips panhead screws to hold the steel bracket on, after trimming the bracket ears that are intended to clip over a license plate. I used clear RTV sealant on the bracket and screws for easy removal. Since the nutserts flare out behind the aluminum plate, I had to drill larger holes in the fiberglass for clearance. I masked around the area, and with the help of my daughter inside the trailer, I mounted the assembly onto the hull with a thick bed of 3M 4200 adhesive sealant. A word of warning: 4200 is great stuff, but expensive and once opened, you have to use the tube within 24 hours or it will harden in the tube . It always pays to read the instructions: I was going to use isopropyl alcohol to prep the parts, but it specifically says that alcohol will prevent the 4200 from curing! I used MEK, as advised... http://3mmarine.com/3mtm-marine-adhesive-sealant-fast-cure-4200fc-white-3-oz-tube-05260.html More to come, I haven't finished the wiring, and am waiting on a switch panel from Jason. I'll post pics of the inside work and transmitter. John Davies Spokane WA
1 point
-
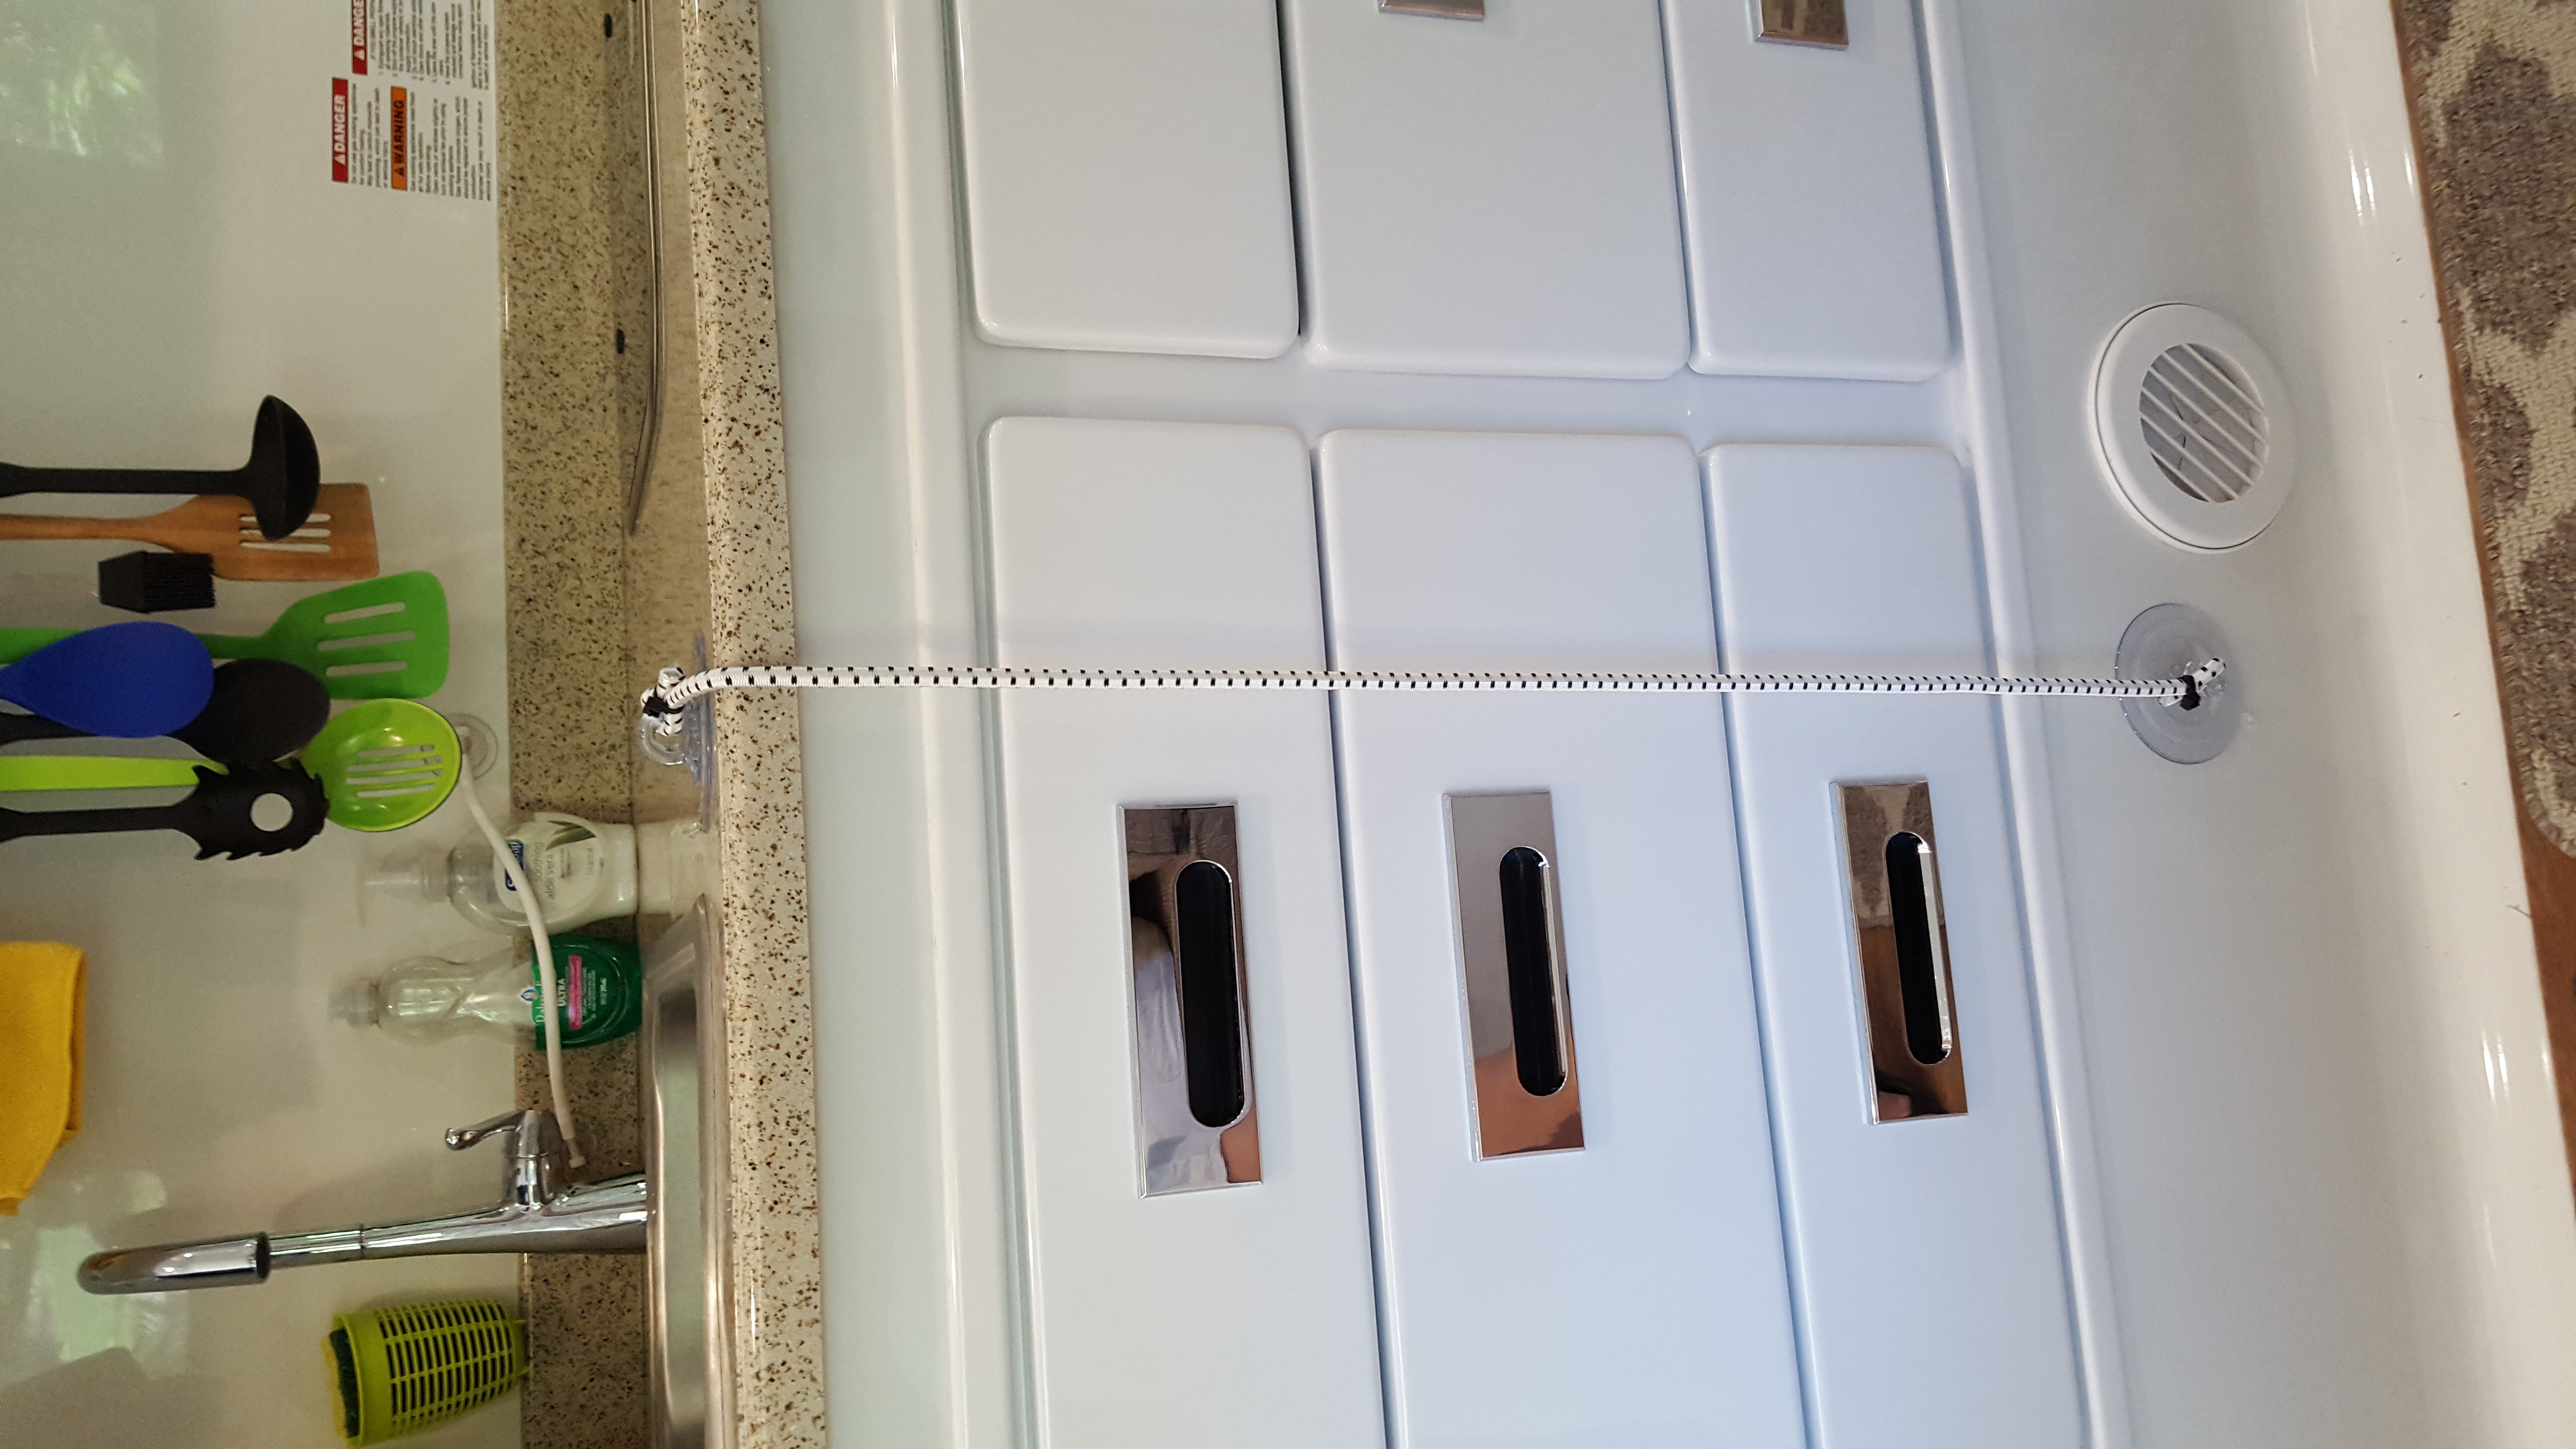
This is what we did to stop the kitchen drawers and night stand from opening. We didnt have a problem with stuff crashing to the floor, but after seeing photos we thought we should come up with something. Adams Manufacturing makes the suction cups in the usa. They work really great. Down side is you have to buy a bulk amount. We got a spool of shock cord and attached with tie wraps and just put them on when we travel. Then they just hang up in the closet when we are camping. But we are finding all kinds of cool uses for them. Havent even started thinking of outside uses yet:) janet g
1 point


-
Recent Achievements
-


")


")


")
