

John Dorrer
-
Posts
659 -
Joined
-
Last visited
-
Days Won
5
Posts posted by John Dorrer
-
-
On 7/18/2023 at 12:54 AM, jd1923 said:
Being confident, the old has to go... Next day, I just pulled everything old!
Request for those reading... How should I fill these holes?
I'm an engineer/mechanic, not an artist or autobody/paint guy. I want to be able to later finish the fiberglass and polish the corner, without evidence of original installation (finish work TBD by a professional).
Fiberglass work by Oliver or a marine shop that does fiberglass repairs.
-
 1
1
-
 3
3
-
-
On 11/26/2024 at 6:47 PM, jd1923 said:
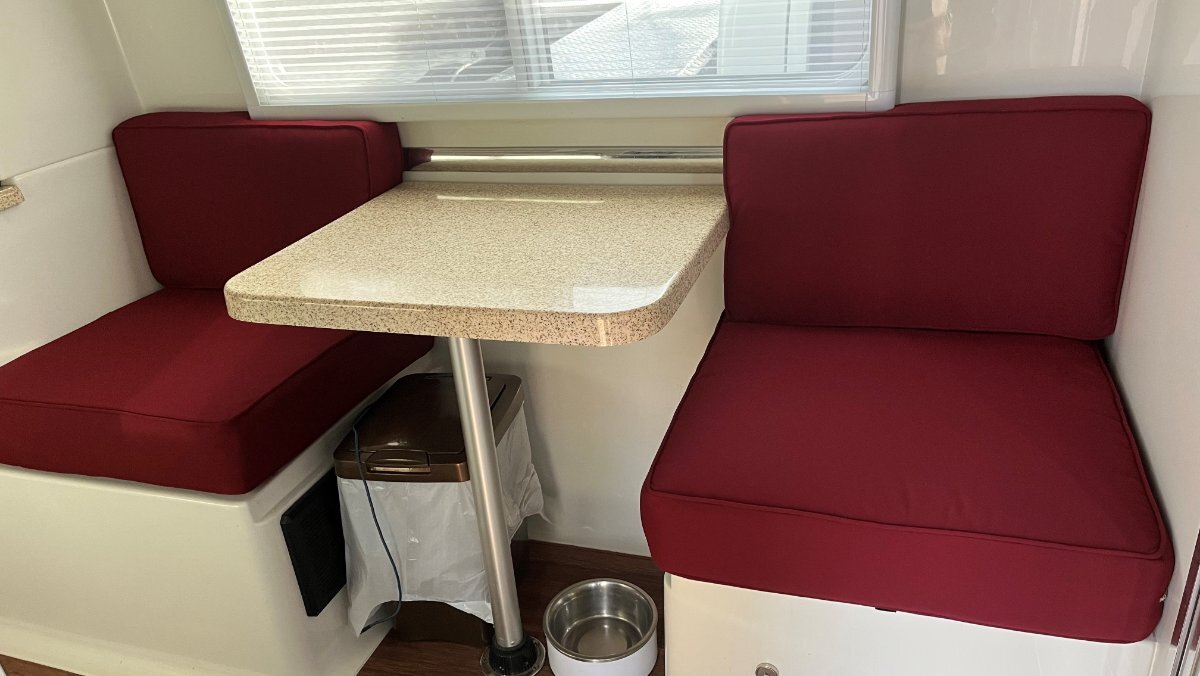
They put us on their November calendar. After running our trip, every time I sat on the old cushions, I thought it would be a shame to merely reupholster with new cloth yet keep the 9-year-old foam. When we dropped them off, I asked about new foam. He said the quality of foam for seating they carry is far superior to what we showed them in the old cushions. We went with 24x25" bottoms with 5" new foam (1" taller) and with the batting and fabric, the cushions are closer to 6" tall. We had 2" clearance under the window frames with the old cushions. The new ones just fill the opening and stay nicely. Went with the original sized 4" foam for the seat backs. All new foam, batting, fabric, zippers with newly corded edges.
Chris loves the color given her Red, White and Blue Oliver theme! We spent just under $500 out the door. Which for me was better than the $350 for upholstery only. Soon, she will look as good as she tows or provides inverter power!
Those look awesome👏👏
-
1
-
-
Happy Thanksgiving 🦃
-
6
-
-
On 11/25/2024 at 9:09 PM, jd1923 said:
We just received our MetalTech scaffolding today. Got it setup in 90 minutes (on the 70-year old-fart plan, yep just taking my time). In another 90 minutes (working hard this time), I removed EVERYTHING up top-up front on our OLD Hull #113!
Boy-oh-boy, do I have a lot of fiberglass repair to do!
This scaffolding is awesome and reasonable. I'm 6' 2" and weigh 225 lbs on a good day! This platform did NOT waiver, did not sway, not a blink! I'm also weary of heights and ladders yet felt great on this platform and even forgot I was up there after working a while.
Strapped the ladder into place as shown. I climbed up and down 5x while working this first job. A young guy would just climb the scaffolding! 🤣
Pictures to follow are first the scaffolding setup. Then the demolition. Pulling parts is always fun and easier than the final restoration. 🤣 Posts to follow will cover the complete repair of the front roof. Today was easy. I see many hours of repair in my future.
Ladder tied off as well. Good job👍
-
1
-
-
I need to get a first hand up close look to see how these work. Am I correct they control the movement of the door, so the door doesn't fly open when you open the door in the wind🙃
-
1
-
-
3 hours ago, Ronbrink said:
I soon replaced the stock brake cable with the red coiled cable, like the one @rich.dev mentioned, after stepping over the trailer tonge when hitched and tripping myself; yep face forward fall, lesson learned. (It’s okay to laugh!)
Just got mine from Amazon. When I go to storage, I will swap it out and coil the old one and keep it as back-up.
-
1
-
-
7 hours ago, Jason Foster said:
I plea the 5th.
🤣 I did get a good chuckle.
-
2 hours ago, Jason Foster said:
Cut them down to the correct length if they hang too much but also make sure you cross them at least once, so if the trailer hitch comes off the ball, it drops onto the chain crossing.
My post was about the brake cable hanging too low, not the chains🙃👍
-
1
-
-
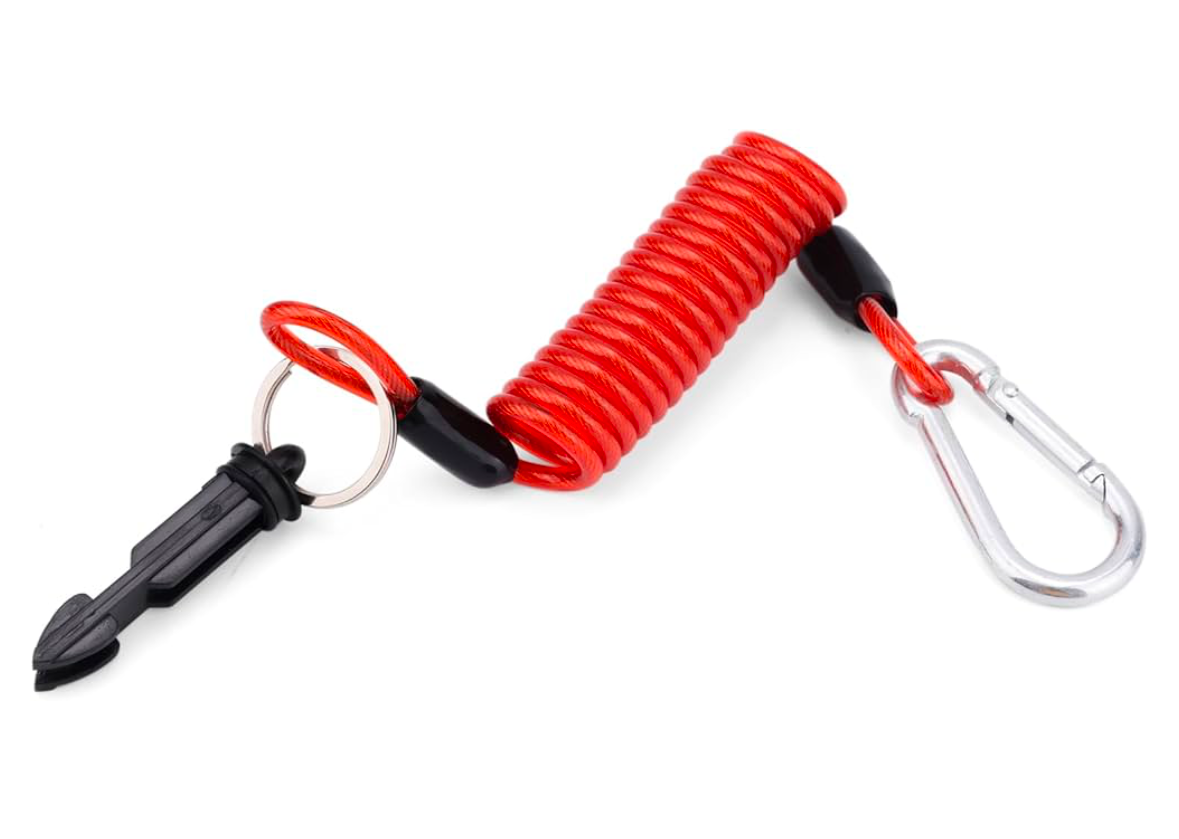
37 minutes ago, rich.dev said:
Get one of these John
Nice, 👍
-
This has been bothering me for a while. When I connect the brake cable to the truck it hangs down to 2"-3" above the road.
Can you run it up through the hitch pin with the 7-pin cord?
What does everyone do?
I'm concerned it is matter of time before it is hit by road debris. Having the trailer brakes activate at 60+ mph is a scary thought.
Thanks,
-
1
-
-
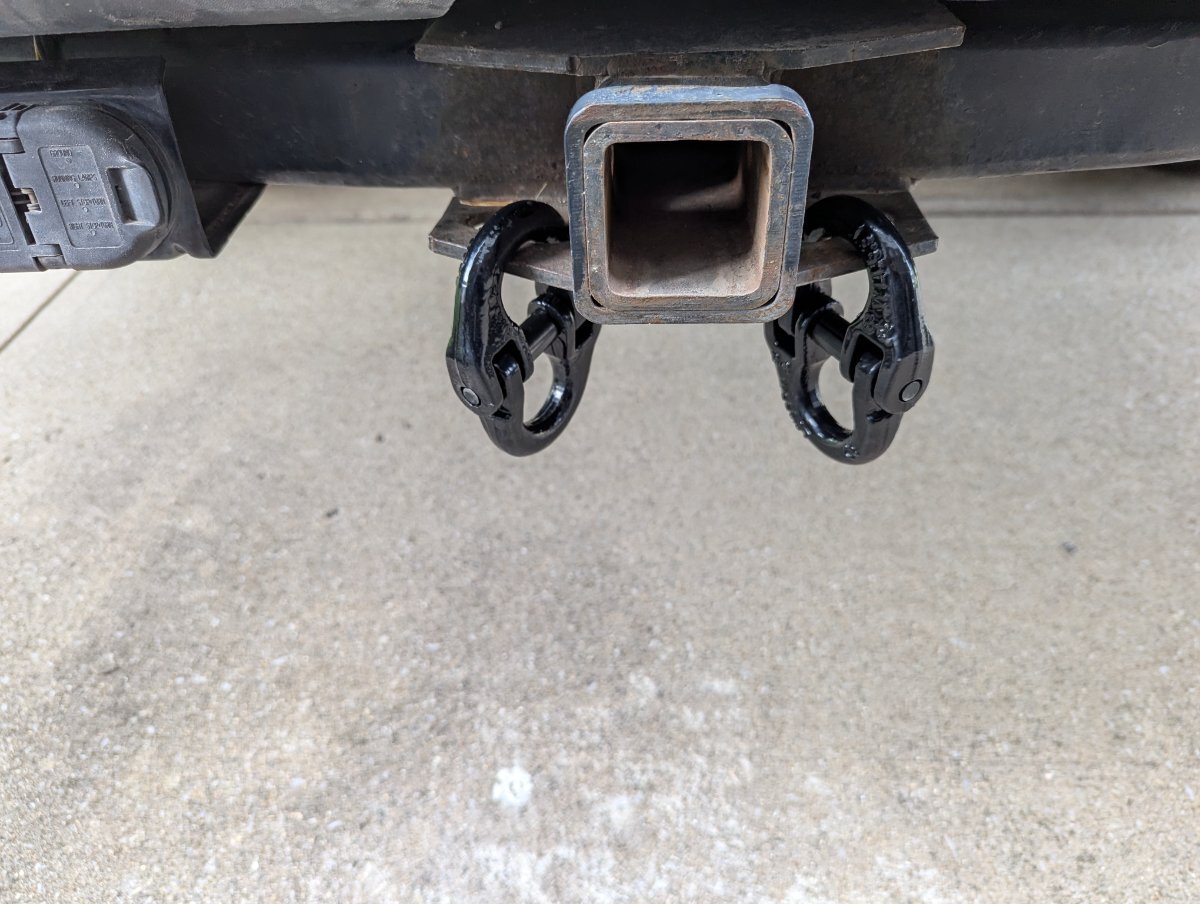
1/2", 12,000 lb Hammer Locks installed. Great addition. Thanks Patriot.

-
1
-
 1
1
-
-
Welcome from Hull #1045, Jolli Olli
What Patriot says👍
-
2
-
-
4 hours ago, topgun2 said:
I agree that they are cool and attach easily and will probably last a long time...
But, this is one of those items that I've told myself I need but I simply can't figure out why I need them.
Bill
+2, I use the buckets and have a piece of 90-mil single ply roofing I place on the surface and then the Andersen Jack Base. I just couldn't come up with a reason to spend the $$.
-
2
-
-
1 hour ago, SeaDawg said:
It may not be the same formulation. And, your detector is a year older than last year.
The saran wrap was genius. Imo
Yep. 3rd year with detector, but not sure what the date is on the back. Weird that this has happened to a number of people. May need to check out another source.
-
I ended up covering the CO Detector with saran wrap and tape. Went 24 hours without a beep. Asked the manager at our storage place to listen for beeping. Couldn't find the fuse, well I could a black fuse holder, but wasn't completely sure if it was for CO Detector, so used Saran Wrap.
This whole thing is very strange as I was using the same TV antifreeze from Ace Hardware that I used in 2022 and 2023.
-
Where is the fuse for the CO Detector? Fuse box? In the detector? If in the detector how do you get to it?
Even with everything covered and a fan on the floor, it was going off this morning. Leaving to take it to storage in a couple of hours.
-
15 hours ago, Patriot said:
We have used this dehumidifier successfully since 2020 until the temps get below 40 degrees. It has served us well.
We have never used damp rid.
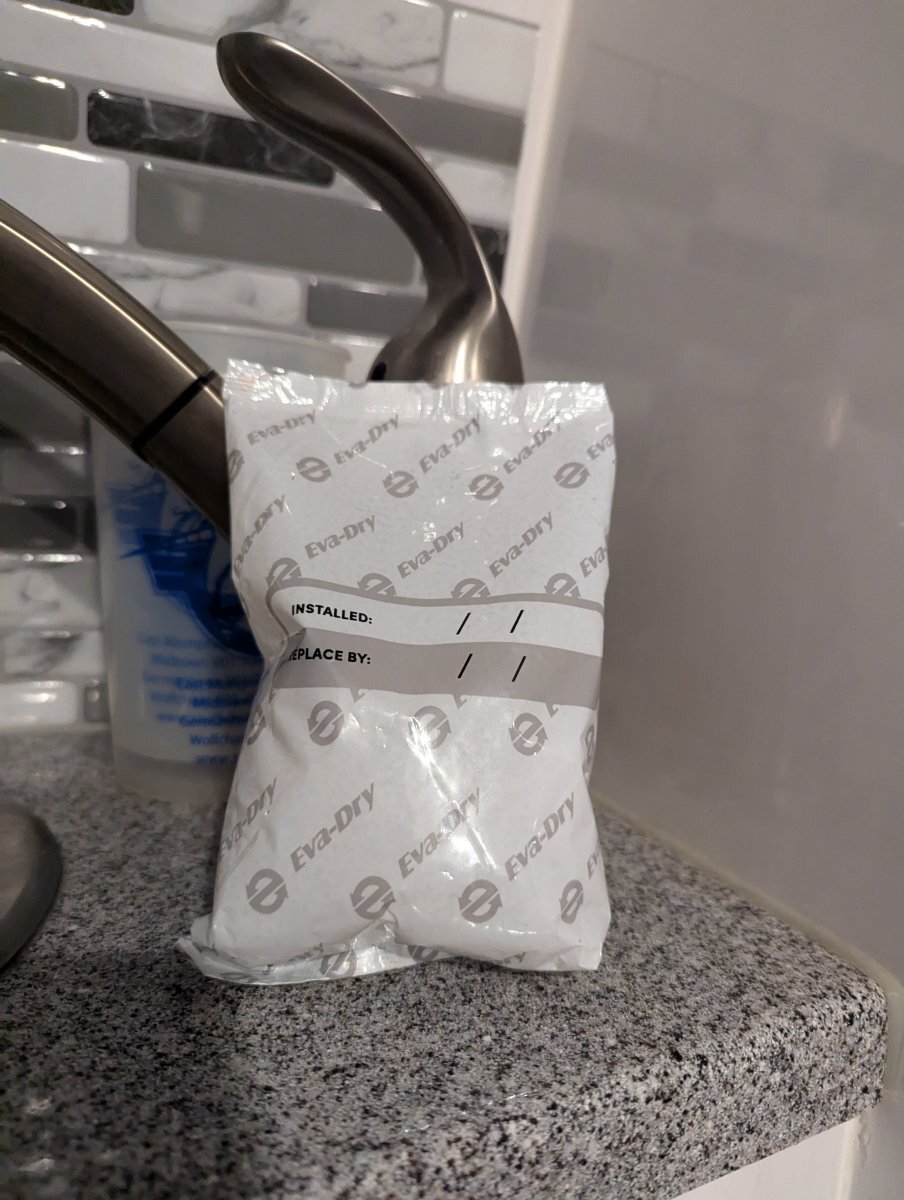
We use two 1-gallon containers of DampRid, and 2-packets of Eva-Dry Charcoal packets in the bathroom and closet when trailer is stored. We have a plug in dehumidifier and use Eva-Dry charcoal packets, and a rechargeable dehumidifier when traveling.
-
46 minutes ago, topgun2 said:
Since you know that there really isn't any CO nor propane in the camper while it is in storage - why not simply take the fuse out of the detector.
However, if you do this, please make sure in some manner that you put that fuse back in before using the Ollie the next time.
Bill
Wonder if you could take saran wrap and just cover it?
-
1 hour ago, Patriot said:
John,
I stepped in XPLOR this afternoon and checked on our dehumidifier. While inside I noticed that the strong odor of the antifreeze we used to winterize has greatly diminished. I could still detect a slight odor but nothing like it was. So after inserting ear plugs as the alarm as you know is ear piercing and I decided to reattach the RV Safe LP/CO detector. The green light came on in normal and the detector did not go off. 🤞🏻 Our Ollie is parked in our Hangar in the backyard allows us to actually hear the detector if it alarms. I also took @topgun2 suggestion and covered the porcelain throne with Saran Wrap and I also covered grey water drains with a little painters tape. I will let you know if our alarm goes off again as this is week 3 after winterizing. I think leaving two windows open even with our cover on really helped disparate the antifreeze odor.
- David
I used saran wrap to cover the toilet bowl, kitchen drain, and shower drain. I weighed a piece of rubber over the saran wrap. Drain plug in bathroom sink
Also covered the toilet with a baking soda scented garbage bags.
Small fan blowing. However tomorrow we take the trailer to storage, a one hour drive, so I would hate to get a call from the manager and have another 2 hour round trip🙃
-
1
-
-
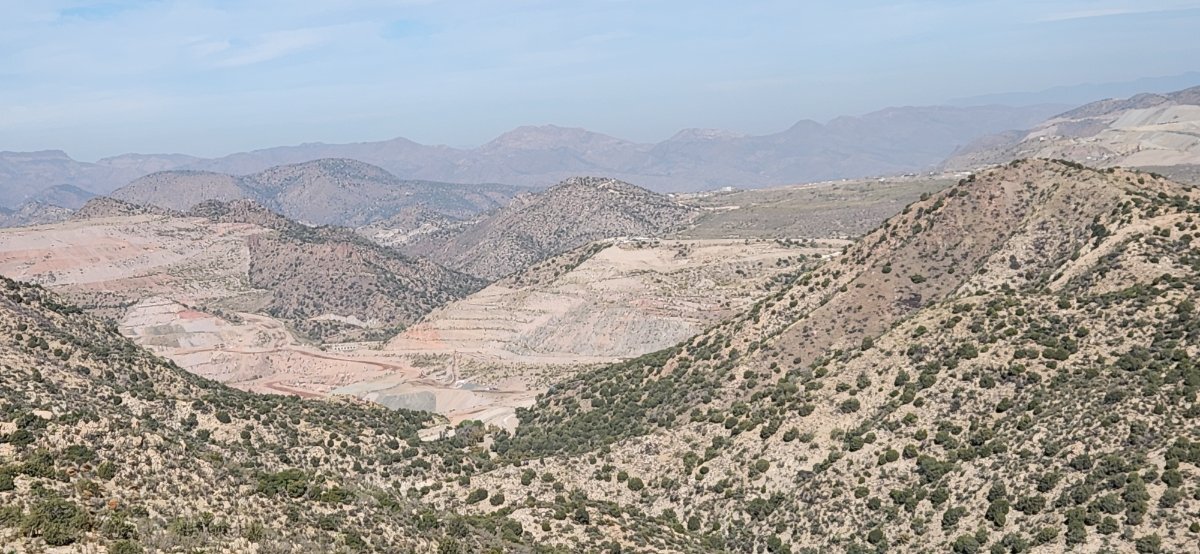
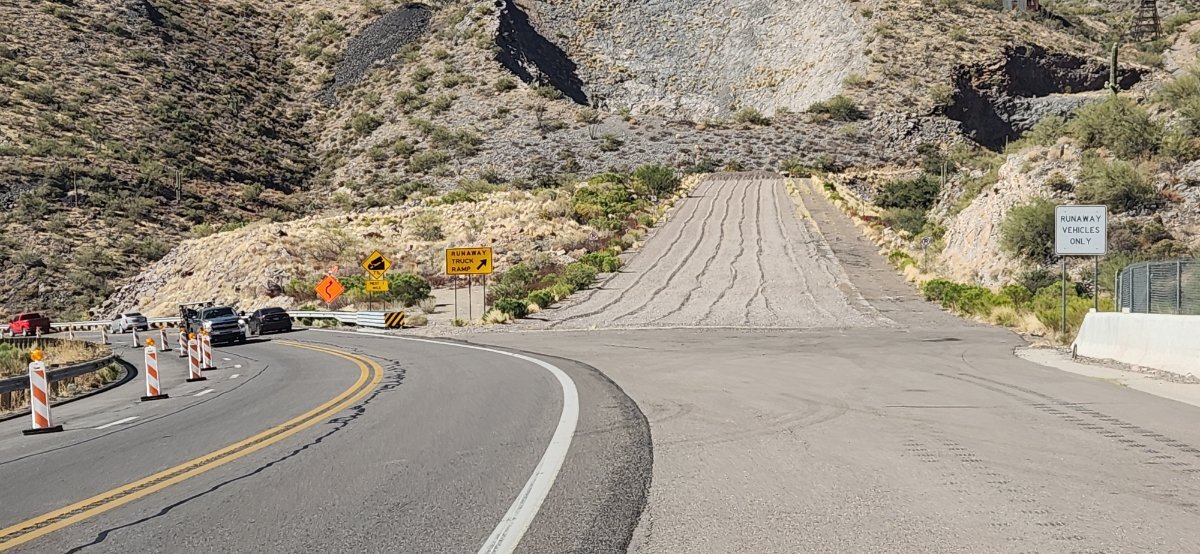
4 hours ago, jd1923 said:
Pictures from "Top of the World." The first picture does not do it justice. This drop in person looked like if you were driving at 50 MPH right on the edge of the Grand Canyon, OMG my heart was pumping! Final pic is the truck runaway just prior to a tunnel through the mountain. US HWY 60 descending to Superior Arizona.
Sweet
-
1
-
-
Well, this isn't funny anymore🙃. Winterized 3 days ago, anti-freeze poured in both sink traps, floor drain with back flush closed, and toilet.
Left window open 2"-3" and no issues. Rain forecast so I closed the window. We were gone 3 hours and when we returned it was going off. Had to place a small USB fan in front of the detector. Took 5 minutes to get the green light.
Going to try the wrap. This sucks.
-
This what we have been using and never had the alarm go off until this year.
-
Well, I winterized this morning, and then the CO Detector went off 3 times. Most of the RV antifreeze I used was from last year and I opened a new one that was different, bought from same Ace Hardware. I left a window open. Very strange. First 2 times no issues.
-
1
-
-
On 10/25/2024 at 5:22 PM, Gliddenwoods said:
John
Did you replace with same brand? Or did you replace with a higher quality (if one exists) brand?
Under warranty, and Oliver sent me a replacement. I may have to replace it again. Won't know until I take it into Oliver in February
-
1
-


TV secure no drill (velcro strap hack)
in Mechanical & Technical Tips
Posted
👍