TimD
-
Posts
52 -
Joined
-
Last visited
Everything posted by TimD
-
Hi all I'm not sure if I did or not. Possibly 3M paint protection film as I had some lying around. I'll have to check. The hitch receiver is not bare metal, btw. You suggestions sound good. Tim
-
Thanks Steph & Dud B. JD - The owner of the storage location asked that I not store propane in the space. That's why they are out of the trailer. Best Tim
-
Hello all, I hope you are enjoying northern camping season. We noted an LE2 pulling into Shore Hills campground in Boothbay, ME during a recent visit to our cabin in the area; hope you had a nice stay. A question - has anyone successfully traveled with a single propane tank installed? We're going for a short trip and one 30 lb. bottle will be more than enough. The bottles have been in winter storage and so are out of the propane compartment. Seems like I need a way to support the clamping bar from below but otherwise I don't see a reason why one bottle would not be OK, provided the loadsharing valve is gas-tight on the unused side. Thanks! TIm
-
Based on various conversations I believe that the new windows are Lippert 3000 FV, 48"x18". I have not been able to confirm that the dimensions of the hull rough opening have not changed. Tim
-
Getting back to this: Looking at the Lippert.com website, I do not see awning-style windows, just the 8800 series sliding windows. Are we sure the manufacturer is Lippert? Are they OEM only? Tim
-
Thank you, I've written to J Walmsley, but he hasn't read my message yet. Tim
-
Hiya, I've sent a message to JWalmsley. If that fails I'll try Jason directly. Of course you could reach out to Jason, too. 🙂 Thanks, best Tim
-
Well, after opening a case with OTT tech support I received and answer indicating they were not involved with Forum management. Happy to PM the moderators were I to learn who they are. Thanks Tim
-
Hi Bill (et al) - Thanks for the suggestions, I will open a case. To answer your question, for the same reason Ollie owners replace their trailer's springs when they might otherwise appear to be in good shape 😀 Or maybe I'm just paranoid with too much time on my hands? Anyway, I'd like to keep them out of the trash for the time being, at least. It seems to me like they might make a good 'just in case' spare to have. They are small and don't weigh much. Thanks, best Tim
-
Hi all - Perhaps we need a 'free stuff' sub-forum 🙂 Just replaced the propane cover draw latches on our 2021 LE2. Accordingly I have two spares, in good used condition. I'm keeping one 'just in case'. The second one is available for the shipping cost. More info here: https://www.htfhardware.com//240-150-10702.html If you are interested PM me. Thanks Tim
-
Sierra Pacific (SPEP) 240-150 draw latches are available from Hard To Find Hardware, htfhardware.com. Tim
-
Nice mod. A question about the elbows: You indicate they are 'street', are these 1/4" female NPT or 1/4" inverted flare on the input (pigtail) side? Thanks Tim
-
We are planning a trip which includes a possible stop in Virginia Beach. We understand the Hampton Roads Tunnel on I-64 has been and is under major construction. We drove through there in 2024 and it was kinda hairy. Has anyone been through there recently pulling their Ollie? Thanks Tim
-
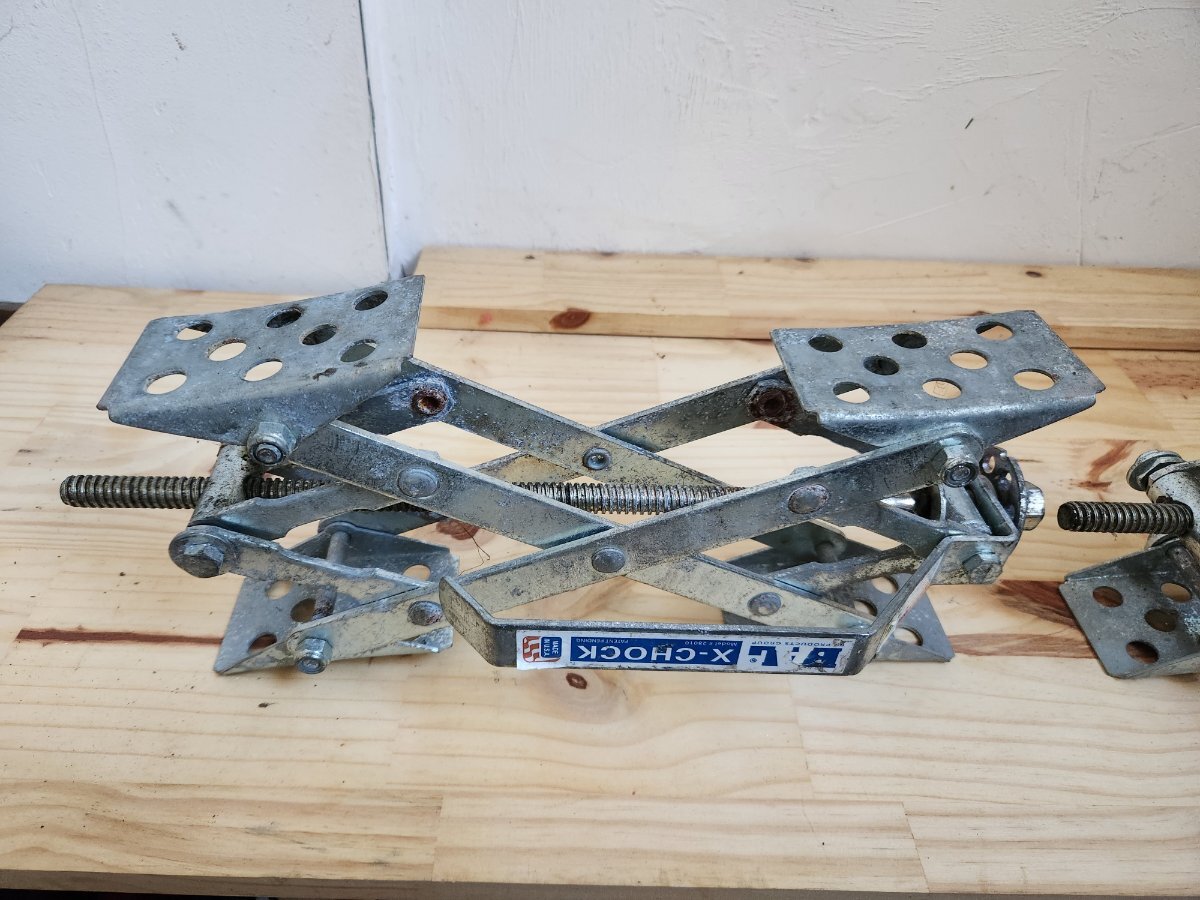
Free to a good home (ok, for the shipping cost): A pair of BAL X-Chocks. We do not use these and do not plan to use these. Very light rust in spots, otherwise fine. Shipping from 01760, guesstimate 15 lbs combined. Thanks! Tim 2021 LE2

-
CO/propane gas detector replacement
TimD replied to rideadeuce's topic in Mechanical & Technical Tips
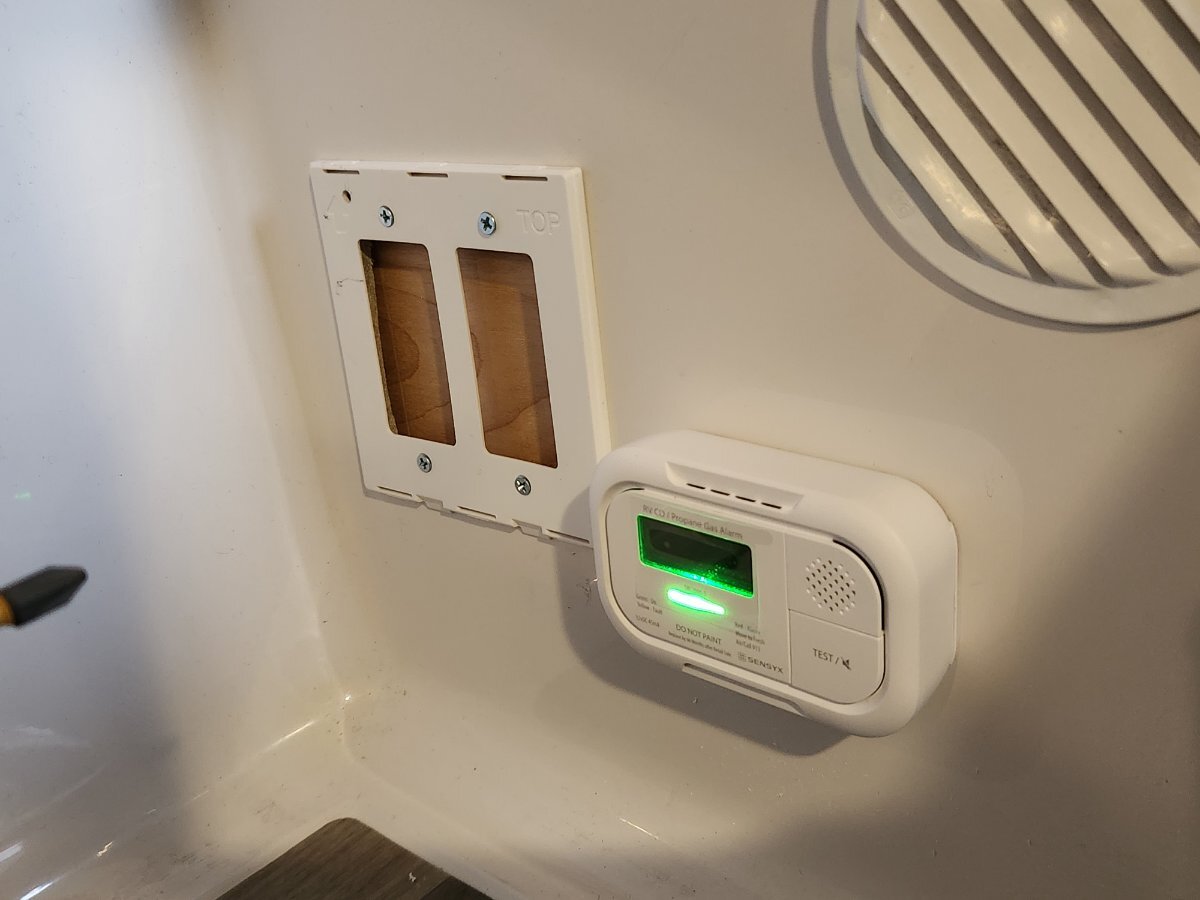
Here's what I did to cover the hole formerly occupied by the OEM detector. The plywood is held in place with 2-sided tape, which is now under mild compression due to the tension of the backing plate screws. Screws are #6 x 3/4". Tim
-
CO/propane gas detector replacement
TimD replied to rideadeuce's topic in Mechanical & Technical Tips
That fuse placement is ridiculous. Once found it isn't hard to remove, but getting back in was a struggle. Hopefully it has been moved closer to the detector itself in current production. Tim -
Thanks to everyone for sharing their experiences, we are hopeful. We run the tires at 60 psi but will try lower pressures in the future. Thanks Tim
-
We replaced the OEM springs on our 2019 LE2 (hull 701) with Alcan HD springs a couple of weeks back. Certified RV in Holliston, MA did the work and, other than having a drop link flip as we lowered the trailer off the jacks, the work was done without drama and to our satisfaction. We then did a 650-mile round trip to the Lehigh Valley to meet up with some friends from Pittsburgh. I re-tightened the bolts after 300 miles and will check them again now that we're home. Not long after leaving home we felt the HD springs have caused a significant increase in "jounce" (pitch) of the TV, which is a 2019 F-150 SuperCrew, 145" WB, 5'7" bed, FX4 off-road suspension. The TV bed was lightly loaded, perhaps 125 lbs total, with another 50 lbs in the cabin rear seat area. The effect is that the rear of the TV is accelerated upwards when the Ollie hits a large bump, more than we remembered. Anyone else experience this? Mechanically it makes sense: the Ollie suspension is less compliant, so the hull moves more and transmits this motion to the TV. Something to consider when changing springs... Improved corrosion protection is one thing, increasing stiffness is an entirely different thing. As a postscript, we recently spoke with a guy at a campground in Morrisville, VT who was pulling a 30' Airstream with a Ford Expedition (not a Max). He insisted that bigger / heavier / more stiffly sprung tow vehicles were not obviously better and mentioned a Canadian YouTuber (name? Too lazy to look) who espoused this view... We did not change the axles nor replace the equalizers. Tim
-
I ordered the Pioneer. Will post updates as things progress. Tim
-
Sorry, I see this question has been asked in another thread. Please disregard! > Is the Max model required? E.g., is the 'fan off' function specific to that model?
-
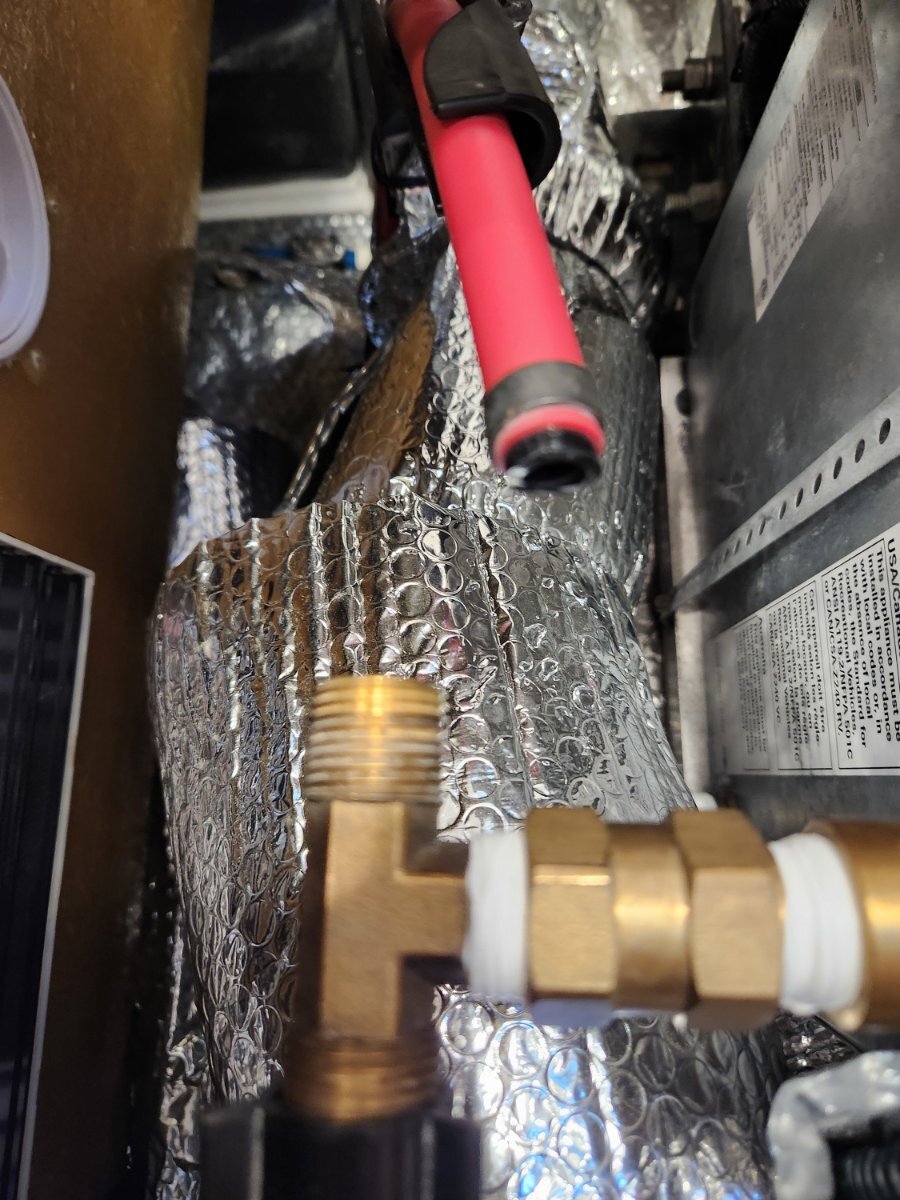
We have had a significant water leak on our current stay in central NJ. After connecting to city water and finally sitting down after a long day we noticed a stream coming from the rear street side scupper. After some investigation we discovered that a plastic PEX-to-female NPT fitting had cracked and broken clean off. The fitting is located at the HW heater outlet and is subject to full (regulated) city water pressure. Needless to say this was like spraying a small garden hose into the engineering space, not good. We've succeeded in drying things out but we will add fans and dehumidifiers back at home. A bit of a scramble later I'd replaced the failed part with a brass fitting sourced from a (fortunately) nearby and very posh Airstream dealer. As it was 4:45 PM on Labor Day Saturday they were very quick to help me and see me out. IMO this part is a failure risk and should be proactively replaced. We aren't sure why it failed other than fatigue. In the pic the NPT part of the broken fitting is not shown. Hope this helps Tim
-
We did not add that, but it is possible the prior owners did as they did a lot of deep winter camping. Thanks Tim
-
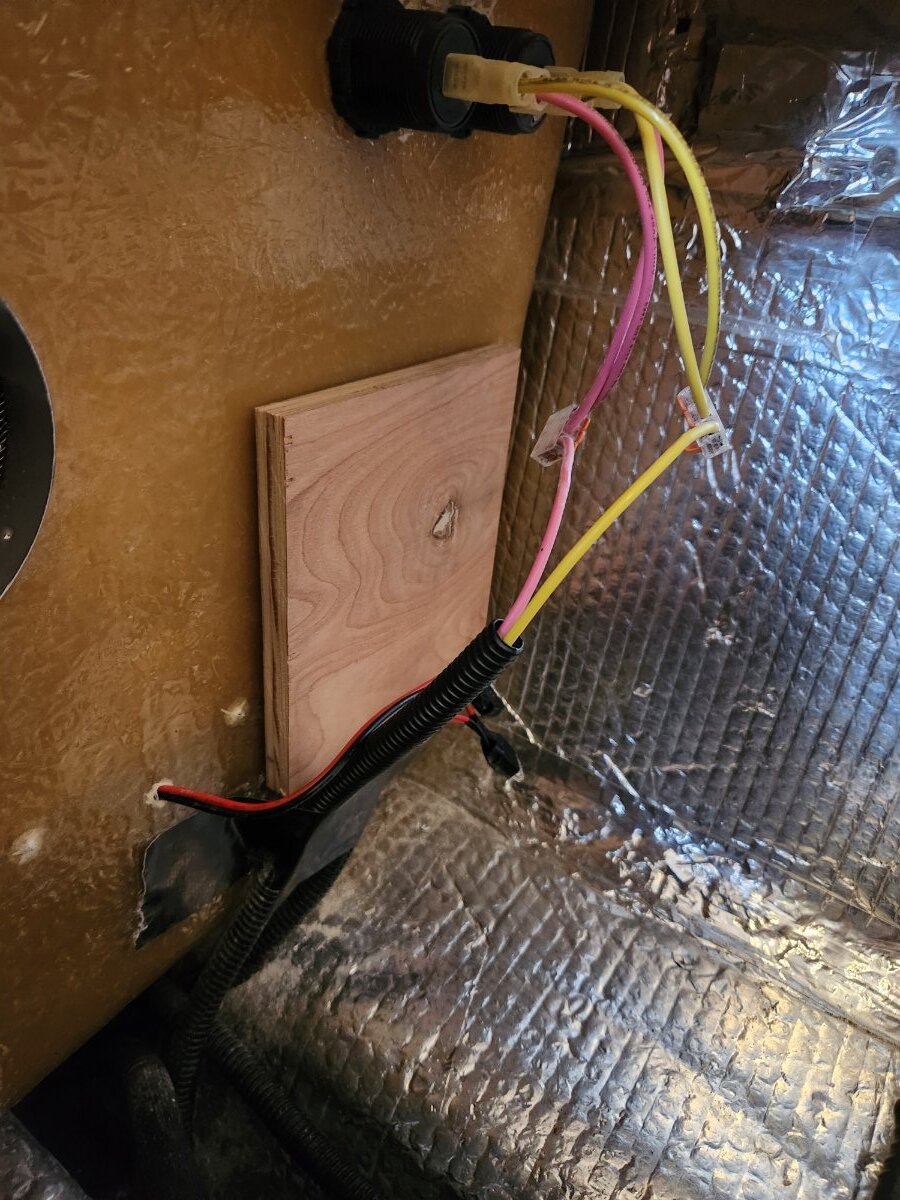
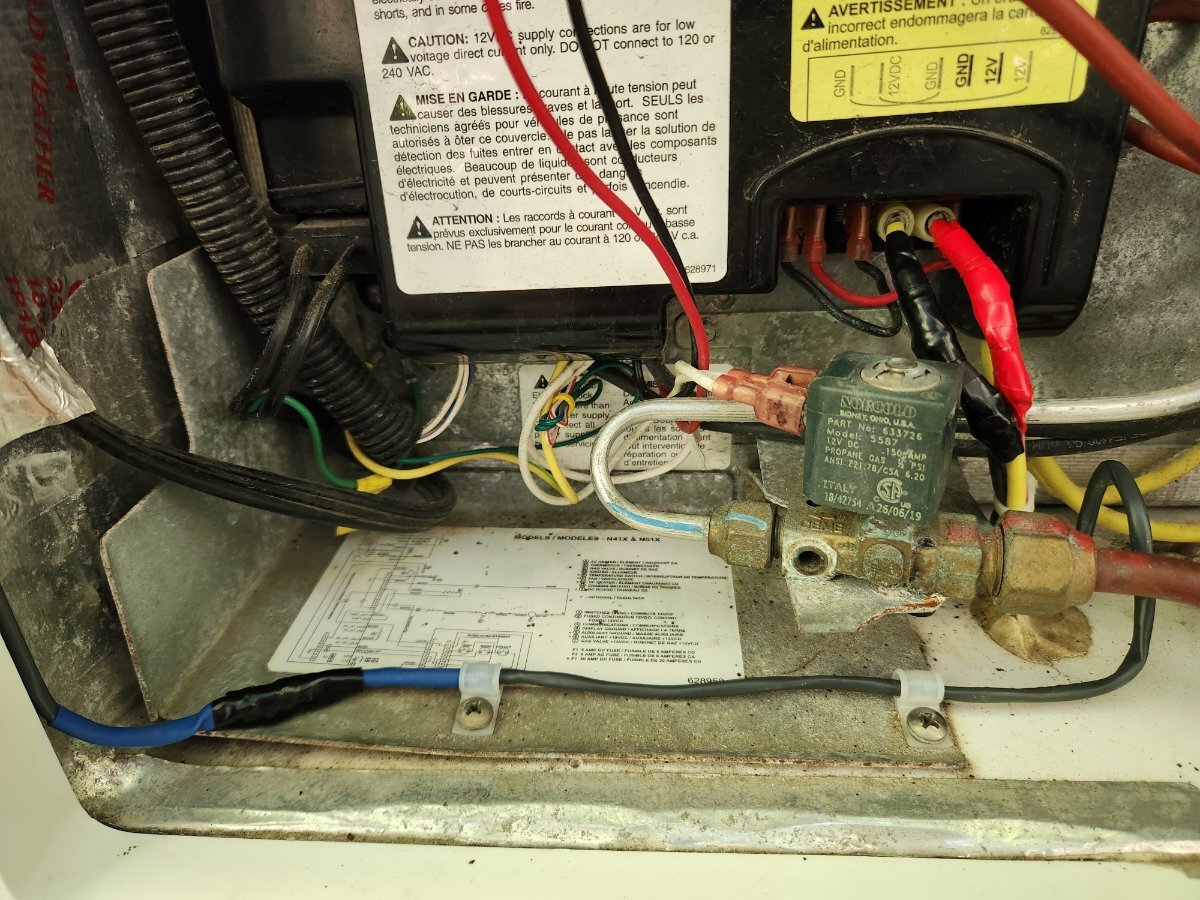
Forgot one. You can see the black & red power wires for the existing fan (mounted on the coil fins) rising vertically from the control box. Perhaps it is thermostatically controlled. I'd didn't bother to figure it out.
-
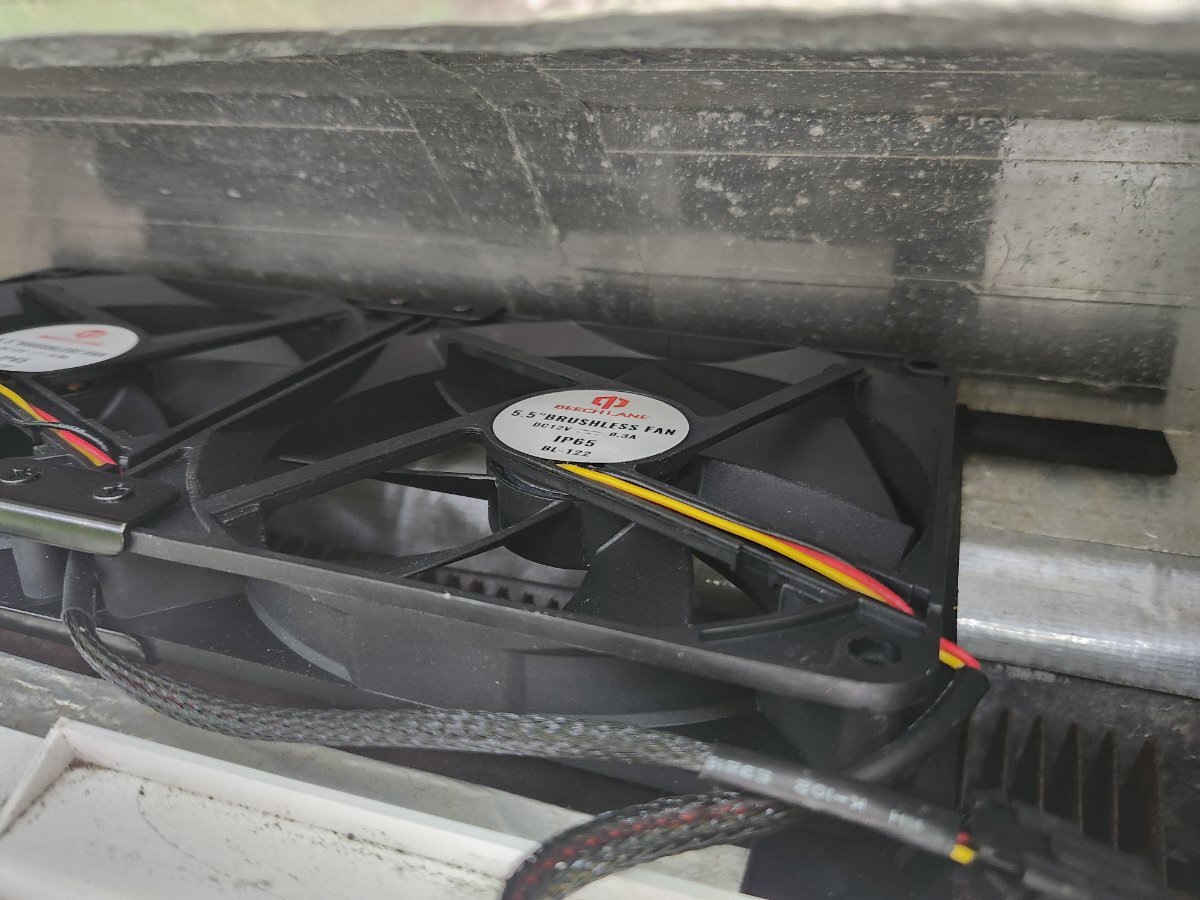
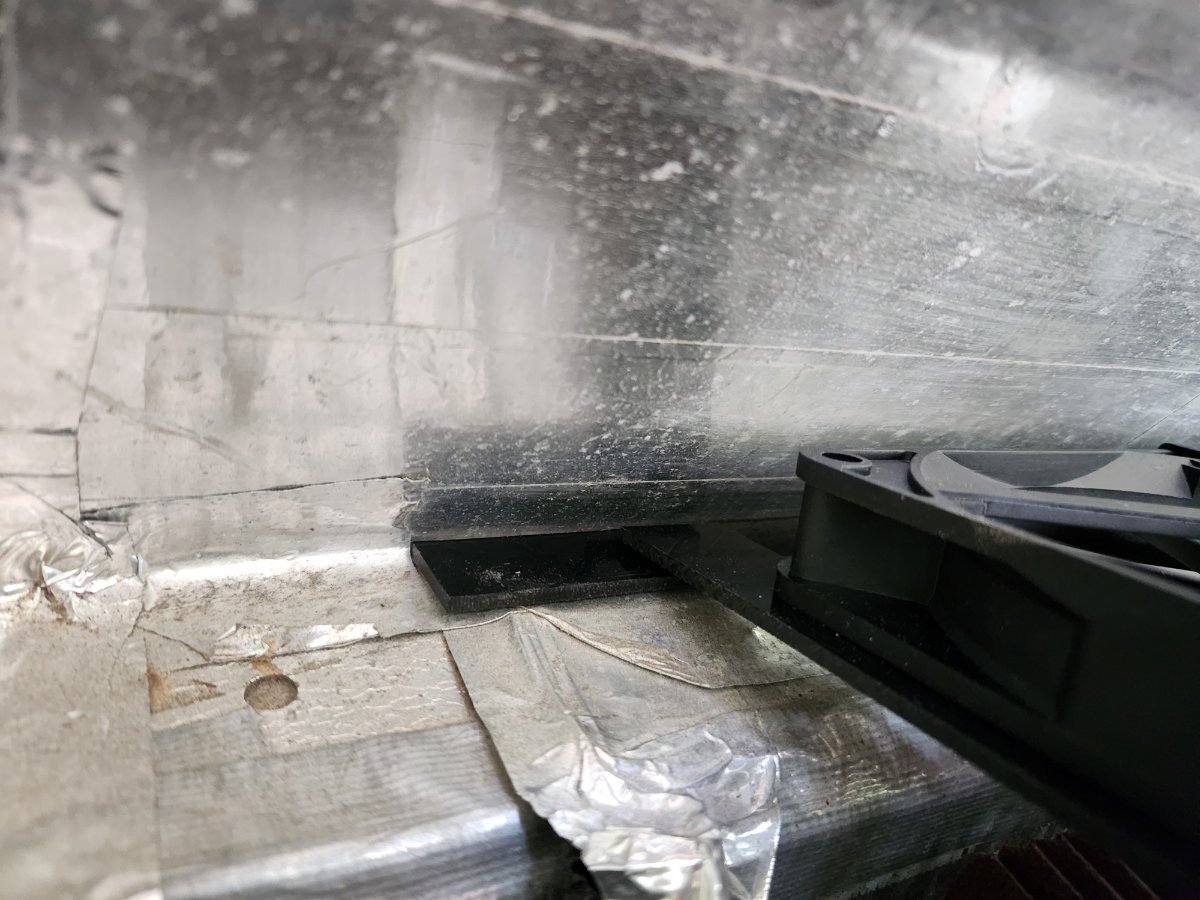
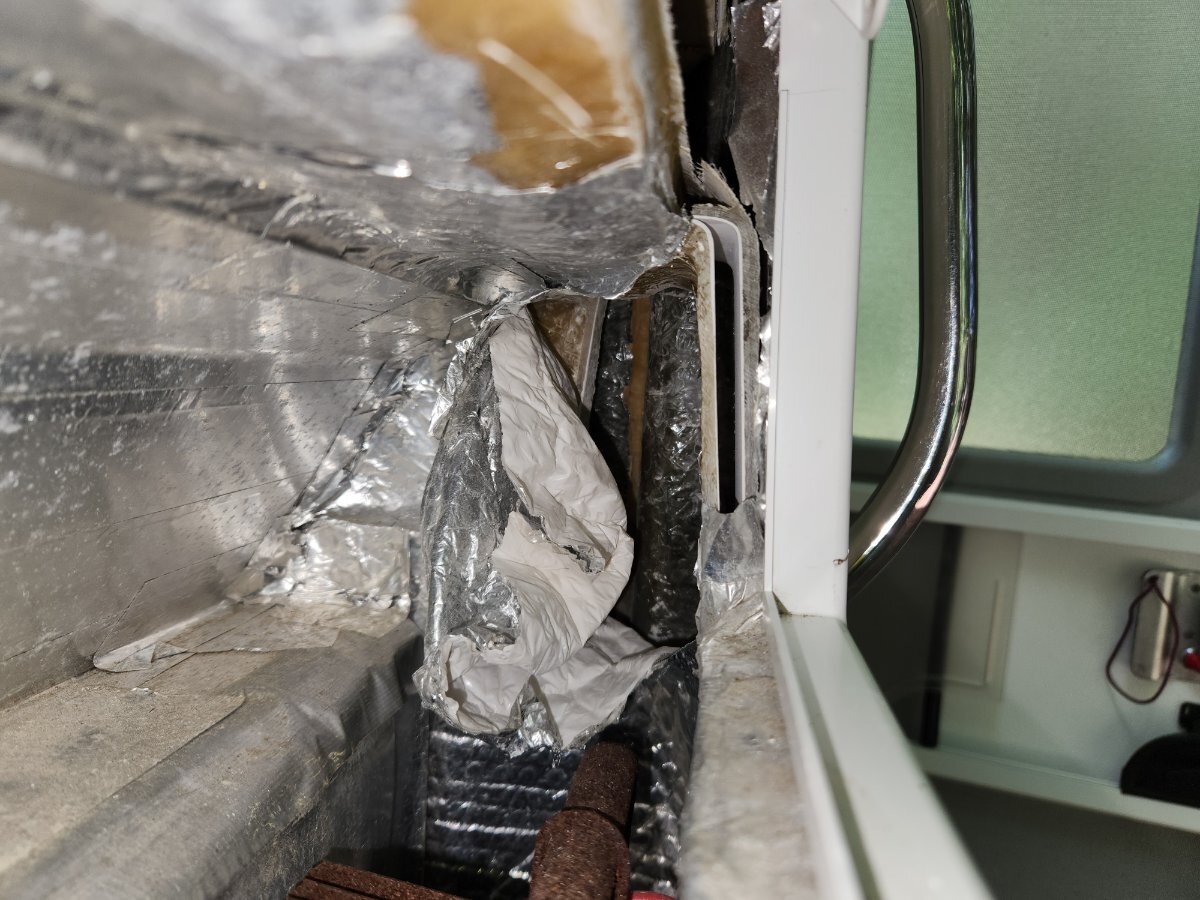
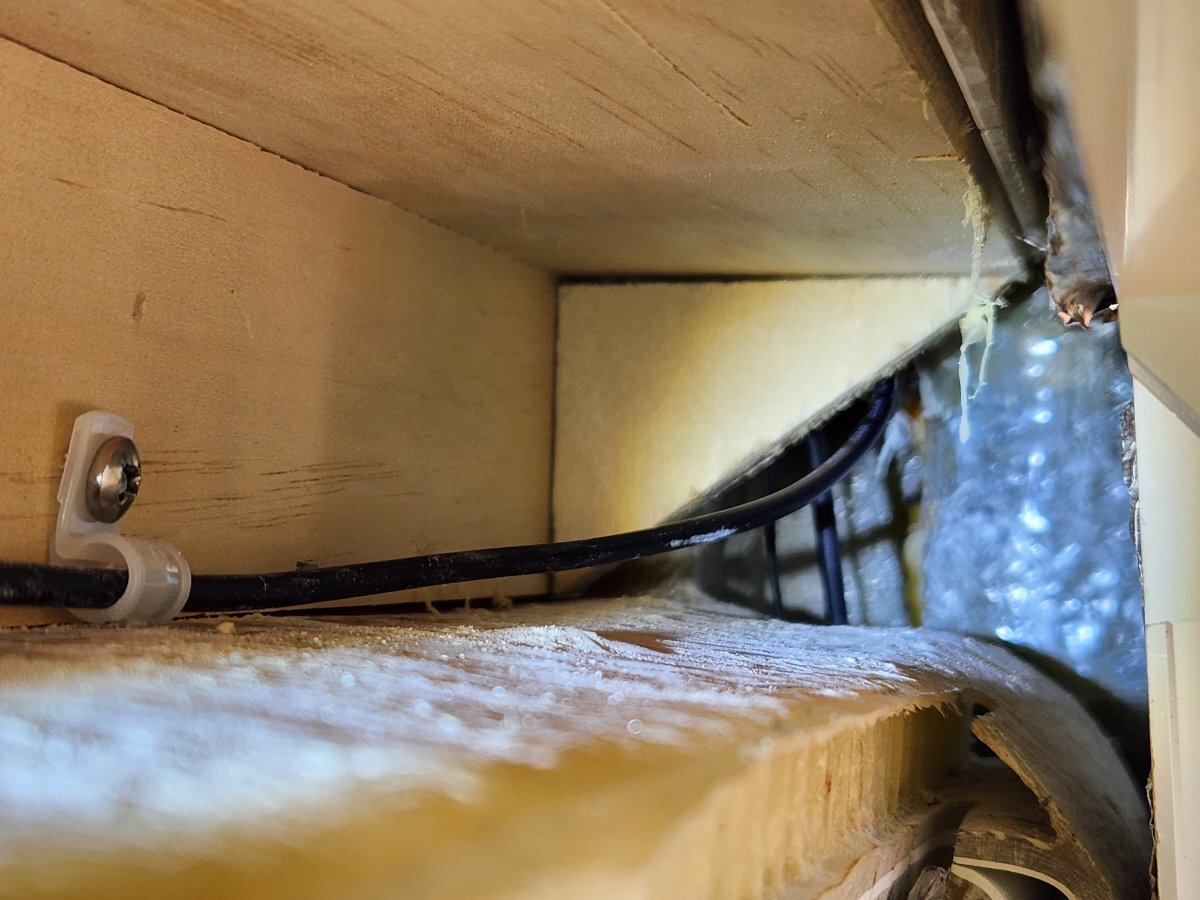
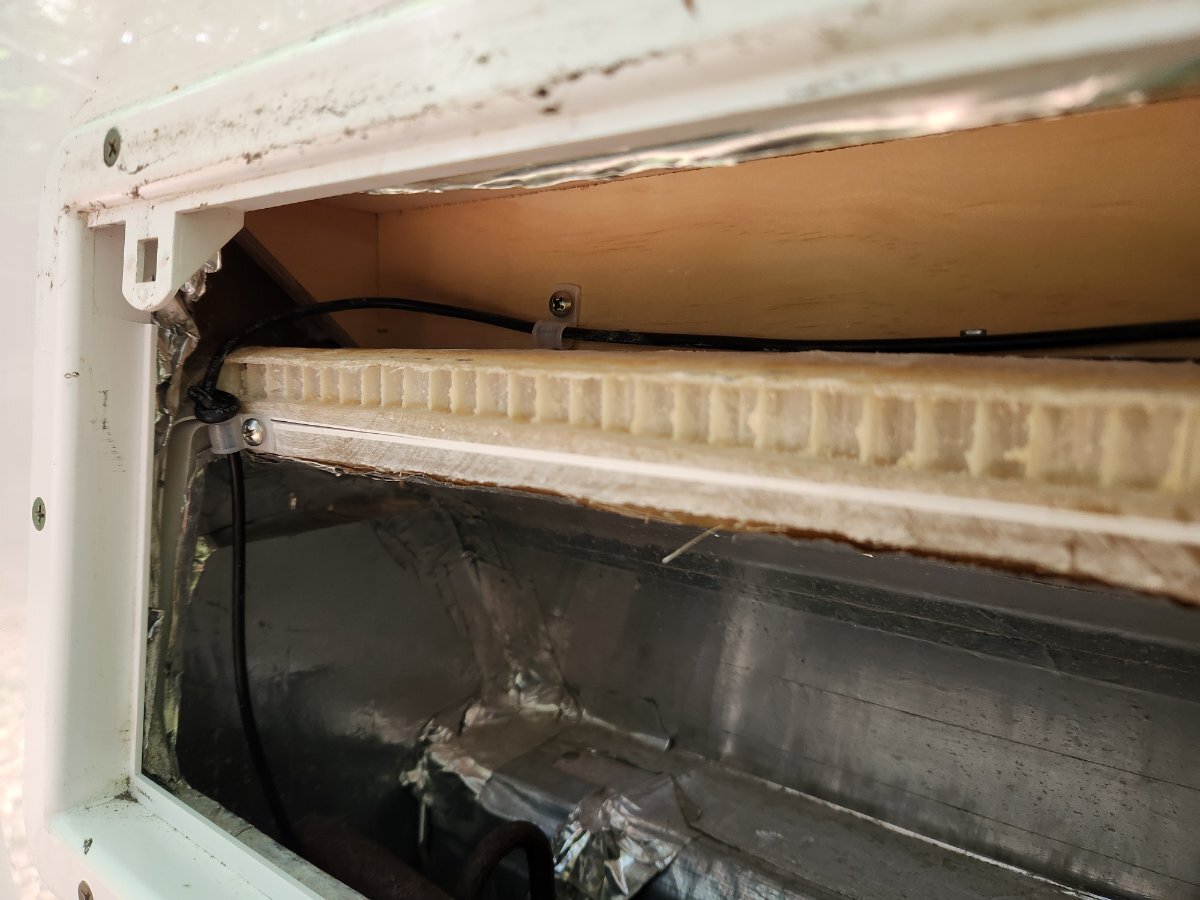
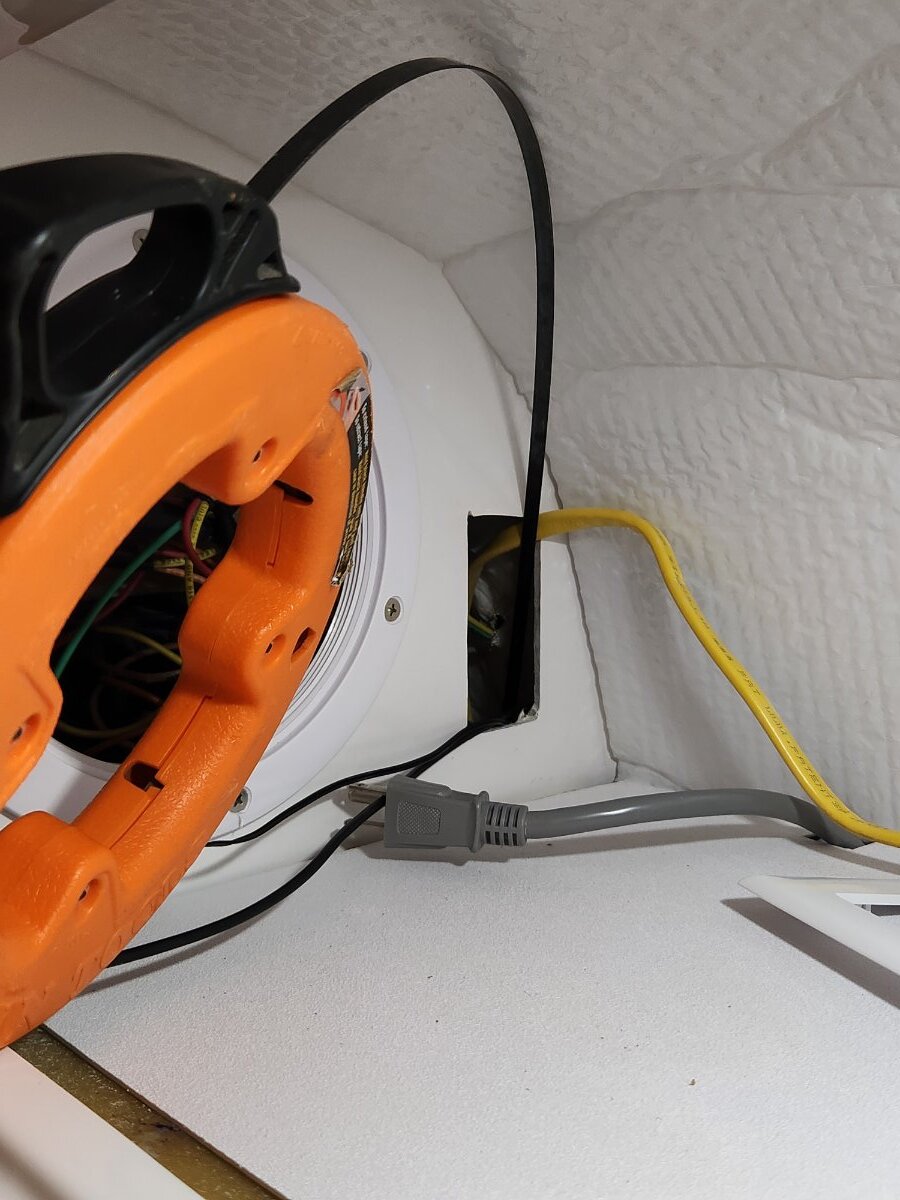
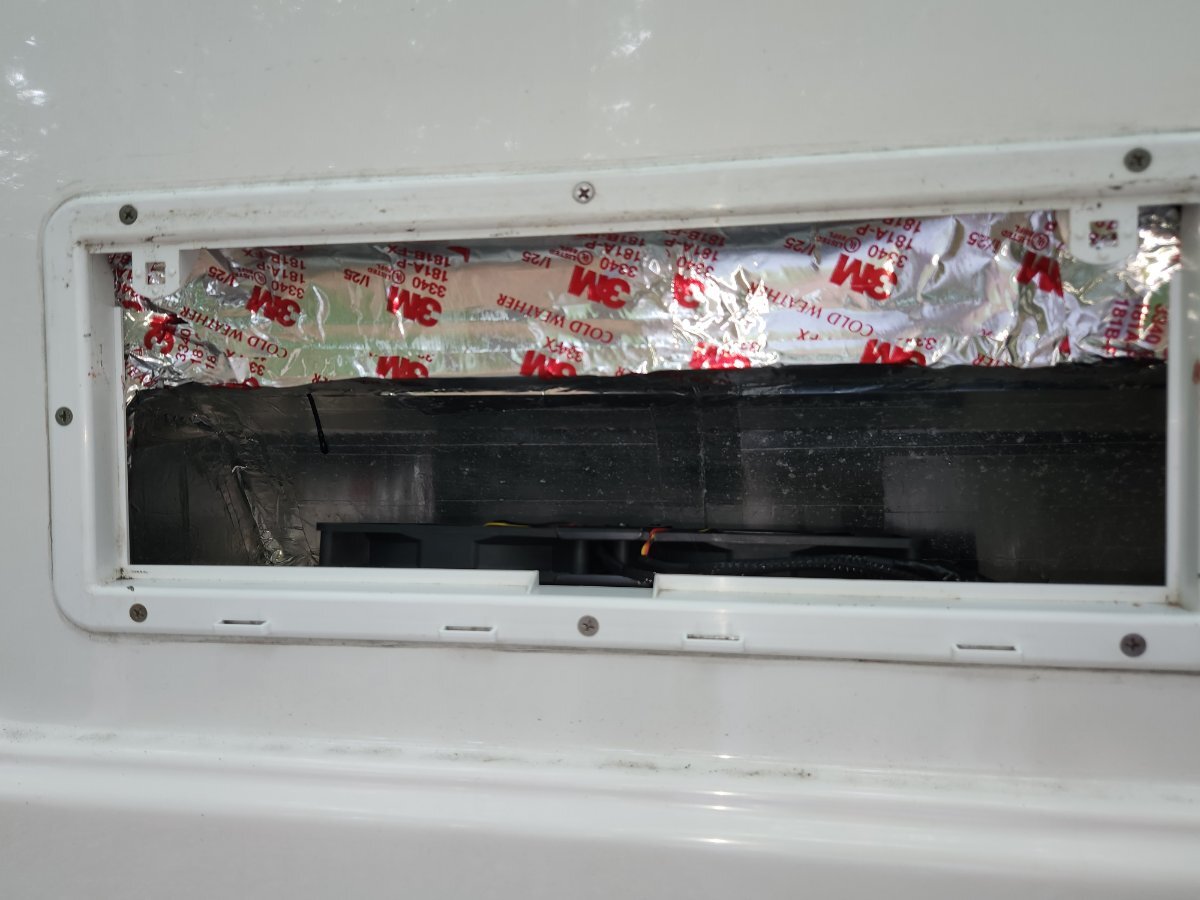
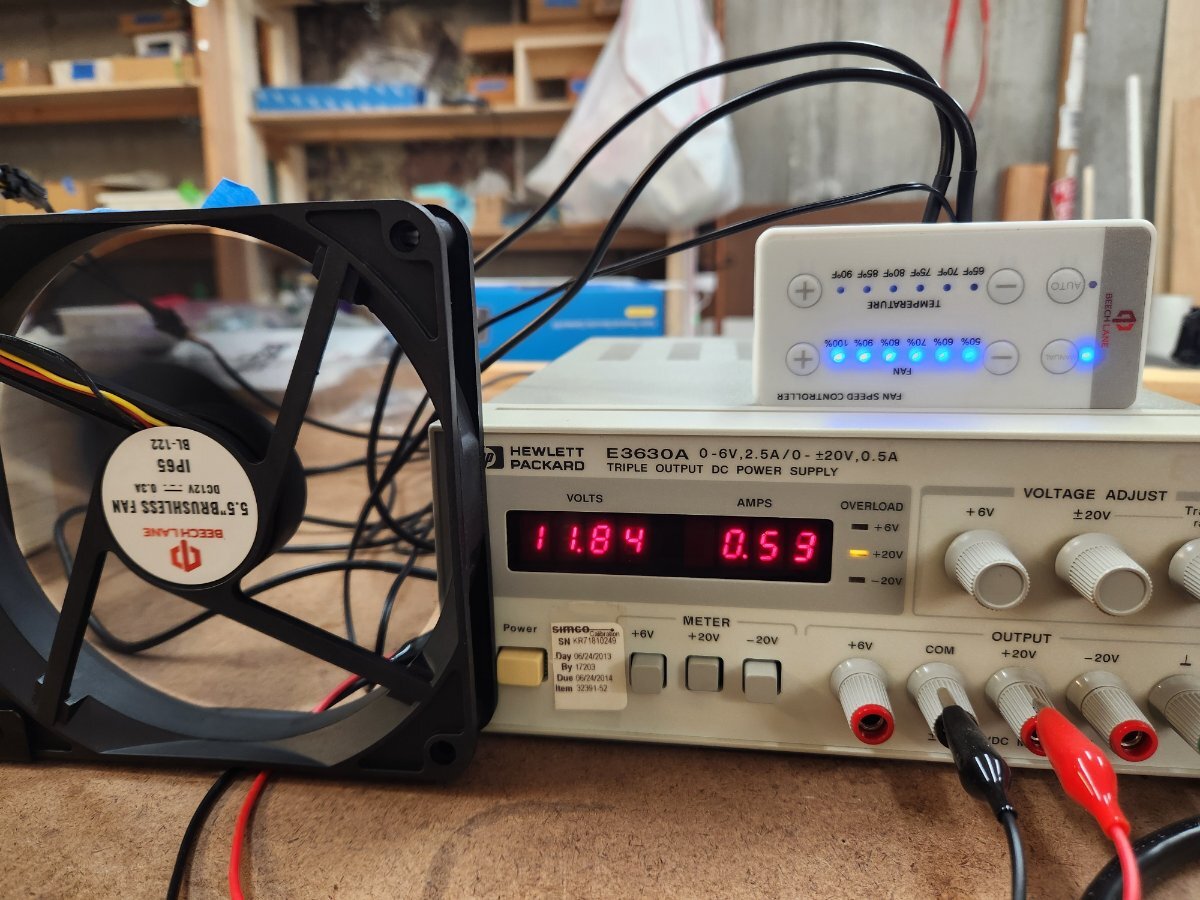
Finished the install. A somewhat complicated project but definitely helped by all the great info posted in this thread and elsewhere. Thank you very much! To summarize: As the brackets supplied by Beech Lane weren't going to work in our 2021 LE2, hull #701, I rearranged the fans to bring the cables to the front and then fabricated a mounting bracket from some ABS sheet I had in my shop. ABS is great stuff, nearly indestructible and easy to glue with ABS glue (a mix of acetone, MEK, and dissolved ABS. Don't drink it.). Nothing else works, including epoxy. The fans and bracket sit atop the space, let's call it a plenum for simplicity, in which the 'fridge coils reside. The rear longitudinal piece, which has foam tubing on it in the final version (not shown) sits snugly in the vee of back wall. The tabs on the lateral pieces sit atop the hull honeycomb behind the grille surround and are screwed vertically into the honeycomb with 8x1 1/2" stainless sheet metal screws. The fan assembly isn't going anywhere. The three cables from the controller run through a new 1/2" hole drilled in the cabinet wall and downwards. One you find the right spot with the fish tape it is straightforward to push the cables & tape downwards until they are visible from inside the plenum. The fan power cable and connector are routed to the right, wrapped in electrical tape, and secured against the wall using 3M 3340 HVAC tape. From there it passes through the bubble wrap insulation and up to the area to the left of the upper cabinet, behind the 6" round access panel and switch panel. It is necessary to pull the bubble wrap insulation and original HVAC tape away to access this space from inside the 'fridge upper vent area. Meanwhile, the controller and fan power wires are routed across the top of the vented area and secured to the plywood. It is necessary to remove a piece of foam secured by HVAC tape to access this space. From there the power wires are routed down the aft side of the 'fridge coil space and secured with cable clips. As suggested by @RonbrinkI spliced the power cables into the existing +12V and ground by removing about 1/4" of insulation, wrapping the fan power wires around the 10 ga. 'fridge power wires, soldering them in place, then covering with shrink wrap and electrical tape. The power cable supplied by Beech Lane is too short to reach all the way down to the bottom of the 'fridge so you'll need to add length if you go this route. I used 18-2 cable from a big box store. The OEM Beech Lane cable is like 22-2 and somewhat difficult to solder, so be forewarned. The controller & fan power wires were secured with cable clips and 8x1/4" stainless sheet metal screws. The temperature sensor was provisionally mounted in the upper aft part of plenum and secured with 3M HVAC tape. Not sure whether that's the best place or not yet, it may be better off further down the plenum. The pink foam which had formed the front wall of the uppermost part of the area behind the upper grille was replaced and secured with HVAC tape. Last, the controller was mounted to the rear wall of the cabinet using heavy duty Velcro. I used two 1/4" wide strips of hook material on the back of the controller and two 1" squares of loop material on the wall. There's no need for more than that as the controller weighs very little and using more hook material will just tend to pull the loop material off the wall if and when you need to move the controller. We'll see, we're not going anywhere 'hot' until February when we'll be in central Florida. Bench testing showed about 0.6 A draw, or the amount shown on the fan label, when the fans were set to run at 100%. Thanks to everyone and I hope this helps. Tim
-
Hey Geoff, yes, that's what I suspected, and the notion it was coming from the panel was confirmed when I pulled the cable off the back of the panel and the V went to zero. Oddly the LED did not illuminate when I removed the fuse, unlike with the other fuses I tried. Thanks everyone, this forum rocks! Tim


.jpg.623219bf7c8f2451bf2d4fa8240146c9.jpg)