Tony and Rhonda
-
Posts
82 -
Joined
-
Last visited
Everything posted by Tony and Rhonda
-
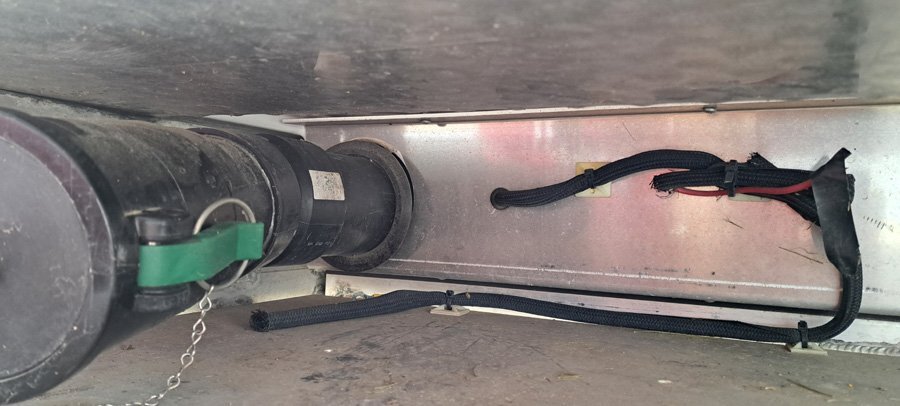
Yes @jd1923 the flex hose attaches there. There's another identical buckle/latch on the other side. I had hoped to be able to leave the flex hose attached to the waste pipe but it extends too close to the bumper. That does seem like an odd location for the propane. That's why I asked the question. The "other" wire hidden by the Techflex sheath has a ring terminal attached. As you can see in the photo, the red wire (+?) is just cut off and wrapped in electrical tape.
-
Since we have a new to us older Oliver, I've been wading through the threads here. I found the thread about the gasket on the waste pipe in the rear bumper. I checked and it was loose. I've re-seated it but I found another issue. I have an electric line laying sort of loose in the rear bumper cavity. The wires need to be terminated better but does anyone know what they were for? I also found a propane connection in the rear bumper. Is this a standard feature? Thanks, Tony

-
HOW TO: Rear mud flaps for the Ollie
Tony and Rhonda replied to John E Davies's topic in Towing an Oliver
The URL shown in John's first post results in a 404 error. The new URL is: https://olivertraveltrailers.com/forums/topic/2504-how-to-stone-stomper-gravel-guard/ -
TPMS sensors are user installable if you purchase the sensors that screw onto the valve stem. Internal (to the tire) sensors require professional installation. You will also need professional installation if you need to replace rubber valve stems with metal. While some have good results without switching the stems, my TST flow-thru sensors require metal stems (per the TST instructions). After a shop replaced my rubber valve stems with metal stems, I installed and calibrated the sensors following the instructions.
-
Lowering Television For Viewing
Tony and Rhonda replied to Tony and Rhonda's topic in Mechanical & Technical Tips
Thanks @Rivernerd, I'm overthinking again. Tony -
Lowering Television For Viewing
Tony and Rhonda replied to Tony and Rhonda's topic in Mechanical & Technical Tips
Thanks @Dennis and Melissa, that worked. Guess I was overthinking it. The screen doesn't hang vertical due to pull from the cables. Is there a way to lock it vertical or do I need to pull slack in the cables? Thanks, Tony -
I've been searching the forum and the Oliver videos but I can't find instructions for lowering the television. Would someone point me to the instructions or video. Or just explain it to me. Thanks, Tony
-
We followed a thread from 2014 we found on the FiberglassRV forum. Works well. Looks very similar to what @mountainoliver posted. www.fiberglassrv.com//threads/oliver-shower-curtain.1163490/
-
Changing tires in the wild - lessons learned
Tony and Rhonda replied to John and Jodi's topic in General Discussion
sorry for the double post. How did that happen? Can someone delete it? -
Changing tires in the wild - lessons learned
Tony and Rhonda replied to John and Jodi's topic in General Discussion
I've had good luck with a 4-way lug wrench. This allows me to use both arms and body weight to break the lug nuts free. Also makes it quick and easy to spin them off and back on. I finish them off with the torque wrench with 4" extension. No need for deep well sockets on our older model wheels. I keep the 4-way on the floor under the TV's driver's seat. When you have a tire shop work on your wheels/tires, it's a good idea to check the lug nut torque after you get the trailer back. Some shops over torque the lug nuts with their impact wrenches making it very difficult to remove the lug nut manually. I store the torque wrench in the storage area under the rear seat of my TV, it even has cutouts to keep the wrench (or whatever) from rolling around. Tony -
Changing tires in the wild - lessons learned
Tony and Rhonda replied to John and Jodi's topic in General Discussion
We have a TPMS on our purchase list but, after your story, it's now at the top. Thanks, Tony -
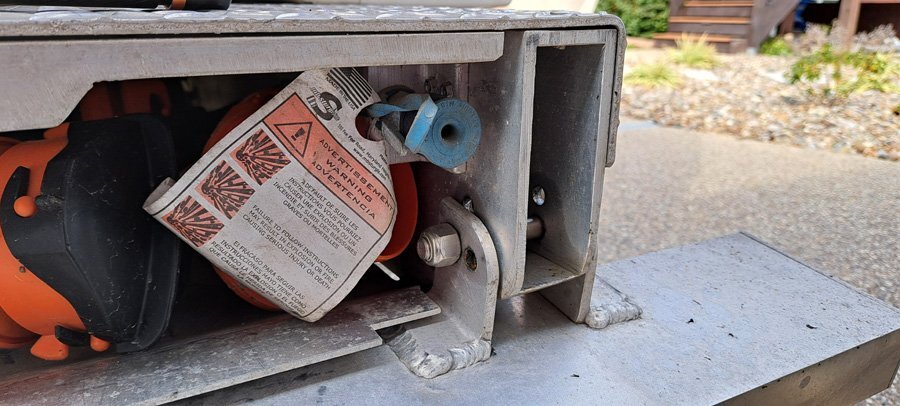
Sounds like under the whale tail it is. Thanks everyone. Tony
-
Reviving a moderately old thread. Our 2017 Ollie also has the curly safety cables and I agree with @jd1923 in that, changing to chains is not liability I want to take on. A bonus with the cables is I am able to secure the cables inside my Paclock coupler lock. Chains wouldn't fit. I tow with the Andersen WDH. My question is should the cables be above or below the whale tail? I haven't found any info on this in the owner paperwork. Both kind of make sense to me. How do owners with WDH's and cables route the cables? Thanks, Tony
-
I was finally able to run the cable. I had to fish from the bottom up, just couldn't get past something between the hulls working from the top. Thanks for the help. Tony
-
Thanks for the suggestion @Ray Kimsey. I'll go out and give it a try. The VIctron came with a long data cable so I don't think I'll need a longer one but I'll see. Thanks @ScubaRx. That's good to know! Tony
-
I'm trying to fish the data cable for the Victron BMV-712 from the display beside the Zamp controller down to the street side under-bed area. This is the street side space between the Zamp install/rear window and the pantry/battery box. I've been trying to follow the solar wires but there seems to be an obstruction across this space. Has anyone successfully fished a wire through this area? If not, any suggestions where to run the cable? Thanks,Tony
-
Late-Model RAM Owners - how do you like your “tech”?
Tony and Rhonda replied to Galileo's topic in Towing an Oliver
Thanks Geoff! -
Late-Model RAM Owners - how do you like your “tech”?
Tony and Rhonda replied to Galileo's topic in Towing an Oliver
@Snackchaser What are the two other black connectors bolted to your front tray in your photo above? Thanks, Tony -
Battery and Solar Disconnect Install Questions
Tony and Rhonda replied to Tony and Rhonda's topic in Ollie Modifications
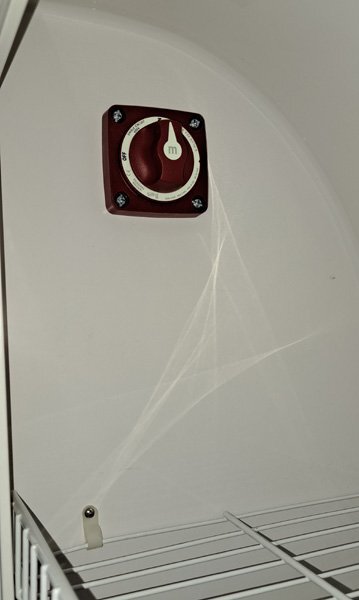
This was/is @dewdev's idea. I haven't pulled much wire but there seems to be plenty and this location may actually be a shorter distance to the panels. After watching the EXPLORIST Life switch installation video recommended by @rich.dev I wanted the dual circuit switch but I did not want the big breaker box as installed on EXPLORIST Life. Your m6010 switch uses the same size hole as my m6006 so I may change it in the future. @Galway Girl What gauge is your solar wire? Mine is 6awg and as far as I can see, they are separate wires, not the dual bonded wire in your photo. After looking at the crimps on the (undersized?) Zamp ring terminals, I don't want to reuse them. Perhaps the installers ran out of some supplies and made it work with what they had? @dewdev stated his solar wire is 8awg. Is that what most have? -
Battery and Solar Disconnect Install Questions
Tony and Rhonda replied to Tony and Rhonda's topic in Ollie Modifications
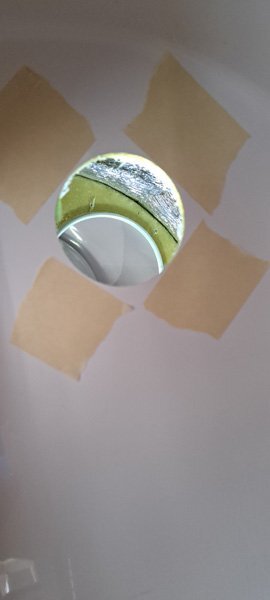
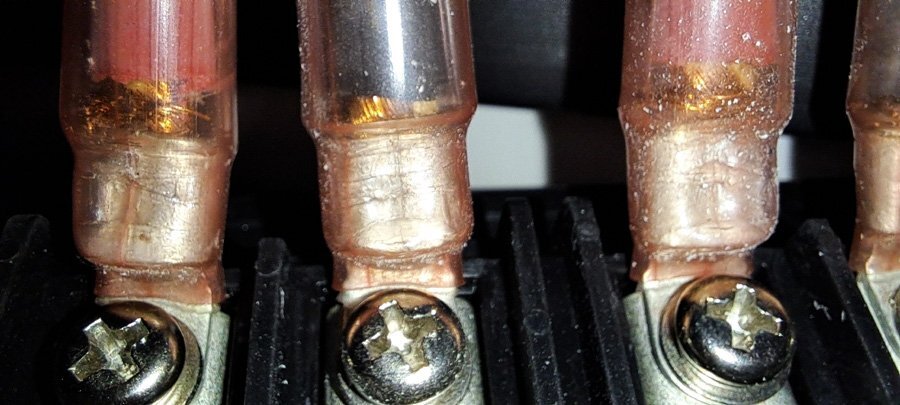
I'm happy to report progress on my solar disconnect switch. I've drilled my first hole in our Oliver. And installed the switch. Unfortunately I ran into a problem as I was making the short wire between the 3/8" ring terminal post on the BlueSea switch and the ring terminal to the back of the Zamp. I ordered 3/8", 5/16" and 1/4' ring terminals for the 6awg wire attaching to the back of the Zamp. Unfortunately it uses 3/16". They should be in today. I also noticed something that makes me a little concerned about the solar wiring safety. I'm not an electrician but this install does not look like it was done by an electrician either. If you look closely at the red (+) wire connections in the photo below, it appears at least a couple of the ring terminals used on the 6awg solar wire are under sized. It's hard to see but the "excess" wire strands are wrapped around the ring terminal and covered by heat shrink. The black (-) wire connections look OK. Not sure if this is common practice but it seems unsafe and more like a DIY rather than a professional install. I haven't removed any of these ring terminals yet but, but once I do, I'm going to cut off the heat shrink to examine this more closely
-
Battery and Solar Disconnect Install Questions
Tony and Rhonda replied to Tony and Rhonda's topic in Ollie Modifications
@dewdev Thank you for the detailed "How To." It's finally cooled off here (for a couple days) so I'll be working on the trailer this weekend. Thanks again, Tony -
Battery and Solar Disconnect Install Questions
Tony and Rhonda replied to Tony and Rhonda's topic in Ollie Modifications
@dewdev I know to tape the fiberglass and drill slowly. I plan to drill the pilot hole first and then follow with the hole saw. Did you use a toothed hole saw or an diamond or carbide edged saw? I have both a diamond and a carbide edge saw but the diamond saw (Amazon) is larger than advertised and the carbide saw (Harbor Freight) seems very course. I haven't been working on our Ollie since late June due to the weather here. Highs in the mid-90's with heat index in the 100's. Very frustrating! May be able to get something done by the end of next week, highs 'supposed' to drop to the low to mid-80's. I'll keep my fingers crossed. -
Two Quick Stabilizer Jack Questions
Tony and Rhonda replied to Tony and Rhonda's topic in Mechanical & Technical Tips
Thanks for the links, I'll take a look. Tony -
Two Quick Stabilizer Jack Questions
Tony and Rhonda replied to Tony and Rhonda's topic in Mechanical & Technical Tips
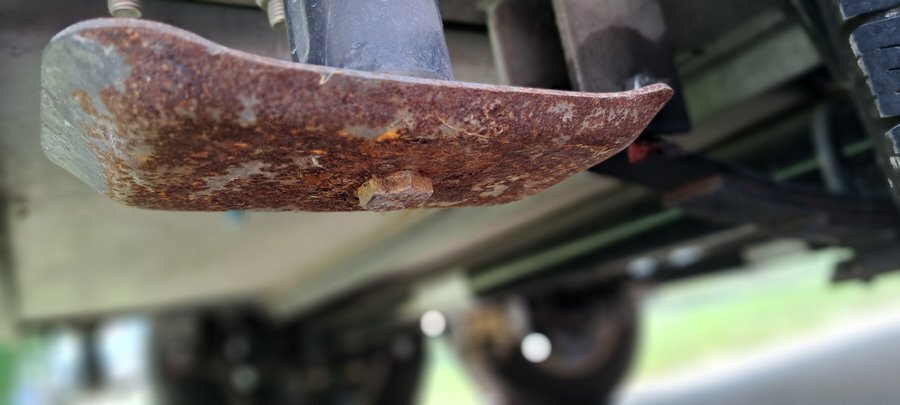
Thanks for the responses. The pad on the front jack is round and it looks fine. At least for now, I'll take our rear pads, brush off as much rust as possible, then repaint. @Patriot Are there advantages to using round jack pads vs. the rectangular ones installed on our camper? Which jack pads (size, model) are you using? I had no idea there were so many options to choose from. @jd1923 Your jack shafts are shiny! Ours are not but I'm considering cleaning ours up. Did you use a wire brush in a drill to clean them? The Andersen Jack Blocks are on our purchase list. Thanks, Tony -
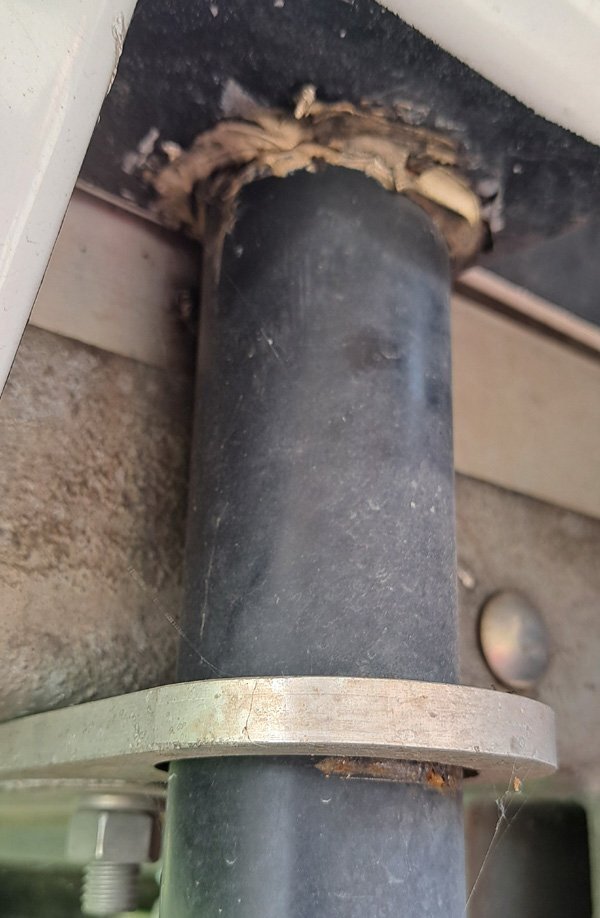
The feet on our stabilizer jacks are pretty rusty. Is this normal for our age camper? If it's normal wear and tear, I'll leave it as is. If not, I'll remove, de-rust and repaint. The caulking where the jack penetrates the hull is not very pretty and it looks like gravity has caused it to separate from the camper body is a few places (not visible in my soft photo). What caulking is recommended? Thanks, Tony