rideadeuce
-
Posts
397 -
Joined
-
Last visited
-
Days Won
20
Everything posted by rideadeuce
-
So update on install and vent closure. We have had high humidity here in TN and since closing the outside vents I have been getting alarms from my Ruuvi sensors. Cabin humidity has been climbing into the 70s and even 80s at night despite trialing the dehumidifier mode on Atmos. This is concerning to me. Anyone else that has closed their vents seen this issue. Thinking about maybe opening one of the vents to the outside. Any ideas? Prior to fridge replacement and closing vents humidity was staying in the 40-60% range

-

Victron Multiplus and MPII Feedback Request
rideadeuce replied to jd1923's topic in Ollie Modifications
That is reassuring. Great research, as always! I think I will order a 400 amp ANL for now and maybe switch to T class when I catch up a little. I do wish I had more of an electrical education. Learning as I go, thanks to the forum members many times. Thanks! Enjoy seeing your take on the install. -
Victron Multiplus and MPII Feedback Request
rideadeuce replied to jd1923's topic in Ollie Modifications
The problem with that is, I believe, the 4/0 cabling is only rated to about 250 amp. I was mistaken about mine being a 300 amp ANL it is 250 amp from the factory. So I think I should stick with the lower amp fuse but definitely may look into changing from ANL to T class for the higher AIC. Not sure about beefing up the cables. -
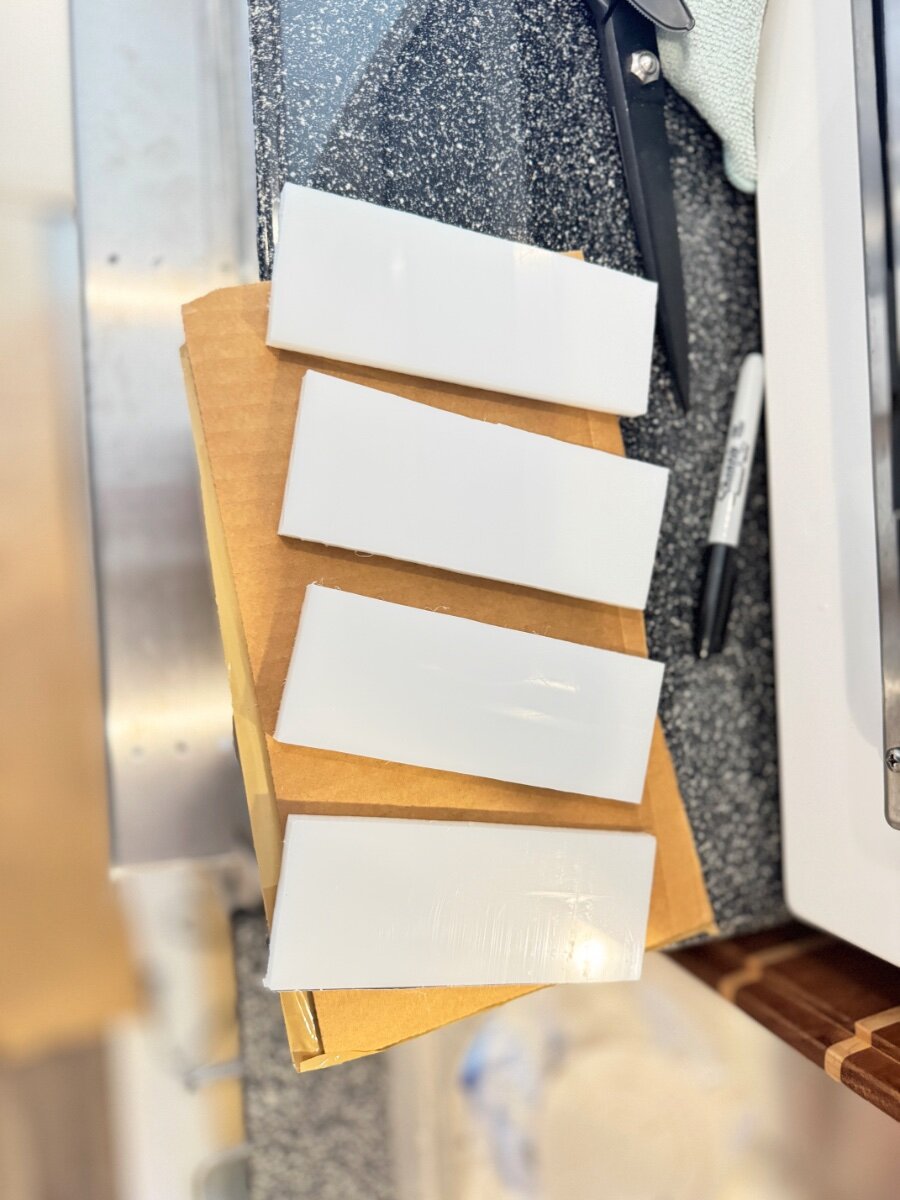
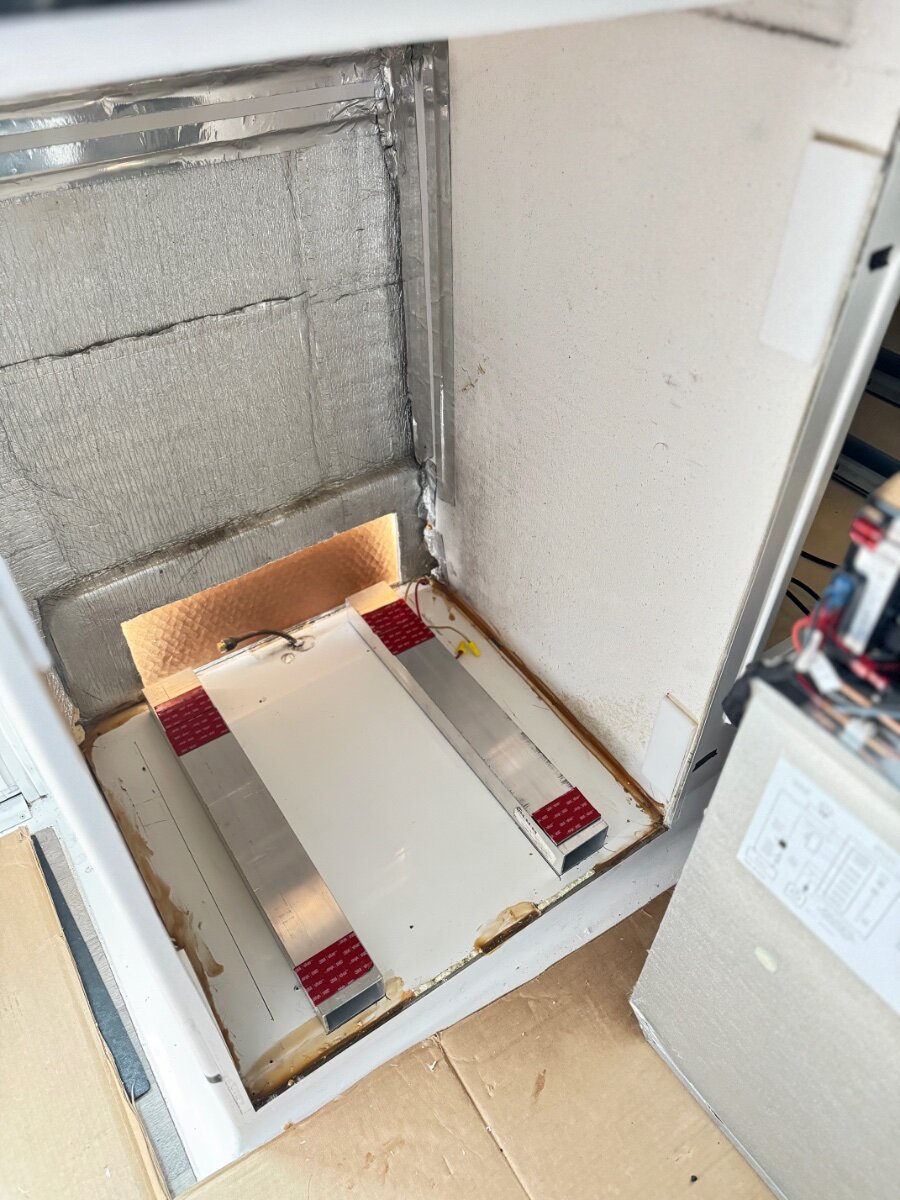
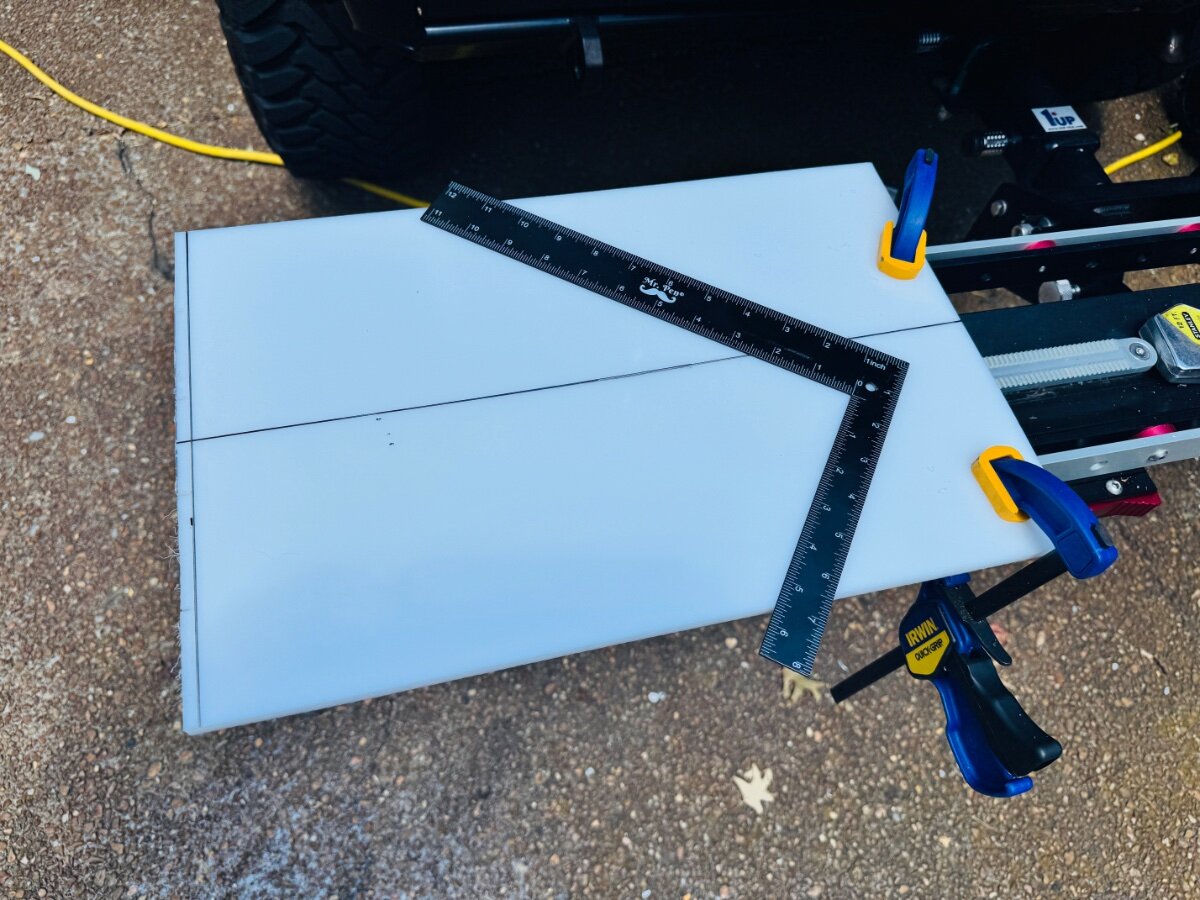
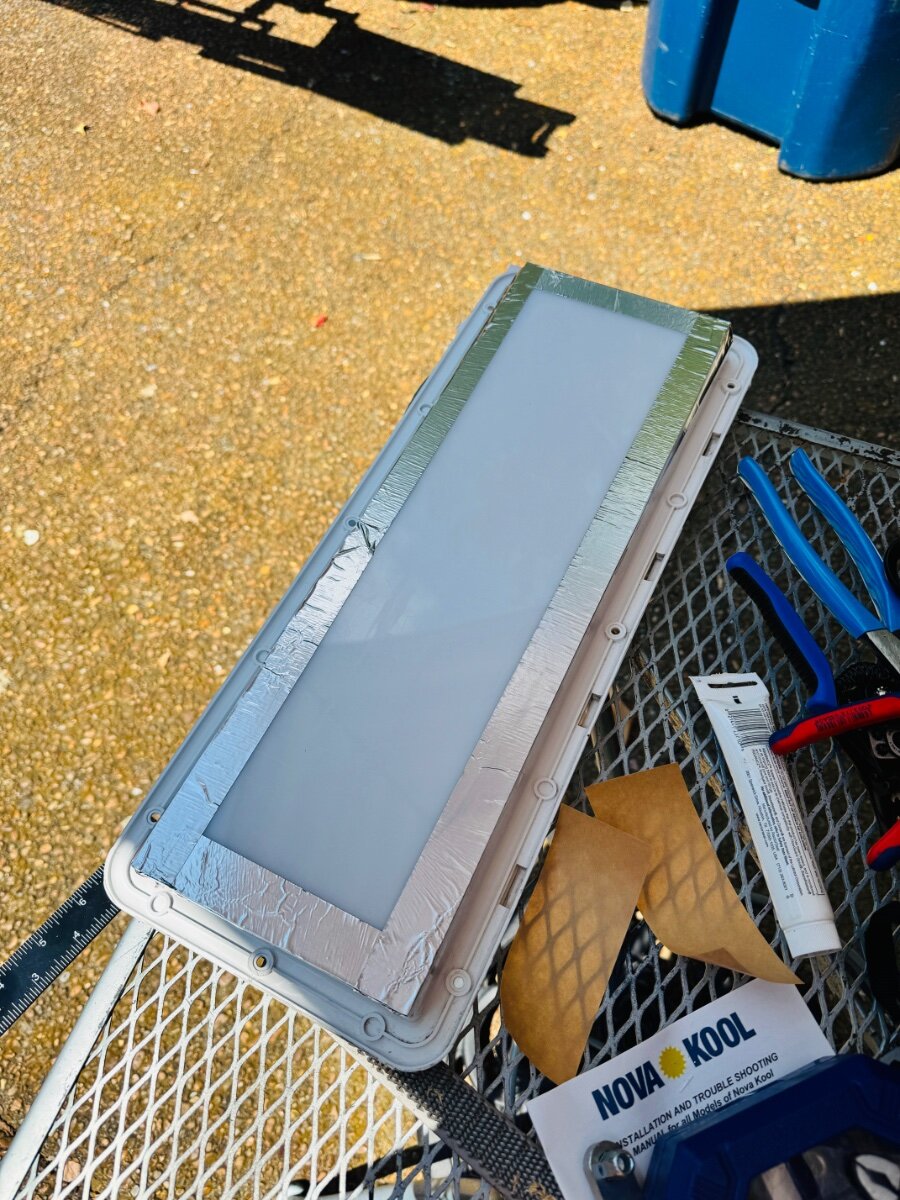
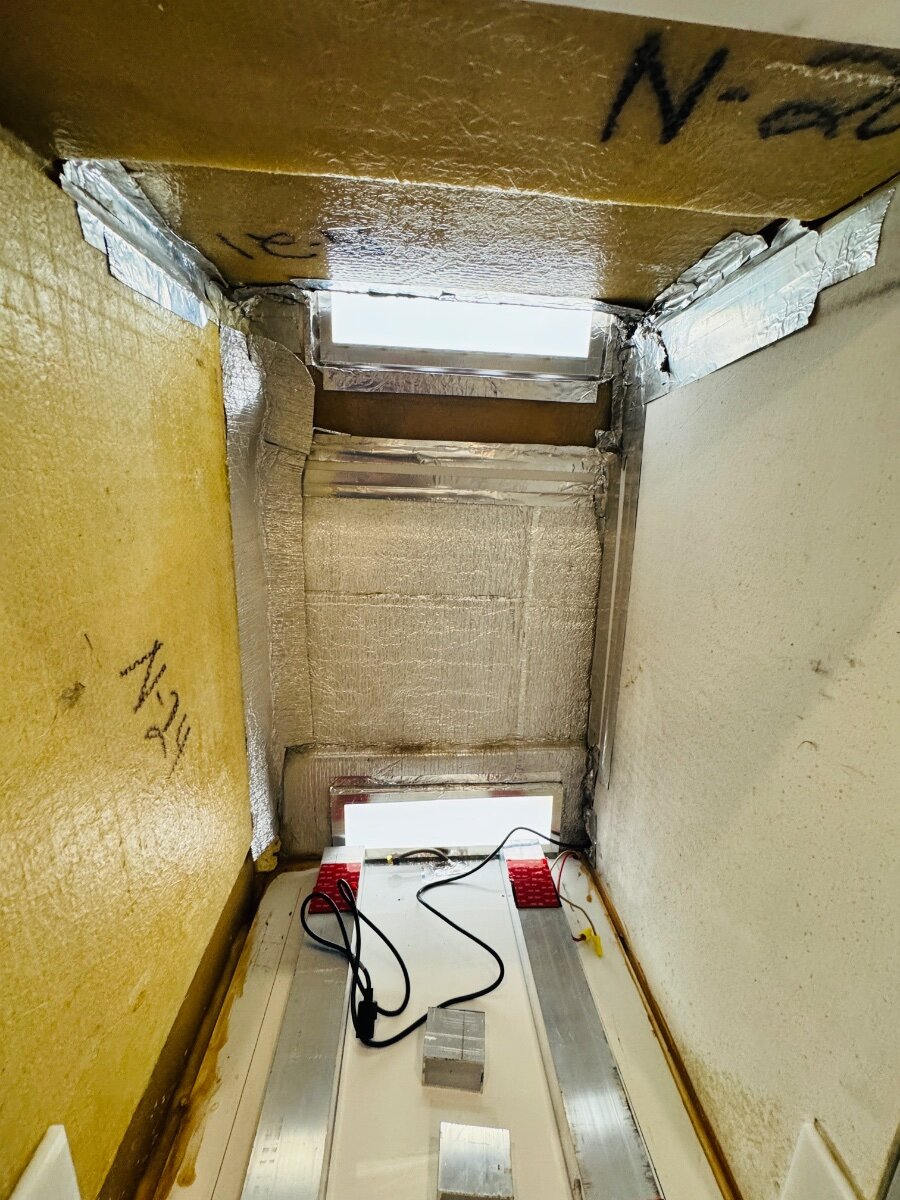
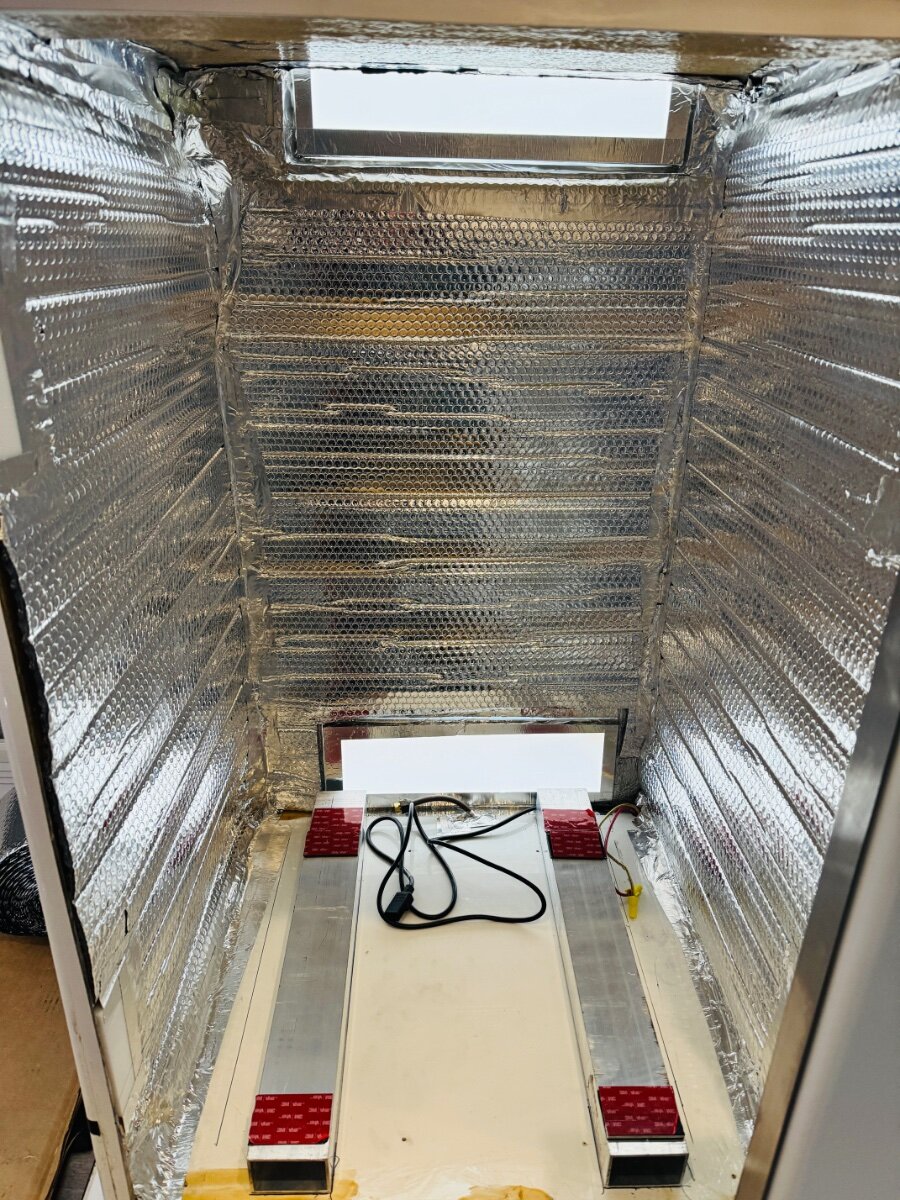
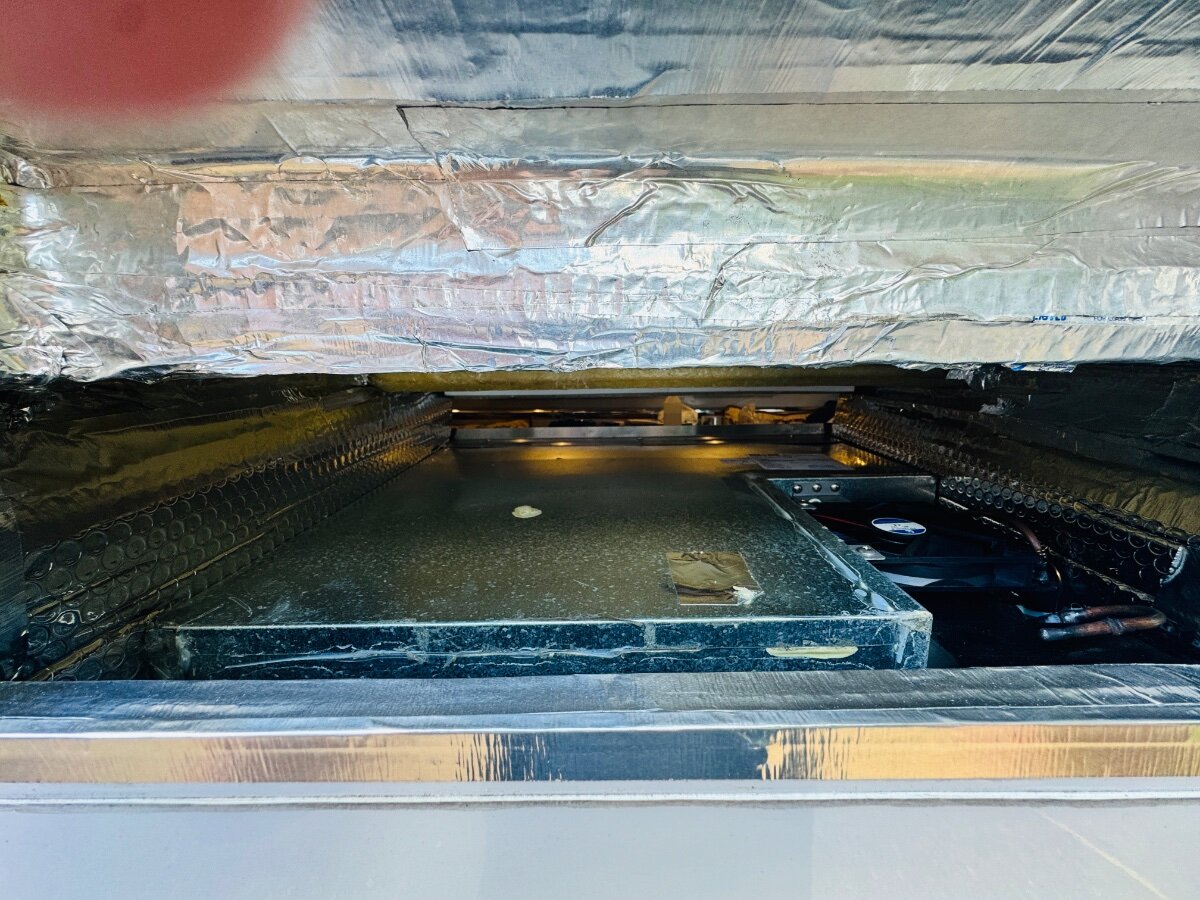
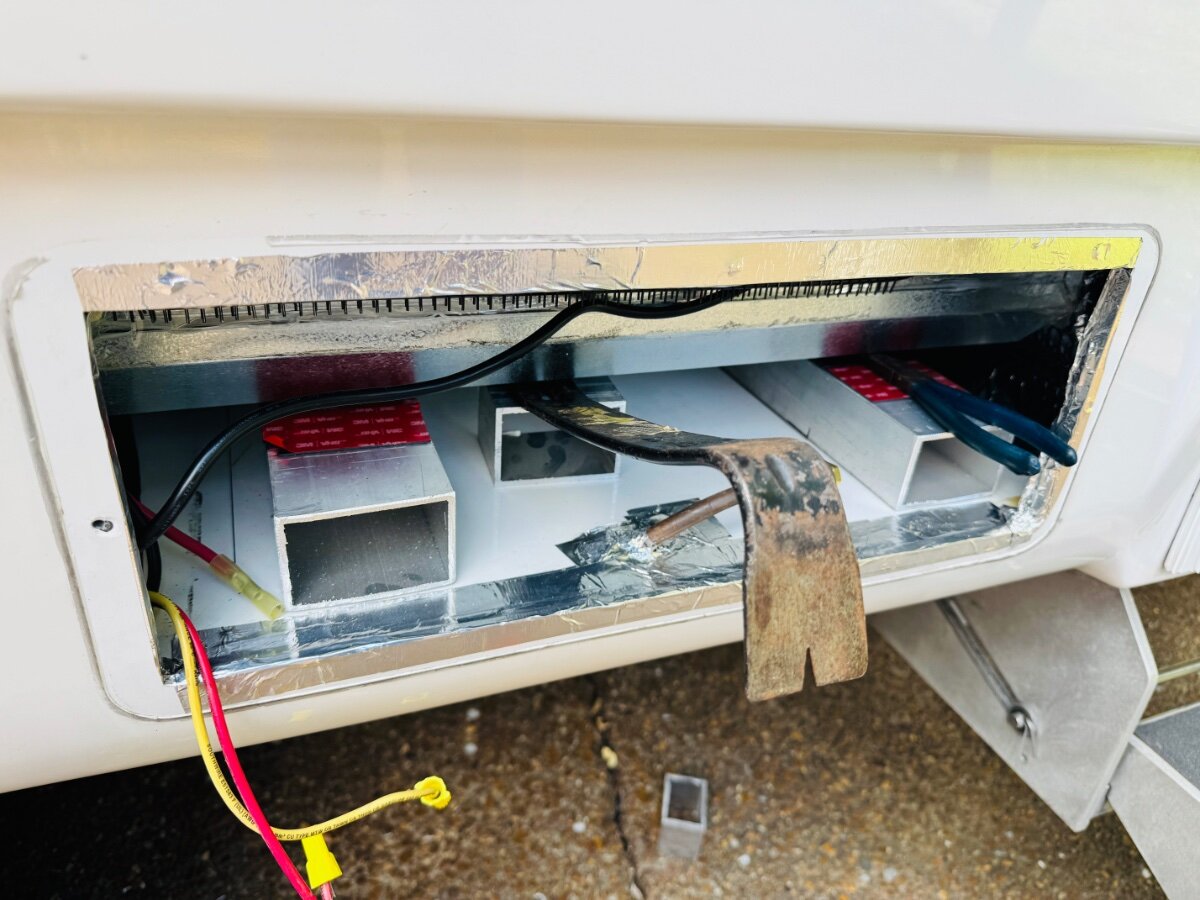
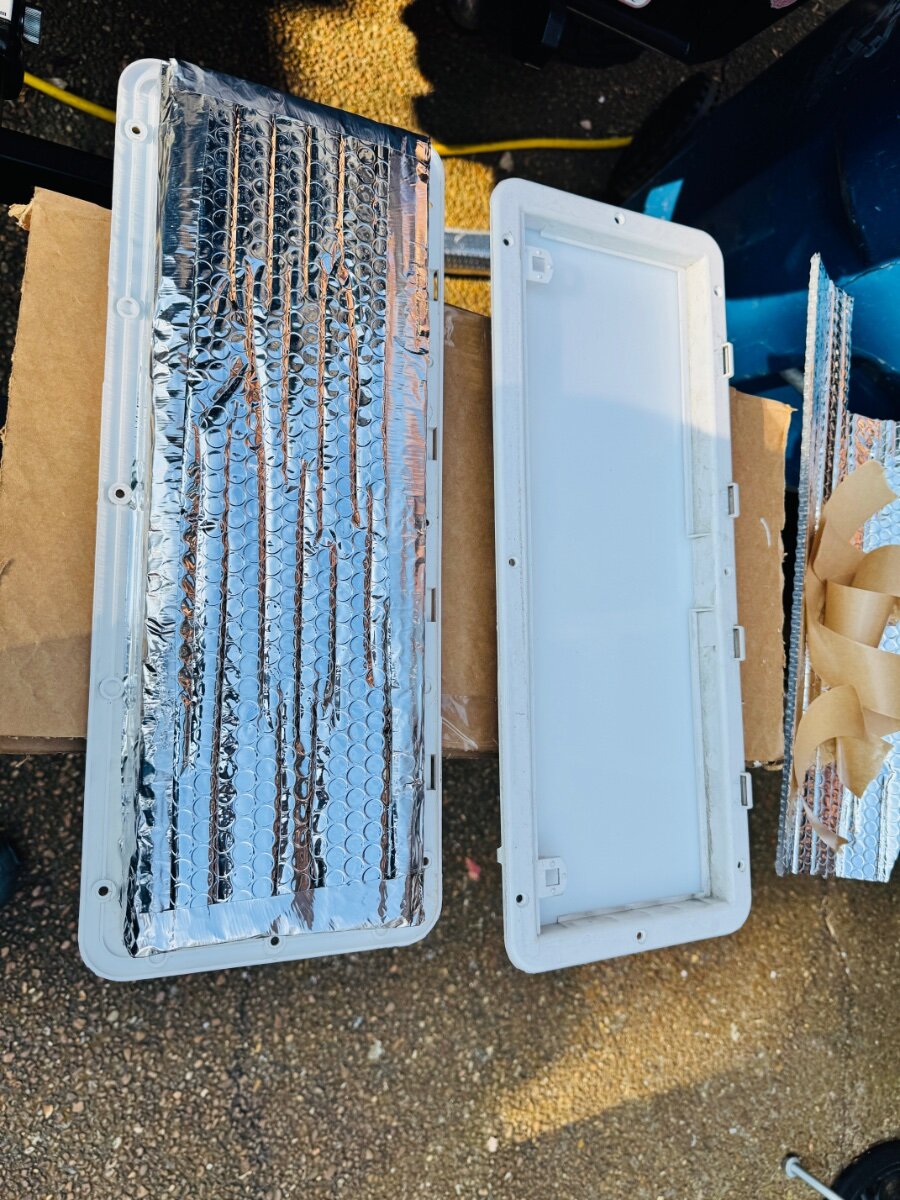
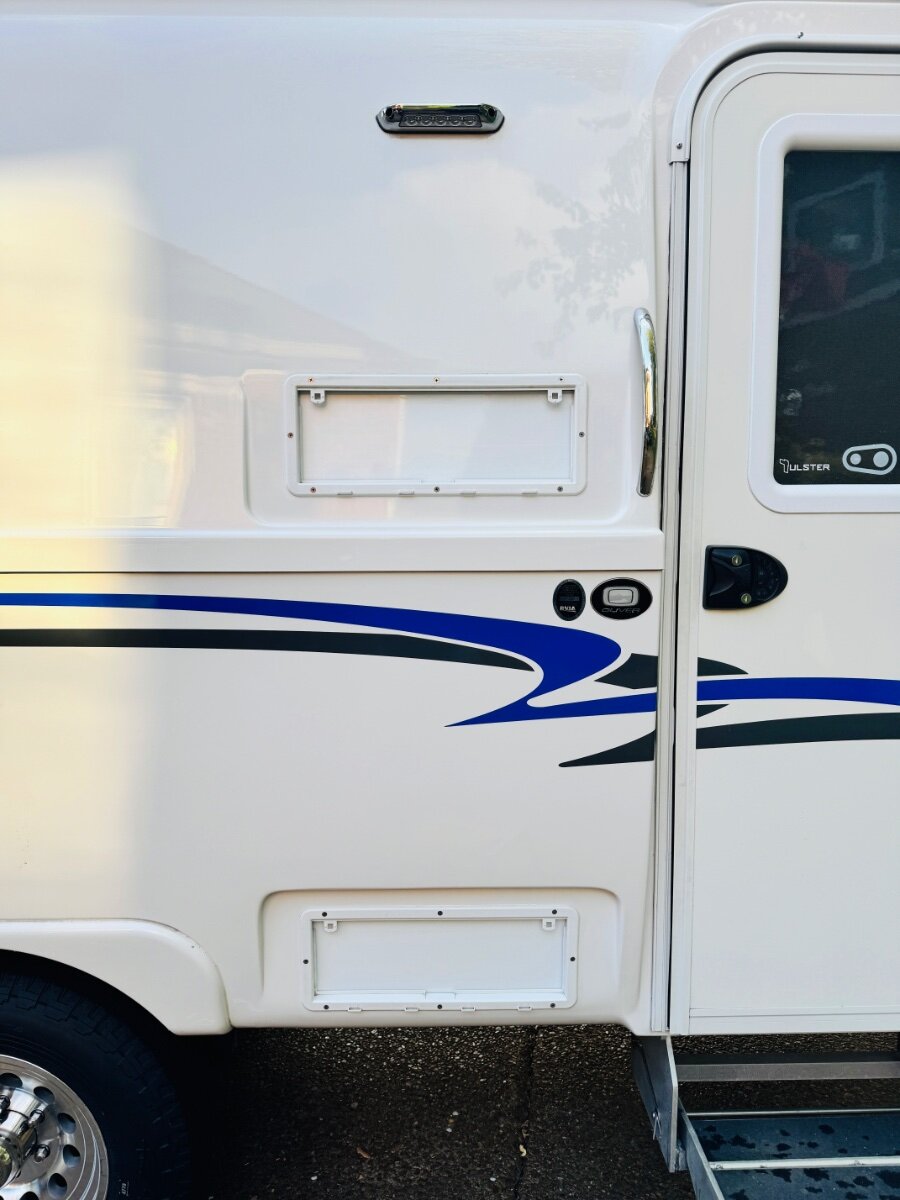
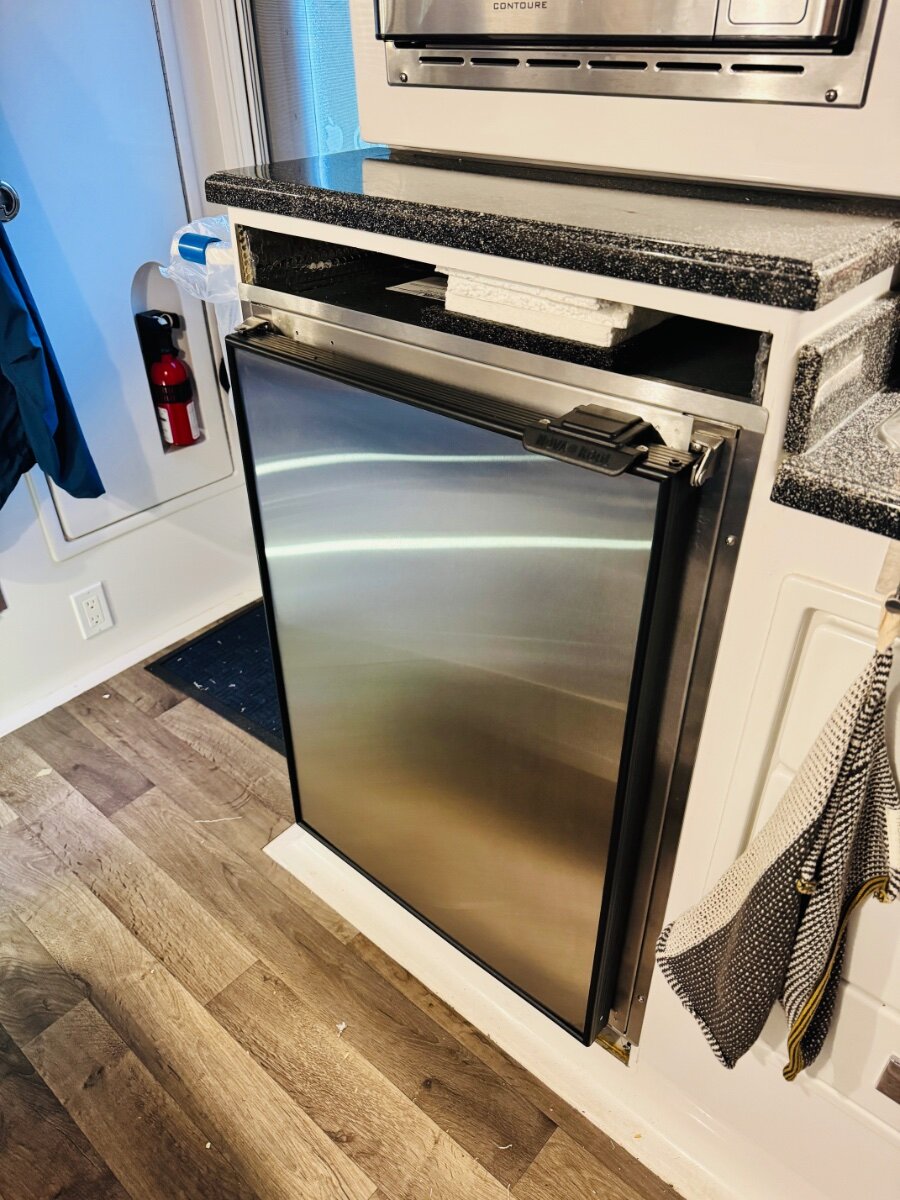
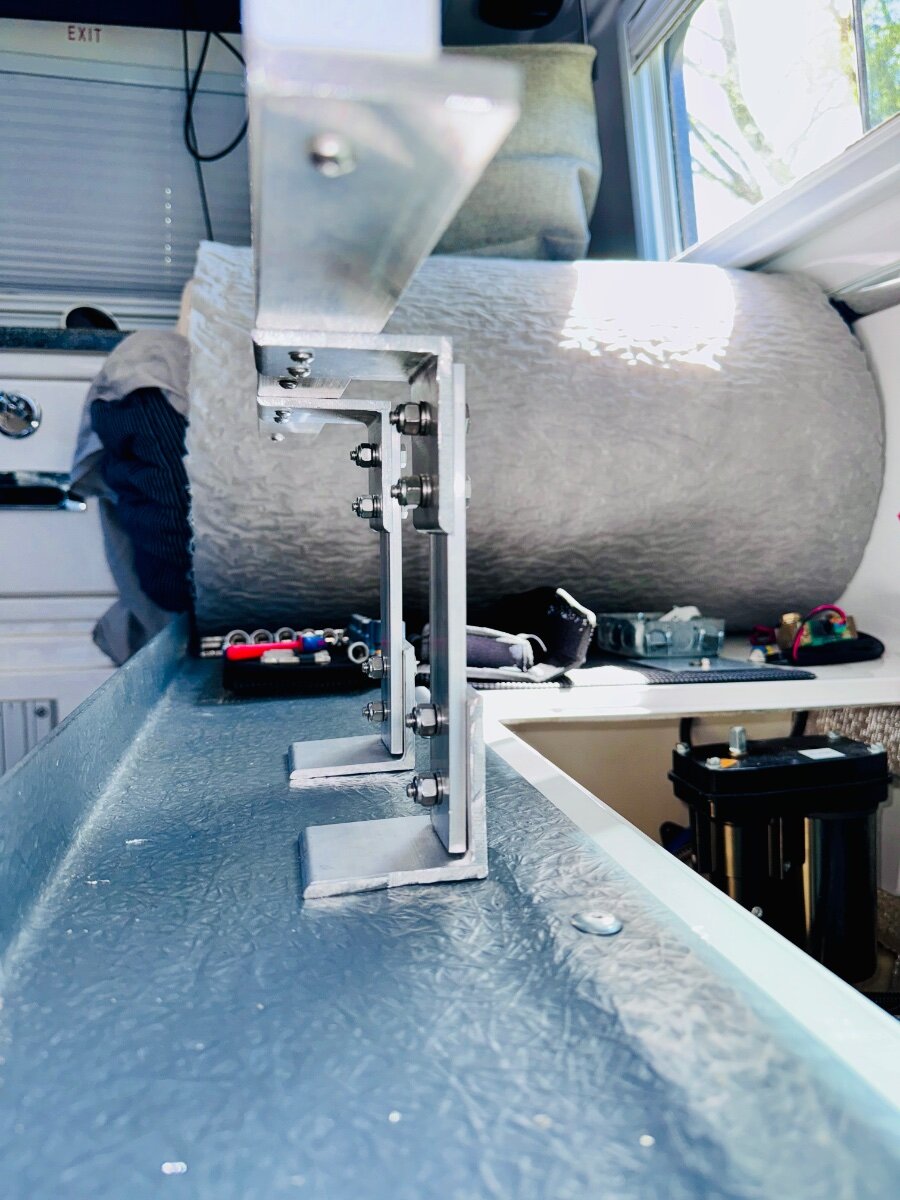
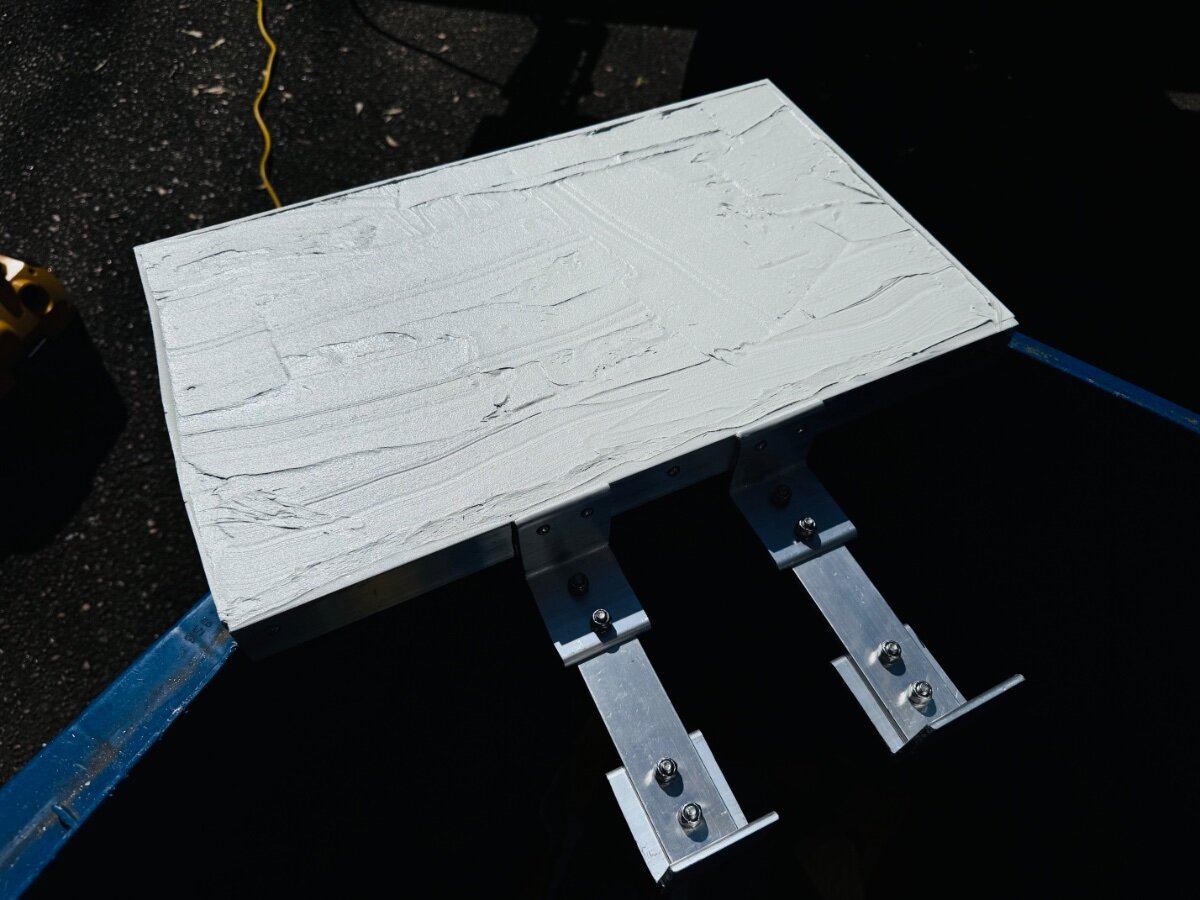
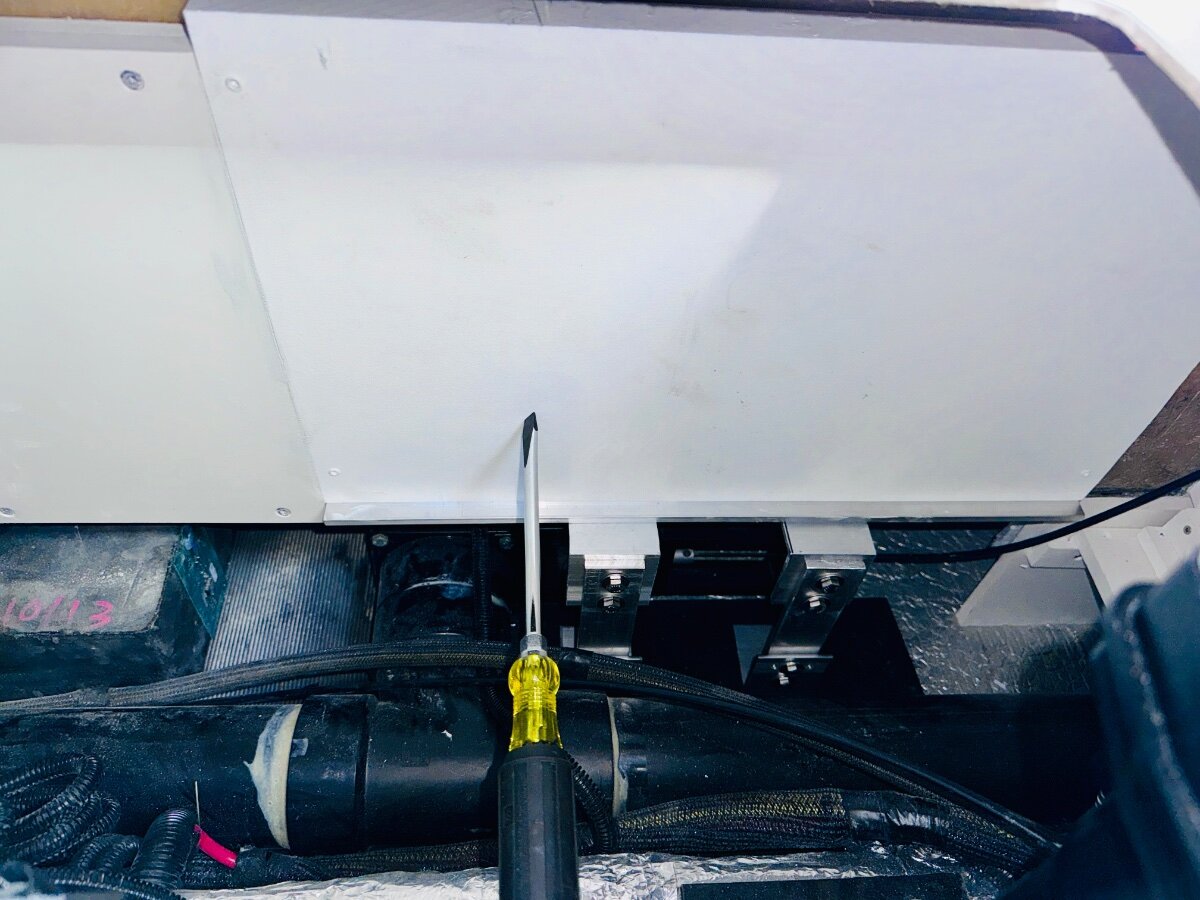
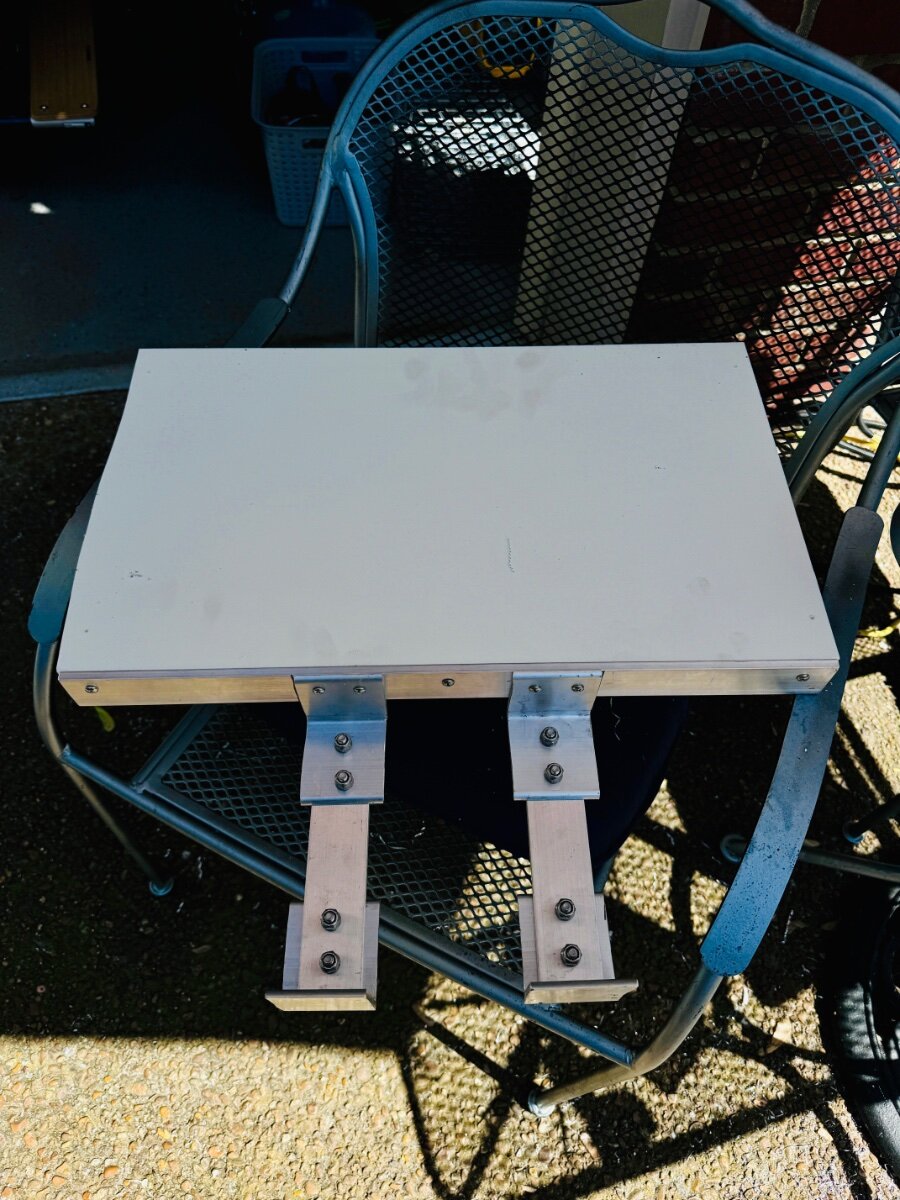
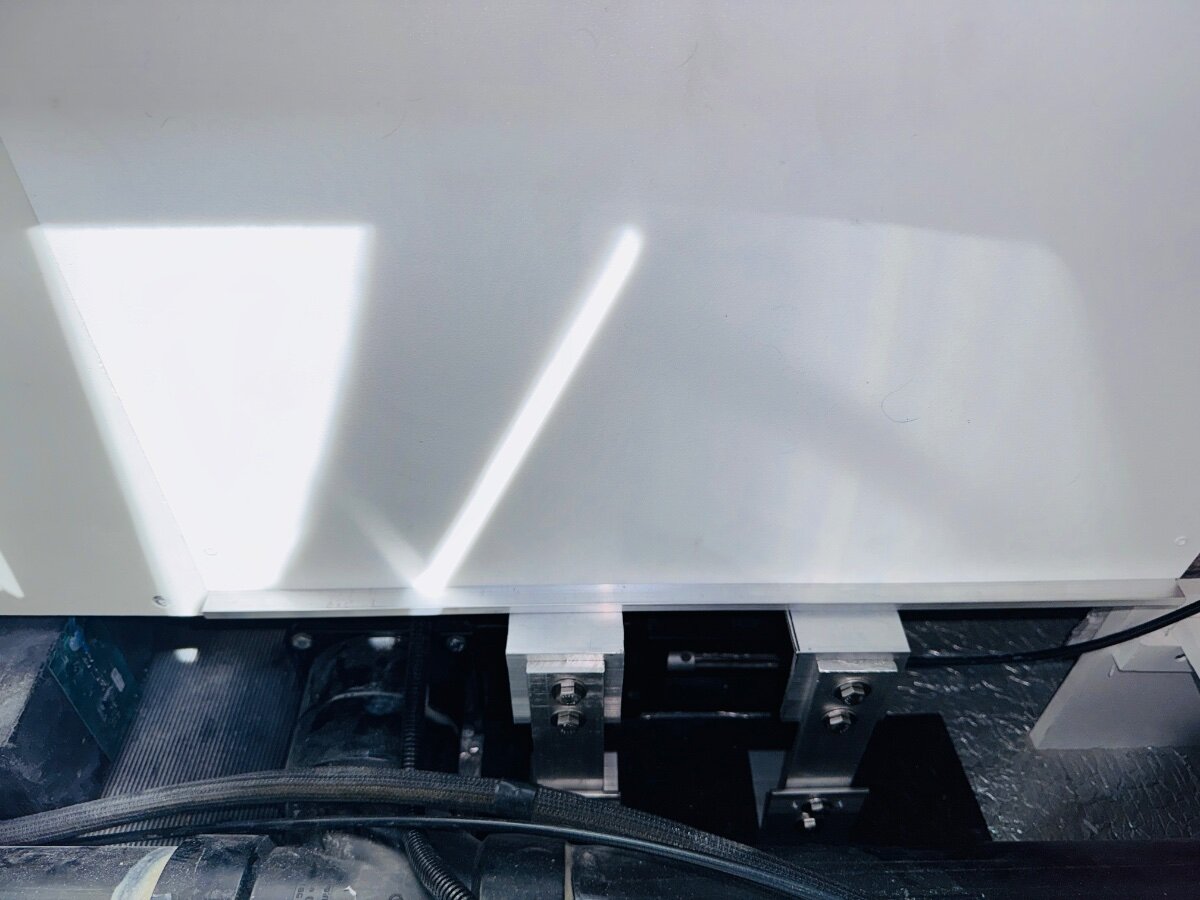
Thanks to everyone before me who did this install and shared it on the forum. Especially, a big thanks to @mountainoliver, @Geronimo John for all the info and pics. The install was pretty straight forward but not as refined as some. So happy to have gotten rid of the absorption fridge. Nothing to add except some pictures. I did end up copying a lot of things. Ended up using a little bit of VHB tape on bottom supports, 3/8 in HDPE for side brackets and used some better plastic to plastic epoxy. The other stuff I used did end up failing @mossemi (you sir were correct!) and ended up screwing (6) 1 1/4 in. SS screws through the backside for stabilization of the MPII. Glad I had the aluminum mount for backup. This time I used https://a.co/d/5IrB3w2 First part of install was quick and I forgot to take pics. Destroyed the Dometic fridge getting it out!. I will be done once I caulk and source some SS vents to cover the top and bottom holes.
- 28 replies
-
- 10
-

-

-

-
Can you DM contact information for sourcing vents. I would appreciate it. I am trying to finish up install of the Nova Kool and still trying to source the upper and lower vents akin to what MountainOliver did. Thanks, Mike
-
Got it! It was the iPad giving me trouble. Double tapping on pic finally worked.
- 1 reply
-
- 2
-
-
Can someone remind me how to size pictures. I seem to have lost the ability to do it or I just can’t remember how. At one time, I thought you could drag or attach the picture and then were able to size it when you inserted it into the text. Thanks, Mike
-
Victron Multiplus and MPII Feedback Request
rideadeuce replied to jd1923's topic in Ollie Modifications
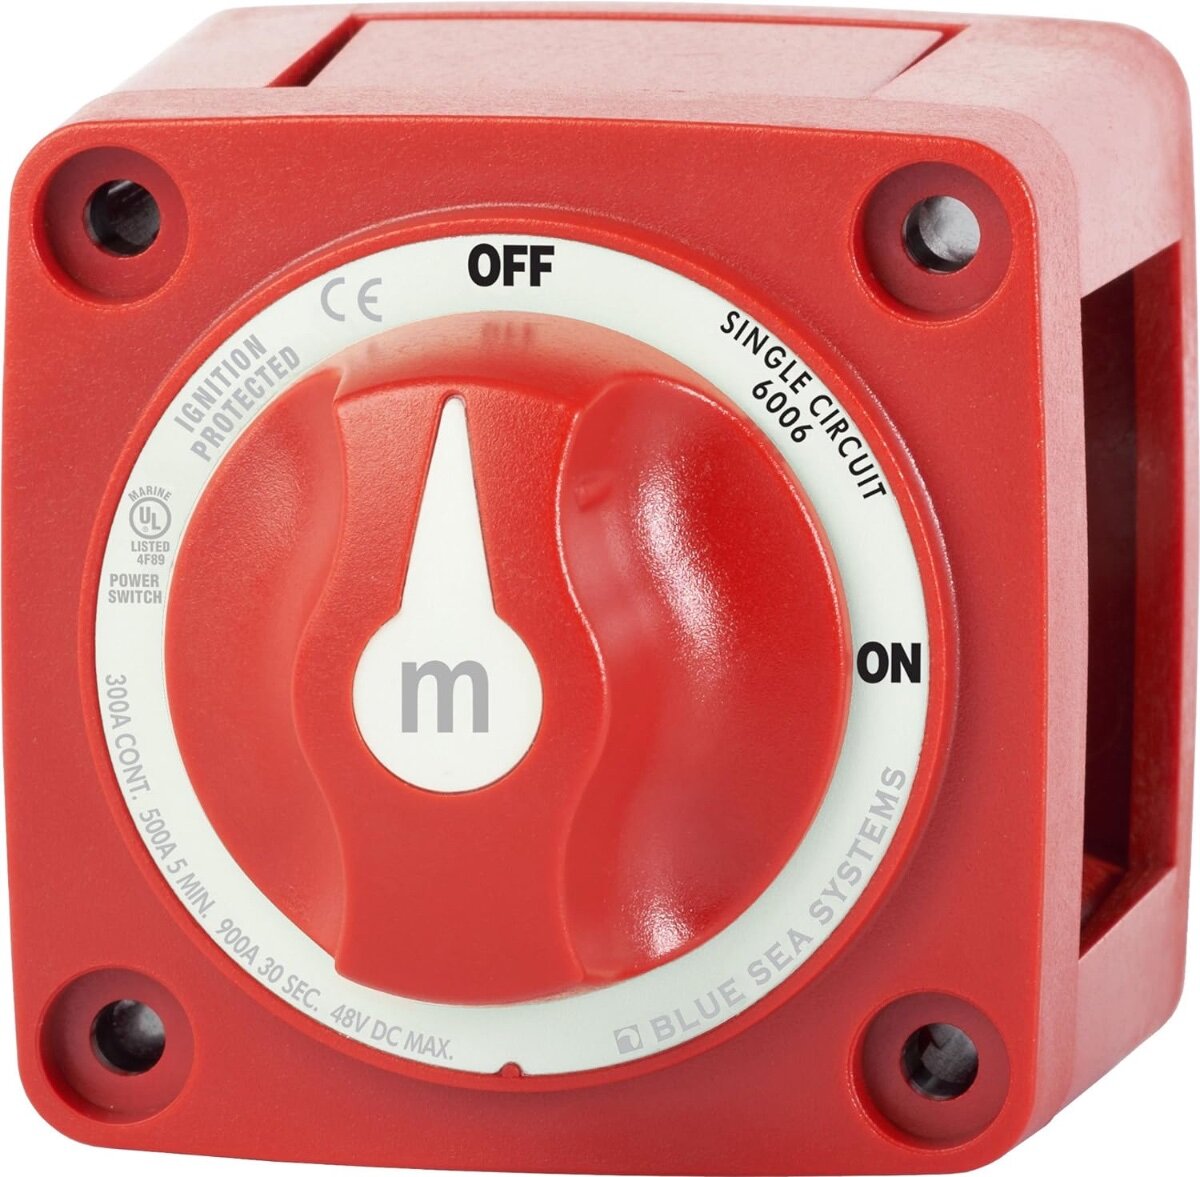
I agree with everything you said above. My batteries have an on the battery ON/OFF switch and through the comm port extended remotely installed in the pantry. If you wanted a cutoff switch I would use a Blueseas switch next to the ANL fuse you already have installed. Amazon link: https://a.co/d/3ahngGe
-
Victron Multiplus and MPII Feedback Request
rideadeuce replied to jd1923's topic in Ollie Modifications
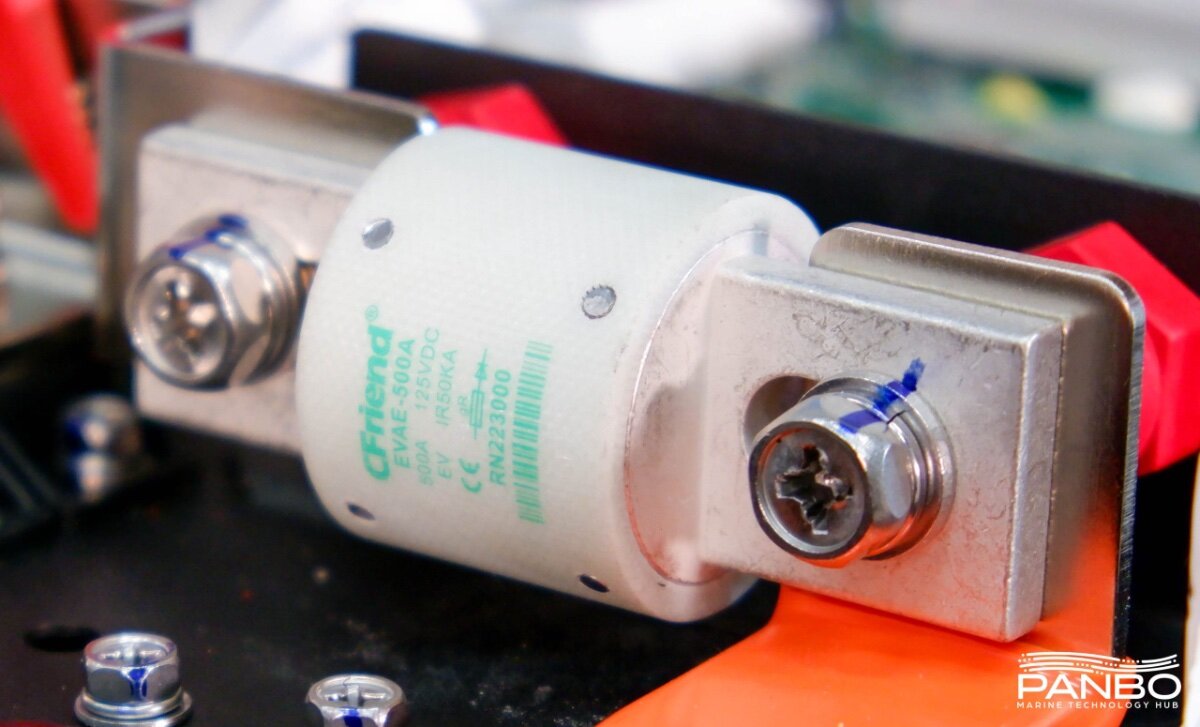
The Epoch 460 marine battery I have has a 500amp built in T-fuse plus my OEM build had a 300amp T-fuse directly outside the battery bay so I called it good. I did buy some 180 amp MRBF fuses for the terminal but ended up returning them. If you need any kind of fuses, I recommend Blueseas. Excerpt from Panbo.com “ Let’s get one exciting thing out early. These batteries contain a 500 amp fuse under the cover of the battery, just before the positive post of the battery. The fuse Epoch uses is from the EV market and carries an amp interrupt capability (AIC) of 50,000 amps. That rating means that with up to 50,000 amps flowing through the fuse, it will still successfully trip to an open and safe condition. ABYC’s electrical safety standards require a fuse with a 20,000 amp AIC. Before disassembling this battery, I’d never seen a class T rated above 20ka AIC. Thus far the only gripes I have about the fuse are that it appears difficult to source a replacement — which I’m hoping Epoch can help with by selling replacements — and I think Epoch should label the outside of the battery to warn there’s a fuse inside. That way, a boat owner won’t find themselves stumped if they accidentally trip the fuse. But, make no mistake this fuse is a really big deal and a really good thing. By placing a high AIC fuse inside the battery, installers are now relieved of the obligation to place a physically large class T fuse as close to the batteries as possible. The combination of fuse holder size and thick cables can make this a challenge. Knowing the fuse is inside the battery, an MRBF post-top fuse holder can now be safely used. Thus, the entire system is protected via the internal fuse, and the wire off the battery is protected by an appropriately sized MRBF on the positive terminal.” Cheers, Mike
-
Made in USA leaf springs
rideadeuce replied to Mountainman198's topic in Mechanical & Technical Tips
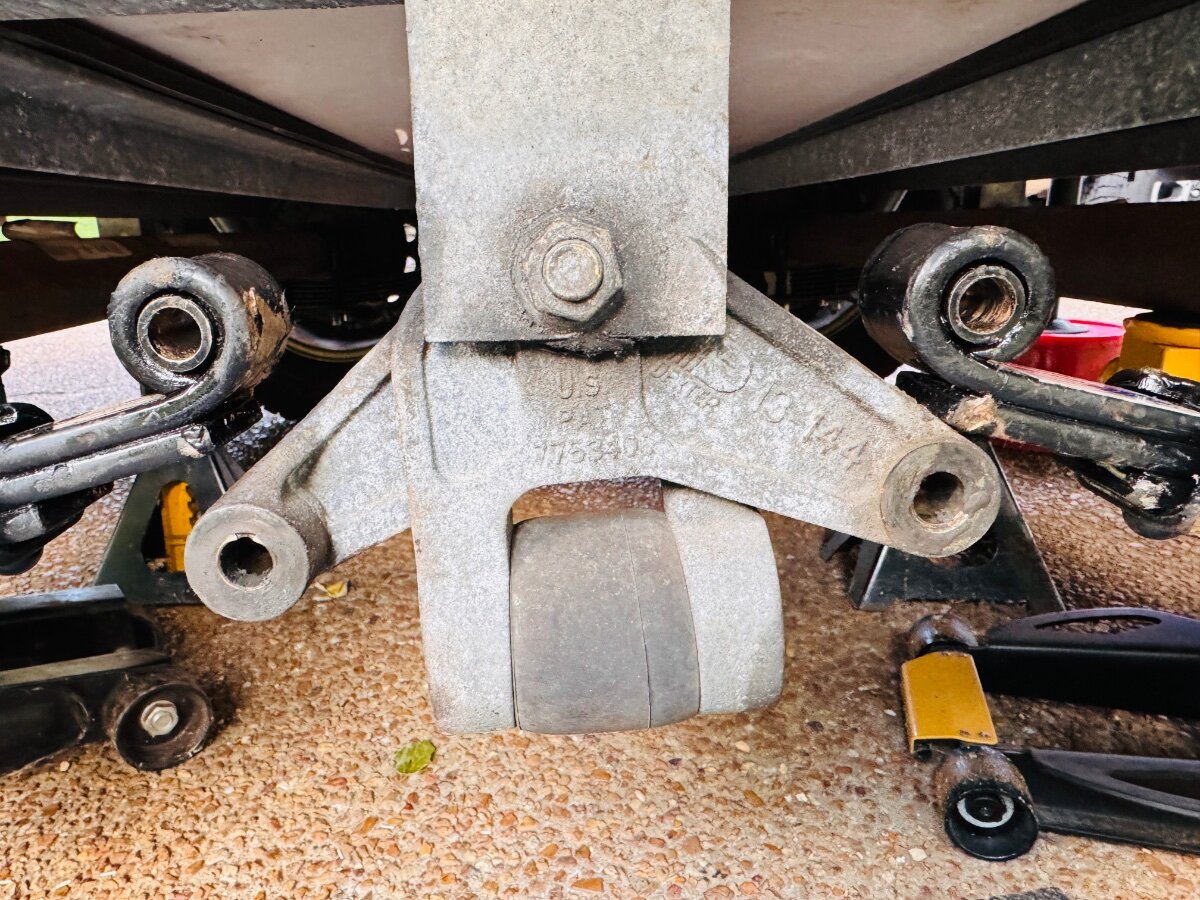
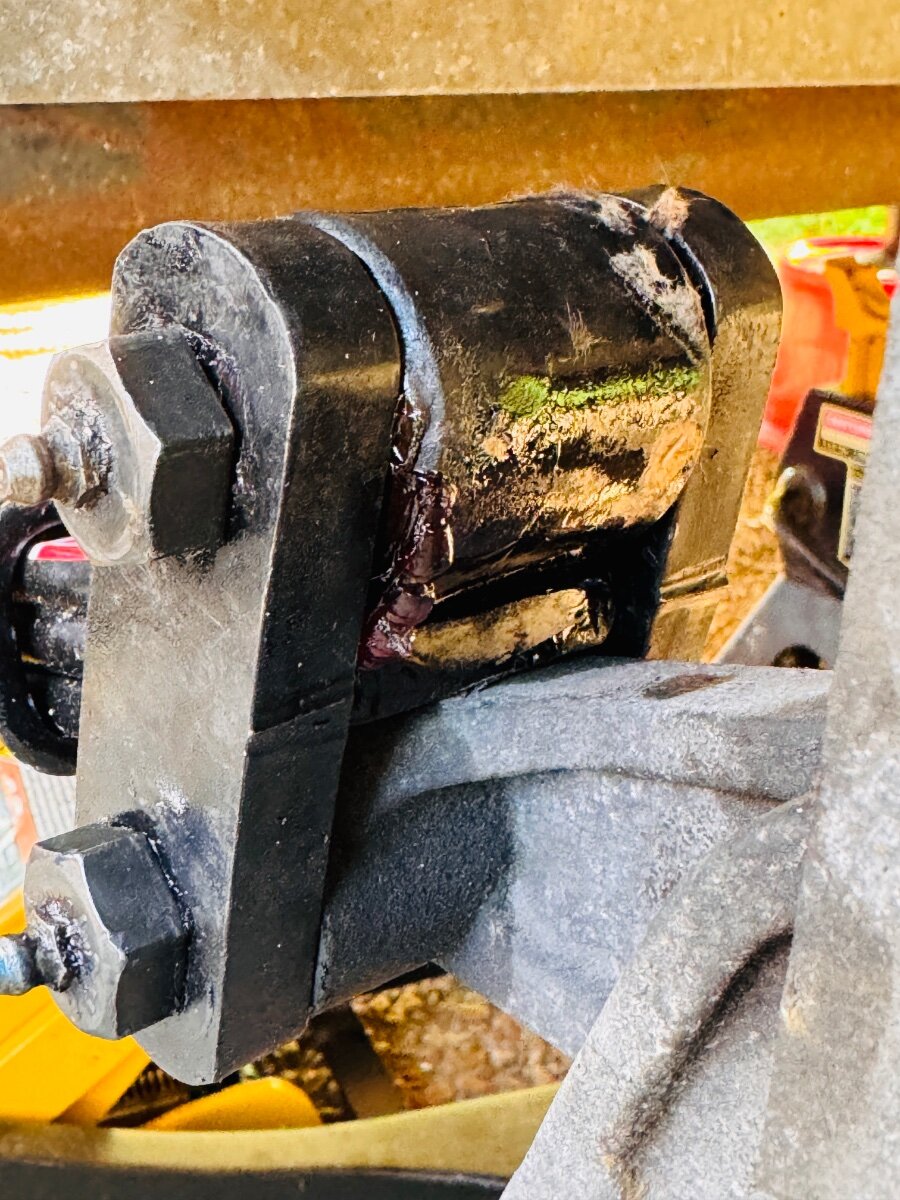
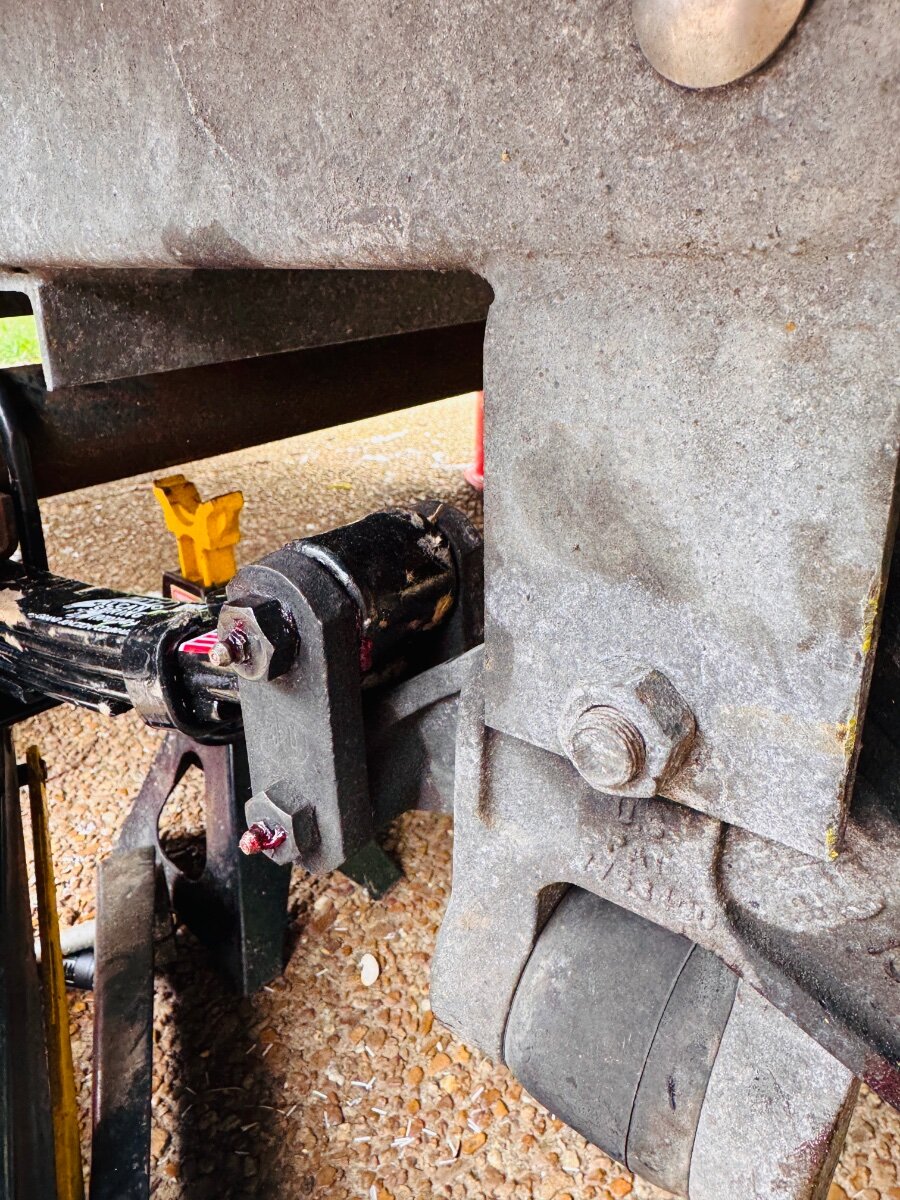
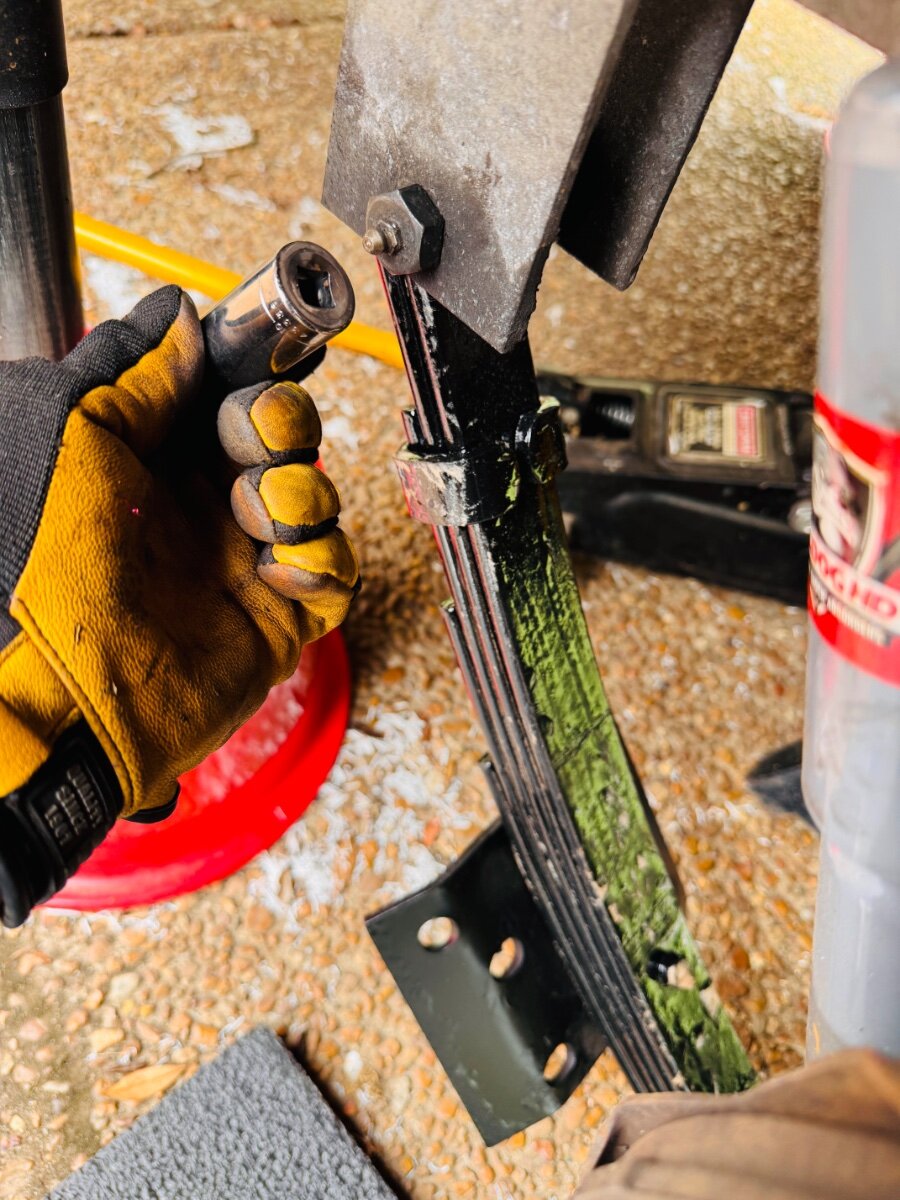
The original Dexter HD 2 in shackles first. Leaf hit the arm, unable to install. Lew sent out 2 1/4 in shackles, able to install but still barely hit. Going to use it and watch for issues. May end up cutting 2nd leaf. Next time you do maintenance check your full articulated clearance. It is not obvious in the neutral position. -
Made in USA leaf springs
rideadeuce replied to Mountainman198's topic in Mechanical & Technical Tips
My question is why doesn’t yours hit. Do you have the same EZ-flex and 2 in or 2 1/4 in shackles. Does your 2nd leaf extend to the eyelet like mine? -
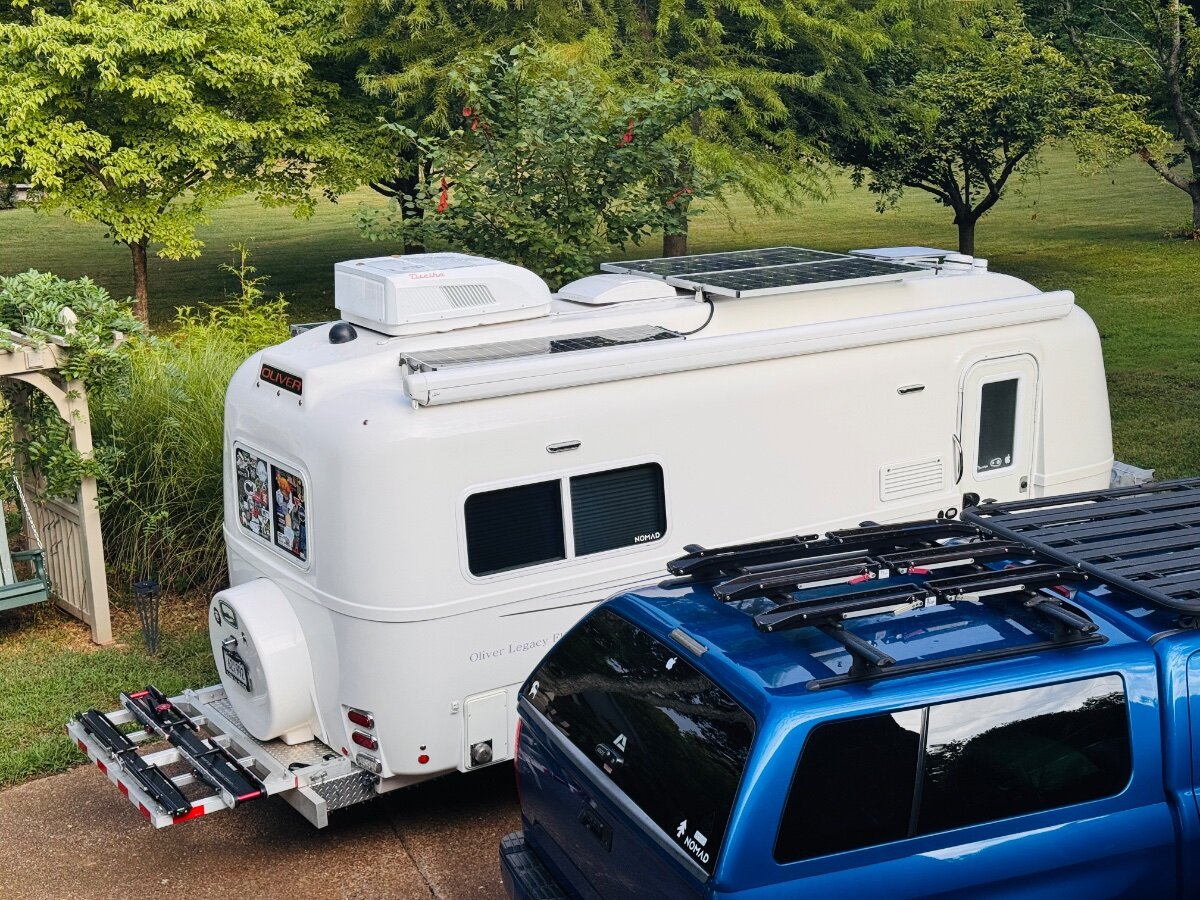
@Ronbrink My PII was a 13.5k. The performance of the new unit has been great. I have been pleased with the new functions like the Auto feature. It has been great for when it is parked not in use. It automatically keeps the 75-80 range depending on outside ambient temperature. I wish there was some adjustment but it is completely automatic. The good thing is that while in storage the unit does turn completely off at times including the fan in AUTO mode. I really like the ability to dump the air straight down over the bed area or switch to the vents. Vent oscillation is a nice touch, you can feel a nice breeze when you are sitting at the dinette. Of course, you can turn it off as well. Still haven’t played with the sleep mode or dehumidification mode. Here in TN it has been very humid and hot with no issues of increased humidity inside. Staying in the 40-60% range. As far as efficiency, it is at least 30-40% sometimes 50% better than the Dometic PII 13.5k. 75 vs 150 amps 10 decimals quieter than the Dometic. Probably the best feature outside of efficiency. The remote, app and panel control work great. Condensate drains off the road side if you tilt the trailer a bit when parked. Between the unit and new Alcan springs the trailer is about 2 in. taller. All in all, very happy with the new Atmos. I think you are going to enjoy it. Let us know what you think after installation. Best, Mike
-
Made in USA leaf springs
rideadeuce replied to Mountainman198's topic in Mechanical & Technical Tips
For me, it is! Keeps me from scraping the back end coming up my driveway. -
Made in USA leaf springs
rideadeuce replied to Mountainman198's topic in Mechanical & Technical Tips
My only reason for adding to the lengthy post is at least in my situation the ALCAN springs are too robustly built. 4th leaf length needs to be cut back some during build or longer shackles are needed to be installed to get full articulation without hitting the EZ-flex arm. Lew actually put hands on his first Oliver this week and said he has another one coming in soon. So he will be looking at this issue more closely and making necessary changes if needed. Hope this helps someone keep their TT off jack stands for 2 weeks during install. Best, Mike -
Made in USA leaf springs
rideadeuce replied to Mountainman198's topic in Mechanical & Technical Tips
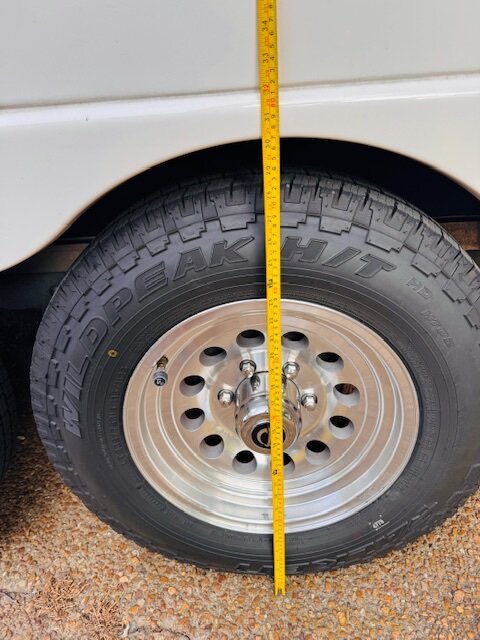
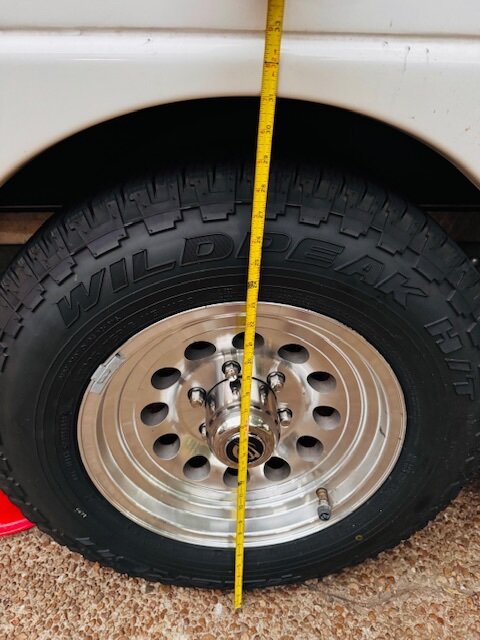
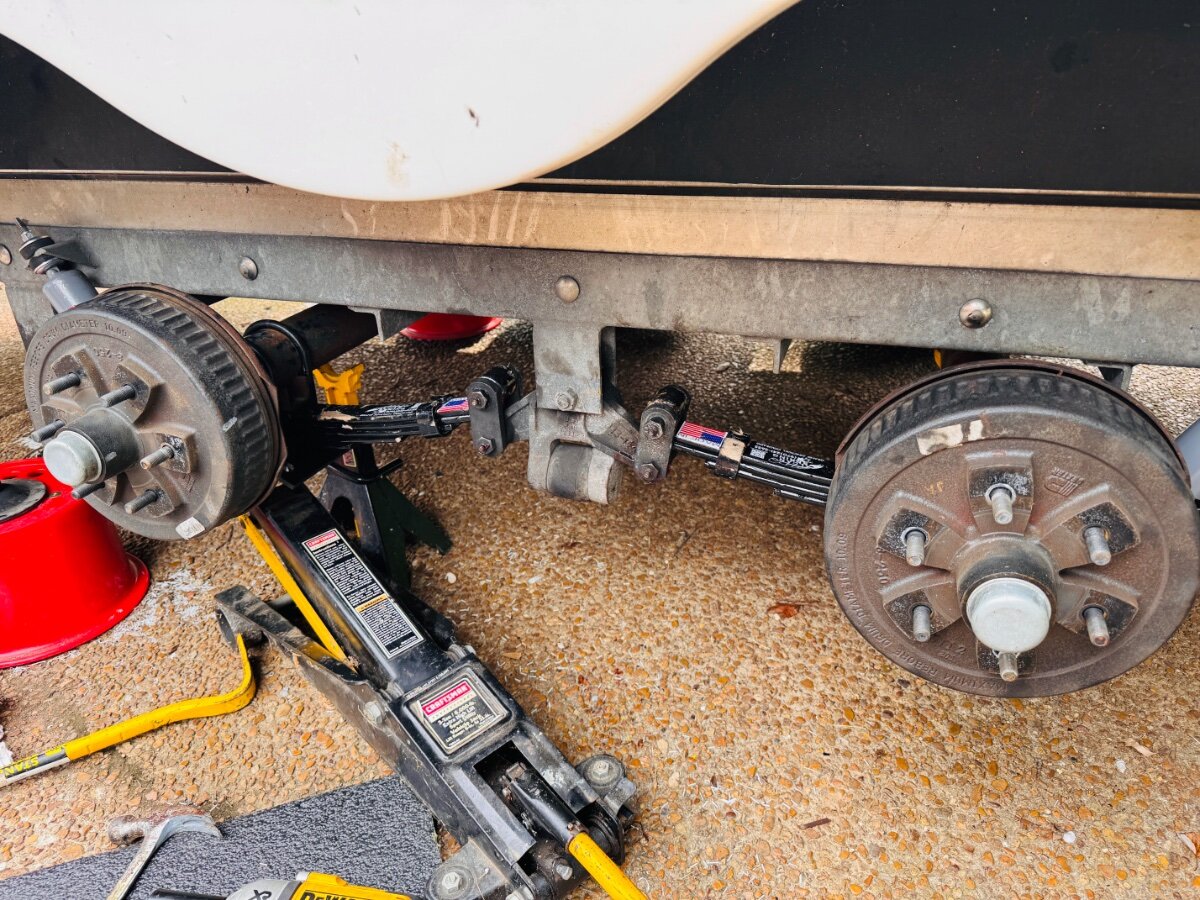
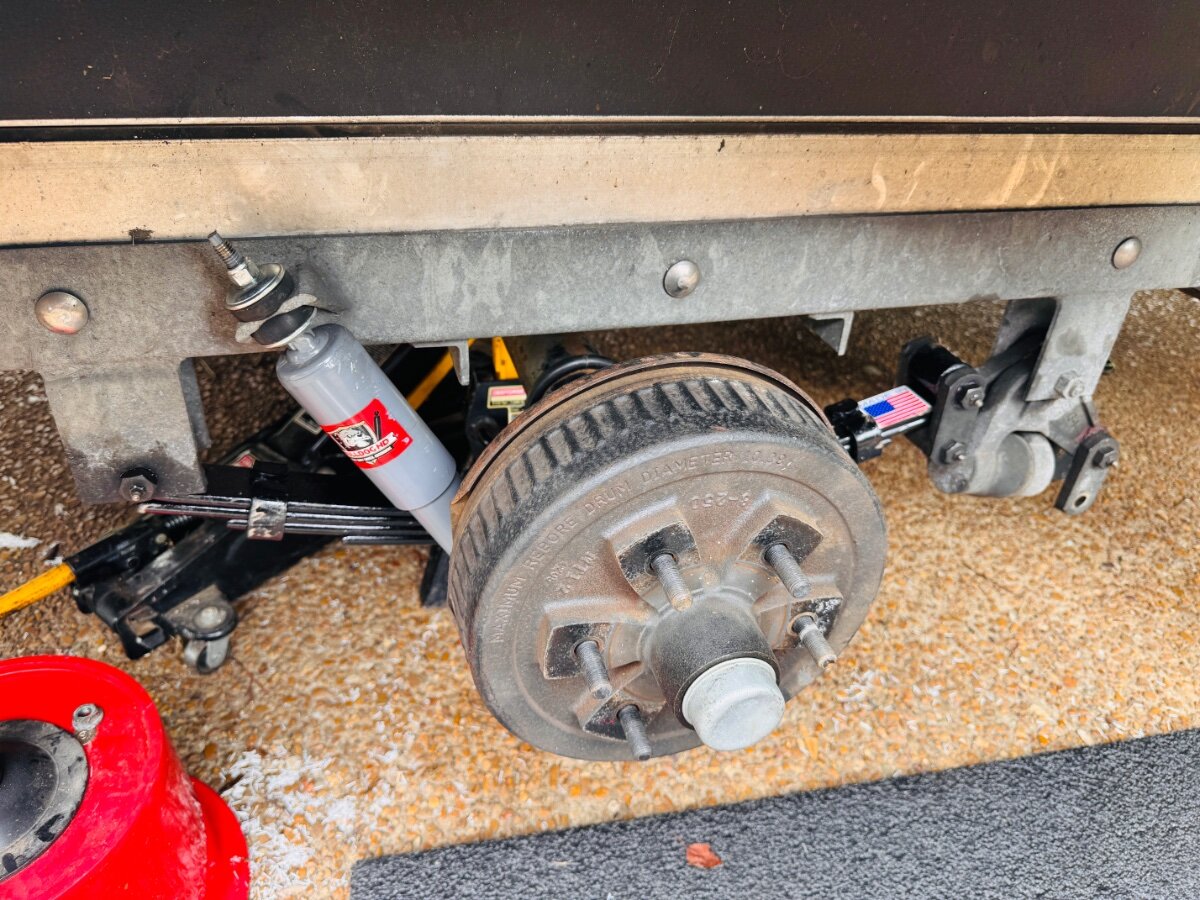
Height measurements before and after ALCAN springs install. About 1/2 - 3/4 in height gain. This is with 2 1/4 in length shackles. Before After
-
Made in USA leaf springs
rideadeuce replied to Mountainman198's topic in Mechanical & Technical Tips
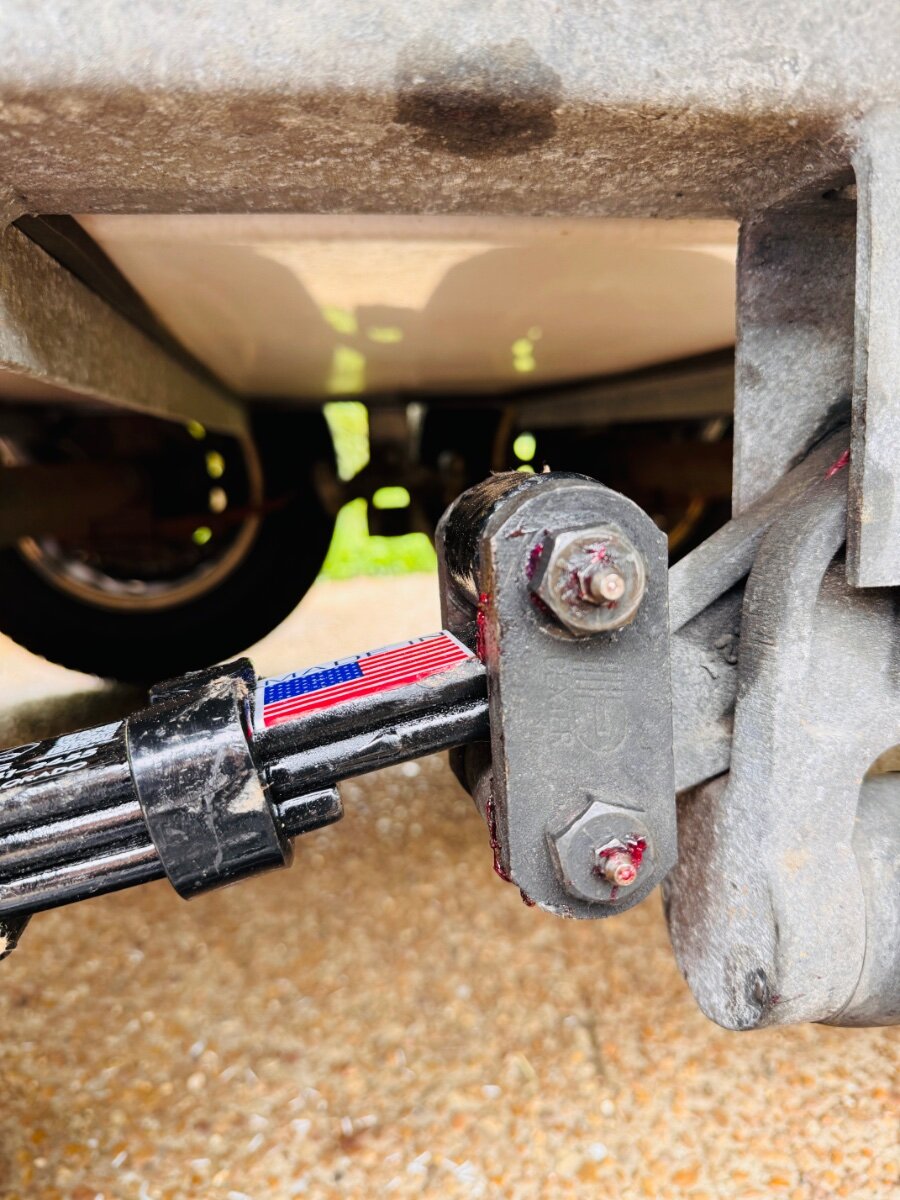
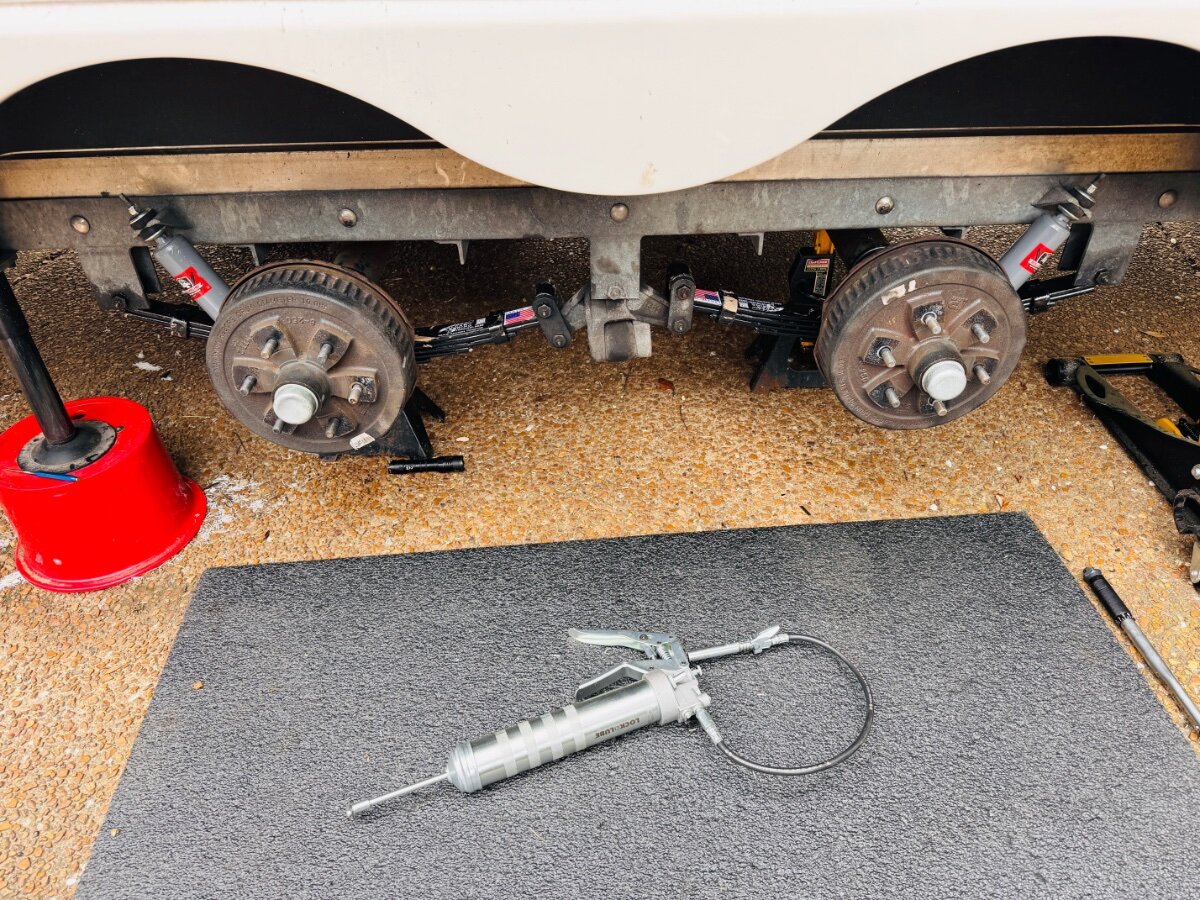
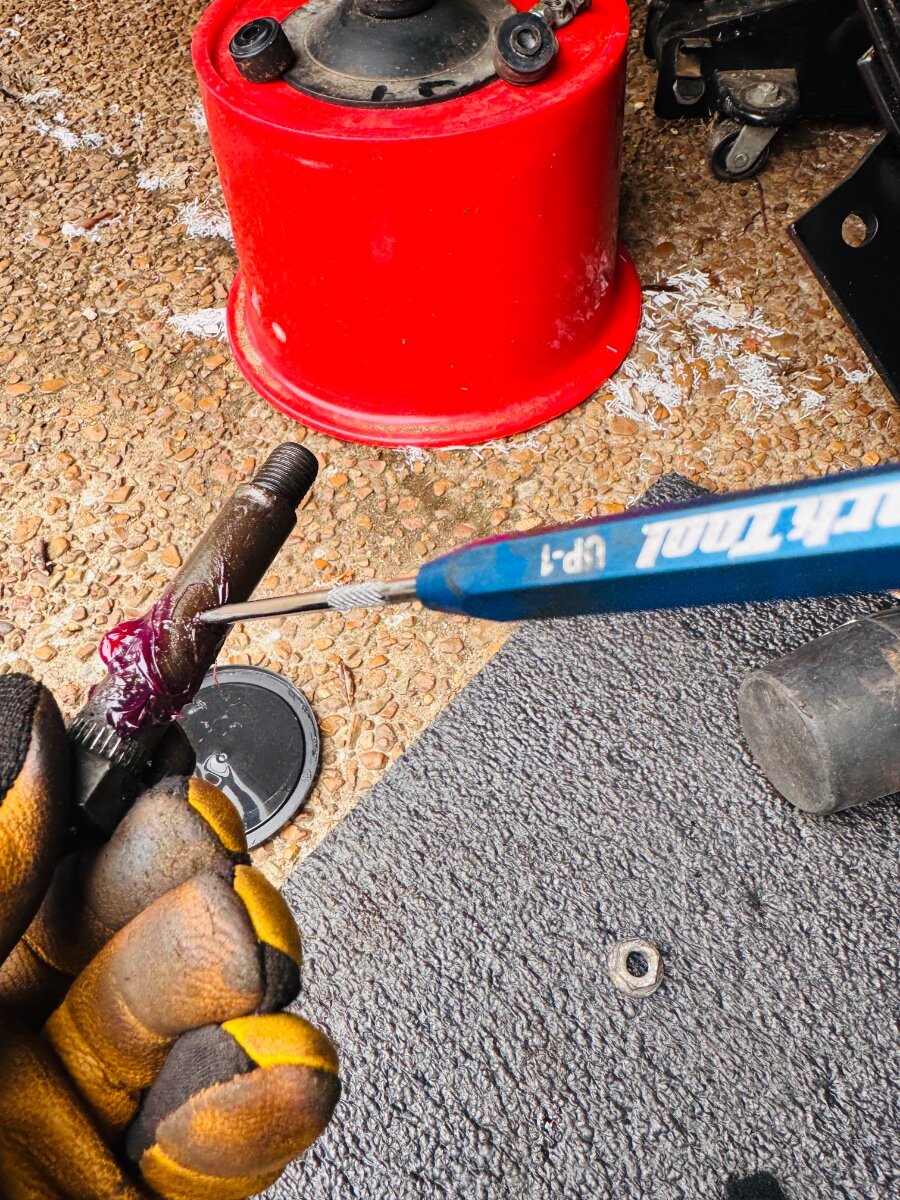
Update to shackle issue installing ALCAN leaf springs. Received the 2 1/4 in long shackles and installed today. Installation went straight forward but when I was greasing the assembly I noticed that when fully articulated the 4th leaf was still hitting the arm of the EZ-flex. So I called Lew and after some discussion he recommended to just keep an eye on it and that he didn't think it would cause any issues since so many other people had many miles on theirs with no reported issue. Also, offered the option using a cut-off tool to take a 1/2 in or so off the length of the leaf. Didn't go that route. Yet! I am interested in what others may notice upon maintenance if theirs hit when fully articulated. @Mountainman198 @MAX Burner and many others. My axles are 3500 lb 3 in diameter axles so may not be the same for everyone. My trailer is back together with new tires, shocks, and springs. Finally.
-
Made in USA leaf springs
rideadeuce replied to Mountainman198's topic in Mechanical & Technical Tips
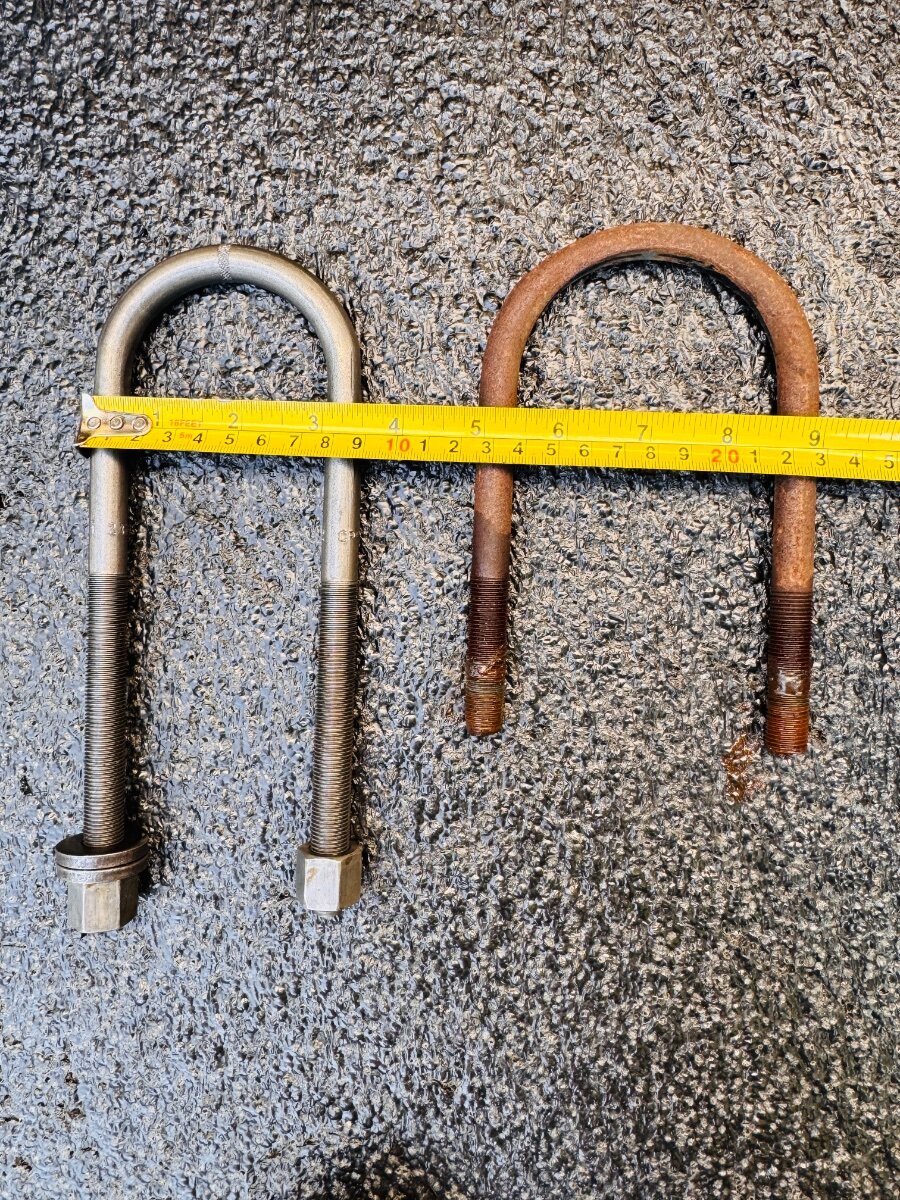
So got the new U-bolts from ALCAN and put the new leaf springs on only to find out the HD 1/2 in. OEM shackles were too short. They are the HD 1/2 in width but 2 in long measured zerk to zerk. The 2nd leaf rides on the suspension arm. Talked with Lew, figured out the problem and he is sending out new 2 1/4in HD shackles to resolve the problem. Confirmed Key points: 3500 lb axles use 4 bolts on the backside of the hub and 1/2 in. U-bolts. They can have tube diameters of 2 1/2 or 3 in. Make sure to measure. 5200 lb axles use 5 bolts on the backside of the hub and 9/16 in U-bolts. They typically have tube diameters of 3 in. Make sure to measure. If you don't upgrade to the shackles Lew sells, make sure even if you have upgraded HD 1/2 in. shackles to measure the length. If it is 2 in they will not work, must be 2 1/4 in. Make sure to measure. Lew was great to deal with as always. @ScubaRx I did confirm that he does not want his 2/12 in U-bolts back. Hopefully, this adds to the conversation since both of these issues came up for me. Cheers, Mike
- 922 replies
-
- 13
-
-
-
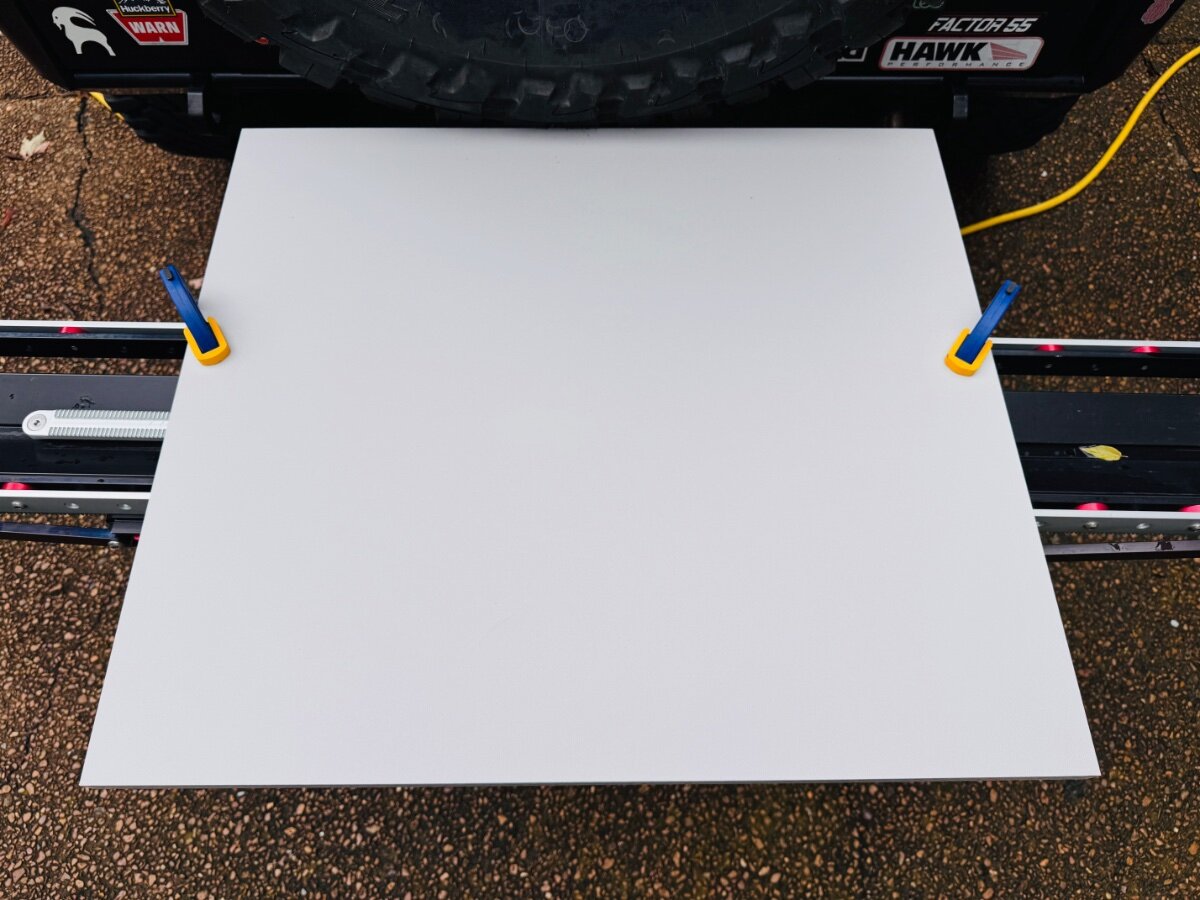
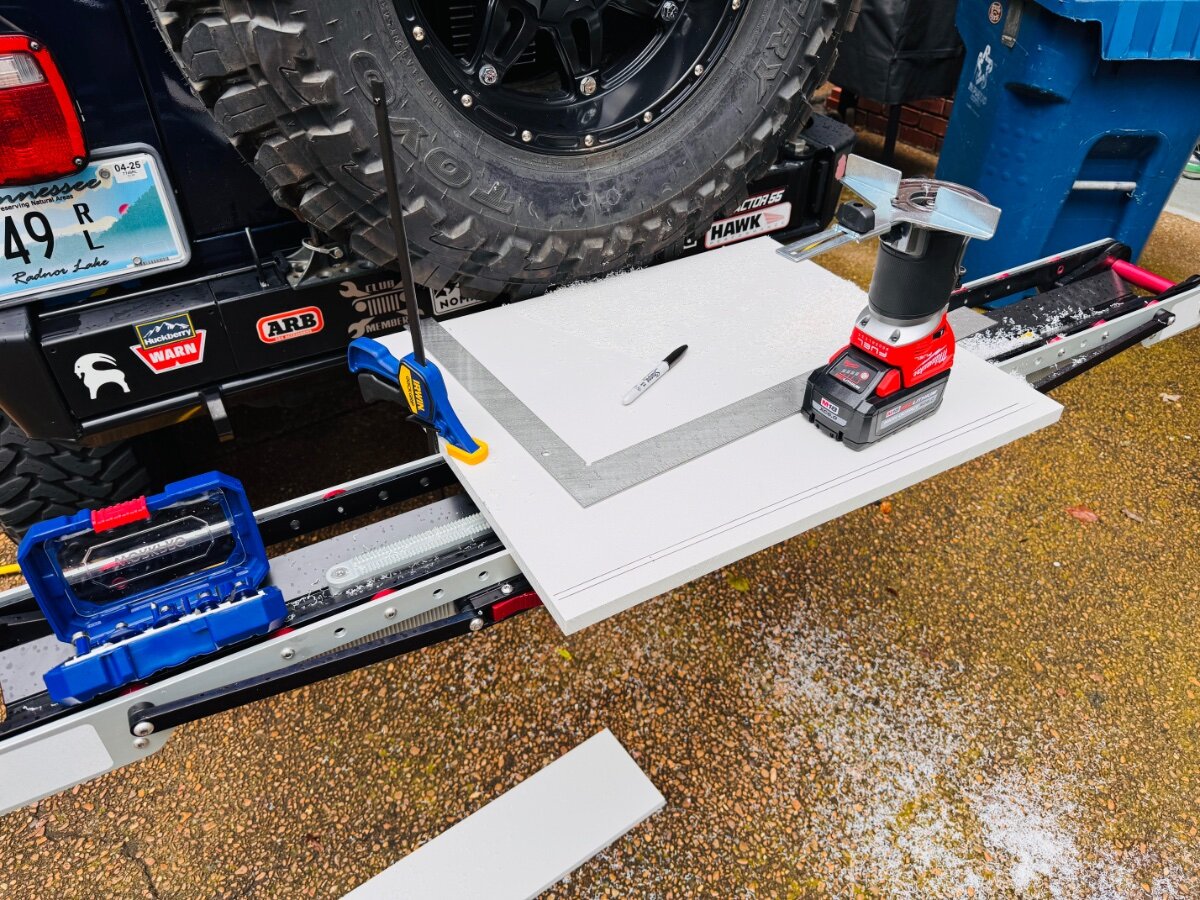
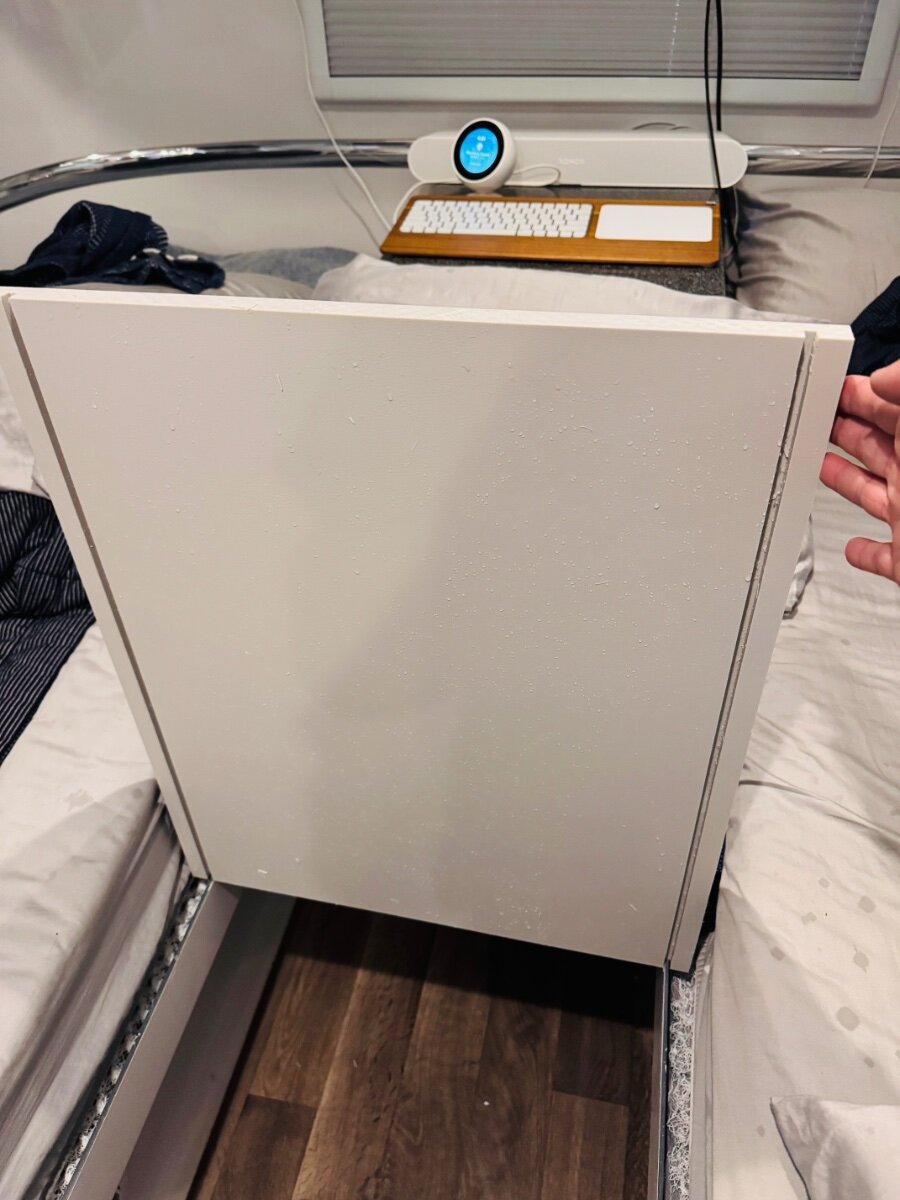
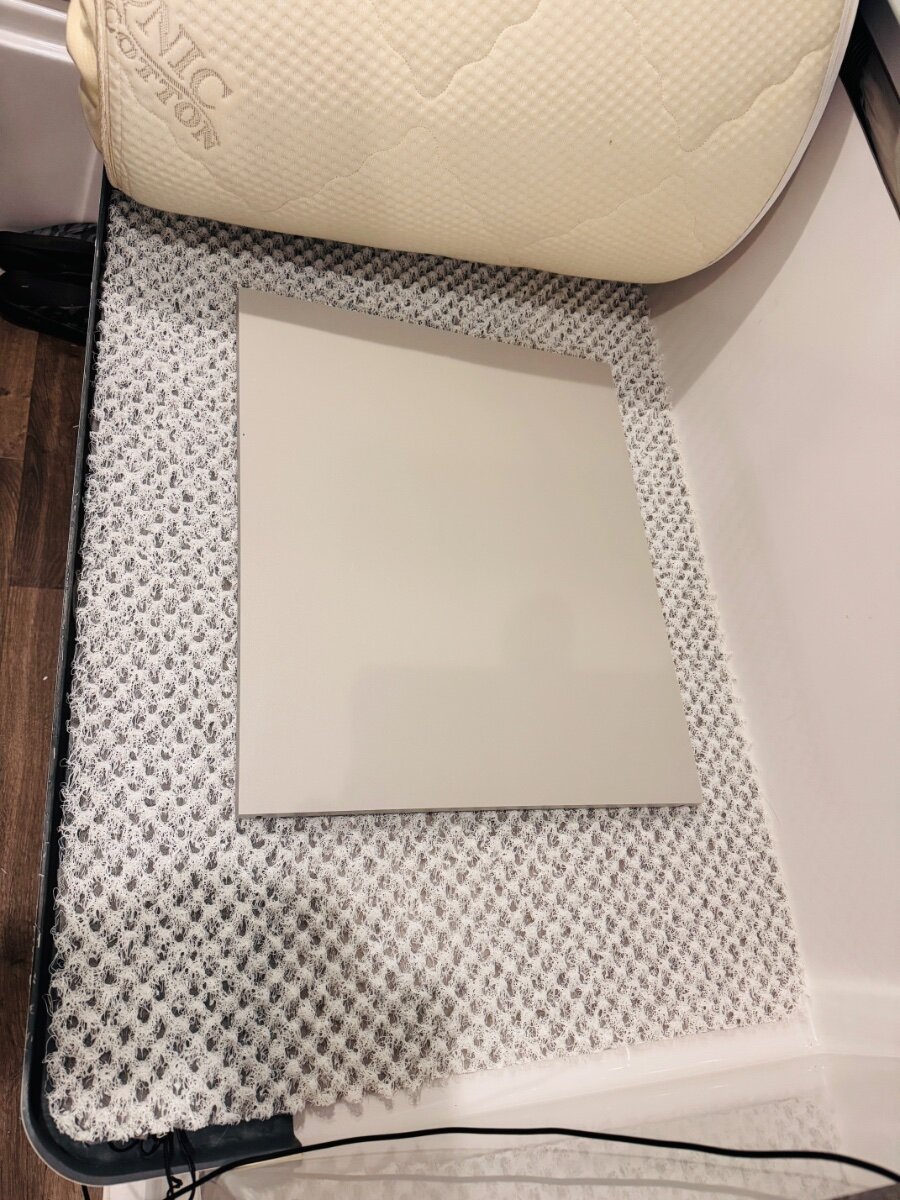
So after some time trying to sleep with 2--3 kids in the Ollie and not wanting to mess with taking down and setting up the dinette table. I thought there might be an easier, simpler way. First, we tried a solution that worked well once the base was setup but after some time it became clear it was too time consuming and cumbersome for us because we had to stuff it in the back of the Tundra. My search for something different was based mainly on the requirement that it could be stowed easily in the travel trailer. Finally, I decided to try something. I bought two 24x27 sheets of HDPE 3/4 thick and cut them to the width of the space between the mattresses and then routed a channel for them to sit on top of the rails firmly in place. This is how it turned. Please excuse my wood working skills. 20 in x 24in with 1/4 in. channels. Worked perfectly. Very sturdy and stows under the mattress on top of the moisture mat. If you have a router, the materials were less than $100. I used the color dolphin grey. Best, Mike
-
Made in USA leaf springs
rideadeuce replied to Mountainman198's topic in Mechanical & Technical Tips
This is not entirely accurate. Lew just sent me out U-bolts that were 1/2 in. for my 3500 lb axles with 3in tubes. The only problem for me is if the replacement U-bolts are 9/16, I will have to drill out the U-bolt plate so they fit. Easy to modify. Bottom line and the reason I first posted about the U-bolts is to point out to be sure you measure your axle diameter or get your spec sheet from Dexter before ordering. Lew has no way of knowing what you have except experience and an educated guess due to Dexter’s non-conformity building their axles. -
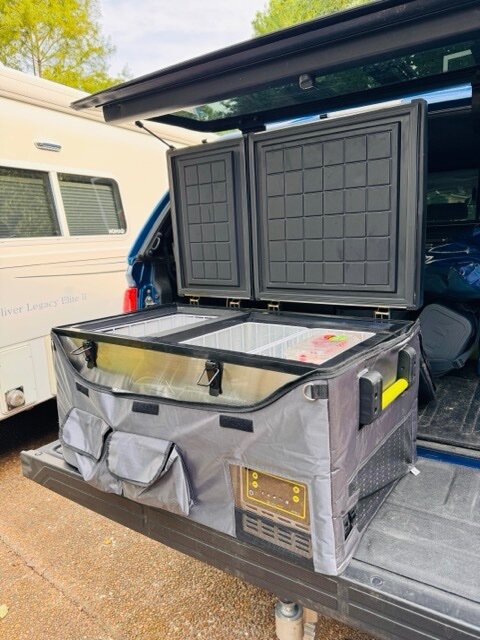
This new freezer/fridge combo by GZ proved to be more efficient and better in every way than my old reliable ARB fridge. Bluetooth connectivity in cab monitoring was perfect every time. Temps in the unit were always within a degree or two even in the heat wave we experienced in D.C. It was nice to have a true partition for refrigerator items vs freezer items. Dual side plugs for power. Ran perfect off DC outlet in bed of truck or via GZ LiFePO4 solar generator. Not always needed on our week longs trips but for longer trips it is perfect for extra meat, milk, OJ, etc. Overloading the Dometic 3-way fridge just makes it not work effectively. LG compressor brought the temperature down quickly on initial startup. The only downside is the size, takes up a good bit of room but for us when needed is worth the trade-off. They do make a smaller version that is a single zone. .
- 1 reply
-
- 7
-
-
Made in USA leaf springs
rideadeuce replied to Mountainman198's topic in Mechanical & Technical Tips
1/2 is 65 ft/lbs 9/16 is 90 ft/lbs Is correct. Make sure to tighten bolts in a cross-pattern and re-torque after 100 miles. -
Made in USA leaf springs
rideadeuce replied to Mountainman198's topic in Mechanical & Technical Tips
I suspect it was not worth the shipping cost for him because he did not do an exchange just shipped out the correct U-bolts same day. I had talked about my axle tube widths when the order was placed due to the confusion about what U-bolts to order expressed here on the forum (2 1/2 in vs 3 in tube width). Lew did say that most D35 axles he had seen from us were 2 1/2 in tube width. So, I believe, that is why he sent them. Called mine an oddball and that from now on he will make sure that the width of the axle is confirmed. Excellent customer service from Lew and others at ALCAN spring. It doesn’t hurt that over 100 Oliver owners have ordered upgraded springs from them. Again, if anyone can use them on this forum and can do a local pick-up, just PM me. They are our yours, I don’t need them. -
Made in USA leaf springs
rideadeuce replied to Mountainman198's topic in Mechanical & Technical Tips
I started to install the ALCAN springs that came while I was on vacation. I was surprised to find the 1/2 U bolts were 2 1/2 in instead of 3 in. I have #3500 lb axles with 3 in tubes. I guess they can be either size diameter. Contacted Lew and he quickly verified pics and said new ones would be in the mail tomorrow. This is just a reminder for everyone that orders to make sure and give them the tube diameter of your axles. If anyone is in need of the 2 1/2 U-bolt set I have just message me.
-
Victron Multiplus and MPII Feedback Request
rideadeuce replied to jd1923's topic in Ollie Modifications
This mount was easy to make and has been rock solid. I glued down a thin heavy duty rubber mat and once epoxy was applied to HDPE put the assembly in place and pushed down onto the mat with HDPE push against the inner basement wall for a minute or two to try and absorb any vibration and prevent rattling. Seems to have worked. Low hum when charging mostly, no rattles. The mount has to be heavy duty... the MP2 weighs almost 50 lbs. And yes, a temperature actuated exhaust fan would be great. You can program it through a Victron system pretty easily. On my list...
-
First highway roadtrip with Atmos 4.4 => MI to TN
rideadeuce replied to rideadeuce's topic in Ollie Modifications
So after unloading from our trip I decided to play with the settings a bit. Remote is easy now that I dedicated some time to learning it. Also, so far the AUTO mode is starting to make sense. In FULL AUTO mode today, ambient outside temperature is 81 degrees F. Time: 12PM As soon as I put it in auto mode it showed AUTO cool with the number 77 showing. The inside ambient temperature was 72. The fan continued to run for a few minutes then the entire unit turned off including fan. Then the display showed AUTO Heat 68 degrees F. So I am assuming it will not turn on again unless the temperature drops below 68 or the Auto cool kicks in. But what temperature that is still unknown since you cannot set it manually. Strange that you can’t manually set temps, but the AUTO setting (68-77) may end up working great for certain situations like when the unit is plugged into shore power in my driveway. I will update as I follow how the unit reacts to outside ambient temperature throughout the day and night. Time: 1pm. Went into camper, AUTO mode display had switched from HEAT to COOL 77, Fan only running no compressor. Inside cabin temp 75 degrees. Ambient outside temp 83 degrees. TIme: 1:25pm. Unit off. AUTO mode heat 68 displayed again. Ambient inside temp 71. Interesting, seems like this setting may be great for when the Ollie is parked plugged in at home. It would save the fan motor from constant use. But would never work for me in use because I am hot natured and would need lower settings. Time: 1:50pm. Once cabin temp reached 76 degrees fan only turned on. At least, I can’t hear compressor. Pulling around 300 watts. Again, I believe this mode will work great while stored/parked. I like to keep my camper plugged in and connected to WiFi. @Ronbrink I believe the 15k BTU unit will be great for the Ollie because for one it is more efficient than other 13.5 BTU units and second the mode settings and unit design allow for the better management of humidity. But agree, more actual use is needed to confirm. Best, Mike