John E Davies
-
Posts
5,759 -
Joined
-
Last visited
-
Days Won
243
Everything posted by John E Davies
-
That is what I was talking about previously, your shelves are identical to mine. Those have to be bent outwards. You can clip those cable ties and then flip over part of the shelves so you can put three 1/2 gal milk bottles in there, resting on the strong glass shelf. That alone will take some load off the steel. A couple of 3 liter plastic juice bottle will fit too. And put drinks in the door… only light stuff up high. I guess we need to add all this stuff to this thread: https://olivertraveltrailers.com/forums/topic/8827-thread-for-isotherm-cruise-130-elegance-2-way-compressor-fridge-the-unit-used-in-2023-models/ John Davies Spokane WA

-
See the thread, I only had to add a temp sensor. This is wandering off topic. Sorry LeBill! John Davies Spokane W/
-
No, that is why I am asking if the Oliver installations include it. It was a little less than $200. Installation with the fridge removed at the factory would be a WHOLE lot simpler than having to retrofit it later. Up to 25% energy savings from compressor-efficiency gains Up to 40% energy savings with combined effect of cold-energy surplus stored in food and drinks https://boattest.com/isotherm-intelligent-temperature-control John Davies Spokane WA
-
FYI, if Isotherm doesn't step forward with a fix, I will probably make new shelves out of heavy gauge aluminum sheet, bent up in front and back for rigidity. There is a fix for this.... John Davies Spokane WA
-
John Davies Spokane WA
-
Can you tell me if your Ollie has this Intelligent Control? If so, please PM me with some pictures. https://olivertraveltrailers.com/forums/topic/9169-how-to-isotherm-intelligent-control-for-cruise-130-refrigerator/ John Davies Spokane WA
-
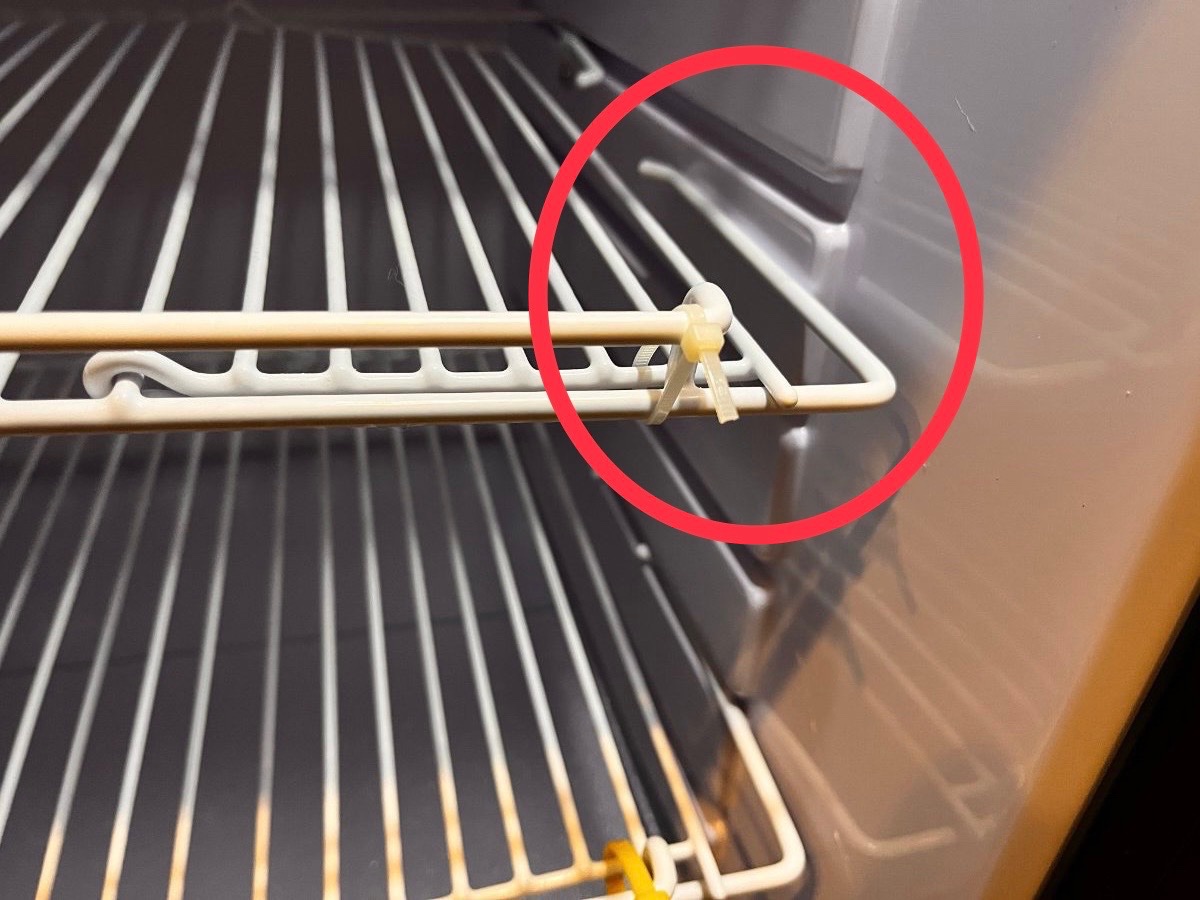
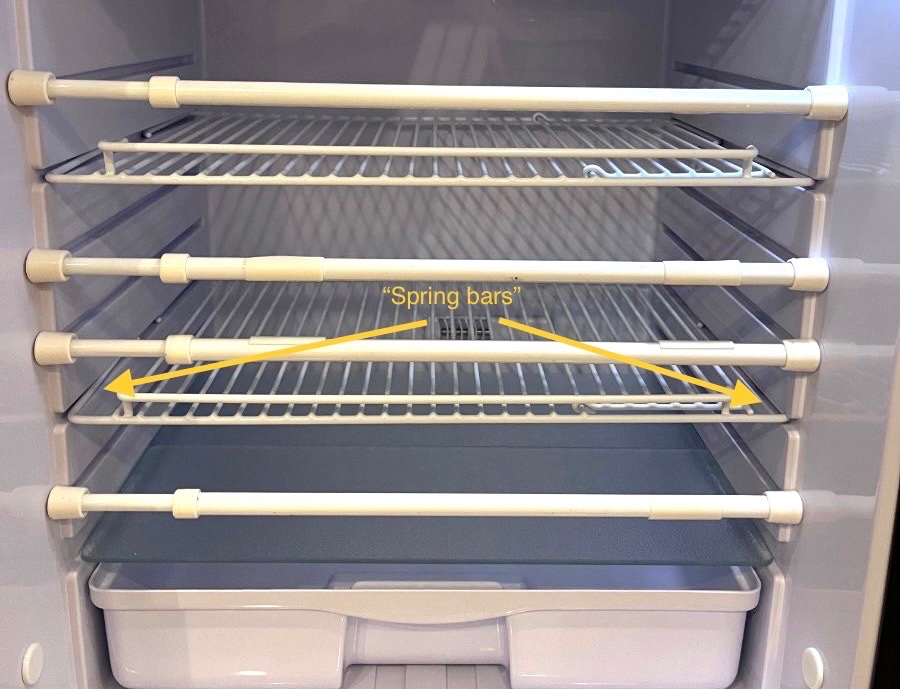
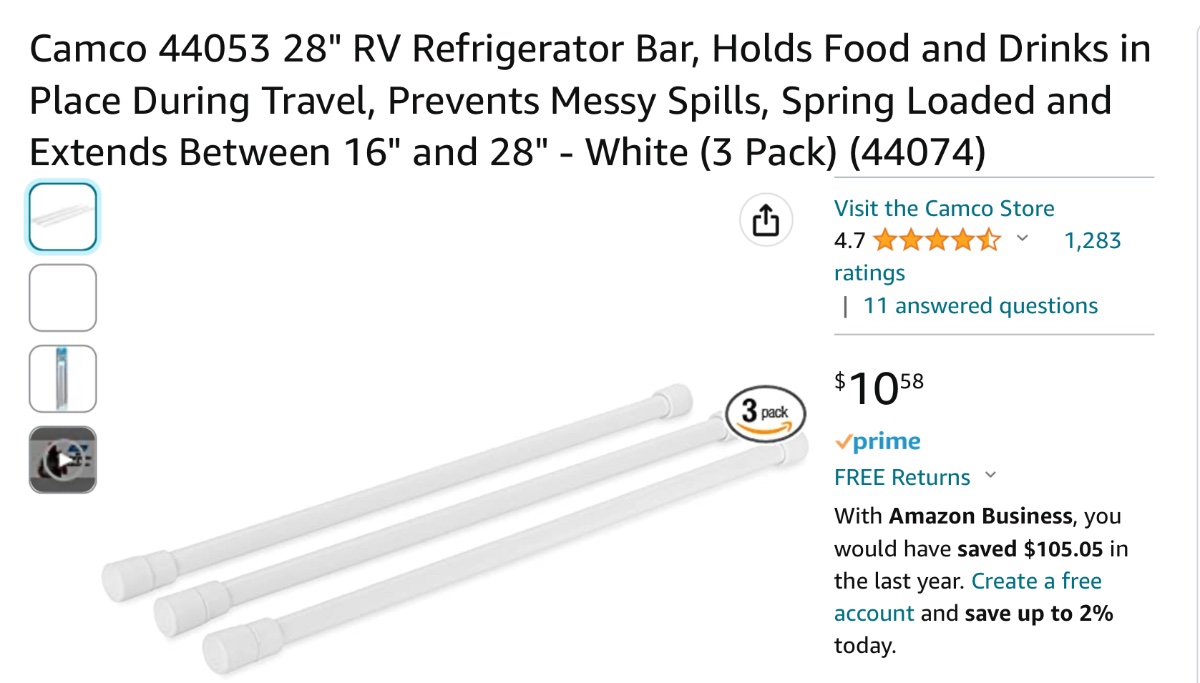
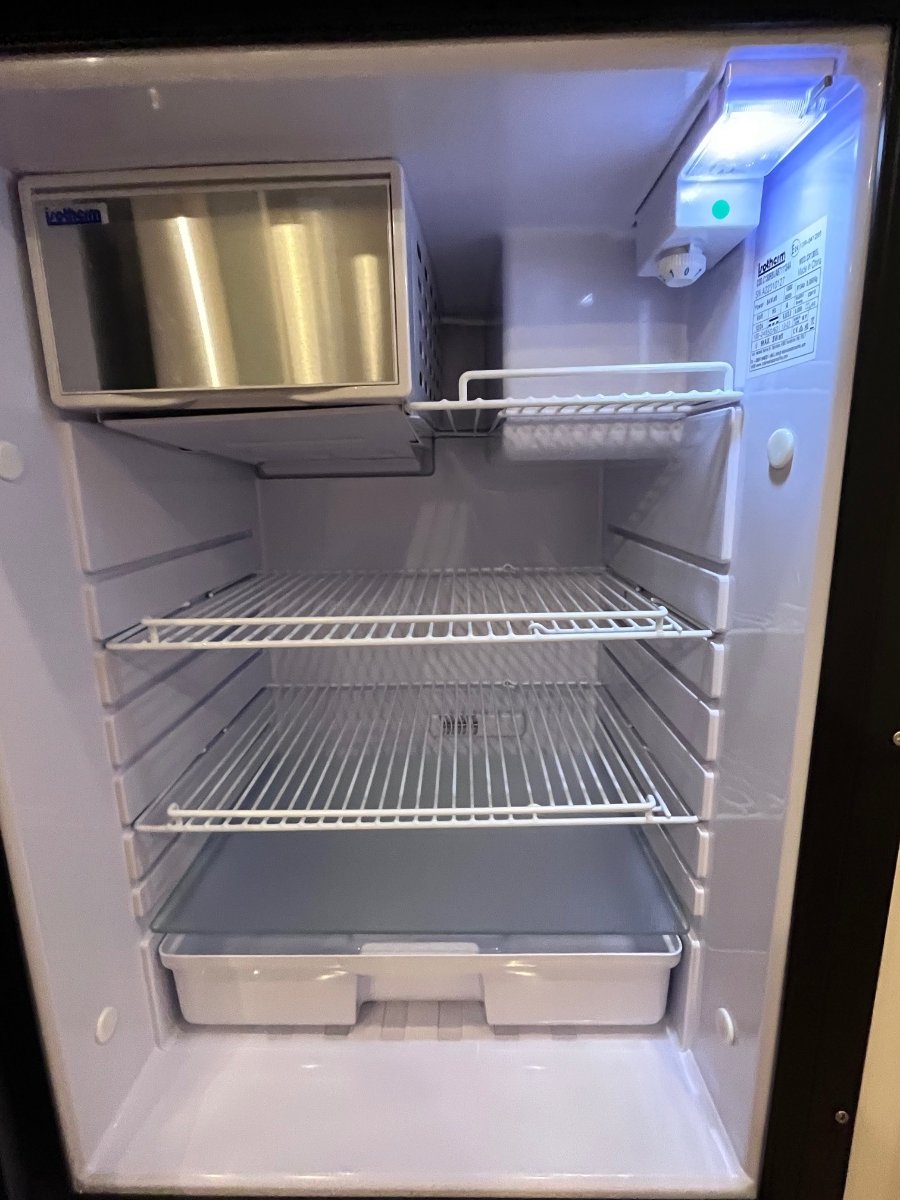
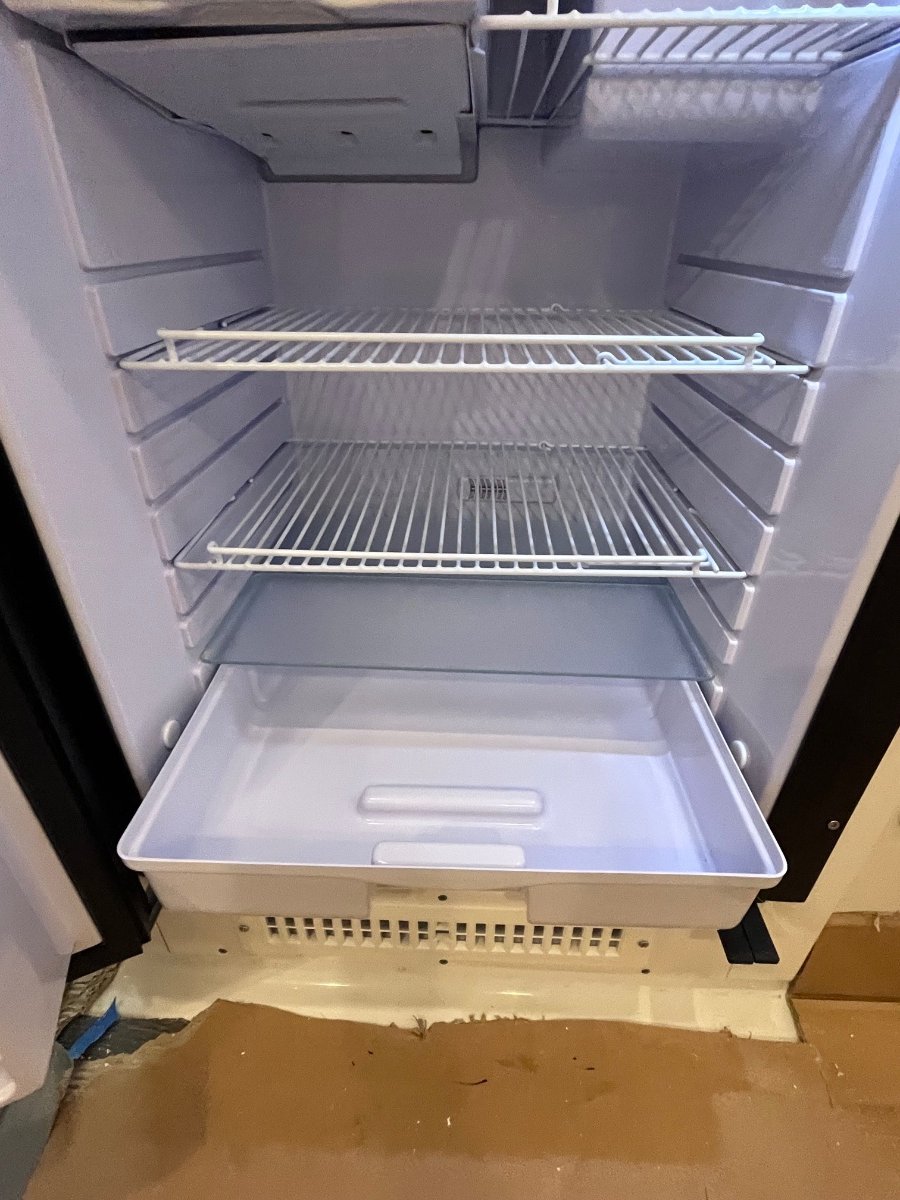
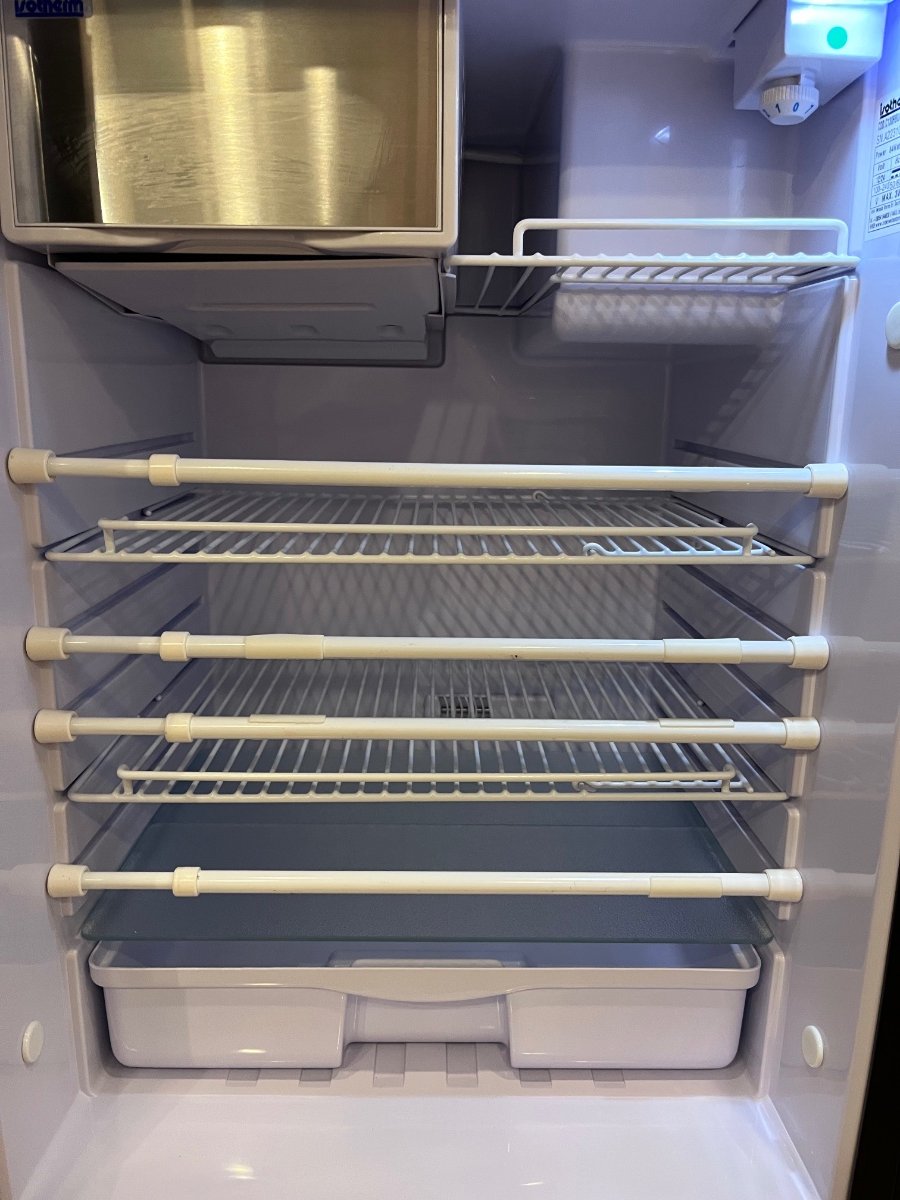
I just installed one, into Hull 218, and the shelves are a disgrace. You need to remove them, bend the side “spring bars” outward (that ride in the grooves), I doubt that they have an actual name, and try to make the shelves straight again. They are much smaller gauge wire than the old Dometic 3 Way, and seem to be made from old wire coat hangers. And they seem to have the same strength, meaning none…. I am not impressed, I really hope a stronger set becomes available. I can’t file a claim with Oliver, but you and other Isotherm owners should. In the mean time try to keep the heavy stuff down low and in the bottom tray. Adding adjustable spring loaded fridge bars, braced against the sides, to keep foodstuff from sliding around should also help. These used to be pairs, I cut them into “singles”. You could also add small plastic clamps to all the shelves, to fix them in place, but I suspect that they would still deform. John Davies Spokane WA
-
People do this all the time, but please do not join them, it really is a bad idea. Not only is it a violent location, it is filthy and super wet . Not a good location for any kind of powered equipment. I carry a 50 pound ebike (battery removed) on a tray close to the bumper. It’s OK, and when I had my cargo basket there, with two full jerry cans of fuel, it was just OK, but far from ideal. https://olivertraveltrailers.com/forums/topic/3263-how-to-move-the-factory-cargo-tray-to-a-rear-rack/ John Davies Spokane WA
-
This has been discussed countless times, do a search and then come back with any specific questions. We cannot read your mind, you must be more communicative. John Davies Spokane WA
-
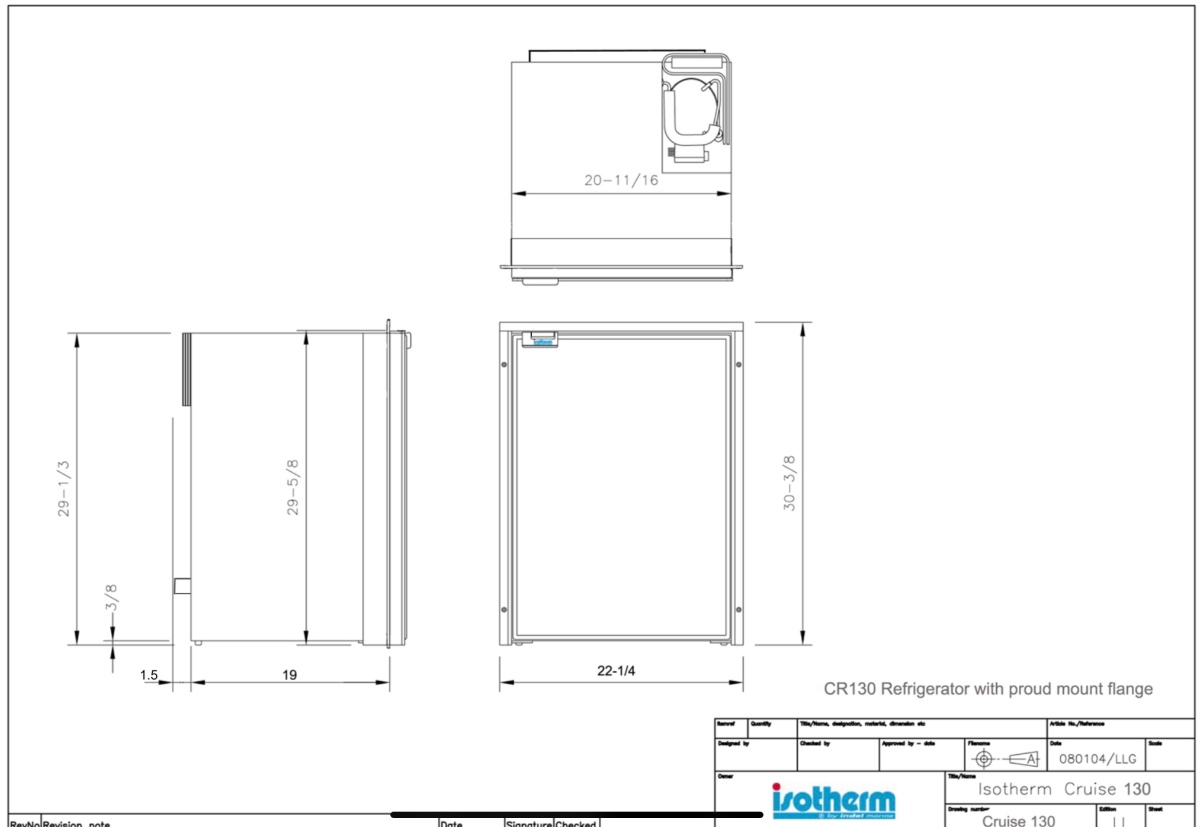
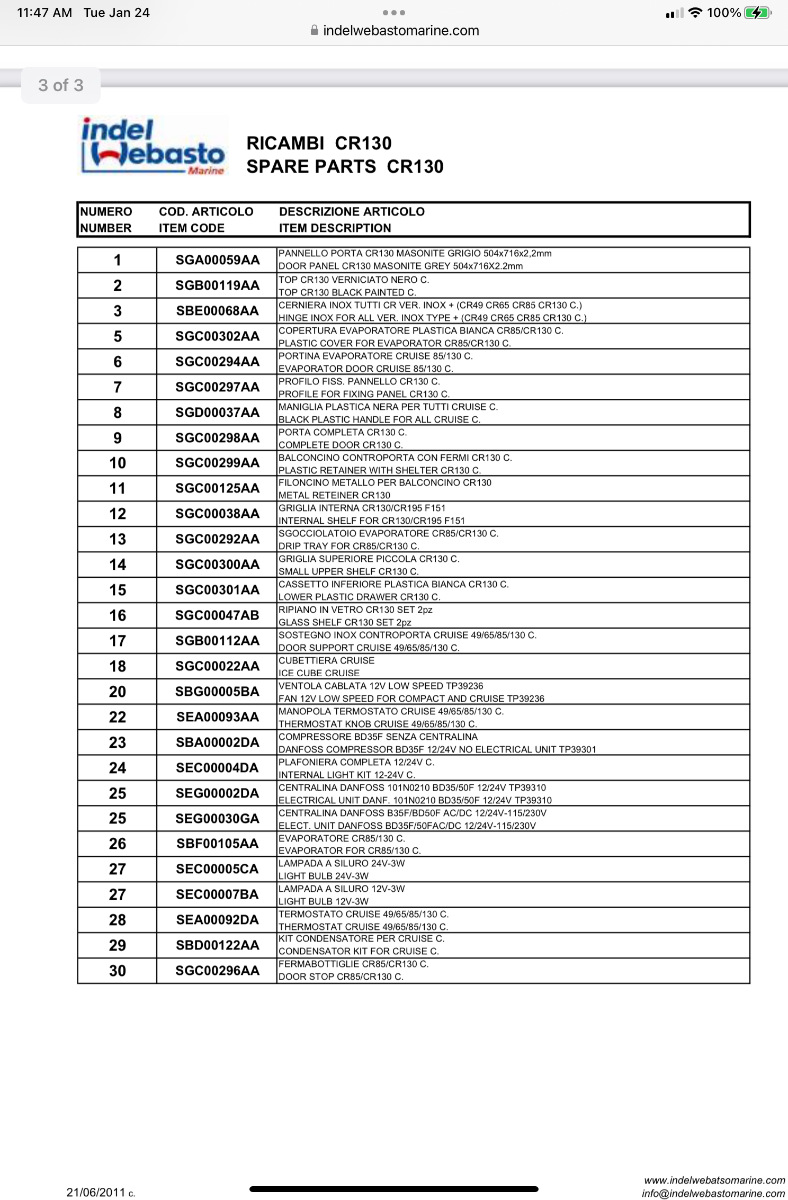
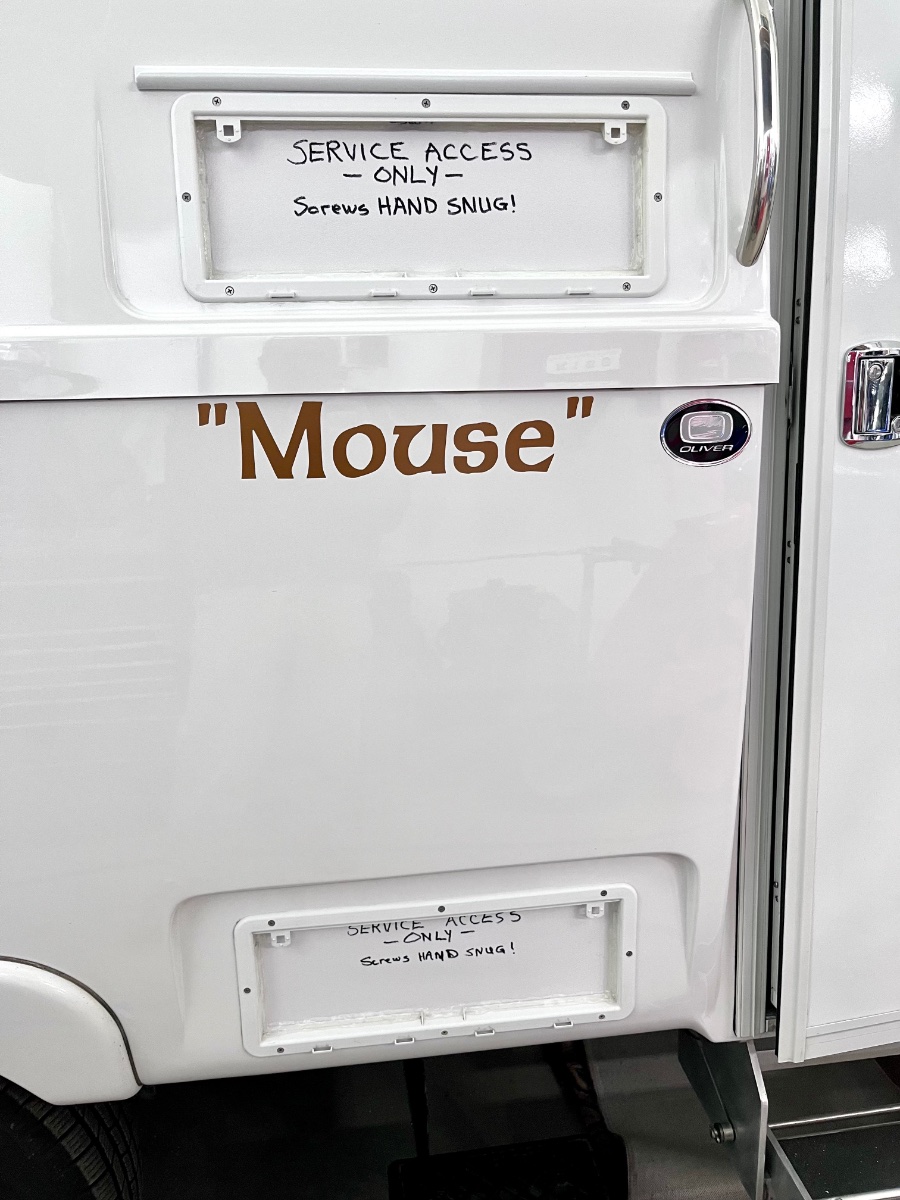
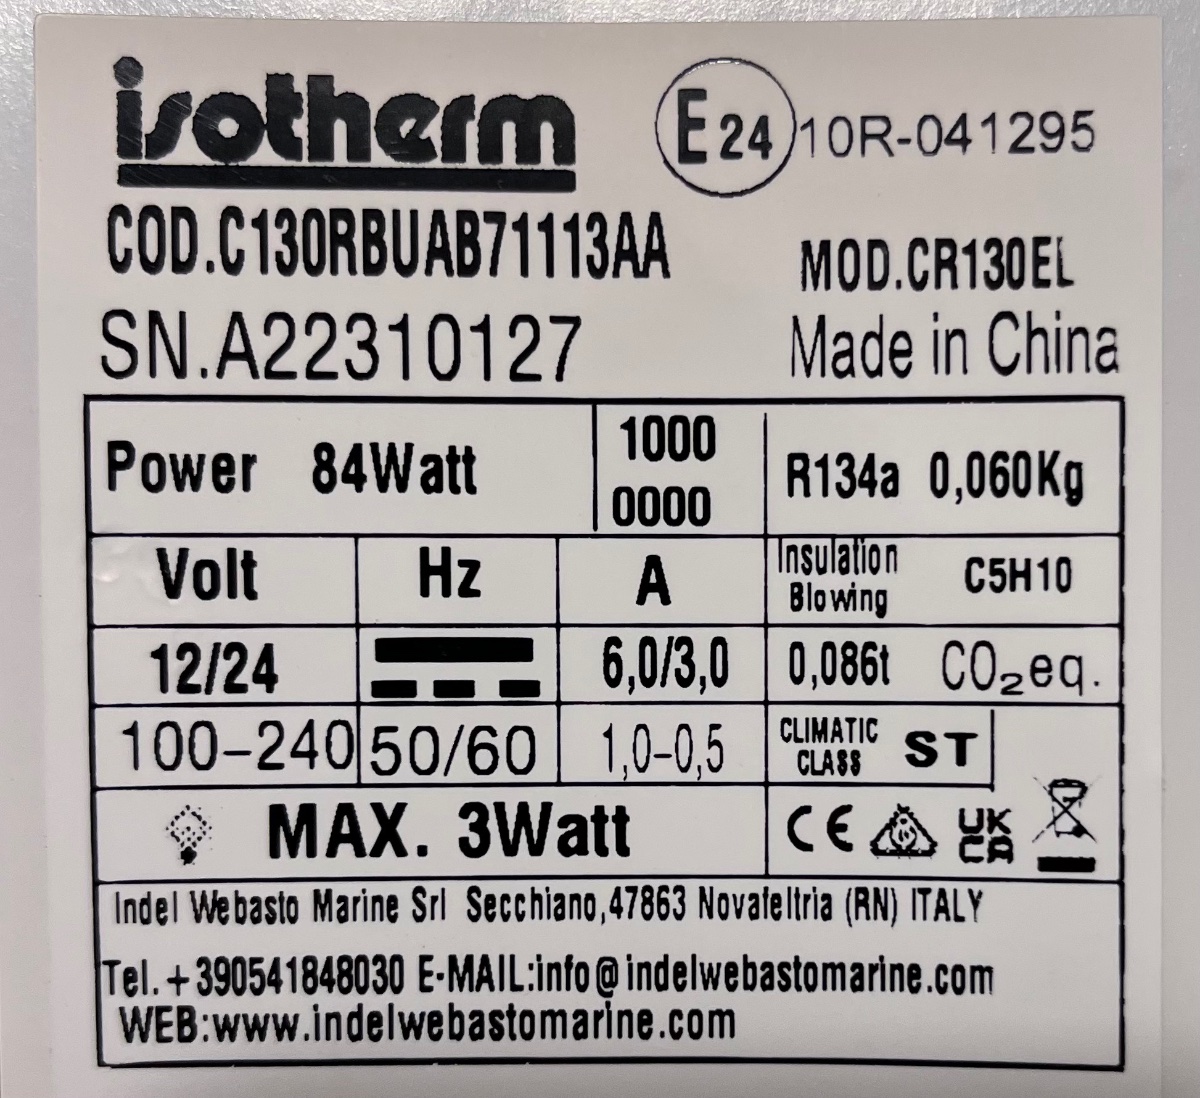
 Here is the Removal and Service Notes for the Owners Manual: +Isotherm Cruise 130 2-Way Compressor Refrigerator Removal and Service Notes Hull 218 “Mouse” .pages John Davies Spokane WA
 -
Here is the Refrigerator Removal And Service Notes document I made for the Owners book: +Isotherm Cruise 130 2-Way Compressor Refrigerator Removal and Service Notes Hull 218 “Mouse” .pages John davies Spokane WA
-
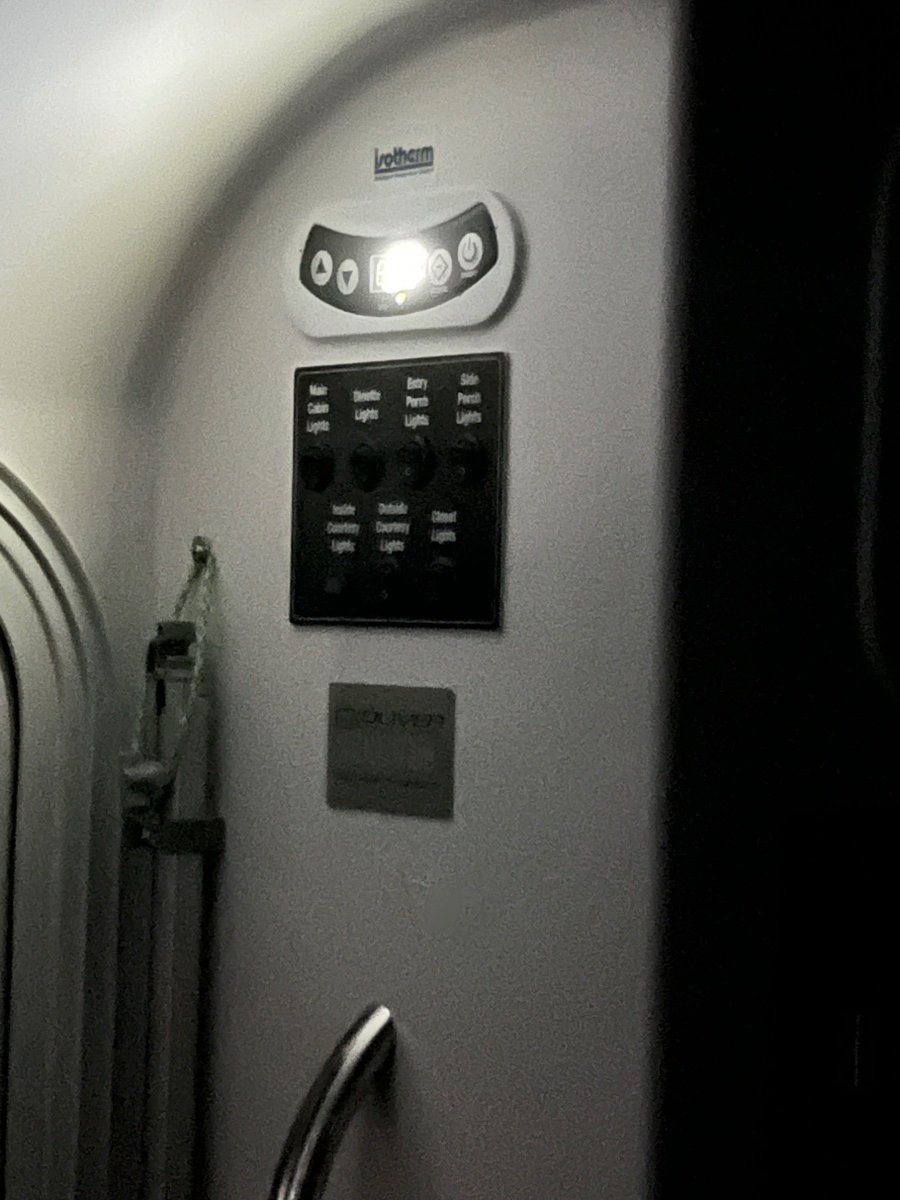
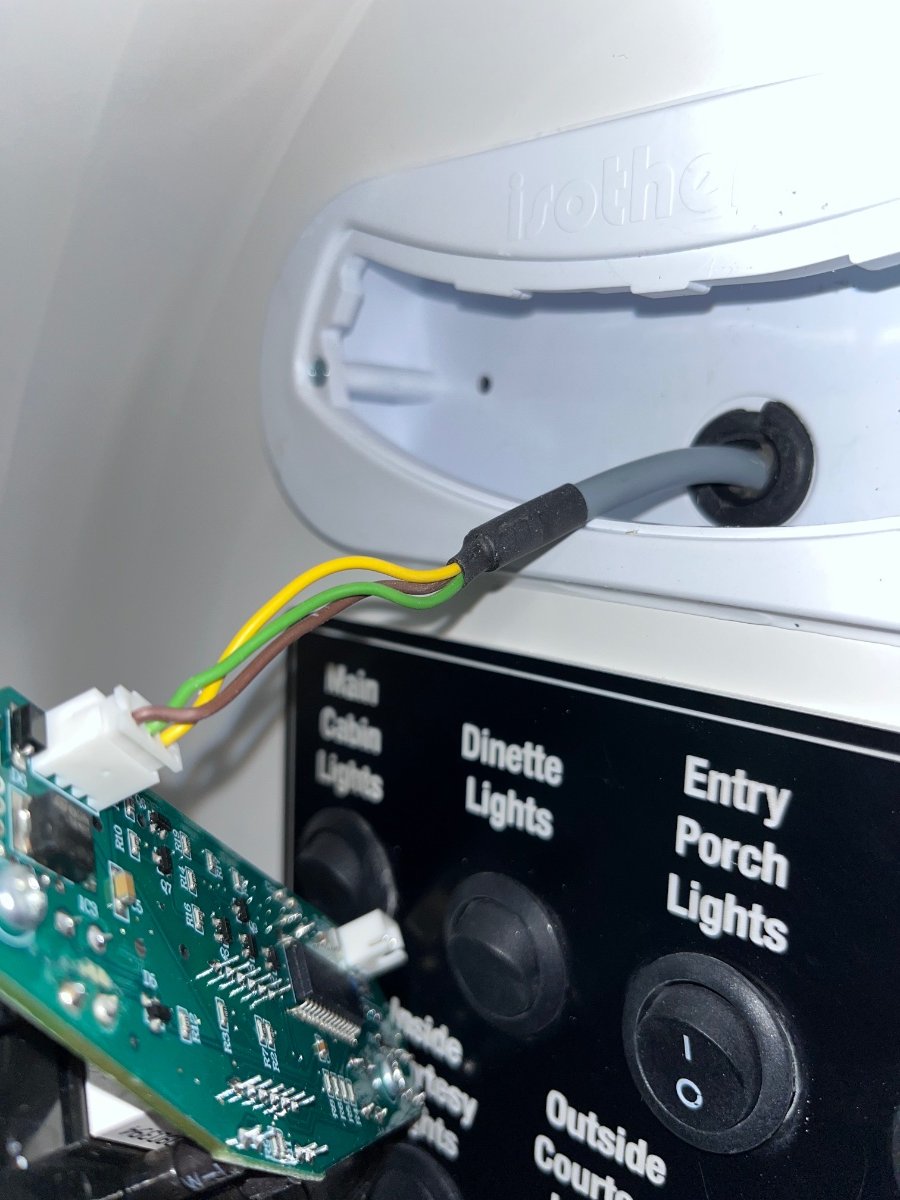
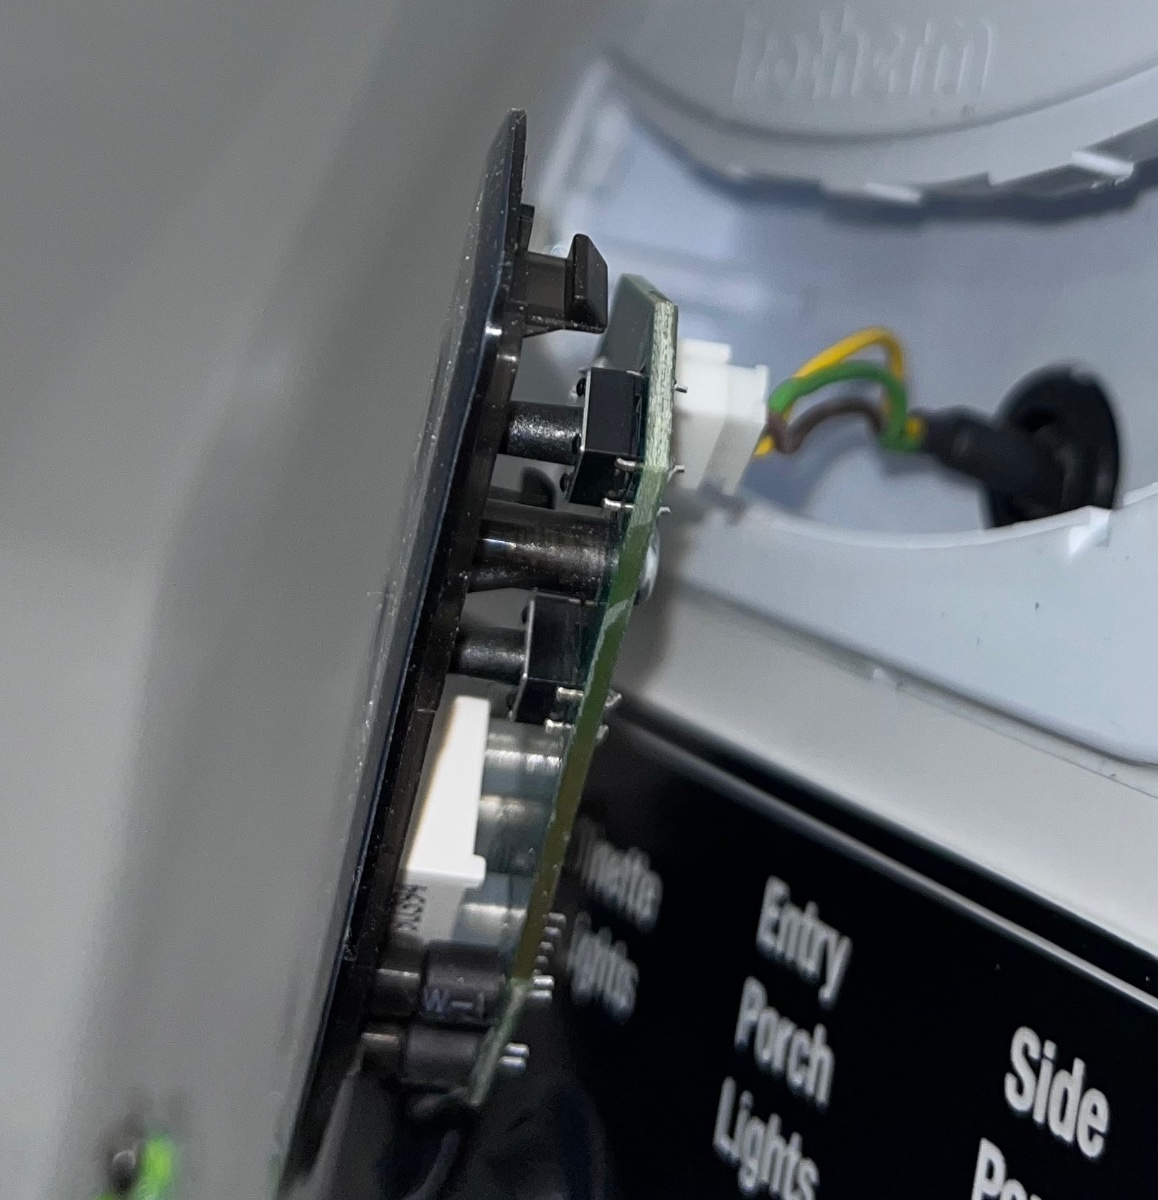
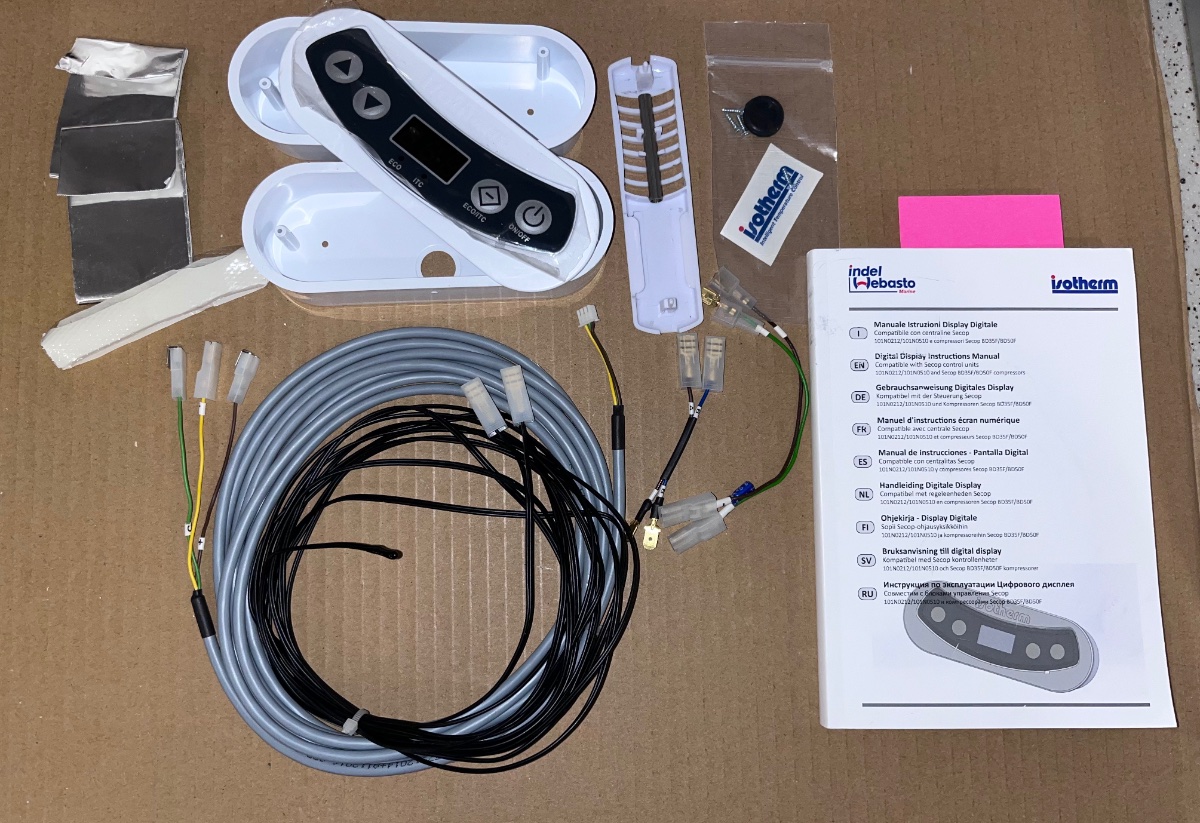
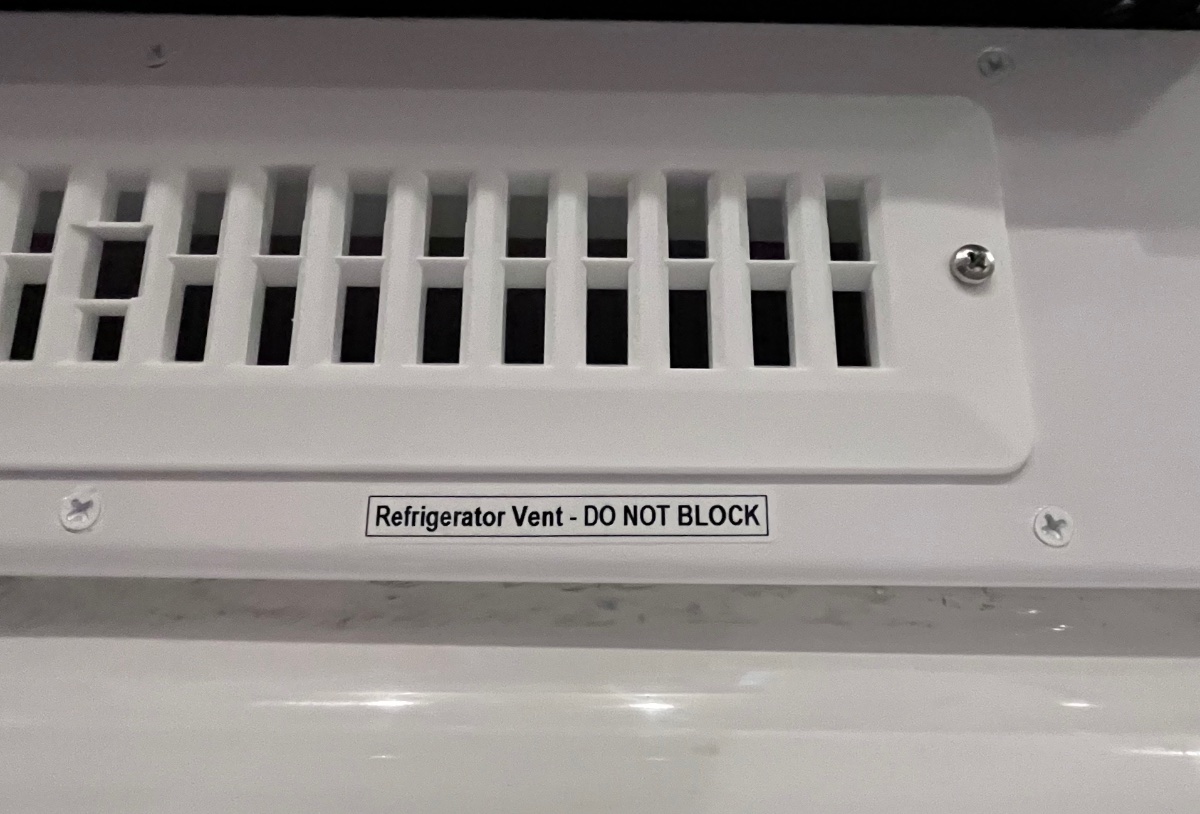
One issue appeared on the first night camping, the display is BRIGHT, it is very much like a small pocket flashlight!: I added four pieces of Post It notes on top to kill the glare, I need to figure out a more elegant solution. I may try some LED Light Dim Stickers that I have used elsewhere inside "Mouse". The advisory sticker is mine, made with my new DYMO LabelManager 420P.;) ECO runs the compressor at slower speeds and tries to save as much battery power as possible. ITC runs it up to full rpms, and also super cools the fridge while on shore power or when getting extra power from the truck when towing. Note the two black dots I added with a Sharpie, they show the location of the two pry points for removing the panel. So far after a five night trip, the system works great. It seems to consume very little power but it is very hard to quantify that. I am hoping that it will be efficient enough that I will not have to add another 100 AH battery to my two existing Battle Born ones. BTW I am pretty sure that Oliver does not install this Intelligent Control with their new Isotherm fridges, can anyone comment about that? If so, I would love to see some pictures! .John Davies Spokane WA
-
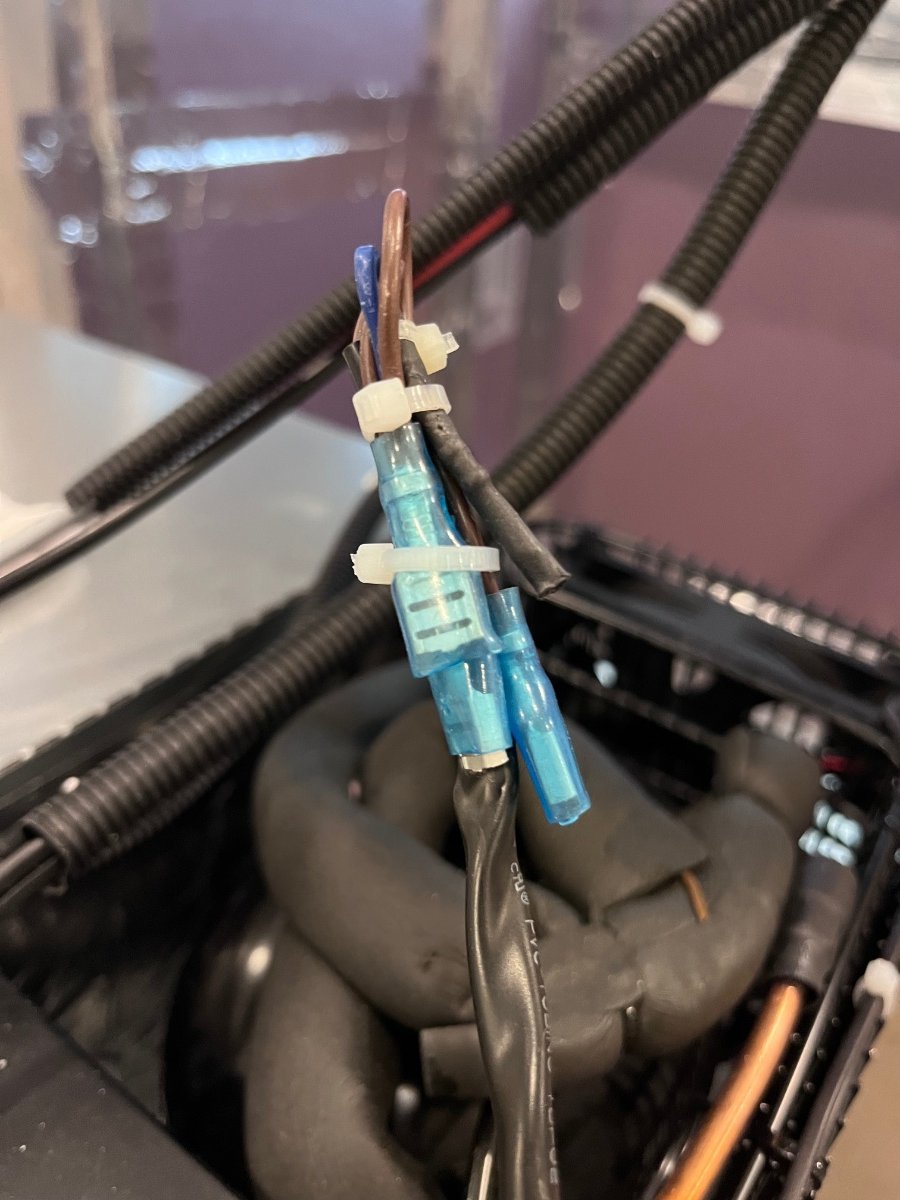
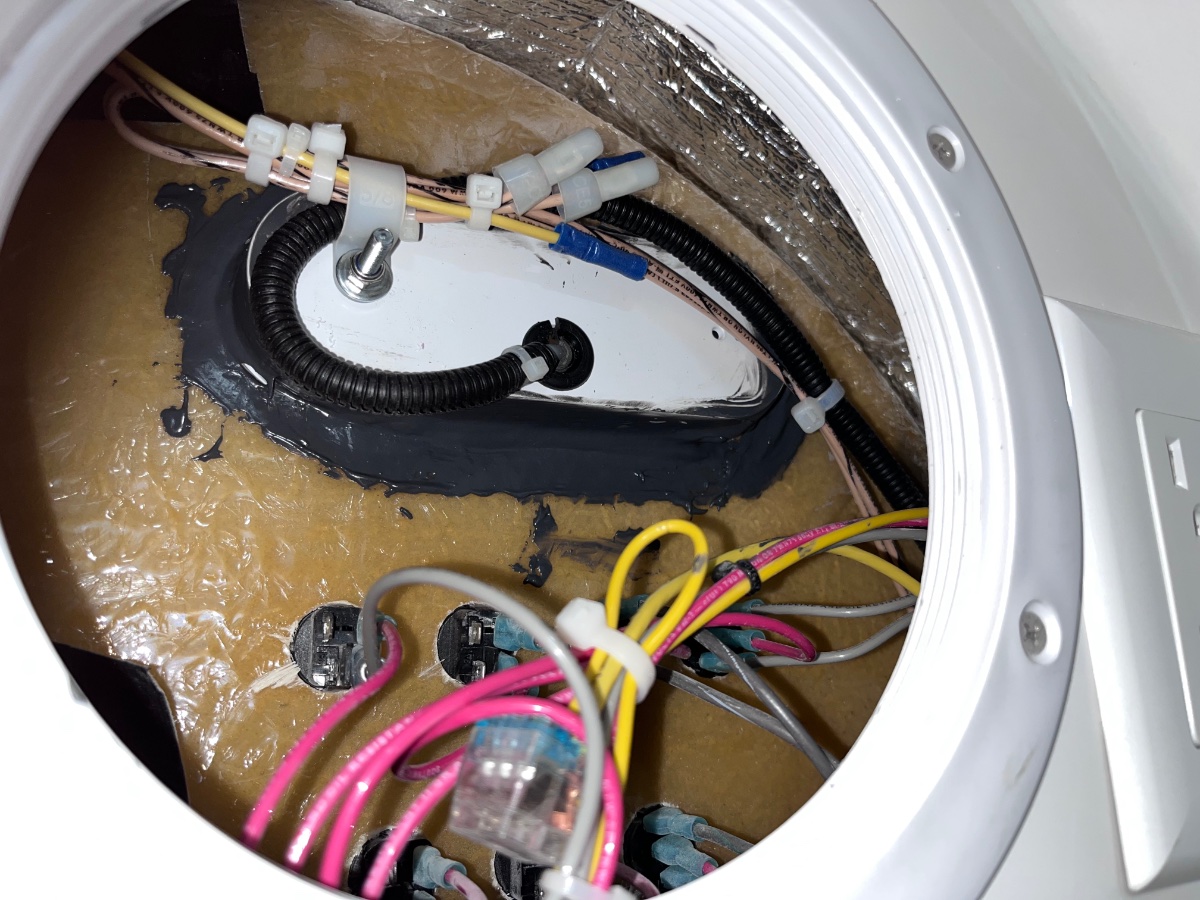
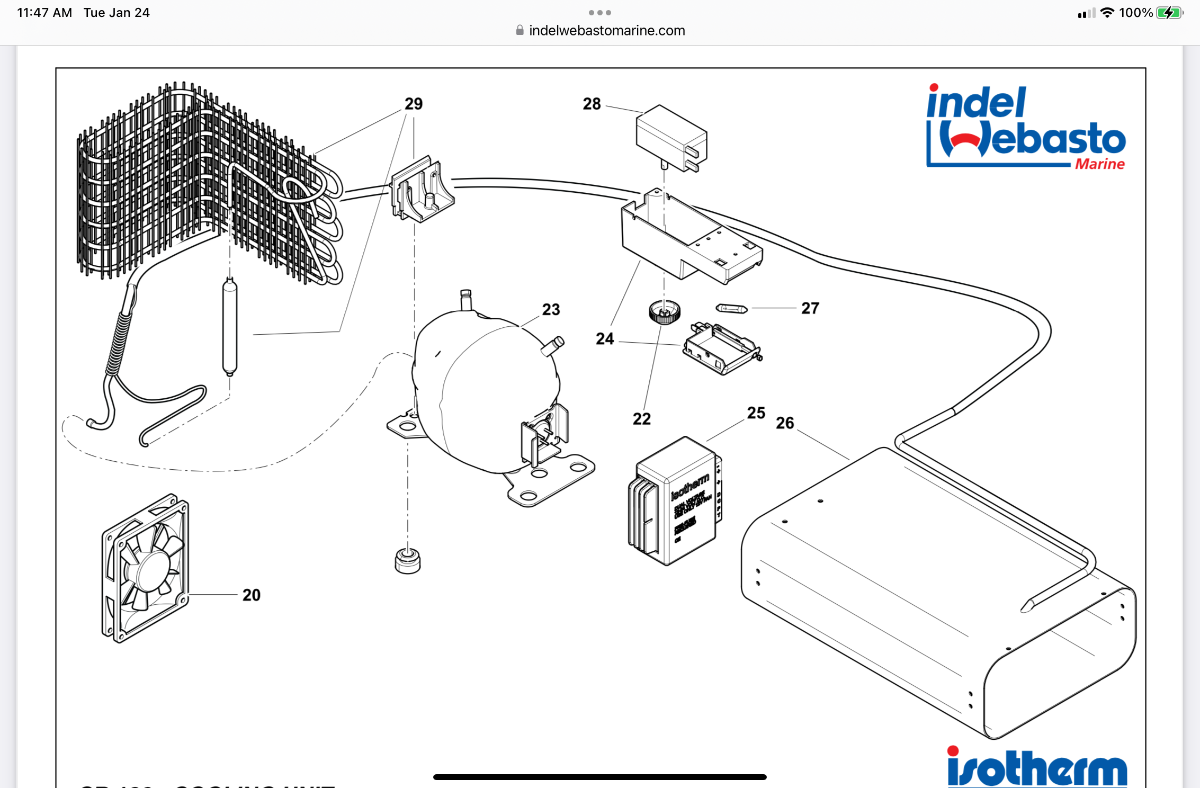
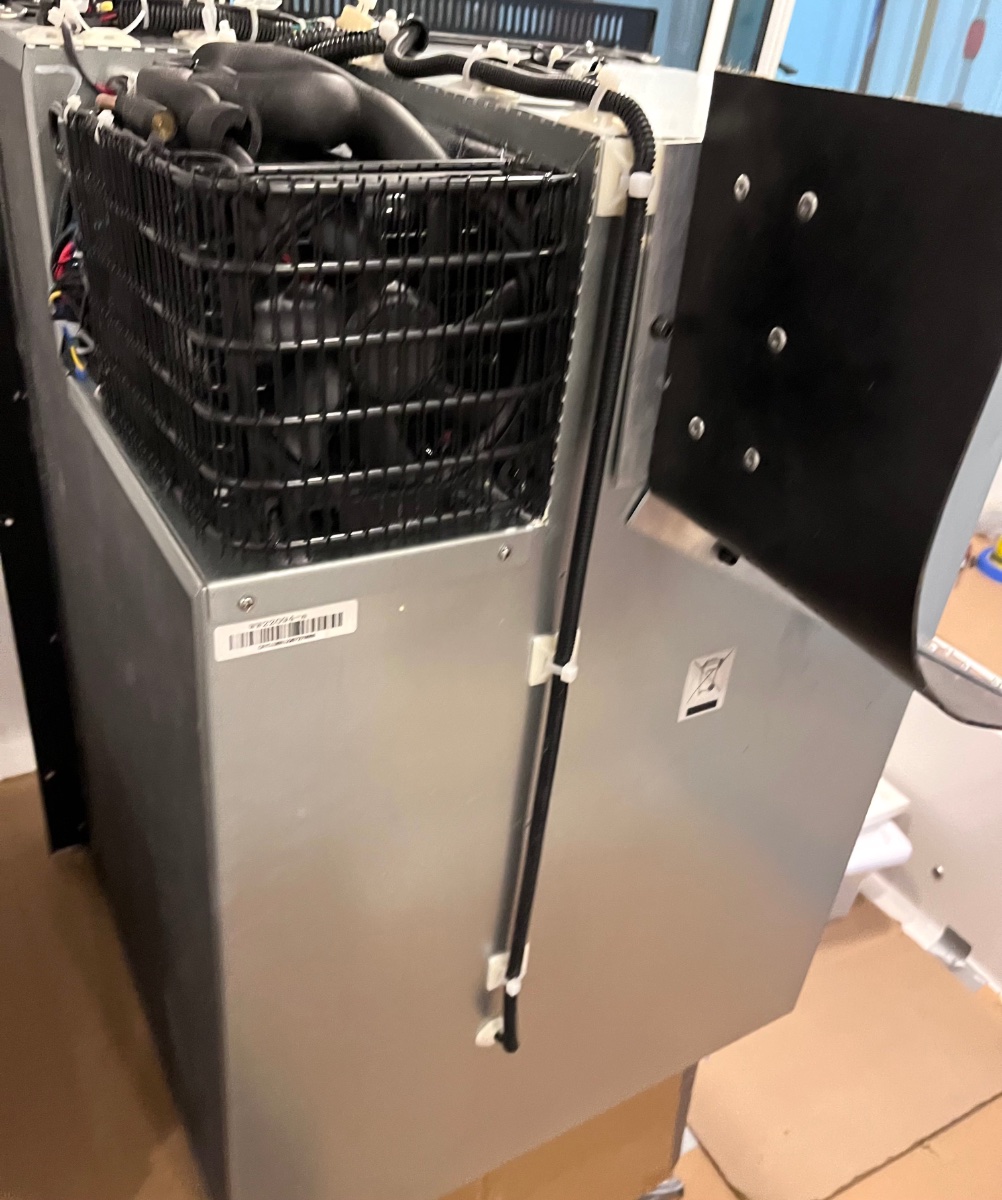
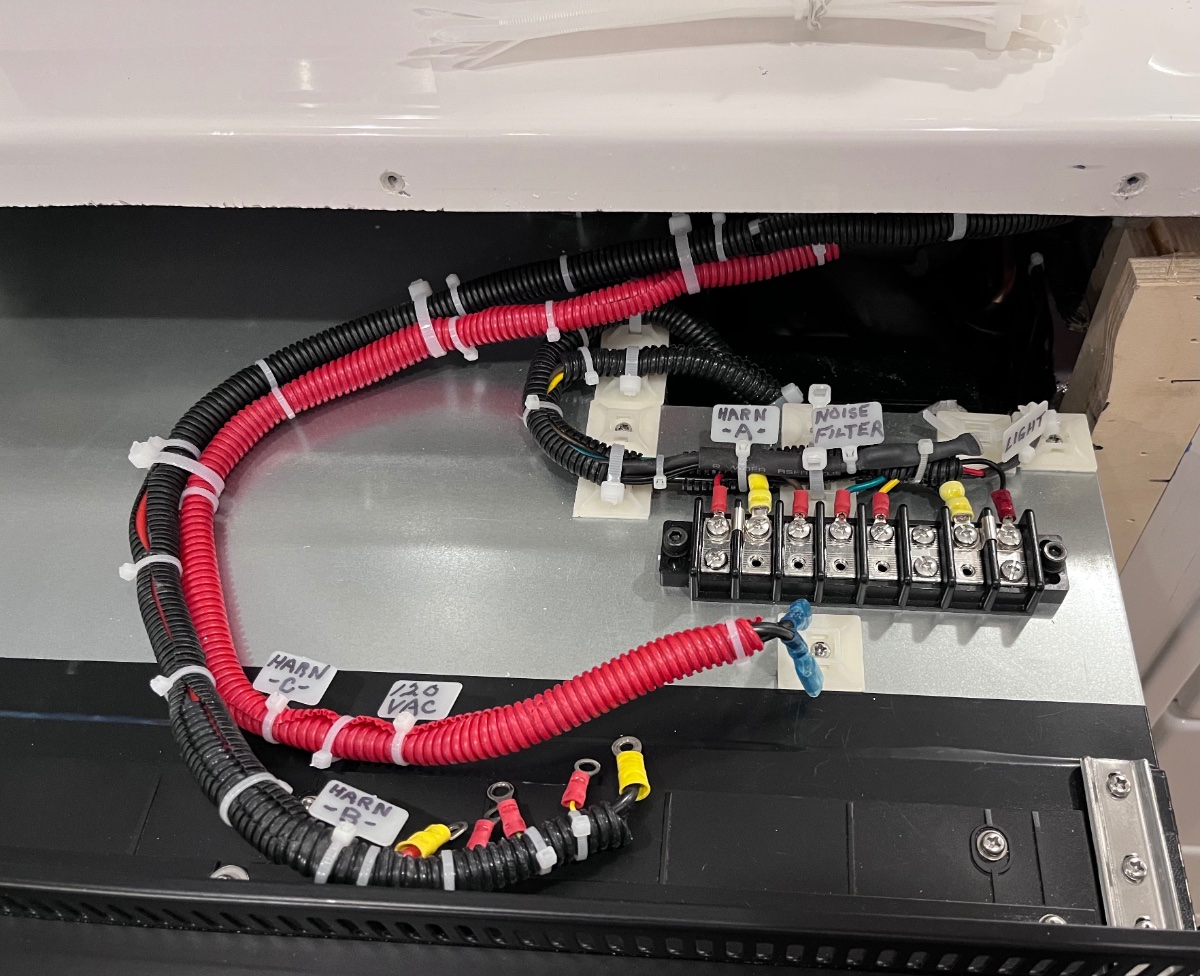
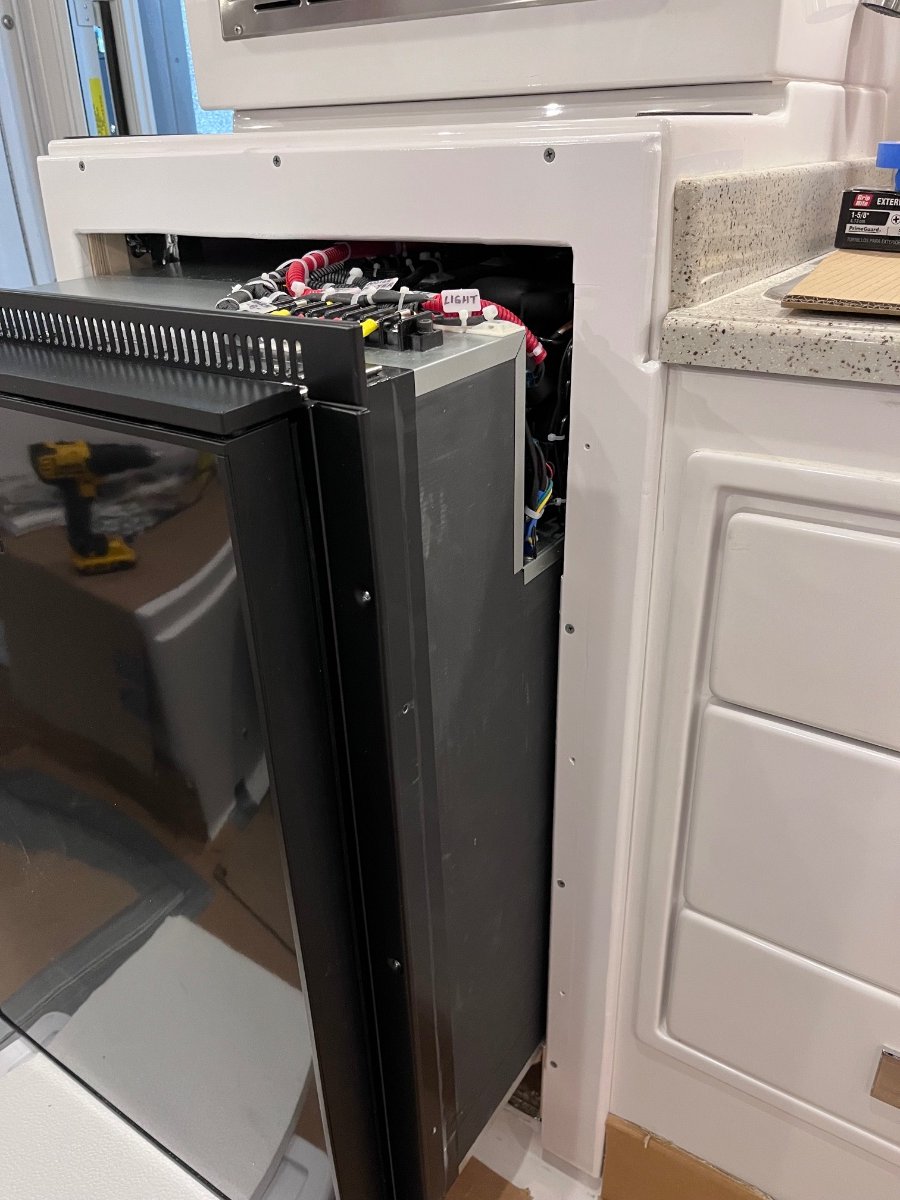
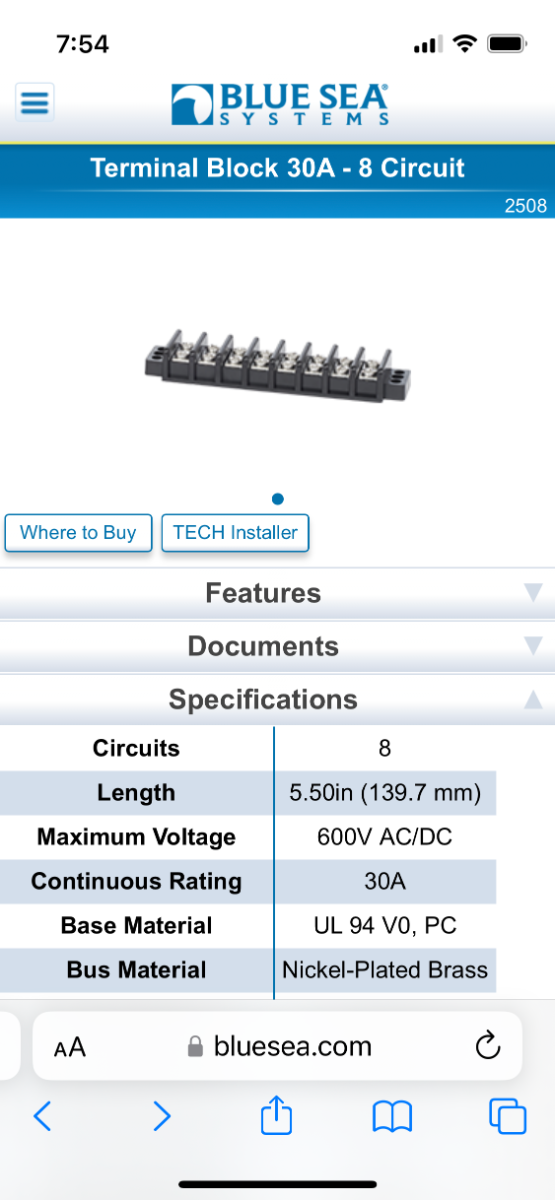
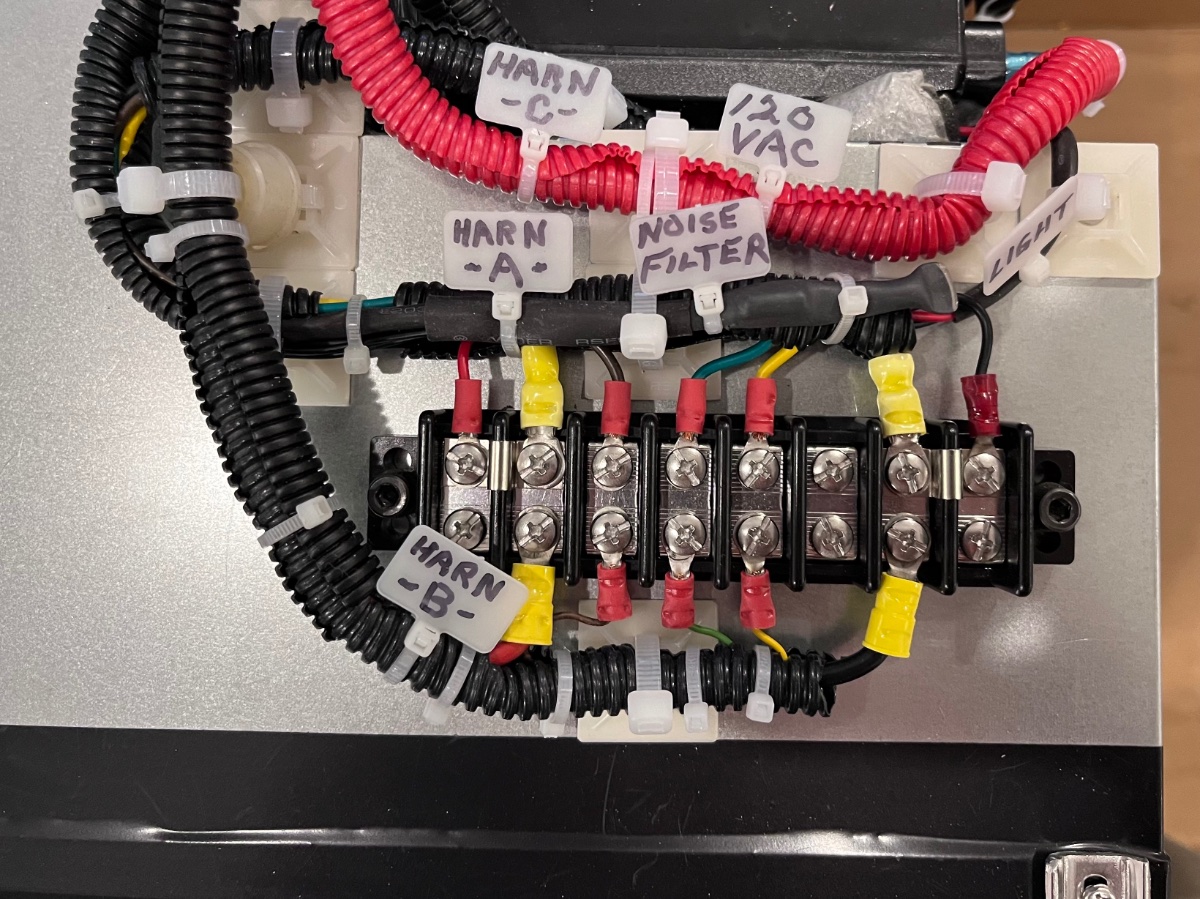
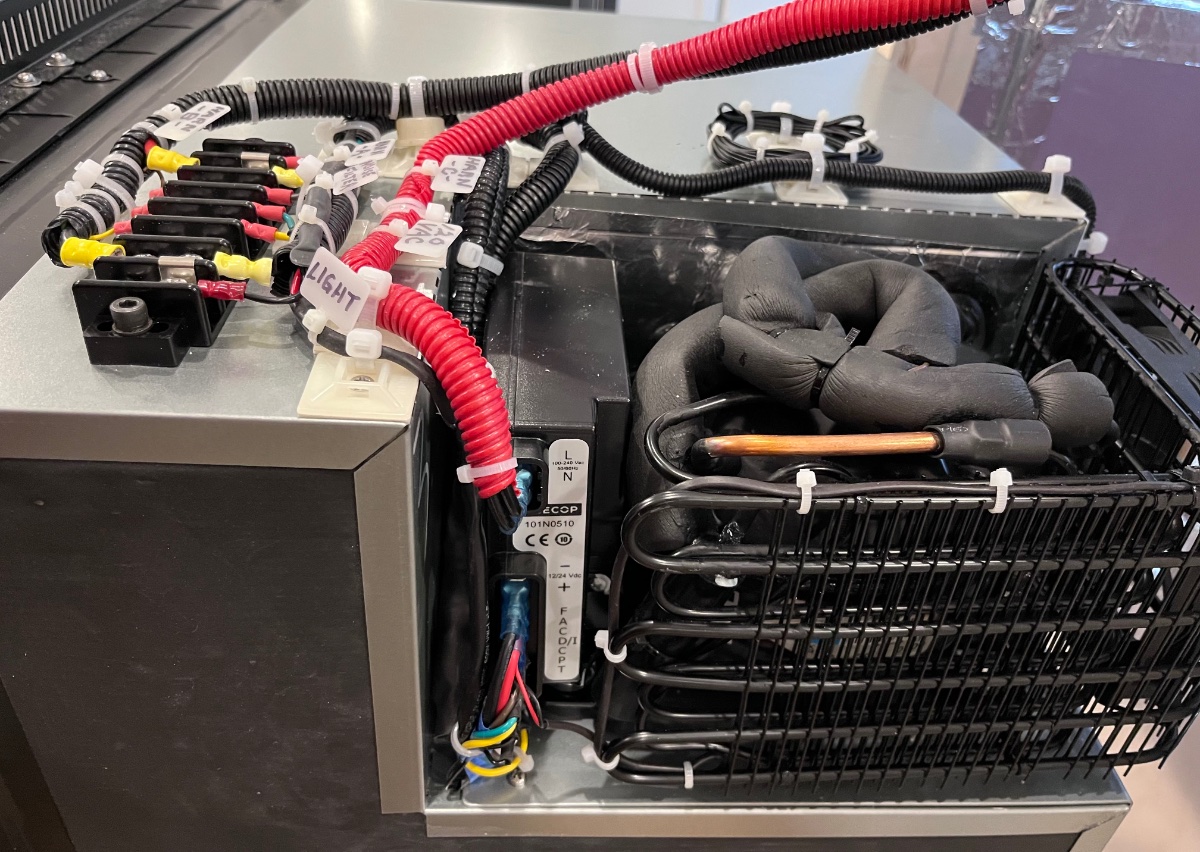
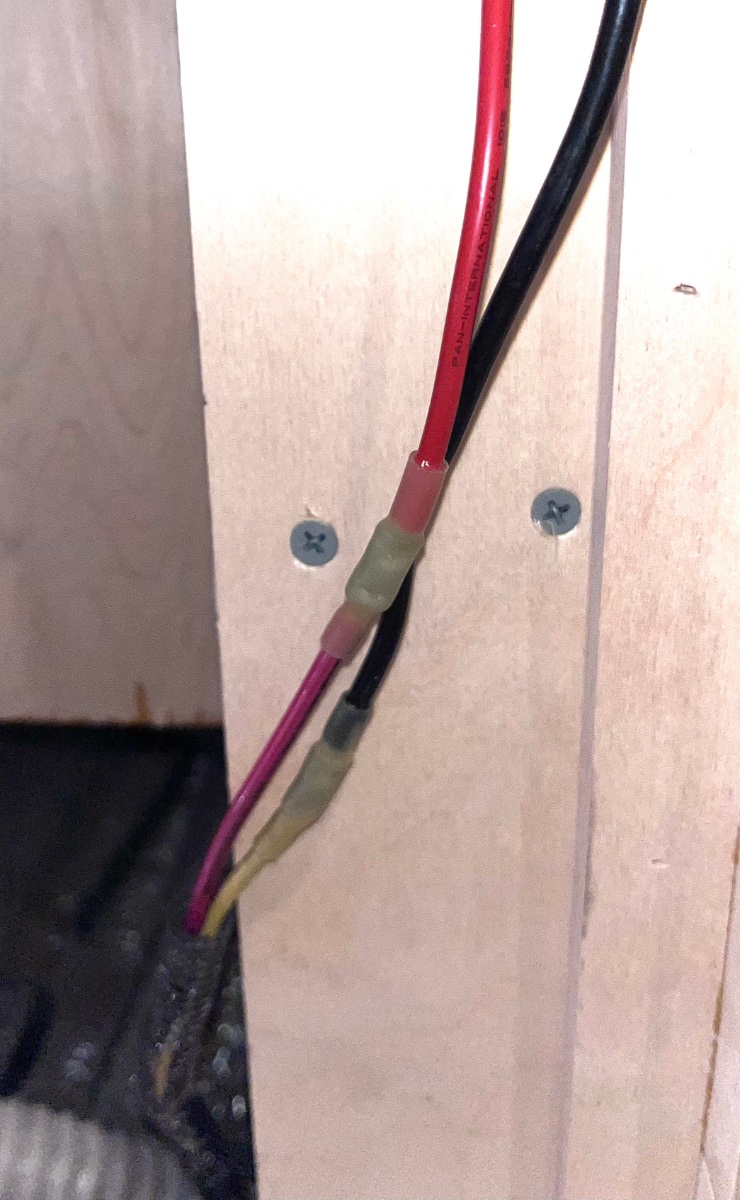
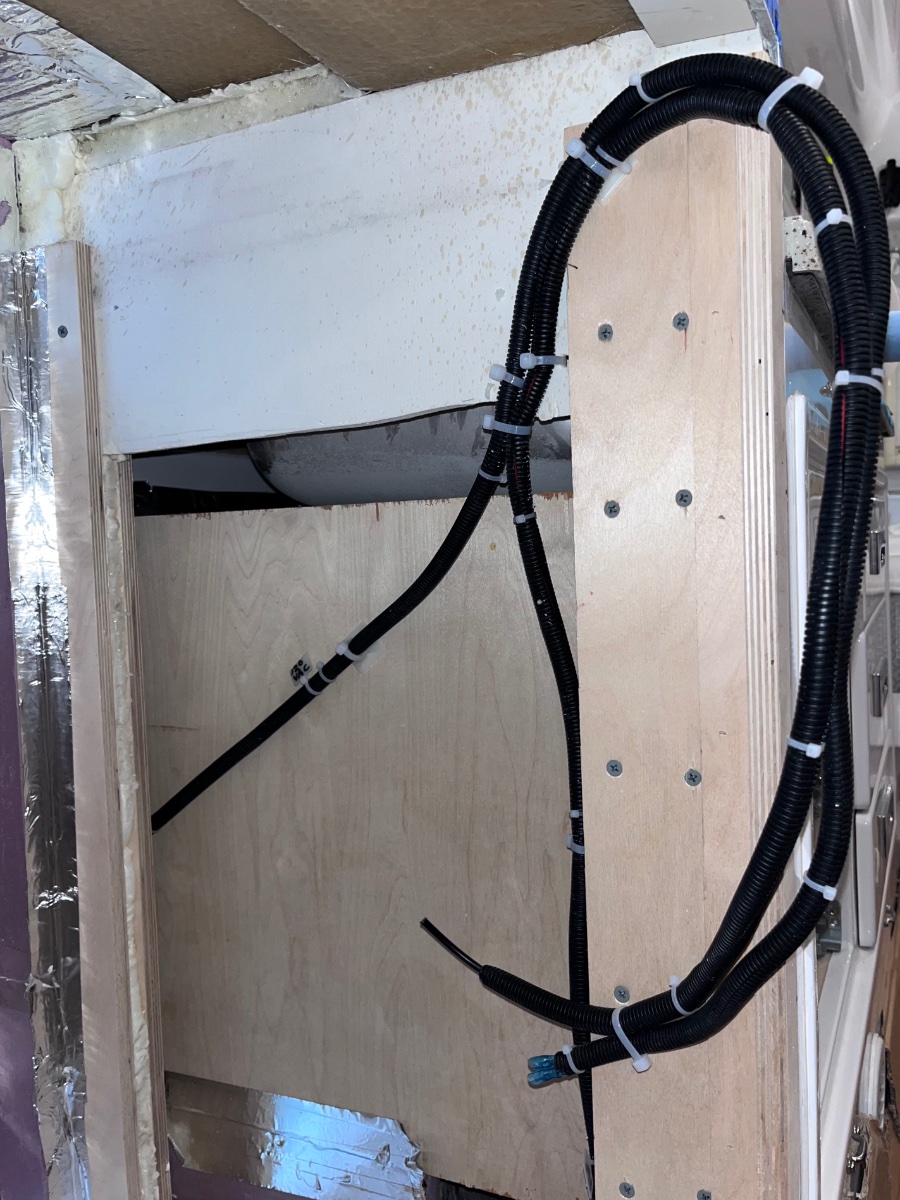
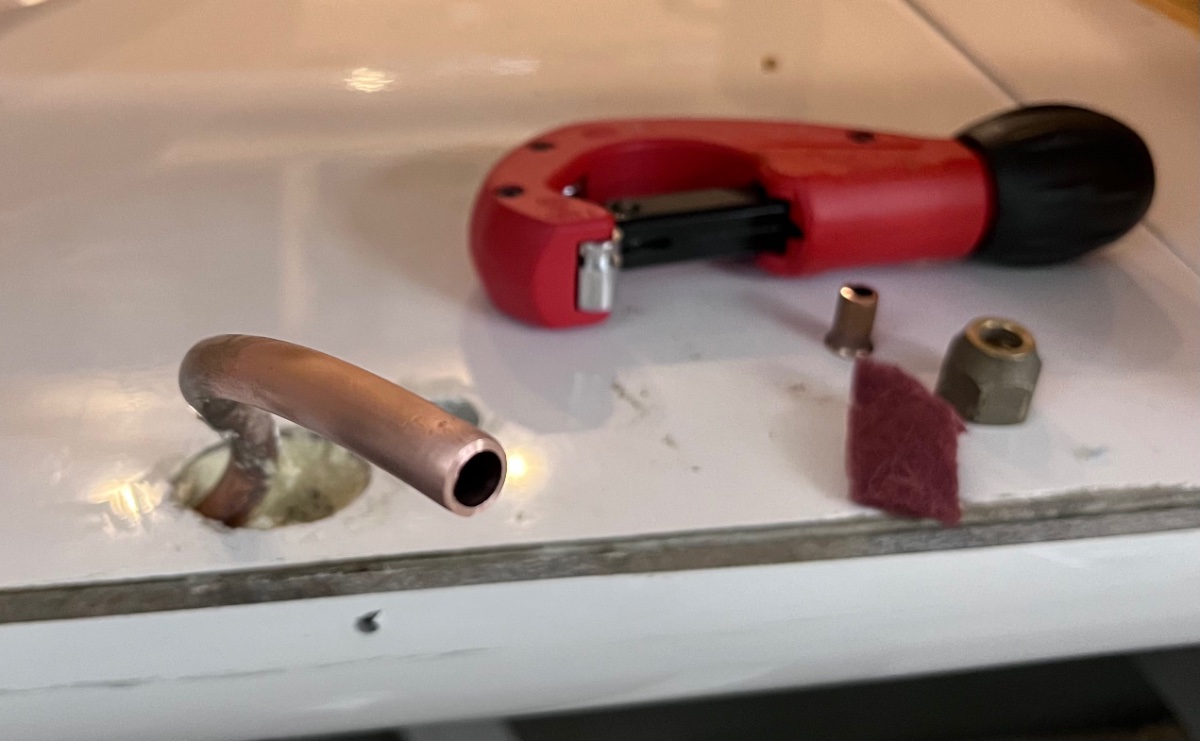
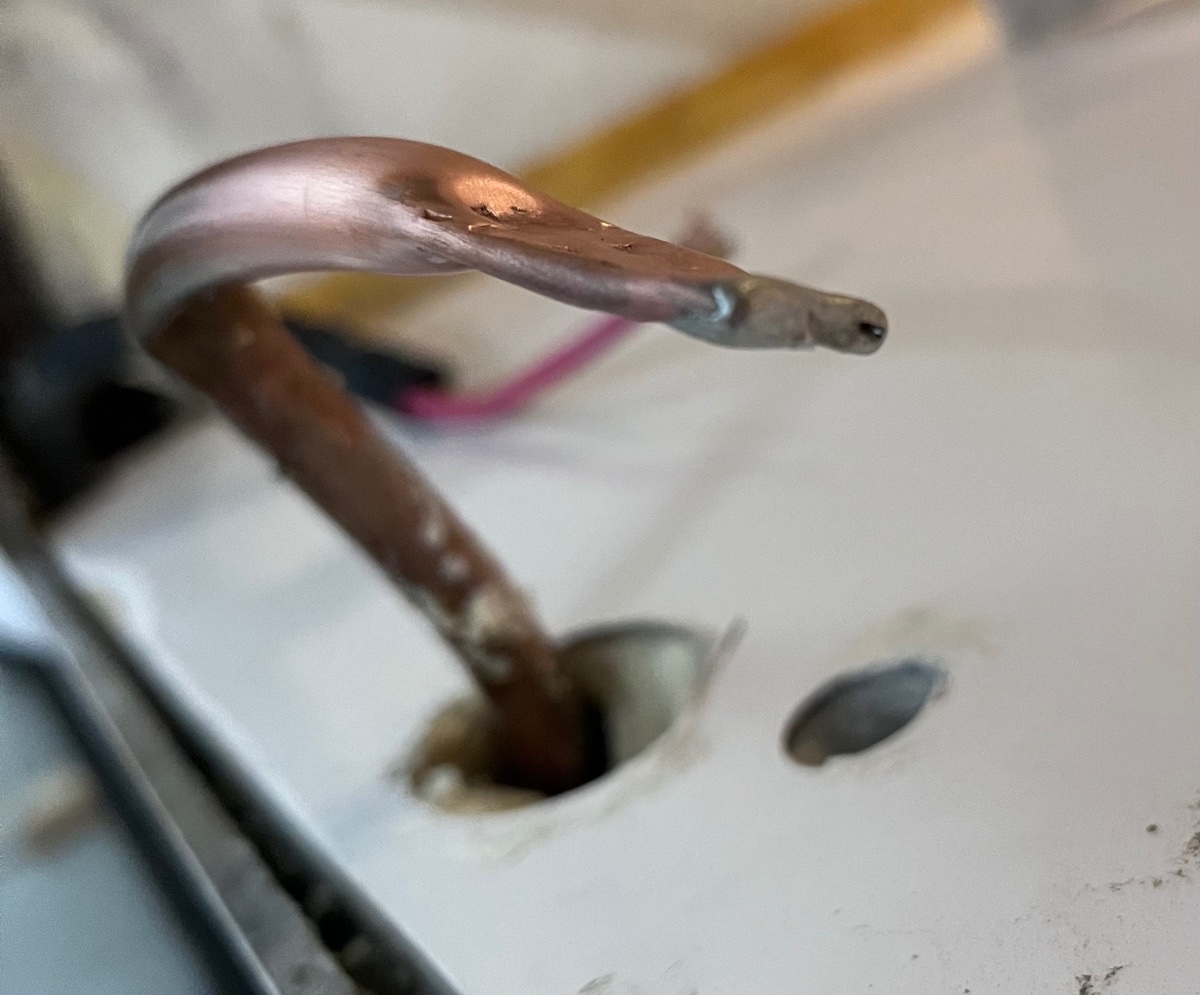
See this related thread for more pics of the wiring: https://olivertraveltrailers.com/forums/topic/9168-how-to-install-an-isotherm-cruise-130-2-way-refrigerator-in-an-le2/ Note: West Marine stores typically carry both of those items. Temp sensor wires run straight up the back to the bus bar. All the nylon wire pads are drilled with a stainless #6x1/2” screw added so they will all still be firmly attached fifty years from now, for the tenth Ollie owner. I made a heavy air baffle to direct cool cabin air up to the condenser coils, rather than just having it wander aimlessly around inside the cabinet (there is a huge airspace between fridge and hull, over 6”.) The screws go into threaded nutcerts. "Harness B" is the trailer DC power and ground, and the three original control wires that I extended (brown, green and yellow); from the opposite side of the bus strip, they run down to their three appropriate terminals at the compressor. “Harness C" is the 120 Volt AC shore power wire, coming from the Oliver outlet under the galley sink. "Harness A" is ALL the wiring going down to the compressor, NOT EVER to be disturbed for normal service. Note that I labelled the noise suppressor and also the LED light wires which go down into the fridge cabinet. To remove the fridge, simply unscrew the five Harness B screws, unplug Harness C at the compressor, and clip some cable ties. Out she slides. Or you can leave it all connected for troubleshooting with a volt ohm meter, if you support the fridge on a 7' tall support box. John Davies Spokane WA
-
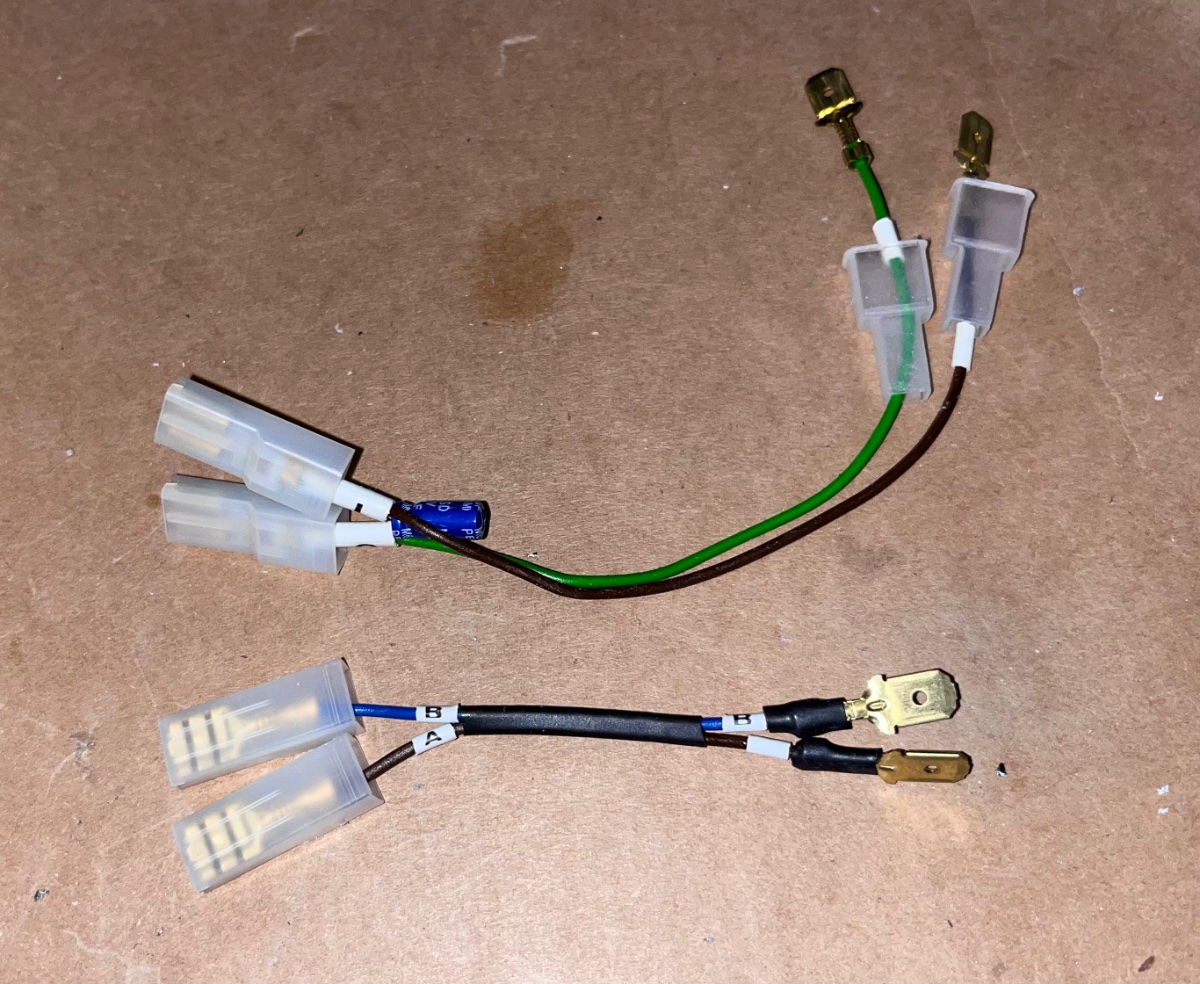
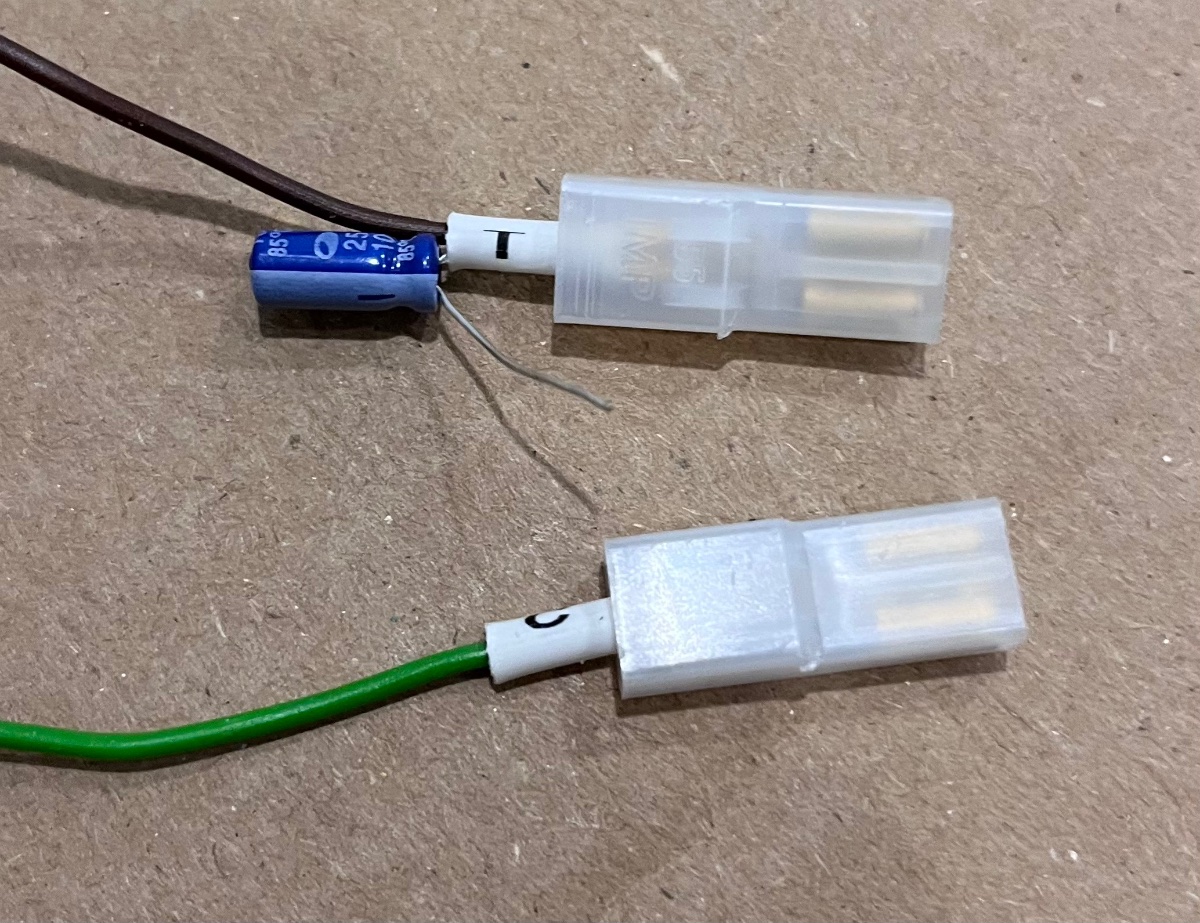
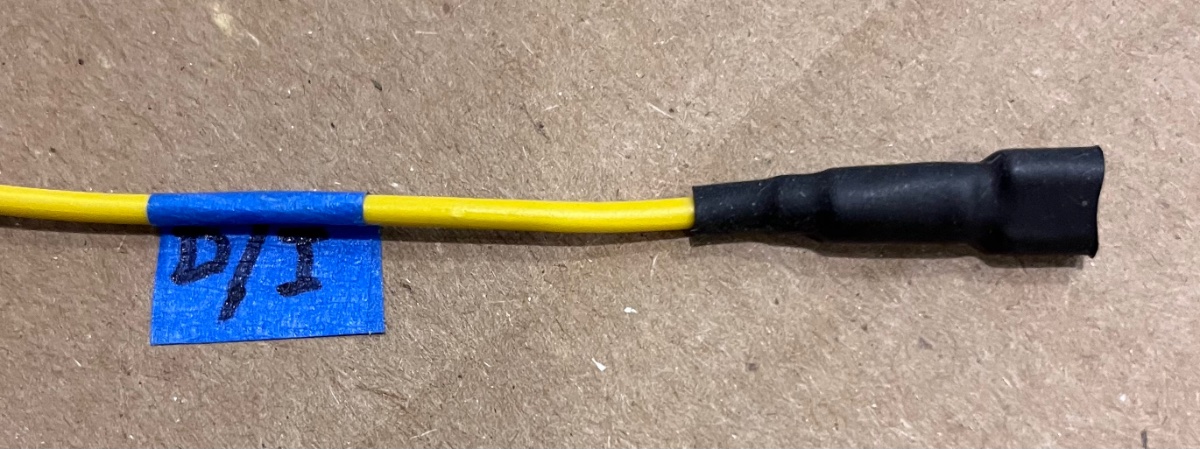
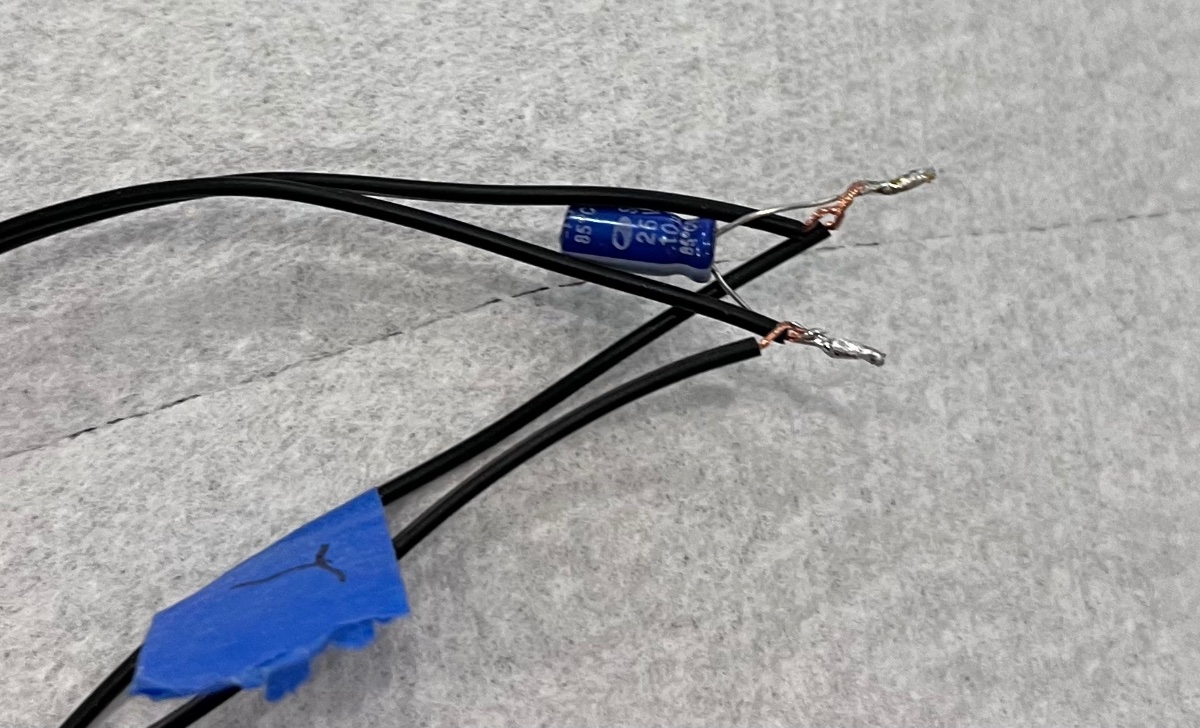
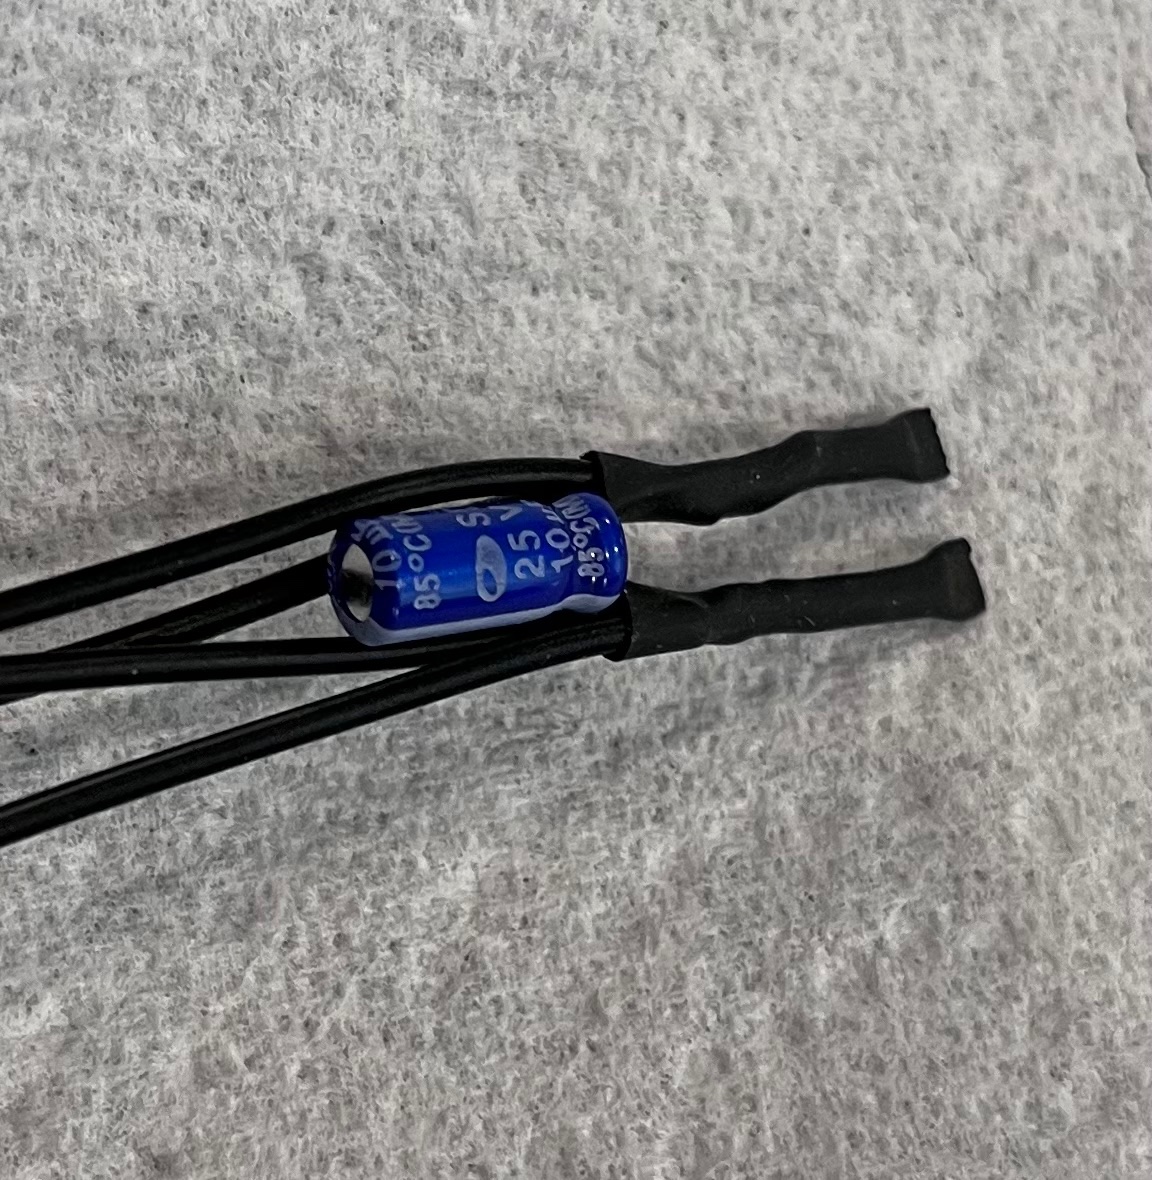
Wiring... Hoo boy, this was very bad. Here is the terminal strip as delivered. Black and Red are 12 volts DC negative and positive. It is crowded as can be but secure and neat looking. Here are the two provided adapter cables: It took me 30 minutes to figure out how they went "letter to letter". Initial test run, no smoke, the compressor ran quietly and cooled! It took me less than five seconds to decide that there is no way that sort of Rube Goldberg mess would survive a bumpy trailer ride. I decided to run all the connections up to a bus strip near the top front. Unplugged the old unused thermostat wires (from inside the fridge), secured them and heat shrinked them; Here is the electrical noise suppressor (capacitor), which came apart in my hands as I was inspecting it. Note: You cannot just stick a tiny bare wire into a big crimp connector and expect it to be secure: Soldered it, heat shrinked it, ran the unit up top. This is heavy self-adhesive heat shrink, with the open end crimped with pliers while hot, no moisture can get in: Here is how I made insulated boots for the new 1/4" female spade wire terminals that had to go onto that very crowded terminal strip at the compressor.
-
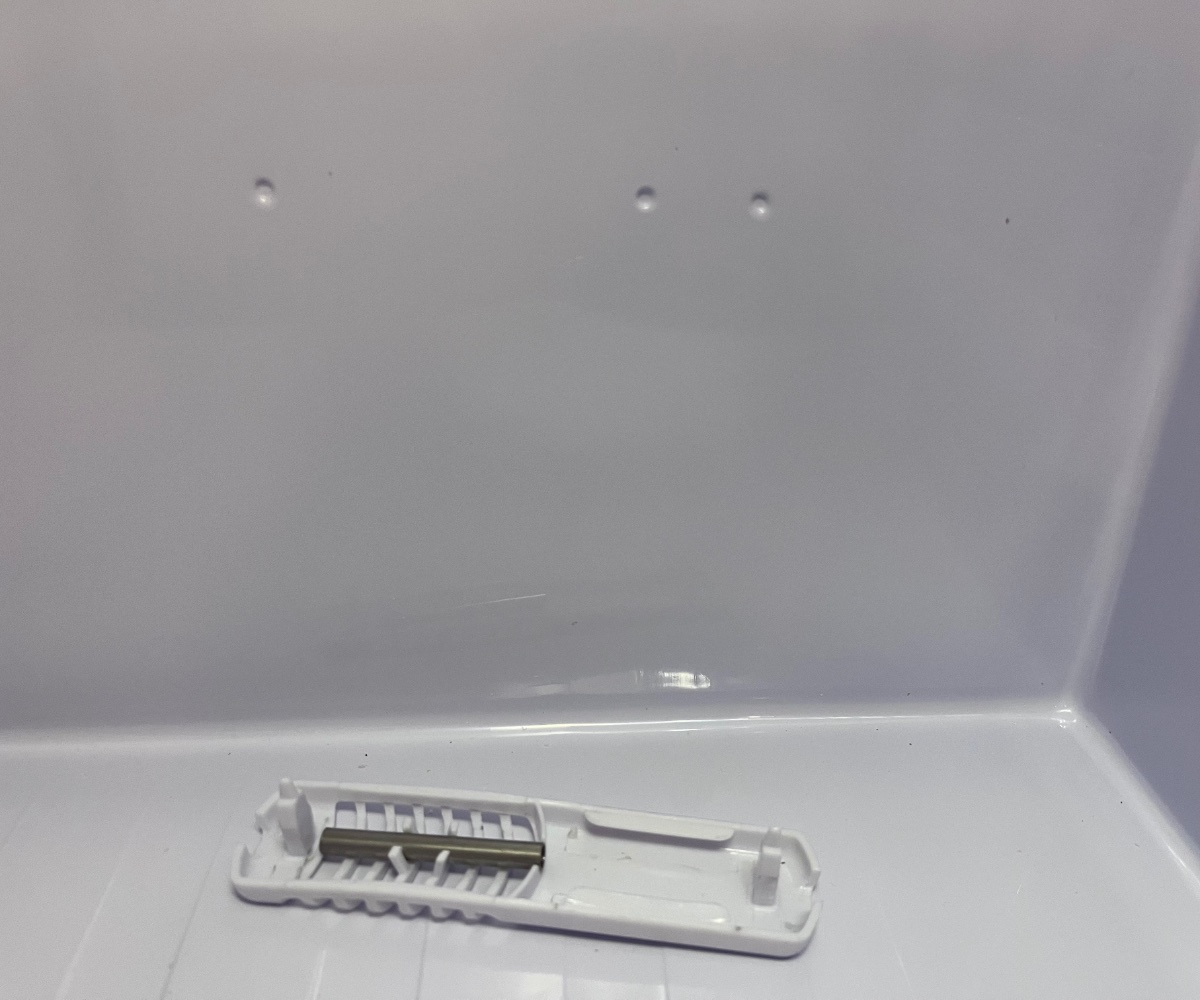
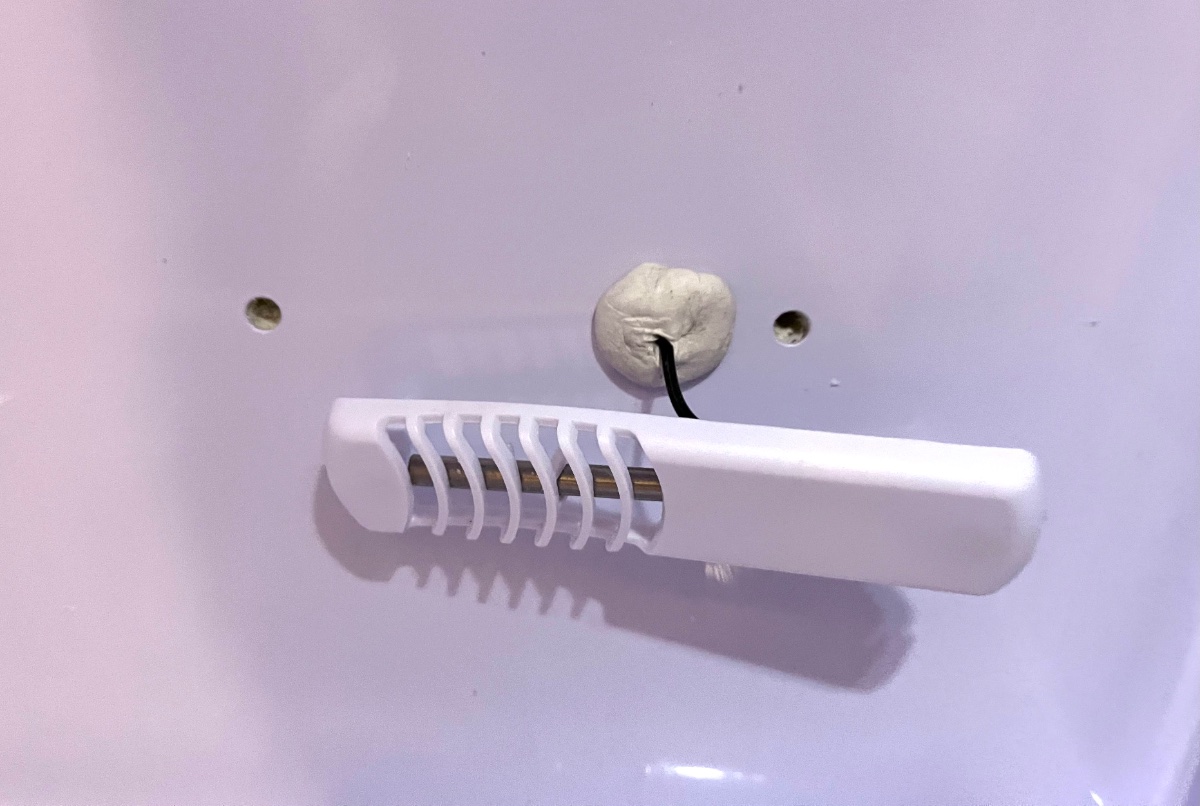
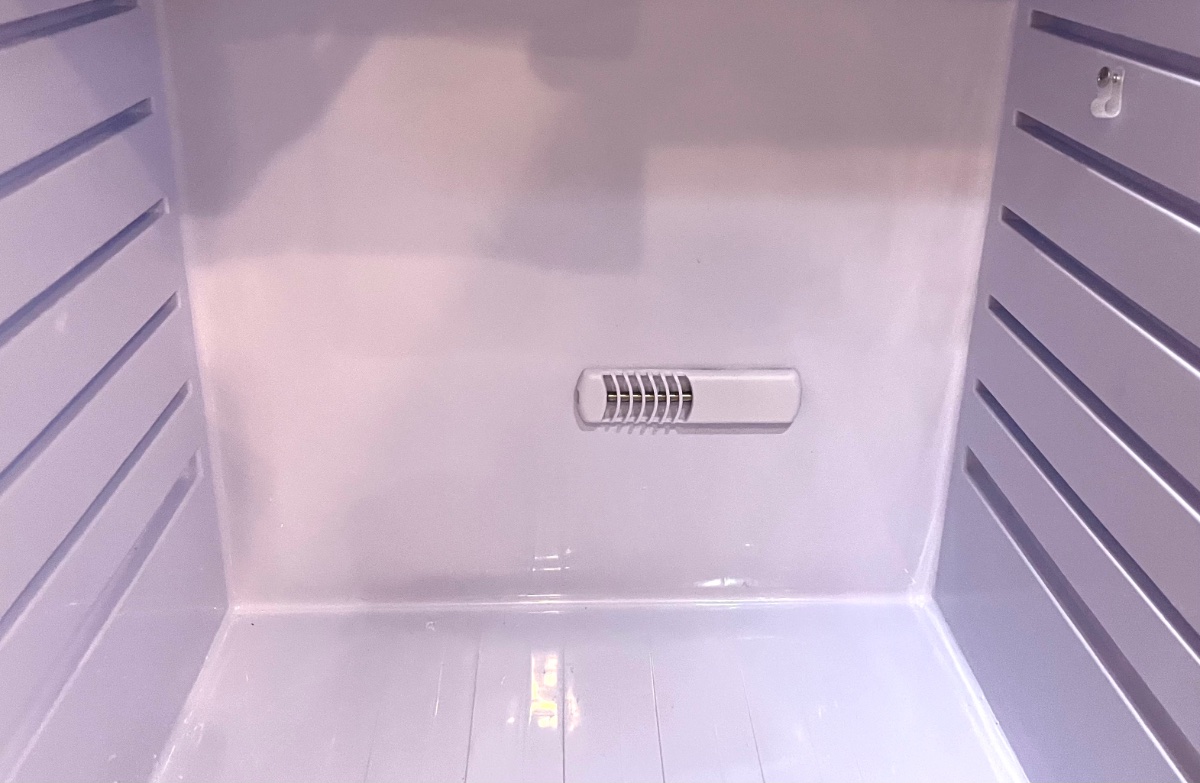
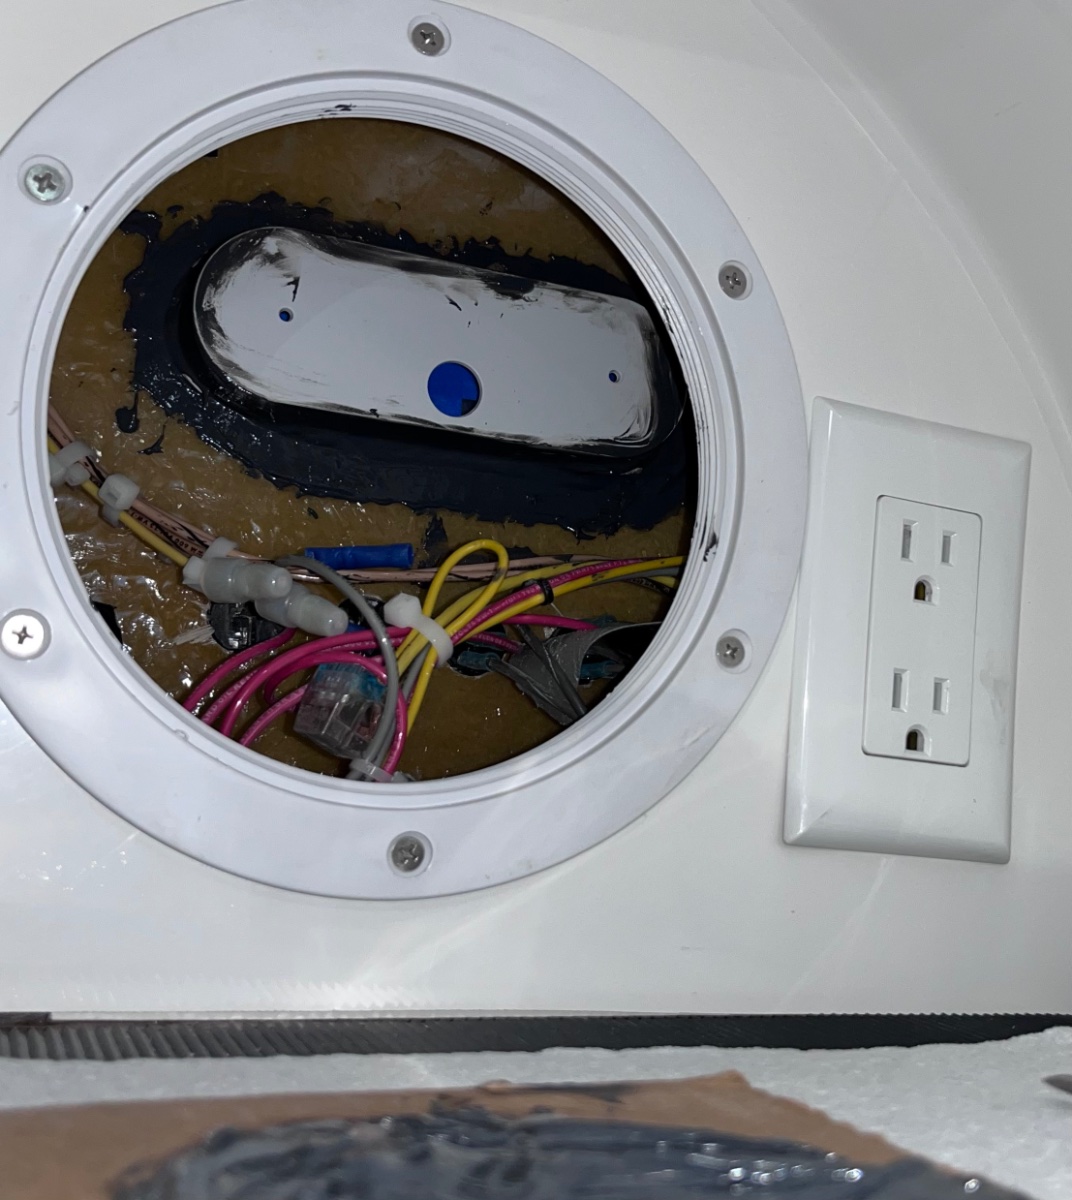
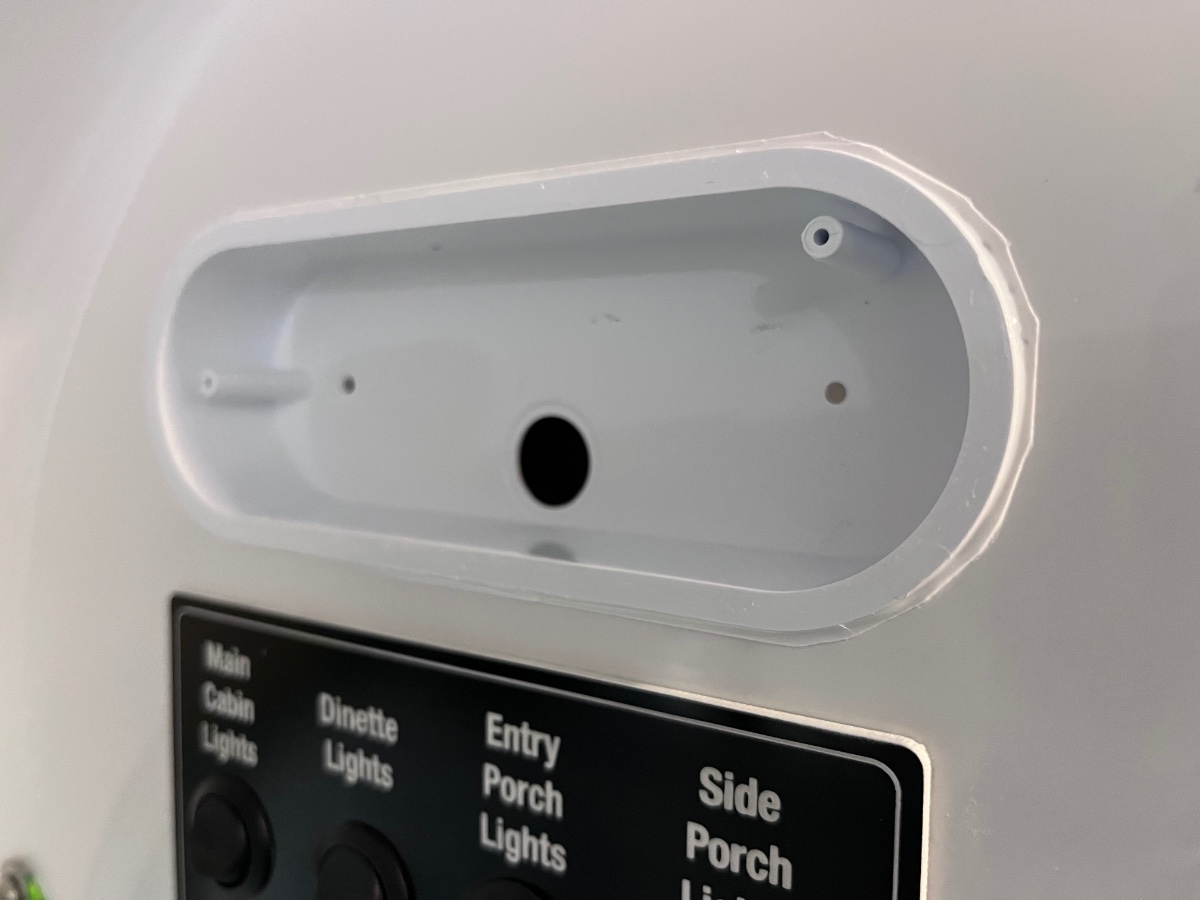
Install the sensor inside the fridge cabinet, fortunately on this model the holes are marked by dimples. Drill the center one only all the way through and out the back. The outer two are shallow.: John Davies Spokane WA
-
I routed the control cable up through the back of the microwave cabinet. This shows the retaining clip, one at each end, you must pry them in gently to remove it. John Davies Spokane WA
-
https://olivertraveltrailers.com/forums/topic/9168-how-to-install-an-isotherm-cruise-130-2-way-refrigerator-in-an-le2/ This looked so easy, and it turned into a can of worms right away.The installation instructions seemed concise, but there were a lot of frustrating errors, omissions and vague statements like "Connect all the lettered wires to each other properly". +Isotherm Intelligent Temperature Control (ITC) BoatTest.com article.pdf John Davies Spokane WA
-
Pics Installation & operating instructions Isotherm Cruise & Cruise INOX marine refrigerators.pdf
-
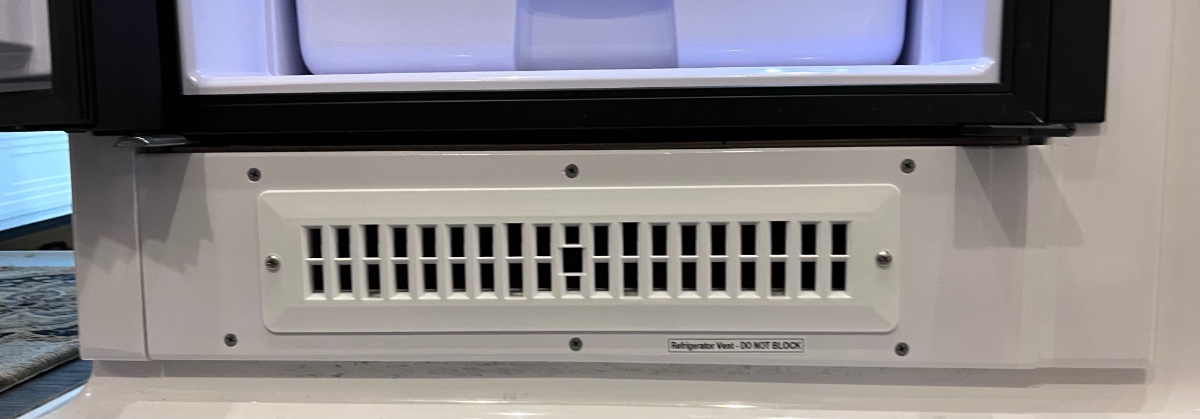
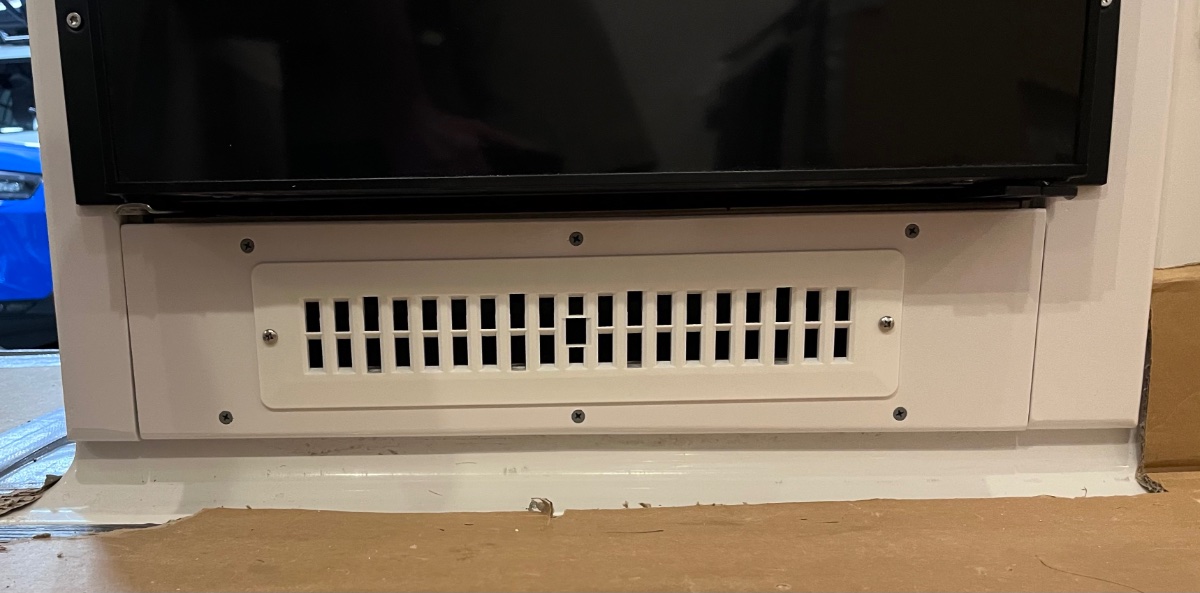
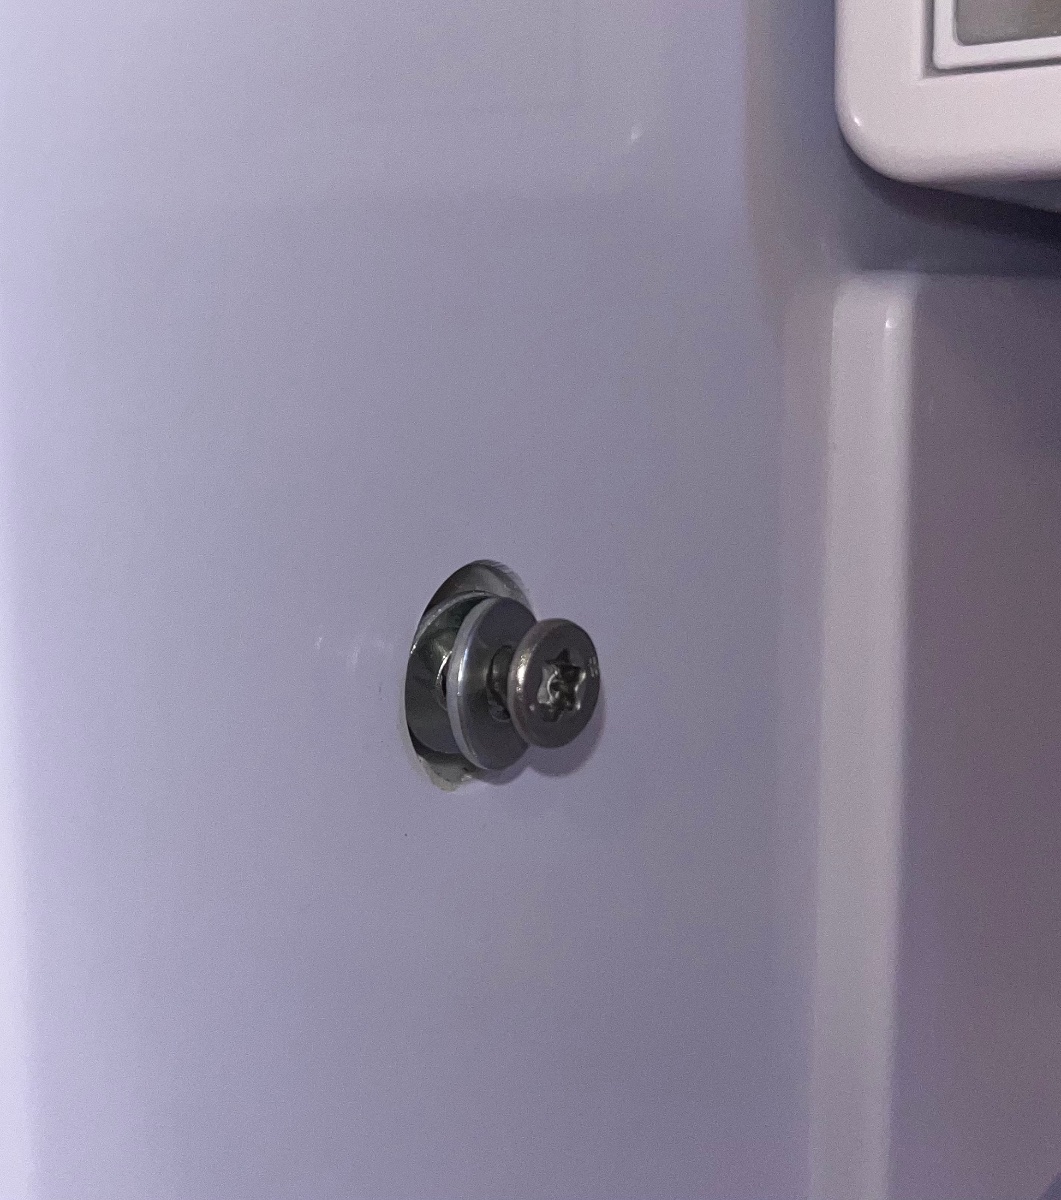
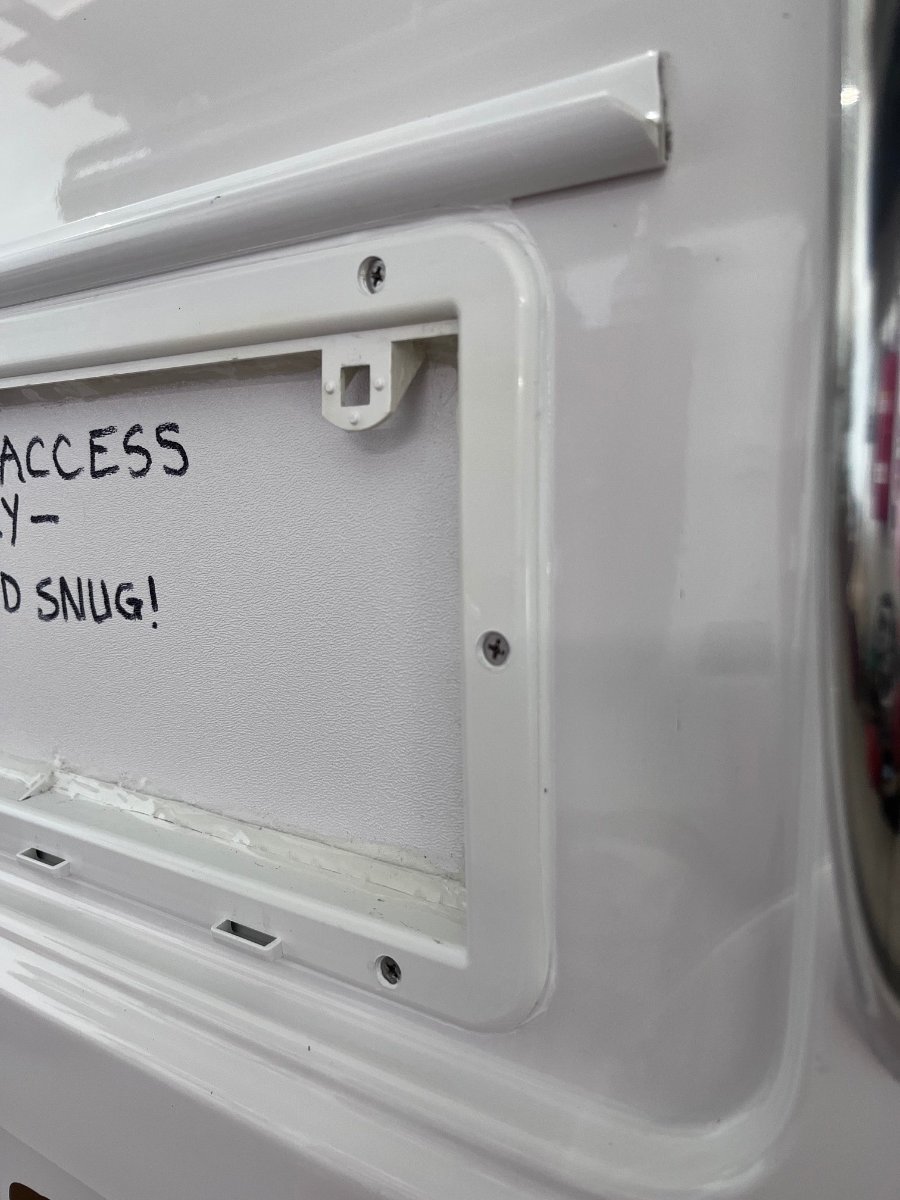
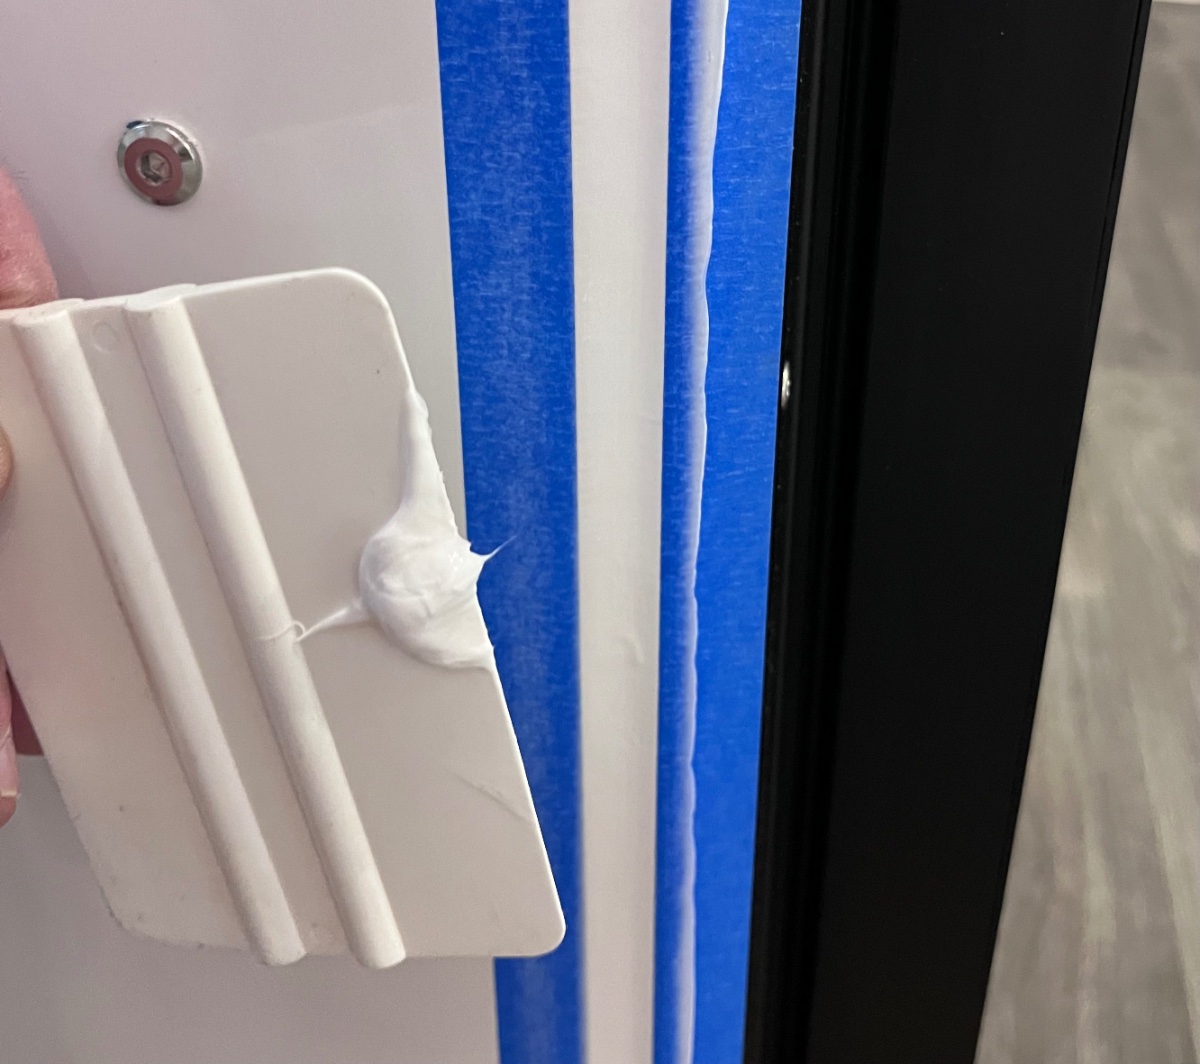
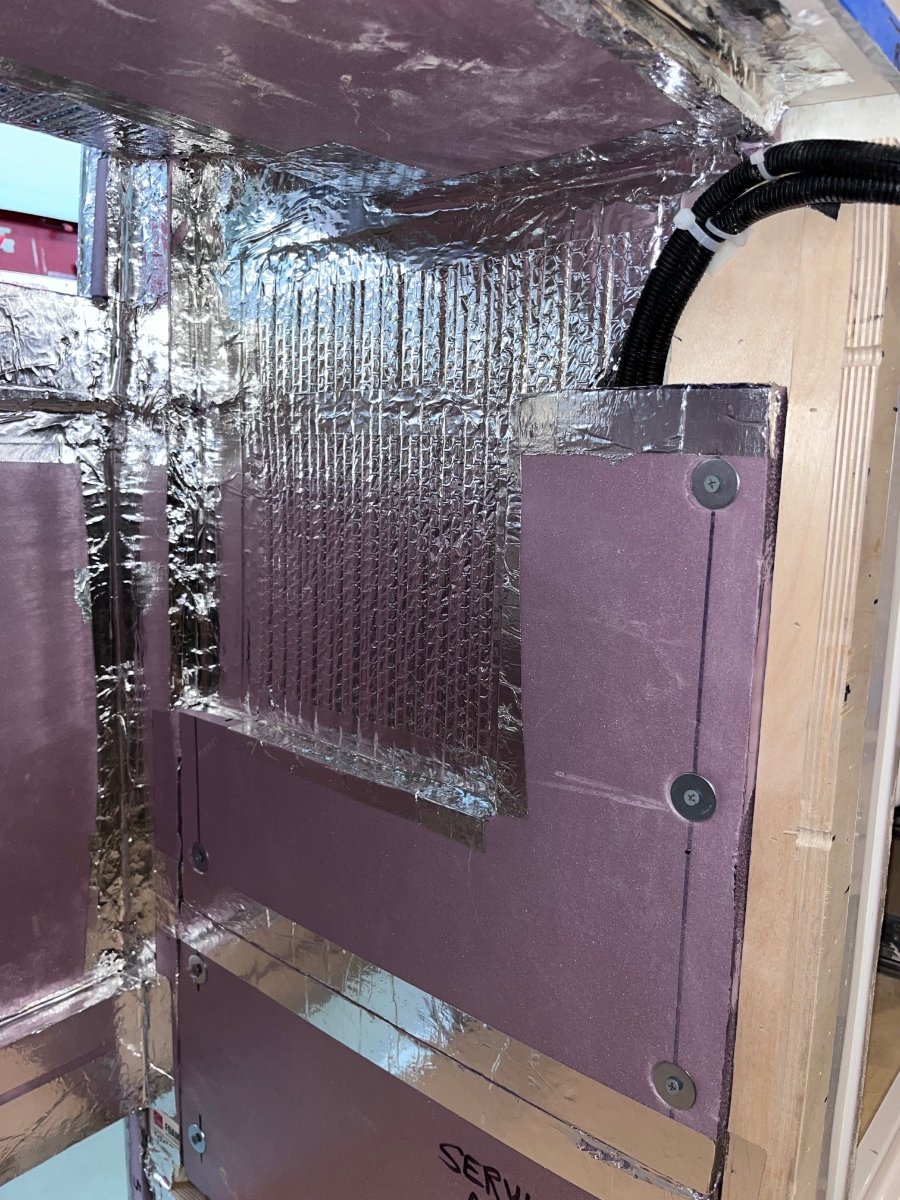
Pics The two vertical gaps were covered with 3M white electrical tape, and the screw heads painted by hand with Testors model enamel.
-
Pics
-
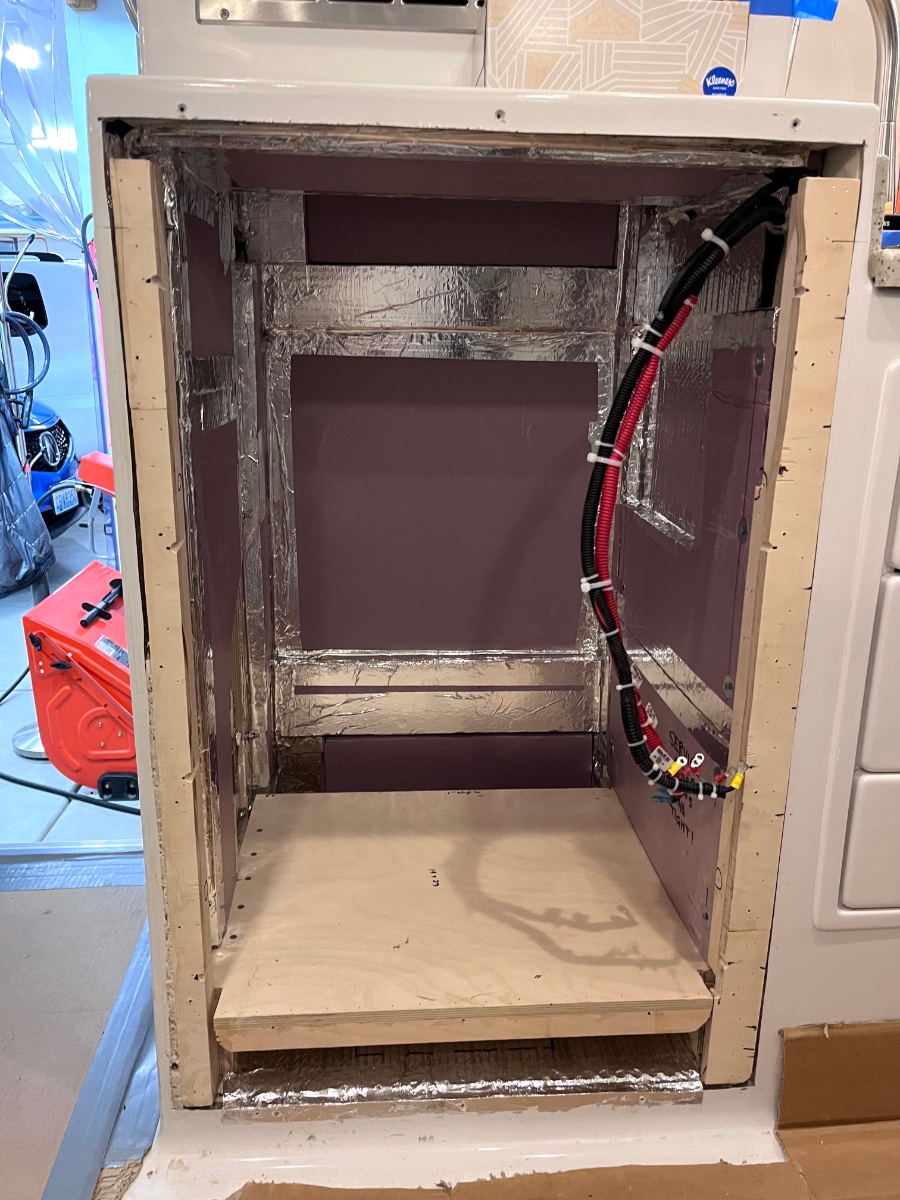
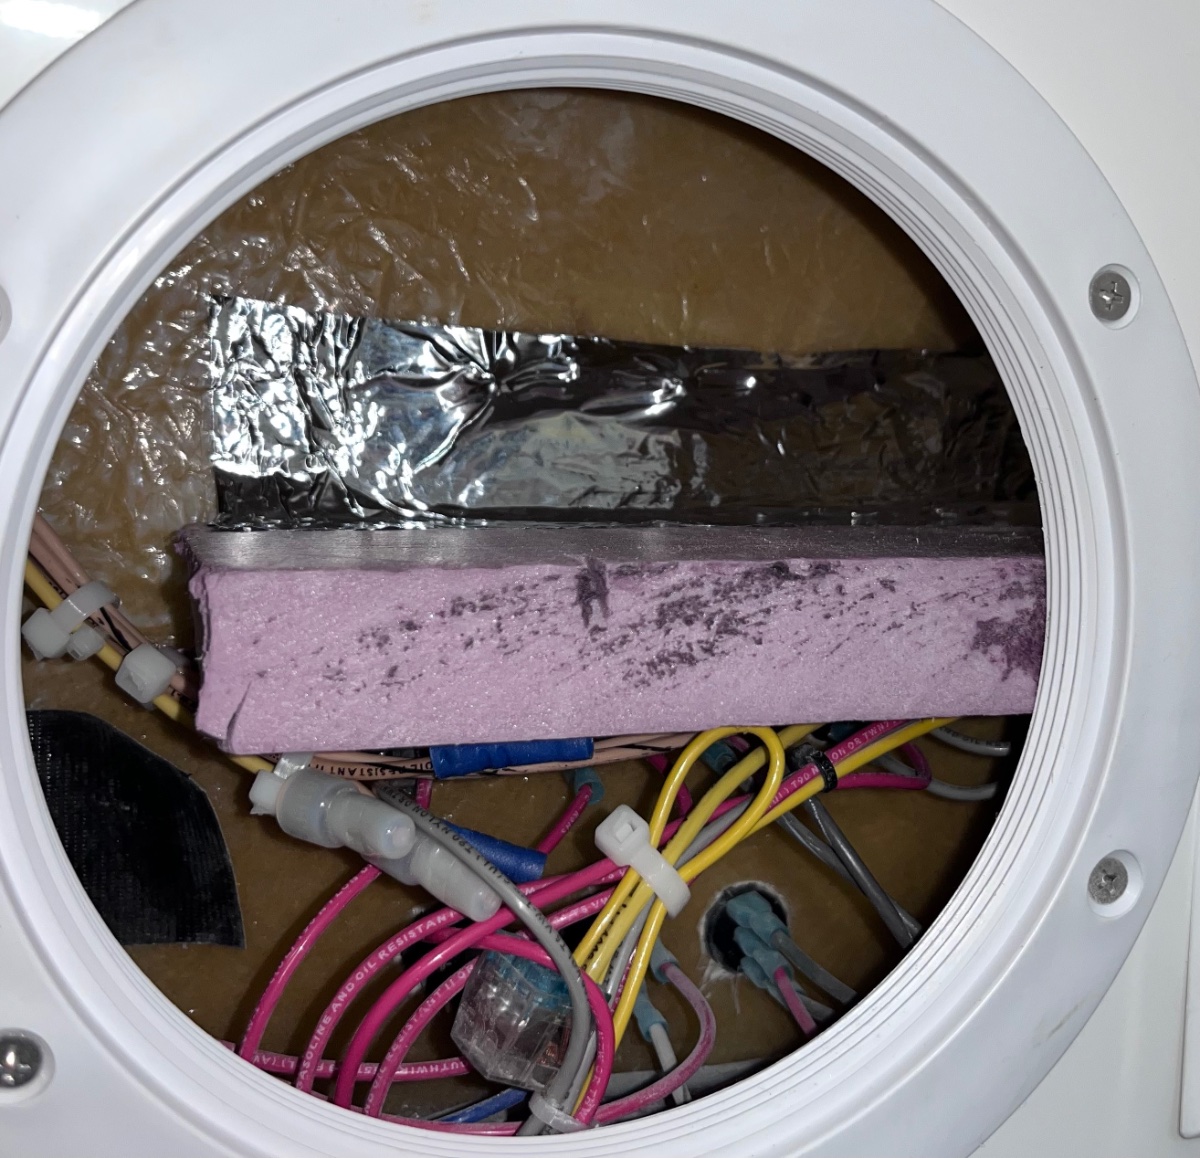
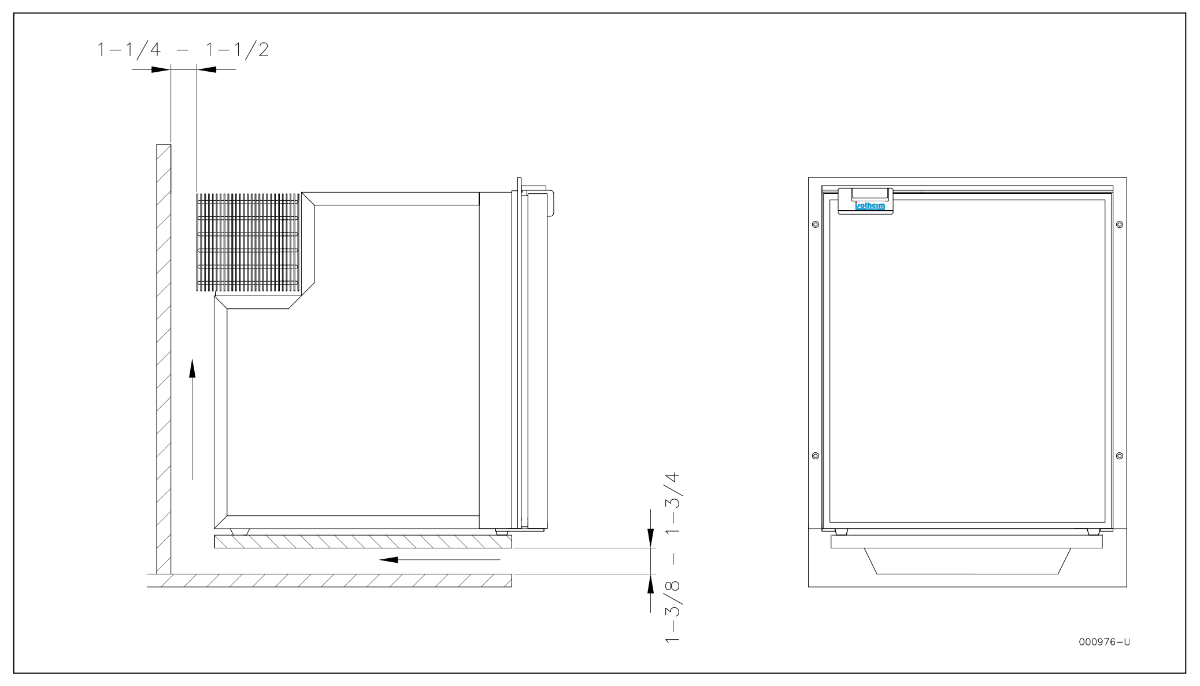
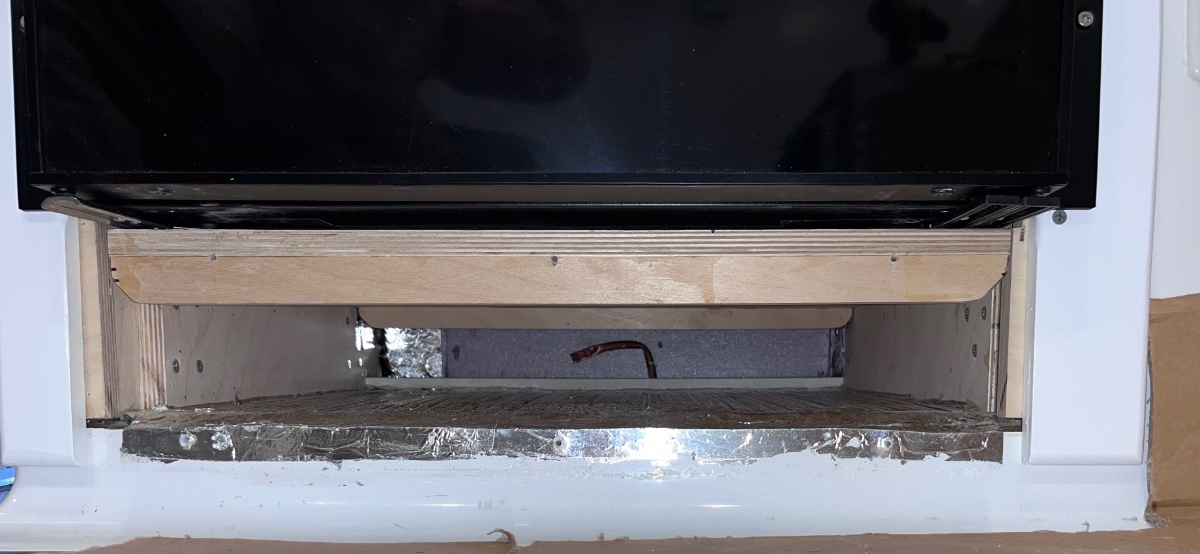
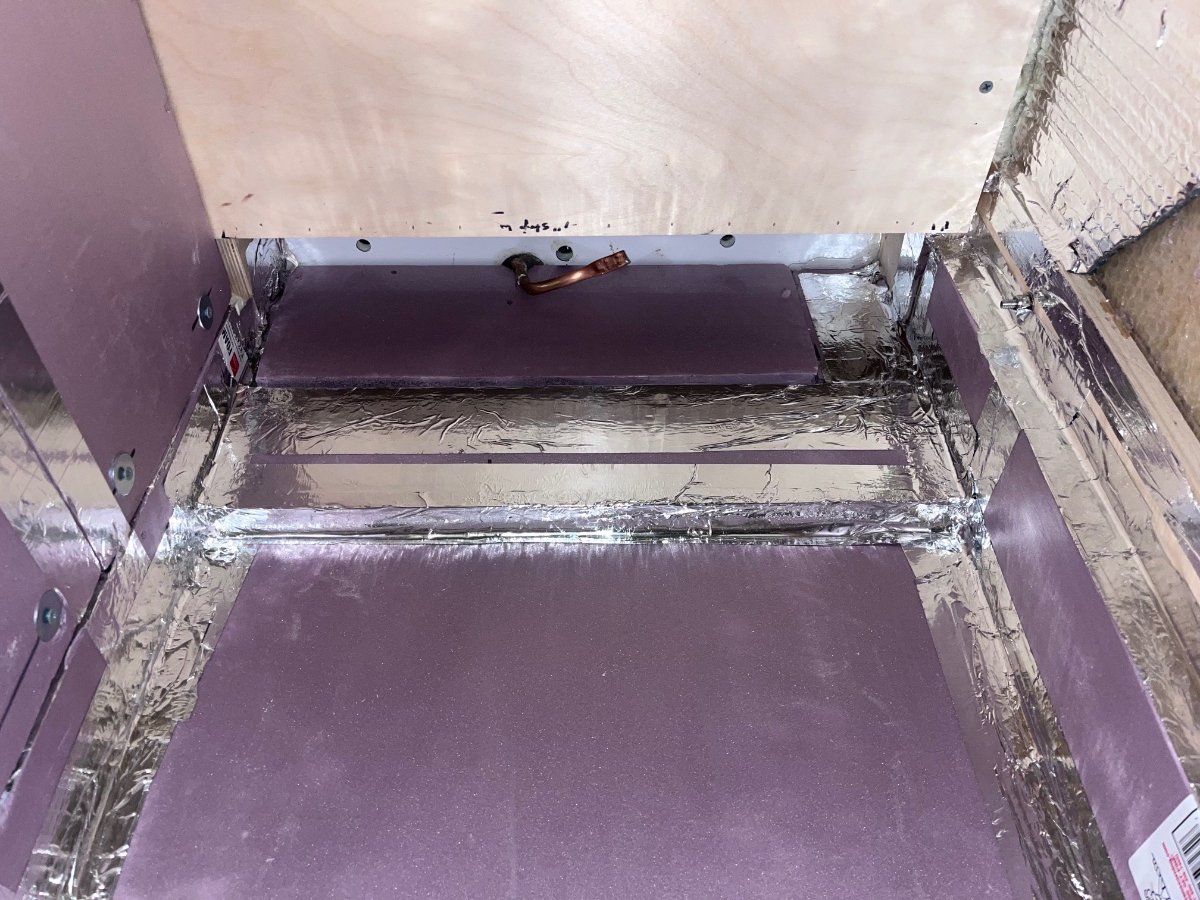
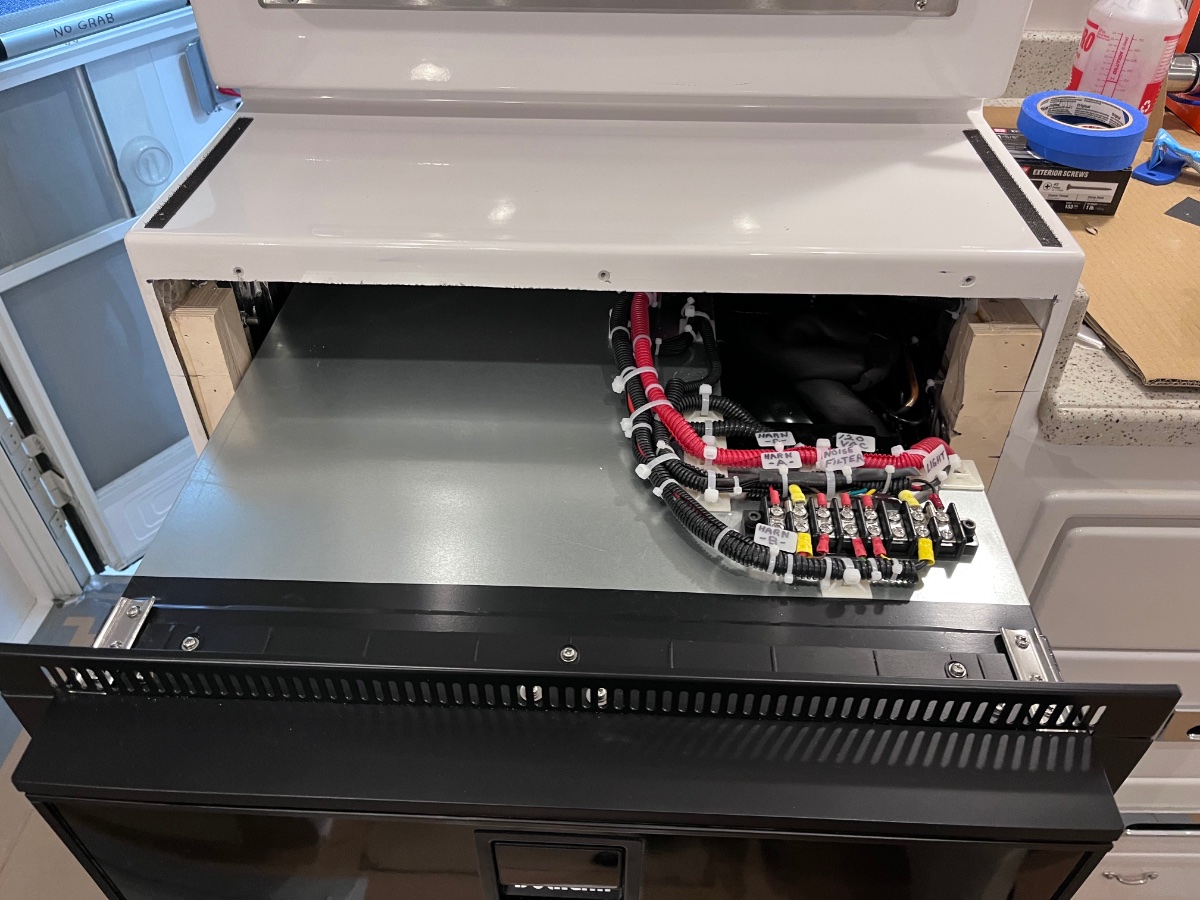
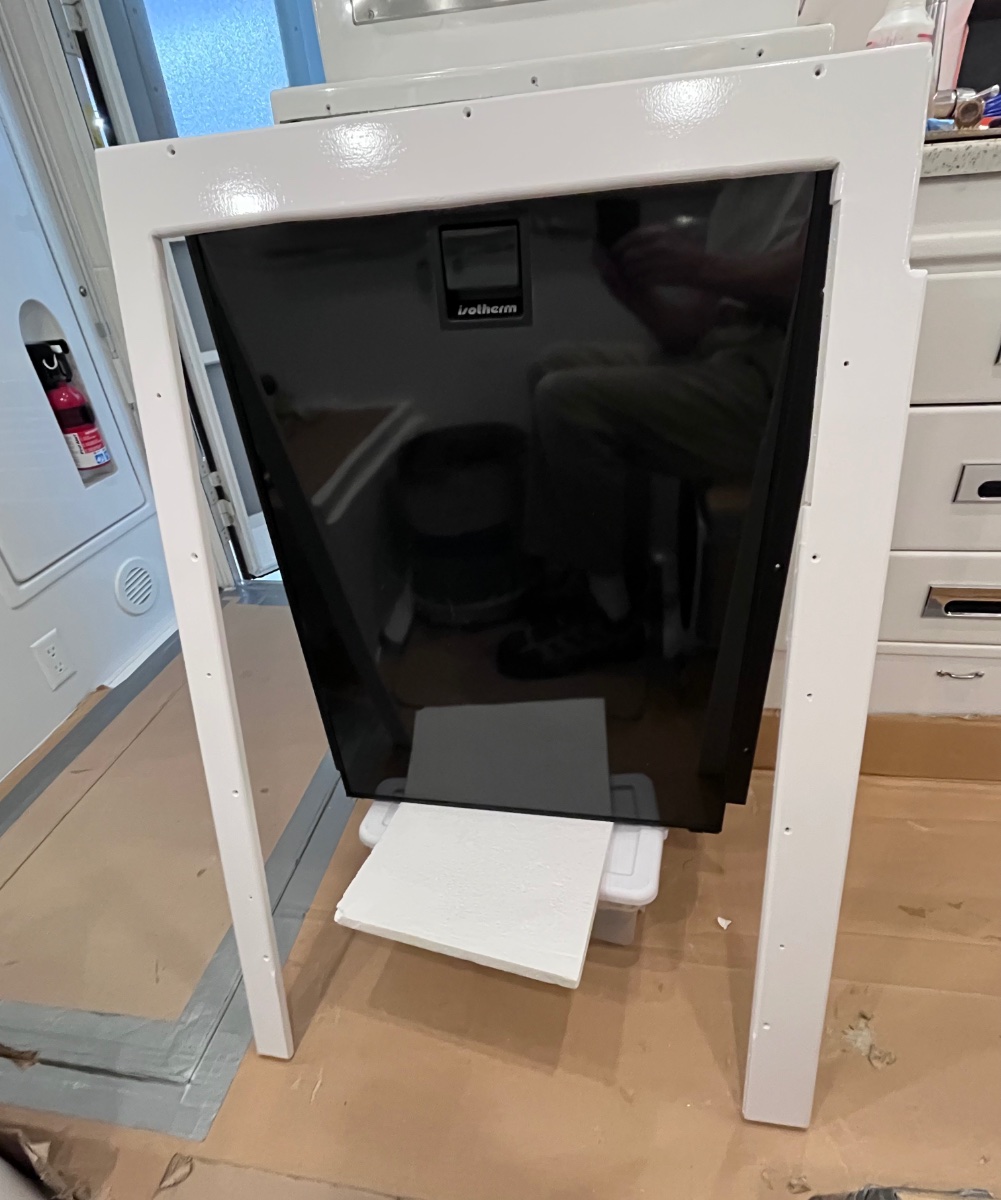
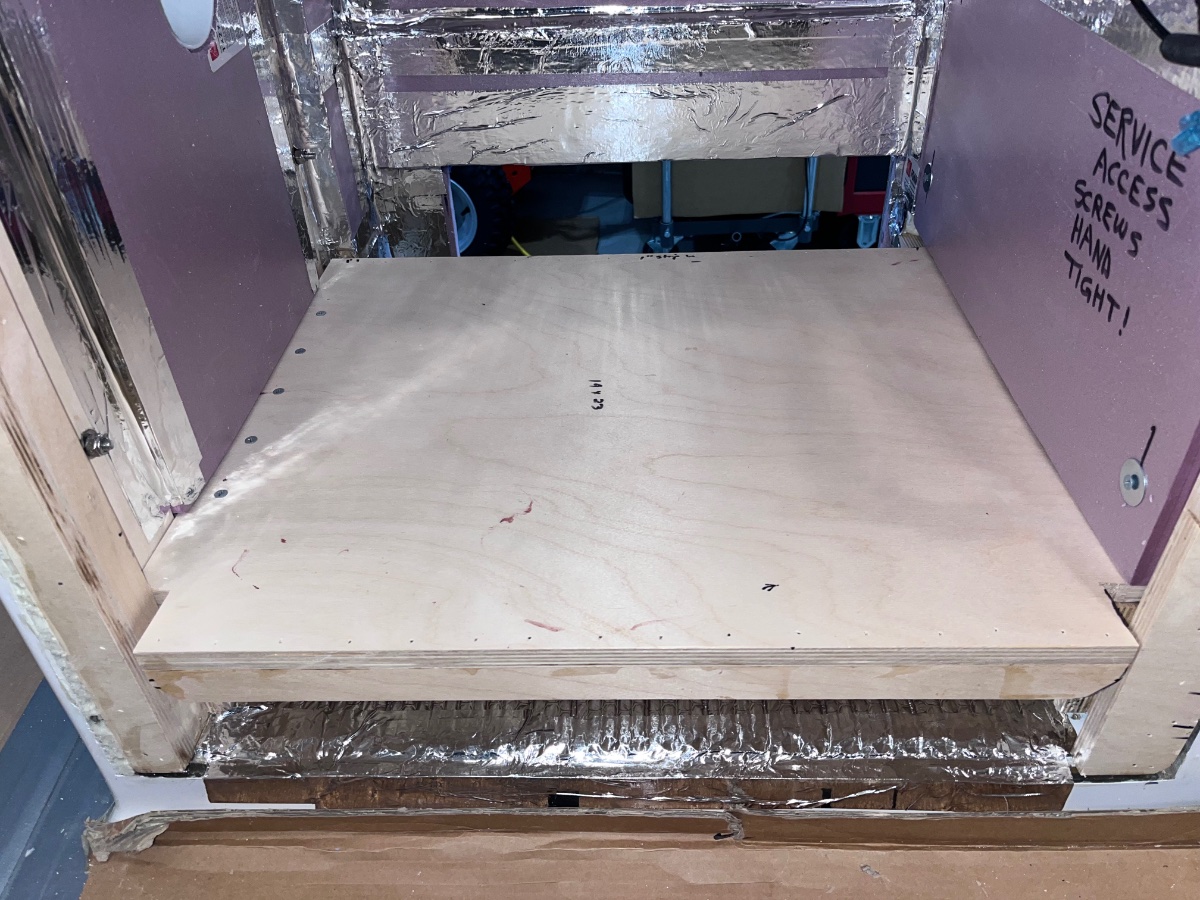
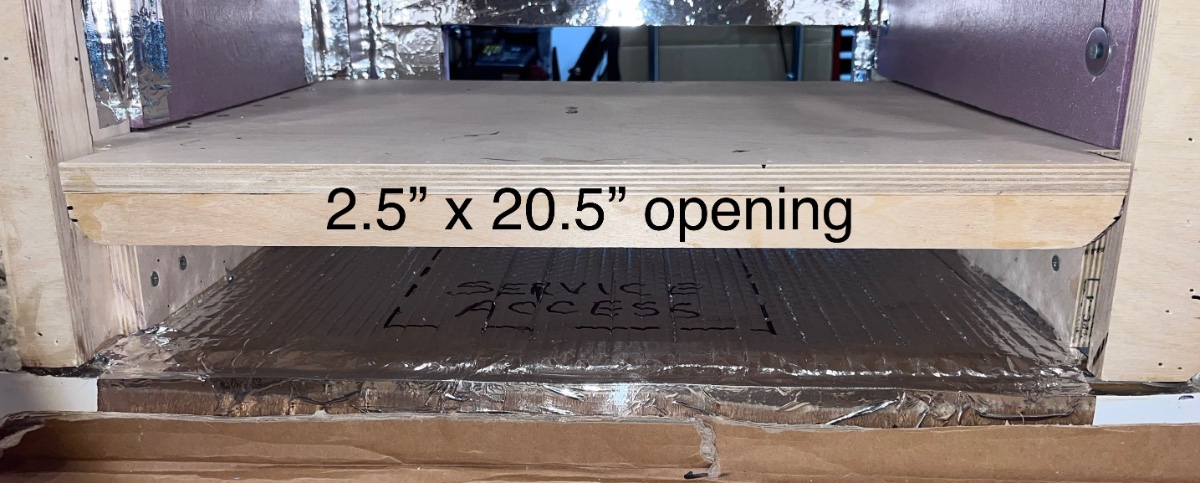
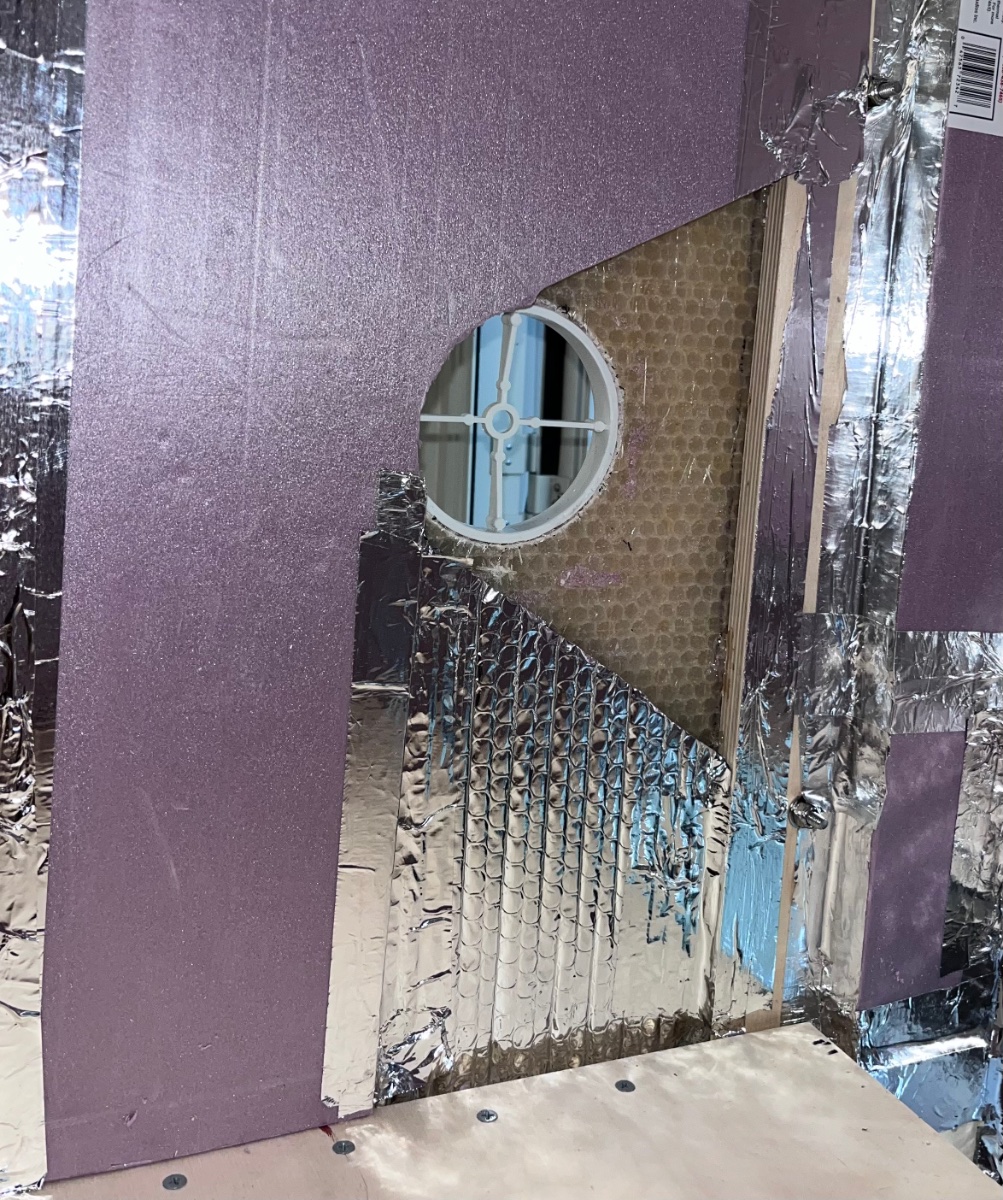
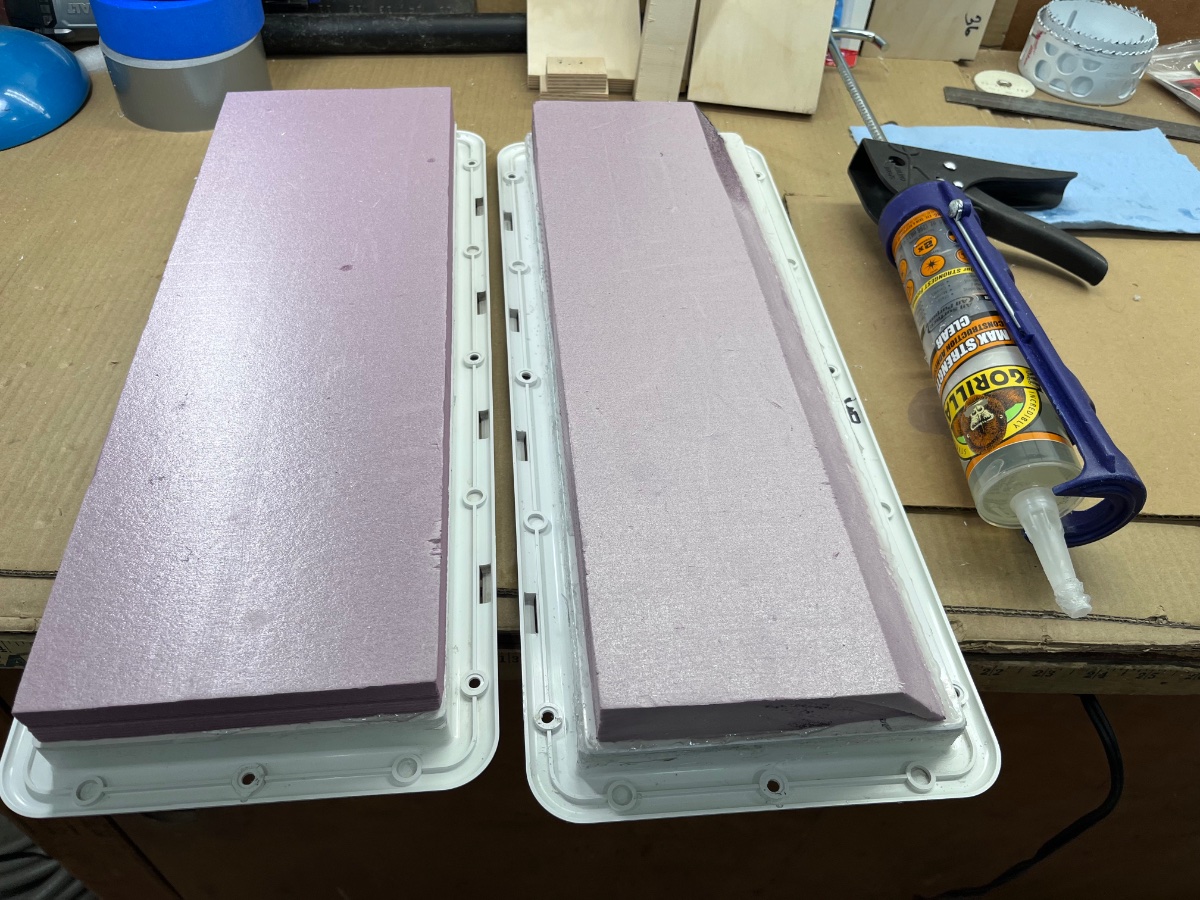
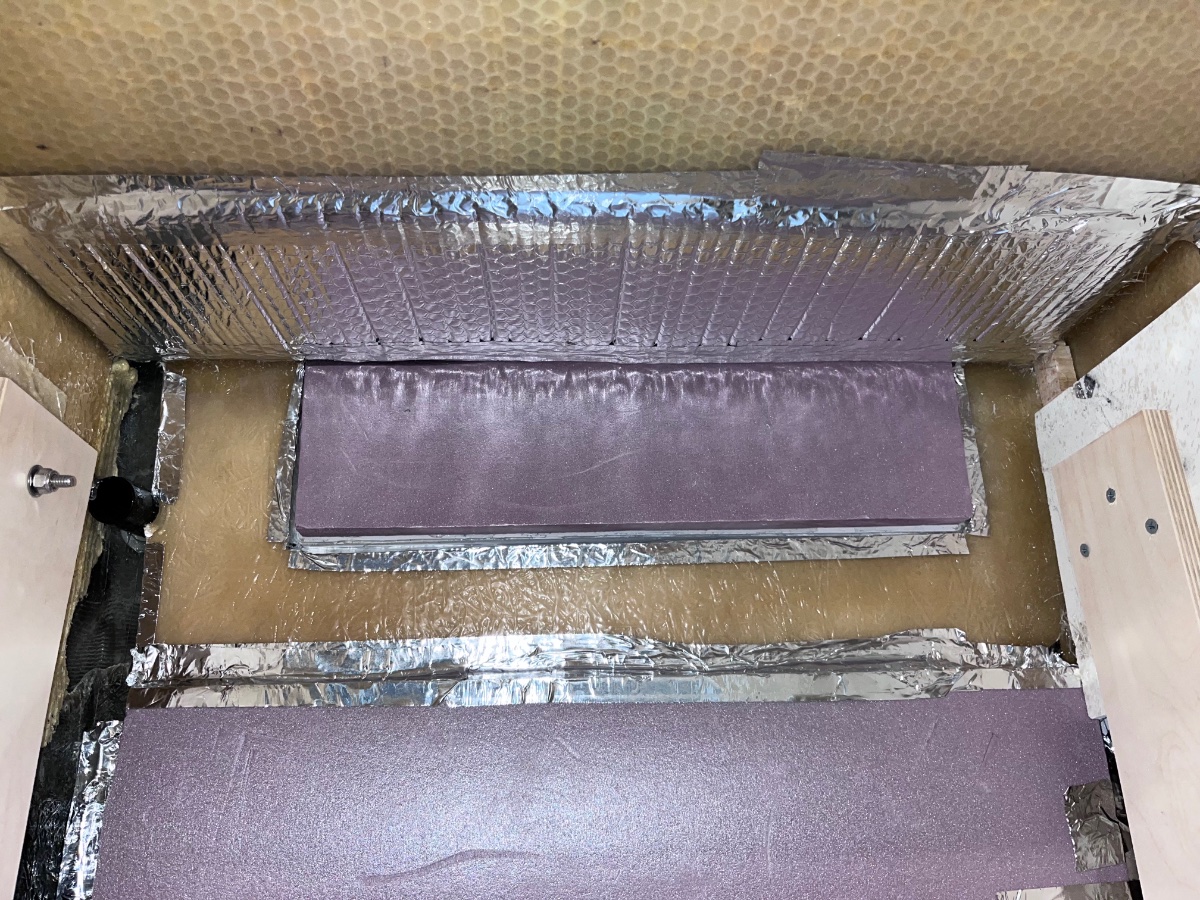
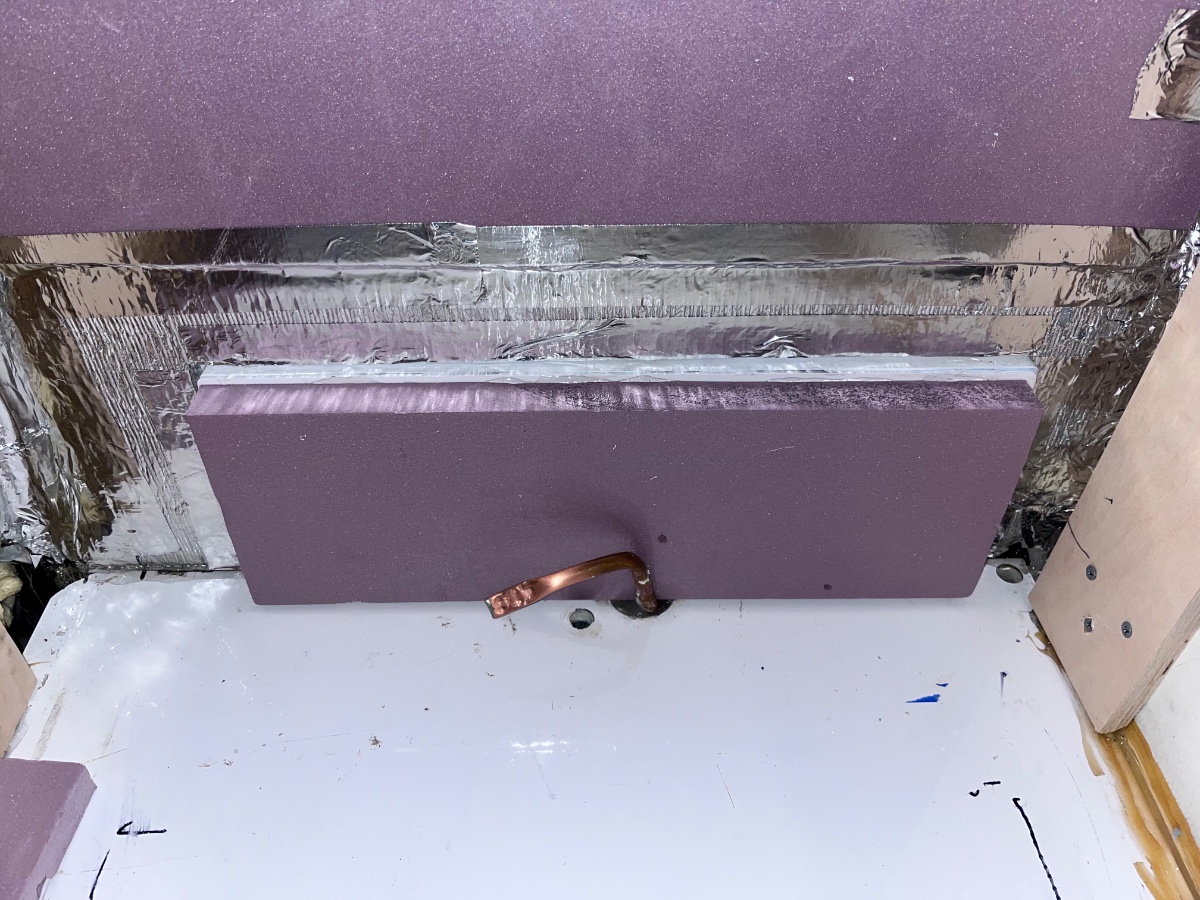
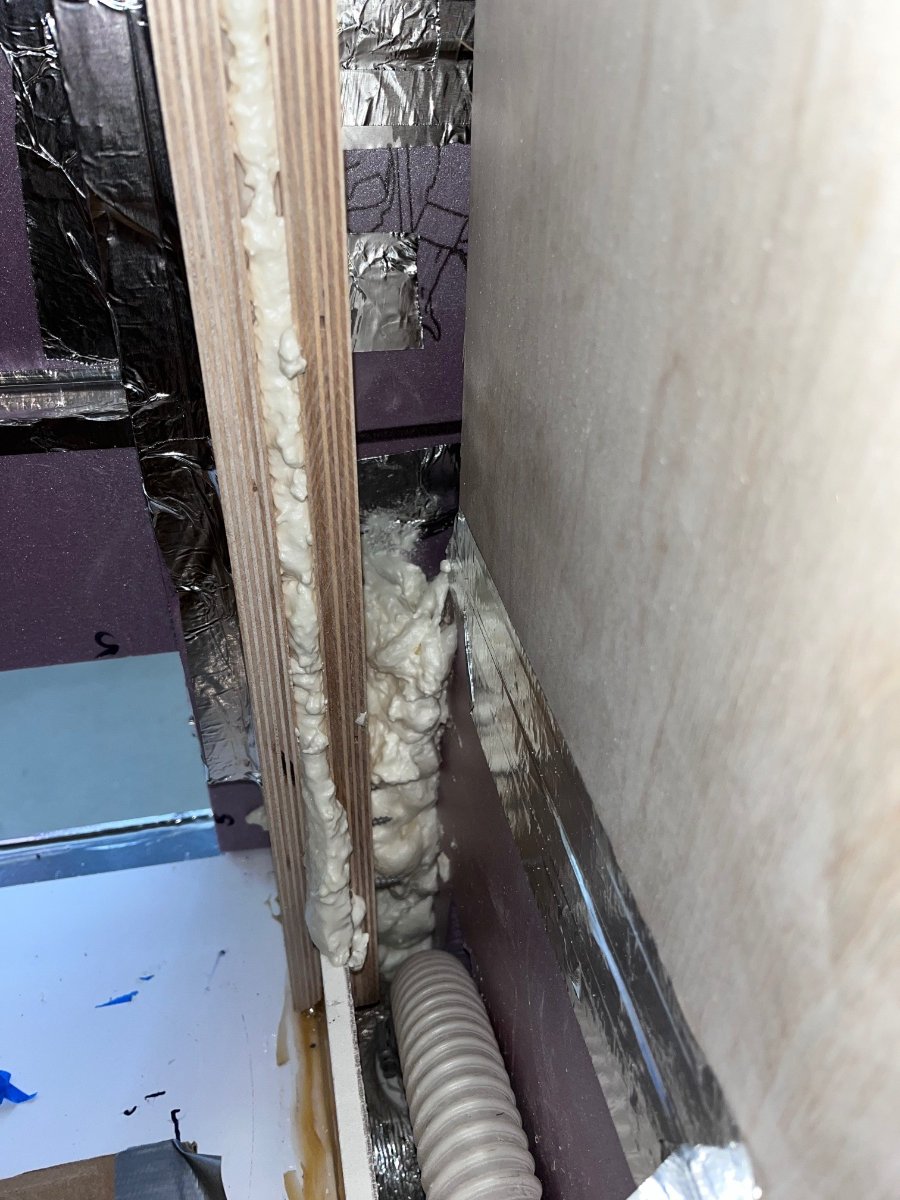
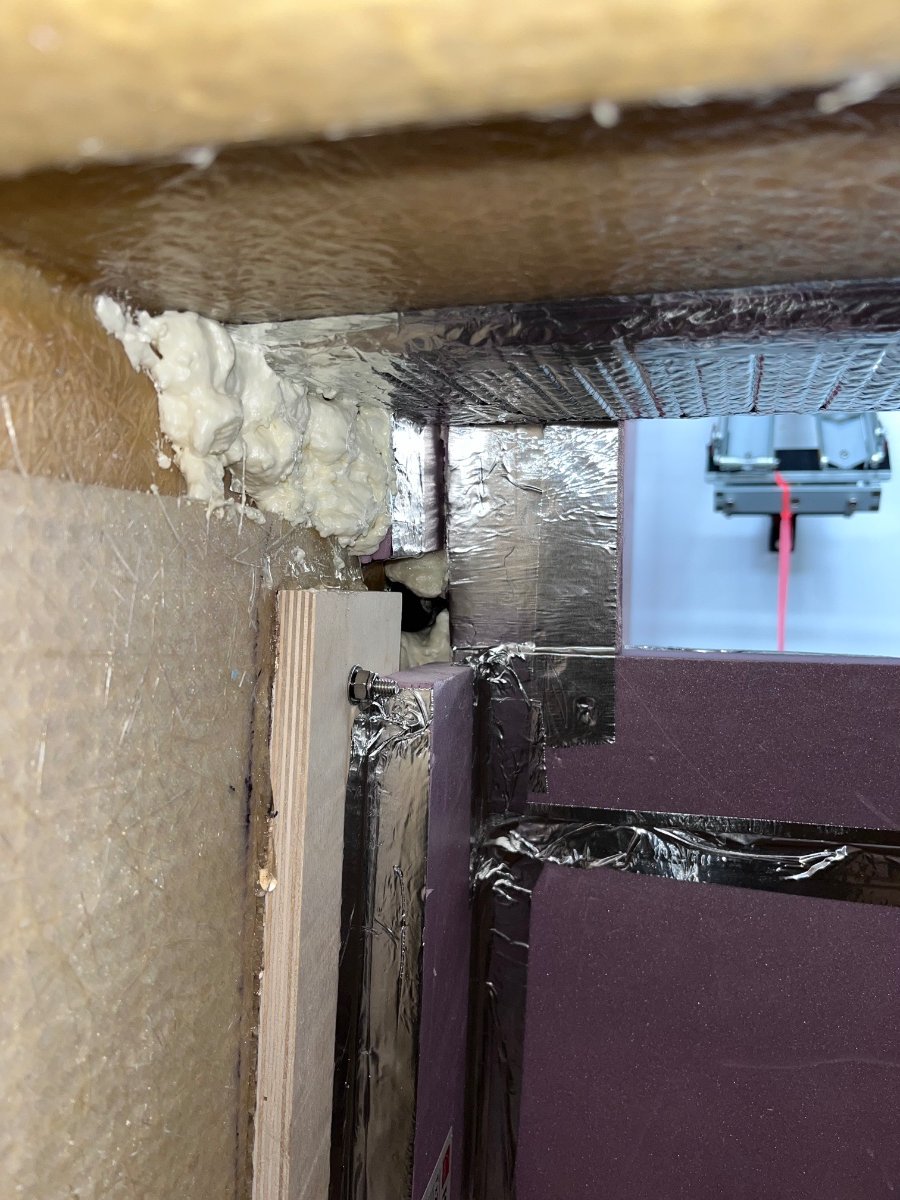
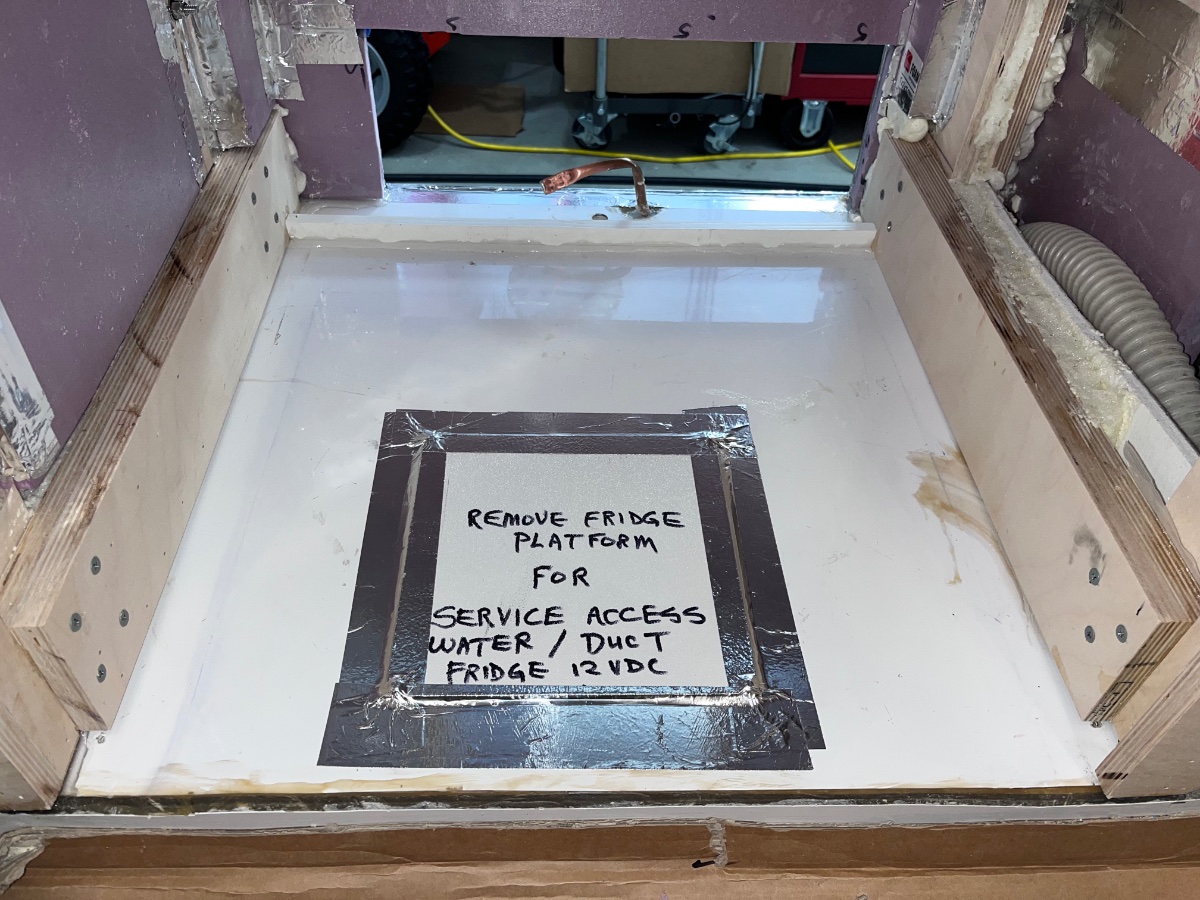
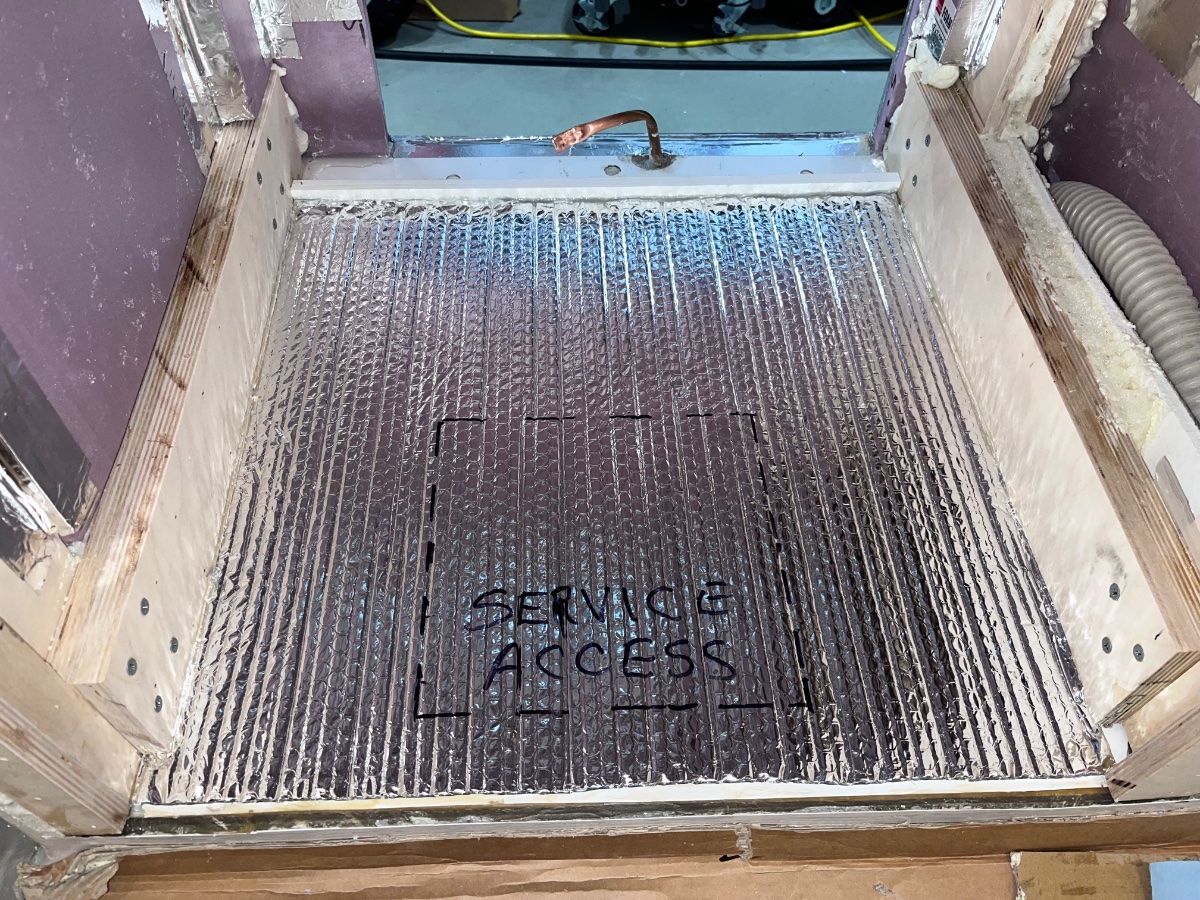
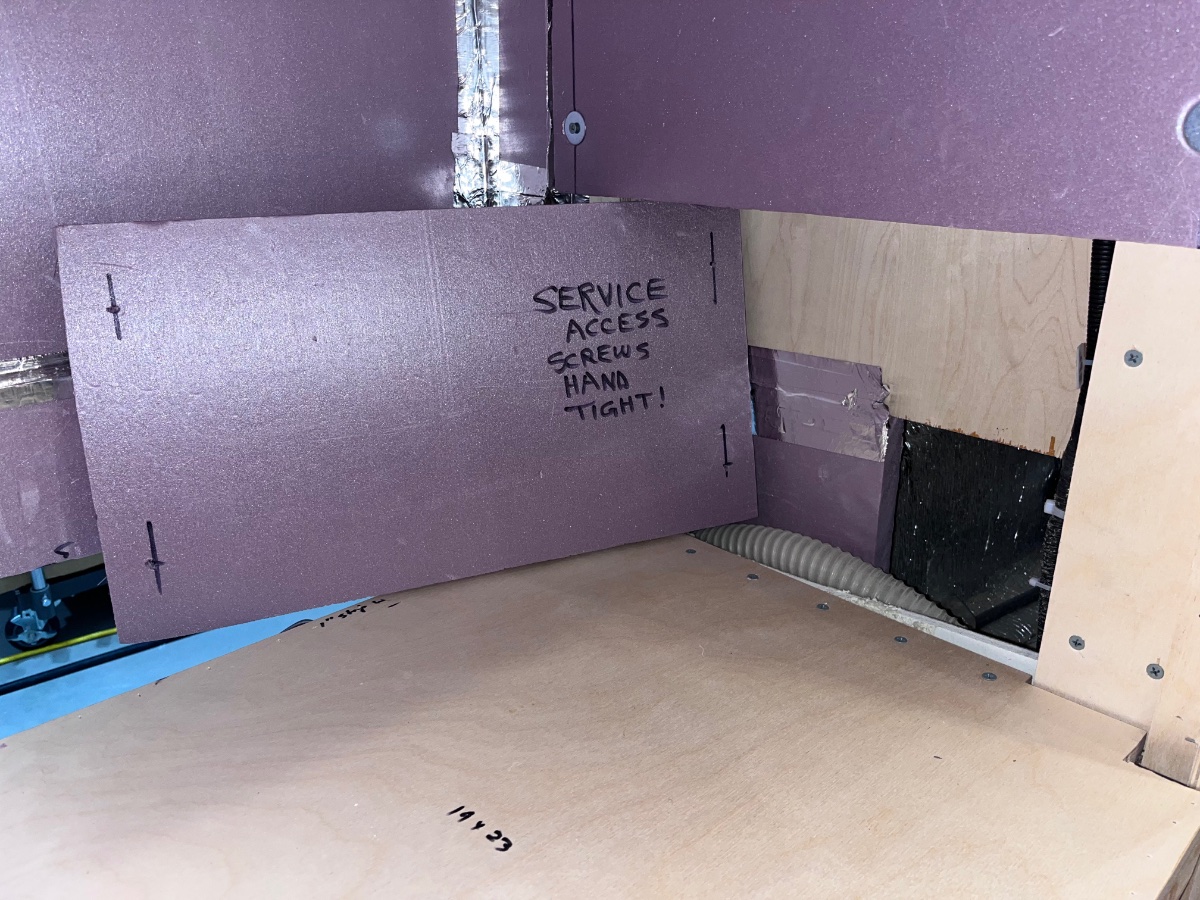
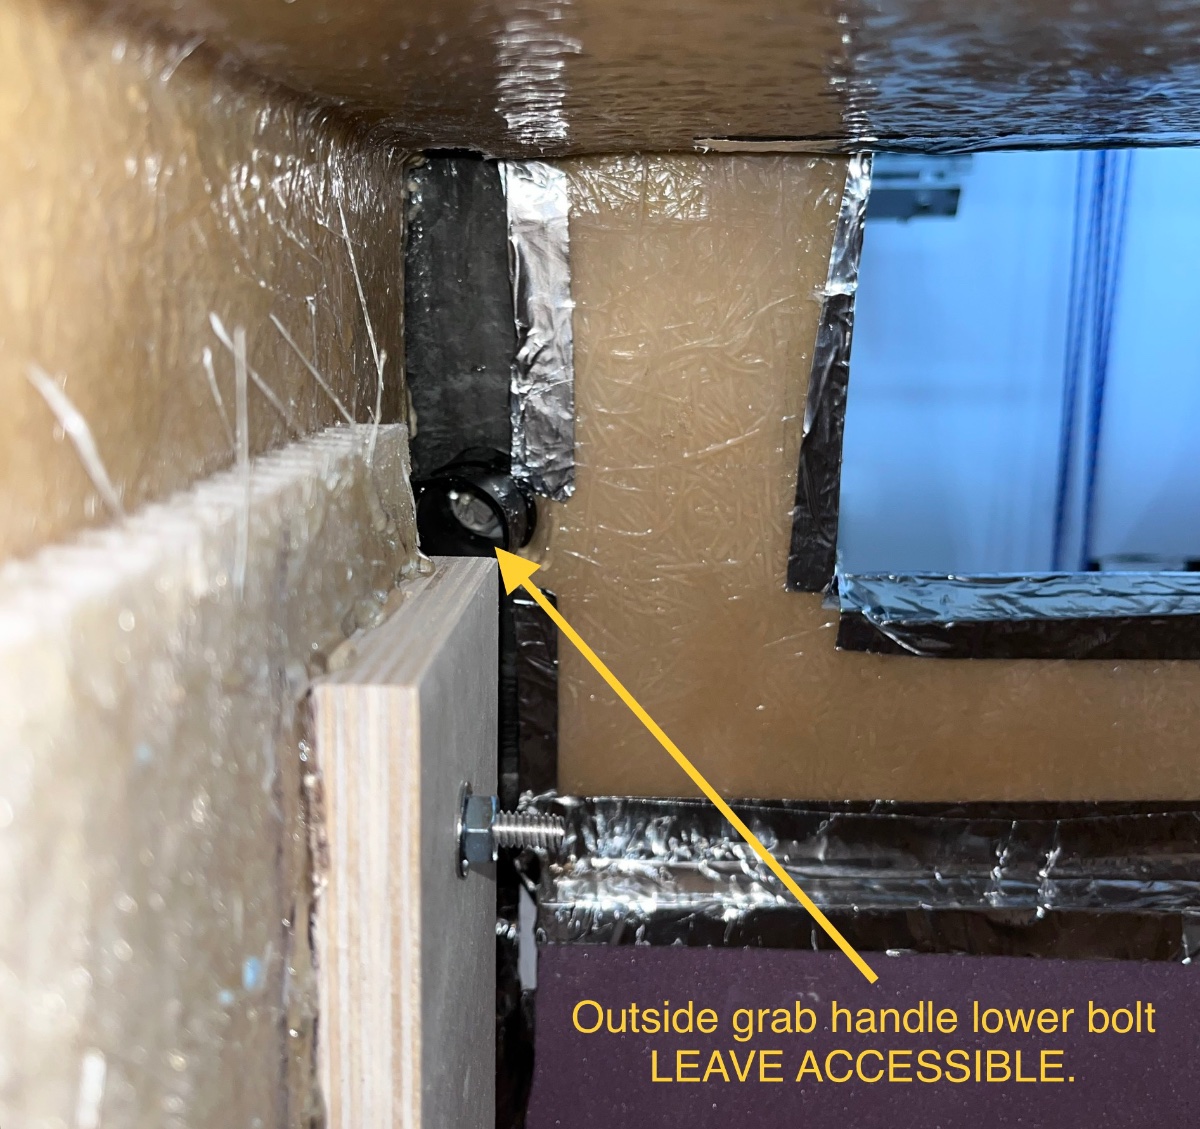
Pics The entire cavity is fully insulated with R5 foam board, spray foam and bubble insulation, including the outside hull panels. The fridge must be supported under the door to keep it approximately level, or it will drop down and possibly damage the wood trim or wiring on top!
-
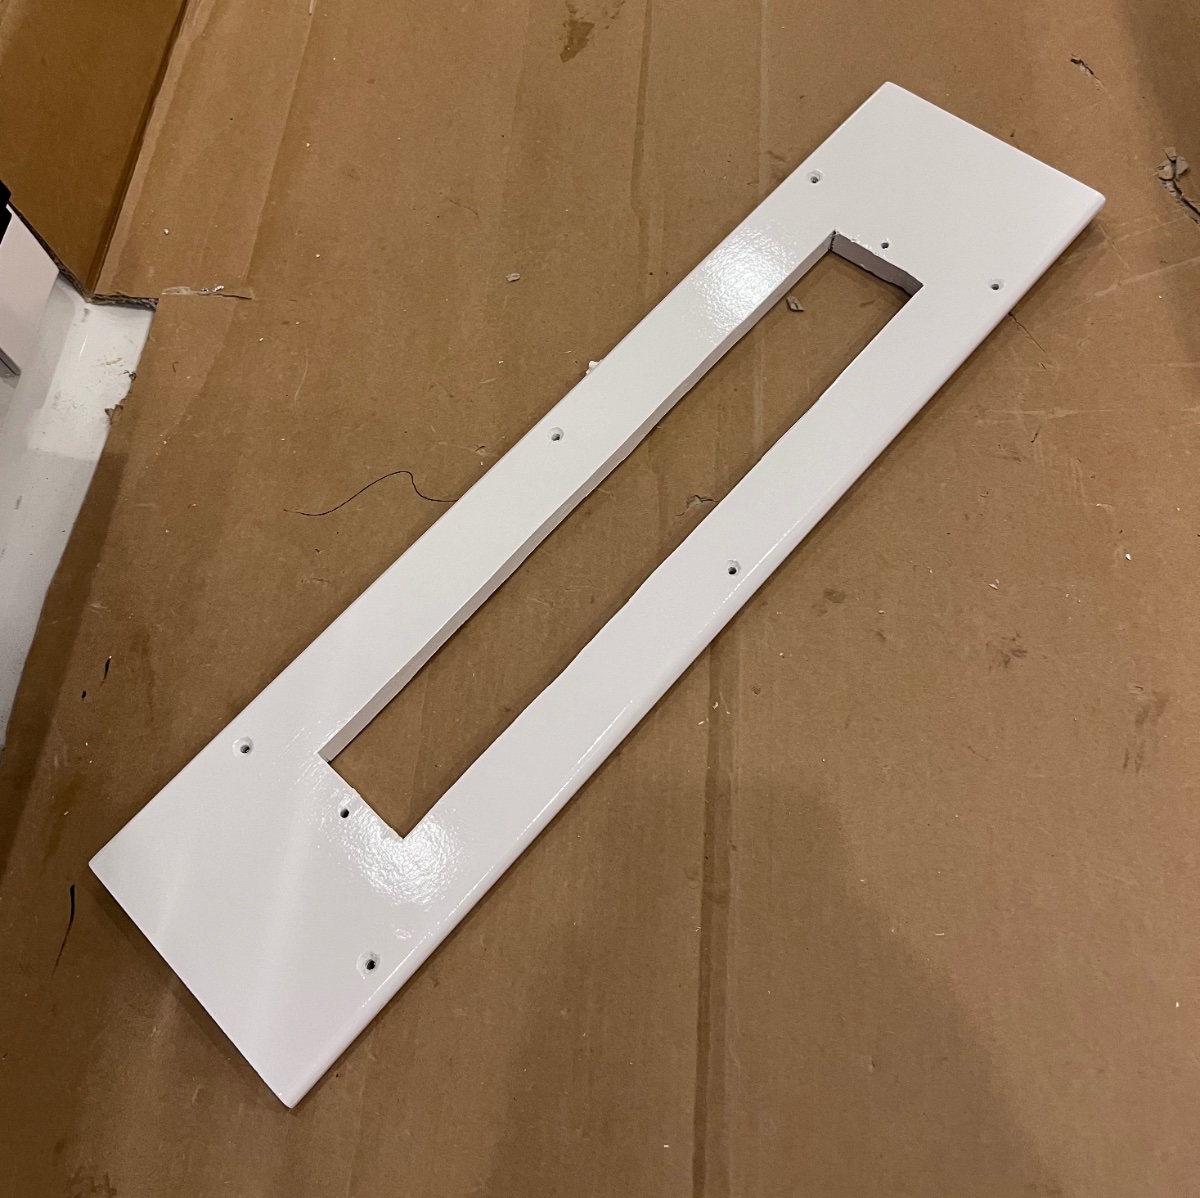
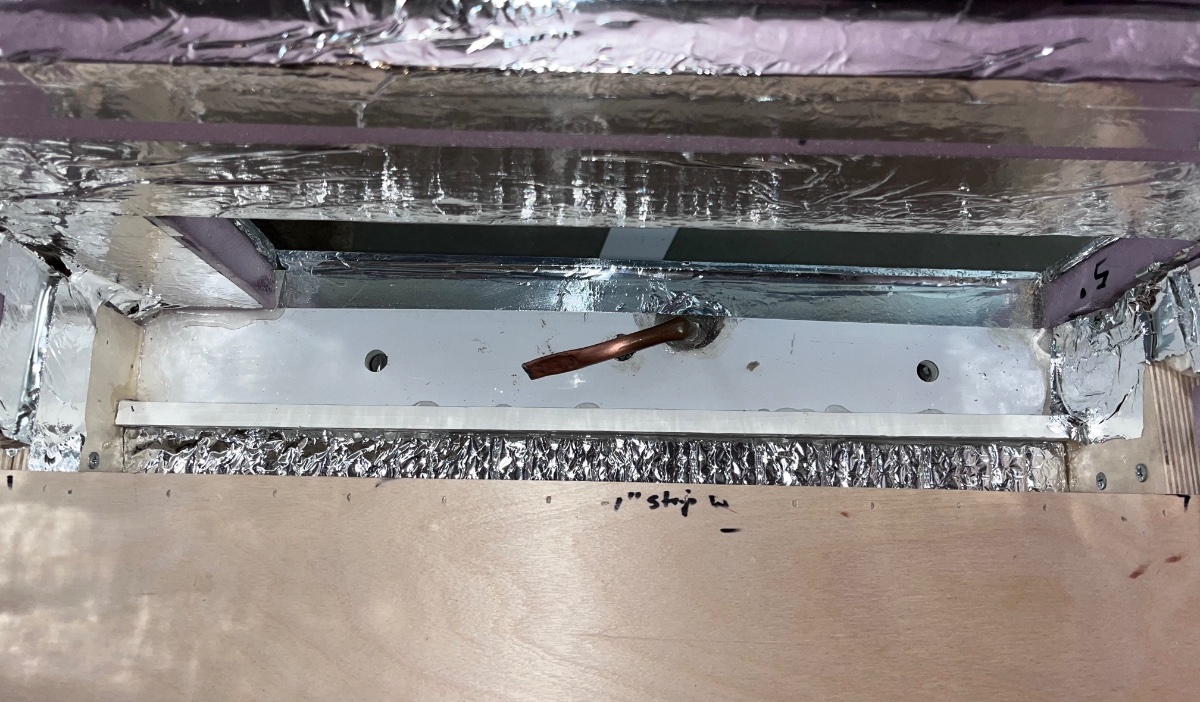
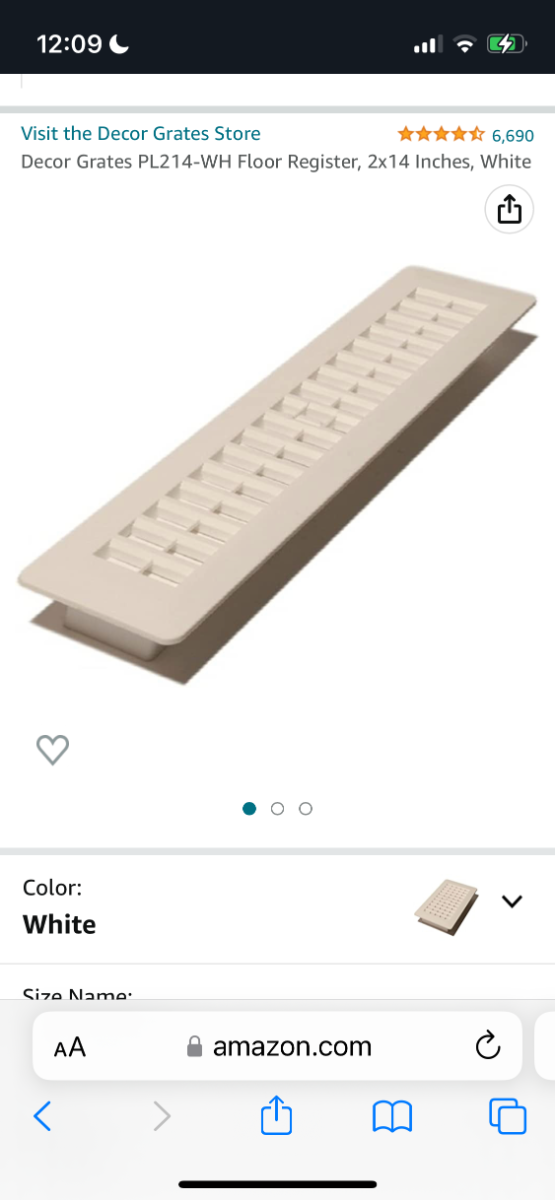
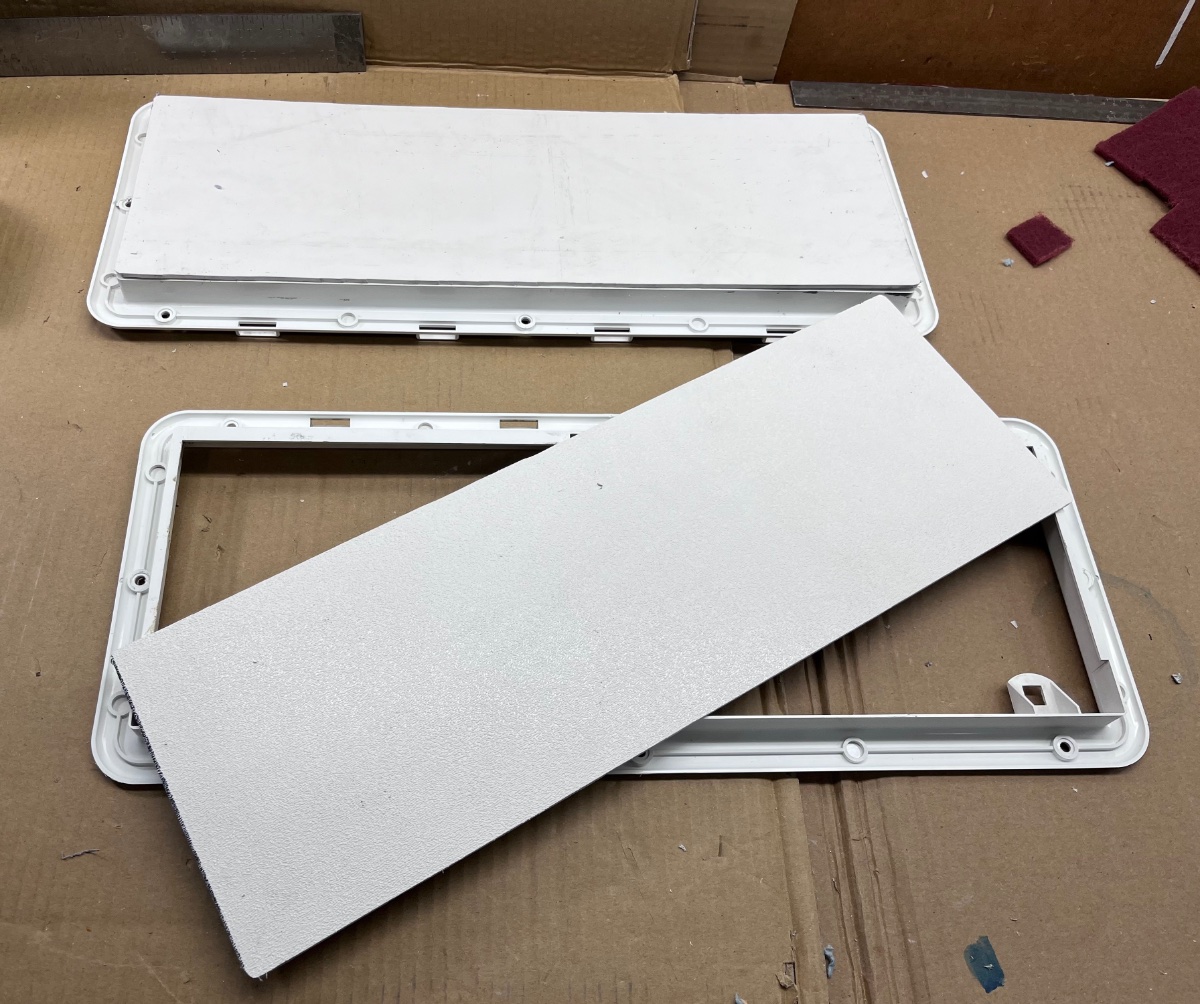
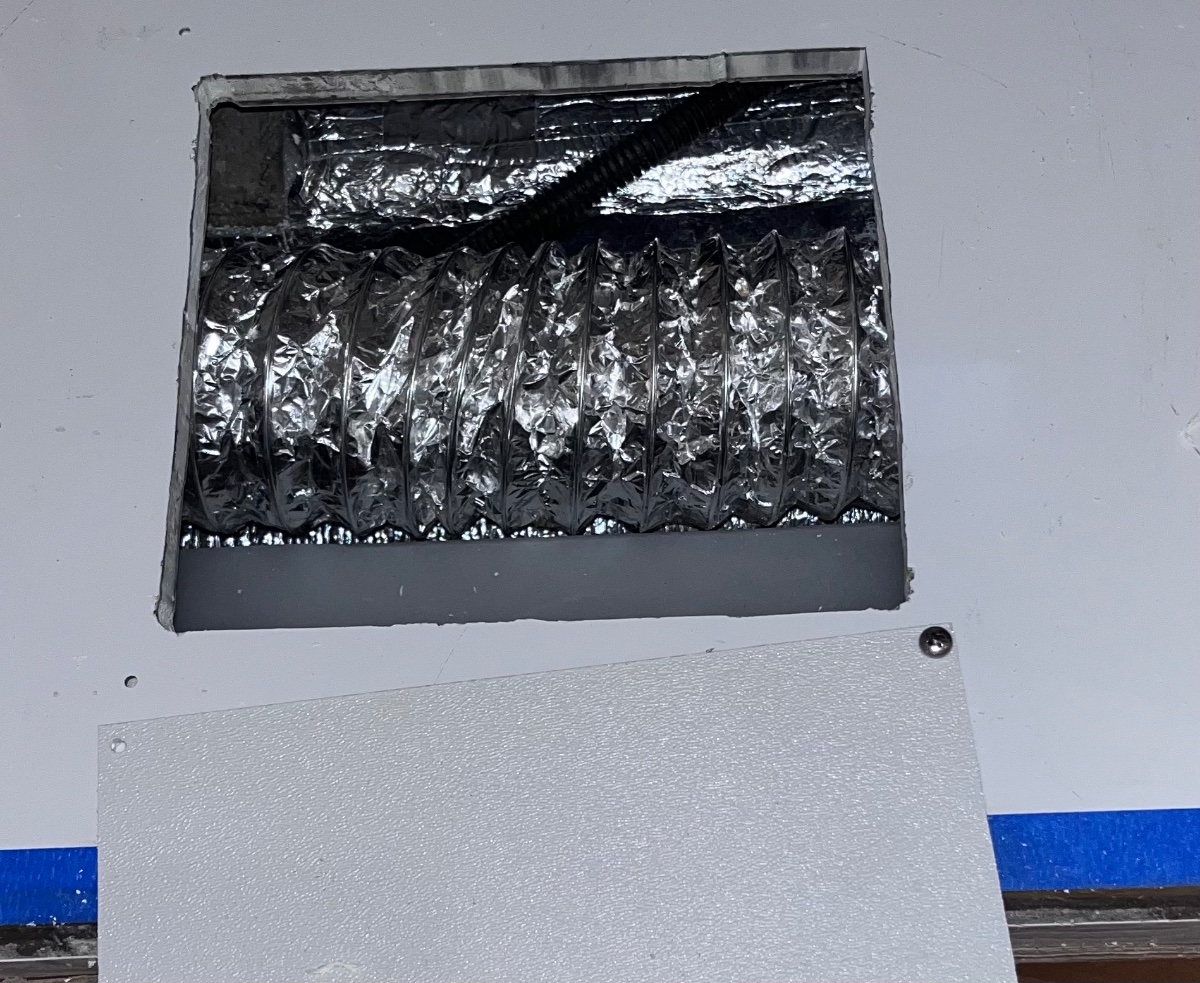
Pics The sliding inner flow adjuster for the register must be completely removed. Cut off the plastic retainers.
-
Pics
-
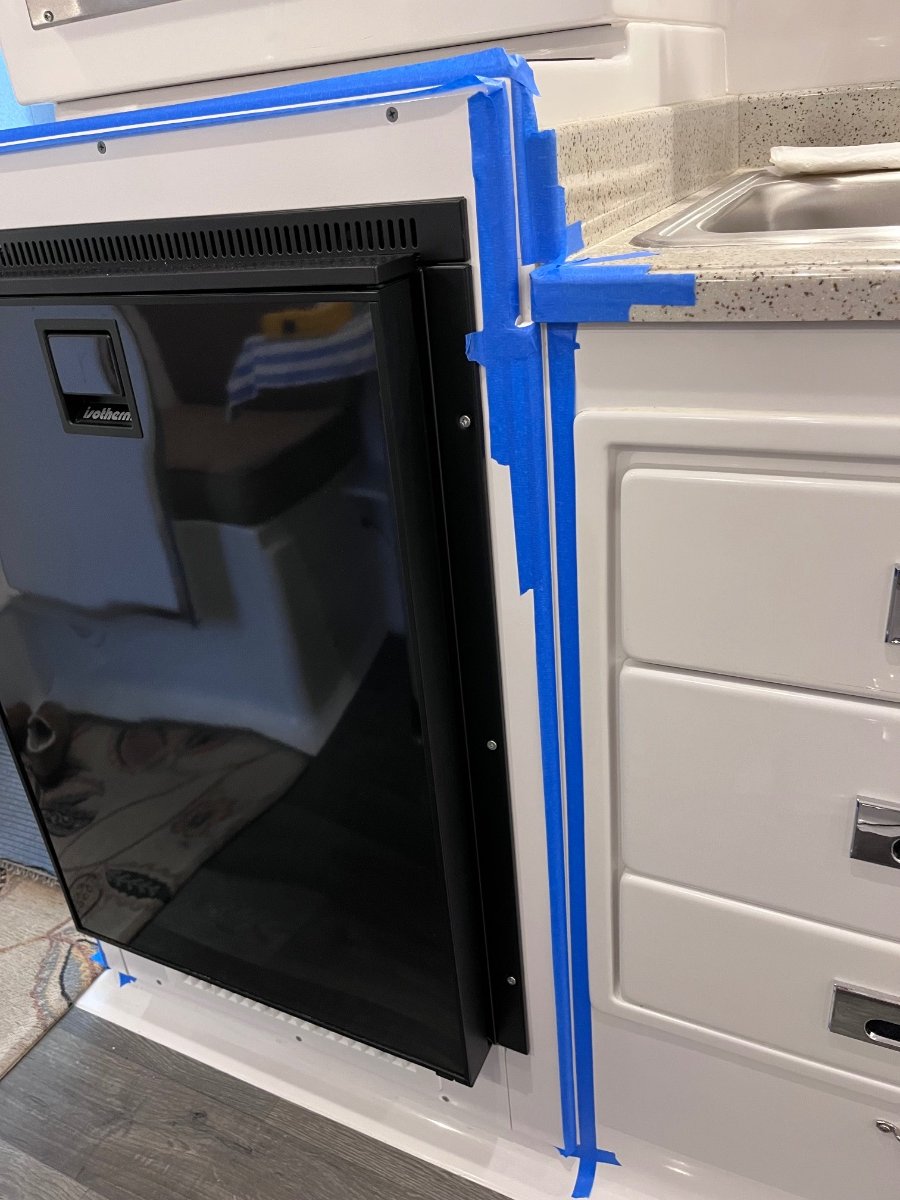
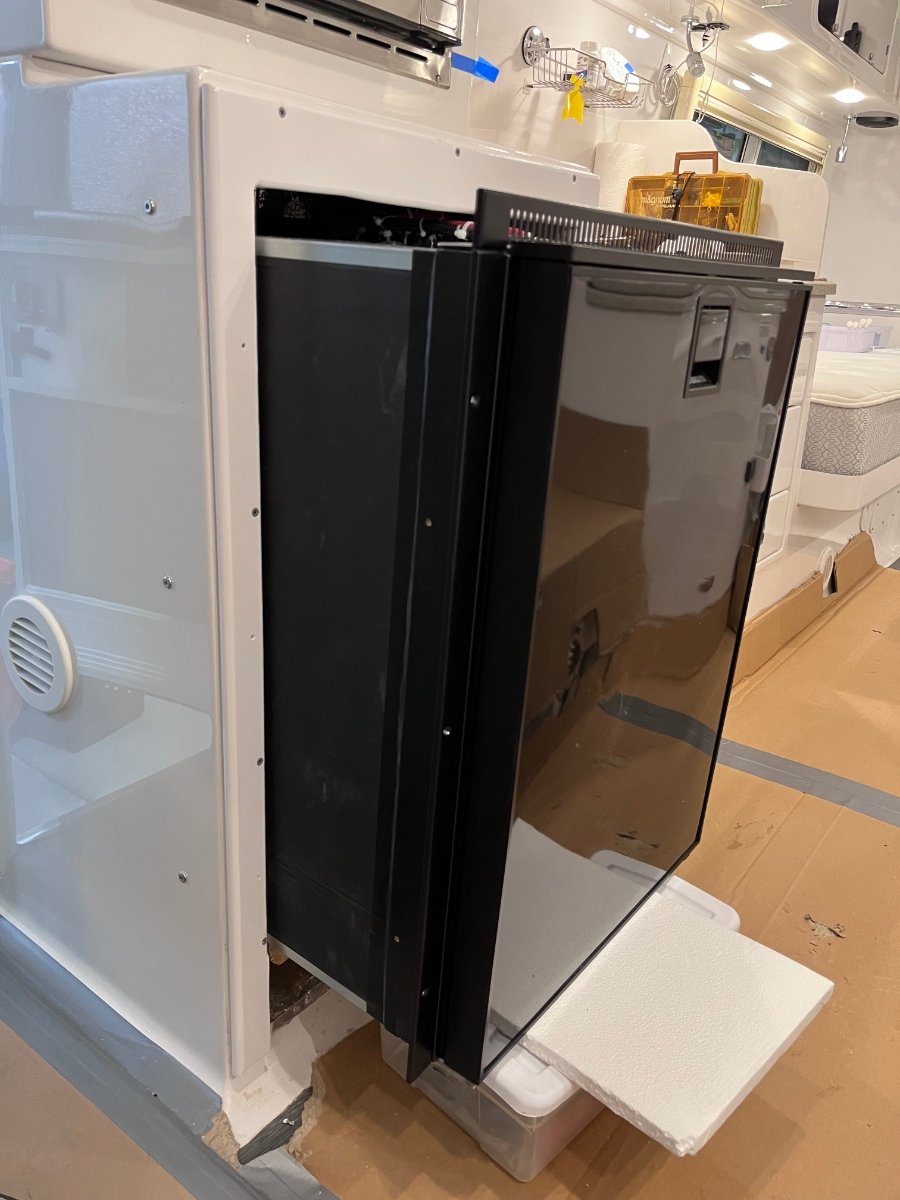
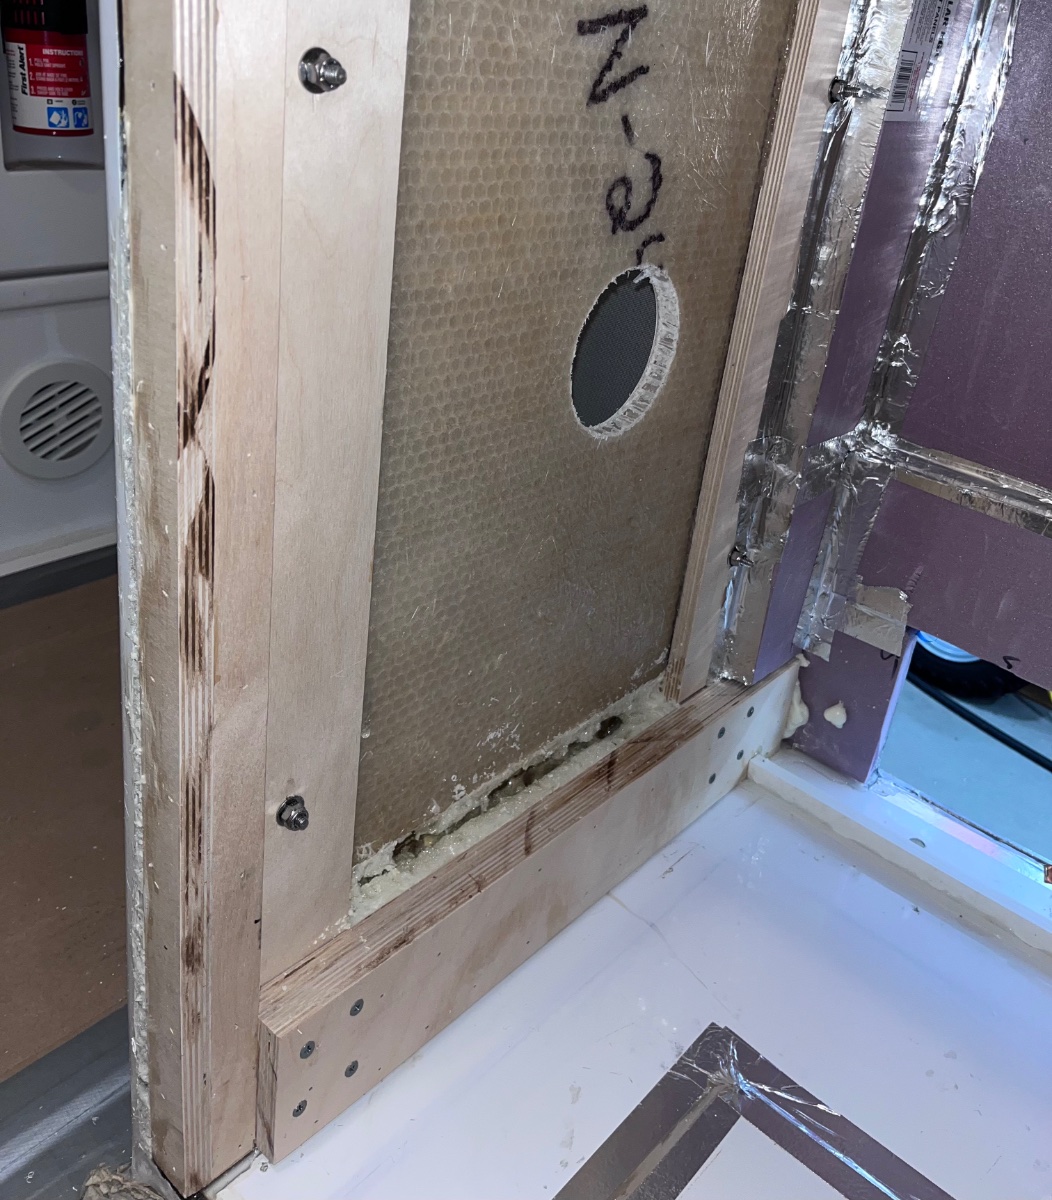
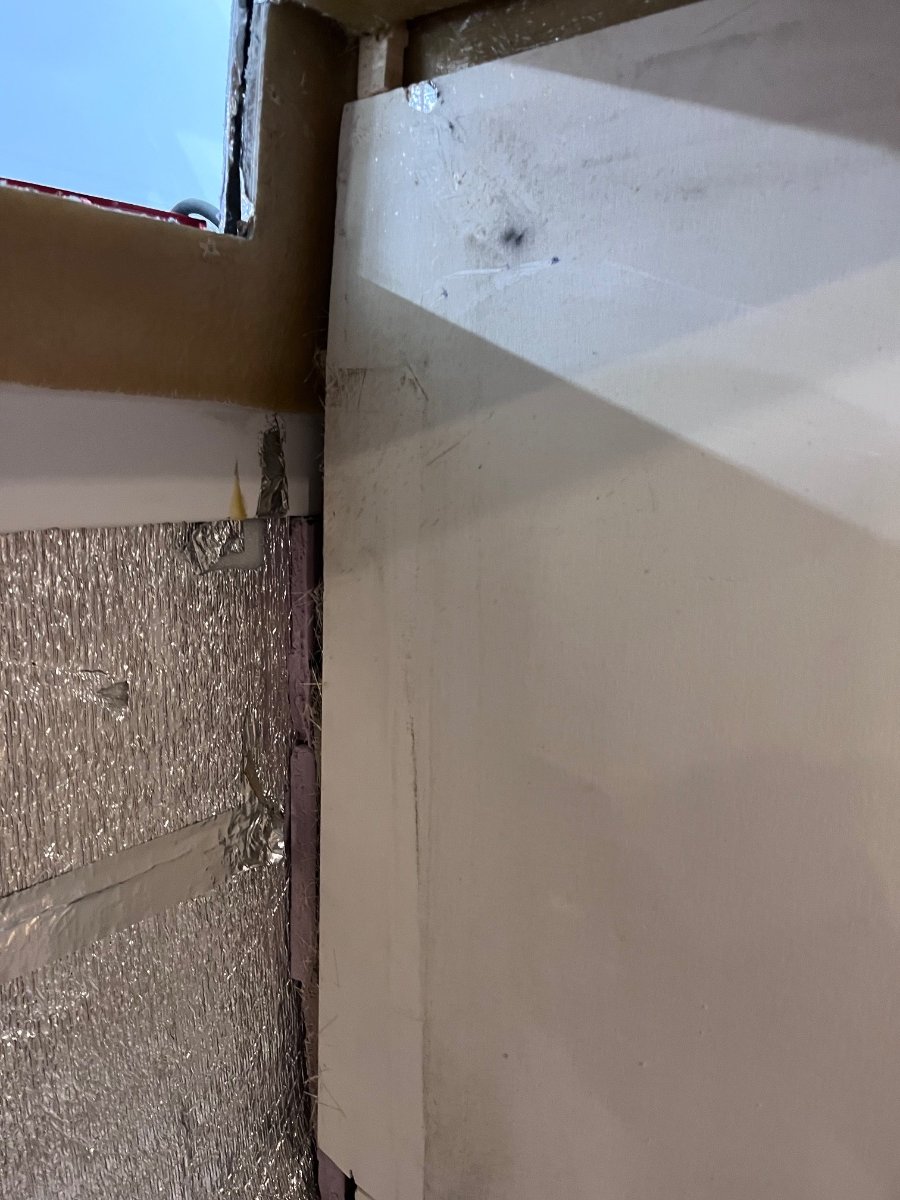
There won't be much commentary, this is a huge job, one I regretted more than once during the months it took me... West Marine lost my fridge, then it showed up and when I got it home from the store I found massive damage from a wayward fork lift tine. All in all, it took about four weeks to get one. Getting the old Dometic 3 Way out was not hard, but the factory installation is horrible and putting it back would be a great chore. See this thread: https://olivertraveltrailers.com/forums/topic/9040-how-to-dometic-3-way-fridge-removal-and-demolition/ And this one: https://olivertraveltrailers.com/forums/topic/9169-how-to-isotherm-intelligent-control-for-cruise-130-refrigerator/ The huge problem is that the fridge cavity is a fiberglass molding which is "out of true" in every dimension. NOTHING was parallel, true or at 90 degrees to each other, and the galley bulkhead was a disaster, it was not cut properly and the tech simply taped a flimsy extension that leaked copious amounts of outside air and dirt. Since I have the tools and skills, I decided to use 15 mm Baltic Birch to make a true and straight cabinet inside the wonky fiberglass. Here are a bunch of pics in approximate order. If anyone has a specific question, ask. BTW the final installation turned out to be beautiful. I used the six flange screws AND the four internal side screws. All ten go into solid thick plywood. It is super sturdy and dead silent in operation. John Davies Spokane WA
-
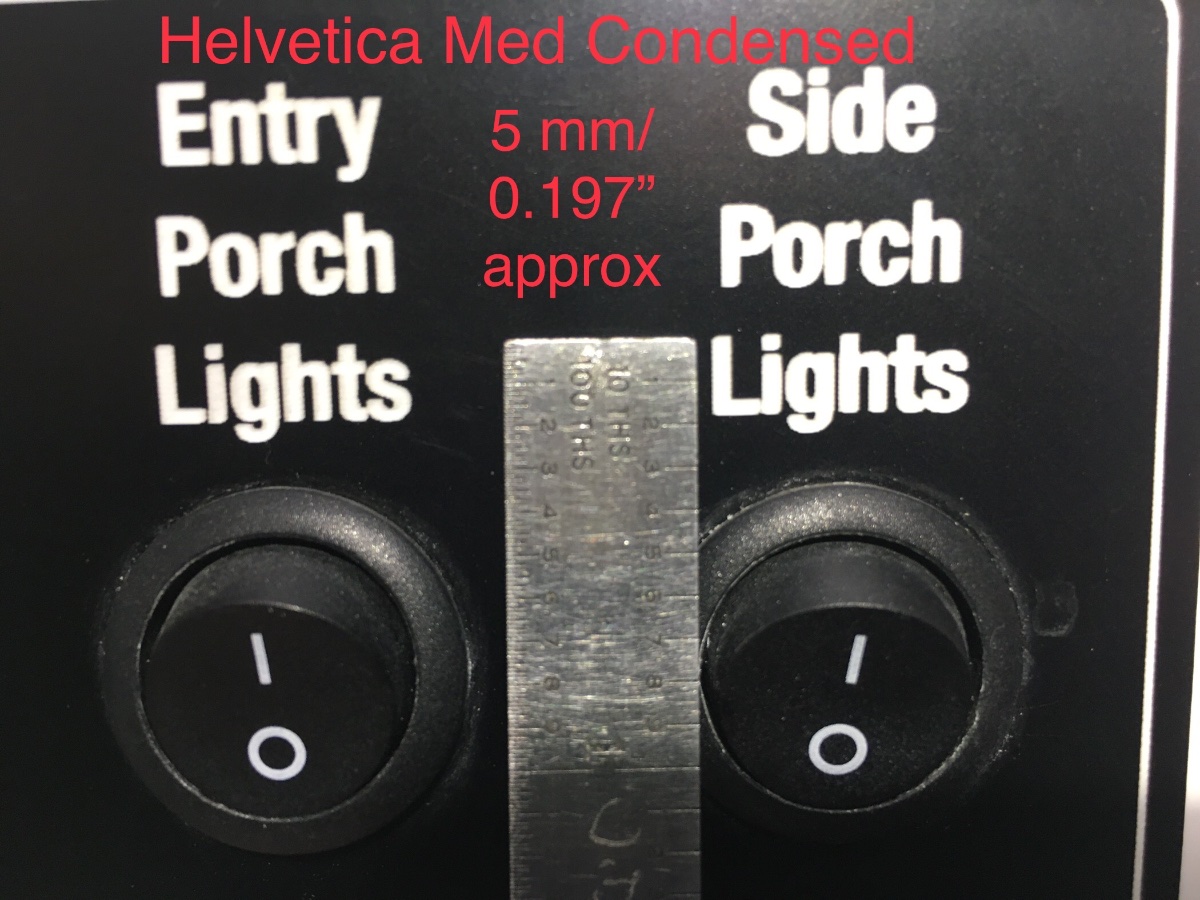
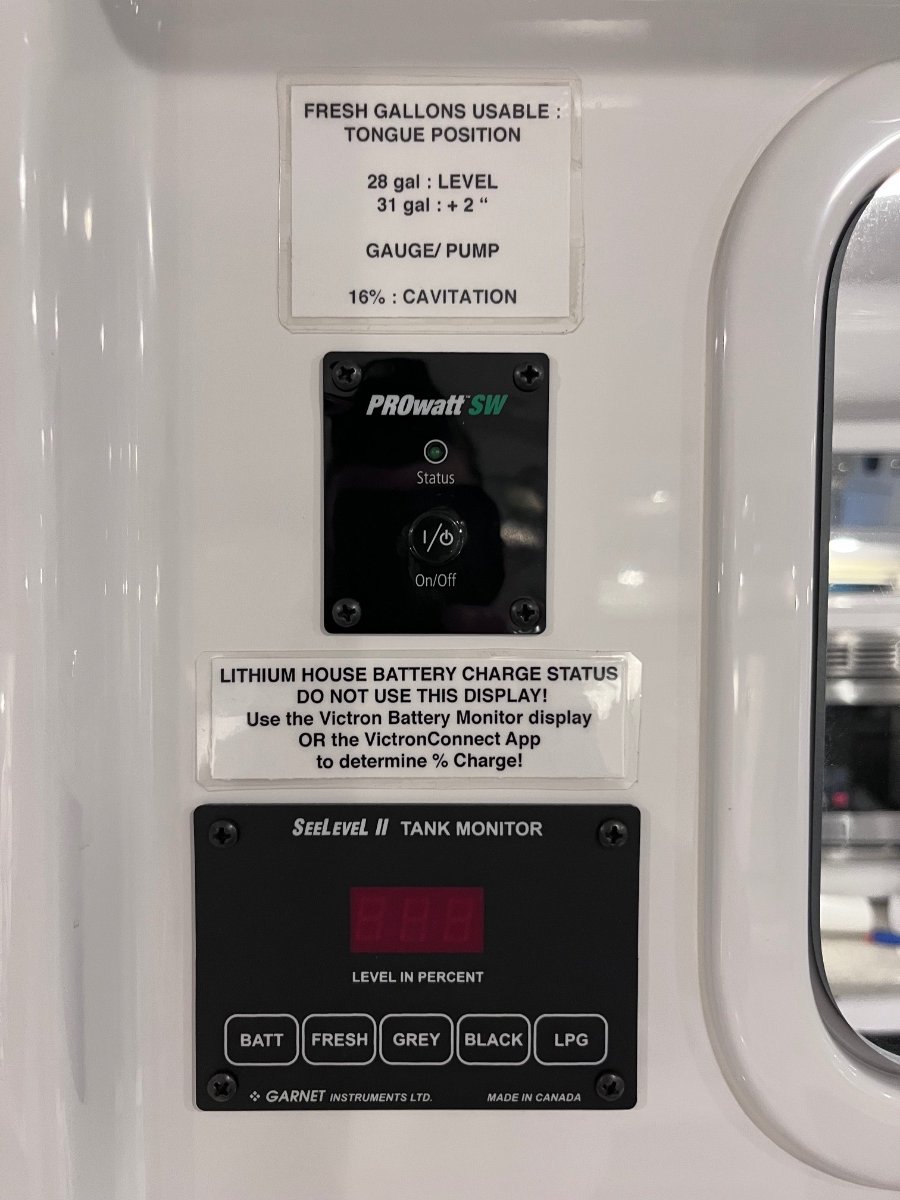
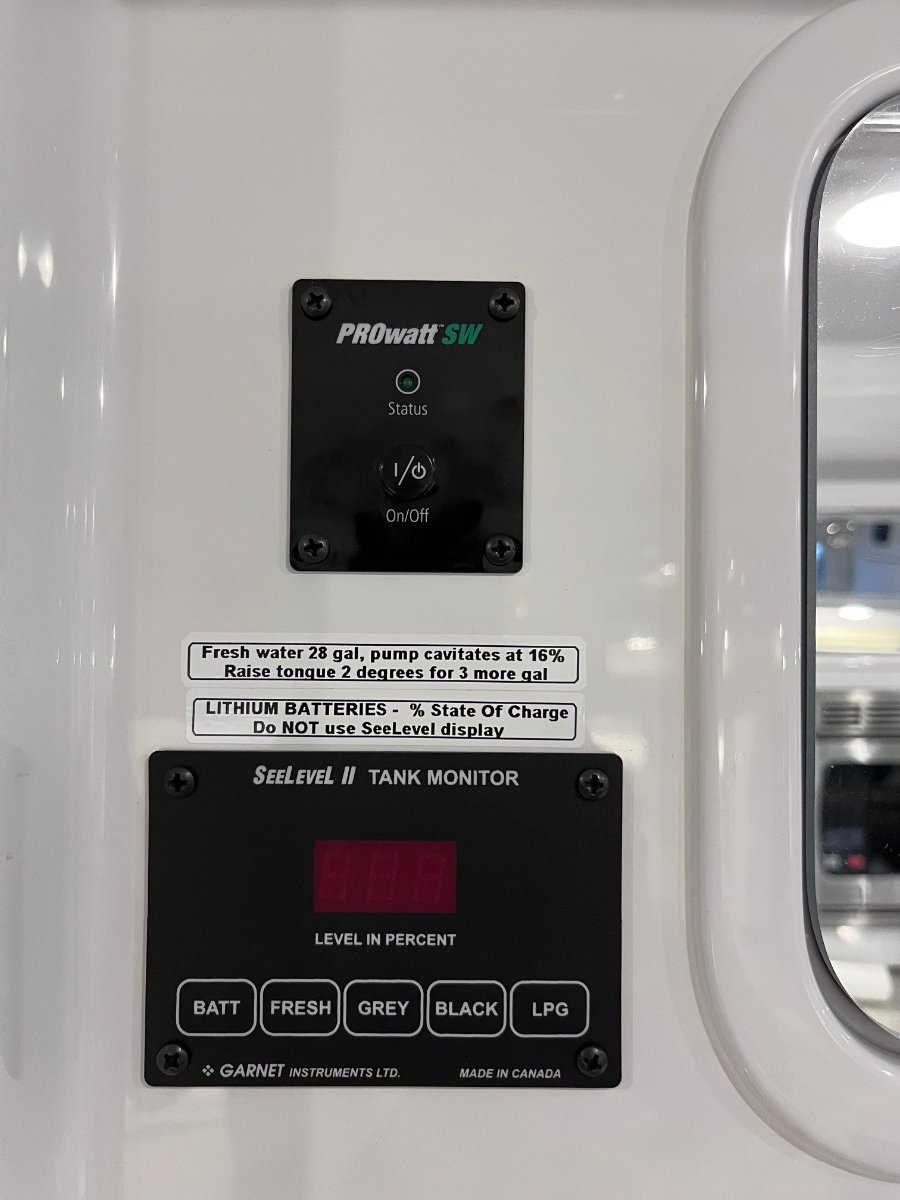
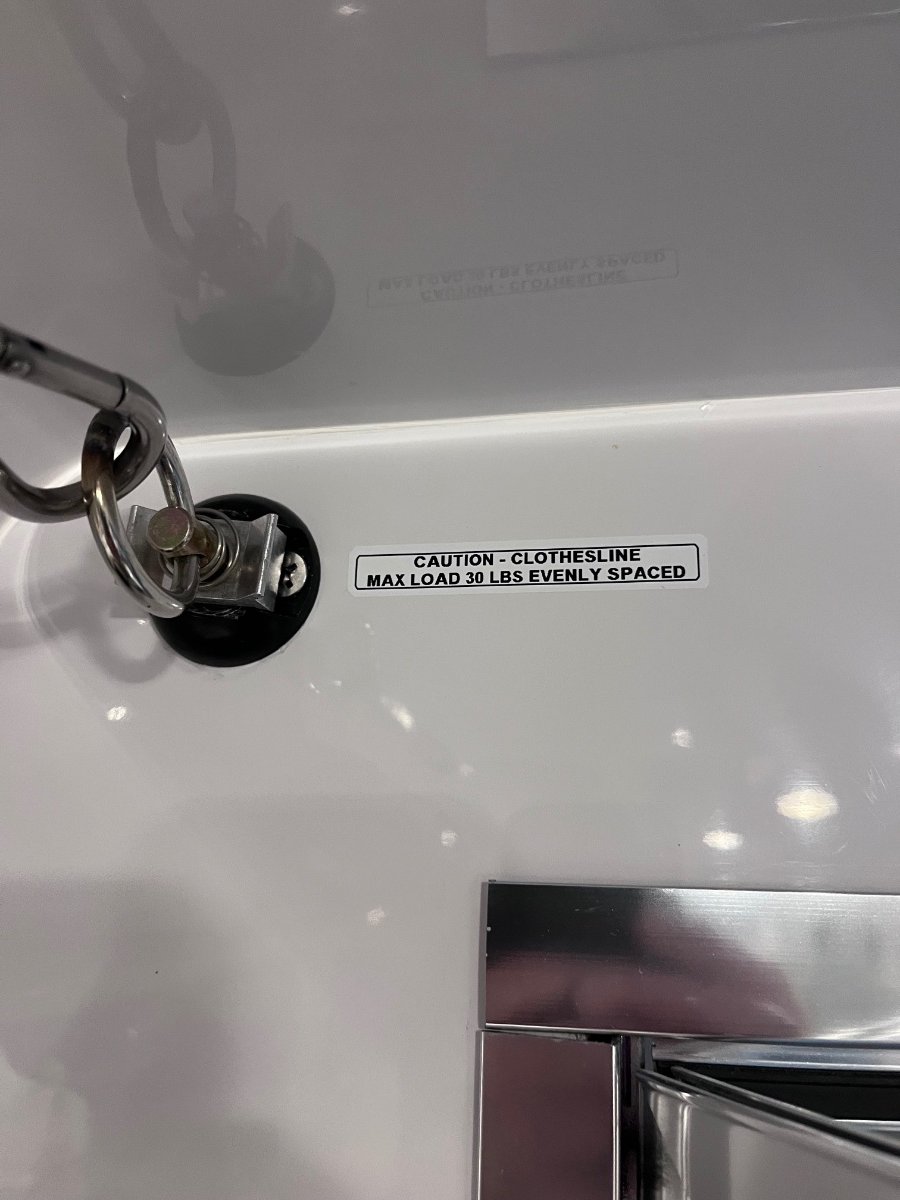
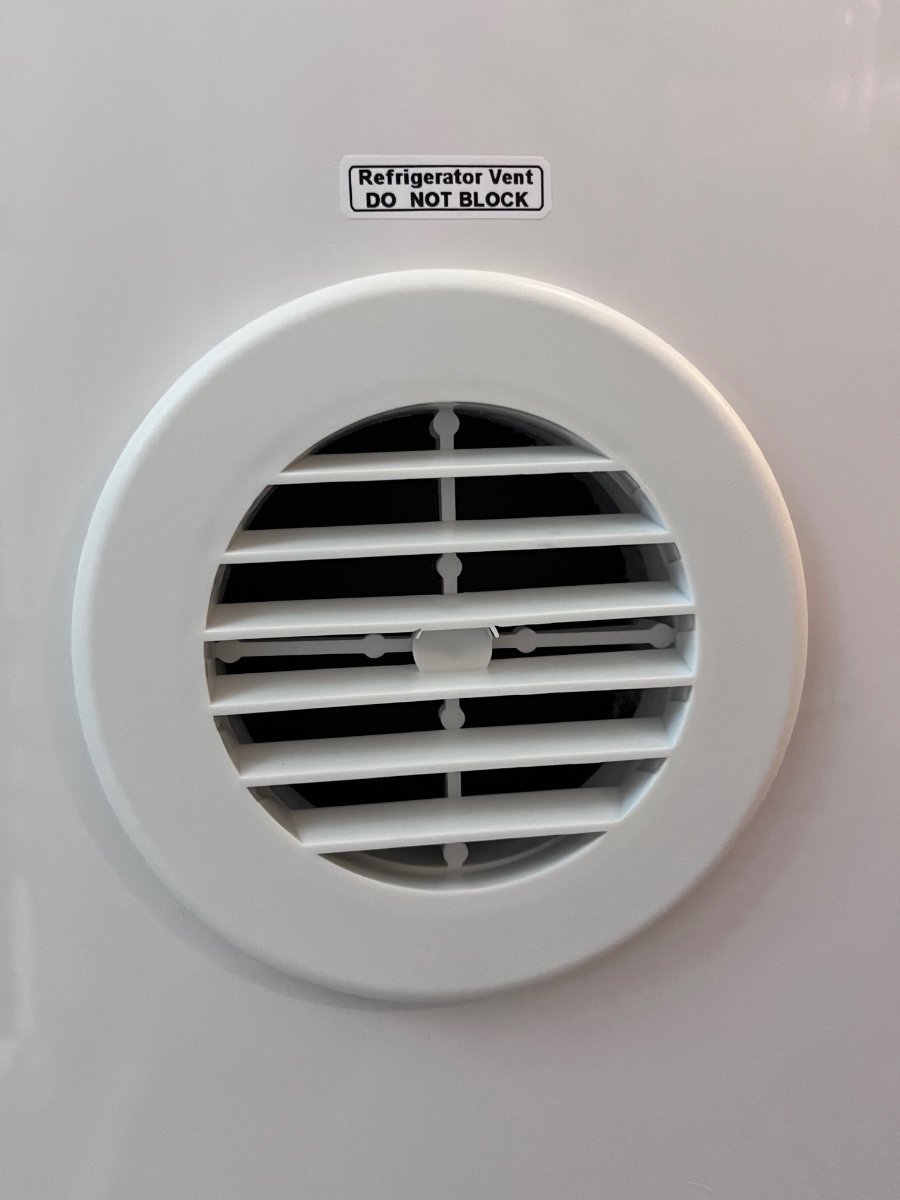
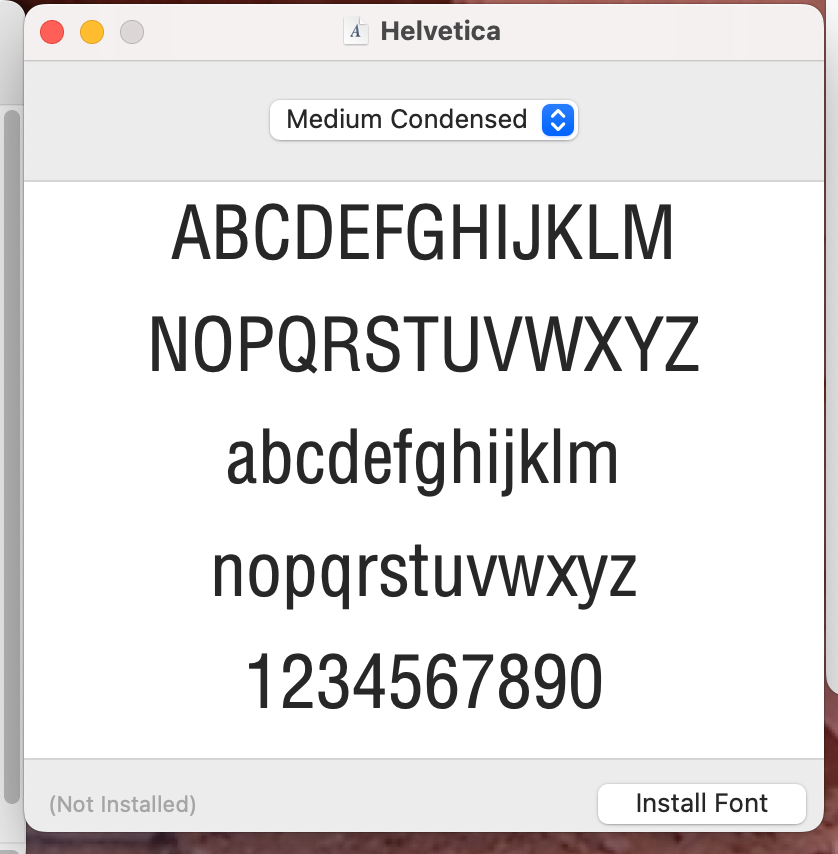
I recently bought a DYMO LabelManager 420P at a killer price, 46% off the price when I added it to my watch list a couple of years ago. DYMO Label Maker with Adapter | LabelManager 420P High-Performance Label Maker, Rechargeable, PC and Mac Connectivity, Bright Backlit Display, Easy-to-Use, Portable, for Home & Office Organization I also ordered a case, which is quite nice:: Case Compatible with DYMO Label Maker LabelManager 160/280 Portable Label Maker, Label Printer Storage Organizer for AC Adapter, Tape Cartirdges and More Accessories(Box Only) Black I was hoping to be able to match the existing font and style of my Oliver switch placards. I was able to measure the size and track down the font. I added the Helvetica Medium Condensed font to my iMac and was unable to access it using the DYMO lable software, drat. However, I did find out that the basic onboard font preloaded into the tool makes for very nice labels that look similar to this, the bonus is that you can sit inside the trailer and make them there. No computer hookup needed. If anyone wants to try the proper one, I have attached it as a "otf" file below. You double click to launch the font installer on an iMac. I do NOT know if it will work on "Some Other Mac" aka a PC. Helvetica Medium Condensed.otf Previously I would make a label using the iMac, print it, cut it, laminate it, cut it out again using a flat paper cutter, and stick it down with double sided tape. It worked but was a true PITA and it did not look great. So I replaced a few of those: And added some new ones. I am pleased. I used the generic tape, not the DYMO ones, because they are 20% the cost. If you wanted to ensure that they would stay on a long time, you could add some clear (not transparent) Scotch tape over them. All these were done on the 1/2" Black on White tape, the tool will handle up to 3/4" (four lines) DYMO LM420P UserGuide.pdf John Davies Spokane WA
-
- 4
-