All Activity
- Past hour
-

MaxxFan Mod to Add a Fan Motor Switch and Deep Cleaning
jd1923 posted a topic in Ollie Modifications
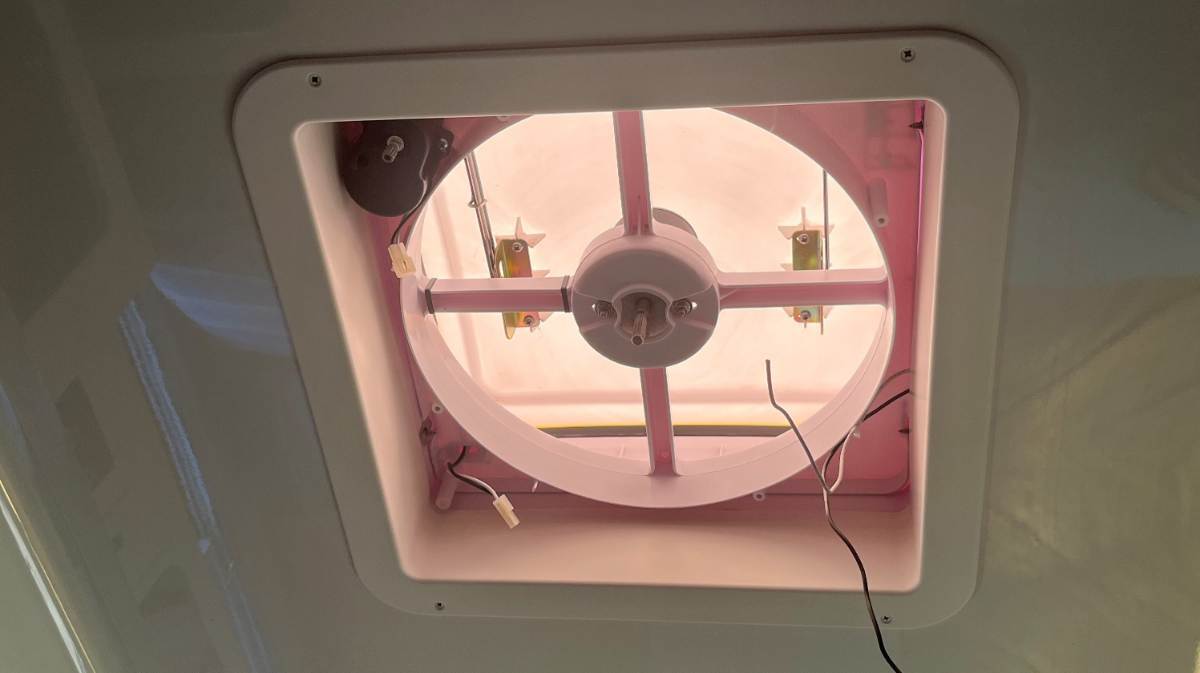
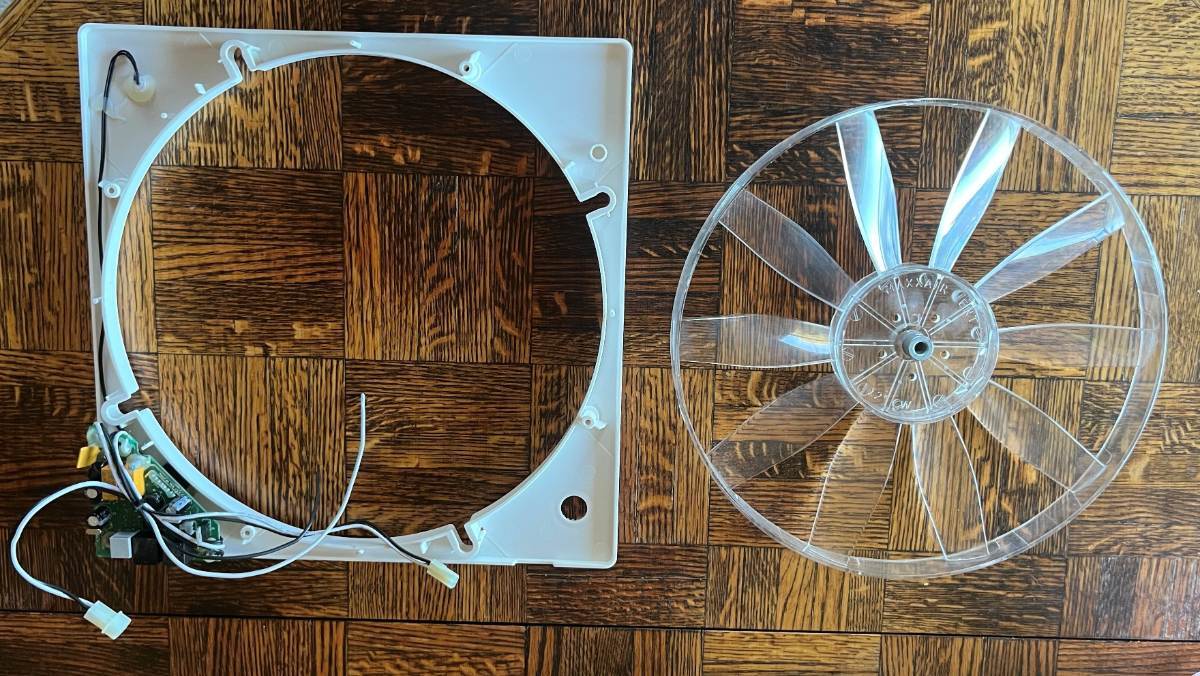
The goal was to add a simple toggle switch to the fan motor so that when the fan is ON, the fan motor can be turned OFF while leaving the vent door OPEN! I contacted MaxxAir CS to see if there is a better way to do this, but they really had difficulty understanding my use case and after asking 3 times in 3 emails, as they cc:d 3 more staff persons, I gave up to "Do It My Way!" (as usual) 🤣 Often during evenings, we have the fan on low to exhaust heat from the Oliver ceiling. Later when going to bed, I want to turn OFF the fan but leave the fan door open as a vent. The fan open/close mechanism is very NOISY! Often Chris has drifted off to sleep, and I hardly want to CLOSE the fan and then have to OPEN the vent door again. I used to place a pillow over the opening to cut down the noise. Bad programming on their part does not allow for this feature; hence my toggle switch. First thing I noticed was how dirty the fan parts were which was not as noticeable when camping day-to-day. Certainly, much more worked was involved in a detailed cleaning than the 20 minutes it would take to split a wire and crimp in a toggle switch. We mainly cook breakfast indoors with the fan exhausting. The screen and other parts had a layer of bacon grease and whatever else. I had to scrub the screen with Dawn for quite a while to get it completely clean. In fact, so much scrubbing removed the shine (coating) on the screen (I found an open box replacement on eBay for $20). The fan blades too! They were so dirty after sponging with Dawn, I had to wipe each blade several times with rubbing alcohol on paper towels to finally achieve clean/clear plastic! At this point, I figured I would disassemble and clean it completely. Adam is my "Second Story Man" so he grabbed the ladder and I handed him the Phillips. The complete exterior unit is held on with only 4 screws. With everything removeable out, I stood on a milk crate under the opening and cleaned it inside and out. To start there are 4 swivel clips to hold the screen (I'm going to start cleaning the screen every 1-2 weeks). Under the edge of the screen are 4 screws holding the lower plastic assembly in place which contains the electronics and wiring. Every screw on the MaxxFan is a Phillips so all you need is one screwdriver and wire tools if you're wanting the toggle switch. MaxxFan uses terminals to connect power to the fan motor and opening mechanism, but OTT did not add a terminal for power to the unit, so I cut the black and white wires and used butt connectors upon reassembly (adding a terminal disconnect would be nice). I'll show a picture of the internal wiring later, as I forgot to take one, but I have to open it again next week when I get a new swivel pin for the screen. One of 4 had a broken tab which would occur as somebody tried to pry off the pin vs. turning it. The outdoor assembly comes apart into pieces by removing 5 + 3 + 6 more screws (see pics). When I reassembled this section, after cleaning all, I put a matchhead sized dab of clear silicone grease on the white wheel-shaped bushings on the ends of the lift levers. What is really amazing is it's now so CLEAN that it allows twice as much light to enter the cabin. We might now need cover for sleeping, LOL! It's hard to photograph it all clean and installed due to lighting contrast. Love the simple switch! The video should get the point across. We can now turn off the fan at night without making more than the click sound on the toggle! 😎 Fan Power Off Button.MOV
-

Upgrading from a Bulldog 2” coupler to 2 5/16 BD coupler
rideandfly replied to Patriot's topic in Ollie Modifications
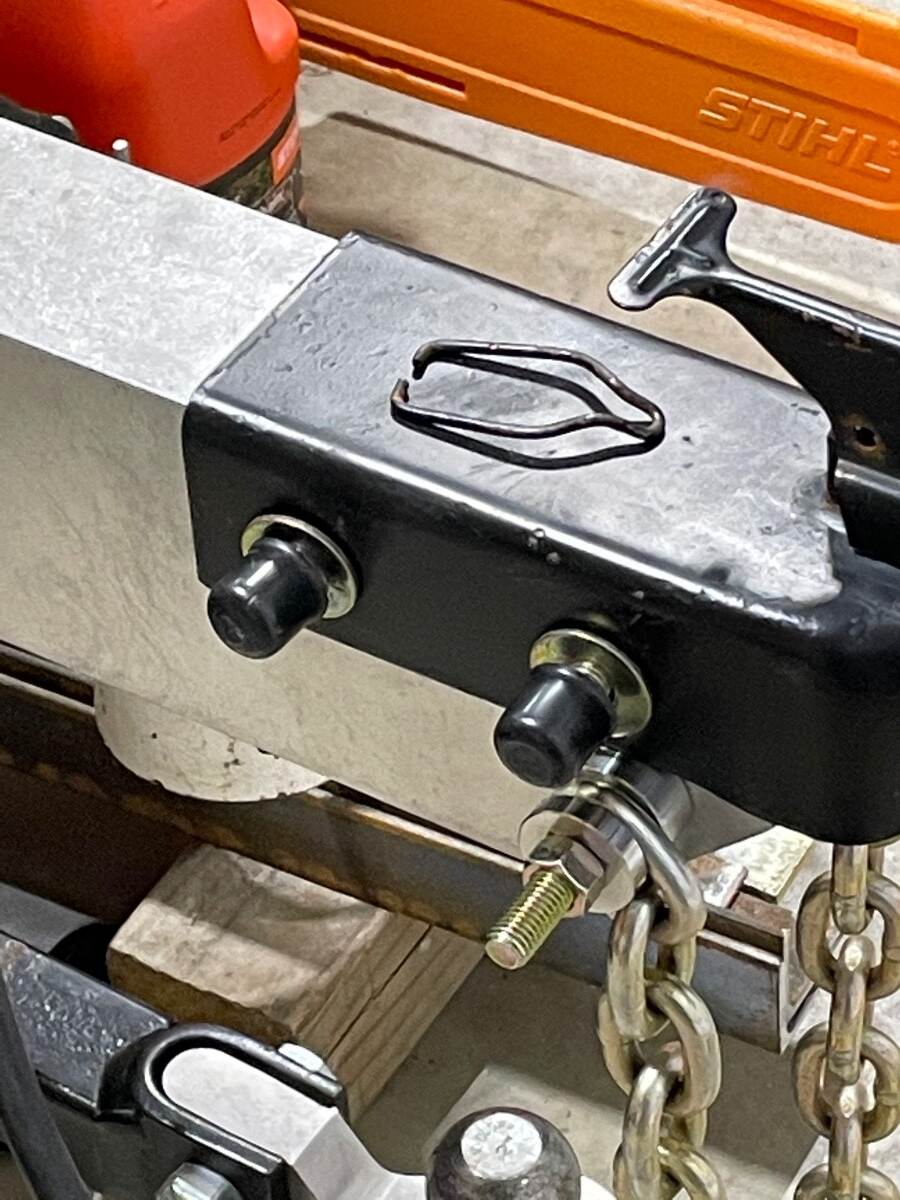
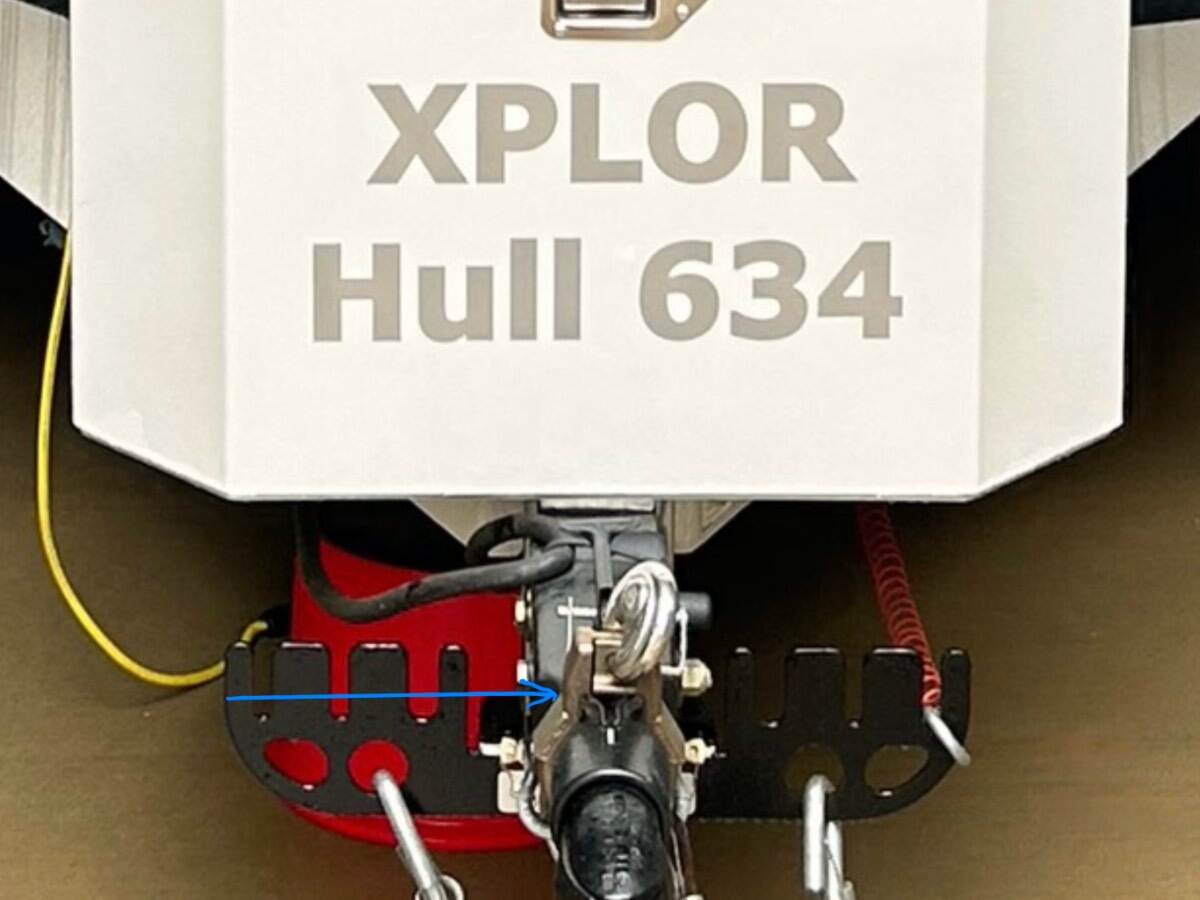
Good discussion! Just measured the Bulldog 2 5/16" coupler and 1 7/8" ball mount/ball and discovered the following. With the 2 5/16" coupler with collar lock installed, a thief can easily back up to a trailer with 2 5/16" coupler, lower it on a 1 7/8" ball and drive away (not sure how far the 1 7/8" hitch would make it). My current 2" Bulldog coupler is still on Ollie stored at the airport, doubt it will slip over a 1 7/8" ball if locked with a collar lock like the Bulldog 2 5/16" coupler, but will check. At the most narrow inside portion of the 2 5/16" coupler with collar locked measures 1.91" A 1 7/8" ball measures 1.87" outside diameter A theft deterrent for the Bulldog 2 5/16" coupler needs to have the ball opening covered or filled to prevent this type of theft. I like using the Bulldog coupler latch locked with a long shank padlock while in transit and for storing the chains with the emergency brake cable snap-hook. Also use an inexpensive Universal Coupler Ball Lock that Fits 1-7/8", 2" and 2-5/16" couplers. Previous Bulldog hitch discussion: - Yesterday
-
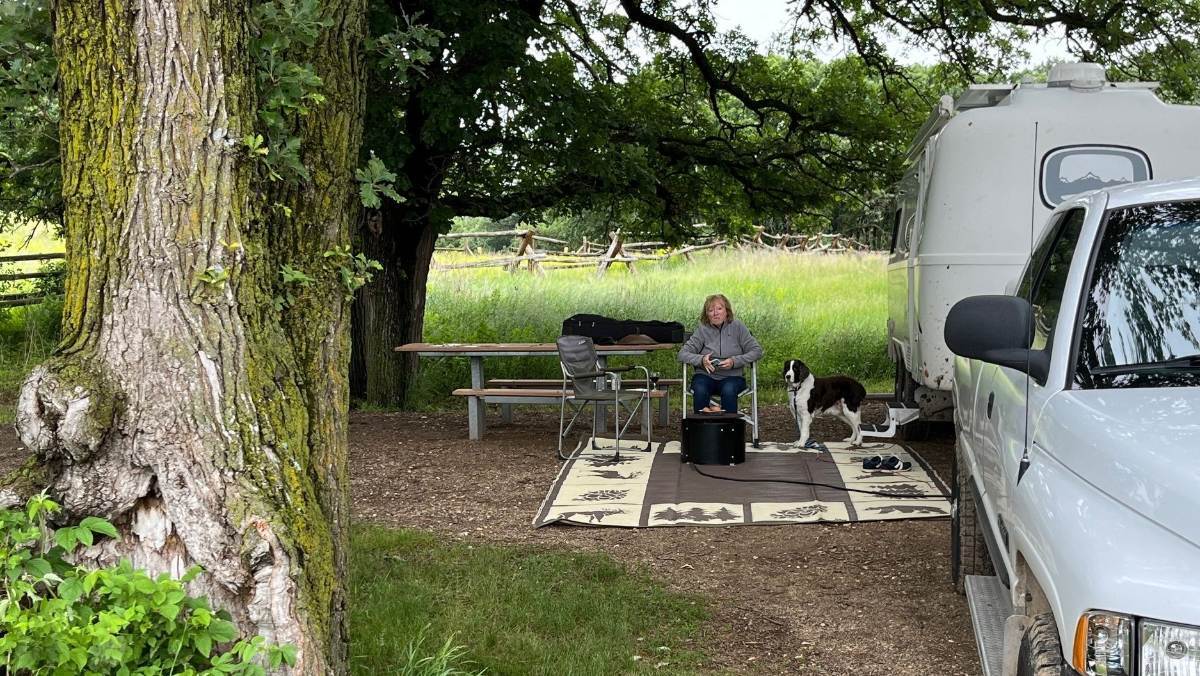
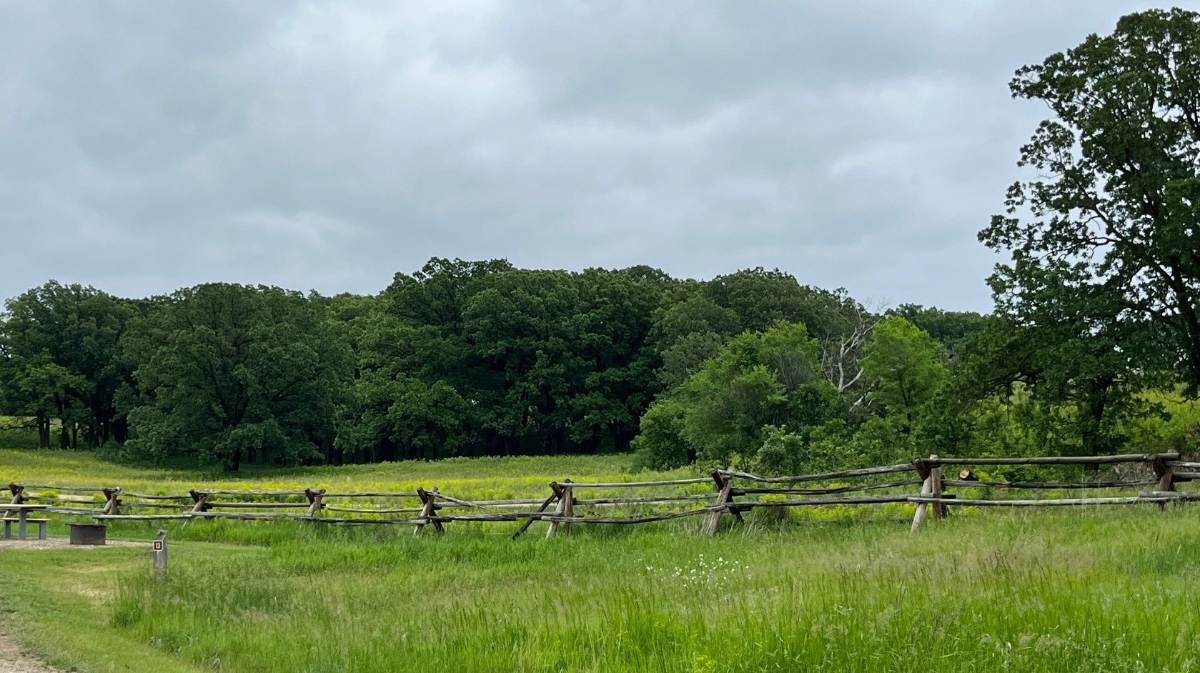
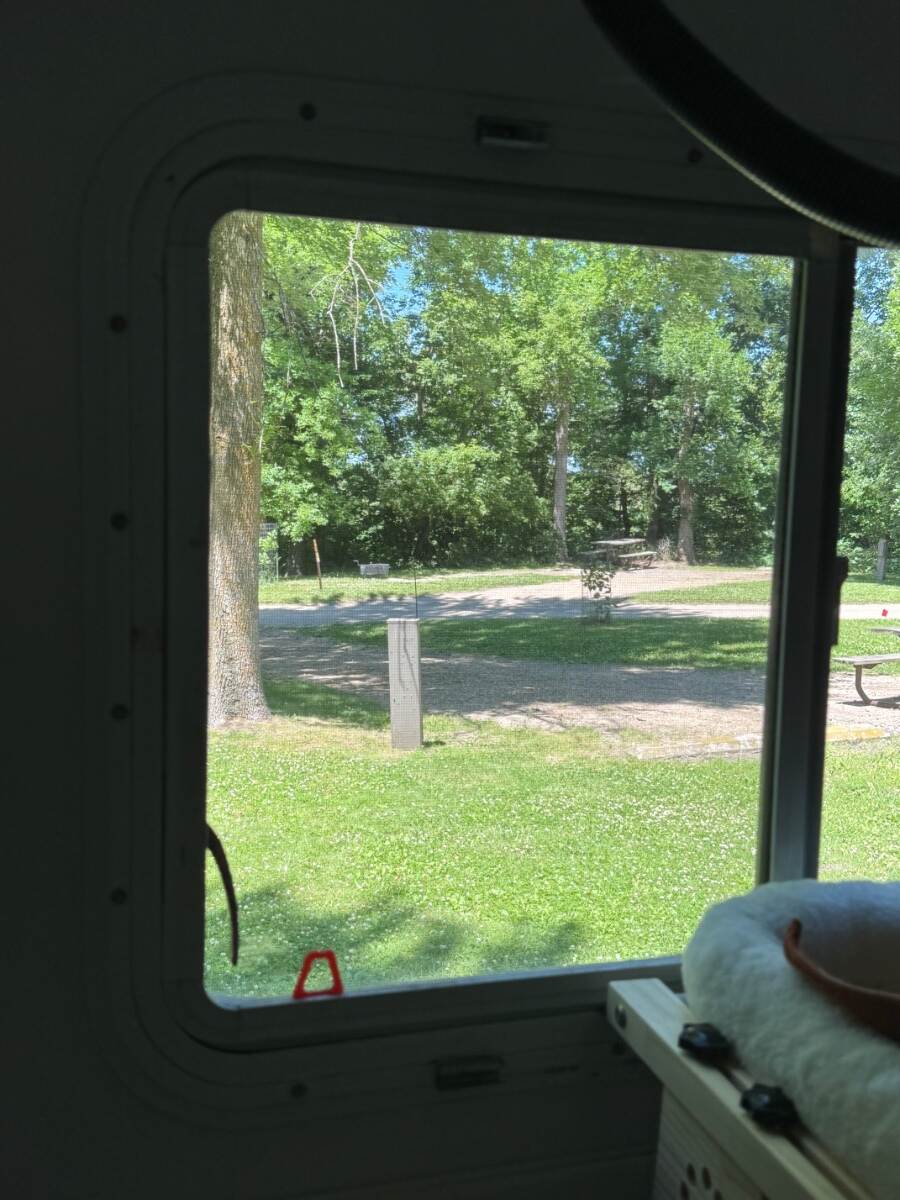
I highly recommend this campground (unless there's thunderstorms). Quiet and beautiful in the Sheyenne National Grassland, just one hour S-SW of Fargo. It's also very inexpensive accepting the National Senior Pass too! We spent a night there last summer. Wanted to stay longer but we got a little muddy on the way in and feared storms coming in the next afternoon. But it's dry most of the time with nicely graded dirt roads the last few miles. We met some girls who brought their horses out for the weekend! Just gorgeous! Dakota Prairie Grasslands | Hankinson Hills Campground | Forest Service
-
Original window frames, alternate window treatments?
jd1923 replied to Galileo's topic in Ollie Modifications
Impulse All-In-One Roller Shades for RVs - MCD Innovations -

Original window frames, alternate window treatments?
ScottyGS replied to Galileo's topic in Ollie Modifications
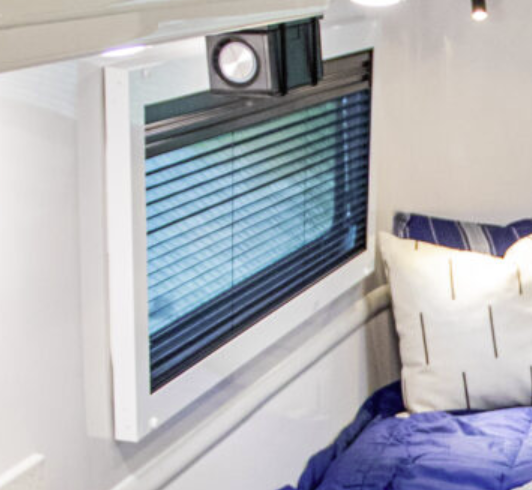
Not the ones you see on the virtual tour. Those are the 2026 shades. <moment of silence for those that bought in 26'> The new 2027 shades have a white frame around the window.
-
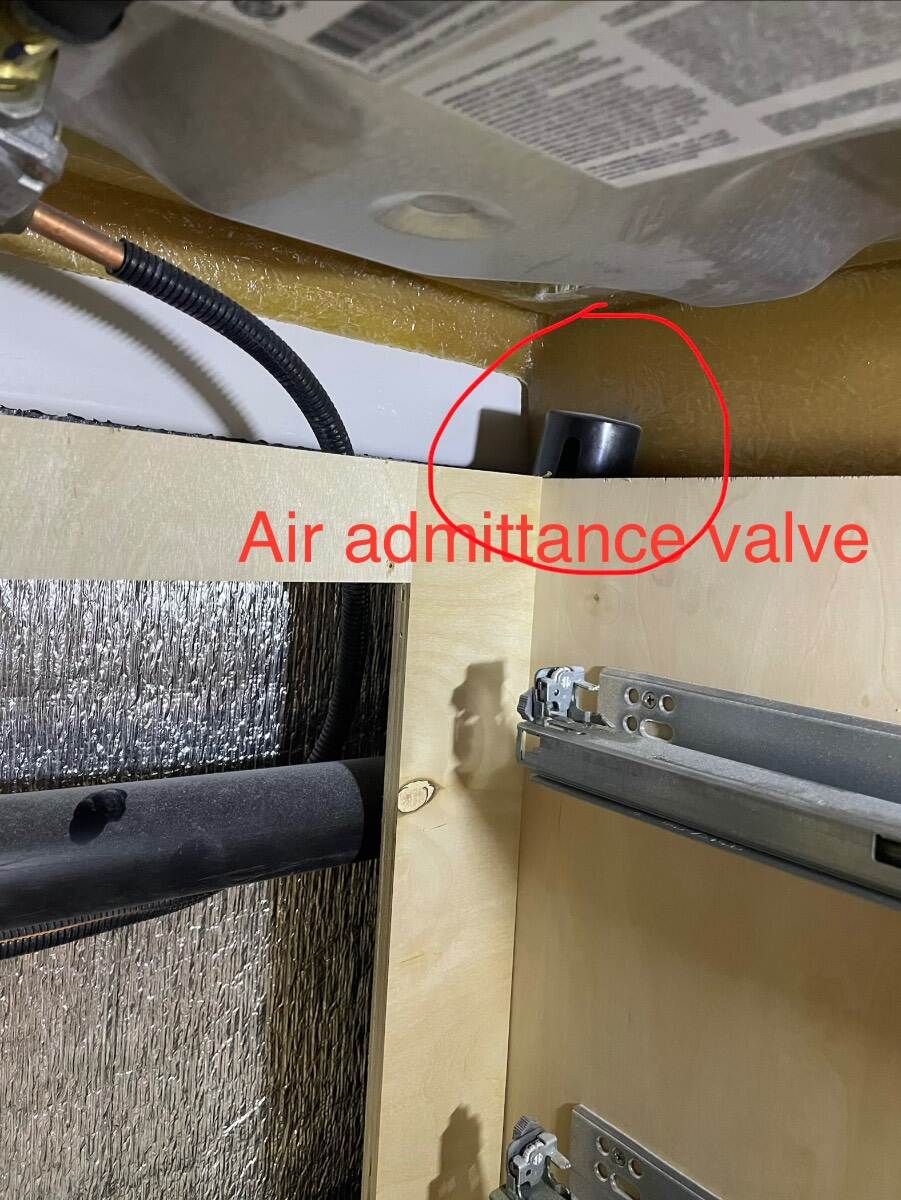
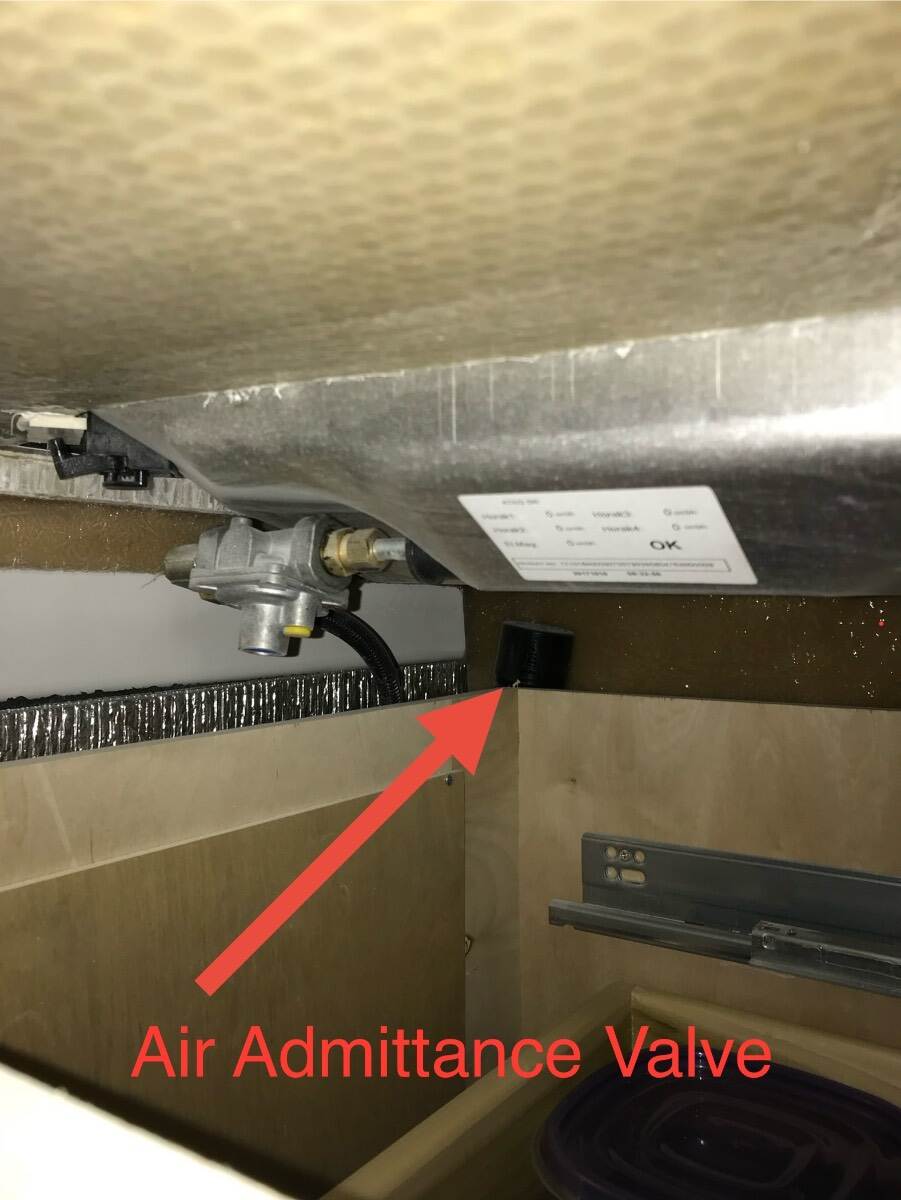
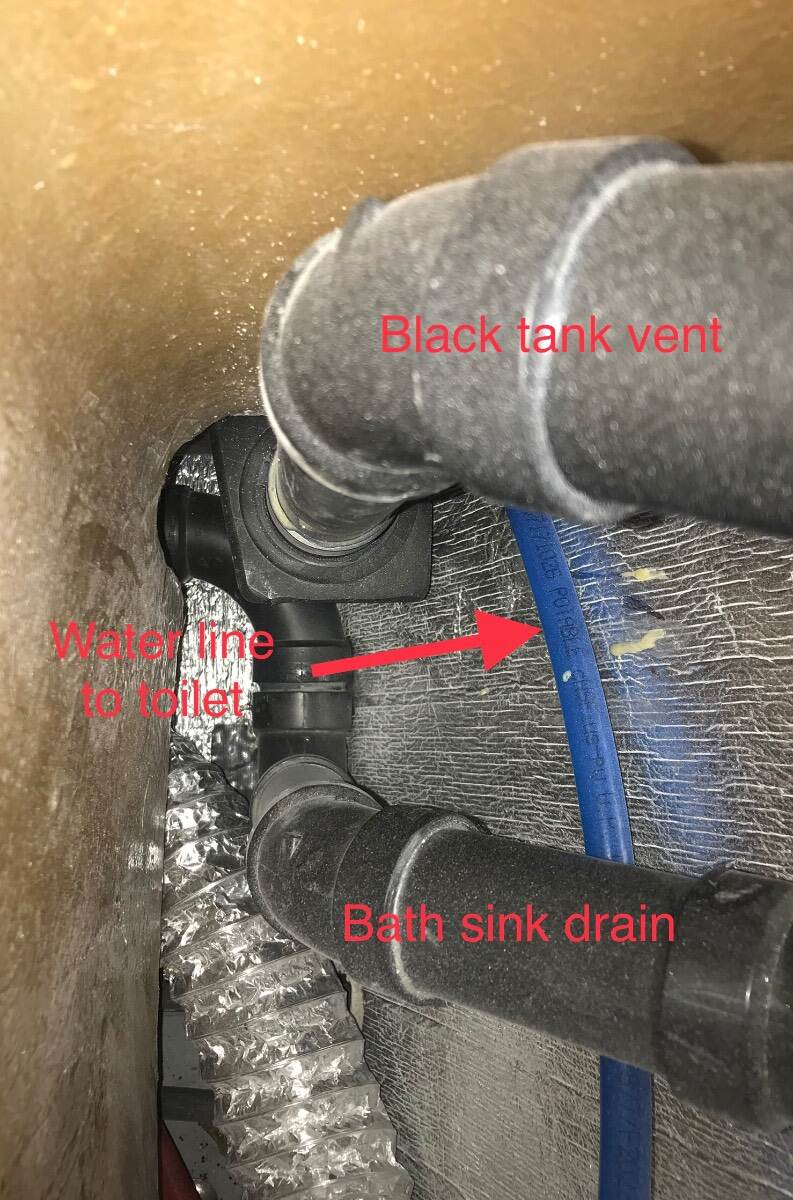
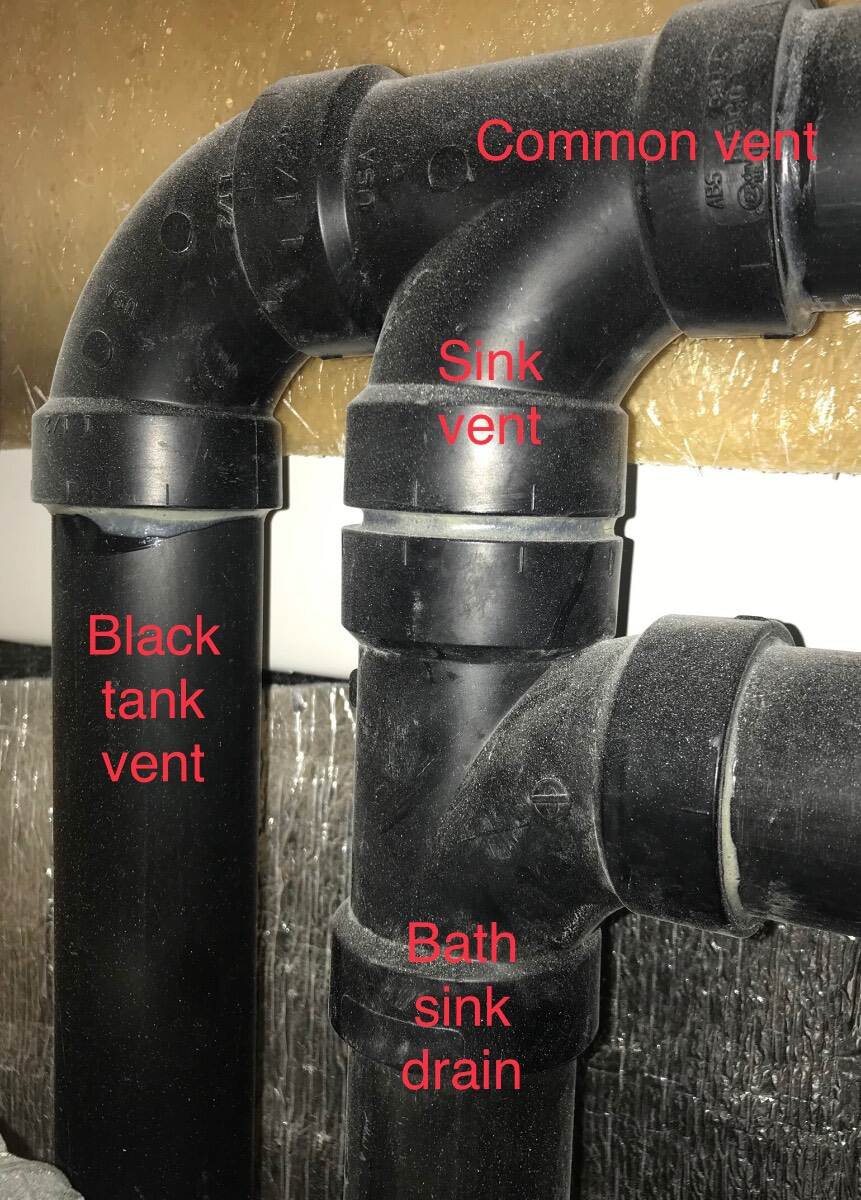
That roof vent vents the black tank all the time and the gray tank only when the shower valve is open. There is an AAV - air admittance valve - under the kitchen counter in the back right corner of the kitchen drawers that should allow air into the gray tank when draining even if the shower valve is closed once the water level drops below the place where the kitchen sink drain enters the gray tank. The bath sink drain and shower drain flow through the open shower valve to the gray tank. Bill
-
Doesn’t the vent on the roof vent both the black and the grey tanks, or just the black?
-

Original window frames, alternate window treatments?
Galileo replied to Galileo's topic in Ollie Modifications
https://mcdinnovations.com/products/day-night-roller-shades/ -
Original window frames, alternate window treatments?
Galileo replied to Galileo's topic in Ollie Modifications
From what I could see on the “virtual tour” the window frames look similar - even though the windows are swing-out instead of sliders. From what I could see, it looks like the pull-down shades mount above the window - not on the frame. So I’d bet would could scrap your old shades and adapt the new ones - if you were willing to drill into your inner shell above the window. I -think- I saw “MCD” logo on the window shade. Could likely track them down. -
It helps to open the shower drain valve (either manual or automatic) to allow some air into the (forward/high/uphill) end of the gray tank... making it somewhat easier for the liquid to pour out of the rear/low/downhill end of the tank. Don't forget to close this valve when moving the camper or parking extremely nose-down or the gray tank fluid may burble up into the shower floor pan from the long & shallow gray tank, which may not be pleasant. This valve must be open when using either the shower or the bathroom vanity sink.. otherwise these will not drain into the gray tank as expected and the fluid will either stay in or flow into the shower floor plan.
-

Upgrading from a Bulldog 2” coupler to 2 5/16 BD coupler
Patriot replied to Patriot's topic in Ollie Modifications
Yes sir Bill, another big plus to the S/S collar. 👍🏻 -
Original window frames, alternate window treatments?
ScottyGS replied to Galileo's topic in Ollie Modifications
I have been wondering if the new (2027 model year) window shades would work with the older style windows. The frame looks different but the shade seems to perform the same functions. In October at the Rally I will take a good look at how they are attached and if they could be retrofit to the older sliding style windows. -
Hi all, Im sure this has been discussed elsewhere, but nothing I could find seemed to answer my questions. I removed the window shade assembly from the rear/emergency exit window to hang a cat perch in the frame: Not a great photo due to backlighting - but should be visible. I figure that the window shades that came with our trailer from the factory were not necessarily meant to be paired with this model of window. If it were, there wouldn’t be a need for spacers behind the clips that hold it in place. Im curious if there is a faceplate, bezel, escutcheon, etc that goes with these windows to cover the unsightly screws that show if you pull the shade off. As others have mentioned how far the shades project into the interior, often getting bumper by shoulders or heads - I figure there must be a lower-profile option to both cover the frame and to attach window treatments to. Any thoughts? I don’t know if we’re going to keep this cat bed. The cats don’t seem thrilled, the bed needs work to make it support our lardass 16# cat, and unless I can add curtains - we have no shade/privacy anymore. I don’t think I want to mess with removing and reinstalling the rear window shade every time we move camp or decide the neighbors are too close or nosey. Has anybody done away with the problematic shades and opted for curtains or other window treatments?
-

Upgrading from a Bulldog 2” coupler to 2 5/16 BD coupler
Townesw replied to Patriot's topic in Ollie Modifications
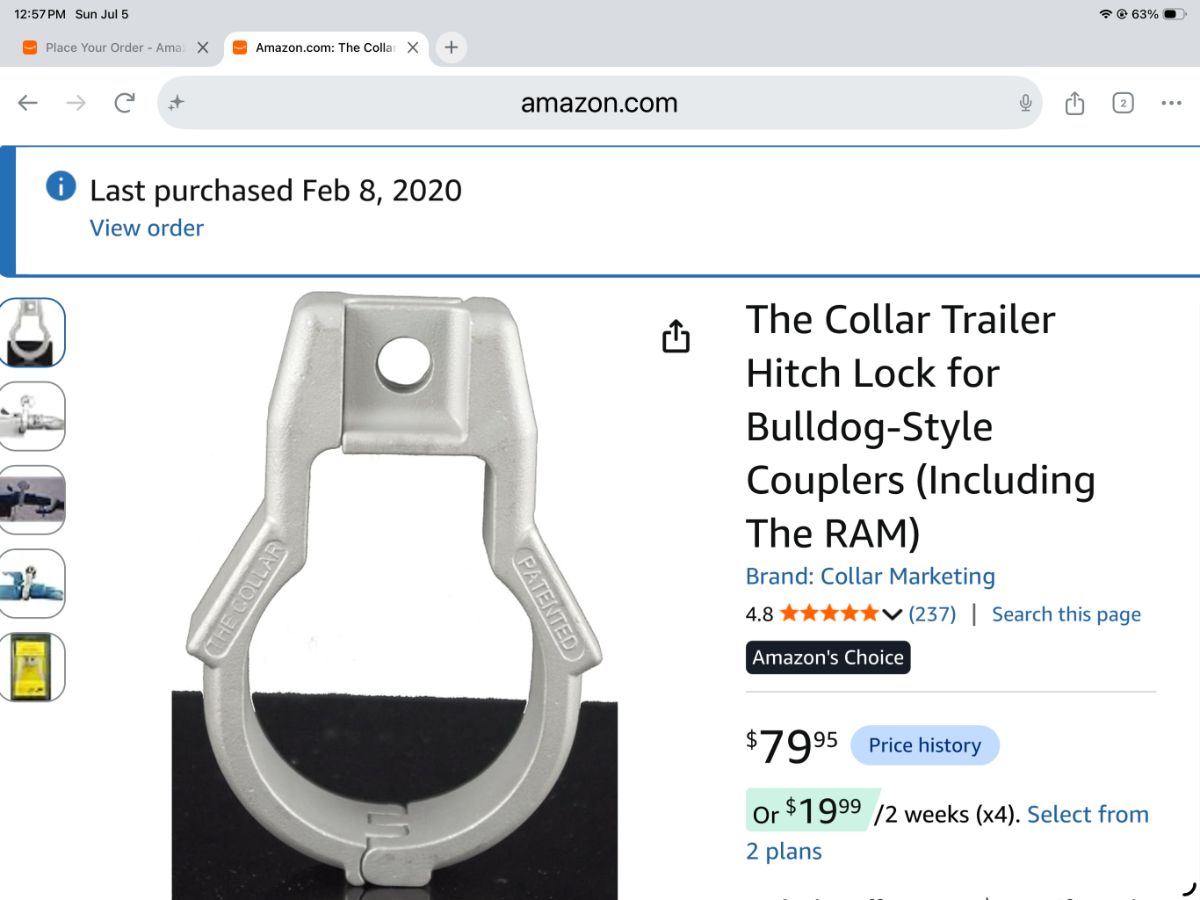
Those of you who use a lock in the lever as a method of securing your hitch should consider the Collar Lock. The wire bail between the lever and the sliding collar that secures the clam shell is easily removed without tools and the sliding collar can be pulled back by hand. Bill
-
We’re in Starbuck, MN - Glacial Lakes SP. The bathrooms are just OK - a bit dated. 5 miles from the town of Starbuck. (There’s no Starbucks in Starbuck.) Bigger town of Glenwood a 20 drive - more stores and restaurants. Alexandria about a half hour away. (This is where the Starbucks is) Nice lake here. Also near Lake Minnewaska. Some hiking. Quiet during mid-week. Typically full weekends. Electric-only sites - no water at sites. There is a place to fill and a dump station. Also primitive sites. Flies and mosquitoes ARE all here. (“Minnesota - Land of 10,000 lakes - and 10,000,000,000 mosquitoes.”) Pretty much halfway between Fargo and Sioux Falls. We’re campground hosts until end of July. Our second year. This was our attempt at “cooler weather during the summer” - we didn’t go far enough North!
-
Thanks for all the info.
-
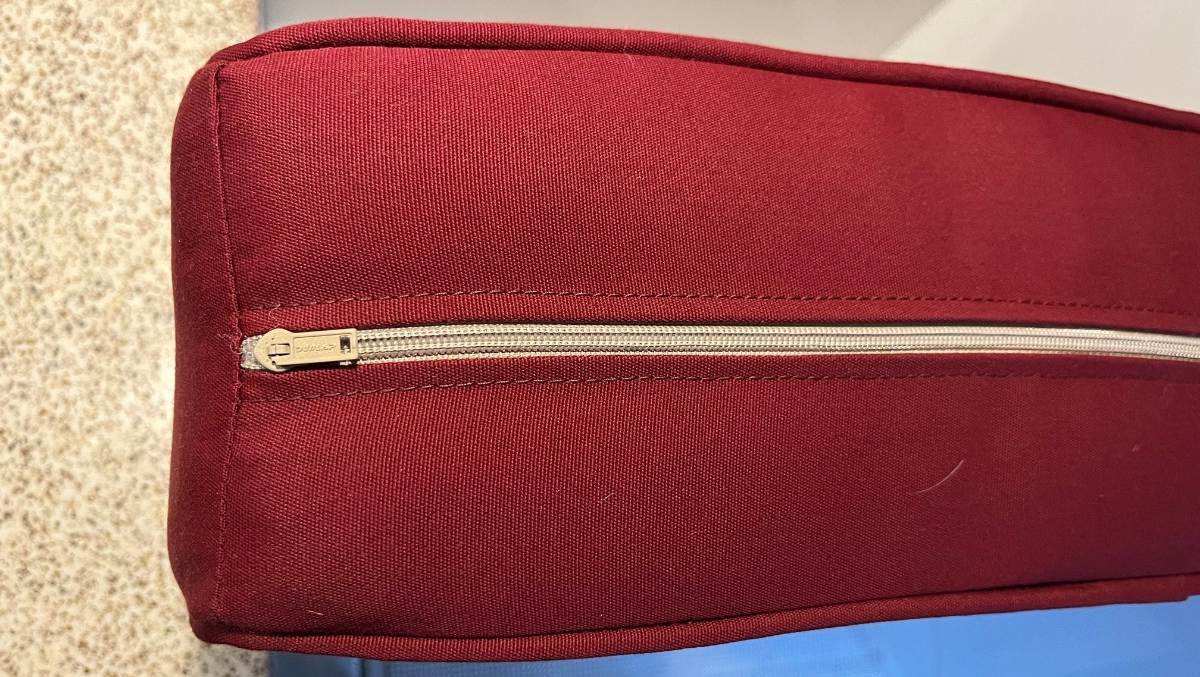
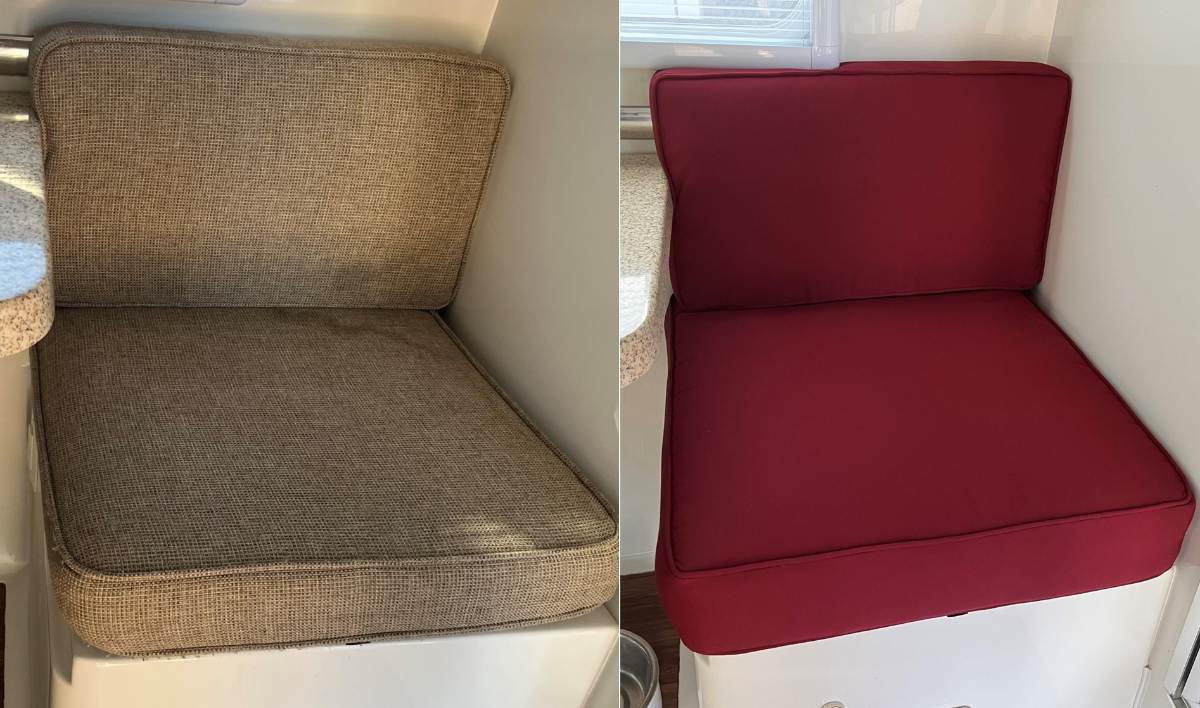
Thanks, Rob! Your local upholstery shop should be able to produce something equivalent when using quality materials and attention to detail. Our shop used high-density upholstery foam and Sunbrella fabric. This brand is designed for outdoor furniture and comes in dozens of colors!
-
Bill has provided a lot of good advice here! Agreed, the worst thing you can do is the campground slow drain-as-using routine. Always drain tanks as near full as possible. And it's better to dump after towing, for a cleaning action to break down the solids. Thinking in this way, we often dump when we arrive at a campsite vs. as we're leaving (no long lines at the dump station either). Our Black Tank mostly empties in about 20 seconds and the Grey in a minute or two max. We always camp with the nose up about 3/4" on the LevelMatePRO to help out the water pump. We always dump tanks with the nose up 2-3" and the curbside leveler up 1-2". If you fail to raise the curbside, you can think the grey is empty and it's still partially full (see Bill's picture above). IMHO SeeLevel readings are next to useless. They say these are more accurate than other brands, but they all show bad readings. We've learned from experience how many days the fresh tank will last (depending on showers taken), and when the Black and Grey waste tanks will fill (for battery SOC get a shunt with Bluetooth). Think about your usage and learn. I stopped looking at our SeeLevel display long ago. We put some TP in our Oliver toilet which does not cause an issue when draining tanks properly. Of course, you don't want TP nor solids sitting on the bottom of an empty tank, so always add at least 1 gallon of fresh water prior to toilet use and have the bowl half-full when using. We used to add cleaners but stopped doing that except for an occasional cleaning as-needed. If ours were ever to drain slowly at the dump station, after dumping I would refill both waste tanks about 3/4 full, add some low-suds laundry detergent in both tanks. Then tow onto our next destination to use the road for cleaning action, dump on arrival at the next campsite. To fill the black or grey 3/4 full, I use a gallon counter on the hose. The black tank has a hose connection, and I put the hose right down the kitchen sink drain to fill the grey. After cleaning, refill both tanks and drain again until the water looks clear. If you do not have one already, your drain hose should have a clear section or elbow where you can see the liquids while draining. In storage have a couple gallons of water in all 3 tanks (don't worry, nothing bad will happen if a tank 10% full freezes).
-
 I did look at those Brooklyn Bedding mattresses but ended up for now doing the ones at Costco. Like I told my wife if they don't work out after a trip or they will be easy to sale on craigslist. Agreed on the existing cushions. The foam in those are pretty bad. We need to at least replace that if nothing else. Your new cushions look great.
 -
Upgrading from a Bulldog 2” coupler to 2 5/16 BD coupler
Patriot replied to Patriot's topic in Ollie Modifications
Hopefully they will restructure like many companies do. Only time will tell. -

Upgrading from a Bulldog 2” coupler to 2 5/16 BD coupler
Boudicca908 replied to Patriot's topic in Ollie Modifications
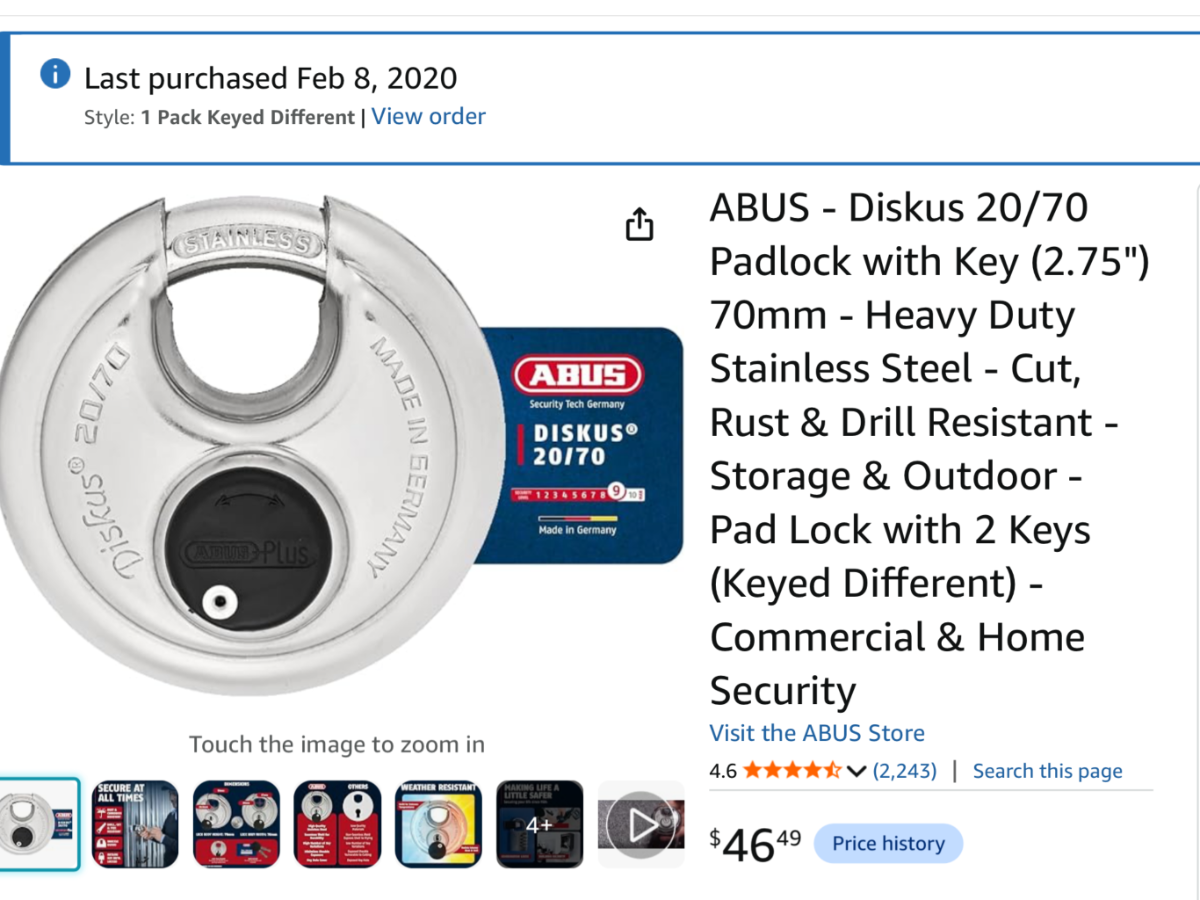
I purchased my Oliver in 2022 with the upgraded Bulldog 2 5/16 coupler and have no regrets. I also use this collar with a slightly different ABUS lock. EDIT: I will also say that I use this coupler lock when I am hitched (visiting somewhere, for instance) as security. AND on top of that, as I like to boondock, I use the Fort Knox Locks box when I am not hitched, along with the collar lock. It might seem like a lot, but I worry a lot less with this setup. https://ftknoxlocks.com/shop/ols/products/bulldog-lock I'm sorry to hear about the issues with Bulldog. Hopefully they will straighten out and pull through. -
We do not have the king setup, but we did replace EVERY cushion in our Oliver! Also hated a king topper we had at home years ago. We'd sink into the foam making us sleep HOT! We now use Brooklyn Bedding at home and the Oliver. They manufacture in the Phoenix West Valley and have every RV mattress size imaginable. They roll up and box their mattresses and ship everywhere. If you're ever down here, they have several store locations across The Valley. RV Mattresses by Brooklyn Bedding They have new models this year, with hybrid (foam/coil) models in RV sizes. We purchased two 30x75" foam beds 2 1/2 years ago for our twin bed setup. We went with 12" mattresses based on the fact that the taller the mattress the softer the feel (you can see that in their charts). The 12" mattresses are heavy, but Chris is able to lift them/stand them sideways to work the sheets. I'd prefer a shorter/lighter mattress for the Oliver, but they might be too firm. Time to take care of our older bodies! We had to replace the dinette cushions too. The original cushions were 4" and we made ours 5" tall. We had these custom upholstered at a local shop with higher quality foam for $500 OTD. Boy, the OEM ones were ugly, and my bony butt doesn't hit the hard fiberglass right through the cushions anymore! 😎
-
Upgrading from a Bulldog 2” coupler to 2 5/16 BD coupler
Patriot replied to Patriot's topic in Ollie Modifications
We have used this coupler security and ABUS lock combo since we took delivery in June of 2020. Since it only takes less than 5 minutes to remove the BD coupler via the two bolts off the trailer tongue it’s a good deterent and better than nothing. Also when on the road it makes for an easy eye safety check during a walk around of our rig. This combo continue to serve us well 6 years in. Both have strong reviews. I will use this collar and lock on the new 2 5/16 coupler. Another plus with the S/S collar, you cannot secure the collar on the coupler locking mechanism if the coupler is not properly locked down so the clam shell cannot be moved back on the hitch ball. A nice little extra built in secondary safety feature. https://www.amazon.com/dp/B00HL2NM0K?ref=ppx_yo2ov_dt_b_fed_asin_title ABUS Stainless lock made in Germany- https://www.amazon.com/dp/B009S5Y6ZS?ref=ppx_yo2ov_dt_b_fed_asin_title&th=1
-
In September, my friend and I are going to be camping in Theodore Roosevelt NP (the North Unit) and Badlands NP & Rapid City SD environs. After that, we are heading east and looking at spending a day near Fargo ND, and then a few days in the Sioux Falls SD area, to explore museums and local sights. West of Sioux Falls, we plan to go to the World's Only Corn Palace, in Mitchell SD. We prefer not to camp in the urban area. The closest federal camping I see is Cottonwood Recreation Area campground near Yankton SD (1.5 hours) and Left Tailrace near Thompson SD (2.5 hours). I've camped at Cottonwood and it was nice. But we would like to be closer to Sioux Falls. Any suggestions for the Fargo area and the Sioux Falls area would be appreciated.
-
Look under street side bunk. Make sure valve is open all of the way when handle is pulled. Also if you’re going to fill it lay a water hose in the shower pan (but watch it REAL close) and really raise the nose so you are washing the bottom of the tank. Fill tank until water stops draining in shower pan. Be sure to quickly turn water off. Open the valve and let it rush out. Do it a few times. Watch what comes out if you can. You know that white snot that grows in HVAC condensate pans and lines? I think similar stuff grows in gray tanks. I think #1455 has sat unused and you have a build up in your tank. I think people set these trailers up level, hook up to the sewer and open the drain and let the water out as it is filled. This lets solids settle on the tank floors. We were told to keep the drains closed and only dump when the tanks were filled so that solids could be flushed out. We always dump black first. Then we use the flush inlet and fill and drain the black tank 3,4,5 times until I don’t see anymore floaters (we don’t put paper in our black tank) in the clear elbow at the sewer connection. Then I open the gray tank and let it drain while I do something else. After a few minutes the gray tank level is 0. Since I got that gunk out of my gray tank I haven’t had any problems. It will still drain slow but I eventually get to 0%.