Leaderboard


Popular Content
Showing content with the highest reputation on 12/15/2018 in Posts
-
Wishing Everyone Merry Christmas and Happy New Year!2 points
-
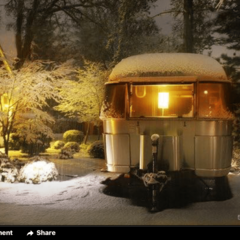
If you decide on painting yours, contact me and I’ll let you know what you shouldn’t probably paint. We have the red JellyBean pictured above. For example, do not paint the rubber window gasket/glazing beads. It fades/cracks and distracts from the look. I’m currently in the process of replacing all of mine with black. :)2 points
-
On August 5th, 2016 My wife and I set out on our annual trip to North Carolina to escape the steamy weather of Northwest Florida. Our plan was to work our way up the Blue Ridge Parkway through North Carolina and into Virginia, then maybe on to PA as time permitted. My first mistake was thinking I could tough it out with a torn Meniscus in my left knee. It soon became apparent that the act of kneeling, stooping, hauling, and all the physical activities associated with setting up and breaking down camp place a huge strain on the knees and pain became a constant companion making me a miserable companion. So after only ten days we gave up and headed home. A few things learned... Camping is physical and you need to be healthy. Some things on the Oliver are just not designed for function. ie. The sewer connection is very difficult to reach when your newly purchased Rhino hose separates from the fitting. I will be modding this to extend that connection to outside the bumper. Lesson learned...always check the connection before opening the gate valve. The water connections are just inconveniently located. Not only must you kneel to access them, they are underneath the trailer so you must kneel And reach. OK if you are healthy but a real struggle with a bad knee. Again I will mod these somehow so they are easier to reach. The fridge is way small, and again down low so that you must kneel to gain access. Holy cow...even the $30,000 Escape has a 7CU fridge mounted at eye level. Rain. What can I say. Just no good solution to living indoors when it raining and your campsite is a lake. 100 square feet and no comfortable chairs gets old after a few days. One good thing we learned is that the shower curtain my wife made works great and having a shower inside the trailer is a real bonus. I suppose we all will experience some bumps in the road and this will not be our last less than good trip. In the twenty months we have owned our trailer we have had over a dozen great outings, all in the Southeastern U.S. and all but this last one have been great. I see the surgeon tomorrow and hopefully the knee will get repaired soon. My new mantra is "Always check your sewer connection".1 point
-
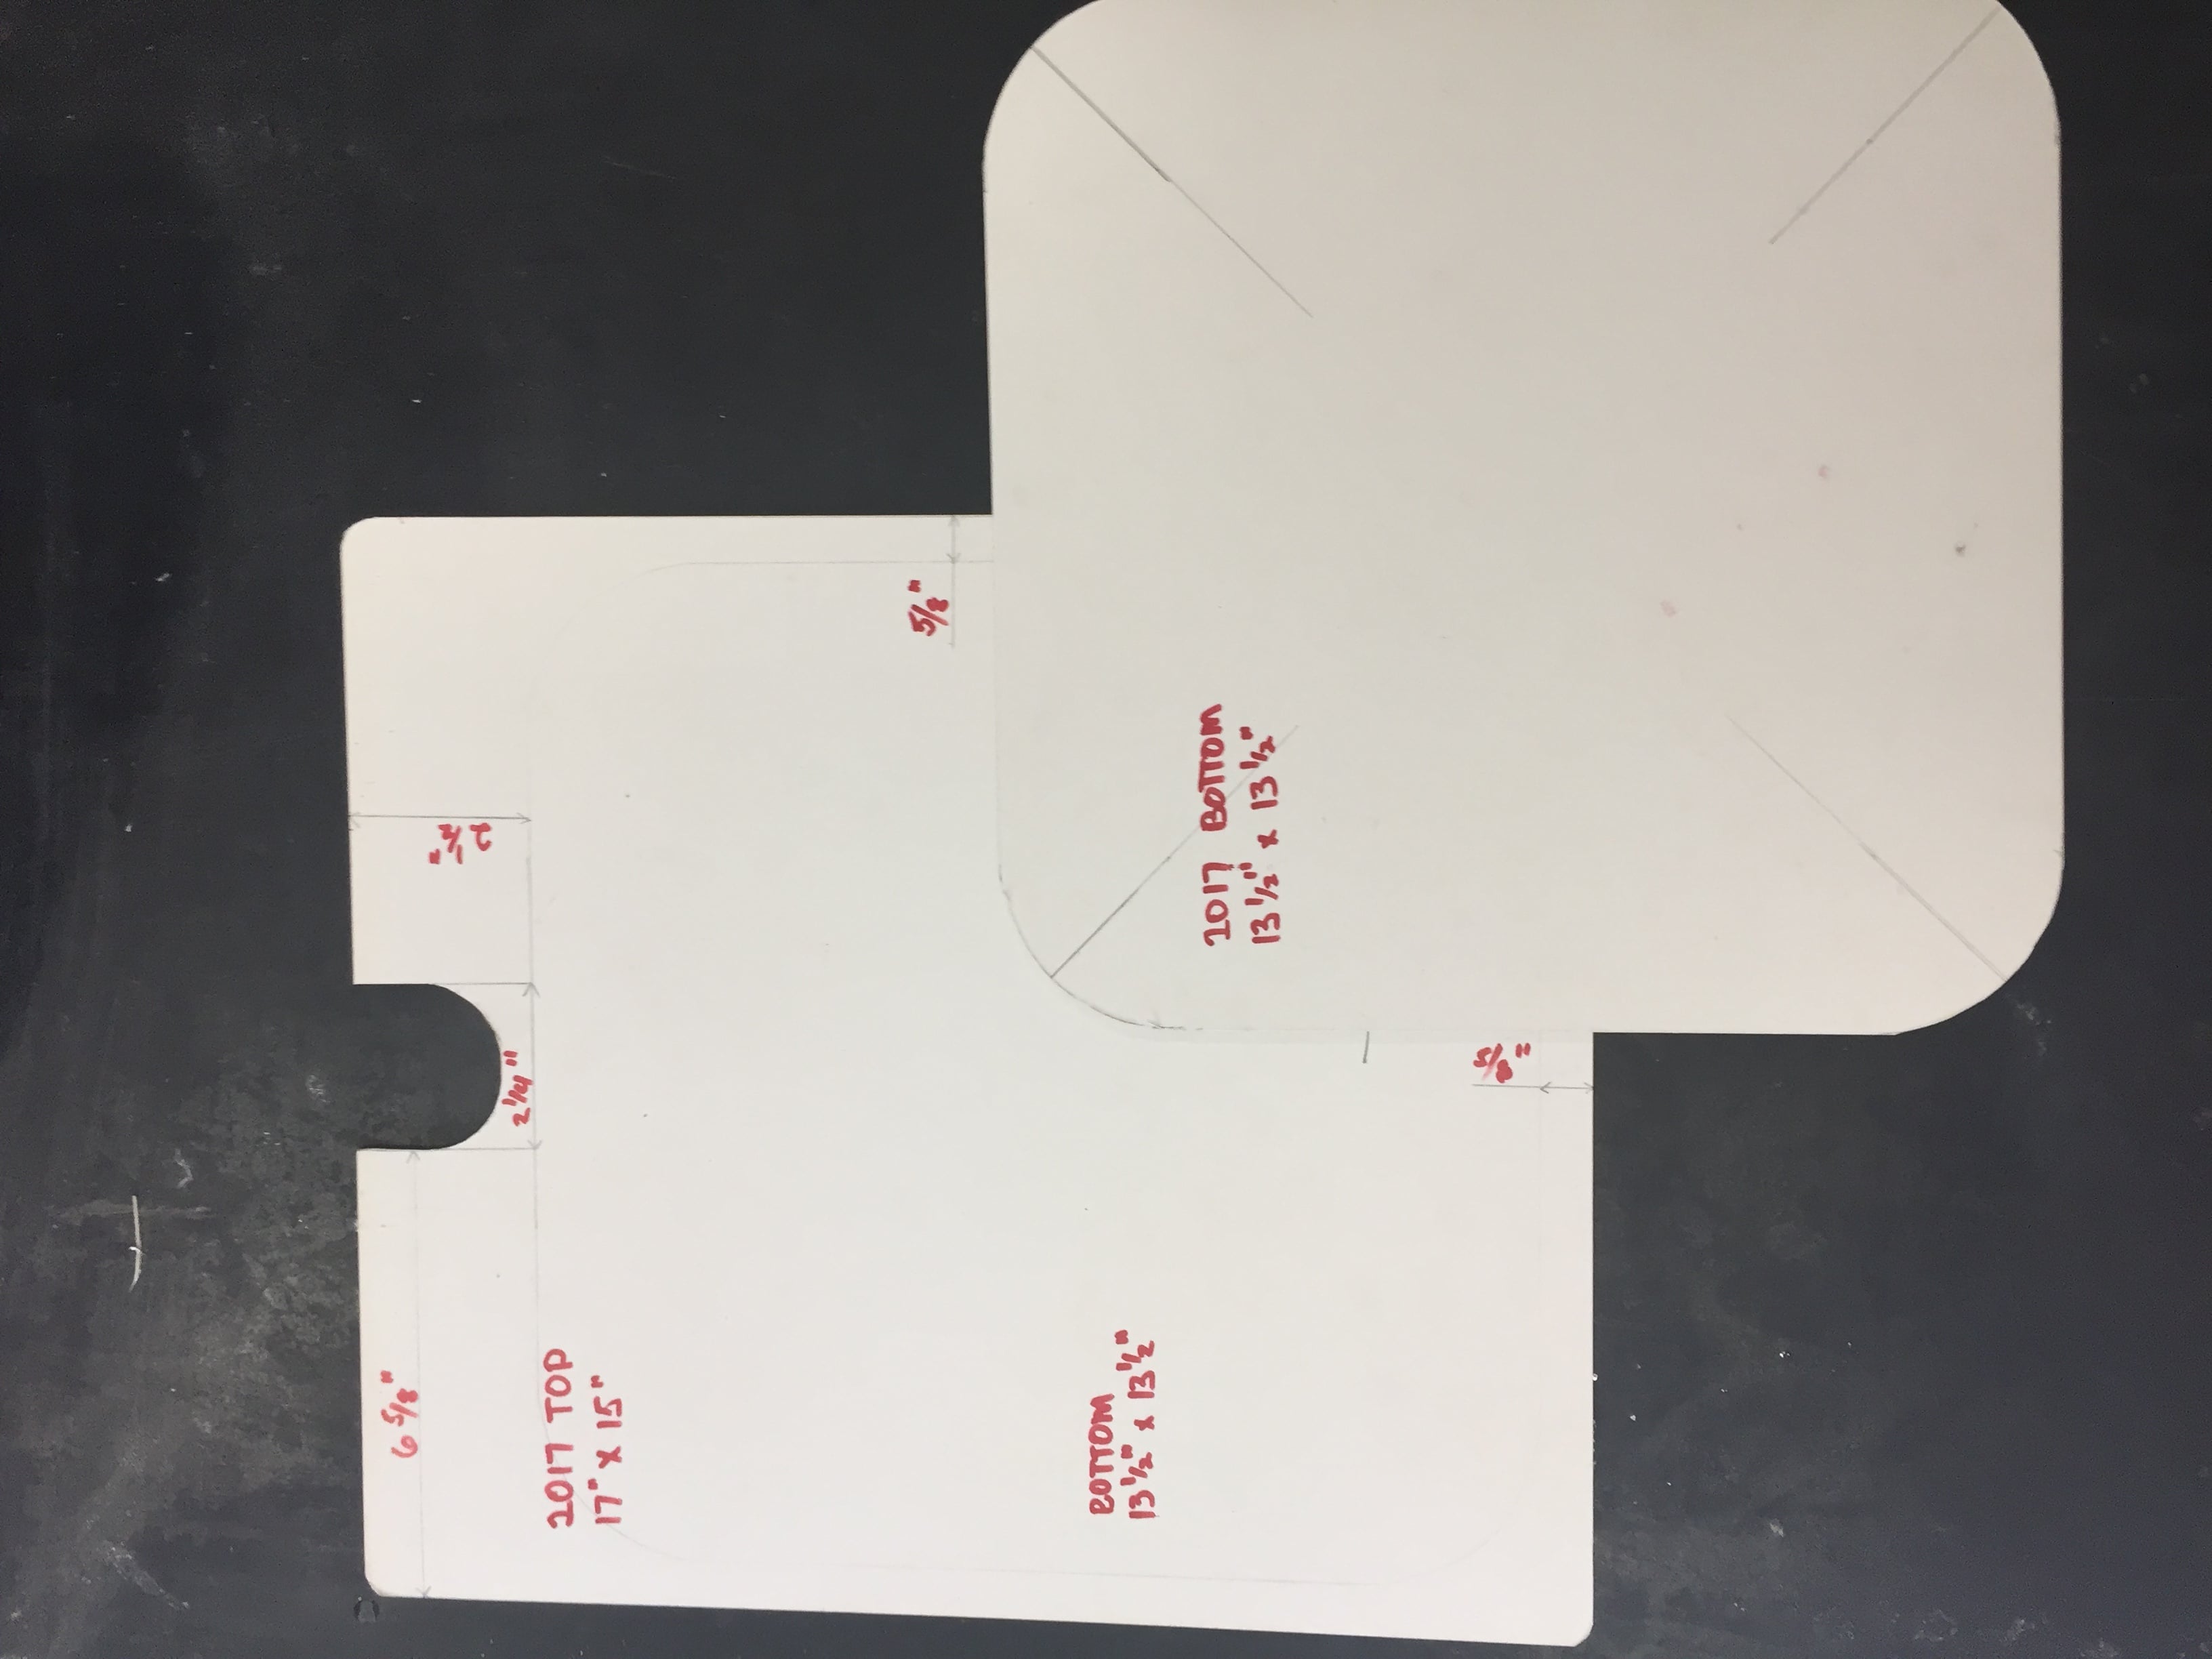
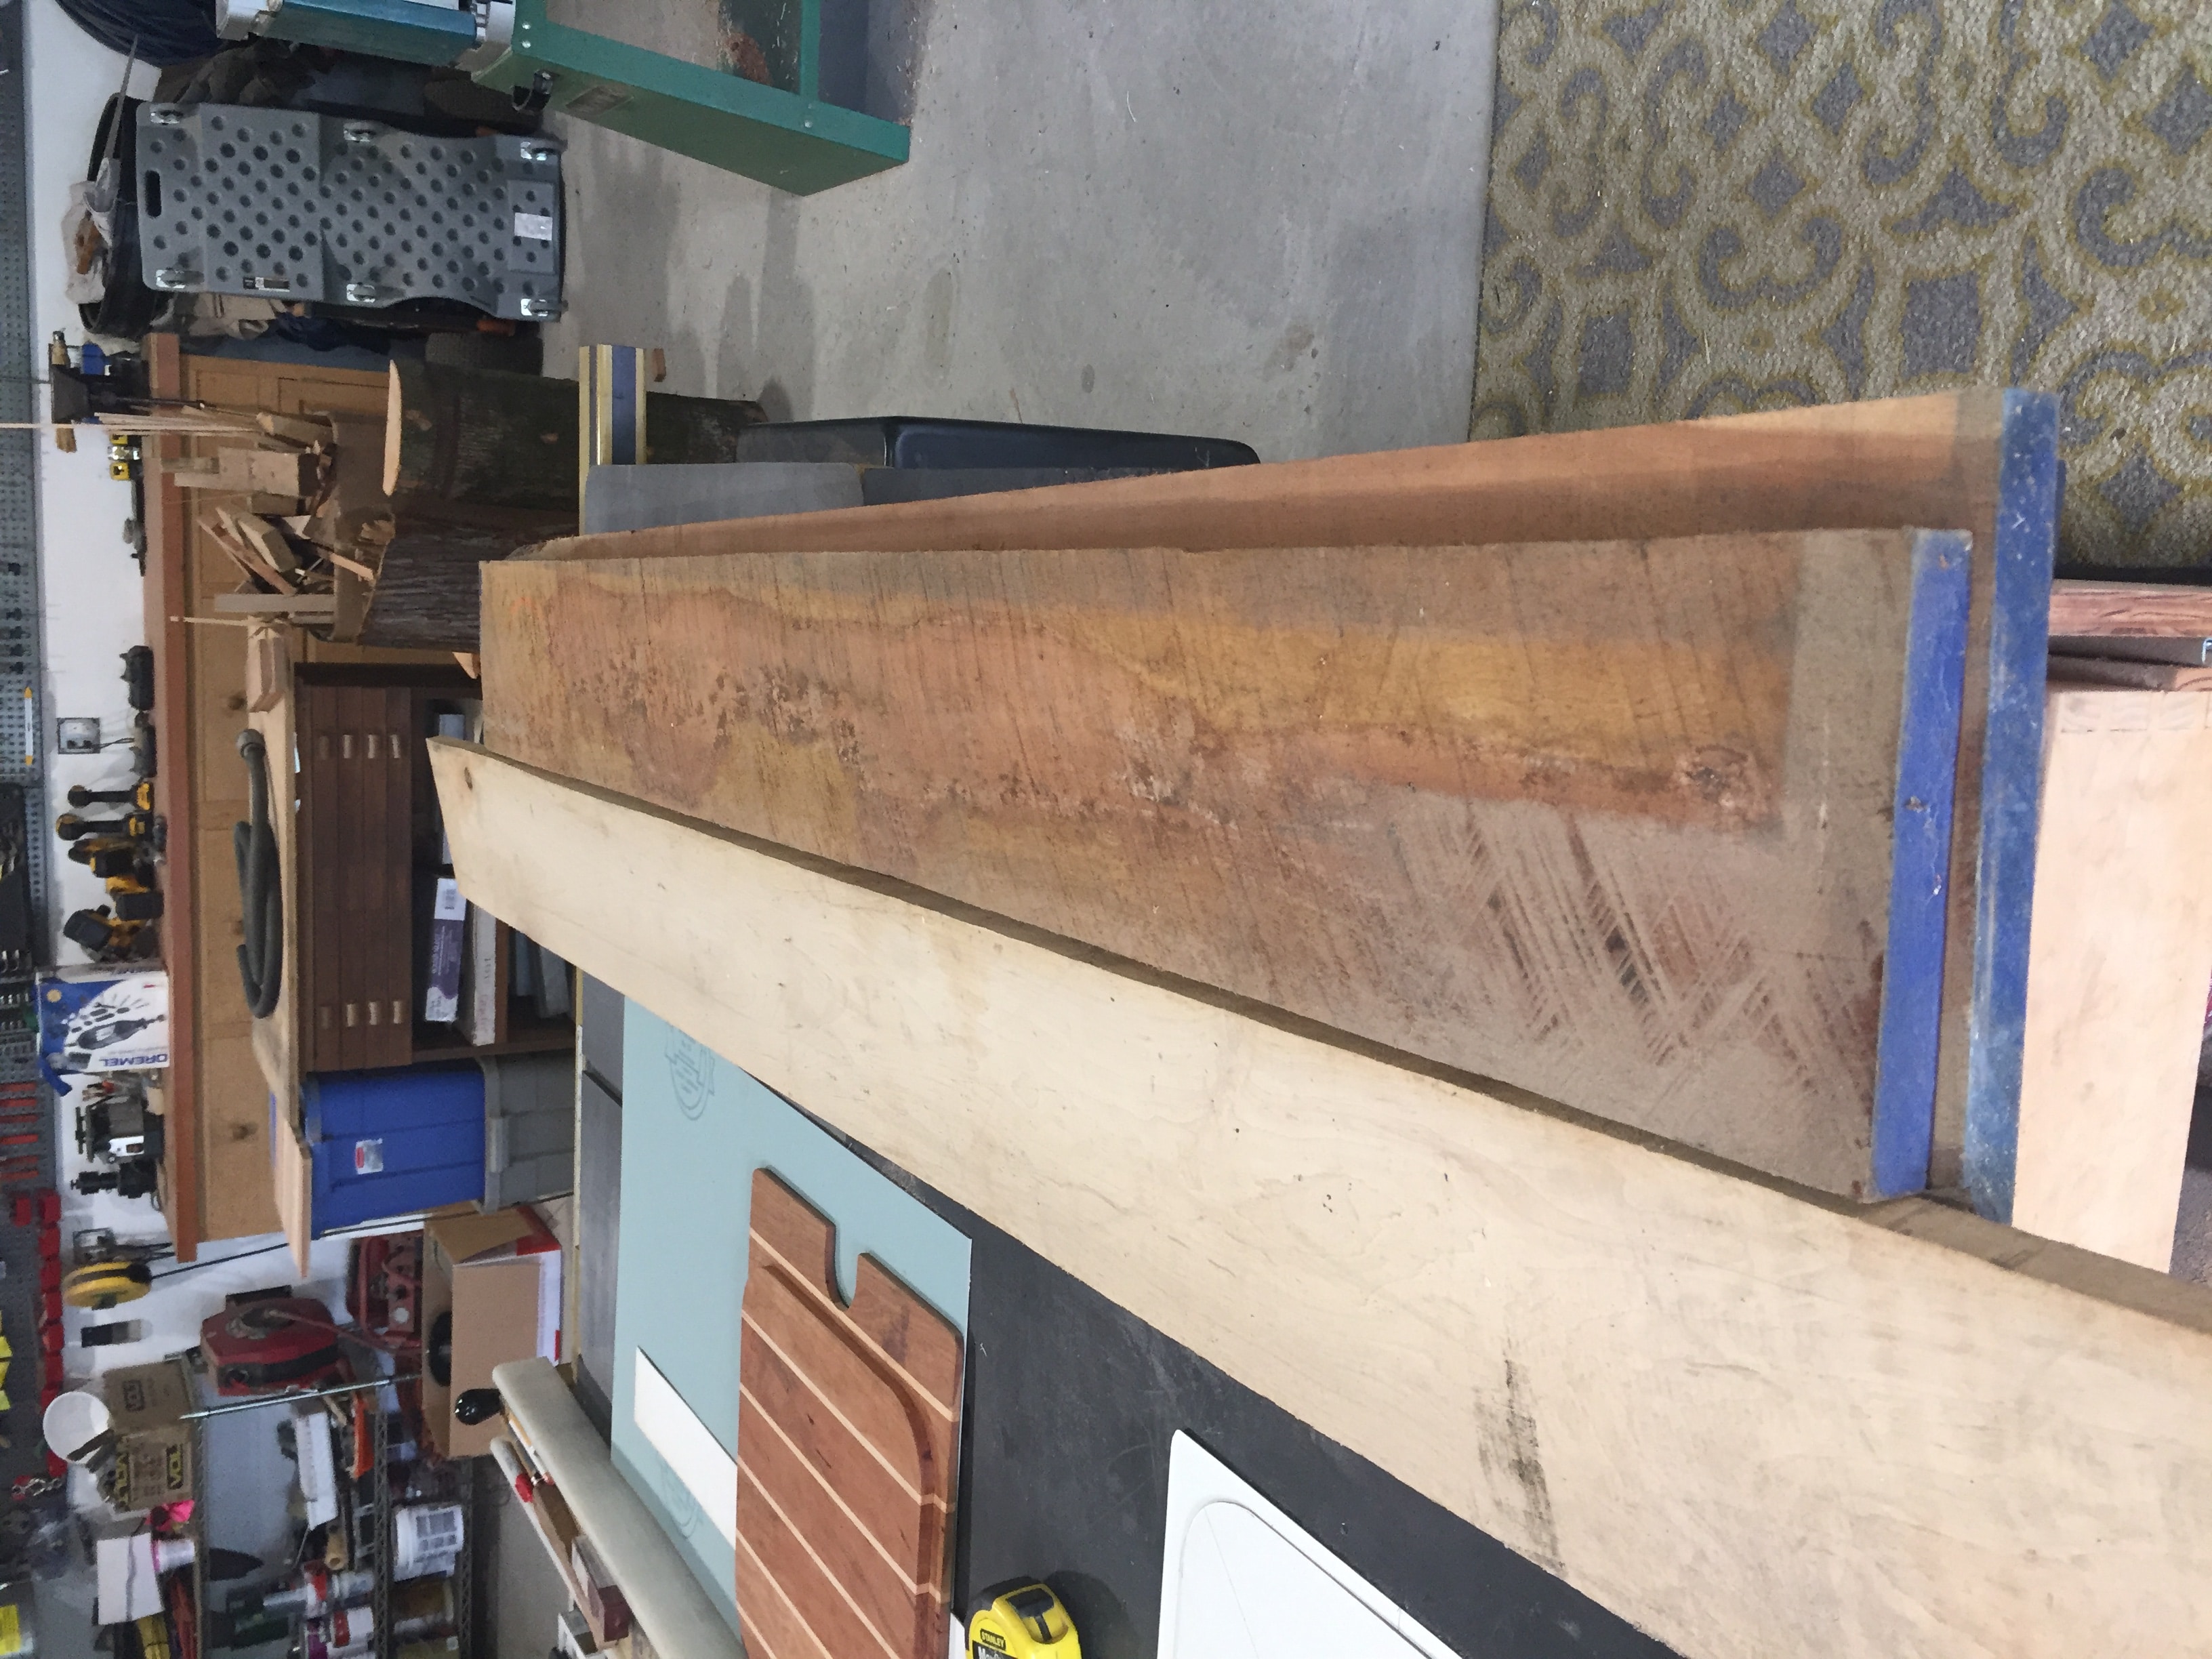
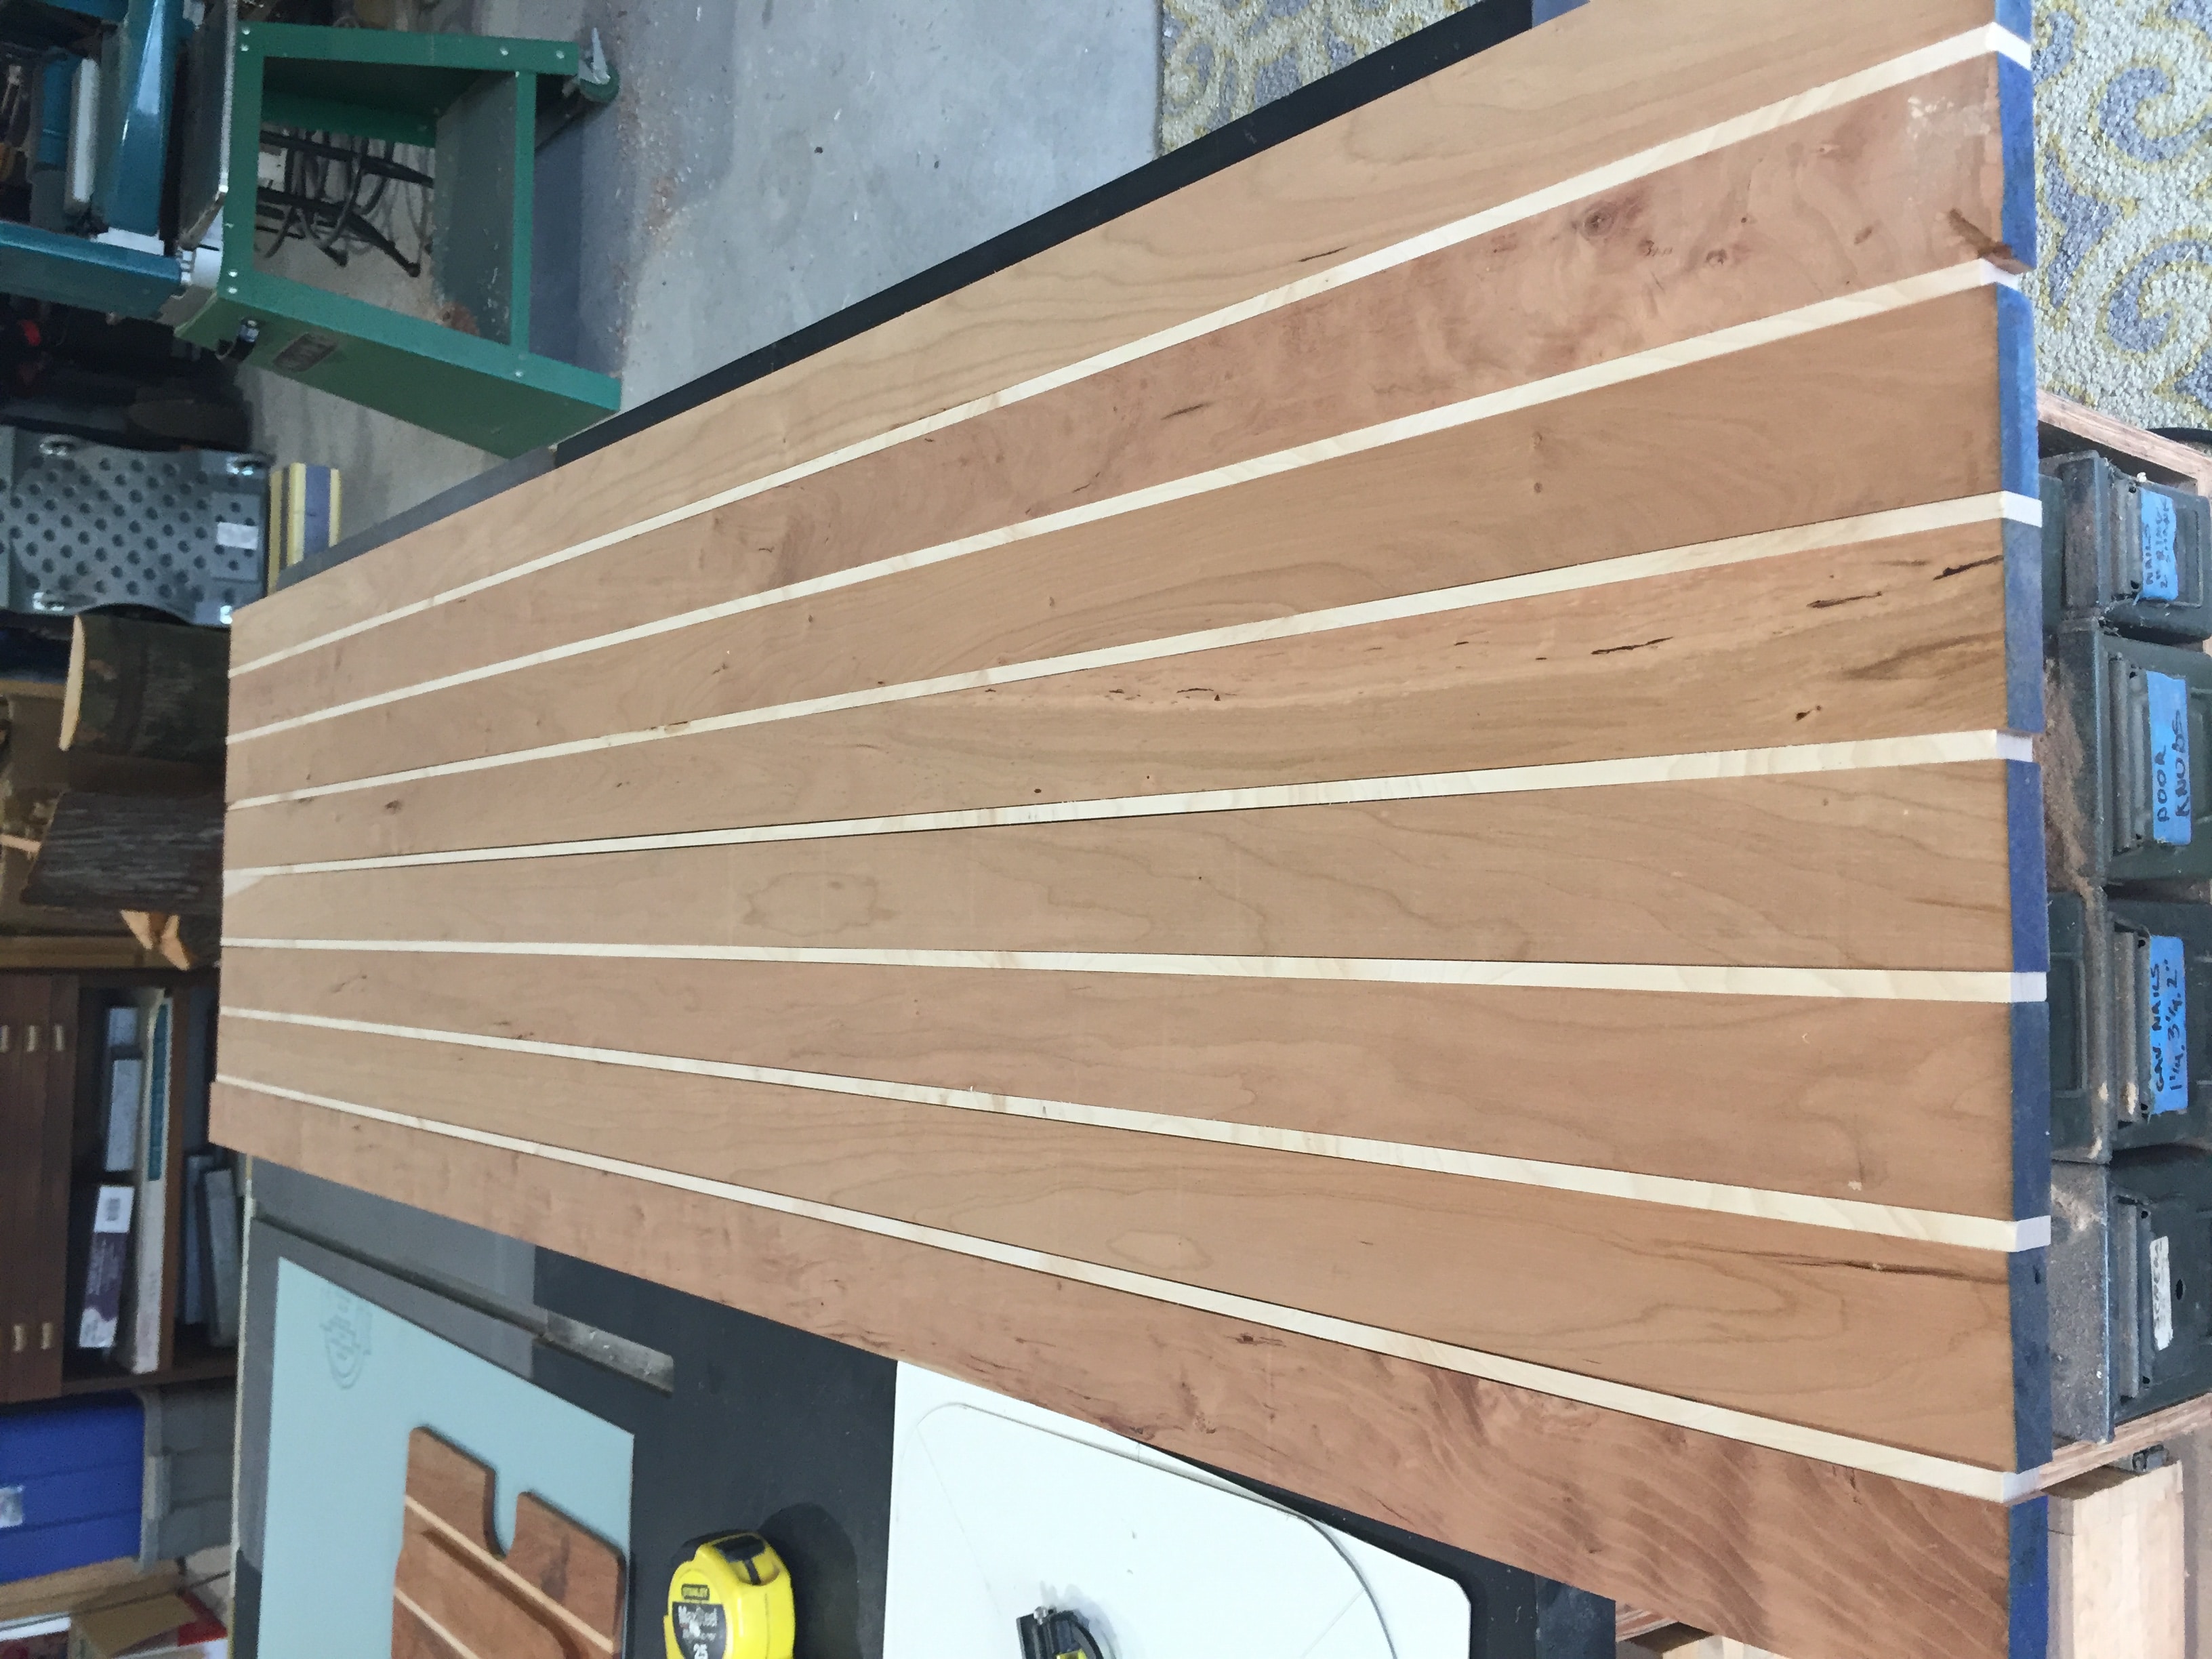
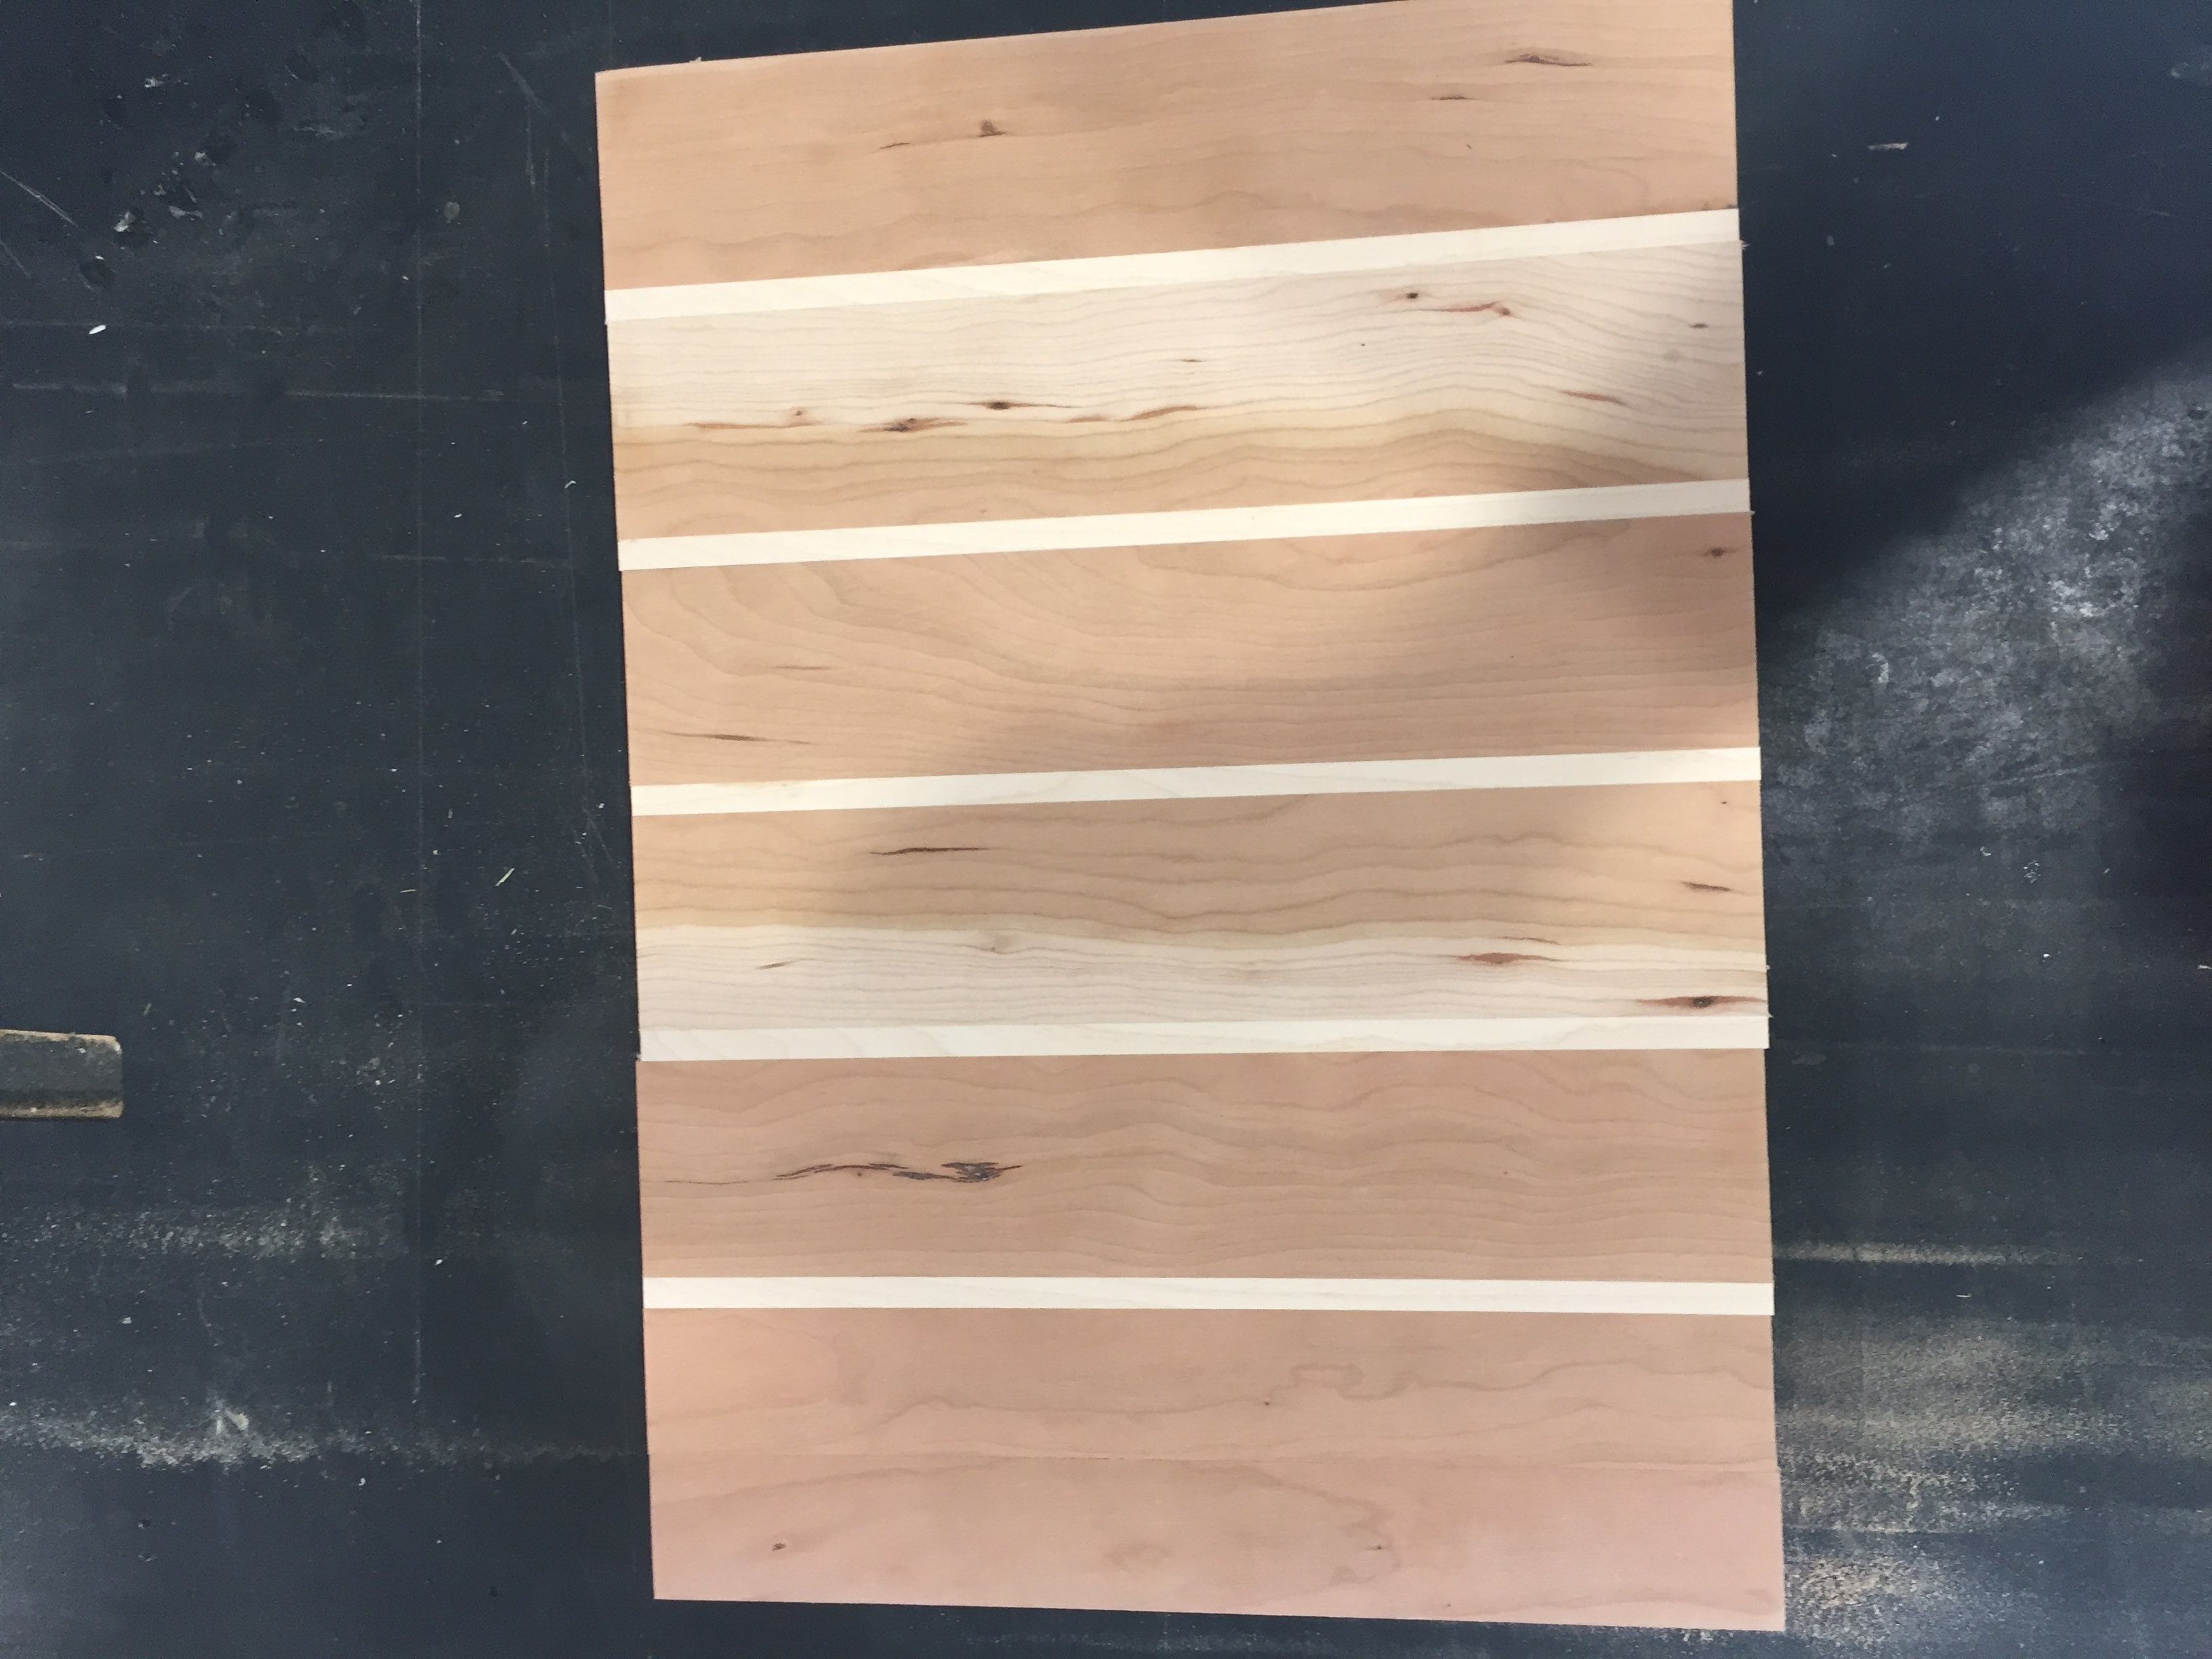
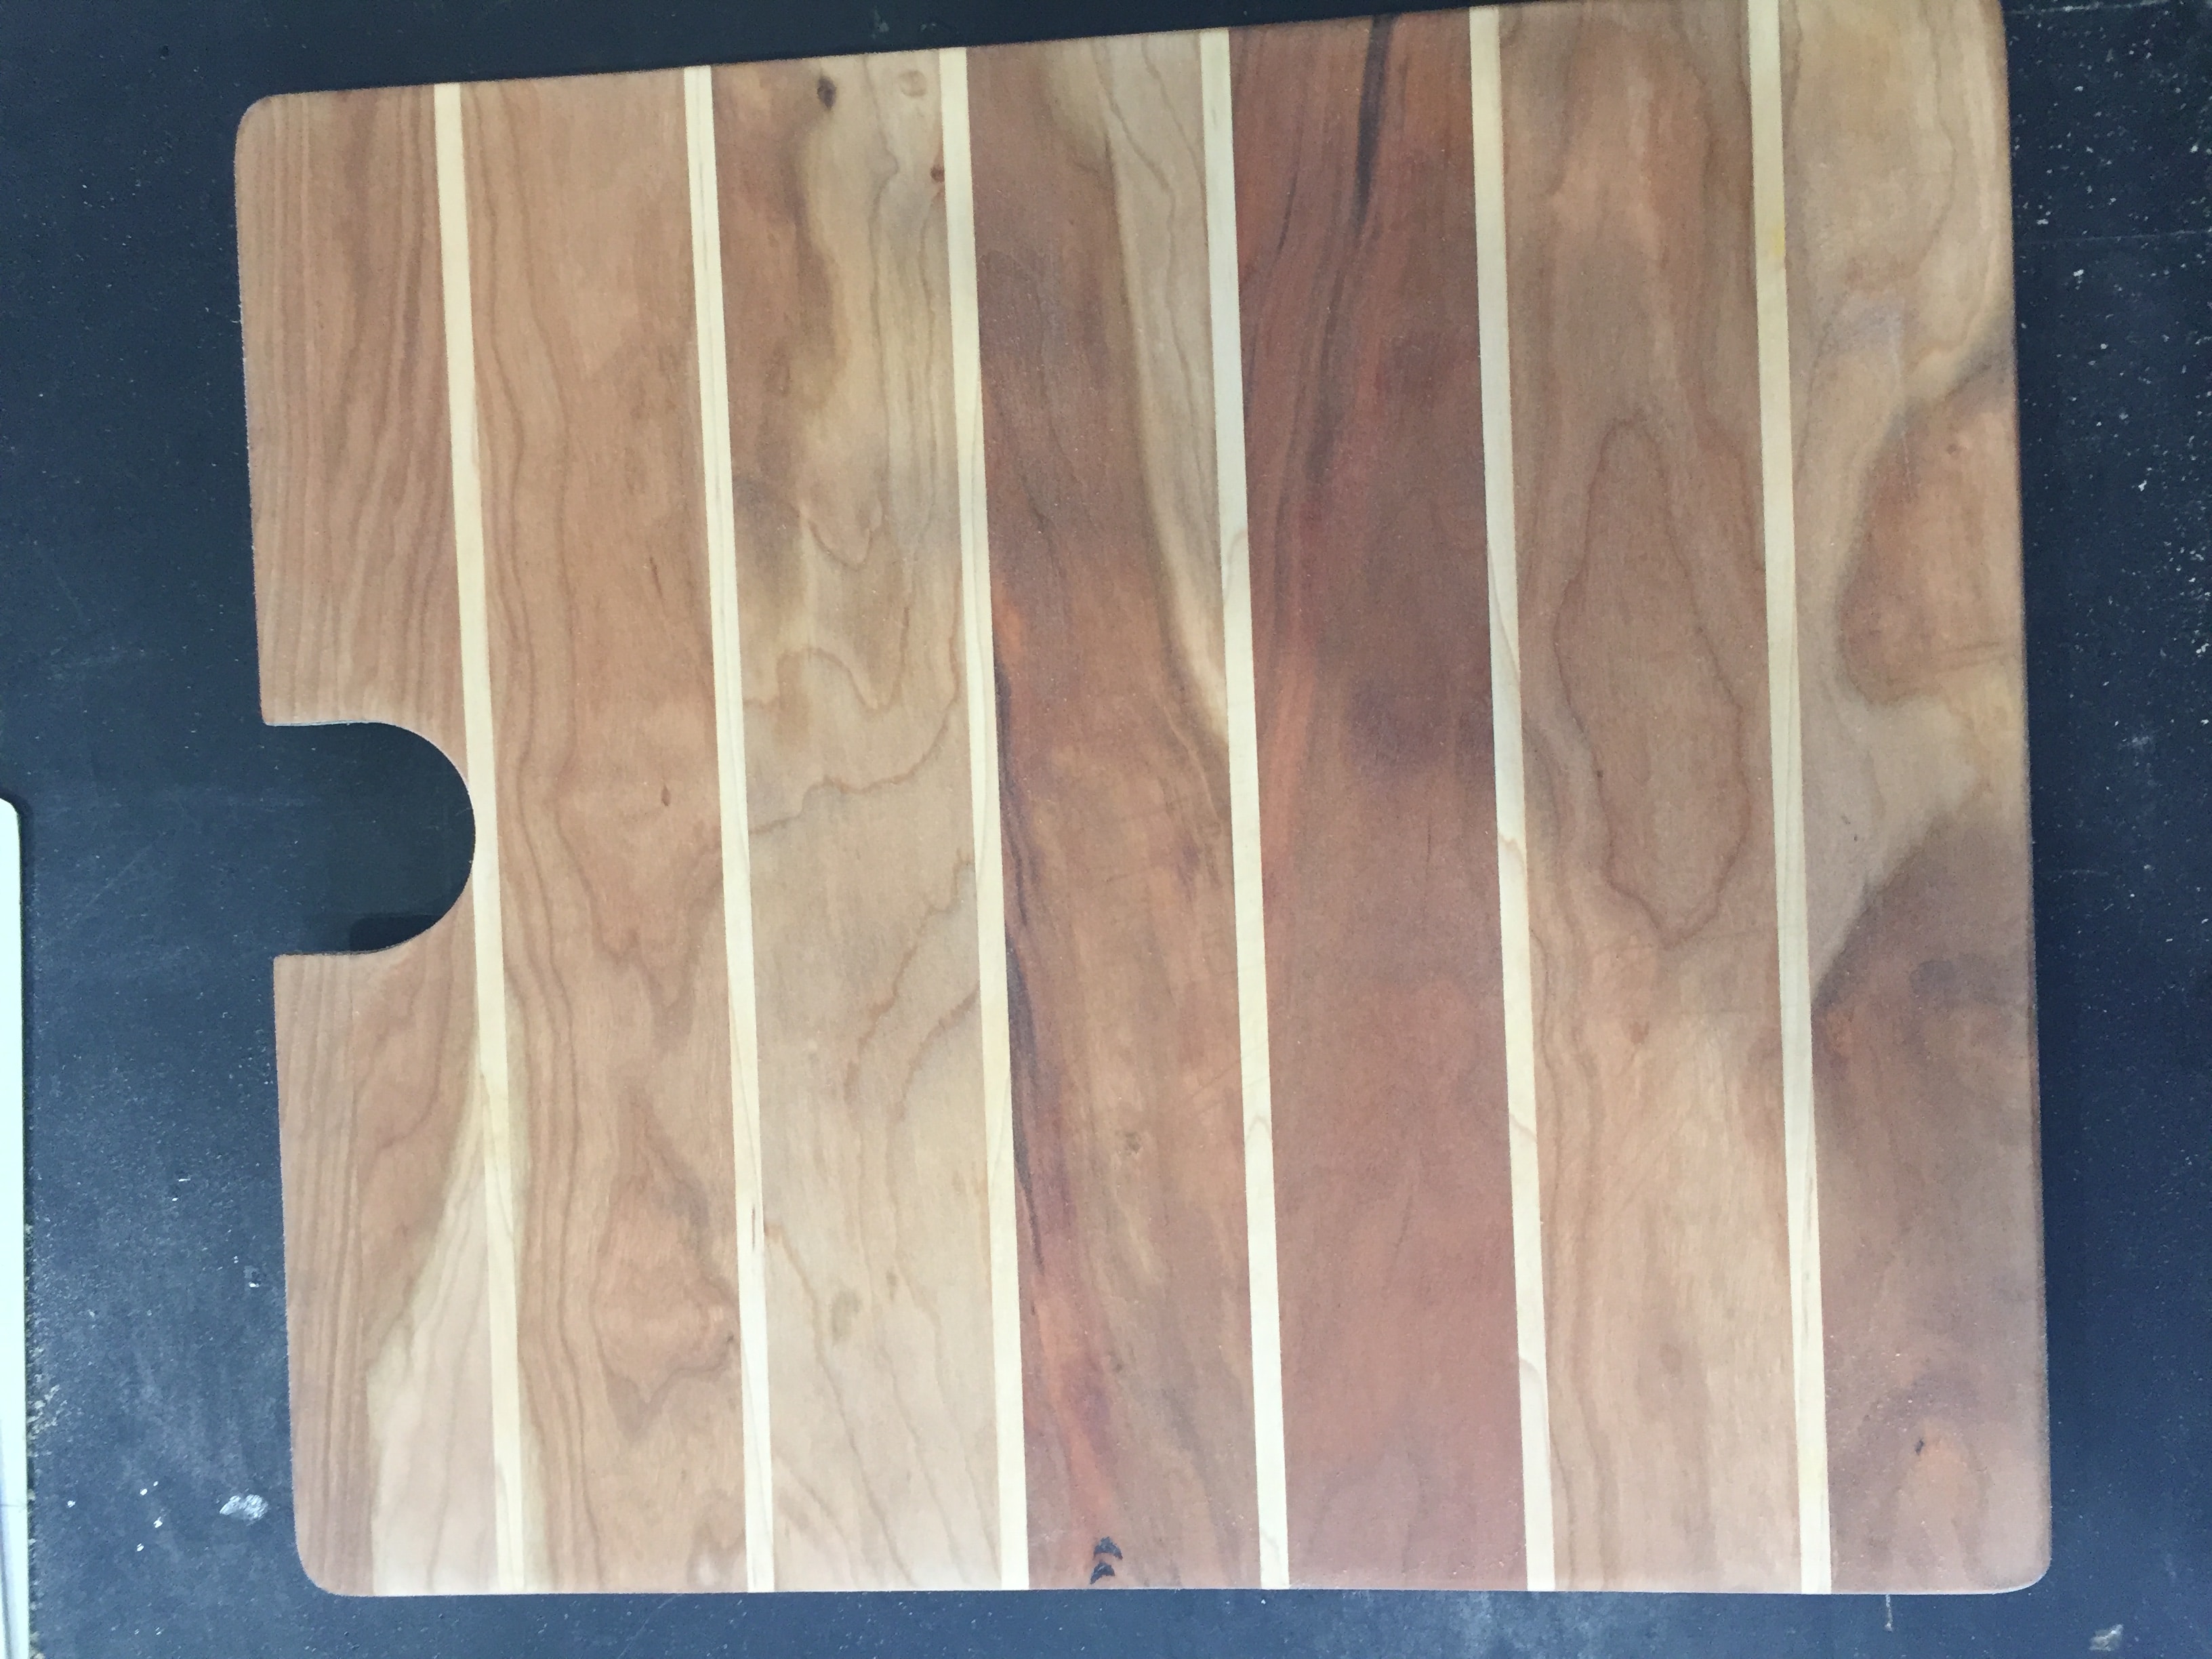
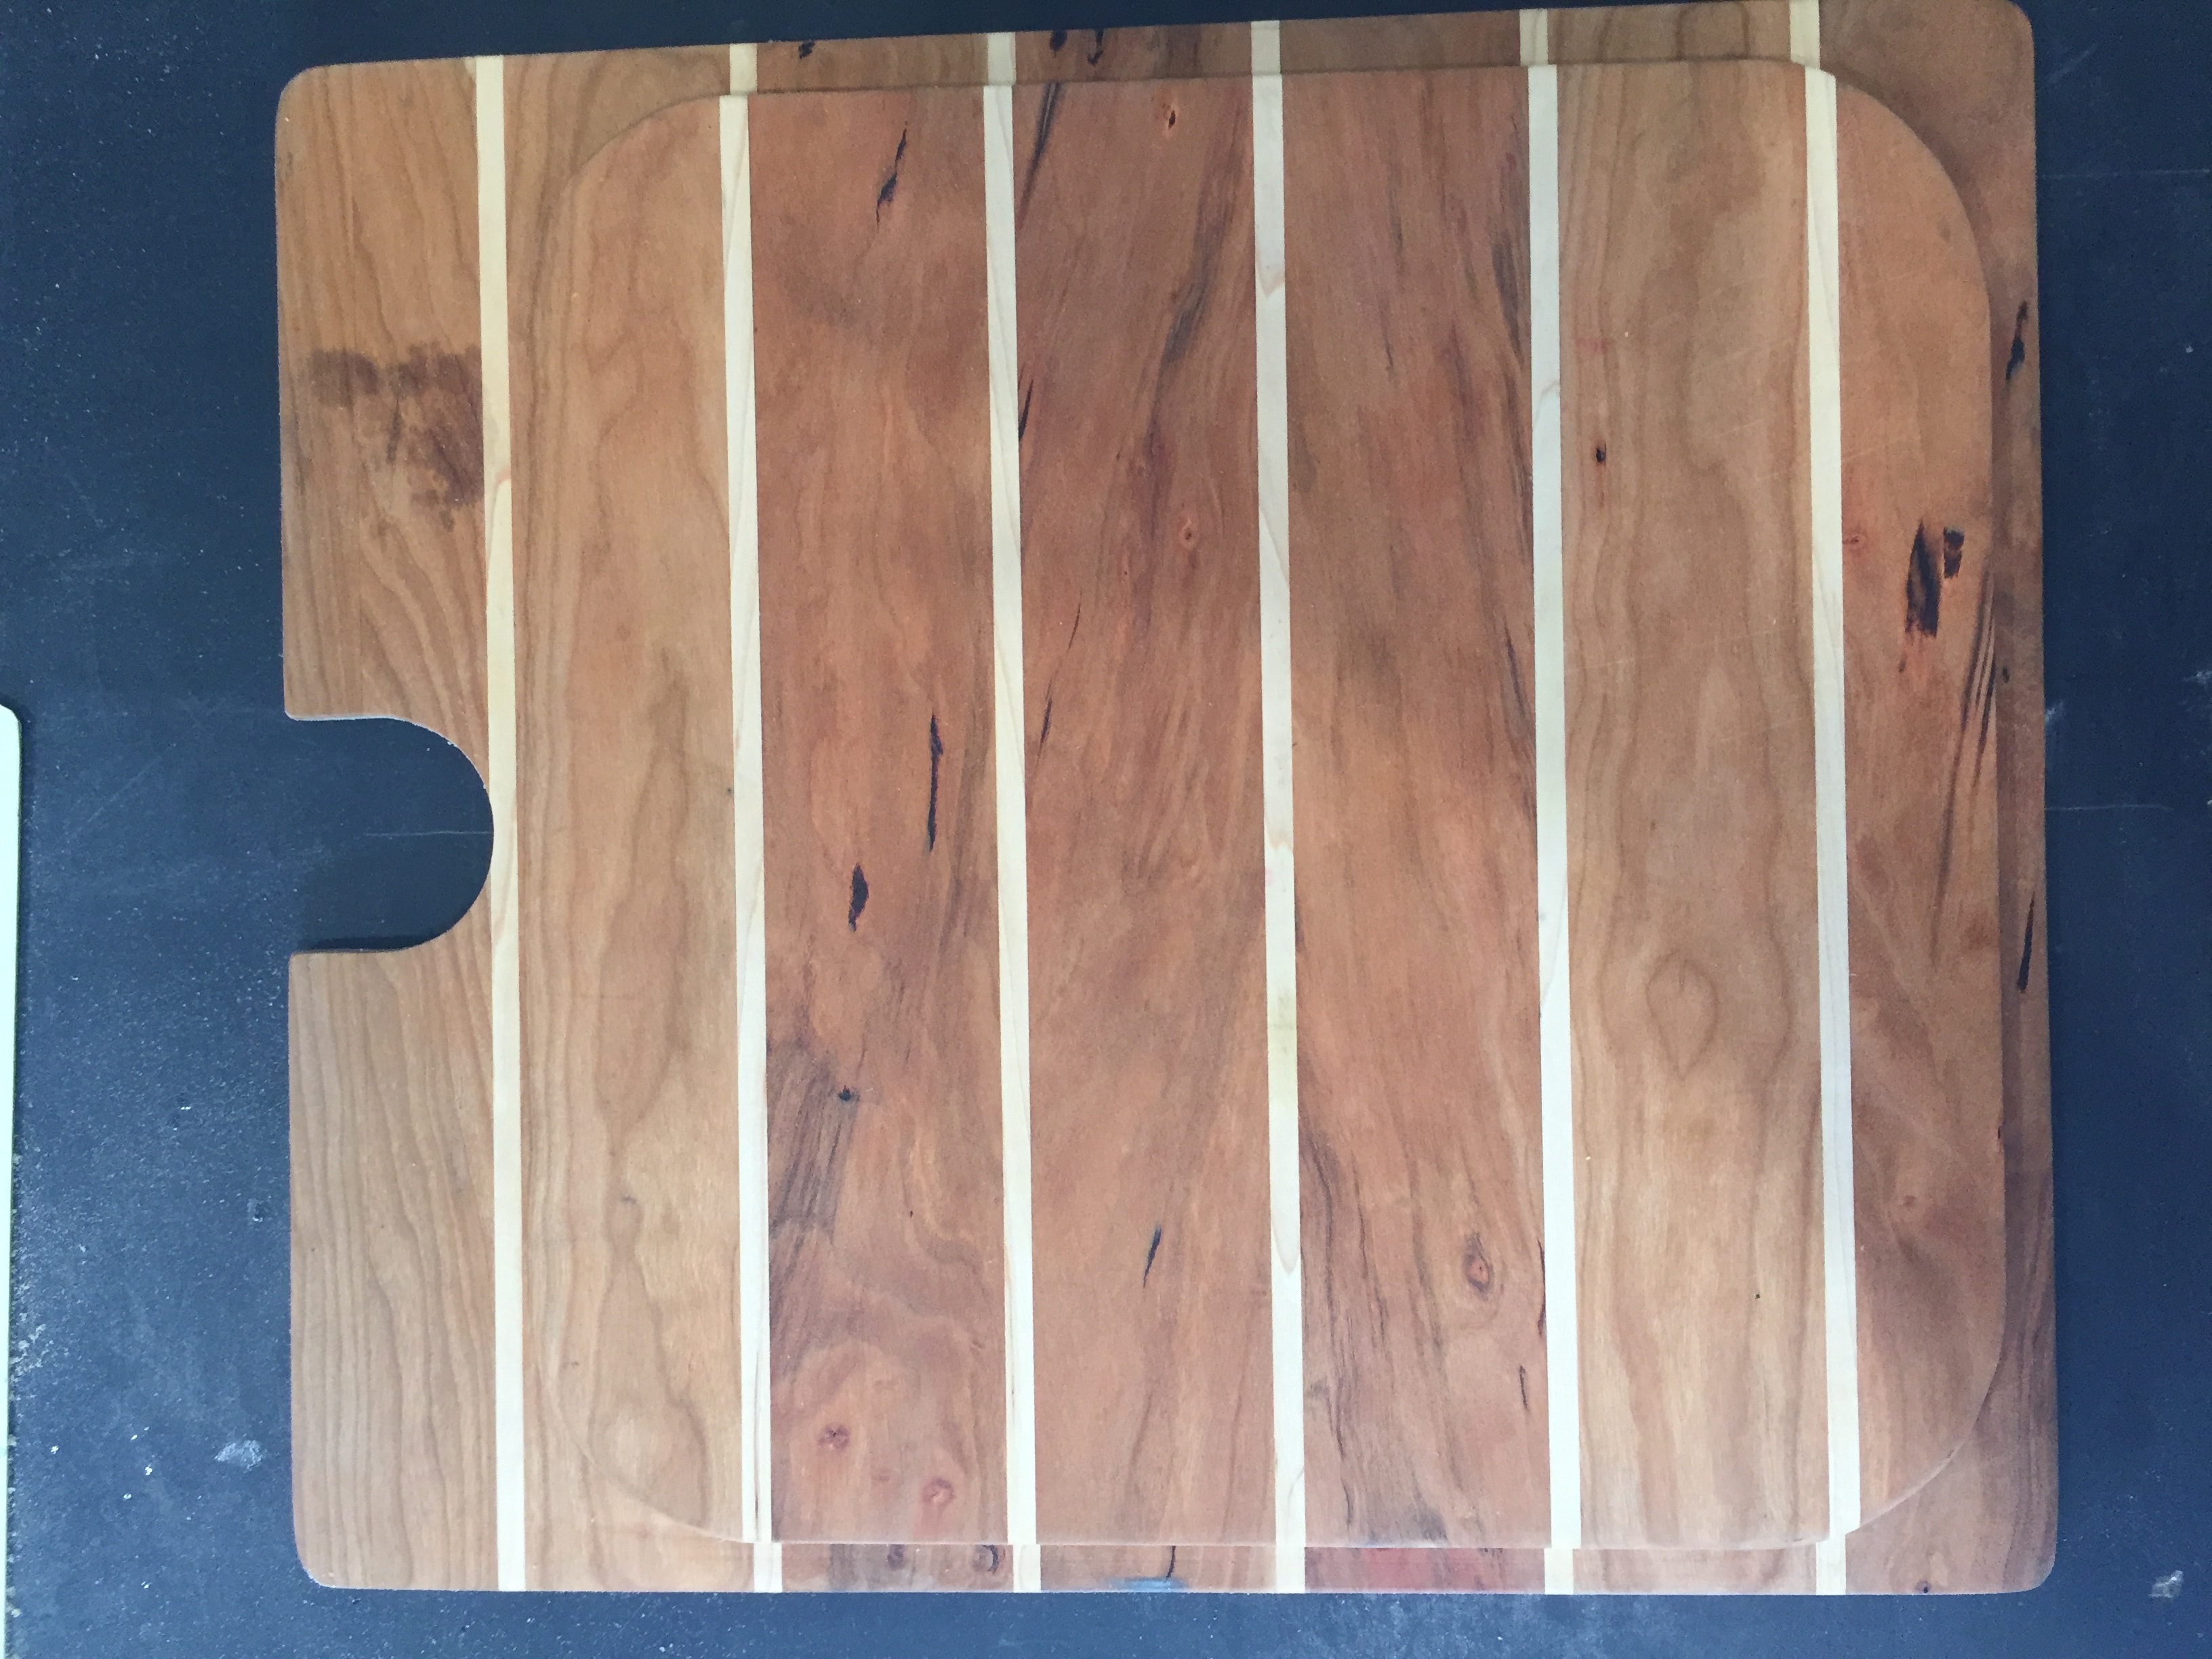
For those of you interested in my craft of making cutting board, I though I would do a quick overview of the process. It all starts with templates for the sink, in this case 2017 Elite II. A top cardboard template that is cut to the finished size, faucet location/cut-out and corner details are establish. I second template is made for the bottom which is use to hold the cutting board in place by dropping down into the sink bowl. Once these are checked for fit, I can make as many as I need knowing they will all be the same. Rough saw 1 1/4” thick Cherry and Maple are select and measured for total board feet need to build all the cutting boards. The board are then milled on the jointer to establish a flat bottom side and then passed through the planer for a perfectly flat board. The final thickness is 7/8”. These are then ripped down on the table saw – Cherry to 2 1/3” and the Maple to 1/4”. [attachment file=IMG_0859.JPG] With all the milling done the boards are then arranged in the ship decking pattern and glued together with food safe, water proof glue. These large panels are then cut to rough size cutting boards. Using the top template the corners are rounded and faucet location are cut on the bandsaw. The final size is cut on the table saw for last minute adjustments. The bottom template is then use to mark the bowl location and the wood is removed from around the edges at the router table. This allows the cutting board to sit inside the sink and not move. Last step is sanding and more sanding and more sanding. 80, 120, 220 and 320 grit sandpaper are used. The final step is a coat of mineral oil and they are done. It takes about 3 days to make a run of 4 cutting boards. Some people have ask why I do this? And think I am a bit crazy. It's not for the money for the wood alone cost what I charge. It is for the love of working with wood and created something I can share with others who value my craft. Over the next few week I will begin shipping these board to their new Oliver Owners. I hope they enjoy them as much as I did making them.
 1 point
-
Recent Achievements
-


")


")


")


