Leaderboard


.thumb.jpg.e34bf01ef7f7d5e99ad31856d45afbeb.jpg)
Popular Content
Showing content with the highest reputation on 03/07/2026 in Posts
-
Hi everyone — I previously did an intro in the introductions section, but my wife and I are new (to us) Oliver owners (about 2 months in). We’ve camped twice so far and already have several trips planned over the next several months, including a lot of boondocking in USFS campgrounds. I've had travel trailers of various forms for about 20 years and we are super excited to now be Oliver owners. I just finished a lithium / inverter / portable solar upgrade on our 2019 Legacy Elite II (Hull 514) and put together a detailed project write-up with photos, wiring approach, parts list, and lessons learned (see attached). The trailer came from the factory without an inverter, no roof solar, and no solar connector. It had two AGM batteries when we bought it. The main goal was a clean, reliable, serviceable install that leverages the existing factory AC/DC wiring/routing and keeps the system simple (including an inline inverter/charger pass-through so the trailer’s AC panel works “like stock,” just with inverter capability). I found great info on this forum as I undertook this project and hope to give back just a little by posting this as a practical reference for anyone planning a similar upgrade — happy to answer questions or share any additional photos/details if it helps. Happy camping!! Lithium Inverter Solar Write-Up.pdf2 points
-
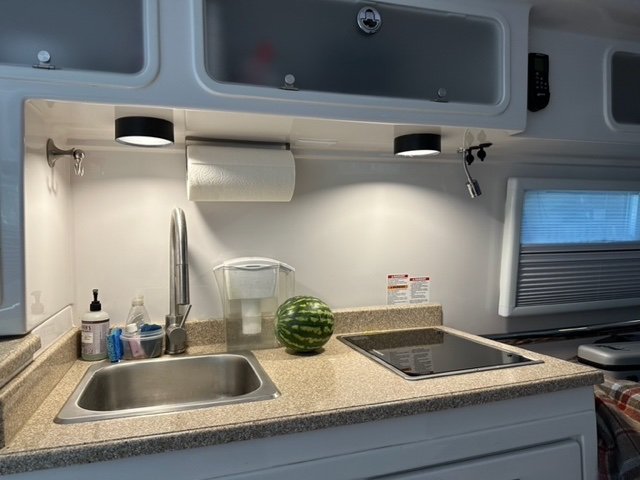
It's a minor issue, but sitting at the dinette or lying in bed we found the touch lights can be glaringly bright. I discovered that a 4" PVC sewer-pipe connector has a flange that is the ideal diameter for slipping over the touch light to create a light shade. To create a shade I cut off the flange from a connector using the band saw. This is the cut end that slips over the light... This is the finished end that becomes the bottom of the shade: The shade slips over the light and stays in place with a friction fit, but a bit of 3M double stick tape provides insurance: Dinette touch light, without shade: Dinette light, with shade: Galley lights, with shades: Shade installation does not appear to have any effect on light operation--they still turn on and off by touch. I suppose that the flanges could be cut with a hand saw (hack saw, coping saw?), which would likely require some additional filing and sanding. Also, the shades could be painted white, but for now we've stuck with plain black.
 1 point
 -
These days, yes... I think they used to block transmission on anything over 10mph with the roam plan and you also needed a special dish. I have a friend with a mini mounted on top of his van and it works perfectly at highway speeds.1 point
-
I remember long ago watching a YouTube, where they had a Starlink dish in the car propped up to the moon-roof and somehow it worked! Maybe they had the larger dish. After using our Mini for a year, I cannot see how that is possible. It's a bit touchy, requiring proper alignment pointing to the northern sky. That's why we have our Pepwave router with Parsec Husky cellular antenna installed in our TV. Chris uses her tablet often while I'm towing. We have our own Wi-Fi connection wherever we drive and on many "flatlands" and most all Interstate Highways, we are connected. No campground or coffee shop Wi-Fi connections for us! Then we use our Starlink only when cell reception is weak, like for example, Burro Creek Campground sitting at the bottom of a DEEP canyon! There's no cell signal, no TV reception, no radio at all, and that's where Starlink truly shines! 😎1 point
-
Good luck. Keep a presence on our little forum. It is a very valuable resource for us in the Ollie world.1 point
-
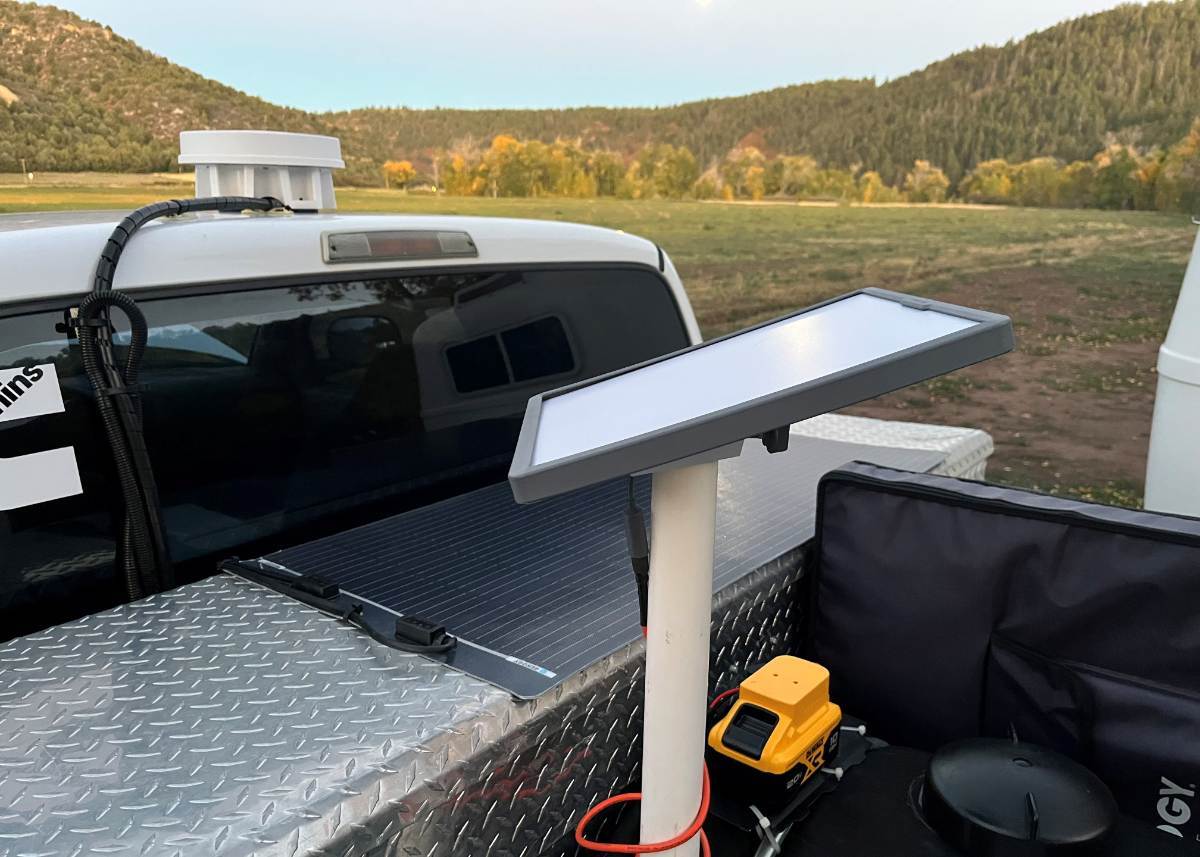
Yep, to everything Geoff wrote. He is THE electronics/wiring expert on our, The Forum! I wired the DC-2-DC 12/24 charger as he wired, tuned it up to 30V, but so far have not used it. It's an amazing upgrade which I have installed and will use someday. If you look very closely at my picture, the harness going up to the rooftop cellular antenna, the cable tied down in a loop has Ethernet and 30V power supply for our Starlink Mini! There is only time for so much in life, and once I realized a simple battery is all we need for BASIC functionality... I've been using this day-to-day! 😎
1 point
-
Hey Fred! Even with all the other options now availible, this Starlink Mini power supply is a great way to go! I provided Amazon links to the Victron, timer, and programmer to someone else above, and the links are still good. As far as the 3-pin connector, there are several choices on Amazon. Search for 5.5mm 3-pin DC power connector. Go to timers.shop website for programming instructions. Iv'e provided a screen shot of the settings above. The programer is powered by USB, and the settings are flashed to the timer via WiFi by a cell phone or computer, No Apps are required, just open the URL address and plug in the settings. Have Fun! Geoff1 point


-
Recent Achievements
-


")


")