

ScubaRx
-
Posts
3,091 -
Joined
-
Last visited
-
Days Won
158
Posts posted by ScubaRx
-
-
Just now, Patriot said:
Thank you Steve. This is on my to do list tomorrow morning.
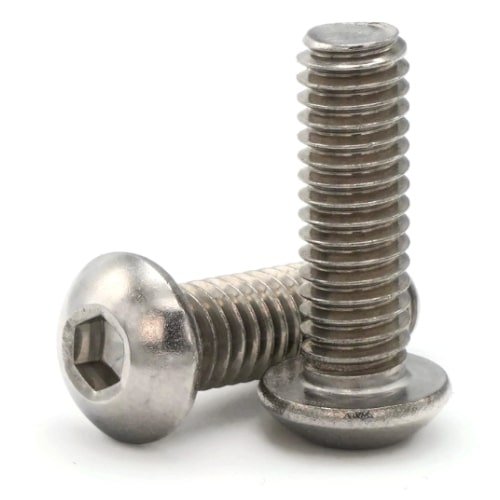
I didn't mention this, but probably should have. I'd use 1/4" SS button head machine screws. They look pretty good. And you will be able to see them on the aisle wall. I would try to make them line up vertically and horizontally so they create a box or rectangle shape, just for aesthetics.

-
On 12/24/2022 at 9:40 AM, Patriot said:
...We purchased a hydraulic lift table from harbor freight to initially load the gen onto the tailgate. It works great. From the tailgate to the gen tray we just both lean in, lift and set it in.
-David
We discovered a long time ago that if you lower the tongue as far as the front jack will go, you hardly have to lift the generator at all to get it into the basket. 😊 I do like your hydraulic lift table though.
-
 3
3
-
-
On 12/22/2022 at 12:02 PM, Geronimo John said:
REF: Champion 2500 Watt Inverter:
- $484 Amazon Prime
- Dual fuel
- 38 pounds
- Super Quiet
- 2500 watts start and run rating
AMAZING! 🙂 It sure isn't a "Hammer Mill" like this grandpa's was!
Actually, RE: Champion 2500 Watt Inverter:
When the 1.05-gallon tank of gasoline is full, the 79cc Champion engine produces 2500 starting watts and 1850 running watts and will run for up to 11.5 hours at 25% load. When using a 20-pound propane tank, it produces 2500 starting watts and 1665 running watts and will run for up to 34 hours at 25% load.
Be aware that all generators will lose 10-15% of their output using propane. This is due to the differences in BTU's between gasoline and propane.
-
4
-
1 hour ago, connor77 said:
John D & GJ,
How did you both through bolt your PVC board for your inverters with that wall of fiberglass in the way? What am I missing? I'm having a separate issue with my inverter and stumbled upon this thread. I just looked and confirmed that my inverter is held in place on that white PVC board with the 4 small sheet metal screws and I agree that the unit is too heavy to be held up by just those. But I have no idea how you're able to through bolt that board back on. Where/how are you accessing the washers and nuts? Or are you just through bolting the inverter onto the PVC board and then reattaching the PVC board (with the inverter mounted to it) to the fiberglass wall with longer/better/more screws?
I'd like to be proactive and get something better in place and I'm considering just longer, beefier screws that will go into the fiberglass in the existing 4 holes that the small screws occupy now.
Any chance you took pictures?
You are on the right track by being proactive. Eventually, those things that are glued to the vertical inside walls are going to fall off, especially the heavy electronics now being used. The way they did theirs is the best way to go. It will require a little swallowing of pride however. Since your unit is still attached, your "fix" should be much more simple.
1 - Remove ONE screw holding the inverter to the PVC backer board. Using that hole as a marker, drill from the inside completely through the fiberglass out into the aisle.
2 - Place your SS bolt into the hole from the outside and put a washer and nylock nut on the inside and tighten it down.
3 - Repeat for the other three screws, one at a time.
Yes, this requires drilling a hole through the fiberglass. There goes some of that pride I spoke of. You'll survive, and I promise it won't fall off the wall now. If you wait, it's gonna be a lot harder and the end result will still be drilling those holes. I really don't understand why they don't do it that way at the factory.
-
 1
1
-
4
-
-
6 hours ago, taylor.coyote said:
...I'm assuming your new Oliver will come with the new 1100 BTU air conditioner. A 1100 BTU air conditioner w/ soft start should run great using a propane converted Honda 2200 in all conditions. We do not run the microwave and air at the same time. I have never done the calculation or attempted to run both at the same time. Also, we run the heat on propane when not on shore power...
The standard air conditioner for all trailers currently being delivered is the Dometic Penguin II 11,000 BTU. Oliver will install the Micro-Air EasyStart™ as an option if requested. The standard water heater is the Suburban propane/electric. The standard furnace is now a Truma unit.
The 13,500 BTU Truma Aventa Eco Air Conditioner is an optional upgrade and is only available paired with the optional Truma AquaGo Comfort On Demand Water Heater. Oliver WILL NOT install the Micro-Air EasyStart™ on the Truma A/C units as it will void their warranty. You will need a 3000 watt generator to run this unit.
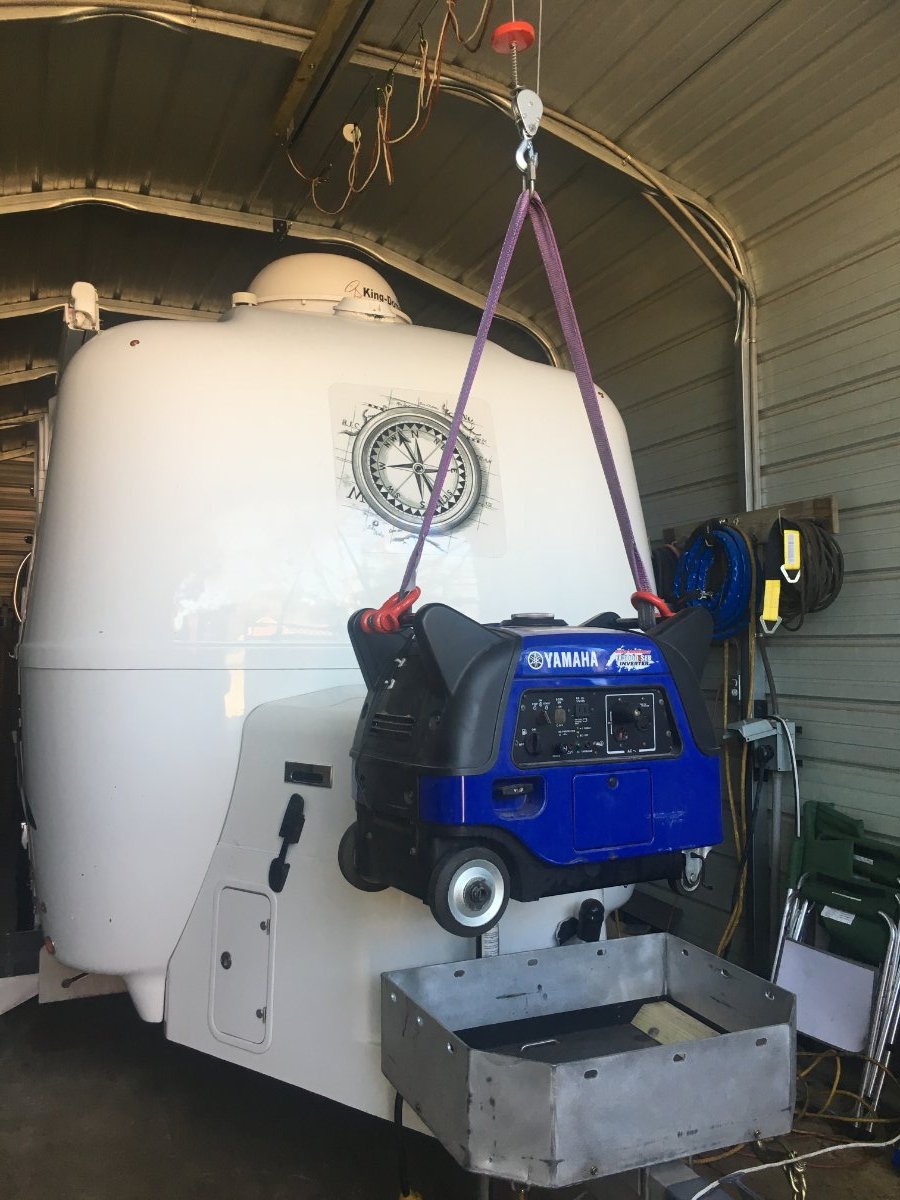
We bought a Yamaha EF3000iSEB 3000 Watt Inverter Generator 16 years to travel with us on the tongue of our 2008 Elite. It migrated to the tongue of our 2014 Elite II and has traveled well over 150K miles. It will run anything we've ever thrown at it. As many have mentioned, it is very heavy. Since it has been sitting, locked in the generator baskets of two different Oliver's, for 99% of the time we've owned it, the weight just has never been an issue to us. The only times it has been removed from the basket has been for oil changes and I have an overhead trolley mounted lift to move the heavy stuff when needed.
-
2
-
-
Don't leave home with the Ranger towing an LEII. It would be a pretty good tow for an Elite.
-
5
-
-
The Ram Promaster 3500 Van only has a towing capacity of 6,410 lbs primarily because it has a 4,680-pound payload capacity. This would give it around a 12,000 pound GCVWR.
-
2 hours ago, AriesBarb said:
Is it because the Promaster isnt high enough towing capacity? What about a Chevy Express with a 10,000 towing capacity?
Much better from a towing capacity standpoint. Sixty four hundred pounds is "just getten' by..."
-
1
-
2
-
-
On 3/26/2023 at 4:12 PM, Steph and Dud B said:
Would be nice if they were still 3rd brake lights.
RVIA will not allow that.
-
2
-
 2
2
-
-
On 4/18/2023 at 3:15 PM, Steph and Dud B said:
We stopped (twice) at that Bucees last week. Our first Buc-ees. Very impressed with the food and gas pieces. I'm actually eating some Beaver Nuggets right now. 🍽️
I do love me some stewed beaver nuggets. Pair that with some sweet taters and hit don't get no better.
-
 4
4
-
-
On 4/20/2023 at 7:44 AM, Ollie-Haus said:
If you hover over the activity button in the nav bar at the top, you will have a row pop up that has "unread content" in it.
Thanks for that, I saw it once long ago in the past and could never figure out how to do it again. Yea....
-
2
-
-
Which will make you
-
5 hours ago, connor77 said:
Mossemi / Scuba, this is a great example of what I think would be helpful in terms of videos to walk people through how to perform these tasks. Doesn't necessarily have to be an Oliver person so long as what is done and video'd is approved by Oliver. The obvious beauty of the videos (both the "full" length ones and the shorts) is that once they're done, they're available to everyone always.
Kevin, if you have the equipment and are so inclined, feel free to video our demo and post it. This is something that everyone will encounter during their tenure as an owner and the procedure is pretty straightforward to observe and do but very hard to comprehend from written instructions. I think you’ve got a great idea.
-
5
-
-
4 hours ago, Ollie-Haus said:
...Sorry for spilling my feelings here on the forum, but I'm truly crushed and leaning on you all for the moment. Again thank you for all your kind thoughts, words and support. God's blessings to you all.
We are all here for you and your family in times like this so lean on in there. I lost my younger brother over 10 years ago. My mother always said that parents should not outlive their children. Our prayers are for you and yours. Can we look forward to seeing you next month at the Rally in Guntersville?
-
 3
3
-
-
5 hours ago, Bill and Nancy said:
We have them on our 30 gallon tanks and they work great. The only thing I had to do was I made some spacers to lift the tanks about 1/4 inch because the unit that mounts to the bottom of the tank is proud of the rim by about 1/8 inch and it hits the ground and or the floor of the dog house. It comes with little aluminum spacers to raise it up but they didn’t work very well. When I take the tank out to fill them you can’t sit the tanks down on the ground or you will brake the sending unit that is stuck on the bottom of thank. Maybe our tanks are made differently but that is the case with ours, but they work great. We like them because we de winterize our Ollie in March and leave the heat at 40 and I can check the tank levels every couple days without even going out to the trailer.
I agree with you 100% about the little aluminum spacers that came with the Mopeka system. The idea was spot-on but the execution was crap. We chunked them and sprung for a couple of the Mopeka Tank Halo's. They solved the spacing problem perfectly.
We do a similar thing with our winterization. Since there are so very few days yearly here in North Mississippi that it might get cold enough to damage something in the trailer, sometime in November I drain the water heater, blow out the water lines and put a small electric space heater inside. I like to keep the temperature inside about 60 degrees or so. By mid January, we will fill it back up with water and leave for the Southwestern US to be gone a couple of months.
-
3
-
-
1 hour ago, AlbertNTerri said:
We had the propane tank monitoring system included in our add-on list when we purchased #1125 last year. Since then we had to have multiple sending units replaced because of manufacturing defects, the battery clips weren't soldered well and kept falling off. When the units were "functional" they were only marginally accurate. After several attempts I finally asked for my money back. I returned the magnetic units and OTT sent me a check. I recommend against using them, the quality of workmanship is very poor and when they are working they are not reliable. Better to keep one tank turned on and the other off, when you run out of propane, go switch tanks and plan on filling the empty one. in the next day or two. We were getting 2-3 days during the most cold weather in Massachusetts this past winter, down to the low teens, no problem.
I'm sorry you had this trouble, but if I understand your post correctly, you bought a propane tank monitoring system from Oliver when you purchased Hull #1125. Was it the Mopeka system or SOB? We have had a Mopeka system for going on 5 years and have never had a minutes trouble from it. We replace the batteries in the sending units and the inside receiver/display unit about once a year. They have always performed flawlessly and I recommend them without hesitation.
We partially do the opposite as you with our tanks. Before a trip we have the tanks filled if needed. We hook up both tanks and turn them on. We then just let the Two-Stage Automatic Changeover Regulator do its thing. If one tank empties, the regulator seamlessly begins to supply gas from the other tank. After 15 years of use this way, I can just about know when a tank is getting low. When the monitor tells me it is empty, we will refill it on the road if I think we will need it before getting home.
-
2
-
-
4 hours ago, MAX Burner said:
OK, it's dark out, freezing rain, wind is howling like a banshee - you're tucked-in all cozy in your Ollie and the furnace quits. You don't have the heart to sent your wife out again to check the LPG tank gauges - so you go out and brave the elements to see what's going on inside the dog house....
You have gauges on your propane tanks????
-
10 hours ago, CRM said:
I know this a very old post, but I want to thank you for this info.. I've had my LE2 for a year and a half now and had no idea the bathroom faucet worked this manner to adjust between shower and sink use. Boy do I feel dumb! 🤣
If your outside faucet is the same one, it will also function in this manner. Mine are the same inside and outside and somewhere along the line, I ended up with a spare hand piece.
-
2
-
-
2 hours ago, Mike and Carol said:
...You’ll see it’s 1/2” square. You just stick your Allen wrench in there and tighten (righty tighty).
1/2" Hexagonal...
-
4
-
1
-
-
A 5/16" bolt has a head that is 1/2". Clamp it up in a pair of vice grips and use the bolt head to tighten the water connection. Personally, I bought the hex drives. I've used them on other peoples trailers.
-
4
-
-
7 hours ago, BillATX said:
Hello, I have searched the forum, but not ben able to find a link to purchase a new water pump filter.
I have a 2021 Elite1 and my filter housing has cracked. Where can I purchase a new one?
Thank you in advance.
Bill
I bought one from Amazon.
-
3
-
-
- Popular Post
- Popular Post
I wanted to let everybody know that Anita has had an accident inside her home. She fell while descending a flight of stairs to her basement and has sustained a hip fracture. She endured a 10 hour procedure to remove hardware placed during a (years ago) surgery after car accident before her hip could be repaired.
She states she is currently in a lot of pain. I know she is facing months of rehab and recovery. She is hopeful she will be well enough and her doctors will allow her to come to Guntersville in May.
Please keep Anita in your thoughts and prayers as she works her way through this difficult time.
-
2
-
 15
15
-
 7
7
-
2 hours ago, MAX Burner said:
Good thing they didn't try saving build costs by installing GY Marathon (China Bombs!)...
I’ve never known Oliver to purposely select an inferior product in order to save a few dollars.
-
6
-
1
-
-
If your water heater has had water in it all this time, pull the anode and check it out, allow the tank to drain and flush water through your entire system for several, several minutes. Sanitize the water tanks and lines. While doing all this, check for leaks.
Check out each system to make sure it works properly: fans, water pump, refrigerator (both 120V and propane, A/C, wheel bearings should be repacked and Dexter EZ-Flex greased, tires inflated properly, furnace, cooktop and batteries fully charged (I assume they have been maintained all this time). Change out batteries in any devices that used them.If the entire weight of the trailer has been on the tires, they will, most likely, have developed a flat spot where they contacted the surface under them. This may or may not come out after you have driven it for a number of miles.
-
2
-
8
-
Replacing Xantrex Freedom XC Pro 3000W Inverter
in Mechanical & Technical Tips
Posted
I wondered about access and I'm sure you are correct about others having the same problem. However, if you can get to the screws to install longer ones, could you not get to the same area to install a nut onto a bolt inserted from the outside?
If so, put your longer screws in and let them come through the fiberglass to the outside. Then you would know where to drill holes for a bolt.
Since, I don't have this setup, I'm really just trying to imagine how I'd fix it if I did.
Thoughts?