mountainoliver
-
Posts
329 -
Joined
-
Last visited
-
Days Won
14
Posts posted by mountainoliver
-
-
I noticed in the photos of the new springs that they have the center bolt installed in the opposite direction as the original springs have. I think that the round bolt head should be at the top side of the spring so that it can fit into the locating hole in the spring perch that’s welded to the axle. The hex nut will not fit in the location hole. It’s not a big deal, you can turn the bolt around but you’ll need two strong C clamps to hold the springs together before you try to loosen the bolt. I’ve done this before while restoring old cars and rebuilding the springs. Probably the manufacturer should be notified when an order is placed to install the bolt for the axle mounted on top of the springs not under the springs. I’m guessing that they are used to axles being mounted under the springs on jeeps etc. for more ground clearance.
-
 3
3
-
-
Rivernerd I only have a couple of suggestions about heavier springs besides the obvious considerations. One potential issue or set of issues have to do with frame integrity. The Oliver frame is extremely strong and in all likelihood would never be an issue but overloading is overloading. Rest assured that there is not another mainstream trailer in the USA that has a frame that even comes close to the strength of the Oliver frame design. The overland trailers with heavy galvanized structural steel frames are in another category altogether. The other issue with loading the trailer heavier than what it was originally certified to will definitely cause insurance issues and liability issues and legal issues in the event of an accident. I personally am leaning heavily towards replacing my springs with heavier ones just to have a larger factor of safety and less worry about spring failure. I carry two extra springs in my truck just in case but I don’t at all look forward to replacing them on the road. At least I have all of the parts even if for some reason I can’t do the work myself.
-
3
-
-
A different suspension design would be great going forward but I doubt that it actually could be retrofitted at a reasonable cost. Right now I’d be happy with USA made springs. That small change could make a huge difference. Maybe Oliver could start buying just the axle assemblies from Dexter and springs from a different manufacturer. I know that none of the other mainstream trailer manufacturers would ever do anything so bold or even consider out of the box thinking but Oliver often thinks out of the box, that’s the very reason we have such a great trailer and they’re in such high demand!
-
8
-
-
Thank you for the information. You are at least the fourth Oliver owner to have broken springs. Some trailers are newer and some have been older so certain ages of trailers don’t (at least so far) seem to be more or less prone to failure. Also as you stated, this is not an Oliver issue in any way. I believe that all trailers of any make are prone to spring failures.
-
3
-
-
If you don’t mind, please share the information on where you purchased your new USA made springs. Last year I purchased two replacement springs from Dexter along with new U bolts and nuts, wrapped the springs and carry them in the truck just in case.
-
 1
1
-
6
-
-
I had one quit working last August at my annual state inspection. Auto parts stores have them. Just in case I ordered some more from Amazon.
(PSEQT 3/4 round LED side marker clearance lights, front rear marker indicators tail light waterproof for trailer truck car bus van pickup RV ATV wrangler. 10pcs red & 10pcs amber)
These come with the rubber grommets and chrome rings as well for under $20. Be sure to put a little bit of silicone on it before you install it. They just push through a rubber grommet from the outside. Nothing else holds them in place.
-
1
-
3
-
-
Mike, if yours is still available would you mind bringing it to the rally? Mine was not working when I replaced it.
-
I have been using the Mopeka sensors for the past six years. I’m able to see the levels on my phone without having to remove the propane cover. Rather than finding out when a tank is already empty, I can fill the lowest level tank when we are close to a tank filling station. We are many times in areas that may not be very convenient to a filling station, so the Mopeka sensors allow me to anticipate the need and fill the tanks where either the cost of propane is lower and/or convenient.
-
2
-
-
I too was agreeing with you and just adding another point of reference supporting your statement. I’ve been putting off adding extra holes in my battery compartment for no particular reason. I guess just waiting to see if and when they become necessary for our situation. Although, I’ve been tempted to add some on several occasions. Even to the point of making a fixture to prevent me from inadvertently drilling through the dinette seat back or the pantry wall at the bed.
-
4
-
 1
1
-
-
Because my lithium batteries don’t require ventilation (I don’t know if all lithium batteries are similar) I sealed the ventilation holes in the battery compartment door and insulated the door with 1/2 inch thick closed cell neoprene foam. The only ventilation into the basement area in my installation are the two 7/8ths +/- holes left over from moving the #6 cables to the inside. So far my battery compartment temperature stays very close to the basement temperature.
-
3
-
-
Congratulations Oliver!
-
3
-
-
Ty j, great looking installation! My fridge was dropped as well somewhere along the way. Neither box or pallet were damaged in any way. Must be a common issue. I know that you’ll really like the new fridge.
-
1
-
-
Yes, I read your post about this. Interesting, but l’m still trying to figure out the ideal location in my trailer. The location that you chose is absolutely the best location and using plugs for the wiring connections is exactly what I was thinking about as well. I currently use that location for some storage so need to move that elsewhere. I would like to have an extra level of incoming power filtering. I may have mentioned it in my previous post that even with the Oliver surge protection a series of power surges (not spikes) damaged a control board. Incoming power was rising to almost 200 volts and remaining at that level for several seconds. The surge protector would block it but the surge would happen several times in a row. Anyway, your installation is very well done. Thanks for posting the details.
-
2
-
-
SeaDawg is correct. You don’t want the old outside vents open, dirt and bugs would be the least of your worries. Rain and water spray when washing etc. would end up inside of the trailer. These compressor fridges are not sealed around the backside like the absorption fridges are. Even absorption fridges (my Dometic wasn’t) aren’t sealed underneath, remove the lower grill from a trailer with an absorption fridge and look under the fridge. Mine was open all the way to the front of the fridge. The compressor fridge has to have plenty of air circulation behind to vent heat from the condenser coil. Without proper ventilation not only will the compressor run a lot but, the excess heat will eventually damage the compressor by causing the motor to run hotter. Without proper ventilation the heat cannot be removed from the condenser coil which will cause high head pressure in the compressor itself which will cause the motor to work harder drawing higher amps thus overheating the motor. Sort of a vicious circle situation. During normal running there isn’t a whole lot of heat to deal with, not like the absorption fridges so venting to the inside of the trailer is not really noticeable. The installation manual usually has a specification for the minimum square inches of open area for ventilation. That spec should be followed fairly closely.
-
5
-
 1
1
-
-
I may have misunderstood your question about the upper and lower vents. I first assumed you were talking about vents inside the trailer. The vents outside, I had to block them off. I kept them removable so that I could work from outside as well as inside. Oliver sent me some old obsolete cabinet doors of white plexiglass. These can also be seen in the older forums about the installation along with commentary.
-
1
-
4
-
-
To remove the old fridge I removed the fridge door and the refrigeration unit from the back. As you get into it you’ll see what needs to be removed. Just keep the unit upright and be careful with the heat transfer putty and it can be reassembled with no issues. The NovaKool install, I removed the trailer screen door from the hinges and taped the lower hinge in the closed position. I also removed the NovaKool door and hinges and it went in sideways with 1/4 inch clearance. I also added a strip of painters tape on the entry door frame to prevent scratches. I would highly recommend that you make your own measurements before you even buy a new fridge as I think but don’t know for absolute certainty that Oliver has used slightly different door designs and maybe sizes as well. The NovaKool fit my trailer perfectly with two inch top and bottom openings. You’ll see the stages of the installation in the forums. I did however have to make two sets of upper and lower grills for the two openings. The first set I made at home out of aluminum but I didn’t like the difference in color between the aluminum grills and the stainless steel bezel around the fridge. I later had two more grills laser cut out of stainless steel.
-
1
-
5
-
-
I used the NovaKool R5810 AC/DC a couple of us have used these.
-
1
-
-
Toby, private message me. I have some further information that may be of interest
-
Toby, I’m sorry to hear about your issues with your Dometic fridge. My Oliver is hull #208 built in 2017 and I experienced the exact same issues. Oliver went above and beyond trying to help me fix my fridge with minimal to no luck in doing so. I contacted Dinosaur and at the time they had just built a Dometic control board which I tried with no success as well. Being now several years later, Dinosaur may have a working set of boards. I know that they have great replacement boards for furnaces and water heaters and other fridges so they may be a source. Talking with the folks at Dometic, they didn’t even know how to fix the issue. In fact, they didn’t even know the correct part numbers for the main board or the eyebrow board and the fact that often they would have their boards made in many different Chinese factories didn’t help matters. Supposedly the two boards had to match each other in software design and update as well which further complicated things. I ended up with a new fridge under warranty which also didn’t work. The absolute weirdest part is that the replacement Dometic fridge would not work in my trailer but once I removed it would operate perfectly in my shop! I used to have the six months old fridge and several extra boards but recently sold it all. Maybe someone with extra boards/parts will chime in and supply you with a set of boards that will work for you. In 2019 I installed a compressor fridge and have been absolutely happy with the result. Others have also done this upgrade as well and I think that Oliver is now using a compressor fridge in new builds. You can find our installation process on the forums with photos and detailed write ups.
-
1
-
1
-
-
Nan, if you look at the upper rear of your camper from the outside, the marker lights are the five little round red lights. Three towards the middle are just under the Oliver sign. You can see them from inside the attic area in the last two of my photos. They each have two wires attached. The marker lights in the front upper and lower area are amber (yellowish/orange).
-
3
-
-
The rear LED marker lights are below the Oliver sign but still an excellent point to note that they should be checked as well. Several of my marker lights have leaked. Your post also reminded me that one of the first leaks that I experienced was from the backup camera cable entrance point. That dumped a lot of water into the attic area. Thanks for mentioning the marker lights!
-
1
-
4
-
-
You are absolutely correct, the Oliver sign is a PITN! When my trailer was new the sign leaked four times in the first three years. I took the light assembly out threw it away and patched the inside hole. When we picked up our trailer I asked for several pieces of scrap fiberglass. I got this scrap because I wanted some patch material for just in case and I wanted the gelcoat color to match. I cut out a plug from one of the fiberglass pieces and heavily epoxied the plug in the hole. I later fiberglassed over the patch as well. So for the past four years I haven’t worried about the sign leaking.


-
3
-
-
Wow, thanks for reposting that video! It sure brings back memories. We had been “shopping” for campers off and on for years but a long story short, one evening I googled “large molded fiberglass camper” and this video popped up. I looked at it and called my wife in to look at the video and we both said this is the trailer, this is it! We called Oliver and set up an appointment to go see one and to come to the factory for a tour. The rest is history. One of the best decisions we’ve ever made.
-
3
-
-
Yes, insulation is removed and I thoroughly wipe down the fiberglass to remove any old glue or release agent that may be on the fiberglass. I have typically used a Permatex brand epoxy material that has a very high solvent content so that it actually melts into both the fiberglass and the vinyl mounting material somewhat. Unfortunately in our little town I can no longer find this brand, so I’ve tried other brands with extremely dissatisfying results. The Permatex brand appears to make a very strong bond between the fiberglass and the vinyl board material.
-
1
-


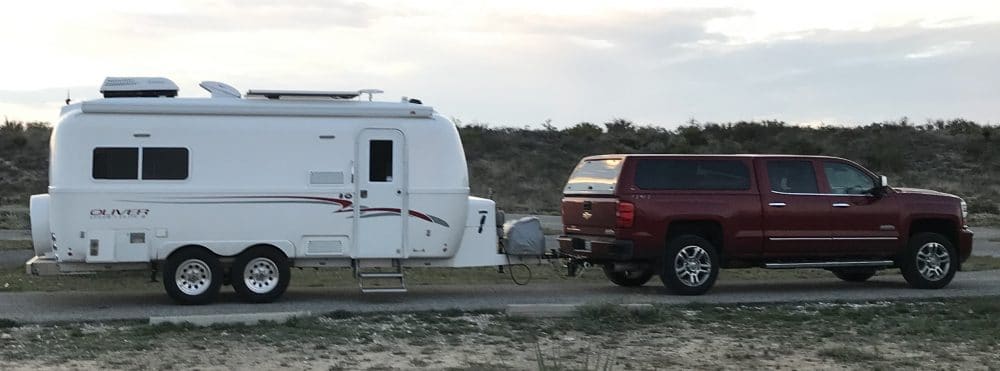
Made in USA leaf springs
in Mechanical & Technical Tips
Posted
“Agree with @Ronbrink and @jd1923: "Old" is not necessarily a bad thing (sometimes).”
I agree as well.