mountainoliver
-
Posts
457 -
Joined
-
Last visited
-
Days Won
19
Everything posted by mountainoliver
-

Trailer Separation from Tow Vehicle
mountainoliver replied to John Dorrer's topic in General Discussion
Okay, thanks. I still can’t imagine the Bulldog popping off of a correctly sized ball. Mine is sort of close fitting. I’d still check the diameter accurately just in case and at least settle that question. Anyway I hope you can figure out what actually happened. -
Trailer Separation from Tow Vehicle
mountainoliver replied to John Dorrer's topic in General Discussion
John, if the hitch was closed and locked closed…..maybe a dumb question but are you sure that your hitch ball is in fact 2 inches and not 1 7/8? Accurately measure with calipers. -
That’s great news! I hope your issues are resolved soon!
-
Thank you Galway Girl for input from your actual experience! Very helpful!
-
I’m sorry that this is happening and during a weekend to boot. Open a service ticket and see if you can send that video. In any event you’ll have to find an authorized Truma service facility to replace your unit. Maybe get the unit replaced now and take a chance on getting reimbursed after the repair?
-
Looks like the burner has fallen apart. I thought that was an ongoing recall for this unfortunately all to common issue. I believe Truma says in this case not to use the water heater. Hopefully someone who has a Truma and has gone through the recall process can help.
-
I had Suncoast Designers rebuild three of my windows several years ago and they did a good job. They remove the entire window, completely disassembled it, disassembled the individual sections, fixed the seal, and reassembled everything and put the whole assembly back in the trailer. They rebuilt both the fixed and the movable sections in order to provide a complete lifetime warranty. Complete disassembly of the frame requires the astragal to be removed by drilling out the pop rivets and replaced with gaskets and pop rivets again. If only the moving panel needs to be fixed, that is easily removed by removing the plastic/rubber track material first then the window just lifts out. After they removed, rebuilt and replaced the windows I had to reseal the frame to trailer myself. Not inexpensive but at the time I had mine done they had a lifetime warranty. If you can rebuild them soon, before any etching takes place between the panels, they can reuse the original glass. They have a fairly large parking lot and nearly every spot has electricity and water so that you can stay in your camper. Also, there used to be a guy at Quartzsite during the big tent rv show that would rebuild windows but you had to remove your own windows and deliver them to him. I have never met him but I know of a couple of Oliver owners who have had windows fixed by him.
-
Entry steps steel rod, broken weld
mountainoliver replied to Olive2Roam's topic in Mechanical & Technical Tips
Yeah, why didn’t I think of that?🤣 -
Entry steps steel rod, broken weld
mountainoliver replied to Olive2Roam's topic in Mechanical & Technical Tips
Order a 1/2 shaft collar from Amazon. Try to find a collar that is split and clamps on or one that uses a set screw for attachment. Buy one that is stainless steel. The collar should be clamped on the rod end that had the washer, the other end will still use the washer and cotter pin. These stainless collars are only a few dollars each and will make a good solid end.
-
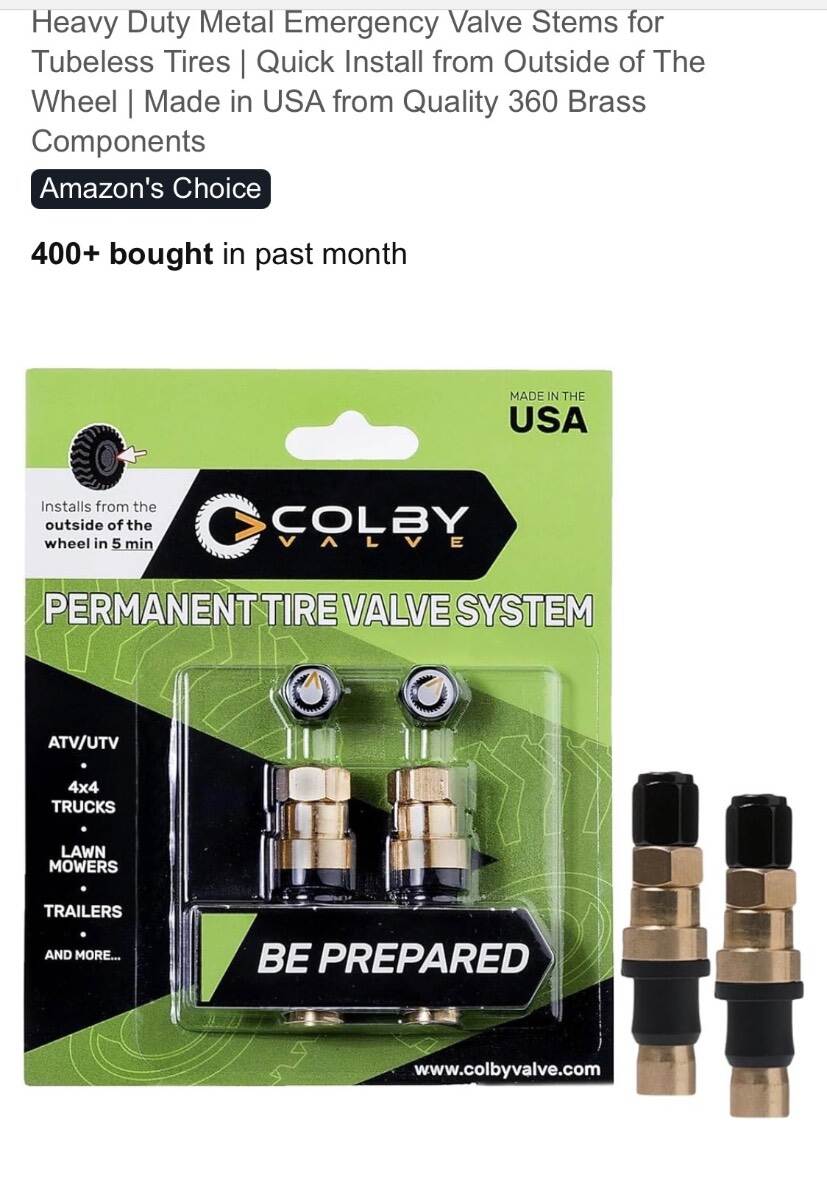
If you have a tire pressure monitor added to the stems excessive flexing caused by the weight of the sensors will fatigue the rubber portion. Plus today’s rubber products sometimes seem to weather rot more quickly. I was lucky in that I never had a stem failure in the seven years before I replaced my tires and changed the stems to nickel plated brass stems. In any event, it would be a good idea to carry emergency replacement stems. I carry these that can be replaced from the outside. Even the metal ones can be hit by a rock or other road trash and be broken. Thankfully I’ve never needed to use them!
-
Alcan Springs Quote for Jan-2026
mountainoliver replied to Wayfinder's topic in Mechanical & Technical Tips
I agree! For example, as we continued our trip after installation, I needed to make a slight level adjustment at a campsite, so lifted one side of the trailer using the onboard rear jack. With just very little lift the tires were off the ground. The shackle bolts were so tight that the whole suspension was extremely stiff. I may be wrong and the expert may disagree but I think the shackle bolts should just be snugged up to prevent excessive play. The nylock nuts will prevent any loosening of the shackle bolts. The U bolts, however should be torqued to specifications. You may have to replace the shackle side plates if the bolts are a sloppy fit. You definitely don’t want the bolts to rotate on their own. Anyway, just my opinion. -
Alcan Springs Quote for Jan-2026
mountainoliver replied to Wayfinder's topic in Mechanical & Technical Tips
I thought about that as well but non of my bolts had the flats lined up exactly. I don’t think that when the cross holes are drilled they are in any particular position. I don’t remember who but someone on the forums had a supplier of rings with a 12 point pattern on the inside diameter that looked similar to a boxed end wrench. These rings would be placed over a bolt and welded all around. This would hold the bolt securely in place. -
Alcan Springs Quote for Jan-2026
mountainoliver replied to Wayfinder's topic in Mechanical & Technical Tips
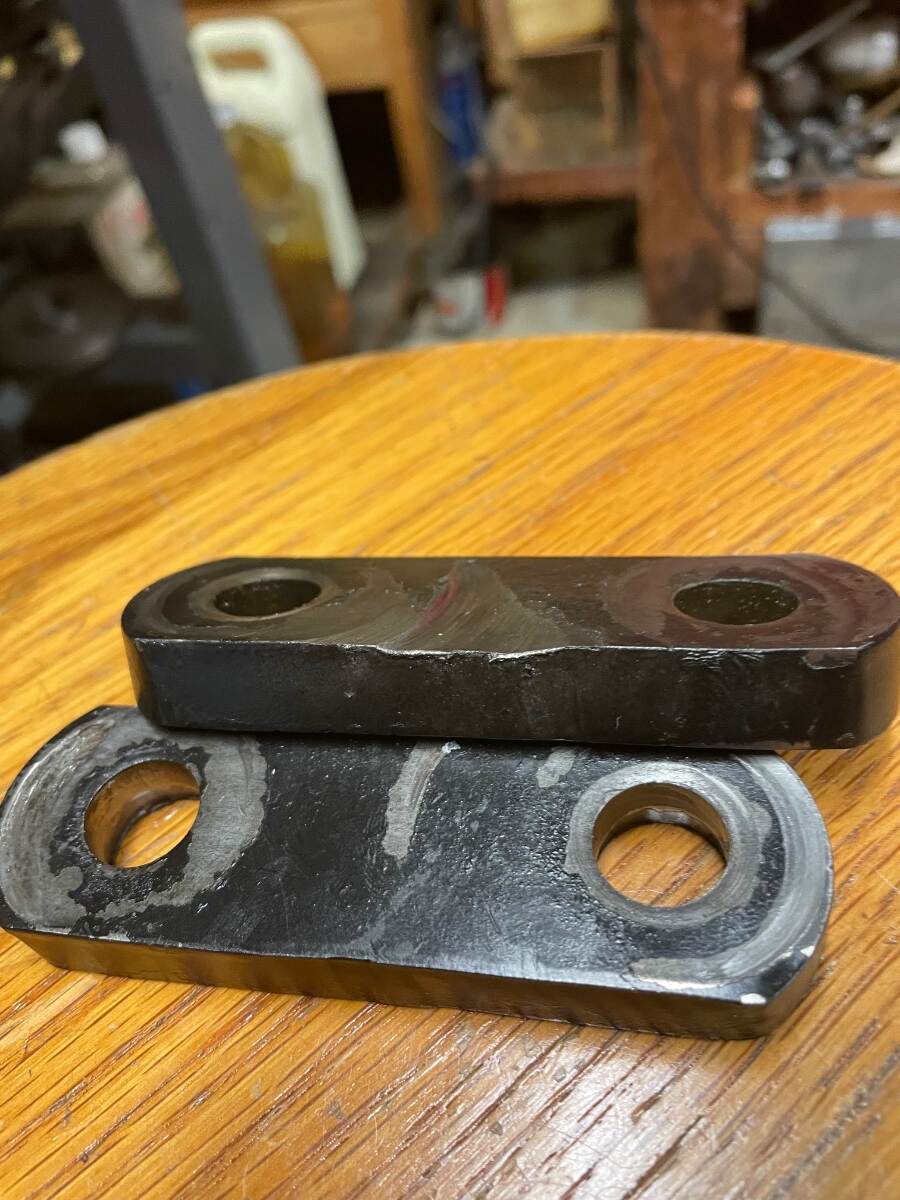
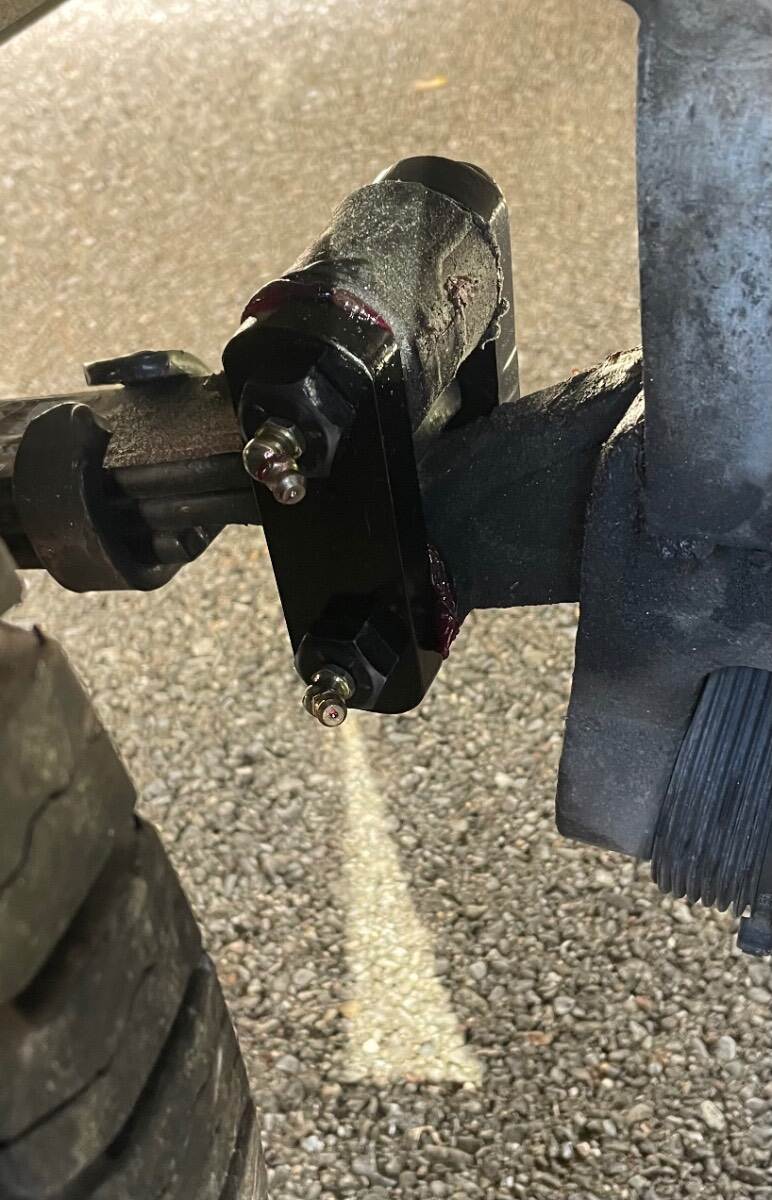
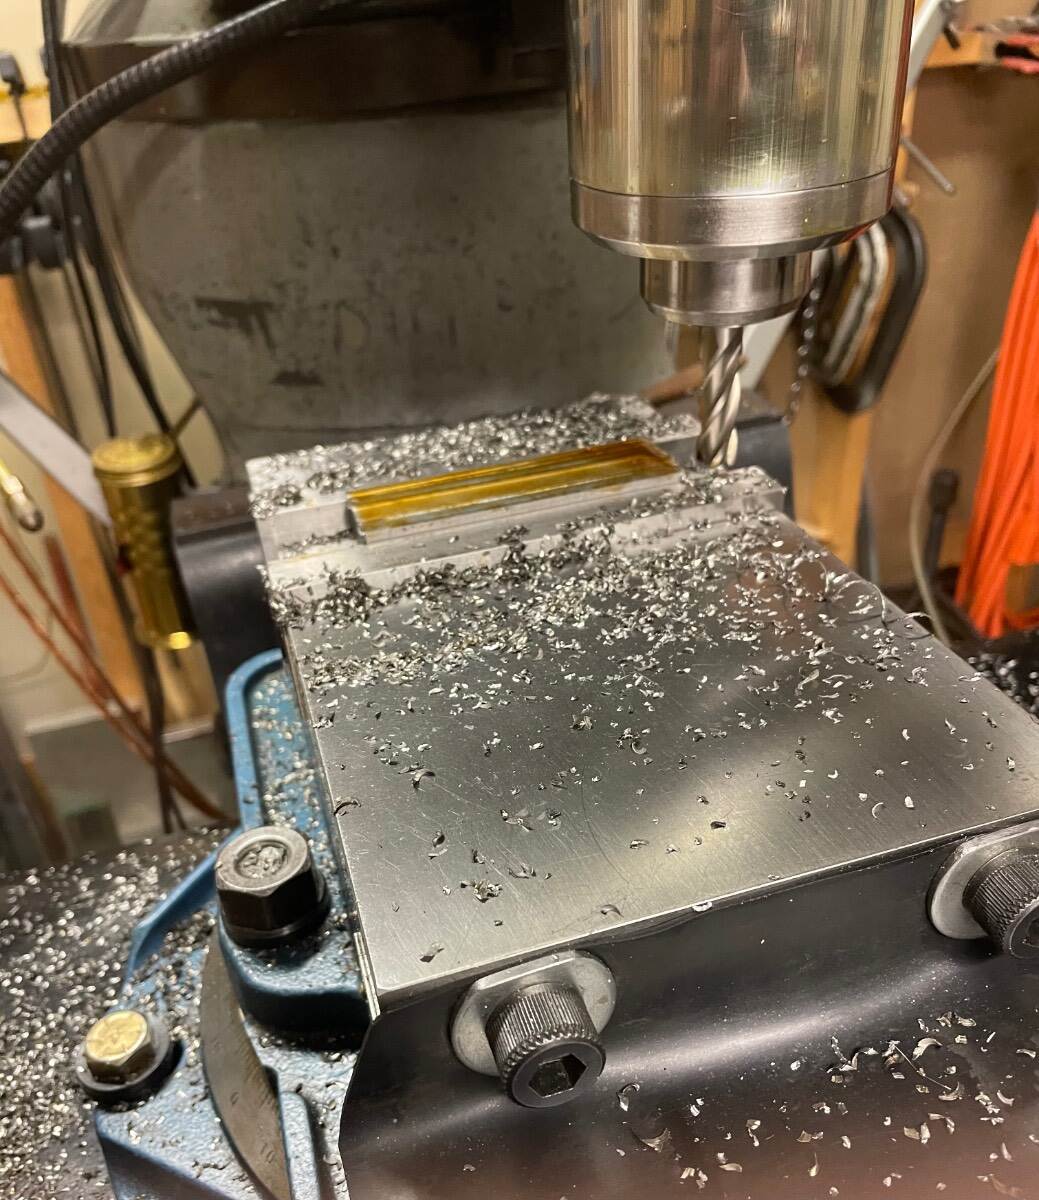
Yes, I had one shackle that had both bolts rotating freely. I only have a few thousand miles on the new spring set but the holes were still wallowed out some. The original plates have punched holes so they are naturally just sloppy clearance holes perfect for bolts or rivets but not so good if a press fit or close accurate fit is required. The original grease fittings were straight so I couldn’t tell that they were rotating until I replaced all of the fittings with 45 deg fittings. One of the side plates was very worn so I made a new one with close fitting 9/16 holes which allowed for a fairly hard press fit for the straight knurled bolts. The 60 ft/lb torque suggested by Alcan in my opinion is way too high being that the bolts are not shoulder bolts. I basically just snugged them up at 30 ft/lb and will probably leave them there. I too had the shoulder bolt vs straight bolt conversation with the Alcan folks while I was in Grand Junction. Contrary to what some folks have been told……I was told to make sure to hold the bolt head stationary with a backup wrench while tightening the shackle nuts and not to allow the bolts to rotate. Anyway? Whatever…. The first photo is of the original worn side plates. The second is of the finished parts installed and the last photo is of me making 1/2 inch thick plates out of 5/8 thick stock. At some point I will probably make all new plates maybe with recessed bronze thrust washers. 🤔
-
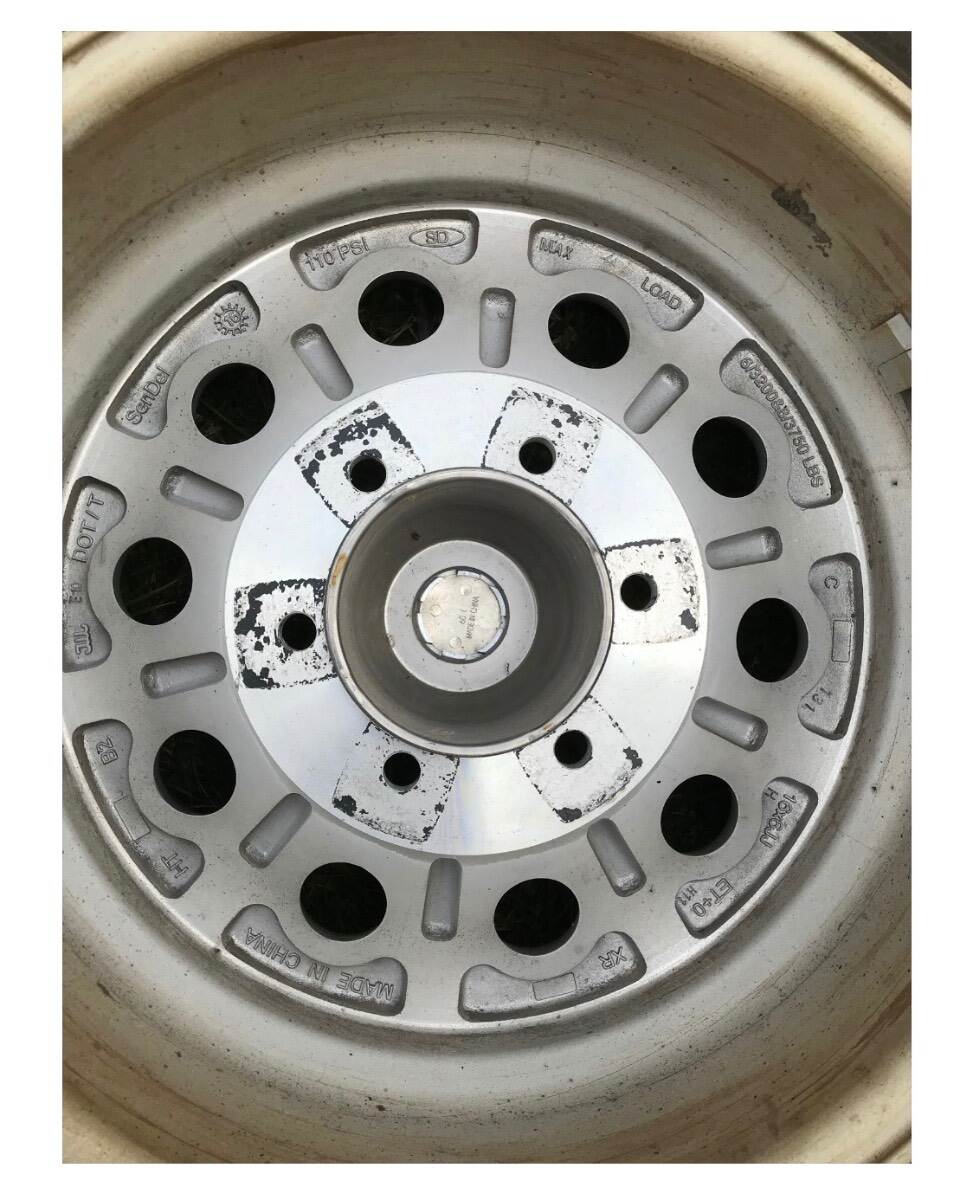
Here’s a photo of the inside of my original 2017 (hull 208) wheels. You can zoom in and see all of the specifications including the 110 psi pressure rating and load rating for the wheel! I took the picture when the trailer was new and filed it for future reference.
-
Progressive Industries EMS Display says OFF
mountainoliver replied to Tony and Rhonda's topic in Mechanical & Technical Tips
I misspoke about the switch. It is mostly recessed, very little actually protrudes above the faceplate. It can be bumped off, just not as easily. -
Progressive Industries EMS Display says OFF
mountainoliver replied to Tony and Rhonda's topic in Mechanical & Technical Tips
The owners manual says that it actually turns off the surge protector function. I have a small piece of black foam in the switch recess to prevent accidentally turning the surge protector off. -
Progressive Industries EMS Display says OFF
mountainoliver replied to Tony and Rhonda's topic in Mechanical & Technical Tips
Mine has an on/off switch on the front of the remote display. It’s sort of recessed to prevent accidentally turning the surge protector off. -
Yeah, actually the “original” bearings supplied with my axles and actually your Dexters as well (you sent me a photo of the one bearing that you pulled from one of the new axle assemblies) are NTN not Timken. Which are high quality bearings and in fact were easily attainable at my local auto parts store and listed for the 2010 PT Cruiser. I do agree don’t buy off brand bearings or questionable brands like the fake Timken bearings from amazon. The SET 49 (not 149) from Timken are available at auto parts stores as well you just have to ask for them.
-
We only have a couple of thousand or so miles on ours and so far absolutely no issues. I typically stop every couple of hours to check bearing and brake temperatures and the temperature is more consistent than with the older bearings. I do carry two spare bearings and the tools to replace them myself anywhere. The bearings are easily accessible at most any auto parts store as they were used on the 2010 PT Cruiser front wheels. I believe that they were also used on many various foreign cars as well. Obtaining them is probably not the issue rather it would be finding someone competent and with the tools to replace them without damaging them.
-
Made in USA leaf springs
mountainoliver replied to Mountainman198's topic in Mechanical & Technical Tips
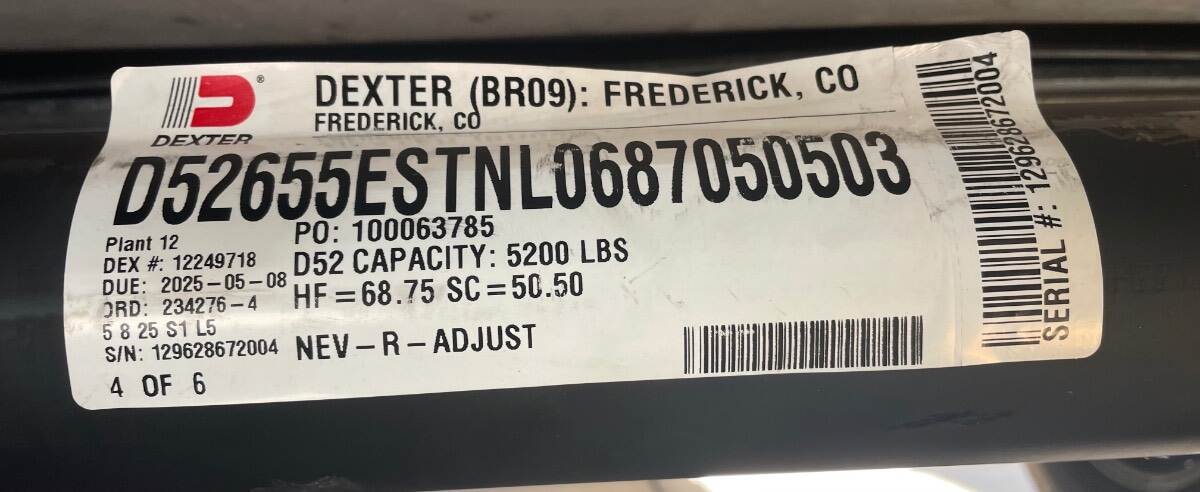
Here is a photo of the axle tag from one of the axles installed on our trailer last summer by the Alcan folks. Our trailer is hull number 208; 2017 vintage.
-
Yeah, my previous post was really meant to be tongue in cheek. I guess you can’t 100% substitute actual long term day in day out use with fake accelerated simulated use testing.
-
Not at all getting on your case because part of my lithium battery research 6 years ago was Will’s channel and still is part of my solar/battery research. I purchased three BB batteries then along with several Oliver friends. Back then BB batteries were the gold standard. Back then Will did all sorts of testing, he went to the BB “factory”, and interviewed the owner. He was as excited about BB batteries as a little kid at Christmas. They could do no wrong back then. Fast forward to today, something changed. Anyway we do the best we can with our research and still…..🤞🤪
-
You were lucky on that one! With our new air conditioner and new axles/springs our new height is 9’ 8”. My personal comfort zone is nothing under 11’! I have many times wondered what the real height is under a bridge seeing new looking conduit or some other pipe hanging under the bridge and/or a new layer of asphalt on the road. Hence my 11’ lower limit. Of course having an old Dometic air conditioner is sort of like curb feelers for the roof! No real loss if it takes one for the team! 🤣
-
The existing wiring is adequate just as long as you don’t try to use all 600 amp/hrs at once! 🌋
-
Over the years I have found that more amp/hrs would be of benefit. I initially felt that the 300 amp/hrs of the BB batteries were enough but with the compressor fridge on 24/7 during winter traveling and a few cloudy days here and there, my batteries would draw down to less than I am comfortable with. Anyway, two of the 300 amp/hr batteries seem to be the wave of the future. Having two still gives me the redundancy that I like. As built, Oliver used 4/0 welding cable for the main battery connections to the inverter. These are large enough for the 2,000 watt inverter and are protected by a 250 amp fuse. The wire used for all other dc circuits is #6 welding cable and is adequate for the existing dc circuits in the trailer. I did not install a larger Progressive Dynamics charger or a larger inverter so I didn’t feel it necessary to upsize any wiring. I do have the air conditioner wired so that I can run it through the inverter but it only draws about 90 dc amps. The microwave by comparison draws about 120-130 dc amps. Really the only thing I did when I initially installed the lithium batteries six years ago was to clean up some of the wiring by moving all of the #6 wiring out of the battery box and I added a circuit breaker. Not too involved.