

NCeagle
-
Posts
382 -
Joined
-
Last visited
-
Days Won
10
Posts posted by NCeagle
-
-
Here's a propane-dependent solution I'm implementing to warm problem areas along the curb-side basement. I have found that by default, the street side basement runs about 10 degrees cooler than the curb-side basement when the furnace is on. The difference increases as the outside temp decreases. My simple goal is to balance the basements in order to protect the street-side plumbing. It's not particularly difficult to run another HVAC line down the curb-side and it takes advantage of the existing furnace.
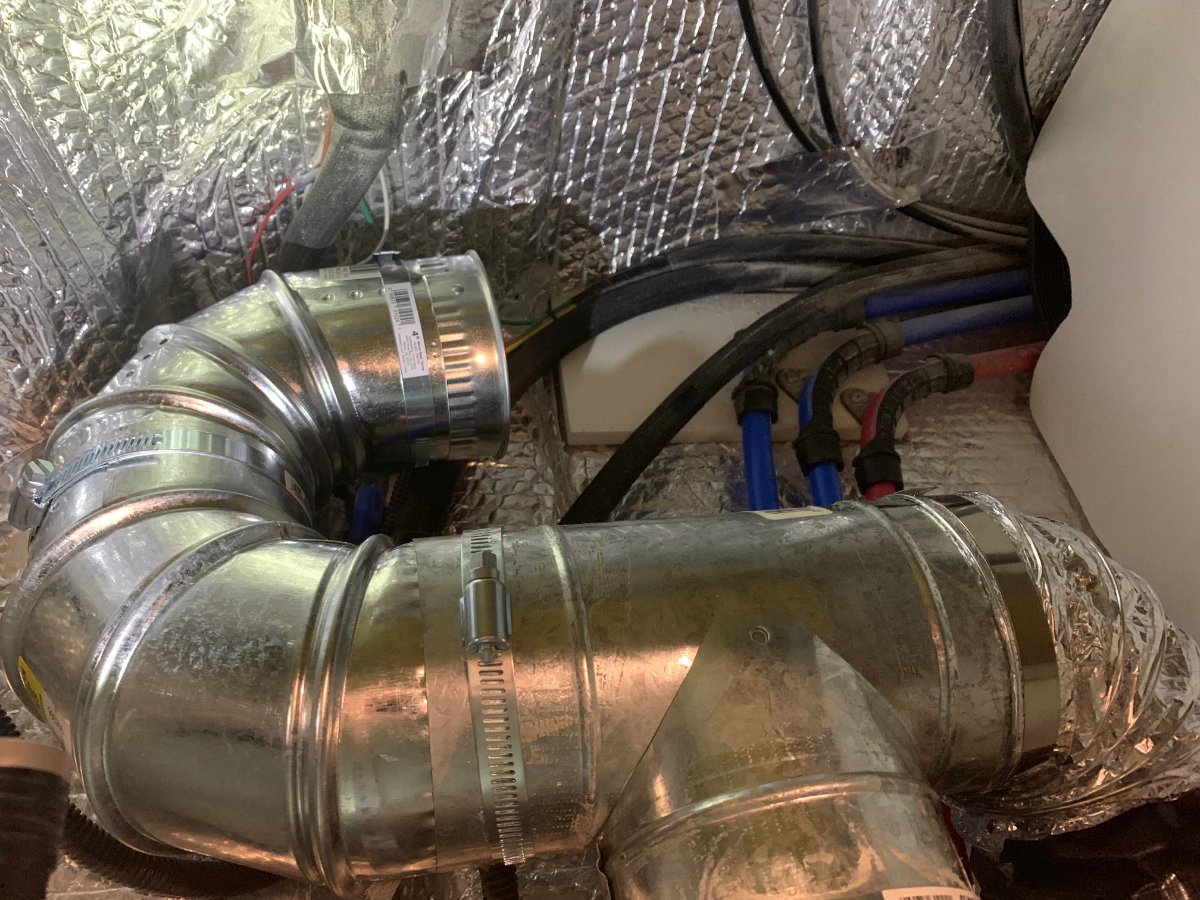
First, I just used a T connector on the back side of the furnace and tied into the line that goes up to the curb-side all the way to the bathroom. Here's a picture. I'm going to install a manual damper inline so I can restrict flow as needed.

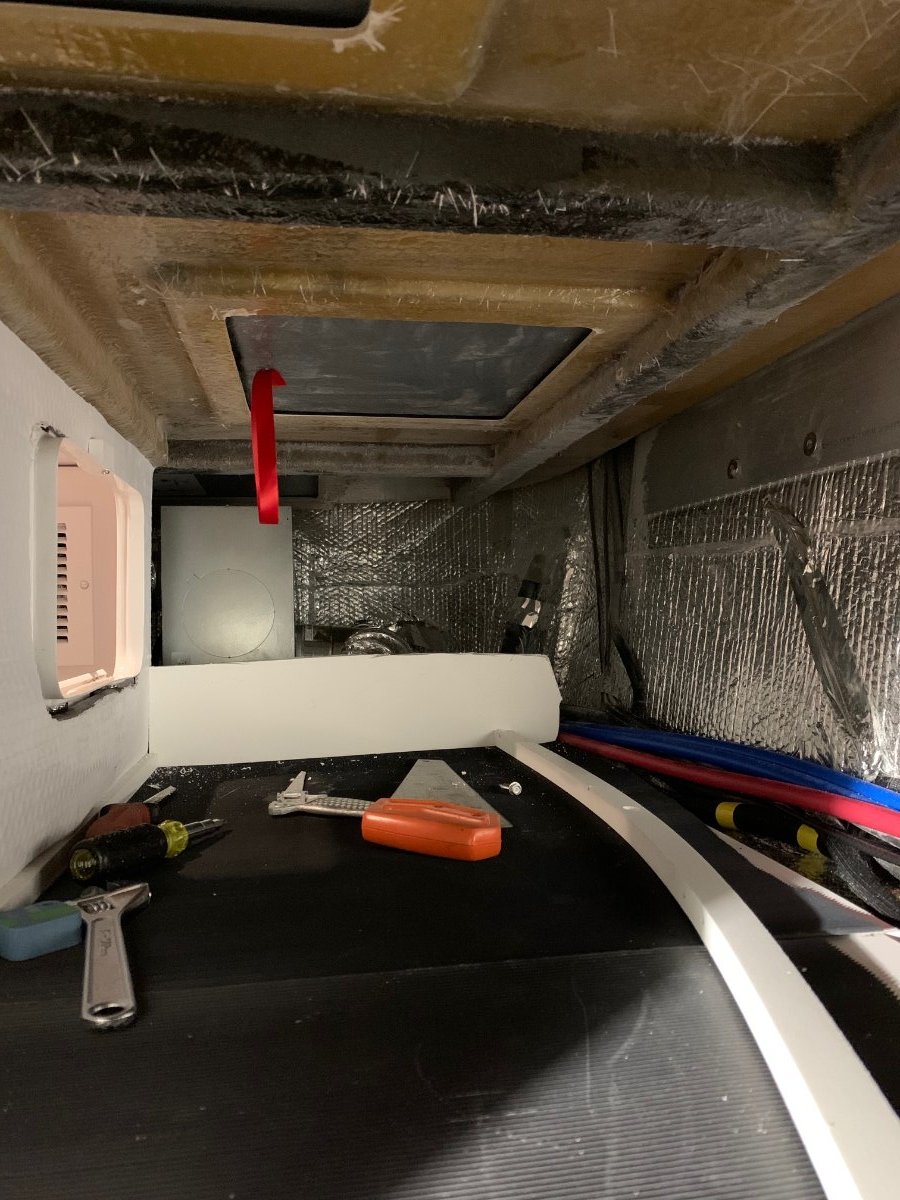
I then removed the flimsy plastic walls on the side and rear of the basement to make room. Here's the view looking into the basement from outside after removal:
You can see the plumbing running along the back bumper area. This area runs a few degrees cooler than the street-side basement, so it's important to get some heat here as well to prevent freezing. I used 4" dryer duct to run along the back bumper plumbing. Then it's reduces down to a 3" solid duct that runs along the basement roof out of the way.
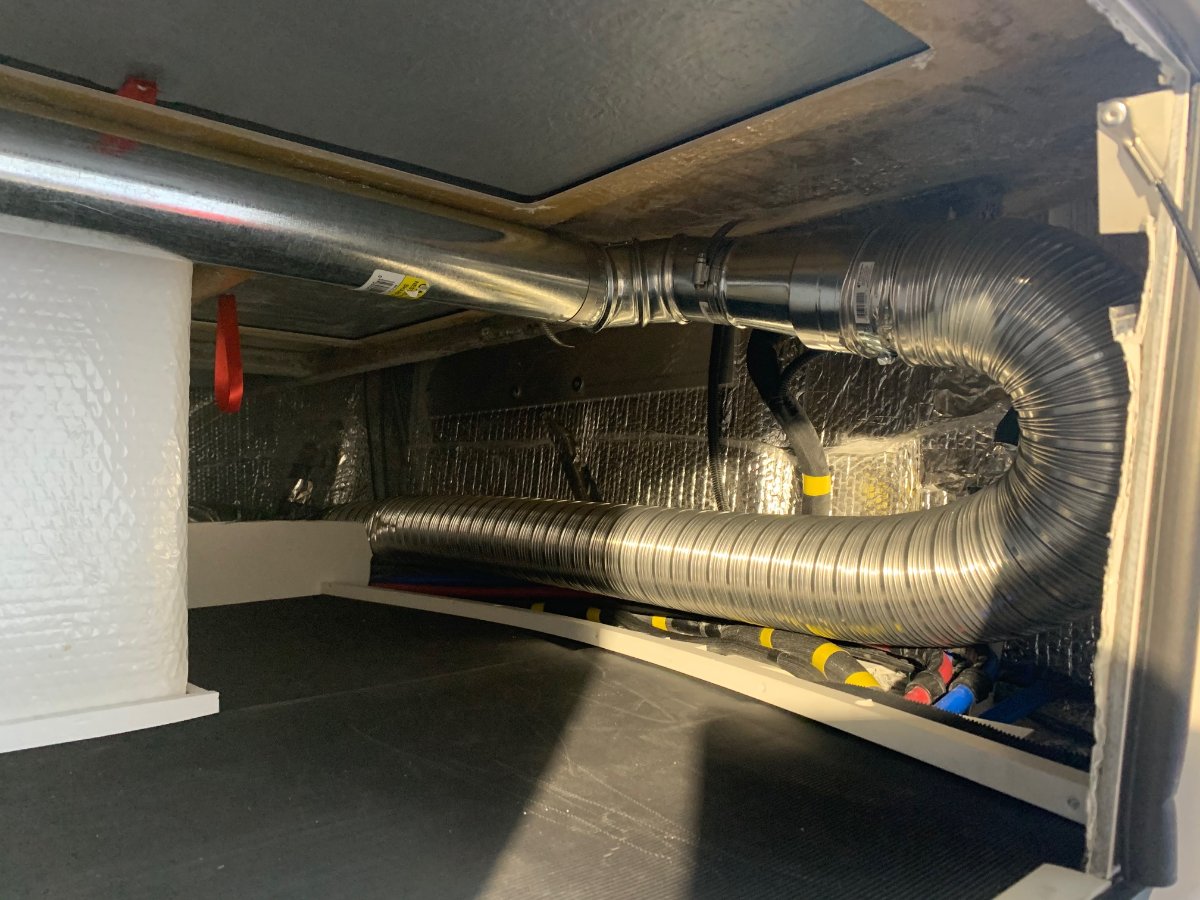
Here goes the 3" duct through the basement wall (pvc board) into the street-side basement:
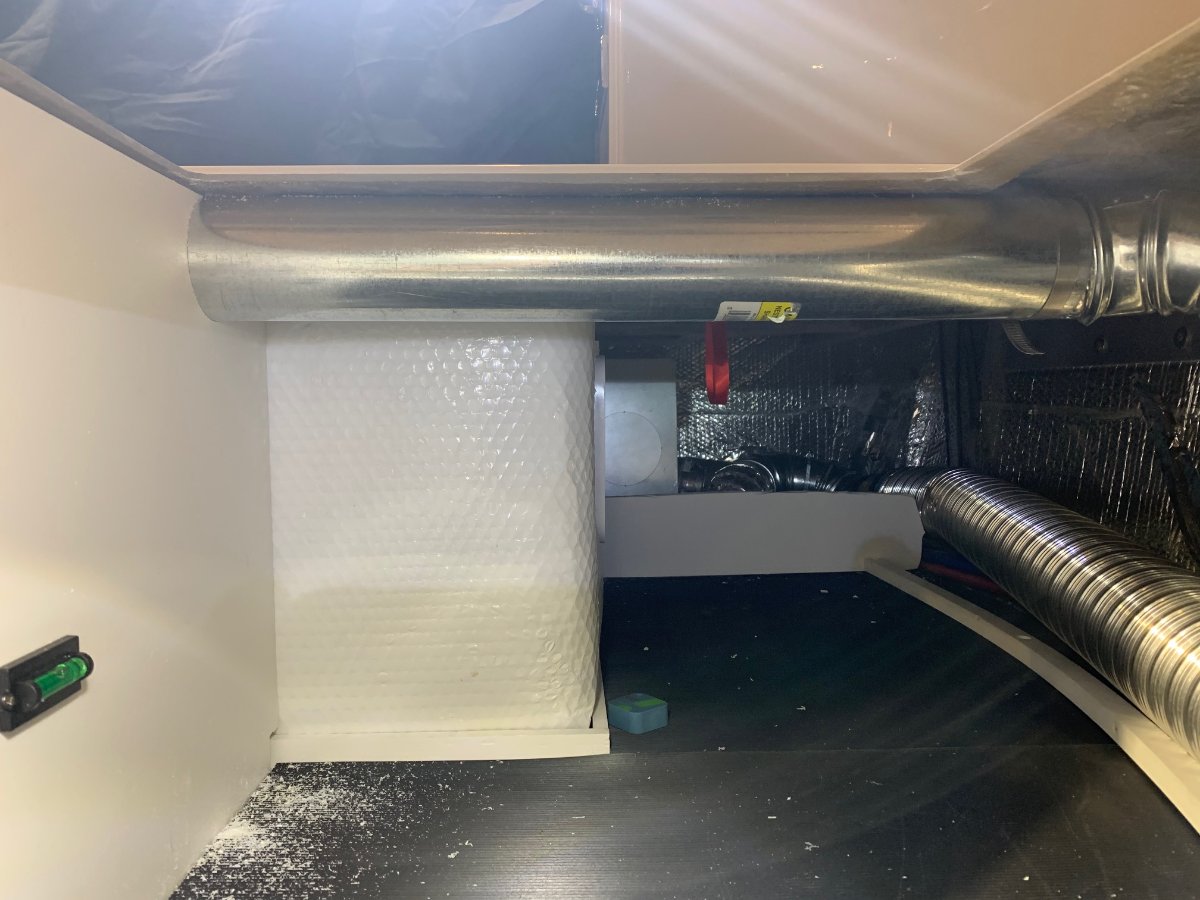
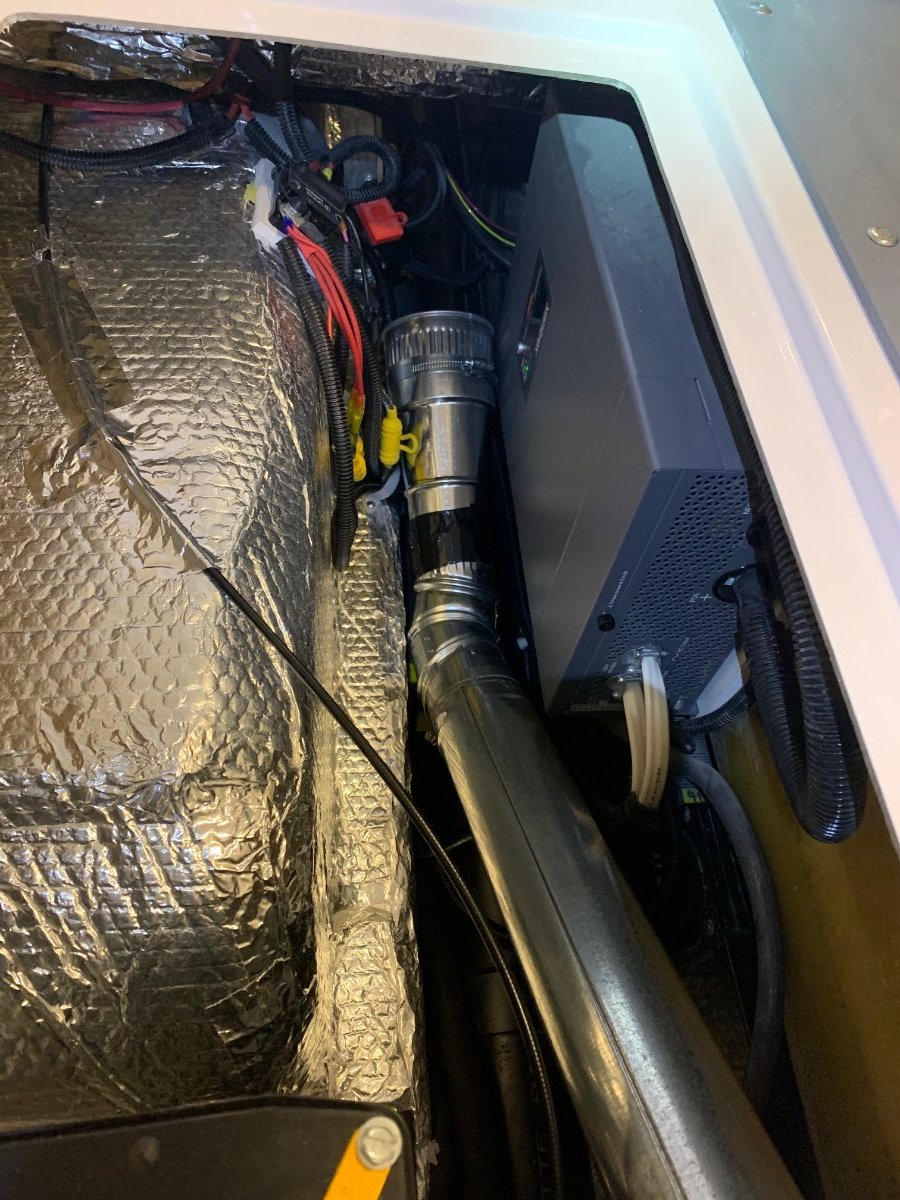
Here's the final picture for now, looking from the back of the trailer towards the front (you can see the inverter on the right). I ran out of time yesterday so I just terminated the connection inside the street-side basement. It's super easy to finish running the 3" duct the rest of the way up the black tank drain pipe to where the footwell for the dinette is. I'm going to put some strategically placed holes along the duct now in order to balance out the temps on both sides at something reasonable.
Still need an all-electric backup, but I feel like this is a good start. Easy, quick and takes advantage of the existing components.
-
 3
3
-
 3
3
-
-
14 hours ago, Overland said:
The more I think about it, the more I like the idea of ventilating the battery box with cabin air rather than trying to heat it. I'd think that a small computer fan would do the trick at very low electrical cost. This one is easily big enough, but only draws 0.2 amps - connect it to a nice louvered vent on the cabin side with 3" duct. I'd have no problem running that all night, if not 24/7, and I'm sure you could find a better sized, more efficient fan with minimal research. I use a similar fan in my fridge to move the air around, and I just turn it on when we're packing the fridge and turn it off when I clean it out at the end of the trip. Its power consumption is a rounding error in the battery monitor.
I mentioned that I'm installing a 3" solid heat duct down the curb-side basement all the way to the dinette footwell in another post. I'll cap it off at the end and put holes in strategic areas to mitigate risk, for example near the outside shower plumbing. I'm also thinking about insulating the battery box as much as possible and putting the battery box "inline" with the 3" heat duct. As long as I have a few holes "downstream", hot air would flow through the battery box when the furnace runs.
My solution is dependent on propane (and a small amount of electric to run the furnace fan). I'd love to have an all-electric backup. I like the idea of computer fans to suck air into / vent the basement (and possibly the battery box). That's further down the road for me though - I'm taking the easy route right now with the built in furnace.
Maybe I can figure out how to make the furnace fan run without heating. When I put my thermostat on fan only, the A/C fan on the roof runs. Doesn't matter if I'm in heat or cool mode. 😞
-
1
-
-
1 hour ago, Overland said:
Haven't posted anything yet. Don't worry - I'll get to it.
Thank you! No hurry at all. Eventually I want to check my HVAC ducts in that area since they were messed up closer to the furnace. Rather not guess if someone has already successfully pulled this off. 🙂
-
2
-
-
On 10/24/2020 at 2:51 PM, Overland said:
I’ve cut five access holes in my trailer: one under my composting toilet, which obviously won’t apply unless you have one; one under the fridge; one under each set of galley drawers; and one in the closet. The most useful and easiest are the ones under the drawers. (Oliver service will cut one of them for you if you ever need to reattach your overflow drain.) The closet one is the trickiest - you can do real damage to your trailer if you mess that one up. I’ll see if I can put some photos together and make a post about them next week.
Hi @Overland, any chance you put together a post on these access holes? I'm very interested in getting at least some access to the areas under the kitchen drawers and the closet. If you have, my apologies - I haven't seen it using search.
-
15 minutes ago, LiFeBlueBattery said:
Hi John and Anita,
All LiFeBlue Battery models have low temperature charge protection. Oliver is currently using our Standard battery. If the cell temperature is below the protection temperature threshold, the BMS will do one of two things: 1) If the charge current entering the battery is 0.05C or less, the BMS will pass current to the cells. For the 200AH batteries, that is 10 Amps per battery. This low current is not harmful. 2) If the current exceeds 0.05C, charge current is blocked until the release temperature is reached.
Any charge or discharge current will produce some heat in the battery, primarily from the FET's on the BMS.
Excellent. Thanks for the quick response Larry!
-
On 11/29/2020 at 4:30 PM, Overland said:
Yes and no. I did replace mine while doing my plumbing refit but I didn’t bother to preserve the bath duct. And in three weeks on the road without it, neither my wife nor I could tell any difference at all. My plan was to reroute the duct down the other side (possible since I’ve previously removed my unused black tank drain), but I don’t think it’s worth the trouble. The bath just doesn’t get appreciably colder than the main cabin.
With the bath duct gone, the two cabin vents blow a bit stronger - probably due as much to having the ductwork pulled tighter.
I replaced the remaining duct with insulated flex duct. I experimented with rigid duct but there’s too many ins and outs with the plumbing to make it work. I guess I could have done the duct first and worked the plumbing around it but that would have made for a real rats nest of plumbing.
But the insulated flex duct is huge and I don’t really like it. I think that I’ll go back with semi rigid like you said.
The old duct that I pulled out was just nasty with caked on fiberglass dust.
I'm using your idea from a similar discussion on another thread - thanks! I'm in the process of routing a 3" rigid steel duct down the street side all the way to where it meets the foot well from the dinette. I can't get by there without removing the black tank drain as you pointed out. I want the benefit of the furnace air on that side (just as the other side gets) just to prevent freezing in some of those trouble areas, help keep the batteries warmer, keep my bed warmer since my wife quickly figured out which one was warmest, etc. Inefficient ducts (I'll strategically put holes in the 3" steel duct and cap the end) down both sides will make the Oliver truly a 5 season trailer capable of keeping me alive should I get stuck in a Rocky Mountain winter storm. As long as I don't run out of propane! 🙂
-
3
-
-
That's a great question (again) because the situation has changed. In a past post with @LiFeBlueBattery(Larry), the design was that when the internal battery temp was below 32F the current coming in was redirected to the heating pads. Meanwhile, the battery BMS keeps "cycling" until the temp is high enough and then it starts accepting charge. With the auto-warming now disabled and the manual heating pad, I'm not sure where any charge current would go. Hopefully the battery has an internal cutoff. I'll send an email to LifeBlue Larry and ask. I want to know now.
-
2
-
-
52 minutes ago, Mcb said:
We’ve got the new Lithium batteries and heat pad set up. As we’ve spent several nights in areas where temperatures have been mid to low 30s I’ve been watching our battery temps on the Lifeblue App with interest. Despite the low night time temps, as well as days in the 40s, low 50s, the batteries say they are quite warm... mid 50s to 60s. In fact, when I opened the battery box one morning it was quite warm in there..
Dont know where the heat is coming from.. much warmer in that compartment than the basement..
Mcb, great call out! I have also noticed that the battery compartment is warm on it's own. I've had my Ollie set up in simulated boondocking mode (using furnace only) and last night was our first sort of cold night. The temp right now outside is 28F. As I collect more data I can give more detail about how temps are changing relative to each other (which will be very important), but for now here are some averages I've collected for the past 24 hours:
Outside: 41.2F, Inside Cabin: 65.9F, Street-side Basement: 55.2F, Curb-side Basement: 63.1F, Battery Compartment: 62.7
So it looks like my Lithiums are staying kinda warm too - and I HAVE NOT sealed the vents and insulated the outside panel yet!
Disclaimer: I know all Olivers are going to be different, especially year to year, so your mileage may vary. 😏
-
1
-
-
On 11/29/2020 at 1:51 PM, John E Davies said:
NCeagle, I would really like to know the part number of the heating mat/ thermostat that Oliver installs, that sounds like a very good option, since the mat can be laid directly underneath the battery housings. (I am assuming that!) If you insulated the BOTTOM of the slide out tray, that would reduce convective heat loss in that direction and save some energy.
Jason replied that the pad is custom made for Oliver by Annod Industries. He noted they have used their products in the past. Unfortunately, he's not aware of a part number. He did know that the mat draws 3.1 amps when on, so that's good to know. Probably best to reach out to OTT through sales and see what they would charge you for one.
-
1
-
-
2 hours ago, bhncb said:
It would be interesting to know if the breakaway switch for the electric brakes is still being fed by the now lithium batteries. And, is the 12 volt 7-way charge line connected to anything at all like maybe a dedicated breakaway battery/charger. Just removing your vehicle fuse may not be necessary or desirable.
I've already inquired about getting a copy of the 2020 electrical diagrams - which I need for other things as well. Can other 2020 owners ask as well? The more that ask the more likely we will get something sooner.
-
1
-
-
I think DC to DC chargers are one of the best options if feasible. Do you have a way to get back to the Oliver batteries with 8 gauge wire already?
-
There have been several threads in the recent past specifically dealing with this topic. LifeBlue provided a design for charging the house batteries from the TV. I decided long before I even picked up my Oliver that I was pulling the fuse that supplies direct battery power to the trailer harness. Without this design, charging Lithium batteries from the TV is never going to be very efficient and it seems detrimental in some cases to the TV battery/alternator.
Meanwhile, I'm trying to get some sort of electrical diagram from Oliver for the 2020 model. It's missing entirely from the owners manual! Hard to do much with the electrical without a basic understanding of the electrical layout. I was looking for the DC fused connection for the TV charge line (shown in the 2019 electrical diagram) and it's not there in the 2020. I'm hoping Oliver didn't just connect that TV hot wire directly to the batteries
-
4 hours ago, John E Davies said:
There is not much point in changing to a MPPT control and not taking the extra step of changing to series connected panels, it is the only way to get the added benefit. It may work as well as a PWM Zamp unit but it won’t be any better. The whole point of a MPPT is to have a high system voltage. If you are not willing to switch the panels, just stay with the old one and spend that money on some other cool stuff, like a portable panel....
I am going up on the Ollie soon to remove the Zamp roof cap, to see if there will be any hassle with changing to that Go Power able entry plate. As long as there is some cable slack it should be OK. Or hopefully I could pull out a few more inches.
John Davies
Spokane WA,
John, I'm no expert on solar either - still learning - but I have a totally different understanding of MPPT vs PWM than you have arrived at. If hooking solar panels in series was the only way to take advantage of MPPT controllers, then very few would be using them. I am seriously considering a MPPT controller WITH my parallel solar panels to get 10-30% more energy out of each panel. They are especially good in the winter, when solar panels produce even more voltage (due to efficiency at cooler temps).
Here's my interpretation of what I've read/learned...
Single/Parallel panel example: The bottom line is that all solar panels put out 16 - 20 volts BY THEMSELVES - they have to be higher than 14-16 volts required to charge 12V batteries of all sorts. A PWM controller will not be able to take full advantage of the higher voltage being produced and loses up to 50% of the wattage. On the other hand, a MPPT controller can utilize the extra voltage and increase efficiently over a PWM controller by ~10% - 30%. So as an example, given a single, parallel 175 Watt panel during a full sun day, a PWM controller would put about 90 Watts of charge into the battery while a MPPT controller would put anywhere from 105 - 140 watts of charge into the battery.
Multi/Series panel example: This one is easy - a PWM controller will fry with voltages higher than 20 or so. A MPPT controller will take higher voltages from series connected panels and efficiently charge a battery bank the same as it does for a single panel at 20 volts.
Conclusion: Since MPPT controllers optimize any panel or set of panels producing more than 16 volts, there are compelling reasons to convert a system to MPPT (even with a small number of panels in parallel in my humble opinion). Compelling reasons to go with series over parallel? Not sure in a system with only a few panels, but obvious reasons would be to use smaller gauge wires and/or have significantly longer wire runs to the panels.
I personally will start with just an MPPT controller and see what the gains are in my current setup. If there is a true advantage to series, I'm all in but I need proof before I rip things off the roof and rewire my panels. 🙂
-
1
-
2
-
-
4 minutes ago, John E Davies said:
I already have some that I use for window covers in the truck. I was hoping for something more durable with a self adhesive backing so I do not have to use glue. What is the difference between all these variations? Are they all the same thickness/ R value?
Thanks,
John Davies
Spokane WA
Not sure about all the variations shown on Amazon, but Reflectix has a bunch of different kinds - one sided aluminum, two sided aluminum, bigger bubbles, etc. This particular one looks like it's 2x thicker than what Oliver installed on my 2020 and it's 2 sided whereas Oliver used 1 sided. I really bought it a while ago to insulate my truck windows when sleeping in the truck like you said. Don't remember how I landed on this particular version of reflectix. Just using what I have left and will likely get more of the same since it's working. I'm using a little bit of contact cement to attach.
-
I was inspecting things in my basement and I noticed a large tear in the flexible aluminum duct that Oliver uses. It's the really thin, flimsy stuff and rips super easy. I pulled it out to repair it and found another near where it connects into the furnace. Now I'm wondering how many other rips and holes I have in them. What a bummer.
Anyone tried semi-rigid duct or something a little more robust? Not sure how to get to the ducting under the sink and subsequently to the bathroom, but at least I could upgrade all around the access doors where things are more likely to get ripped.
Thanks.
-
1 hour ago, Jairon said:
NCeagle, did you retrofit lithium into your 2020 or did they offer it when you first purchased? I was hopeful they would stop venting lithium builds and add insulation similar to the basement door.
Hi Jairon, these are factory installed Lithiums. Just picked up on the 18th this month.
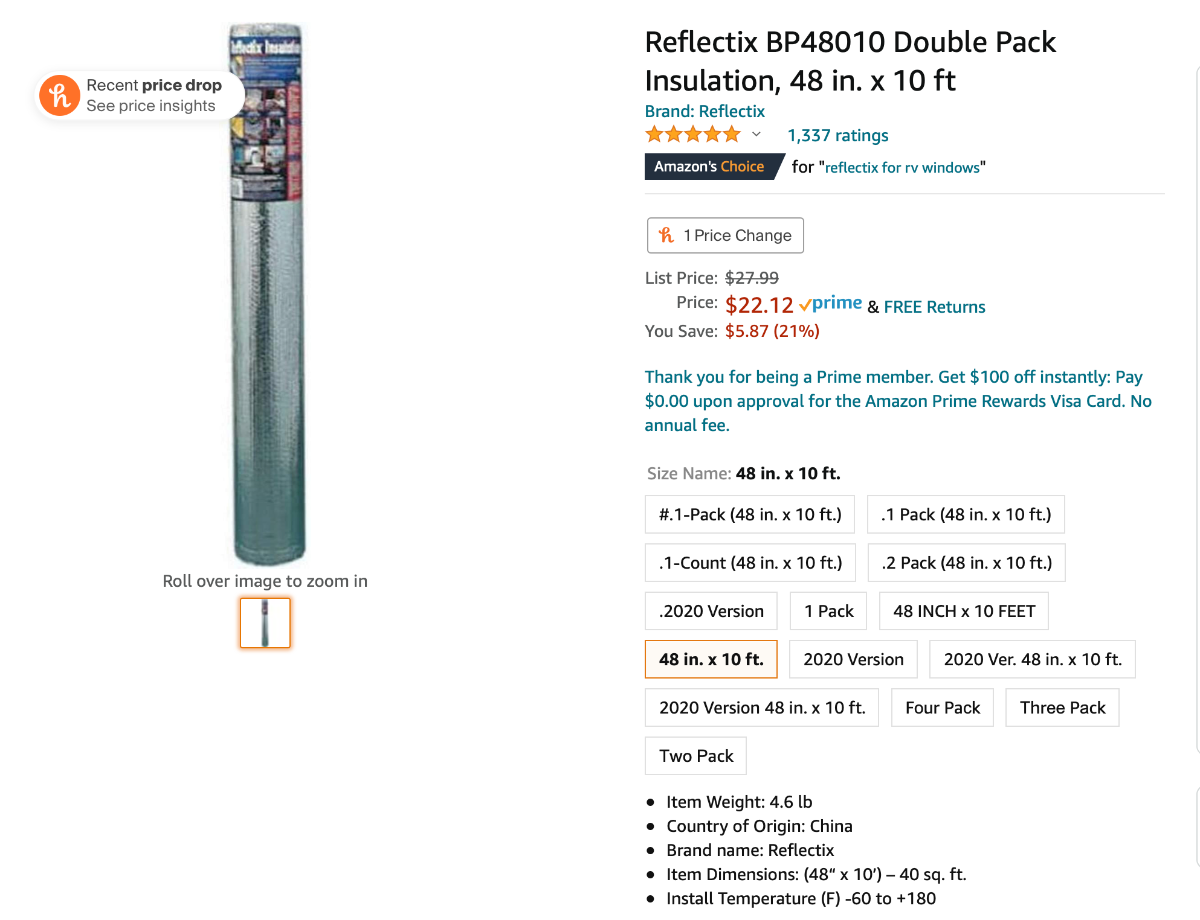
As far as insulating, I'd recommend just buying a roll of Reflectix BP48010 Double Pack Insulation, 48 in. x 10 ft. It's twice as thick as what Oliver uses and I've already added an additional layer of this Reflectix on top of what Oliver installed on the basement door, so in essence I tripled the insulation - I removed the factory piece of reflectix and used it as a template. I'm doing that where ever I can reach on the outer hull in the basements too.
-
3
-
2
-
-
1 hour ago, Fritz said:
NCeagle, what brand temperature monitor have you installed? Does it also have sensors for outside and inside temperatures? Thanks!
Hi Fritz, I use SensorPush Wireless Thermometer/Hygrometer for iPhone/Android - Humidity & Temperature Smart Sensor with Alerts. Developed and Supported in The USA. Have used them for years in many other applications. Love them. They can be calibrated if needed and if you have a wifi hotspot in your Ollie, for example, you can monitor them remotely as well. I'm using velcro to secure them in different places around the inside of the Oliver. I put one outside when camping or when parked in my RV garage, but they are not waterproof, so you can put it anywhere it's protected from rain, but can't really have one on the outside while driving or anything.
-
2
-
1
-
-
13 minutes ago, John E Davies said:
NCeagle, I would really like to know the part number of the heating mat/ thermostat that Oliver installs
I've sent a request to my sales rep for the model and part number. Will let you know as soon as I hear back.
-
1
-
-
8 minutes ago, Overland said:
After spending three weeks without the bathroom furnace vent connected, and not being able to tell a lick of difference, I’m thinking that instead of trying to reroute that vent back to the bath like I’d planned, that I’ll just run it to the battery box.
I have one of those seed mats and while it does get slightly warm to the touch it doesn’t seem like it would have much capacity to warm anything that it isn’t touching directly. Maybe that’s just my particular mat, but I’d worry that if you’re trying to warm the air in the battery box to heat the batteries, that it might be a losing battle between the mat and the cold door, even with insulation.
That gives me another idea... rerouting that vent might also be a GREAT way to heat that troublesome street - side basement at the same time! I've been thinking of a good way to do that and it involves cutting holes for new vents with PC fans sucking warm air from the cabin. I just really wish the Dometic had a "fan only" mode so I could use electric heat in the cabin and move that around if running low on propane.
-
3 minutes ago, Overland said:
Does the LifeBlue app tell you the battery temp?
Yes it does, but it won't notify you as it stands today.
-
26 minutes ago, John E Davies said:
From the sources I have read and linked to, this is incorrect. A series panel works at the sum of the panel voltages, so shading a portion still leaves plenty of cells (voltage) to drive the system. A parallel panel when shaded “tanks” because the voltage drops too far, and the panels are already operating at battery voltage, which is well below their optimum target voltage. I am still learning like crazy, but that page link in my previous post is very adamant. PWM is a very primitive ON OF ON control.
“MPPT or ‘maximum power point tracking’ controllers are far more advanced than PWM controllers and enable the solar panel to operate at its optimum voltage for maximum power output. Using this clever technology, MPPT solar charge controllers can be up to 30% more efficient, depending on the battery voltage and type of solar panel connected. The reasons for the increased efficiency and how to correctly size an MPPT charge controller is explained in detail below. As a general rule MPPT charge controllers should be used on all higher power system with 2 or more panels, or whenever the panel voltage is much higher than the battery voltage.”John Davies
Spokane WA
Remember those Christmas tree lights that were hooked in series? When one went out the whole string was dead. Same for solar panels I thought? What can an MPPT charge controller do when there's no current coming in at all? I am probably missing something simple.
-
John, they are using a 12V heating mat of some sort. You may want to consider 12V instead of inverted 120V. I can see it is directly hooked to the battery terminals and the switch is sitting on top of the batteries. I don't know what brand but I can ask my sales guy tomorrow for you (I'd have to take the batteries out to see the mat). I'd like to know the brand anyhow. I know the mat has a thermostat, so on cold camping adventures, I'd likely just switch it on and leave it on for the duration. I prefer this over the automated version even though it's something additional to remember when it gets cold. I'll have a temp monitor in the battery bay and am also planning on insulating. The monitor can send me an alert when the temp gets down to whatever I set it for, so no big deal.
Here's the verbiage that came from LifeBlue on the new thermal approach:
New State: All of the blue tooth and other specifications of the new battery will remain the same with the exception of the internal heating feature. When a charge cycle is desired on the LifeBlue LB12200D lithium battery and the temperature outside the trailer is above freezing (approximately more than 35 degrees Fahrenheit) then no action is needed. If the temperature outside the trailer is below freezing then check the core temperature of the battery (blue tooth app.). If the core temperature is above freezing, then no action is needed. If the battery’s core temperature is below freezing, then access the battery compartment and switch on the battery thermal blanket (the switch will be an in-line on/off switch located on the battery harness on top of batteries). Close the battery compartment door. When the batteries core temperature is above freezing then the battery will accept charge. Note: the colder the core is the longer it will take to warm up to above freezing. The battery’s thermal blanket is thermostatically controlled between 35 degrees Fahrenheit and 45 degrees Fahrenheit. If single charge is desired then switch off the battery’s thermal blanket when charging is complete. If camper is being used in a cold environment then leave thermal blanket switch on for the duration of trip and switch off when trip is over.
-
2
-
-
On 11/21/2020 at 2:55 PM, theOrca said:
In late October this year I took my Elite II Oliver (Hull 615) to Republic, Washington for Elk hunting. There was 2 to 6 inches of snow on the ground and temperatures of 8 degrees F at night, and highs of 22 degrees F during the day. I stayed in an RV park so as to have AC power readily available. I have a 5 probe digital temperature system installed in my trailer. Probe #1 is near the propane tanks, #2 is under the forward dinette seat, #3 is under the drivers side bunk, #4 is under the passenger side bunk, and #5 is attached to the spare tire. (Note, numbers 2, 3, and 4 are as low is I could get them.)
During my first night I noted that #2 temp was at 28 degrees, #3 was at 22 degrees and #4 was at 38 degrees. The "ducted" heat kept ONLY the starboard side of the trailer above freezing. I put small AC heaters under the dinette seat and under the port side bunk. After that, all internal temps stayed above freezing. The drivers side bunk area never got above 36 degrees, even with the 300 watt heater.
Having foreknowledge of the expected temperatures, I pumped 8 oz of pink antifreeze into all 3 of the exterior water fittings. I then wrapped the fittings in pipe insulation. I believe that I had not done that, all three fittings would have frozen and cracked. I completely forgot about the exterior shower, but evidently lucked out as there has been no leak so far.
I intend to purchase 3 each 100W DC heaters, and install one under the forward dinette and 2 under the drivers side bunk. There is a spare fuse for the drivers side awning which I will use to wire all three heaters through. Have not decided where to put the switches yet.
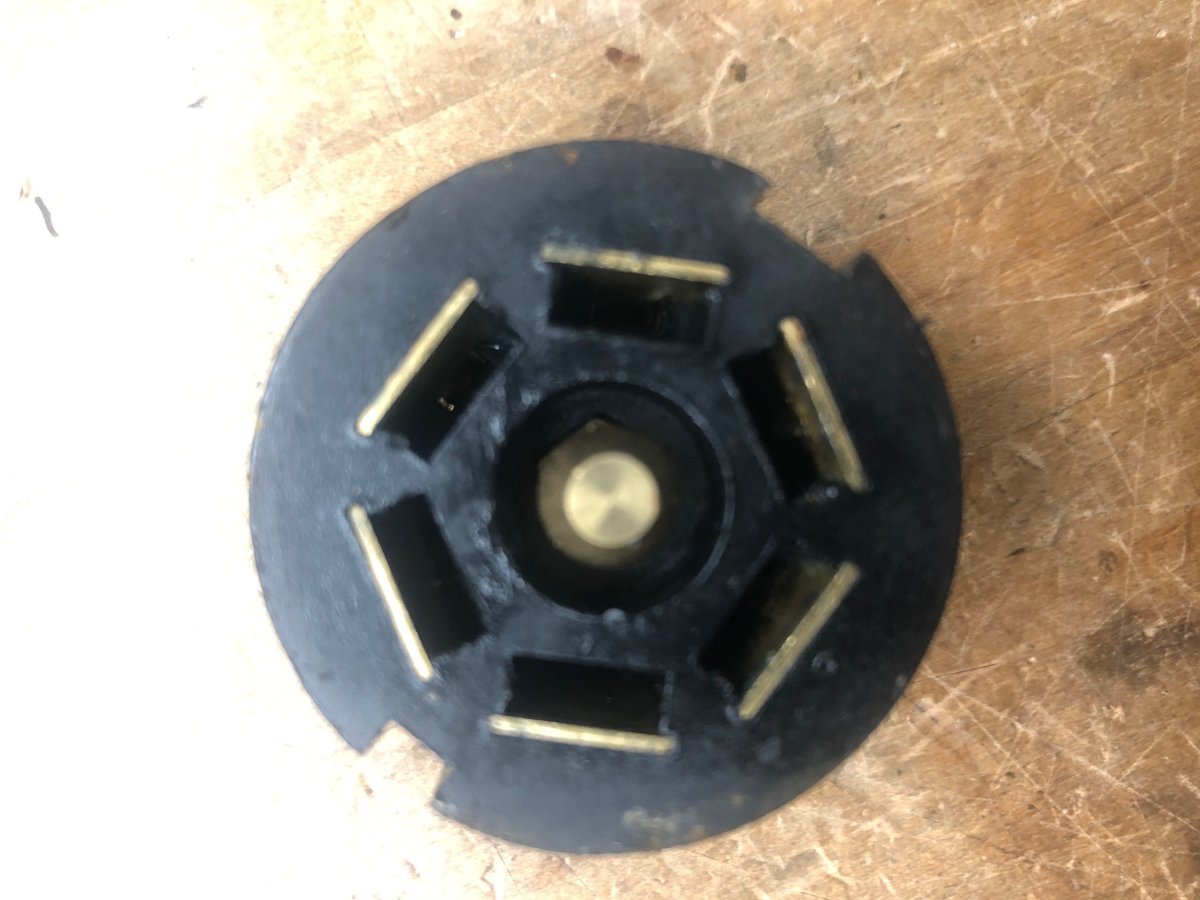
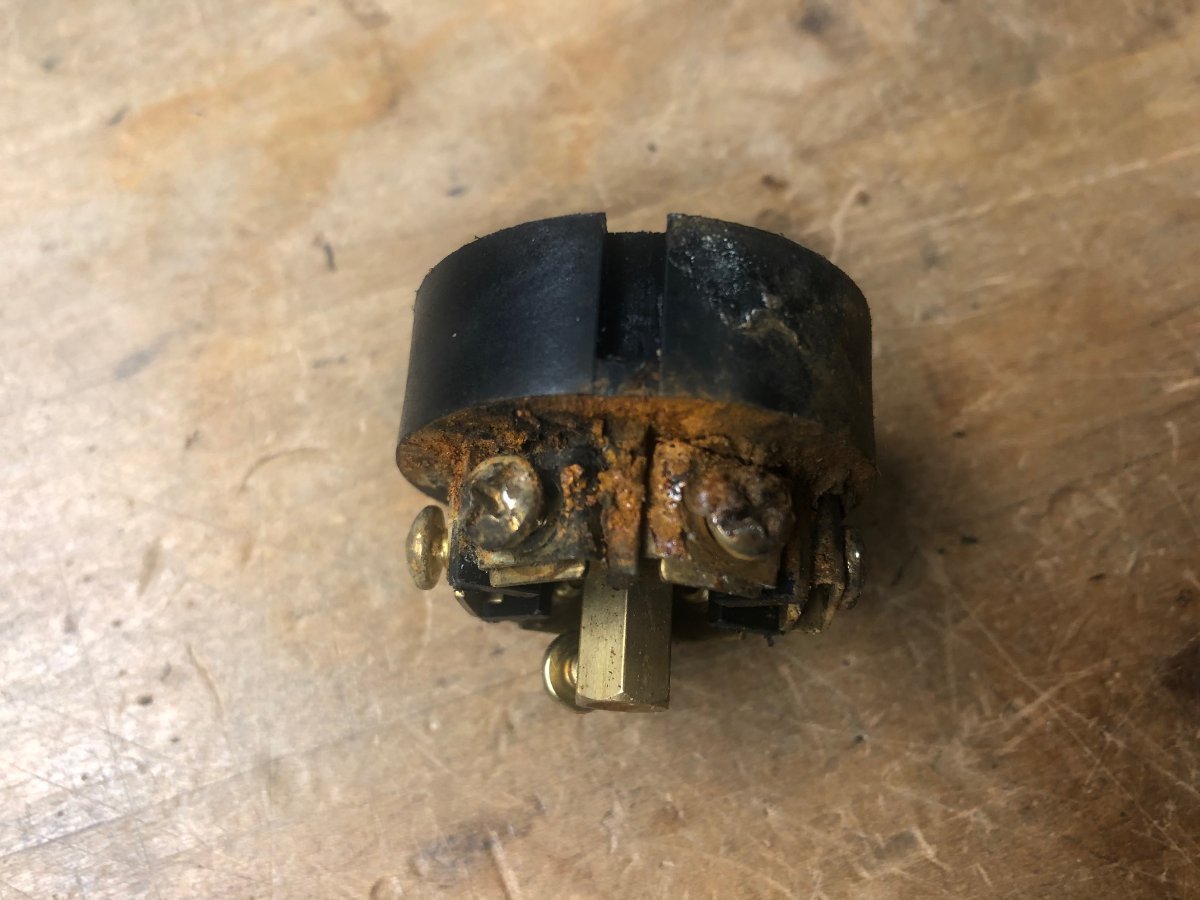
NOTE: Pulling the Olly over salt covered roads can cause a real mess inside the RV 7 pin plug. Oliver service talked me through a very strange set of symptoms, but a set they knew quite well. Symptoms were - with trailer in a camp, no AC connected, occasionally the outside lamps of all 4 of the trailer running light/turn signal assemblies would come on (very dimly). The would stay on until late at night when the battery charge fell below 12.6V. Then they would go out. Service said "it is stray voltage from your 7 pin plug, take it apart, clean it and put some dielectric grease in there." When I took it apart it was so corroded that I replaced the 7 pin plug. Remember, this trailer was delivered to me last March (2020). Service told me that they have switched to a molded 7 pin plug to prevent recent trailers from experiencing this problem.
The exterior of the plug looked pretty good, but the interior was a mess!
Thanks for sharing this information on your various temps. I also have 5 temperature probes and have noticed the big temperature differentials between the curb side basement where the vent / heat are located and the street side which has nothing and therefore colder temps. I tried leaving a top partially off on that are to see if any air would be sucked in when the ducted heat was running but that didn't happen.
So I've been thinking about this too and I was leaning towards putting 2 small vents under the dinette seat and street side bed with some DC fans (like computer fans) to pull air in from the "warm" cabin. Along with a switch, I'm also considering attaching a thermostat underneath so they come on automatically when the temp gets below 40 or so in the basement. I put a small fan above the partially opened top cover of the street side basement and the temps warmed up considerably so in theory fans should work.
There's also enough room in the street side basement to add another layer or two of reflectix on top of the installed stuff (which is very thin reflectix).
I'm just curious, what made you decide on small 100w DC heaters? I guess it's like running a 100 watt incandescent light bulb in each basement - will that be sufficient?
-
I'm claiming the credit for the new Solar package on the Oliver as well as a solar suitcase and an additional solar panel on the roof. I've added panels over the years to my house and always claimed those additions without any problem. I'm not sure about upgrading/replacing components though.

Winter Temps and pipe freezing
in Mechanical & Technical Tips
Posted
No - I used the 3" pipe for that reason. There's still 13" of clearance under the pipe, which is exactly the clearance getting into the outside door. Milk crates fit fine as long as nothing is sticking up too much - same as before.
Good point if you mean the inverter and not just wires - which are everywhere including the curb-side. I'm quite happy with the connections all the way through the wall into the street-side basement, so more reluctant to change that significantly. Since I ran out of materials and time, it's never too late to just use 3" flexible duct like the rest of the trailer in the street-side run. Would be easier to move around as well to your point. Another option is PVC or radiator hose. What do you think would be best since I have some options here?
We do have the "good" toilet, but I'm not ready to destroy anything yet. 🙂 This is all very non-intrusive work so far.