

2008RN
-
Posts
200 -
Joined
-
Last visited
-
Days Won
1
Posts posted by 2008RN
-
-
2 hours ago, Geronimo John said:
I would wager that these springs will end up being the OTT OEM spring for OE2's down the road. Not the Alcan's. Anybody want to wager on that?
GJ
I have to agree with you. All monetary reasons. It is much cheaper, to upgrade to the strong leafs, it only cost is the difference between the 2 leaf packs. And as also mentioned it would most likely void Dexters warranty leaving Oliver holding the bag if there are problems. They would probably charge their customer several thousand more for the Alcans vs a $500 more for the extra $120 it will cost them to upsize to the PR4. They are in business to make a decent trailer for a niche market at a profit.
-
 2
2
-
-
We are just getting to washing the Oli after our 48 day trip. When we pulled the mattresses up we found signs of water under the condensation mats. So when we washed the Olivers outside. We pulled up the mats and mattresses and put them in the isle.
When we sprayed the windows to wash of the soap both bed windows, kitchen window, and the bathroom window screen track over-flowed with water and ran down the wall.
I removed the outside rubber and cleaned the out track and insured the weep holes were clean. I had my wife spray the windows at about 10 feet away with a 2ft pattern. The water went around the window and felt(?) in a couple of seconds and start filling up the screen track. In the past I never had problems with leaking when washing the windows. The outside rubbers are tight against and the end of the fixed window and there is about 1/2 space at the top of the window where the rubber stops. ie: the Rubber is short.
I found the felt track was cover a weep hole between the window track and the in the street side bed window. I also noticed there was a big different between the felt/gasket in the exit window was much different than in the windows. I tried to get one end of the felt out in the street bed window, but it seemed like it was going to rip so I stopped. We never use the exit slider. We use the others window sliders constantly.
The chalking around the windows appears to be in good all around?
Questions.
1. Is it alright for the weep hole between the window track and the outside track to be covered up by the felt?
2. If the water leaking through/over/under the window and felt in seconds are the felts worn out? If it is can it be easily replaced? Does the Track under the felt need to be cleaned?
3. Is the outside rubber suppose to be tight against the window?
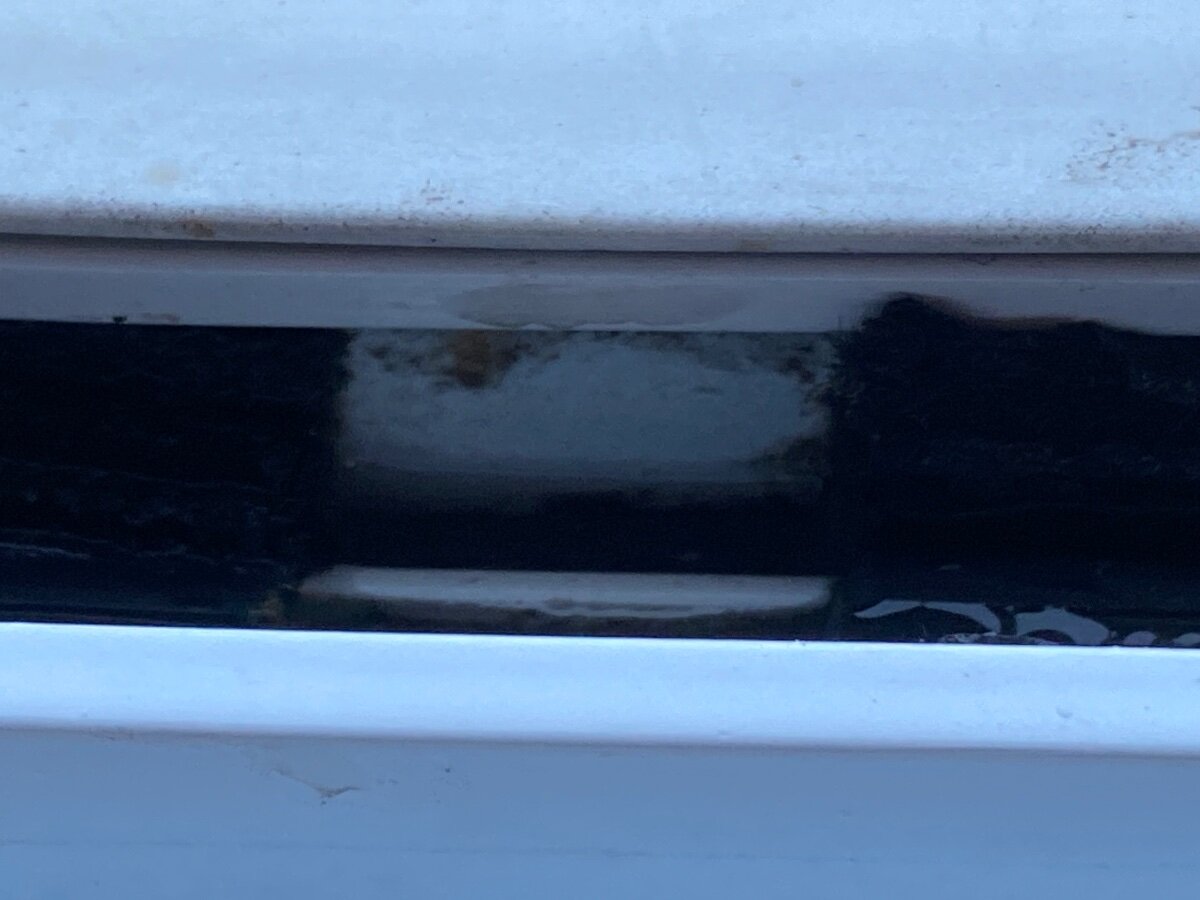
Three pictures of close up of the felt are attached. one is the curb window showing the partial weep hole, the other is the street side bed window. The last in the exit felt which felt more like the rubber bump that sticks up 1/16" more and is plump and is tight against the slider then it opens.
Thanks for your help,
Bob
Curb side with partial weep hole

street side
Exit window
-
I just got done with a trip 7,000+ miles. Wife is doing a deep cleaning after 48 days of travel. When I went by Hohenwald, and met another Owner and learn about the plastic in the lines, and adding flexible line in-between the PEX and the water heater Tee. So after reading this I decided to check all of the hand tightened fittings. Every one of the white fittings were loose, so they all got tightened. I didn't have any leaks luckily. I will have to put this on the maintenance list also.
-
4
-
-
I happened to take about a 10 mile section of a toll road in Indiana 3 weeks ago. Tried getting on their website to pay for the trip. The website is poor at best and I can not get it setup to recognize my vehicle and plate #. No searches return my plate number. Not sure if they want my money. This was the only toll road I hit in over 8,000 mile trip. I also agree there are some terrible roads out there.
-
2
-
-
On 6/6/2025 at 9:16 AM, jd1923 said:
After 25 pages of comments, it's been jacked a few times. All anybody needs regarding the Alcan Leaf Spring mod is the read the first couple of pages. 🤣
I just figured we would try to hit 50 pages. I have gone back a couple of times through the thread when I couldn't sleep. better than counting sheep.😳
-
2
-
-
3 hours ago, Mike and Carol said:
I’m not a Facebook user either, so thanks for this.
Dido
-
1
-
-
thanks great idea
-
I have 2 of the Eley hose reels with every thing has the Eley quick connects for the house. I have the male quick connect that I take off and on the 2 stage water filter for filling the fresh water at home. Never thought of fitting the Oliver and changing every thing to quick connects. so all I need is a pigtail to use at the camp site. The Eley products are pricey, but quality is top notch. I have almost 2 acres to water by hand in the summer, and have tried other reels, the Eley has out lasted the others, The hoses also have lasted longer than the big box stores.
I dislike having to reach down under the edge of the trailer to hook the water up, especially when it is raining and the ground is filthy, and I have to work to get a nice tight connection. I think I will put a parts list together to upgrade filter/pressure regulator/hoses to Eley.
i like the looks of the McKillans better than the Eleys but since I'm already intrenched with Eley at home, I will stay with Eley.
-
That tandem trailer ramp is a pretty cool idea, I like it.
-
1
-
-
22 hours ago, ADKCamper said:
That is a difference between the Elite and the Elite II's. There is no "long" ducting in the Elite; there's just not enough room under the floor to get very far.
In our 2018, like @DavePhelps 2015, the furnace is under the side dinette's forward seat, immediately adjacent to the bathroom. There are 2 fan-forced heat ducts; one dumps directly from under that dinette seat into the aisle adjacent to the bathroom door and the other dumps into the bathroom space on the wall to the left of the toilet. The only return ducting as delivered is via a vent from under that front dinette seat (i.e. beneath the side dinette table) into the furnace.
Thats a horse of a different color. A return vent in the bathroom would make sense in the Elite I, since there is no Hot air output vent in the bathroom.
-
2 hours ago, DavePhelps said:
I don't get the closet vent at all. It is a separate space from the under sink area. I would rather have a return vent move air directly from the bathroom into that space, not from the cabin, to the closet, to the under sink area. I had great success adding new return vents in the rear of my trailer (my furnace is under the front dinette seat). I blocked off the OEM vent which was right next to the furnace. I had substantial temp increases between the hulls. I have also wanted to put one in the bathroom as well but got sidetracked with a pile of other projects. It is now on the short list however.
That is interesting with your furnace under the front dinette, our furnace is curb side in the rear of the trailer. Oliver had put in one main return in the the 2020 the is about 4-5" forward of the rear on the curb side. I have blocked off about 50% of the vent, to increase air return under other parts of the trailer. We also have a heater vent output just below the TP dispenser. So on My rig you would get nice warm air to the the bathroom plumbing if you added a return vent below the heater output. The down side you may not get as much air flow to warm the rest of the bathroom.
I just put in the 2 vents (one up high and one down low) in the closet. With this you are just getting natural air flow/equalization with what is in the cabin. I was really surprised on how well this worked in making the the closet warmer. I know that at least one person has put the vent for the closet to under the sink to work as a return.
With the changes I have made with hot air vent tubes on my rig, the area between the shells is about 5-10 degrees less then the main cabin at least up to the kitchen front seat. I have no idea what the temps are under the bathroom sink is.
-
 1
1
-
 1
1
-
-
20 hours ago, Mark Meadows said:
This is the first time I’ve put my E2 to the test so maybe someone can give me ideas.
I found myself in El Morrow National Monument at 6 degrees with the pipes frozen in the wet bath. I had the antifreeze kit for the Truma Aquago plugged in and the inside heat at 58 degrees. What should I do different to keep the pipes from freezing? Maybe (4 season) isn’t what I thought it was. Thanks for any help !
Mark, I am not sure of what Oliver you have. I have a 2020 LE11. If you could put your Oliver year/model and same thing for your Tow vehicle in your signature section it would aid other owners in helping with answers.
First, as shipped I consider my Oliver as a 3 season. I still winterize the camper for the winter months, and I still go camping. We just carry water with us. The lowest we keep the temp is 62 degrees at night, then 68 during the day. We have the Dometic Furnace, the newer Oli's have a Truma. I would like to update my Truma on demand water heater with the cool weather update, but haven't yet. Also Oliver changed the way the ventilation works on the newer models and vents the closet. Minnesota Oli posted "Breaking Subzero | Oliver Furnace Mod" for making changes to the Oliver for Dometic furnaces. There have been people that made vent changes in Closet, and Closet to under the bathroom sink. Maybe someone else can chime in on this subject. John E Davies may have also made vent changes. John E Davies had made tons of modifications, and information on up keep. He does have a page full of links that are helpful. John E Davies: HOW TO threads and Tech articles LINKS.
I made the changes that Minnesota Oli did,but couldn't quite get the vent tube past the dinette floor. I Also just add the upper and lower vents to the front of the closet, and this really warmed up the closet.
-
3
-
-
16 hours ago, johnwen said:
Says a really tall couple who can lift them over the doghouse lip....

I carry a little aluminum 3ft ladder. I set bottle on the top, then step up on the ladder to hoist it over. We just bought 2 20# we are going to try out for this next year. I can carry an extra 20# strapped into the truck if I need to.
-
2
-
-
We are doing something similar only we are starting in Oregon and taking a southern route down to Colorado, Kansas, Oklahoma Arkansas, back to Tennessee, Kentucky back up to Lake Michigan, Lake Superior, then back across the top of the US on highway 2 (turns into 20) then BC, Canada to Hope, then Vancouver, then back down home. I am trying my best to use 2 lane roads and minimize the interstate(not always possible). We are going to Boon Dock at Harvest Hosts sites, then hit a Full hookup every 4-5 days. Trying to keep the travels to 4-5 hours a day when on the road.
I noticed you are turning around right around the California border. Might want to go a little farther and see the Red Woods.
-
3
-
-
On 11/19/2024 at 5:55 PM, 2008RN said:
If / when Alcan replies back to me I will update you.
The 2000# Dexter leafs are starting to look a reasonable solution. I’m sure I will be happy when I get this back on the road. glad I haven’t retired yet I’d be a little pissed to not have the trailer available for a couple of months.
Well, I finished my other projects, semi-retired and I was able to get back to the Shackles on the Oliver. I emailed Alcan around December 16, 2024 and the special die set for punching the shackles without bending them was on still on backorder. So I canceled my order with them. Got some hot rolled low carbon steel, and purchased some Cobalt drills from drill bit warehouse. BTW, I have never used the cobalt drills before. Man are they nice. Cut that hot roll like butter. Never use them in a hand drill they can break easily. Only use something like a mill, Drill press, etc. I only had a .002" variance in Center line on the holes and they assembled easily.
I made my Shackles 2-5/8" on centers. The original shackles were 2-1/4". When I was replacing the the leaf springs originally, I found rub marks on all EZ-Flex arms where the original Dexter leafs had rubbed against the arm. With the Original shackles and the new Alcan leafs I had .040 clearance between the 2nd leaf and the EZ-flex arm. The thickness of the individual leaf was about 3/8. So I added 3/8" to the Hole to hole distance making them 2-5/8. THis set the distance close to what the original distance was on the Dexters. This lowered the trailer back down by 3/16", The Alcans raised the height by 1/2" so a net gain of about 5/16" in height.
I also went back to the original Dexter Wet bolts. The reason I did this I was having problems getting grease pumped through the bushings with the wet (grease-able) shackle bolts from Alcan when torqued down to 60 Ft/#. The Dexter bolts are shoulder bolts and the Alcan's are straight bolts. The shoulder/wet bolts measured about .010-.015 wider then the shackles/leafs or hangers/leafs. So that meant that Dexter designed that .010-.015 of side to side slop so that grease could moved to all surfaces and the EZ-FLEX could move freely. So I am using the Dexter Wet bolts.
I finished all of this before the end of the year. I decided it was time to change all my coolant hoses on the truck before a cross country adventure, added larger heated mirrors with blinkers to the old F250 SD diesel, and did some other maintenance. So I just got the Oliver out on dry pavement (that does happen often in the Pacific NW). I took her on a 105 mile trip. 45 miles was small curvy roads and about 10 miles was rutted, sunken, patch road. The Oliver performed great. I could barely feel her / see her move, and she didn't rock around all over like before.
I did my Torques at 9, 45,68,105 mile points. I will plan on torquing her again at 250, 500, 1000 mile marks. I may also do more torques if there is any movement at the 1000 mile point.
I feel comfortable where I am at with the suspension. I may go back in a 2-3 years when it is time to re-grease the axle bearings. At that time I will check bushings, wet bolt wear with the leafs and ez-flex. The ex-flex bushings in the arms are not the thickest metal. and I will replace what is needed.
When I put the new leafs on I replaced all of the axle bearing with Timken bearings. I also had small spots of rust al over the 3" axle tubes and leaf plates. So I sanded the tubes/plates and what I could of the Brake Backing plates, then coated with a Rust neutralized, primed and painted and coated with Cosmomline RP-342 after everything was reassembled. Hopefully this will stop/deter the rust. I was disappointed that the tubes had a small amount of rust on it when we got the Oli at 9 months old. We also frequent the Pacific NW beaches a lot so that did not help the rust increasing.
-
1
-
4
-
-
@Ronbrink Great job job of space utilization. I like the way you packed the inside of the griddle. I just bought our 17" inch Blackstone this last summer. My wife and I love it. We fill up the grill for a nice large and fancy meal. Clean up is a breeze. We got rid of our older 2 burner stove for the black stone. It is now our go to cooking appliance in nice weather. If it is poring rain and windy then it back inside to cook.
-
1
-
-
My Dexter leafs on the rear were flat towards the rear of the trailer. I ordered the Alcan springs. I had problems with Alcan’s shackles. The first set they sent me the holes were oversized and the knurls on the bolts just slid in. The second set were the right size, but they bent shackles when they punched the hole. The end of the bolts after being pressed in were about .230 out of alignment which makes assembly impossible. The Dexter shackles and bolts are .005 inch or less for alignment making assembly easy.
Alcan said they would let me know when they figured out how to produce shackles that would work and that was on Oct 15th. I’m still waiting. I put the original Dexter shackles back on and set hummi back on the ground.
The bottom of the second leaf to the ez-flex measures around .040 inch universally. Way too close to take her for a spin.I've gotten busy with a small remodel job on a wall into the kitchen. I need to get it done for the new fridge to fit. Once I get the stove and fridge set up, I will shift back to the shackles, if Alcan has not came up with a solution, I will buy the metal and make my own, I have a buddy with a vertical mill.
If / when Alcan replies back to me I will update you.
The 2000# Dexter leafs are starting to look a reasonable solution. I’m sure I will be happy when I get this back on the road. glad I haven’t retired yet I’d be a little pissed to not have the trailer available for a couple of months.
-
5
-
 3
3
-
-
Good troubleshooting, and thanks for the info. Something to check this winter while hummi is down for the winter
-
On 6/26/2024 at 6:17 AM, Jim and Frances said:
LOL - I've tried everything to get ours to fit...but then again, I am not a good puzzle solver!
Jim,
Don't feel bad. I spent about 10 minutes on my 17" BS try to put the grease catcher under inside the grill for travel. I never figured it out.
-
I use a 12volt pump, kind of cheap and manual, but I hook it to the output for dumping, and then connect to the spray port on the black tank. I do have a fine mesh filter on the pump so no debree gets stuck in the sprayers. I have used it when we are boondocking greater than 4 days.
-
1
-
2
-
-
I have a narrow 90 degree turn getting into my driveway, then I have to make a 60 degree turn to the opposite direction right away. The RV port is only 25 ft from the road. I practiced probably 20-30 times backing up normally into the spot had chosen before we built Hummi's home. I had the location marked out with cones and paint. I got it into the area twice without going out of bounds. I decided that putting the trailer through a wall greater than 90% was not going to cut it. I was wanting a heavy duty bumper to stop deer ruining the front front end. That settled it, and I purchased a BuckStop front bumper with the hitch built in.
It is the slickest way to park the trailer. I can park the trailer within a couple of inch of where I want it every time.
The only thing I wish was the hitch was off set to the passengers side by about a foot. This would make it easier to look around the trailer from the drivers seat. I also use the hitch to carry bicycles on the front.
-
1
-
3
-
-
6 hours ago, Geronimo John said:
Spot on ScubaRX. Would add well greasing the spring and insert. Also using a deadfall hammer would work a bit better than the big ole hammer. May also cause less damage should we have eaten our Wheaties that morning. 🙂
GJ
I like the deadfall hammer I think I have a 2 pounder. I also have a few large brass punches that I could use with the sledge. I am starting to think it would be fun to borrow the Orielly's ball joint press. I have never used one.
-
2
-
-
17 hours ago, ScubaRx said:
Since you (or at least myself) would never try to press the wet bolts into the shackle straps while under the trailer, I can't see this being an issue or a useful tool. If you own a vise and a hammer, you have all the tools you need. If not, this job is probably beyond your capabilities.
Yep, I have a hammer and a mounted vice. I use to be a machinist, and sometimes my mind gets stuck in using proper tools. Big ole hammers and vices just remind me of blacksmithing and welding. I almost thought of spending a few hundred bucks on a Table top arbor press that I could get the 10" drums under for pressing the bearings, but then I figured I was starting to get carried away.
-
 1
1
-
-
22 hours ago, ScubaRx said:
43 pound/feet. The shoulder of the bolt will bottom out on the hanger, make sure it has done that then tighten. DO NOT attempt to use the nut to pull the bolt into place. It will strip the nut and ruin the wet bolt.
Do you press them in place? If so, what is the best way to do this at home without a press?


Touch Lights
in General Discussion
Posted
One of the things that happened on my 48 day trip, the 2 lights over the sink and stove became intermittent.