2008RN
-
Posts
240 -
Joined
-
Last visited
-
Days Won
1
Everything posted by 2008RN
-
Interesting, but not interested. Oliver is simple, well designed for the space available. It is not full of gadgetry. KISS (Keep It Simple Stupid). I think I'm showing my age. SkyDream is just the opposite. The only thing they have in Common is they are made out of Fiberglass. Probably half the places I camp the deck would useless due to thing being in the way. Also in the Pacific North West (PNW) I would worry about leaks. Although when I saw the newest walk through video on the new LEII, I had reservations over the awning with the solar panels on top. It is great having that much extra charging power. I don't think the longevity of these flexible panels would come near the useful life span of the solid mounted roof top panels. Replacing the awning I'm sure would be very expensive. I have trouble getting the regular awning clean and dry in the PNW due to the 7-8 months of rain. When I do have the opportunity to roll out awning and clean and let it dry completely the Oliver and Awning ends up blocking the whole driveway. So it has to be a planned project. I do pack a small Stihl blower and a ladder so I try to blow off the pine needle/leaves/twigs off of the top before finally rolling it up for travel.
-
 Or for the Milwaukee for over $152. It takes me 1 year to go through 1 can. Dust off on Amazon has a deal right now for 2 cans for $6.29. I paid $12.38 for the 2 cans in January.
 -
I do not know who said this in a post about 6 months ago, but when I read it I was running out of canned air in the garage (I only use it on fine stuff like electricronics, other wise I use my air compressor). So I bought 2 cans, one for the old and one for the garage. I did see small hose about 1/8 inch with a valve on it to reduce flow that hooks up to a standard air compressor hose. but I didn't purchase it. might be nice for home instead of a can. But the can is nice and portable for working on stuff inside the house.
-
Well I had an interested 19 day trip to Yosemite, Arches, Canyonlands and dinosaur monument National Parks. I had 4 different failures. I hadn't used my truck in a month before the trip and I have an alarm system in the truck the uses a lot of energy communicating with me and the factory and it drew the batteries in the truck way down. I tried starting the truck a few days before the trip and the batteries were dead. I recharged the batteries and they settled down to 12.6 volts after the charge instead of 12.8v. Just for safety sake I took a 660 Amp jumper battery along, but never had a problem again with the truck batteries the whole trip. Now the AGM batteries in the Oli are just over 6 years old. I haven't had any problems with them, in fact last year we are out for more than 60 day total boon docking on them over half the time and they did great. This trip out they failed the first night at 3AM with an alarm going off after using 34 Amp/hours. I was down to 10.4 volts from a full charge.. I was using a CPAP and the furnace was on set at 57 degrees. I isolated and checked all 4 batteries. Their volts were within 0.1 volts total so it wasn't one battery taking them all down, they are all just tired. I was planning the Epoch upgrade next year, but Oli forced my hand. Luckily I packed the jumper battery and hooked it into the system at night and recharged during the day. We went down to 11.9 volts in the morning heating the olive oil back up to 65 degree to take the chill off. No more alarms going off. I figured that the jumper was 5 years old and was the price of a good lead acid battery. So if I fried the jumper on the trip it was not a big loss. The jumper battery is still running good and holding a charge. Here is the jumper batter hooked into the system. That took care of the first failure. I had been using the heated truck mirror at Yosemite. The last day at Yosemite they blew a fuse and I didn't realize it until we were a 200 miles away from the park and my auxiliary diesel tank pump wouldn't work (same fuse). We got to our destination with a 1/8 in the main tank. I shotgunned the problem after blowing a couple of fuses and found it was the mirror heaters. I disconnect the heaters from the circuit and then we could pump fuel from the auxiliary tank. I will find the short this winter when I have the time to disassemble the dash and doors to trace it down. That night we pulled in and my wife tells me the Fridge would not work on gas. O' no what next. It was late that night and we had hook ups that night, so I waited until morning. When I looked in the compartment everything was very dusty. So I start by physically cleaning out the lower compartment. with a windex and paper towels. After everything dried, I reset all the spade connector in the compartment. Next I took the shield off around the burner and wipe off around the burner and then used canned air to blow out the burner from the air intake holes then the outside of the burner and the rest of the compartment. I tested it out and the first 2 clicks I heard the 2 relays into the electric box click, then the gas solenoid click the flame started on the first click of the ignitor. Nice full blue flame and no flickering or yellw/orange colors. Wow was I happy! OK 3 failures, I'm done now for the trip. Right! Well not quite I had one more minor failure; I bought these white/Blue LED lights for the interior lighting, and one failed the next to the last day of the trip. It stayed on with the blue light. The only way to turn it off was turn off the main switch controlling all the lights. I am now planning a couple weeks of maintenance and upgrades to the trailer and truck. Planning on attacking the Colorado Rockies this summer during the hottest time of the year with lots of long hard climbs and some boon docking . I ordered battery wire and lugs to make cables and i'm going to order Epochs on Monday. I will do a fan upgrade to the fridge, repack axle bearing and check brakes, again. We still have the original brakes with 23K miles on the Oli , just want to make sure every thing is working correctly and checking wear on drums and shoes. Will also fix a few small items on the Oliver. I also have regular maintenance on the truck and the boost is down little on the turbo, and oil temp is up little. So I am taking the truck in to get the turbo boots checked for leaks and the oil heat exchanger replaced on the old Ford 7.3 engine. I know all of this info does really belong in this thread, but I did want to start a new thread about thing that happen. This is the first real major failures since I bought the Oli besides the window tracks overflowing with water.

-
I had up graded all my touch lights with the 7.3" over the kitchen and the 4.75" for the beds and table lighting. I had 22 days on the flight and I had one of the 7.3 lights over the kitchen fail. I touched the light to turn it off and it would not turn off. I only had 22 travel days on these lights. I wasn't real happy. I will replace the it again with the same thing only because we light the low light of the blue. If it happens again , I will try another solution.
-
When I took my Zirk’s out, I had to hold the wet nut bolt with a wrench, and then use vice grips on the Zirk head to loosen it up. The hex heads on the desserts just stripped out with me needless to say I had to replace all of the Zirk’s.
-
Maintenance of D52 Nev-R Lube Axles with Alcan Springs
2008RN replied to jd1923's topic in Mechanical & Technical Tips
Looks pretty good to me, Combines both the greasing wet bolts and physical inspection of operations and rough cleaning without remove the drums. I have never removed a drum with sealed bearings, I have done many vehicles over my years that have the old style tappered bearing. How easy is it to pull the drums of the Never-lube bearings (sealed bearings)? Even if everything looks good physically at some point the drum needs to be removed to check wear of drum and brake shoes. The nice thing with normal vehicles that have sealed bearing they have brake calipers, pads and rotors, being able to check everything with external inspections. -
I am getting close to upgrading to the epoch essentials 300AH. Planning on 2 batteries. Seems like they fit the batteries slide the best. I have a question. I was reading about when installing multiple lithium batteries they said all should be charged up up completely before the installing. Meaning each battery is completely full. I do not have a Lithium stand alone battery charger. So I got to thinking should I buy a separate battery charger for lithium batteries? Do I go with the Epoch that is only designed for epoch, or is their other good lithium charger that would work? I feel like an infant when dealing with all of the different manufacture specs for chargers. Epoch charger looks like it would only fit an epoch battery and nothing else. Thanks everyone, Bob
-
I was just looking at the threads for mounting fans for the fridge. I was favoring the vertical mounting position. I did some measurements from the back of the wall ( fiberglass support) where the top of the fans would be mounted to the back of the top plastic cover. I got about 1" +/- 1/16" The beach lane fans sawy they are between 1" to 1.5" . That is quite a variance. Did any of you has to cut /grind down the fiberglass support to get the fans to fit? How much clearance do you need on the top? Still out on the road, heading home in a 1/2 weeks. Just trying to plan ahead. of time Since I have had the trailer the fridge it has had problems with temps above 90 degree. I just can't keep up. We are heading out in the heat of the summer for our next trip and thought this would be a great upgrade.
-
Ya, We were visiting son last year in Kentucky, and decided to go down to the mother ship in Hohenwald. Driving through Nashville wasn't fun. At least the larger roads are better in Oregon. THe back roads in Oregon and Tennessee are pretty much the same. (yuk). We got a truma repair and a new AC. We enjoyed the last year's models on the sales floor. Several updates I liked, but not enough to buy upgrade. Good to know that Salem, Oregon has someone that could do some repairs.
- 1 reply
-
- 3
-

-
WARNING: Fake Facebook groups cropping up everywhere! (2026)
2008RN replied to Wayfinder's topic in General Discussion
I never had a FB account until 5 years ago when a boss decided it was an easy way to curcimvent manage rules dealing with unions. So she posted al sort of changes happening at work on a private FB Group. The Hospital also had thier own FB group which was part info, part PR propaganda. I changed departments and removed them. I do use Marketplace, sometimes good/ many times bad (still on craigslist). I have been on the FB Oliver group. There is not a lot of structure to FB and does not lend intensely to the structure our forums does. The only thing that is real positive for the Oliver FB group is that it is the really the only way to list an Oliver for sale or parts for sale to people that are truly interested in Olivers since Oliver made regulation changes to the Forum. -
I would like to Will Prowse do this strenuous testing with intact battery to other manufacturers like Epoch, Lithonics and then cut them open after the ridged testing. Then we could really compare. Maybe he has, I just haven't taken the time to look. I agree I think the BB interview was a PR stunt. Lithium batteries are still semi new technology and still evolving. Just because they meet an industry standard does not mean they are well built. It is like high jumping and setting the bar at one foot. As long as you jump over the bar you're good to go. Also Will could take a brand new BB battery and cut it apart to see if he really caused the internal problems he showed. But I highly doubt that kind of melting happened just from cutting the tops off. I understand this takes some financial backing to do these types of test. I don't mean to dish Will, but is he completely impartial in this. There are a lot of variables.
-
We have the 3.5K axels I put the 5 leaf springs on the Oli. I have almost 11K miles on them. The first couple of days (750 miles) seemed a little rougher then they mellowed out. I do go on gravel, and some of the 2 lane roads in the nation are as bad or worst than gravel roads. I just got done doing a lub on the wet bolts and checking everything out. All seems fine. The Oli weighs about 6500 pounds when loaded. I haven't notice any problems in the interior, it was worse with the original springs. The trailer stays pretty mellow with movements of an inch or two after uneven pavement. Where it used to bob and weave like a drunken sailor before making it harder to control. After the leafs no control issues. I think you would be fine either way.
-
Knee replacement surgery, anyone gone through this?
2008RN replied to routlaw's topic in General Discussion
Been there and done that x2 (ten years apart.. Both times I used a stationary training bike during rehab. It few weeks after surgery before I could get the knee joint loose enough to get all the way around the top of the pedal stroke. it was probably 2 months before I could get a above 40 rpm still without force. By 3 months I was walking 5 miles a day and standing on my feet 8 hours a day before I went back to work as a cardiac RN. Both times I did each knee during the summer. It wasn't until spring that I got out on a real bicycle. Even at 9 months I still had to Ice the knee after bike rides. As mentioned above it was about 1 year the I forgot that I had a knee surgery. Also as stated above rehab is tough and painful. Do what PT tells you. The important thing is getting full mobility back. Then getting muscle stronger. This takes months. I still have a minor problem with my left leg (Dominate) with standing on one leg and balancing long enough to put my pants on easily standing up. I still do it, but I am clumsy. I did have an exterior tendon release a few years before the surgery because the tracking on my patella to the knee joint, which might has cause the slight balance issues. Things I have never done again. I love sports and always pushed my self hard. Down hill skiing, If I could not do the double diamonds, and push myself it wasn't worth skiing. Jumping down off of anything: The truck tailgate, large logs and rocks when hiking, Anything that required cutting side to side, soccer, racket ball, etc. As far as trailer maintenance, 3-6 months for some of the easy stuff. The hard stuff like repacking bearings 9+months. You learn about getting down on the ground and getting back up. I still can not squat down to the ground like a mechanic would to work on things. Only do what is comfortable and you feel safe. Remember baby steps. If you have to repack bearings or such coming up soon you should have someone else do it. I do all of my maintenance on my Oli it just means modifying how you do things. I know little old ladies that still garden that have had knee replacement. You should be back in the camp grounds in around 6 months or so. Remember Ice and Stretching during the next 9 months. I spent my lunch breaks Icing the knee on my lunch breaks. I was the best surgeries I have done. Hang in there and don't give up. -
I sorted through mine a couple of years ago. I had to dig into them 6 months ago. Back in the shed are cables from around 1987 when I first got involved with Unix systems, and playing with original PCs. I left IBM 20 years ago. I just got rid of all my old manuals and programming books. My lap top is 1year old, but the desktop is 15 years old. Talking about all of this old stuff, makes my want to clean house and get rid of anything that is older than 2015. Totally retiring in May, so it’s time to embrace to future.
-
I was trying to find specs on the brakes. What I found is the it didn't matter if it was 12" or 10" brakes. Dexter shows 12 gauge to run 2 or 4 brakes from the tongue of the trailer. I do not think the dexter wires coming out of each of 10" brakes are 12 gauge the look more like 14 or 16 gauge. Other places such as trailer shows 14 gauge to each brake. One 12 gauge from the tongue could easily be split into 4 separate 14 gauge wires. I just do not know how and where Oliver did this. If there are problems I would say it was Oliver design problems and not Alcan upgrade.
-
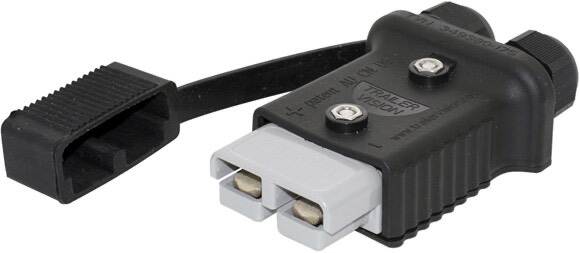
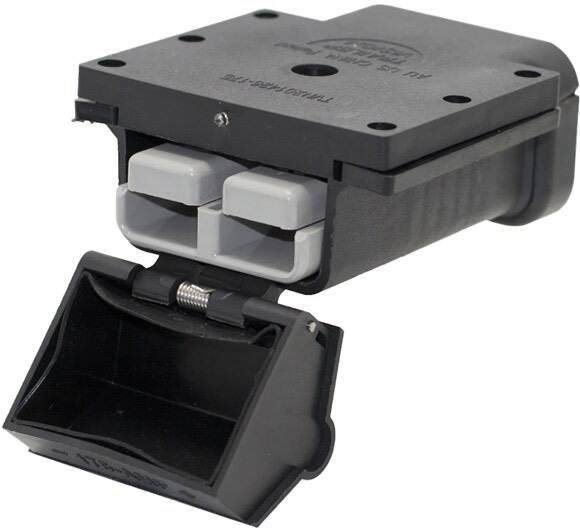
I got everything from Powerwerx.com, and the plugs are SB175. Here is the covers: https://powerwerx.com/trailer-vision-tvn349380-175-sb175 https://powerwerx.com/trailer-vision-tvn201426-175-sb175
-
Thanks, I checked out the remote controller, and found the setting thanks. I also tried the FXC app, I thought that would be cool. After playing and looking thing up for 1/2 a day, I found out the remote controller the was shipped with the Oli doesn't have the bluetooth function. Not sure if I will spend the $100 for a new controller to have a cool function.
-
I used this on the Cable between Truck/trailer. Then I used the mountable ones with the flip cover under the bumper and Oli I have done a few day of rain on the Oregon coast, and I was surprised that they were dry when we stopped. I thought I would have some moisture between the connectors.
-
I went the same way you did. I put Andersen connectors under the reat bumper and under the front of the Oli. I use it when we travel day after day boondocking. If I stayed somewhere with power, or will be staying the next night with power I probably won't use it. We have a trip coming up to Yosemite, Arches, Dinosaur National Parks, and using harvest hosts whenever possible; We will depend on the DC-DC charger much more. Have an August trip, and it should be around 100 degrees everyday, We will be on shore power most of the time and will probably not use the DC-DC charger much if at all. Maybe when we go to Lithium we might use it more often. We are pretty conservative with power on the AGMs. If we boon dock for several days in one spot we use Generator at dinner time to top off the batteries. Except In Wisconsin State parks generators are not allowed so we supplement with the DC-DC charger and the Ford Diesel when staying multiple days. I am going to install an Andersen Cable on the front of the truck this spring. So I can attach from either end of the truck. I am planning on making a Jumper cable with an Andersen connector on one end. so I can jump start or get jump started from either end of the truck.
-
I have another question related to upgrading to Lithium. My 2020 LEII came with a Xantrex Freedom XC 2000. Can the Xantrex Freedom XC 2000 be used with lithium? The 2000 watts has been sufficient for our life style although I would like extra capacity with the batteries that lithium would give.
-
I don't mean to overwhelm you. While you are under the Oliver looking at the shocks, Pay close attention the leaf springs. Look to make sure the leafs are not sitting flat on one end or the other and/or over-sprung. If they are it could cause the shocks to wear out prematurely. If they are there is a huge topic on leaf springs ( more like a book). Remember to just take one thing at a time, you have an older trailer, but is built to last. There is a ton of information on this website, and people that care about there Olivers. Happy Travels.
-
Because it is easier and cheaper to deny and shift blame, and hope that a class action doesn't take place. This is the way the world has gone, no integrity. I would bet the CEO is selling any shares if they even have them. Sorry for the rant.
-
I updated my Truck to a 245Amp alternator with 4/0 to one battery and upgraded the link between batteries to 2/0. I ran 1/0 back to the Oli for the Victron DC to DC charger. While I was working with the big wires, I did the John Davies clean up in the battery compartment with 4/0 with smartshunt and shut off switch so that when I upgrade from AGM to Lithium I would have a good foundation. I bought a hydraulic crimper and I loved it. Made all the work so much easier. While I was at it I bought several extra lugs from 6ga to 4/0. I love my dog but for me tools are mans best friend. They can make life so much easier, they just aren't warm and snuggly.
-
@Geronimo John I have to agree with you. about using the Step wet bolts. When I was installing the Alcan springs in the Oli. I used the wet bolts from Alcan and found when Torqued down to the specs, I could not get grease through the sides on the Bushing. I finally measured the step bolts and the measured the springs and carriers. I found that the should bolt allowed just over .010 slop. This allowed grease to come out of the sides and allowed the shackles and springs to move freely. This allows the EZ-Flex to move freely, and do what it was designed for. All of the stress is on the bolt itself and is not on the threaded shoulder thus allowing a lower torque.