
csevel
-
Posts
219 -
Joined
-
Last visited
-
Days Won
8
Everything posted by csevel
-
I read through all of that and must have missed the core removal. That could be an option to explore. I guess I didn't entirely see how the receiver was built.
-
Thank you.. And no.. My payload is pretty low because of some extra suspension on my Tundra so I'm trying to reduce that some.
-
I'm very close to finalizing my decision on the rear receiver install on my ILOVHER when I visit the Mothership in May. I've read through all the posts regarding the 150# weight limit and the 1.25" receiver limitations for decent bike racks. I don't want to rehash those threads because I'm aware how rear weight can be dangerous and the reasons Oliver chose to do it. I had a custom 2" receiver on the back of my Casita. I stayed within the weight limits, it offered an offset of tongue weight and the cargo space was super useful to me. I DO NOT in any way intend on carrying excessive weight as my primary use will be for a much smaller poly utility chest that weighs about 70# (if that) The aluminum cargo carrier itself is only 30# but has a 2" hitch mount. I have found that it's difficult for me to access my tools and various camping supplies from the box in bed of my truck since I'm so short. I'm always in that chest for something or another and it's heavy for me to slide forward on to the tailgate. This is an expensive upgrade for me and I would like opinions on whether I should have Oliver leave off the 1.25" aluminum receiver piece and bolt on an 2" aftermarket receiver to that rear cross channel OR, should I just buy an adapter? I'm sure it voids any warranty.. If I ever would carry a bicycle, I would probably only have one back there on a rack I already own...again a 2" mount. I realize this is also going to add a couple feet more to the back of my trailer, harder access to sewer and probably something else I'm forgetting. Thanks in advance for your replys.
-
My plan is to replace the curbside Maxxair vent because it's failing after ten years. I have two installed now (curbside and dinette) and you're correct in needing more than one for multidirectional air flow. I'm waiting to test my new vent for any tweaks before I attempt to make another one. I would consider window vents as one of my most loved and needed mods as I've lived in my trailer for up to four and a half months at a time in all kinds of weather! One of the things that's nice is hearing the rain, having a breeze and not using that foghorn of an air conditioner! Lol
-
I may someday attempt to remove and re-apply new gutters and move them further down the sides of the windows...and thanks for your assistance in the repositioning of the pix!!
-
Yes, you are correct. It was a bittersweet transition for Char Rimer as this was to be their retirement. The good news is (and I told her this) that she couldn't have sold the trailer to someone more passionate about fiberglass and that I would do everything to keep ILOVHER in the best shape and send her photos of my travels!
-
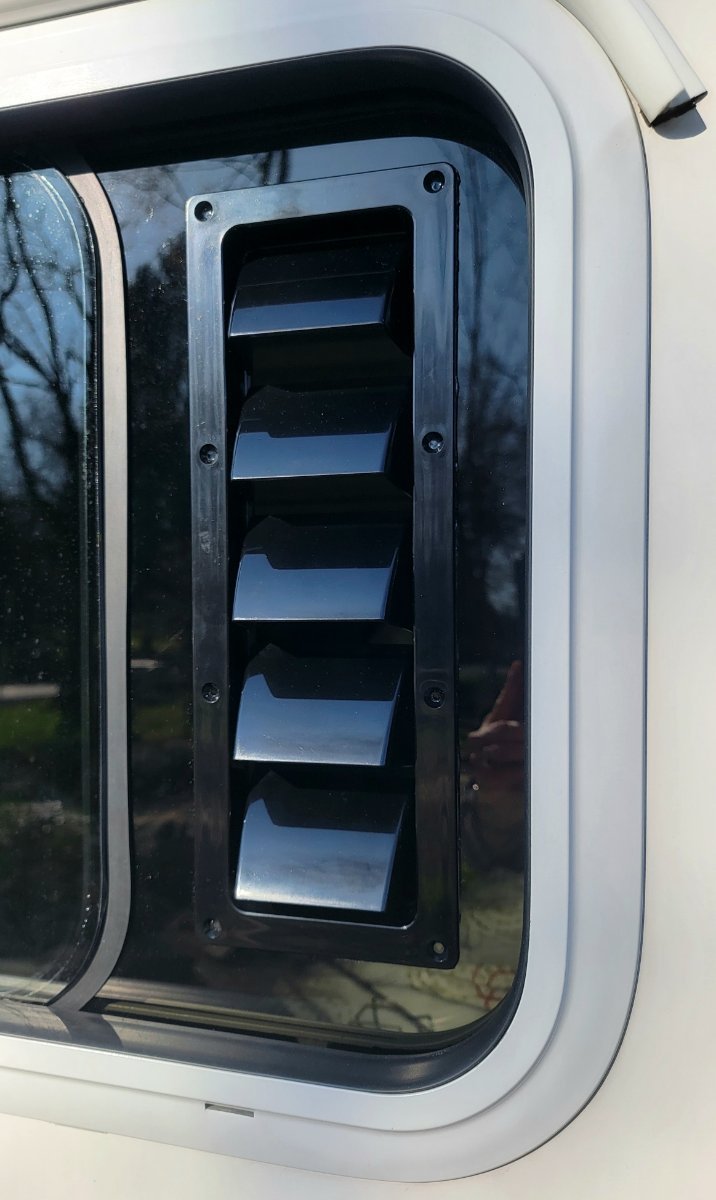
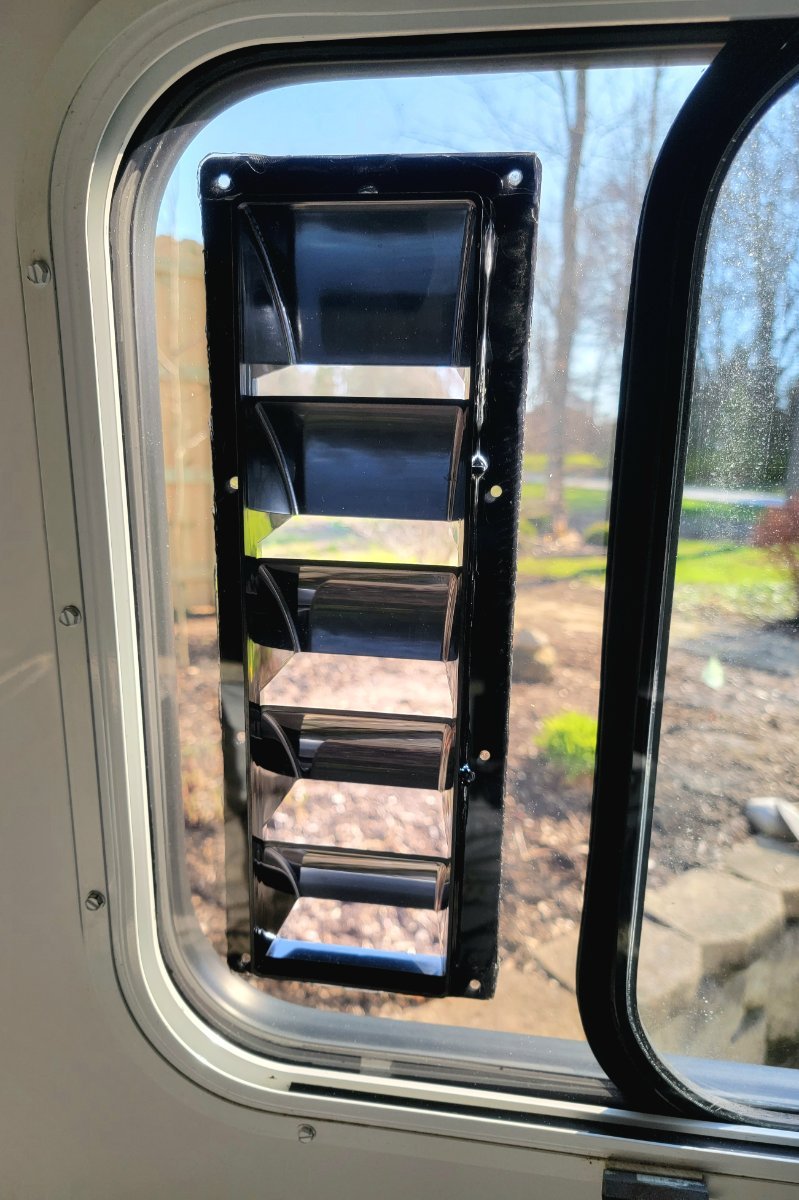
I'm not sure what you're referring to as the 'EZ' RV gutter was installed prior to my ownership. I haven't yet affixed the rubber edging to the vent as I want to see how it drains. The vent freely sits in the same channel as the stationary window so I imagine the water will go through the weep holes in the same way (as long as they've been cleared). There is nothing it's secured to besides the pressure of the window against the edge. It installs the same way the screen does..just upwards into the upper track and then down into the lower.
-
BTW, I did add some rubber edging to the inner part of the vent as well. This way if you're too zealous in shutting the stationary window, you'll have a bit of bumper. Also, the vent can be kept inside a cabinet and is easily installed from the inside where you'll stay dry. Here is a video of it in action. I will be at the rally in May if anyone wants to see it in person! Thank you all for your kind words! I've been dreaming of this mod for a long time. 20220418_110002.mp4
-
Thank you! My new phone (Samsung S21 Ultra) has some pretty powerful editing and a strong camera. I'm pretty computer and phone savvy but had no idea you have to edit or enhance before upload here! Good to know!!
-
I have no idea how to rotate these photos for better viewing... they came from my Android phone ..so I apologize!
-
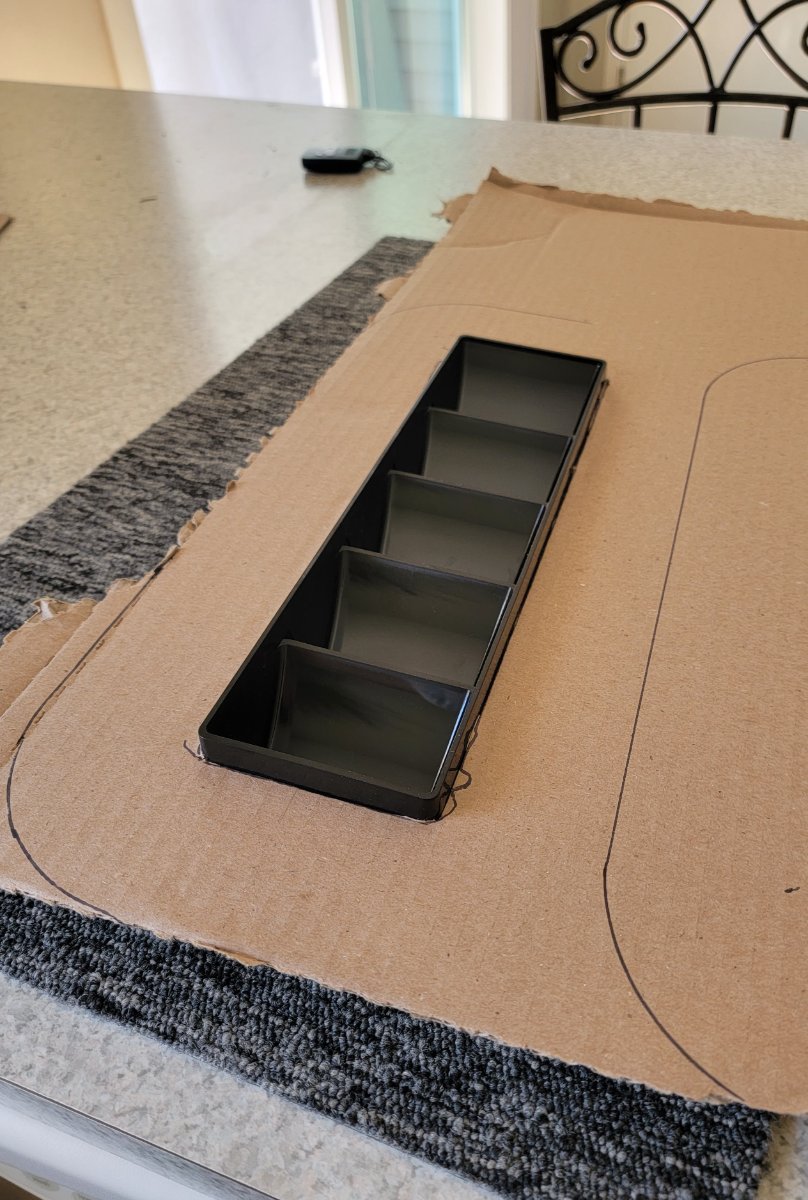
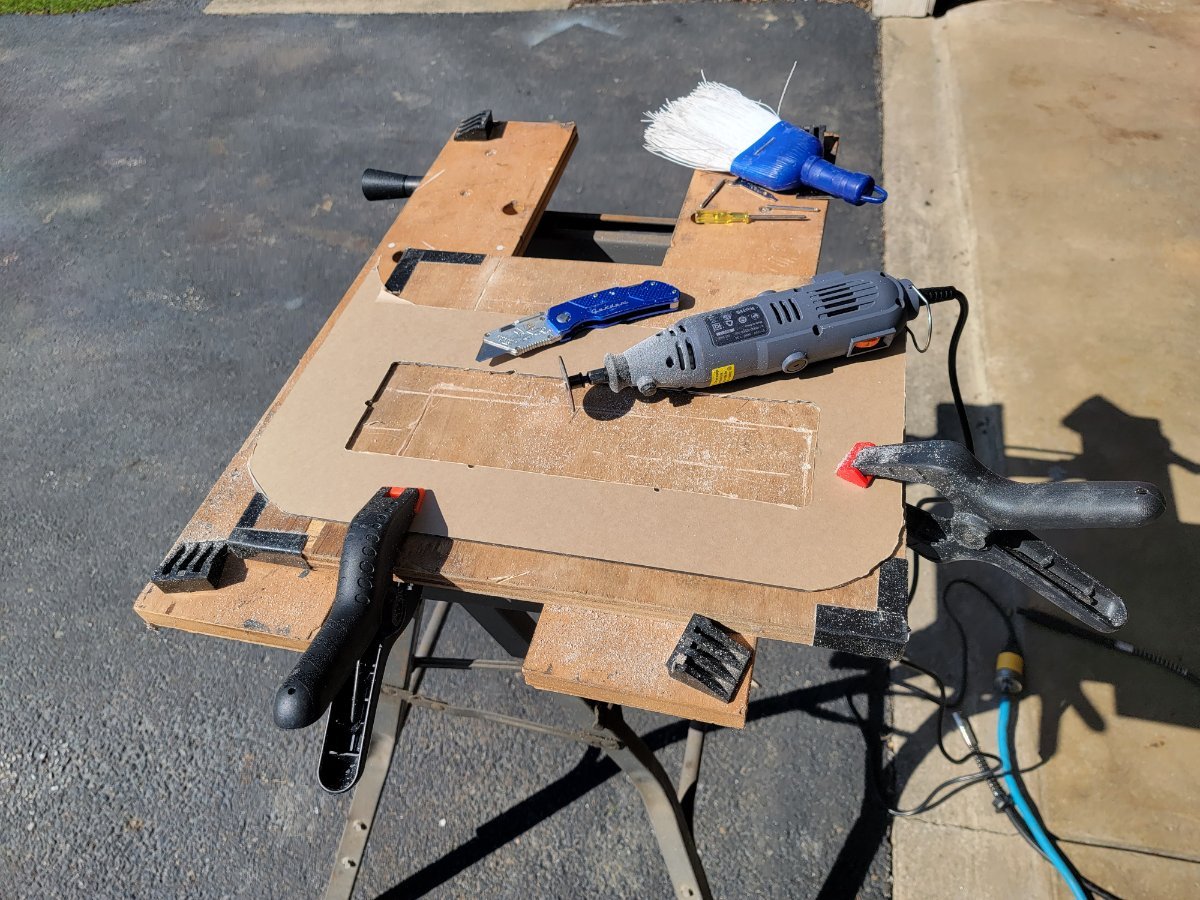
A list of the items I bought to complete the project. 1. https://amzn.to/3JVHMJU 2. https://amzn.to/45bSlqw 3. https://amzn.to/3uQgyjC I also used some Duck Nano Tape from Walmart to hold the vent in place and to be waterproof. I used these Dremel cutoff wheels https://amzn.to/3vjIjju, but you can use whatever tool necessary to cut the plexiglass. Some people use a jigsaw for plexi, but I don't own one. The Dremel with a long flexible shaft made the work easy, especially for the center cutout. It did take some time to get the measurements correct but I went with 16.5" for the height. I imagine you could make the width any size you want. Please wear safety goggles and a mask as the plastic gets everywhere! Good Luck.. I'm super excited in any interest. Hopefully with the rain we're getting today, I can report back with positive results.
-
I tried unsuccessfully to rotate the pix! Hopefully a moderator will step in and help me out!
-
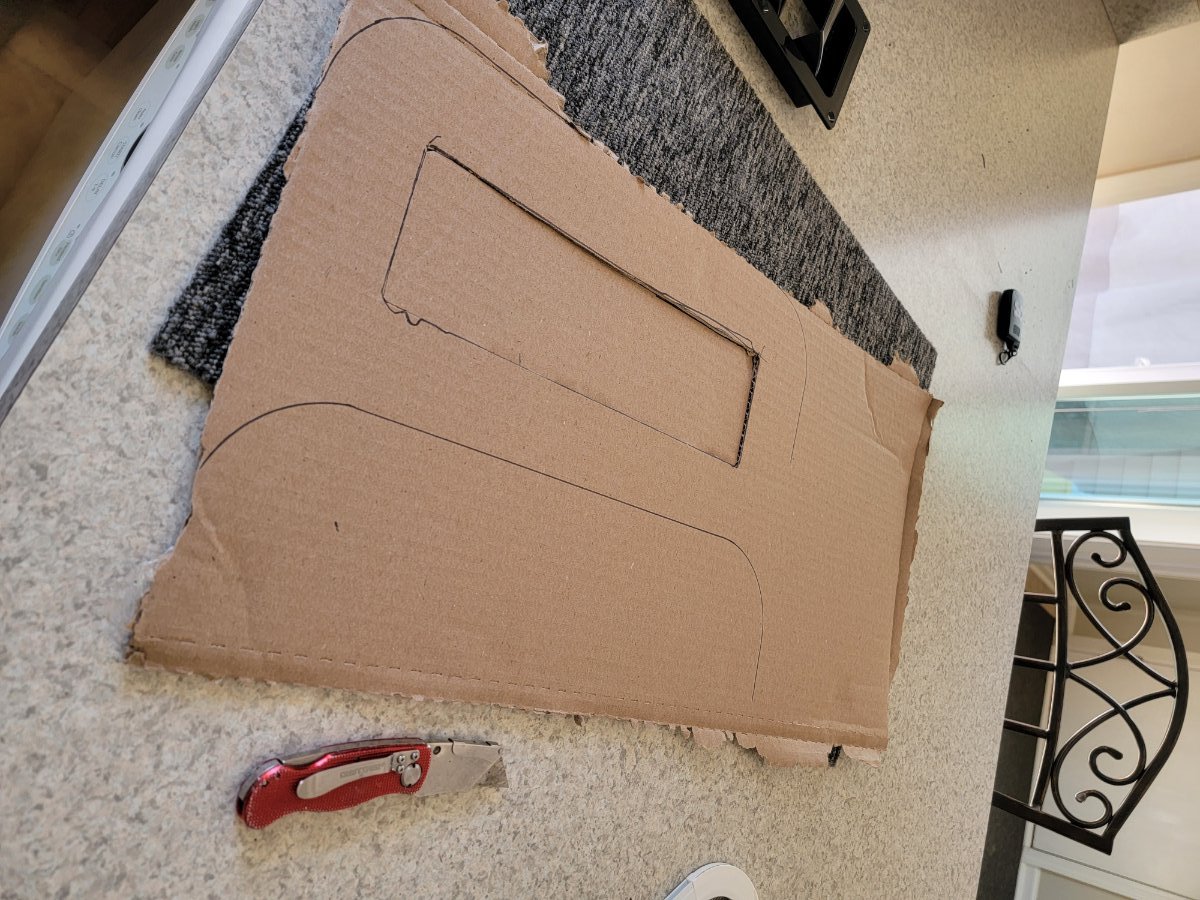
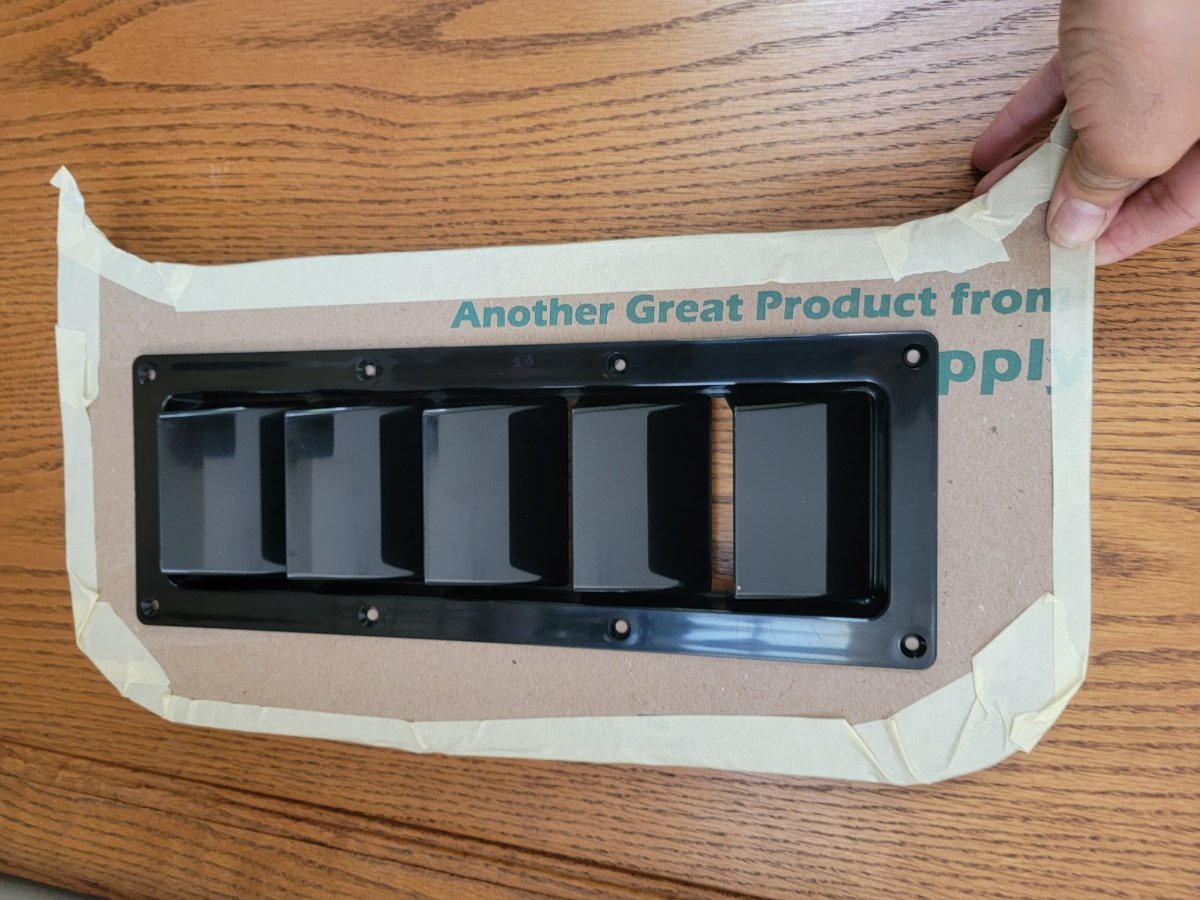
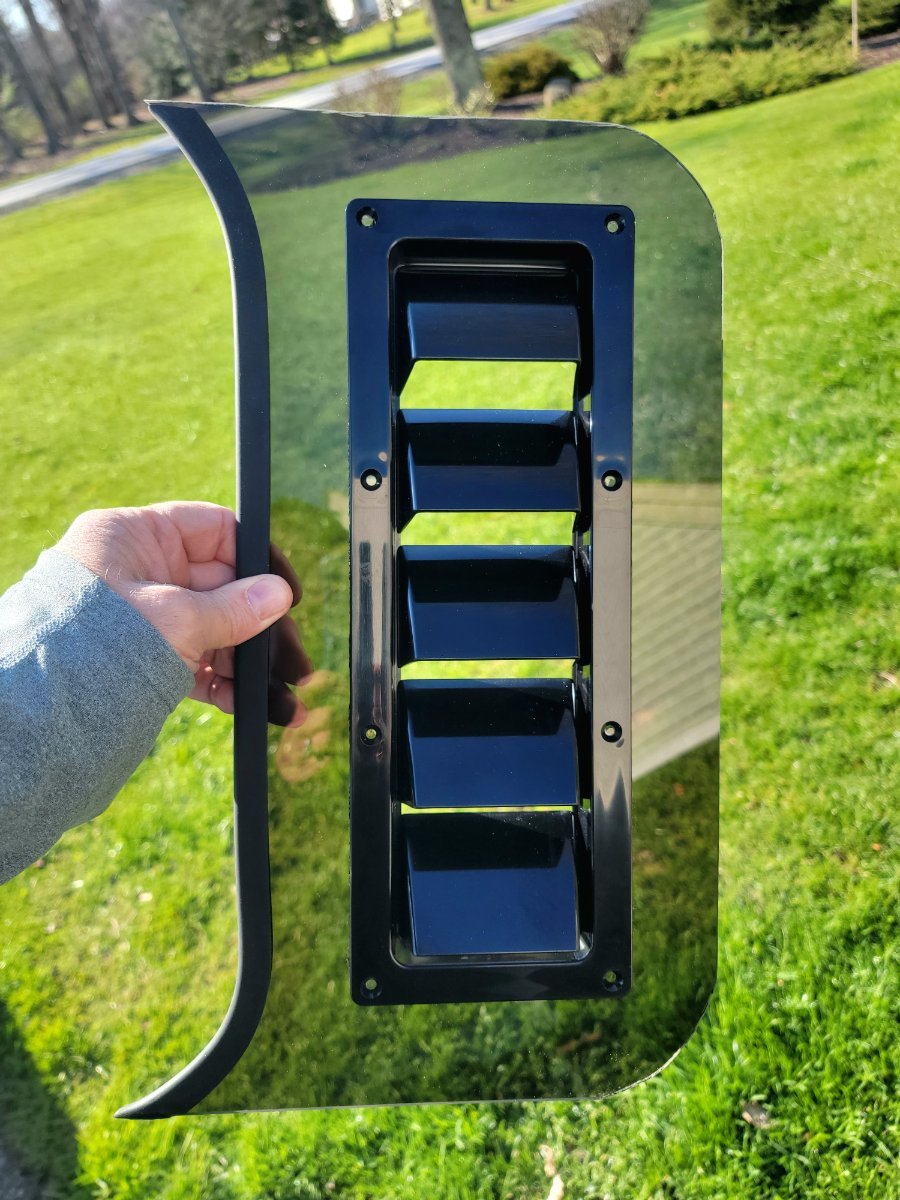
I don’t even know when Airxcel (makers of the Maxxair Window/Maxx Louvered Window Vent) stopped production (maybe 2015) but I was one of the lucky ones who purchased a couple from Little House Customs for use on my Casita. Right before putting OCD for sale, I removed them for use on the ILOVHER. I consider myself lucky as there are still current threads about owners with radius style sliding windows who want the ability to open the windows in the rain for that much needed airflow. The company apparently doesn’t see the need to start production and maybe our fiberglass market is just too small to justify a rebirth. Occasionally, I’ll see a couple pop up on Ebay but they go for a mint..sometimes upwards of $150 plus shipping! I have followed the topic with interest because one of my vents is spider cracking..probably from UV exposure and vibration over ten years. It’s still hanging in there with a bit of FlexSeal tape! I stumbled across a gentleman on Fiberglassrv who was 3D printing a drop-in two piece vent in three colors and sent me info on his prototype. Here is the link to the discussion and a picture of his 3D design: https://bit.ly/3JNotT5 I was emailing him back and forth in September of 2020 but my understanding is that he’s dropped off the planet. He was charging right around $80 for one. I’m not sure how many people were able to purchase one but I never did. I decided to put my mod brain to work and came up with the design below. I will eventually make another one for the curbside. I really enjoyed the process and it wasn’t terribly expensive to do! (about $50) in materials. PM me if you’re interested in the material list.. The vent is made out of a black boat louvered ventilator. I got the idea from a friend who had something similar on the hood of his ATV. I used a piece of ⅛” smoked plexiglass and the window screen as a template. The plexi was cut with a standard Dremel tool cutting wheel. The edges were trimmed with rubber edge trim and the vent is seated with a waterproof nanotape. The only downside is having to install the vent when it’s raining outside and removing it before travel…that’s where the Maxxair vent had the edge! You simply slide the whole thing upwards into the upper track and it fits snug and water-tight. The other bonus was that I didn’t have to add screening as the current screen still closes with it in place. This was really fun to do and I’m super stoked to test it out!

-
That's impressive! My understanding is that treated lumber isn't what it used to be and I've actually had some split. We had part of our deck replaced last summer and it's already showing signs of warping!
-
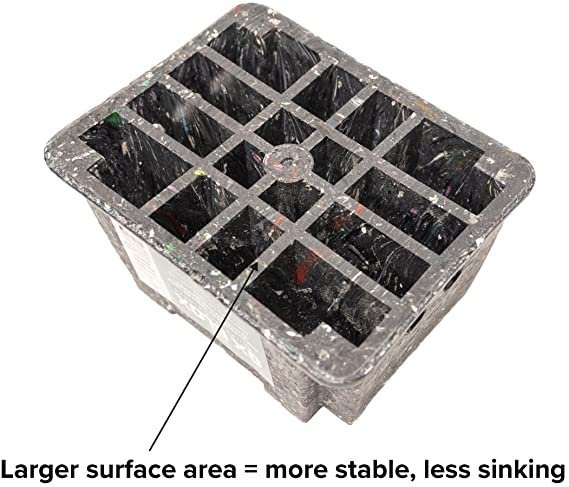
Weighs 9#
-
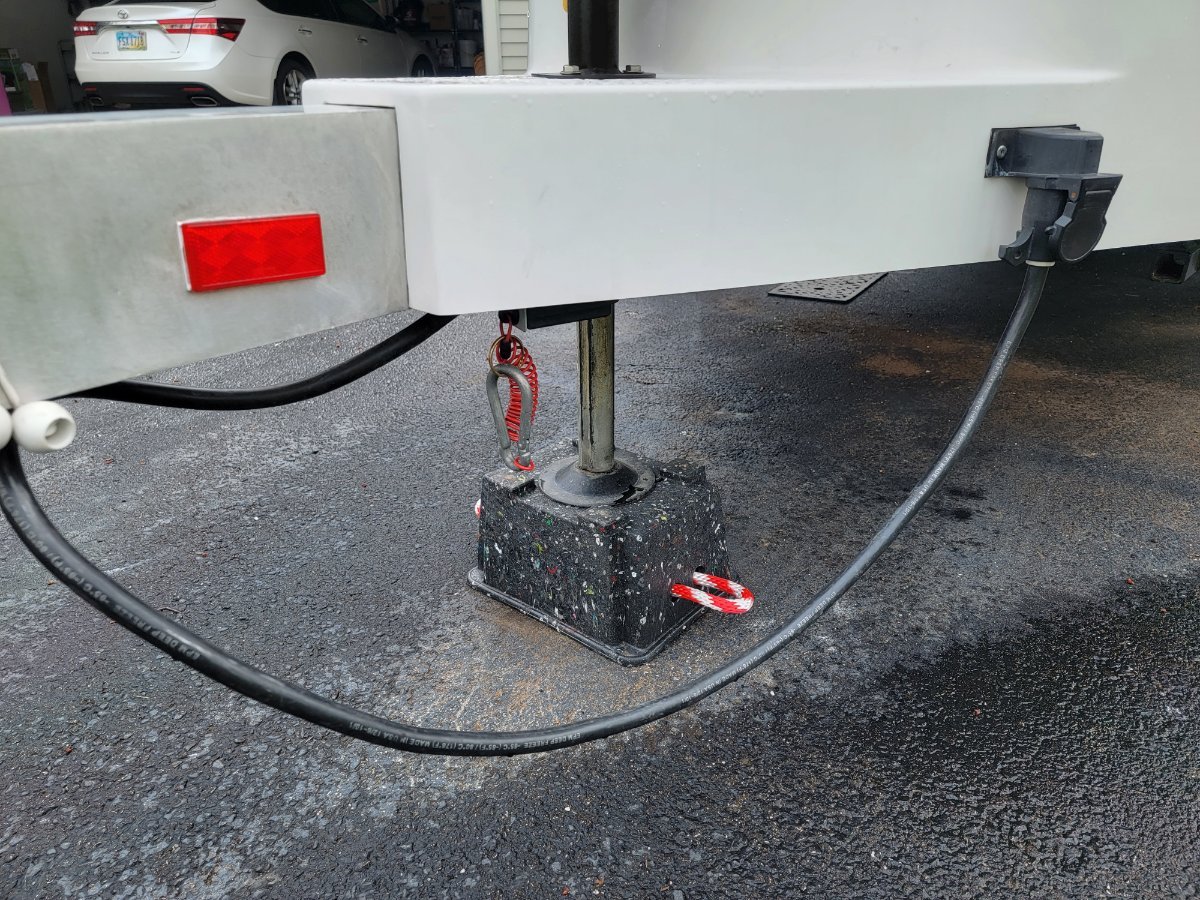
Just wanted to share an item that I've found recently that I'm pretty impressed with. I have used various pieces of treated lumber in the past and will still carry a few for sloped sites where I need to lower the bow more, but I recently was looking for a better (and safer) option for the front jack post while parked in my driveway or at level sites. It's called an Ox Blox. They can be purchased in a pack (4) for the rear stabilizers as well. I only ordered one for now to test it out as it's a little pricey for a hunk of 9# plastic, but so far, I really like it. It can support up to 10K pounds. I added the knotted red rope handles for ease of use. I know there are other options like Andersen but I'm liking it's low profile and the recycled plastic. https://www.amazon.com/Trailer-Camper-Blocks-stabilizer-Supports/dp/B09DMM51FP/ref=sr_1_1_sspa?crid=2QDUHSRGXH4DQ&keywords=Ox+blox&qid=1649865895&sprefix=ox+blox%2Caps%2C178&sr=8-1-spons&psc=1&smid=A2VI3MSVP5BC79&spLa=ZW5jcnlwdGVkUXVhbGlmaWVyPUEzR0dXVTcwMUFBVFJDJmVuY3J5cHRlZElkPUEwNzg3NTkzMjk4MVVISThCUE1WRCZlbmNyeXB0ZWRBZElkPUEwNDgwODAwMklGNEtXWTNDVzRLTSZ3aWRnZXROYW1lPXNwX2F0ZiZhY3Rpb249Y2xpY2tSZWRpcmVjdCZkb05vdExvZ0NsaWNrPXRydWU=
-
 This is one of my worst nightmares! I am so happy you and your loved ones are alive! I have noticed in recent years how many people are distracted and crossing the centerline. I see it and am on the lookout all the time, even within five miles of my house! I can't even imagine the terror of rolling with camper in tow. Blessings to you and your search for a new Ollie 🙂 ♥️
 -
Well then! Back to the drawing board as I DO have the Dexter E-Z flex Suspension! Now I'm completely confused! My goodness..does it have to be this hard??
-
I did receive a timely response from Jason Essary: "The preferred method for a dual axle camper is to use an EZ Jack tire chock. If you do not have an EZ jack chock then locate the closest frame point, to the wheel that will be removed, and place cribbing between the frame & jack so that the pressure is spread across the cribbing" I do in fact have the Andersen Rapid Jack from my Casita days in addition to the smaller Andersen leveler which I use for the front tire for side to side leveling on the ILOVHER. I guess I was NOT thinking! Makes perfect sense for roadside flats or bearing failures (which I hope doesn't ever happen to me)..DUH!
-
Yeah, you're right! My Dad simply left me out of the mechanical stuff and reserved his knowledge for my brothers. He died when I was 21 so I never got to ask him these things now that they are important. The brothers..well, they live in other states.
-
I didn't mean to revive the beaten topic as I've noticed this has come up time and time again through searching and I know there are a number of variables that would predicate different jacking methods, but since I'm a girl with limited knowledge, I'd like to feel confident lifting the trailer in the right spot whether on the side of the road or in my driveway. I have a 3 ton floor jack to use for in-driveway maintenance or rotations, but obviously wouldn't have that available on the side of the road. I have a 2 ton bottle jack that I could use roadside if the onboard jacks shouldn't be used for flat tires.. So the question is the spring plate the right spot if I don't have the steel subframe? Thanks for all of your help!
-
I do have a service ticket for May. I'm in a place where learning to do my own maintenance and/or repairs is important and I excite for the learning experience. However, my tireless research on the forum and elsewhere has left me a bit confused. There's many ways to skin the cat I've gleaned - and since Olivers are constructed differently in different years, I'm having a hard time nailing down how to properly lift my ILOVHER. My Casita (OCD) was simple. The Oliver service bulletin doesn't seem to apply in my case. I will be traveling quite a distance to my first rally and these type of things are just worth knowing if I end up on the side of the road. Thanks for all of your help!!
-
I know I'm reviving an old thread but my '17 does not have the steel overlay forward OR aft of the tires as shown in the photo above. I know because I used a magnet to see. Am I safe in just using the spring plate to place jack stands under while I do bearing, lube and brake work??
-
This was removed, properly sealed and modified last summer
-
This was exactly how I was able to identify the moisture, by removing the left partition in the attic (and the associated electrical outlet and antenna box) to get to the base plate of my corner TV and mount. There was no moisture in the main attic itself...just on the ceiling behind the white reflectix in the dark cauldron of tangled wires! I did not want to mess with removing wires or cords that someone after me might want so I they just got zip tied and neatly placed inside. The moisture was fairly prevalent on the ceiling surface. I know it's not my rear upper taillight as that was properly sealed this past summer. I will check it again in a few days when the weather changes. Thanks for your help.





.jpg.e487fb93989a0ed2f1cd97a65cac9fe5.jpg)
.jpg.1838d6eb0f0c9fdc36d12f5d4c5baf74.jpg)
.jpg.acbfa6336a415fed9ee10889023bcb96.jpg)
.jpg.545f36a4110db19a8aa99ab70042e82c.jpg)
.jpg.19fad7e3f5f2ac34b11f4c916b938c6d.jpg)
.jpg.fa09406d864220321cf729fde0d4a2e0.jpg)
.jpg.20fe0cd48c1264c0e1103298d5012524.jpg)
.jpg.9e364cdec4abe105ea196acc9b90d93c.jpg)