csevel
-
Posts
215 -
Joined
-
Last visited
-
Days Won
5
Everything posted by csevel
-
Yes, this was my concern as well when considering replacement. You'd have to be diligent in remembering to remove them for travel and stand in the rain to install. Not ideal but maybe a good enough replacement when my Maxxair ones brittle-out! I've got hairline cracks and have repaired them with clear flexseal tape. All of my screws are cushioned as well with rubber washers and NOT torqued too tight. As far as cleaning, I'm thrilled with being able to open the windows in my Oliver and clean from the inside! Makes it so much easier than when I had to take them off of my Casita due to lack of non opening windows!
-
If anyone is looking for vents.. There's a guy on the Fiberglassrv forum who has 3d printed a vent in his own design. If you private message me, I can dig that email/ info up and share. They work slightly different as they slide into the track and are not permanently affixed like the Maxxair but they come in three colors.. black, white and smoke. I certainly knew the vents were the first thing I was removing before I sold my Casita! But ~ I will say that eventually mine will need replaced with this alternative, as the Maxx do get brittle. I have a couple hairline cracks already!

-
I just received my estimate for items to be worked on. Apparently, they still do the water pickup mod..but it's pricey at $400. Might necessitate a local plumber instead of a roadtrip. Not exactly the 'warm and fuzzies' since this is a serious design flaw of the fresh water tank.
-
I was in love since the day I saw one in person about five or six years ago. I was content with my Casita for ten years and never expected to ever own an Oliver. Sadly, we too had a hard time swallowing the cost as it dipped heavily into our retirement savings. The thing that sold my husband was the resale values of fiberglass and finding one close to home eventually sold us. We were lucky! I expect this to be my last travel trailer but I feel confident we can recoup much of our investment if something springs up. Good luck !
-
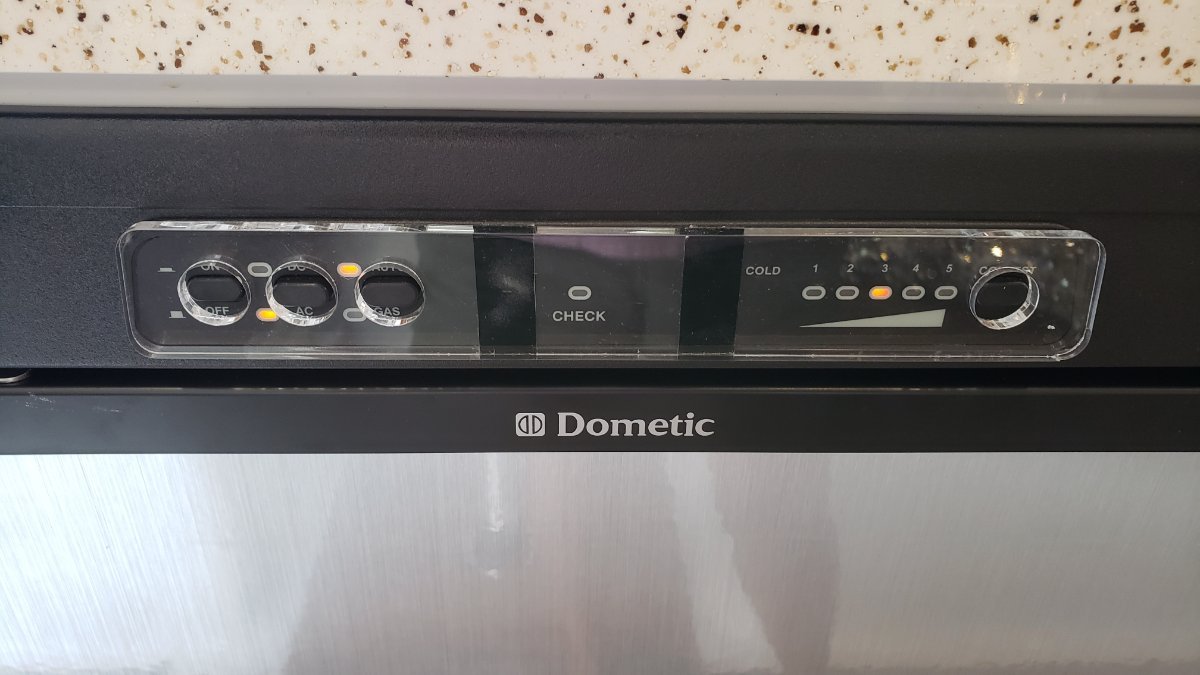
Yes, I've tried that. Don't really like my fridge being much out of level. I've read you can be up to 6 degrees off on an absorption fridge but I find it a design flaw of this trailer and would really just like it repaired. Sensor is basically useless with it until you realize 38% means empty.
-
That would be most unfortunate as it's one of the main problems I have with my ILOVHER. Not being able to utilize 10 or more gallons of water in a 32 gallon tank while boondocking is inconvenient and a pain to do multiple times during even the short trips! Major design flaw. I started my service ticket and am patiently waiting a response.
-
Exactly the reason it's on there 🐶
-
Hi All, I've been thinking about a visit to Hohenwald for service/potential upgrades on ILOVHER and wanted to know (prior to starting a service ticket) what your experiences have been with planning a visit. It's a long haul for me and I really don't know anything about how they handle service to used Ollies but have a number of questions: 1. Where do you stay when your trailer is being worked on? I saw in a thread that there may be room on their lot for service customers but if they have your unit for a few days, is there any place to stay close by to possibly tent camp? 2. What things are included in the general service and is it worth the price? Not sure if I should just contract someone local for brakes, etc. I know they would answer my questions readily but I thought I'd ask anyway. 3. Is there a long wait time for service appointments? 4. Have you been happy with the service you received? I really have a short list of items I'd like addressed (definitely the fresh water pickup) but I feel a visit with the infamous tour might be enjoyable! Regards..
-
 I too do not drink from the fresh water tank and bring my own. My experience with different water sources (aside from plastic taste) is that most campground water tastes terrible! Mineral content and rust come to mind. At the NF campground I managed the water was tested every day for public safety however it always had a tinge of yellow from the two sixty year old 50K gallon tanks and wasn't the best tasting. This begs the question about cleaning out the fresh water tank. Obviously, sediment settles. How on earth is one to clean the bottom of the Oliver tank? I have first hand experience with a clogged fresh water outlet. The black gunky grime/algae from the stagnant water clogged the outlet, the bathroom faucet and the pre-filter! I used a combination of bleach first then vinegar to get things rolling again...but I hate the idea that there is rust and sand sitting flat against the bottom of the tank. On my Casita, I added a waterproof marine deck plate that allowed me to completely wipe out and clean the tank at the end of a season. There was ALWAYS a film of rust no matter what sources or pre-water filtration I used attached to my fill hose. I hope that the tank in the Oliver doesn't ever need replacing due to a build up of sediment. I can't even fathom how it would be done. I will continue to do a fresh water vinegar treatment every year and try not to lie awake at night about sediment. I don't intend to ever drink out of the tank unless I'm dying from thirst.
 -
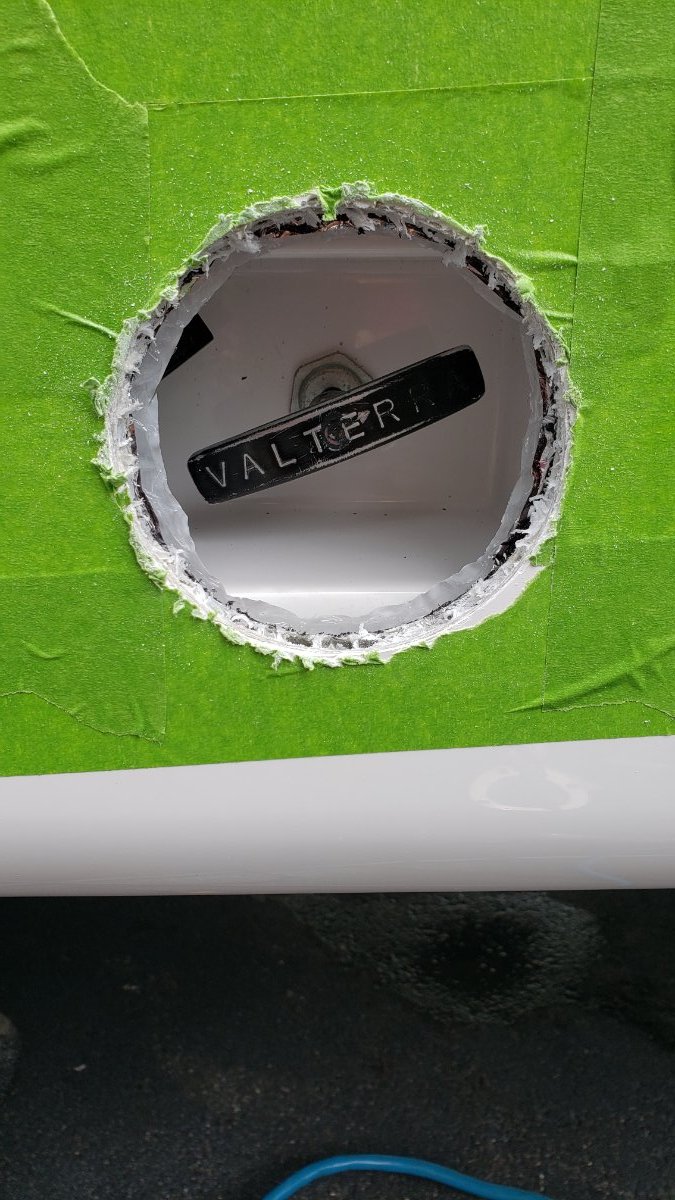
I didn't want to cut and have the drill twist up into the insulation so I just peeled it back to find the center and used some spray adhesive to put it back when the job was completed.
- 17 replies
-
- 4
-

-
- modifications
- drain
- (and 1 more)
-
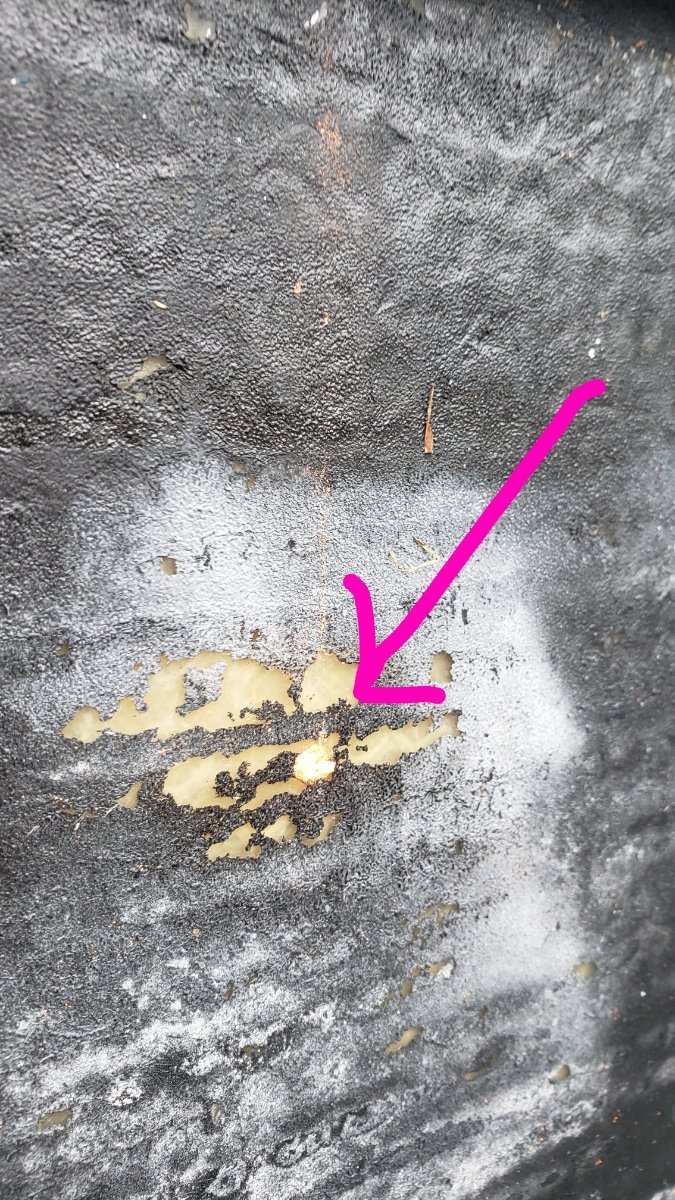
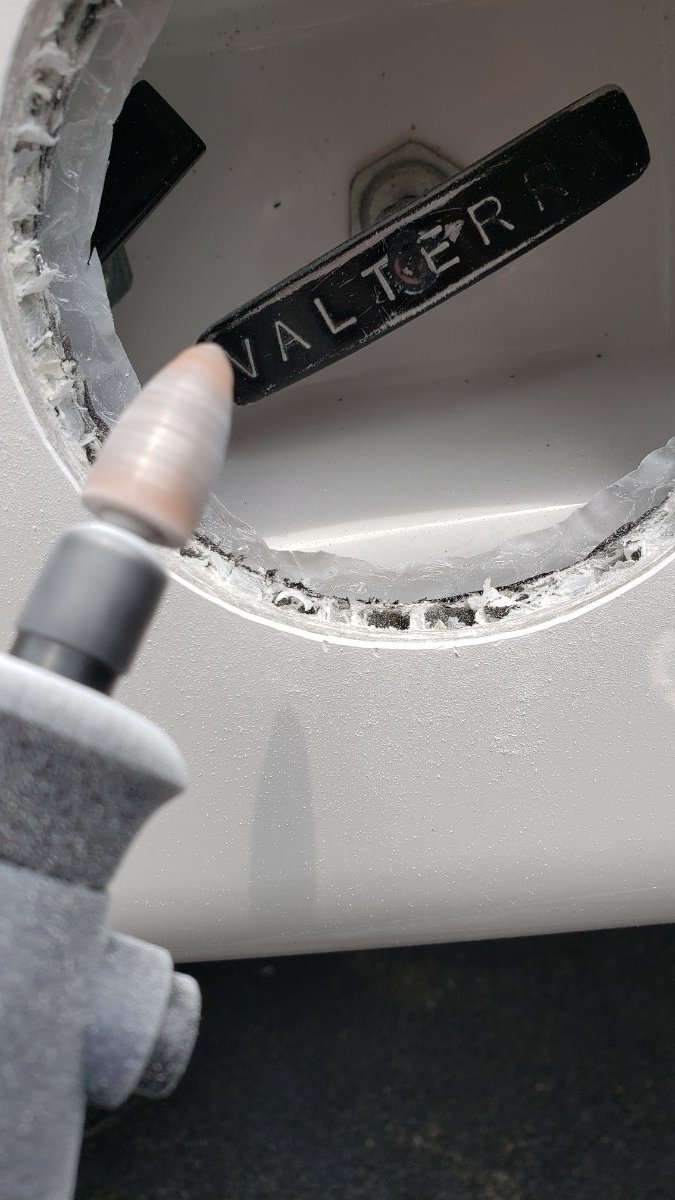
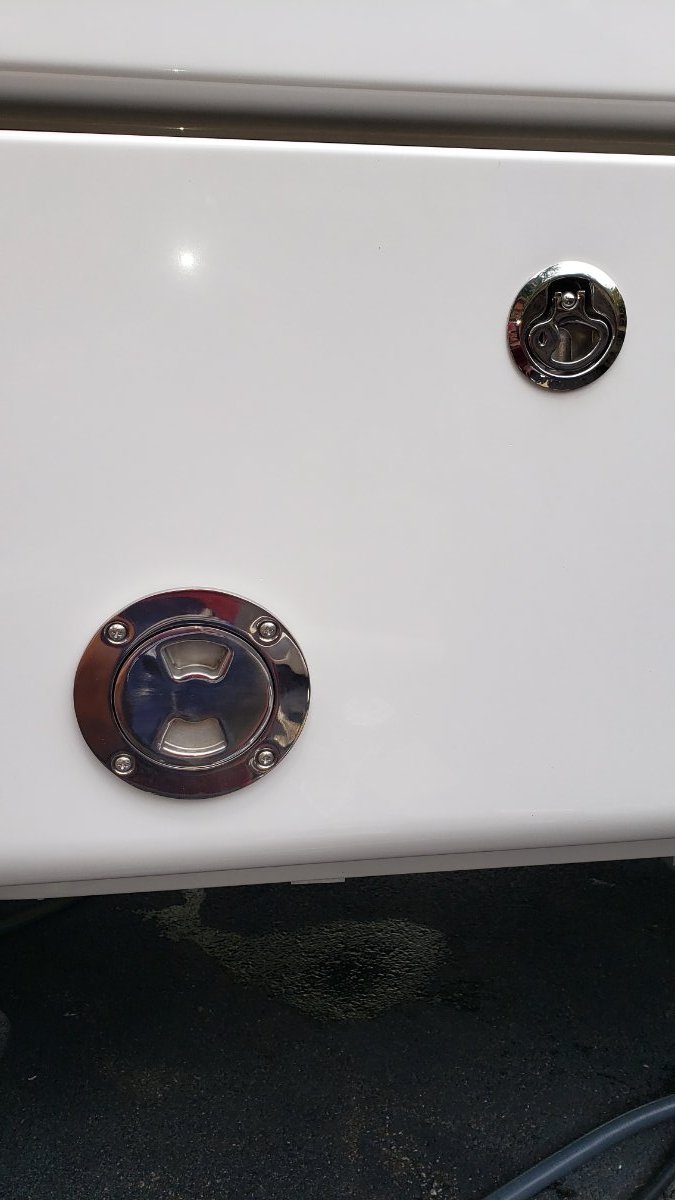
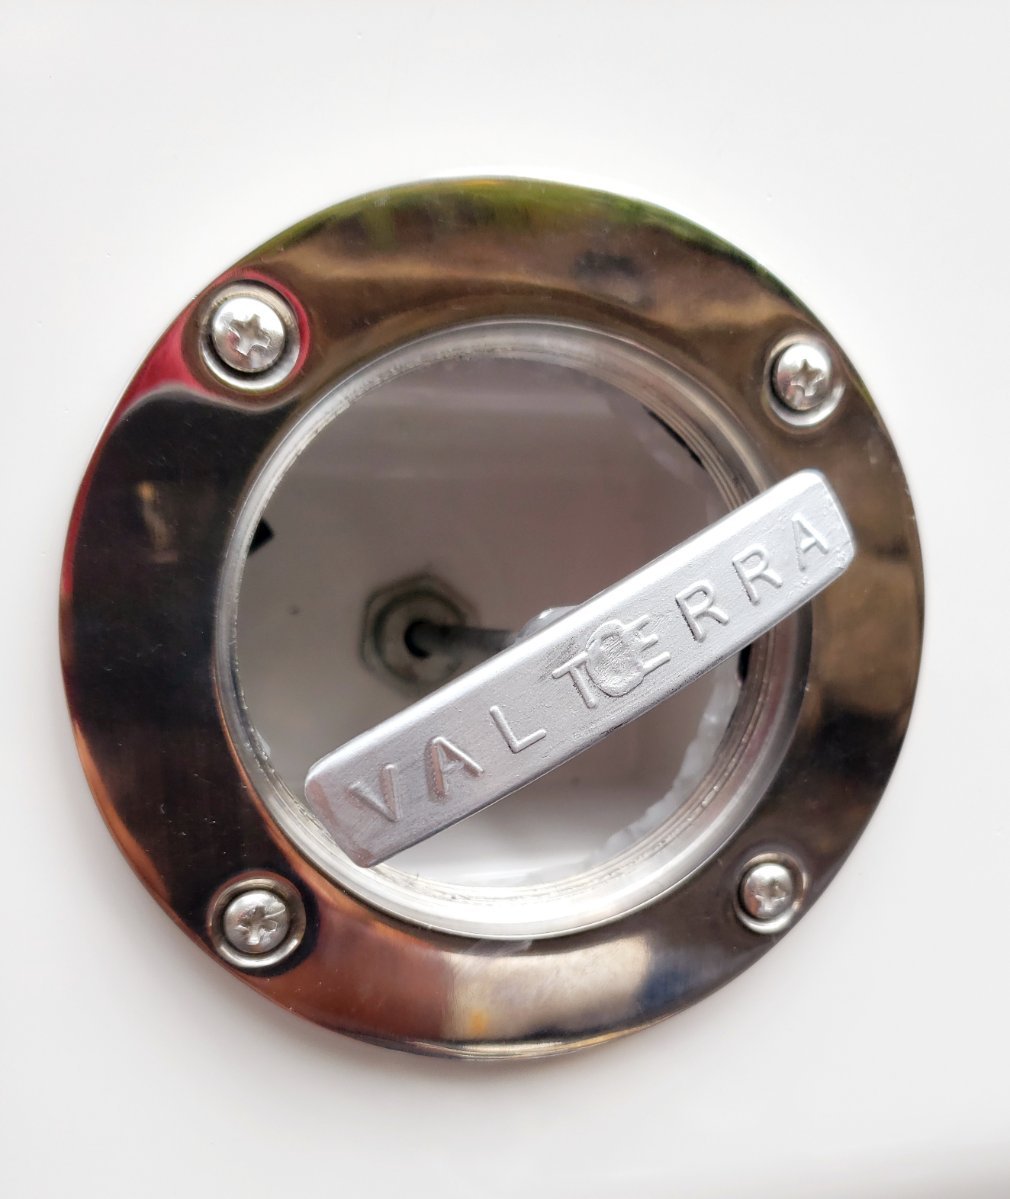
Landrover's mod has been high on my mod list since the day I brought ILOVHER home. Imitation is a genuine form of flattery they say! I have a sewer clean out near my driveway and I really wanted to be able to run grey into it while keeping the door shut and locked. I have a few tools/cords that I don't want to walk off. Keeping the door open while raining also seems counterintuitive. I admit to showering in the trailer and driveway camp as we get frequent power outages here. Something that I was worried about was exact measuring. I came up with an idea to use a pencil eraser super glued to the middle of the handle. I added bit of chalk line chalk to hit the inside of the door to find center. I'm happy to say it worked well! Attached are the photos of my progress. I'm a girl and these kind of things freak me out a little but I'm happy to say everything worked out perfect! I used butyl tape around the marine fitting and stainless screws and nylocks nuts. I decided to paint the handle silver as well since the shortening and grinding of the handle (with a Dremel) made it look ugly. I'm really pleased with this mod.. THANK You Landrover!
- 17 replies
-
- 9
-
-

-

-
- modifications
- drain
- (and 1 more)
-
I hate mine too but I'm lucky that my counters are more ivory so it's not as distracting. Someone here recently painted theirs with Krylon, but it looked to be quite the job. The frames look easy but not the interior parts. I also read that total replacement is somewhere in the $500 to $700 range. Too expensive for my taste. Let us know John if you ever tackle it; if anyone can do it, it's you!
-
The cost of doing too many "mods" - the Overlanding Syndrome.
csevel replied to John E Davies's topic in Ollie Modifications
I did the same thing with my Casita (OCD) by keeping a spreadsheet of what I was actually spending on my hobby. I came to be known locally (our tiny OH rally) as the 'Mod Queen' I didn't do it for notoriety but to substantiate my selling price if I were to sell. It worked well in my sale but also allowed me to share all I learned by logging websites, videos and sources to share with others. I haven't done it with the ILOVHER because I'm fairly sure this is will be my forever trailer! -
I ordered a replacement plate. $17 with shipping is a bit steep for something that apparently doesn't last very long. The negative reviews on Amazon say the plate has a very short life expectancy...but I drank the kool aid and I'm pleased. Easy install. Hopefully, it won't crack again.
-
We bought this generator too from Sam's Club back in early April for the $399 price. We do have the MicroAir Easystart. We figured out that the water heater draws 1200 watts so we had to shut that off before starting the A/C. We bought the grounding plug and so far it exceeds our expectations as well in terms of low decibel sound and power.
-
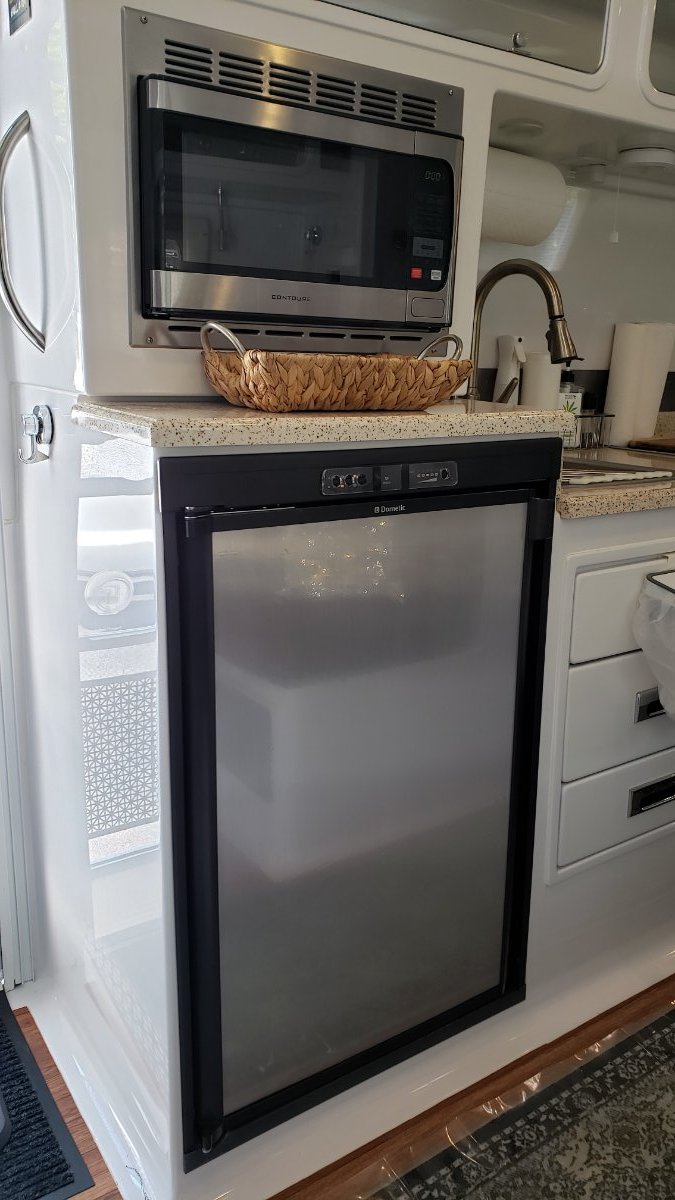
I decided to reinforce the fridge hinge with the LHC reinforcement bracket. Since my Dometic is the same primary design as the one that was in my Casita, I know the benefit of strengthening that part of the door. I've know a couple owners who have broken their door and Dometic's prices for parts is astronomical! I added the button guard in addition. As far as the fridge front, I added a metal decorative sticker to the front panel for aethetics and to try to keep the front from fingerprints. I just didn't like the black. I don't recommend the film I bought as it was a bear to install without a few bubbles and another person to help!
-
I have extensive experience with Krylon from my days with my Casita. I think the ILOVHER will probably end up with a new quality weatherproof cover that will open a bit farther. Thanks for your input!
-
Hi All, I was thinking of replacing the exterior outlet cover with something more user friendly. Has anyone replaced theirs? Not only has mine yellowed but I don't find it easy to flip open and insert plugs or cords with transformers/adapters as it doesn't fully extend or open. I had something like the attached on my Casita and it worked just fine. Any opinions or experience appreciated!
-
I used a square dowel rod cut to size and used Gorilla construction glue to hold it to the door. After it dried I just used screws to affix the holder to the dowel. This is the link for the bag holder. There are many choices in design but this worked well for my needs. Here is the link for the rack. https://www.amazon.com/dp/B00U86KJG6/ref=cm_sw_r_u_apap_KJZLBqNUa9LkA Happy modding!
-
I'll look in to these..I know how crazy expensive the parts are for Dometic. Having a stretchy bungey between these might just work!
-
I understand the benefits of most of these things but I tend to try to be as level as possible (within 6 degrees) for the absorption fridge. I'd like to figure out a way to keep the door from swinging open so far. Thanks!
-
Has anyone modded the fridge door to stop it from swinging so far open? Whenever I have items to load into my Dometic, the door wants to swing way into the entryway that I'm afraid it's going to break off! I've already installed the reinforcement plate from Little House Customs on the top if the door but I'd like to have some kind of door stop in place. In my Casita, the flange on the outside prevented the door from swinging out like this. I thought about a nylon strap fixed to the bottom but I can't seem to figure out how to install it. Thanks in advance!
-
Stony Fork Campground near Wytheville, VA.. A real gem! Nice deep sites (only 40+), multiple trout streams, clean restrooms/showers. received_971523106724921.mp4
-
I know that there are fire bans in many places especially out west but I live and camp primarily where campfires are still allowed. Maybe if I get to go out west again, I'll invest in one of those cute firepits. As far as a blackstone, I'm old school and still like my old Sunbeam grill, tiny and portable and my trusty cast iron pans!
-
Maybe someday I'll buy a Blackstone or a firepit but for the most part I carry a five pound tank and almost always set up near the picnic table. I imagine at a concert, festival or car race having a way to cook near your trailer would be nice. If I have to re-plumb the whole thing, I don't see the original function. I'd be interested in the parts to do it however in case I want it in the future. Thanks for your help everyone!
.jpg.097cbbd85abad185ecbd99d79f515f0a.jpg)