

csevel
-
Posts
216 -
Joined
-
Last visited
-
Days Won
5
Everything posted by csevel
-
I removed the entire toilet as in #2 of my post and there were no cracks in the closet flange.
-
I've seen your mod and it's truly something that Oliver should consider from stock! It was on my list..Brilliant!
-
I was sort of trying to avoid opening that area up. Looks like I have another mod on my hands!
-
Yeah, I'm an avid 'flusher' even with no TP in my tank. I'm pretty sure this is black tank odor..in my opinion, they're both bad but distinctly different. I'm not a fan of the pine scent in Pinesol so I use their other scents with addition of the Calgon beads...but it's not a cure-all.
-
I have access to a camera snake; I may try shooting it down the vent before I start ripping things apart.
-
Yeah, I regularly pour my new tank treatment down the shower drain and of course valve lubricant after every dump. This has me so perplexed!
-
So I feel like I've exhausted my options in tracking down a black tank odor so before I call the mothership, I'd like to solicit some opinions here. I've gone through all the Oliver forum posts relevant here and in other RV places on the web. I have a standard porcelain toilet and towards the end of last summer and this summer I've had an issue with an on and off smell, especially with the MaxxAir fan on and of course in warmer weather. For the record, I DO NOT put toilet paper in my black tank EVER and don't have any tank sensor issues. I'm also aware that gray tank smells can mimic black emanating from drains. I have been using Happy Camper treatment for over 7 years and have been happy with it but I've been following a company called KLEENTANK who advise not using enzyme treatments due to sludge forming in the lines. https://kleentank.com/throw-away-your-rv-tank-additive-use-this-instead/ so I've been experimenting with their DIY holding tank mix this season. I also use plenty of water (even though I hate to waste water while boondocking) and wait to dump until I'm at least 80% full. Here are the things I've done to track and hopefully fix the problem to no avail: 1. I removed and replaced the ball valve seal on the toilet even though it was holding water just fine. 2. I removed the entire toilet from the base and replaced the seal where the pipes meet the closet flange. It's weird that there's just a pipe to pipe connection there. Not exactly sure what the seal does except maybe prevent leakage if the black tank overflows. 3. If you know me, I have OCD and completely cleaned the toilet by turning it upside down and sterilizing every nook and cranny. A yucky job but I ain't scared. 4. I climbed on the roof and made sure no obstructions like mud daubers or nests were in the vent pipe. I even poured a weak bleachy solution down the vent to see if it would help. 5. I've taken a good look under the dinette seat closest to the bath to see if there are any loose connections on steel bands or any other possible loose connection. I see no evidence of prior leaks. There is a slight black smell but I assume some smell can come from the gate valves. I'm using a commercial ozone generator today in that area. 6. I sealed/blocked off both the shower and sink drains to try to isolate the toilet vent and still have smell. The only thing that I can think of is that I haven't removed the face plate from the bath vanity to see if the vent pipe has come loose or something. I hesitate to do this as Oliver repaired my courtesy light and did an outstanding job on the exterior caulk which I'm pretty sure I won't be able to duplicate. I guess this would be a good time as any to make that area accessible but I was hoping not to tackle that just yet. Any other insight would be greatly appreciated; I might be missing something obvious. Regards, Claudia
-
Two rolls of paper towels and seventeen pair of gloves, but it's done. This helped me a ton:

-
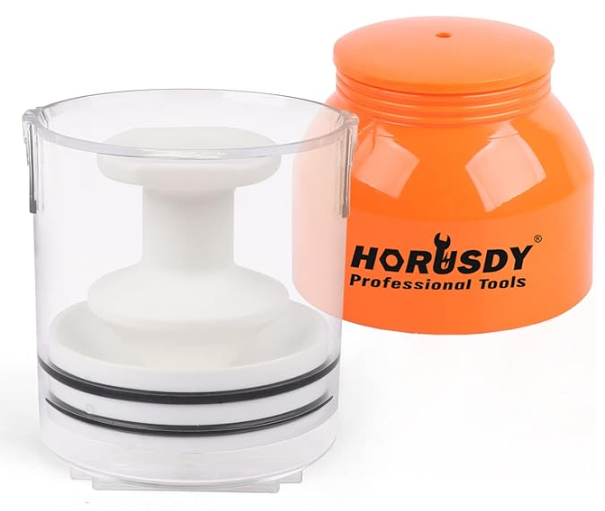
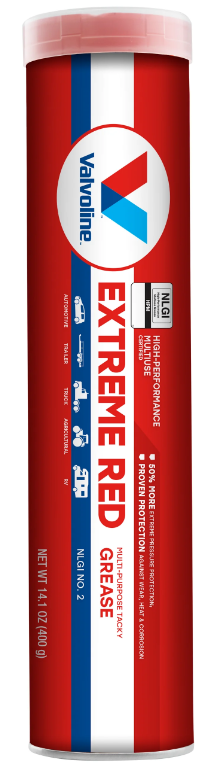
I realize I'm probably in the minority, but I didn't find that the Redline CV2 lasted any longer than the Mystic or Lucas. I just repacked my bearings last week and the grease looked a bit lacking after only 9000 miles. Much like DewDev, I couldn't find the CV2 readily available locally and it's become a bit expensive online. This go around, I'm trying the Valvoline Extreme on the bearings and zerks.
-
I'm considering spray fabric paint for the night shade material and also painting the frame. With careful taping and prepping, I think it can be done.
-
Spent some time on the search function to find the member who painted their blinds from almond to white and just can't seem to find it. I really want to change the blinds out but I can not justify the $900 for a color change. Mine are functioning just fine although they need a good cleaning, have random pinholes and are essentially ugly! Anyone out there know if this is a doable mod and the link to the how-to?
-

No Cold Water to Toilet or Bathroom Faucet
csevel replied to csevel's topic in Mechanical & Technical Tips
My goodness, you guys are making me blush... I'm just someone who doesn't mind challenges that involve my interests, whether physical or mental. I research and learn. Doubt for me is always removed by action. btw, my Casita was named OCD for "Obsessive Casita Disorder" ..Ha Thanks again everyone! Regards, Claudia -
No Cold Water to Toilet or Bathroom Faucet
csevel replied to csevel's topic in Mechanical & Technical Tips
Soo.. I have had great success! Between the vinegar and low pressure air in the line (about 25#) I was able to dislodge whatever was causing my blockage! Just so everyone knows, I'm by no means a first timer with RVs. I've had various trailers over the last 15 years and I'm not new to tools, compressors, trailers and trucks! (owned an excavating company with my ex) I have even done brakes and bearings on the ILOVHER. I don't however know much about electrical and plumbing, but I know enough to come here for expert help whenever something is outside of my field of knowledge! I thank you JD1923 for being up at midnight helping me out. I am very grateful and now have a handy tool for winterization or if this happens again. I don't normally filter water from my house as I know my water source runs through a softener but anywhere else, I use one religiously. I do use a water specific hose that is stored and secured end to end so no real chance of bugs/debris. I'm of the idea that my hot water tank may be backward siphoning or creating a vacuum and dragging junk into the cold line when draining the fresh water tank. I've read this on a few other RV forums so from now on, I'll just bypass before draining since I'm already under the bed moving the valve! I annually change my anode because I know what it looks like when I remove it! To each his own but it is cheap insurance and not hard to do. I usually have some degree of anode degradation and the typical sludge that I flush and brush out. Water quality differs at every campground. I use magnesium over an aluminum HW anode. Again, I'm super thankful to my Ollie fam for supporting me and getting me back into the woods! Thanks again everyone! -
No Cold Water to Toilet or Bathroom Faucet
csevel replied to csevel's topic in Mechanical & Technical Tips
I have a compressor. Going off now to Ace Hardware to get the parts to make your thinga-ma-giggy. After just using some vinegar poured into hose, I've gotten some movement of water in the toilet. I've bypassed the hot water heater and I'm going to also try a vinegar solution through the rear port, let it sit a bit and see if that helps. The aerator on the bath faucet is completely clean and so is the pre-filter for the pump. I'm completely stumped. I hope blowing air through the lines will work and not blow more debri further into elbows or fittings. -
No Cold Water to Toilet or Bathroom Faucet
csevel replied to csevel's topic in Mechanical & Technical Tips
I get both hot and cold at the outdoor shower, and yes the valves are in the normal operating position. Kitchen gets cold water. Nothing changed. When moving the trailer to get tires, it was hooked up to city water. I have well water that is softened at that hose and I like to driveway camp so I use the water system often. Everything was in working order before today. -...and btw, the water heater was cleaned in the spring with a new anode. I do it every year without fail. I was reading on RVLifePro forum that if you use a low point drain without isolating the HWH, you can create a weird syphon that can pull crap backwards out of the HWH into the cold water line. It can then go into the toilet line next time you pressurize and use the system. I never knew this could happen so that's why I probably get gunk at the toilet inlet valve! I drain, fill and lightly sanitize my fresh water tank many times throughout a season! I decided to use a small amount of vinegar poured into the city water hose and have gotten some movement in the cold line to the bath sink and toilet. I'm going to do a full winterization vinegar process tomorrow with the rear port bypassing the water heater and see what happens. Would it behoove me to put a check valve in the feed to the WH? Any other tips are greatly appreciated. -
Of course, right before a trip, something is wonky. I can not get cold water to the toilet or bathroom faucet with city water or the pump! It was working before I moved the trailer today for new tires. Hot water works fine in both the kitchen and bath vanity sink. I removed the inlet hose to the toilet and cleaned what debris I could. (This has happened to me in the past) No luck. If the sprayer/faucet at the bath sink was clogged, I can't imagine hot water would come out, so I did not take it apart. I have cold water at the kitchen sink and at the outdoor shower. Where do I check the cold water lines to the toilet and bath? I may try vinegar in the cold water lines bypassing the hot water heater. .. Thanks for any additional help ..I leave in a day! Ugh!
-
In case anyone was wondering, I went with the Coopers
- 121 replies
-
- 11
-

-
The time is long overdue to replace my '17 ILOVHER tires. I haven't traveled more than 2500 miles in the last year and have put this off long enough. I have the original discontinued Michelins LTX MS2s in the 225/75/16 size. I will not be buying new wheels so what are my options? I know I put Goodyear Endurance STs on my Casita but I don' think they come in a 16s. Thank you in advance for any help and recommendations!
-
Important Update about Oliver Service
csevel replied to Jason Essary's topic in General Announcements
I owned a Casita for ten years and have been a fiberglass enthusiast for longer than that. I don't doubt the build quality of the Oliver, as that's why I upgraded..but also at a significant cost. Part of my choice was certainly factory service and for me, it WAS in the equation! -
Important Update about Oliver Service
csevel replied to Jason Essary's topic in General Announcements
Does anyone feel like the value of their trailer has just been diminished? We spent a good deal of the nest egg on our used LEII, preparing for our future retirement. We have a 2017 LEII with no bells or whistles. No factory solar, no lithium, no inverter, no spiffy white shades, 3-way fridge, basic furnace, basic water heater, porcelain toilet, mirrored cabinets etc. I still love my trailer and she serves me well in how we currently camp. However, our intention was to upgrade items in Hohenwald when the time came for us to retire. We felt confident that we had invested in the service, parts and reputation Oliver provides for ourselves and any potential future owner had our circumstances changed. Service was something we could sell to a prospective buyer. I'm not sure I feel the same anymore. Feeling a little let down and lighter in the wallet. I might have to do some cost benefit analysis. -
I've towed my '17 LE2 about 12,000 miles in two years with my '20 Tundra TRD Sport and find it more than adequate. I think the Anderson WDH is an absolute must with any half ton and I personally wouldn't leave home without it. The issue I have with my TRD is that the extra bells and whistles reduce payload. I pack light but if I were to tow in the mountains out west carrying more gear, I no doubt would want a 3/4 ton pickup!
-
Thank you all for your replys! I sent him screenshots of your most helpful advice! 😁
-
Hello my Ollie friends! Haven't been hanging out here much due to the lovely winter weather we get to endure here in the Northeast. My ILOVHER is tucked nicely away under her cover waiting to go somewhere maybe mid March. My son, however, is a traveling ER nurse and has taken a contract in Madera, California at a Pediatric ER. He has been traveling for three years, an ER nurse for six and has just returned from a three month stint in Guam! This Sunday he leaves again with his 25' Coachman Apex in tow.. He just purchased a '23 Ram Power Wagon and is looking forward to some boondocking adventures. Attached is a RV trip wizard map of the route he's planning. For all of you cross country travelers, do you have any must-see stops, attractions and/or campground/boondocking sites that you could recommend? Any route modifications you would suggest? I wish I could follow him in the ILOVHER but other obligations prevent it and I'd never want salt to touch her! Thank you for any help! *As suggested here my son loves Nature, Off-Roading, Fishing Nut ~including fly, Hiking and Interesting Scenery, Photography, Rafting...the whole shebang!
-
Toyota Tundra enough truck for an Elite II?
csevel replied to Beaver Pilot's topic in Welcome to the Oliver Forums
My understanding from reading the Tundra forums is that there is a bit of anger over Toyota opting out of the tranny cooler on the 20's and 21's. Many have used scan gauge tools to measure their temps while towing and have had high temperature readings. I've owned three V8 Sport 4Runners prior to my Tundra and they all had external coolers. There are a few owners who are opting for adding aftermarket. There are even kits available. I may do this down this road if I ever head west. My son even added one to his brand new Jeep Gladiator Rubicon as he tows a 19' sticky. I think it was a poor decision from Toyota to leave it off the build. -
Love this..wish I would have done this after repairing the courtesy/puddle light in the bathroom! Great work and on my list too!


.png.4ecd567053a13747442744ec2569955f.png)