
jd1923
-
Posts
1,112 -
Joined
-
Last visited
-
Days Won
33
Posts posted by jd1923
-
-
On 8/4/2023 at 6:08 PM, rideandfly said:
Out of curiosity will research to see if this tire size comes in a higher capacity.
The OEM tire spec already has greater weight load capacity than the dual 3500 LB Dexter axles. This is why we fill EII tires at 55 PSI (or lower). 7000 LB gross trailer weight is maximum for the suspension (axles and leaf springs). You can upgrade to 5200 LB axles, but why do you need more than 7K LB? We weighed ours coming back from a camping trip at 6K LB. Another 1000 LB is a lot of stuff. However, those of you who travel months vs. days can need. The place for this extra weight is in your tow vehicle, which is why a 3/4-ton truck makes good sense as you need and collect more stuff!
EDIT: I'm sorry rideandfly, I misinterpreted your statement and took it out of context. See my post below.
-
 2
2
-
-
On 6/30/2023 at 4:10 PM, John E Davies said:
It is not legally allowed anywhere, but many desert boondockers will irrigate the sage bushes with grey water...
Actually, this is not true. See USFS publication: Dispersed Camping (usda.gov)
In most of the eastern US, states that were originally part of the Louisiana Purchase, and much of the northwest, it would be quite difficult to "carry water 200 feet away from streams or lakes." We camp in the high desert all the time, and drop our grey, when necessary, as written in the Dispersed Camping guidelines. Talking to locals, yeah that's the way. I imagine some of you are appalled, but realistically bacteria cannot survive in the sun, on the desert ground, for more than a few minutes. Arizona is 51% public lands (FS and BLM). Drain slowly, before you leave, and all's good.
We have found, it's a full grey tank that limits # days out when dry-camping, but that's when we had a Bigfoot Class-C with a 63-gal fresh tank and 35 grey. And a 15-gal black tank will keep you a long time! The fresh tank on the Oliver is way too small. We only have a little experience with OTT, but both times I filled our fresh tank from home, we only got it to take 20+ gallons before it overflowed. It's a bad design these wide flat tanks without baffles. There is absolutely nowhere on our property to level the Oliver within 100 ft of water. A 5-gal water bottle will not suffice either, not for us. Bladder in the truck? Why, I'd rather just have a tank, strapped front of the truck bed, 35-gal tank from TSC. So now we leave home with 50+ gallons fresh. Grey tank converted to fresh, what are you thinking?!
Keep in mind the concept of Dispersed Camping, where we camp it's miles from water sources, other campers too. Not legal in cities, even Quartzite, and not on any city, county, or private property of course.
Years ago, we lived in N VA, western Loudoun County, on a 13-acre property. The grandparents were visiting, and we were all out at our swimming pool. When grandpa told our son Adam (then 6 years old), he had to walk back to the house to pee. Adam said, "Grandpa, let me show you. We pee behind the pool house. Come on, nobody can see us back here!" Grandpa laughed and followed. Not that a little pee is what's filling your grey tank! Carrying your dish pan outside, doesn't help much either.

-
Well, given this thread has well deviated from "water pump weirdness" so I'll add my observations! 🤣 30 years ago, when we first moved from a city home to a country home, I explained to the family, when you hear something, say something!
Good job btw, your wife hearing and reporting the faint sound!I cannot stand the minimal water system in our older OTT! Slow trickle in the shower, while the kitchen sink is good. I rinsed the HWH twice already and my whole driveway was full of cr@p! I'll vinegar rinse the plumbing soon. Removed both faucet heads, they're now soaking in CLR.
I rebuilt the water system in my last RV, adding silencing tubes and a water small accumulator. The job turned out pretty nice, so one could flush a toilet late at night and not disturb the spouse sleeping. OMG, why do they always install the water pump under the bed? (Same in class-c and many class-a RVs). I understand many of you have newer models with an accumulator.
I recently found this product and would love to install it, but the 2-gal tank is really way too big to fit for anywhere under the bed. Killer product though! Amazon.com : SEAFLO 55-Series Water Pump and Accumulator Tank System - 12V DC, 5.5 GPM, 60 PSI, 2 Gallon Tank : Sports & Outdoors
This pump (made in the USA vs. Mexico, Yay!) runs at 60 PSI, approx 10% greater than the original, running at 55 PSI. Engineering spec limits are always much greater than +10%. So, I can replace our old crawdad (see) pic, with this amazing product! (P.S. look for my upgrade post, sooner or later). If I could only fit this tank, I would be able to take a 2-gal shower after Chris goes to bed, without cycling the water pump - amazing! Yep, she sleeps on that side. But this size tank will not fit. 🙃
I just purchased the pump alone to increase water flow from 3 to 5.5 gal/min (using less current, 4A vs. 7.5A), now priced used for only $75, (Amazon Used Like-New usually means damaged packaging only, and if bad, request a replacement). I will have to find another accumulator or install 2-3 of the little ones in series. Great deal for anybody needing a water pump or a backup pump, buy one now, seriously:
Amazon.com: SEAFLO 55-Series Diaphragm Pump - 12V DC, 5.5 GPM, 60 PSI : Industrial & ScientificWe already have an extra 35-gal freshwater tank in our TV. We might need another tank with near 2x GPM flow - lol! Don't we have fun with our babies?
-
We likely do not camp as often or as long as many of you. I'm still working, not retired nor want to be, so we take short local trips and once a year we take a 3-to-4-week trip to the NF and BLM lands of the great Southwest (thinking hard now about Texas April 2024 to meet many of you).
Chris & I would not think of drinking from the fresh tank, filtered/sanitized or not. Besides, we need water in the OTT, and extra tank in the TV, for washing and showering. When we get to traveling longer, what Steve showed makes good sense. For now, we always have a case+ of water bottles and 4+/- gallon jugs for coffee and of course our pup Charley! Keeping these on hand in our TV. Every week or two we're buying groceries anyway. Best wishes -
-
On 7/31/2023 at 5:36 PM, Boudicca908 said:
I'm so very happy that I found the Oliver -- and that I was able to see one of each size, in person, before placing my order. I'm also glad that I took the time to read many posts on the forum about Tow Vehicles (TV) and systems and other questions posted by owners.
The Forum is like family...
We went into it on gut feeling -- Ah, the Golden Gut! Sometimes it works and when it does, it's all the better. I had no idea of the valuable research, like what Boudiicca908, and others have worked. Just so happened there was a nice older used one 4-sale in our town. Bought it 2 days later! Thinking, when will this opportunity happen again? Not likely and no regrets. We joined the Oliver Forum two weeks after our purchase.
We started the other direction, thinking you wanna RV, gotta get a Class-A diesel-pusher. Bought a good used one and sold it a year later, getting our money back, TG! Then we bought a Class-C that had trouble climbing the mountains out west, and after 4 years, sold it just 3 weeks prior to buying our Oliver. I say go for it! Yeah, make sure you want a travel trailer (TT). I never thought to rent, it takes time and it's not yours, but that is the cautious route. If you buy a brand new one and it doesn't work out, you'll take a hit. There are great used ones listed right here in the classifieds. If you are going to buy a TT, buy an Oliver no doubt, absolutely not one of those overpriced nostalgic tin-can models! Lol
Best wishes and enjoy your next adventure!
-
3
-
-
1 hour ago, SeaDawg said:
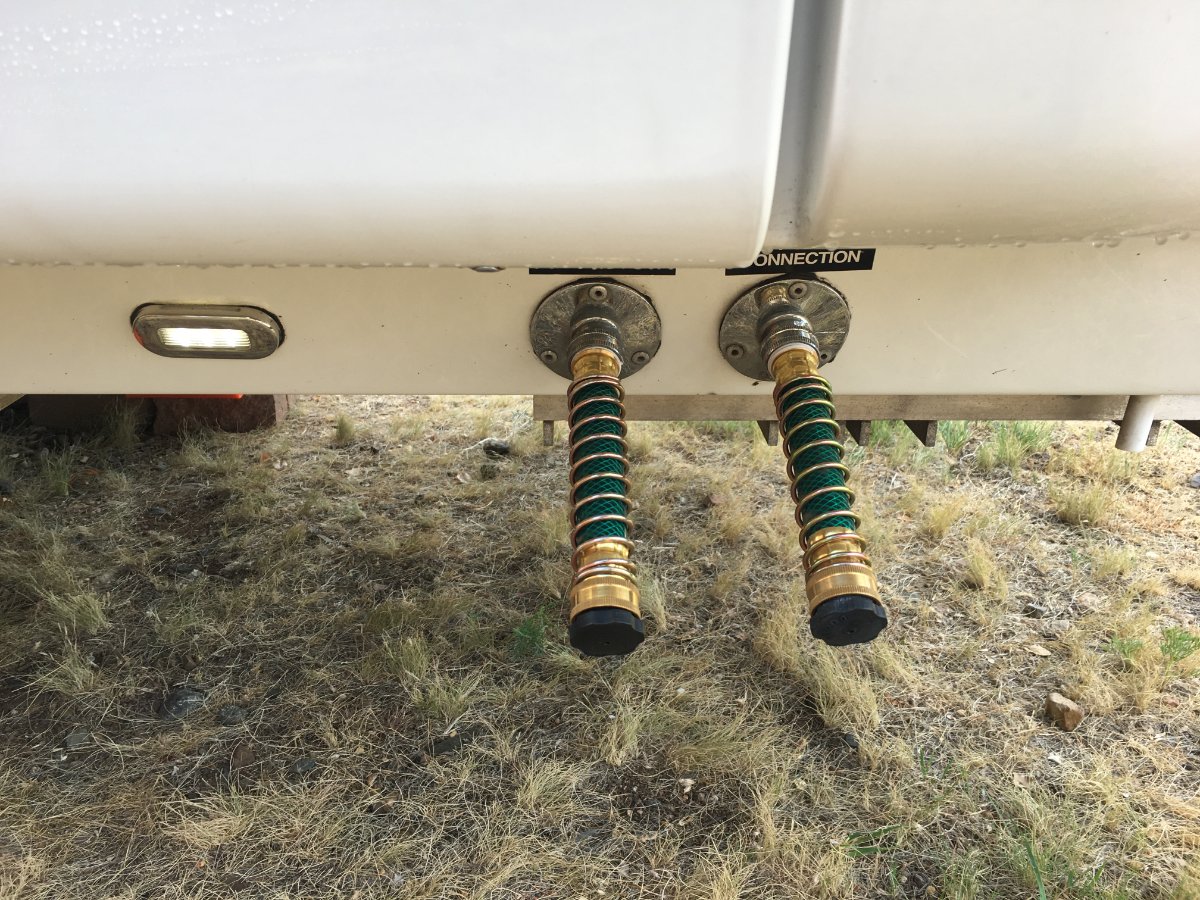
I like the spring guard. Let us know how it works out for you.
I also see that you have plugs in the openings. 👍👍👍 good plan.
Where do you keep the plugs when connected to city water or filling tank?
They're flexible too, so if you hit something, np. I've used these before, had them on a class-c, decent quality and inexpensive, not much to go wrong.
Good eye! I was going to remount those funny little chains, but didn't want to take the time, at the time. I removed the bottom screw to remove them and replaced the screw in the hose bib. Last time I just placed the cap inside the rear storage bin where we keep the hoses. Thanks for asking!
-
3
-
-
I went with 6" extensions, since I really dislike craning my neck to reach under! They connect easy, hand-tight without leaking. The 4-pack is perfect for an Oliver.
Amazon.com: Hourleey Garden Hose Protector, Hose Extension Adapter with Coil Spring (4 PCS) : Patio, Lawn & Garden
-
3
-
 1
1
-
-
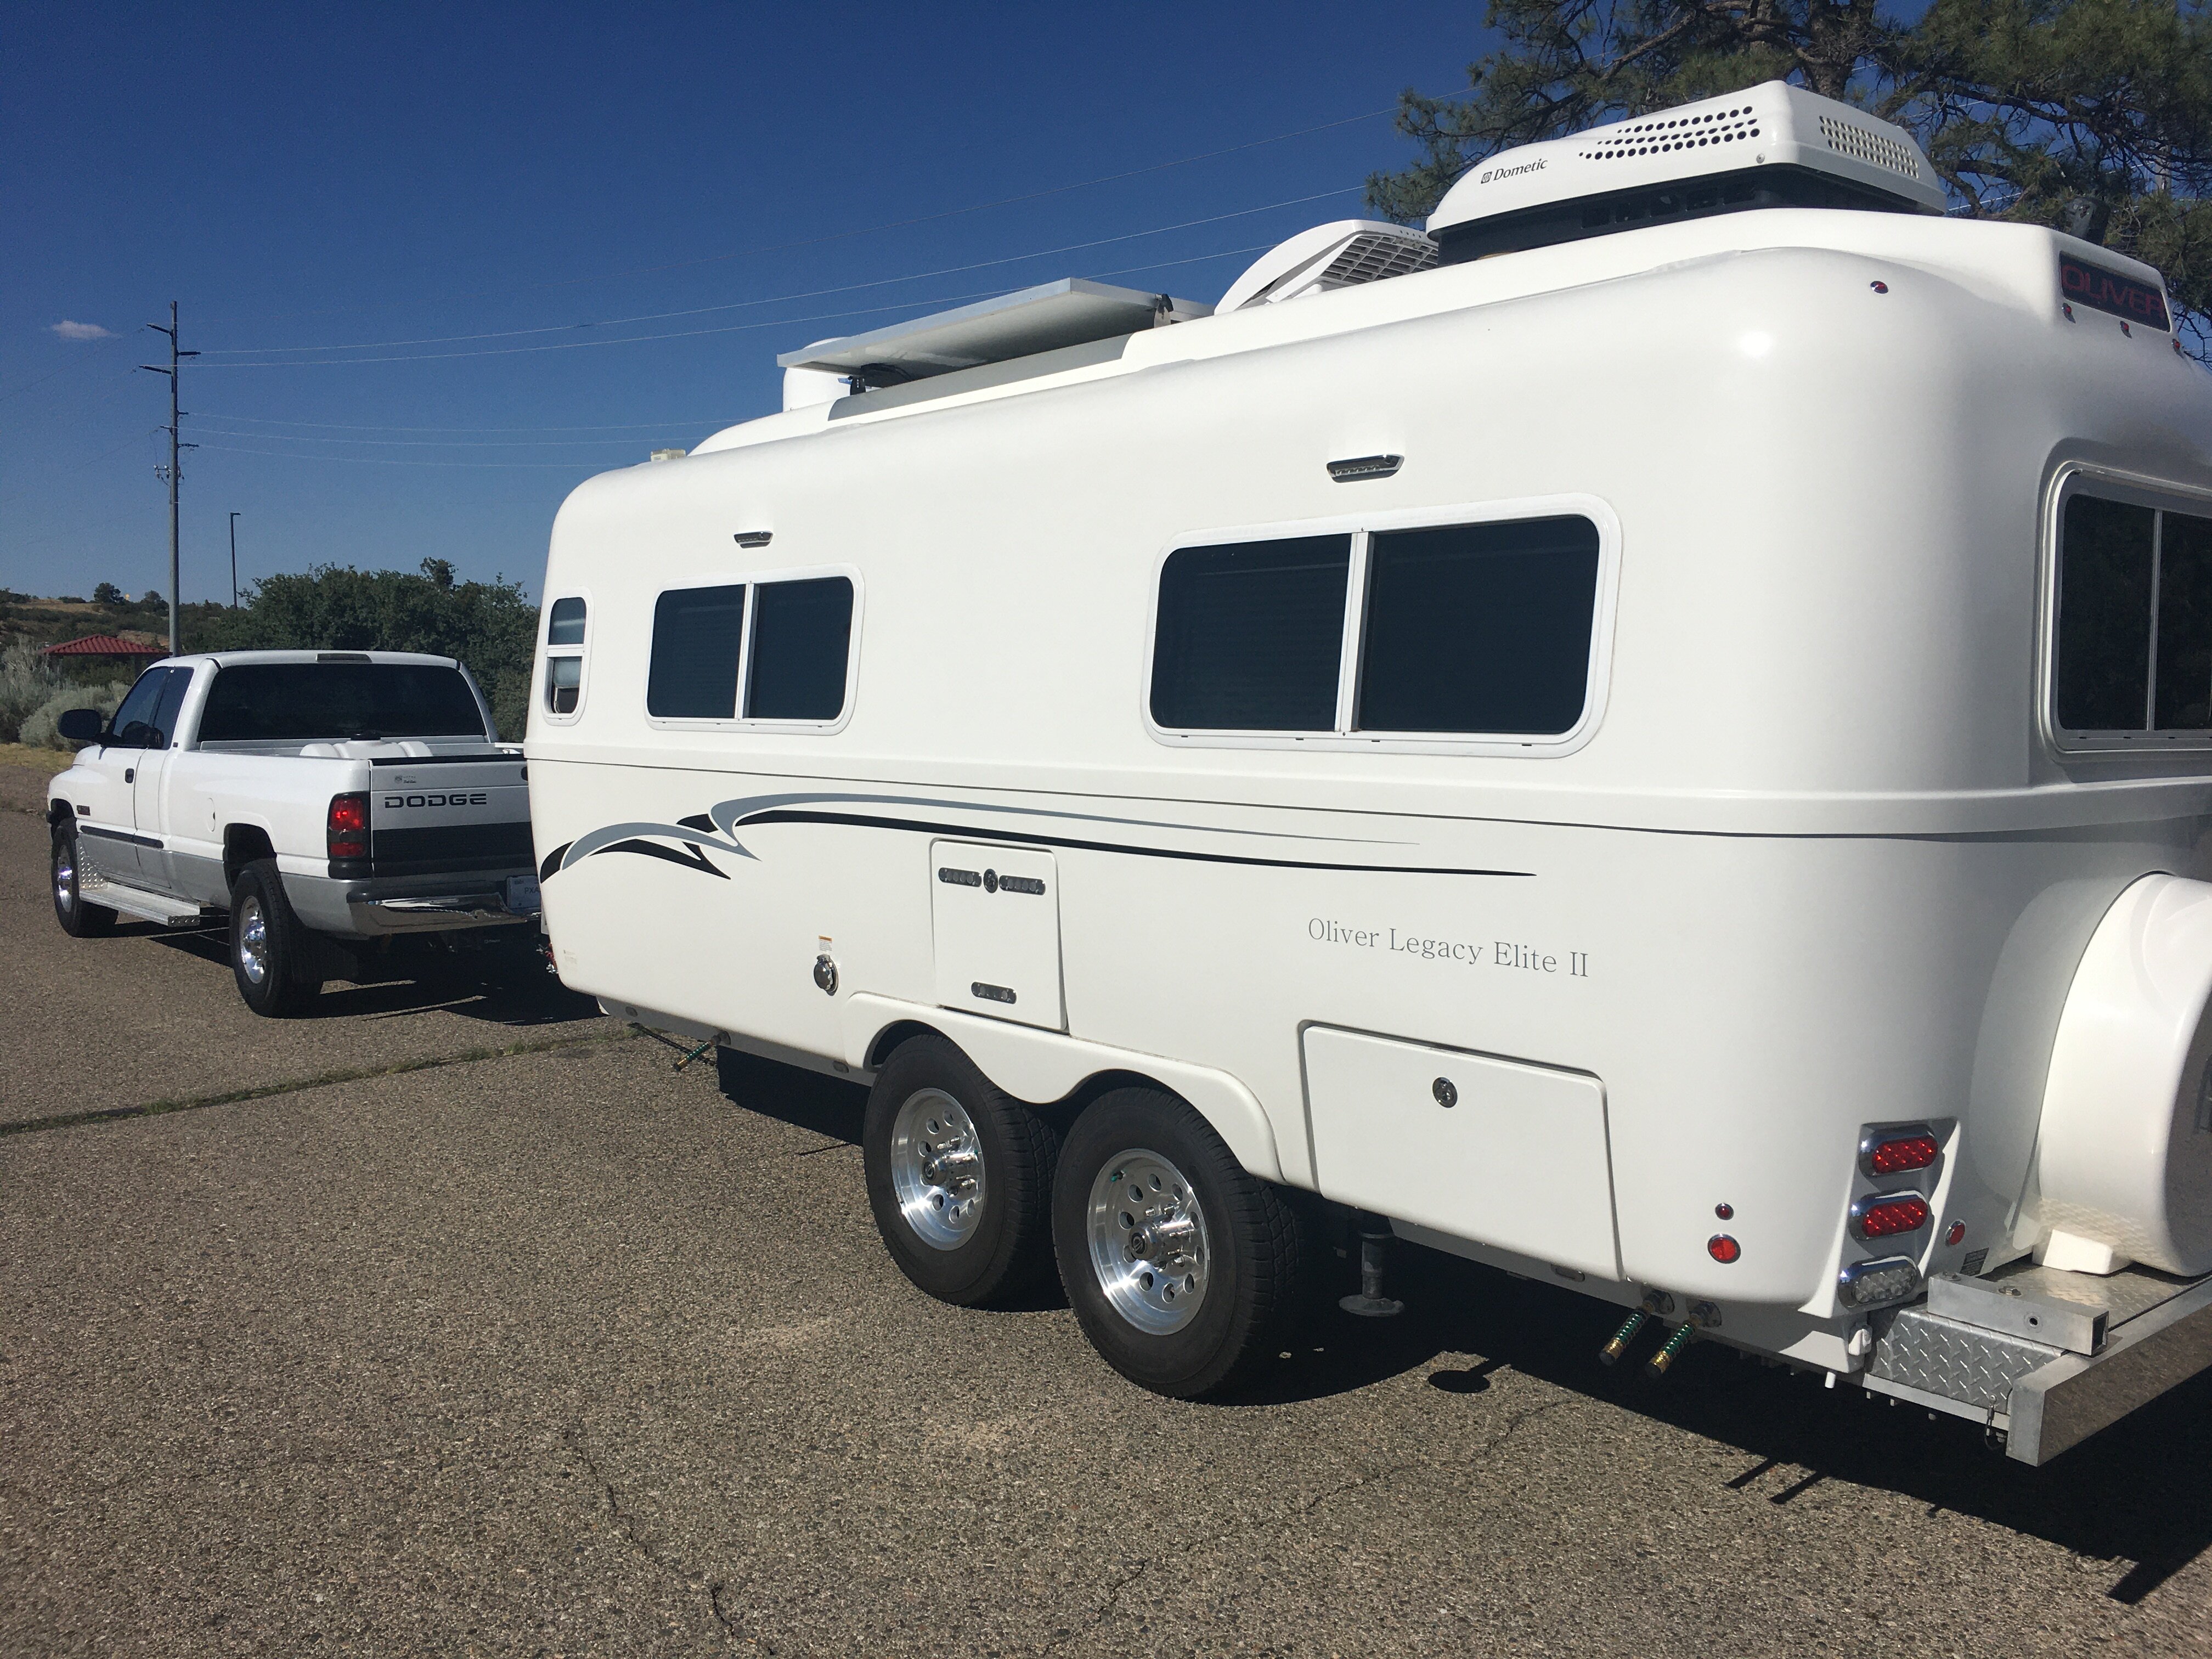
Nice Art, that's a HD truck! Sold my '03 for half of what I paid new in 2004, after 236K miles needing a whole lotta work! 50% depreciation in 18 years, not bad. The buyer understood, and we all know what new trucks cost. After buying our Oliver, the TV purchase was on a tight budget. Just looked at Rock Auto for suspension parts and they are double the price of what I paid 2 years ago for another truck!
Your Tundra and I believe JD's LC200 have the powerful Toyota 5.7L (both awesome trucks). If I had found a Lexus LX570, instead of our wonderful '08 GX470, then we would not have needed the Ram. Ah shucks, too bad I have to have two trucks. It's funny, both of my trucks have 162K miles. This baby (after all my work) is really too pretty to be a TV anyway and the Dodge looks better pulling our Oliver.

-
On 7/16/2023 at 11:54 AM, ChrisMI said:
I think you mentioned the truck drove better with a trailer attached. My guess is the front-end parts are really worn.
Chris, and your guess was certainly correct! When I said, "the truck drove better with a trailer attached" I meant from my history with Dodge Ram 2500 HD Cummins. I owned a 2003 (gen3), from new 'til just a year ago, had 236K miles, and it pulled horse and stock trailers, and even a 14K lb. racecar trailer!
With my new TV (2001 gen2 Dodge 2500 Cummins), I only have a few hundred miles experience. It drives great around town but did drift some on I-40 with the Oliver attached. The weight of the Cummins likely keeps it planted, then add a trailer and the front end gets loose in its current condition.
Jacked a front wheel up today and did the crowbar ball joint test. You can hear a clunk and the lower showed movement (John Davies knew this). Then I removed the wheel, and all the suspension is original and worn. The pic shows worn & torn upper ball joint, sway bar link bushing and tie rod end. Brakes were just serviced. I expected to rebuild the front-end at some point.
Still VERY happy with my TV purchase. For <20% the cost of a new one, this clean Cummins starts with one click of the key, shifts nicely (which can be an issue with some years) the body is excellent, the interior is perfect, like how did they drive 161K miles without sitting on the driver's seat! Come Oct-Nov in nice fall weather, I'll get it up on blocks and rebuild the suspension & steering, with all new parts.
-
3
-
-
10 hours ago, SeaDawg said:
I'd put a block or two under those jacks. Just saying...
Once the front frame was jacked up and placed on an automotive jack stand, I removed the leveling blocks to lower the jack to the bottom for cleaning. This is what is pictured. BTW, the jack pictured is close, but NOT even touching the ground! Now that the work is done, and always when the Oliver is parked, the jack is sitting on 6 or more leveling blocks, so that the jack does not overextend.
Barker, the manufacturer of the VIP3000 power jack, has owner's instructions that includes maintenance instructions. Greasing the powerhead is described, with no mention of grease required on the post.
-
17 hours ago, MAX Burner said:
We ordered the slides yesterday, they arrived here this morning, it's an easy/quick DIY mod for less than $12.
Wow, very good idea and start-to-finish in 24 hours is impressive! Just put these slides on my Amazon Wishlist (for after we get a handle on the big jobs, on our very new-to-us Oliver). Thanks, Art & Diane!
-
1
-
-
Good question. I see three (3) water inlets; the city water, the fresh water, and the rear winterization inlets, which is also used to draw additional potable water while camping. The standard procedure will sanitize the freshwater tank and internal water lines, and per the OTT procedure will also sanitize the winterization inlet as that is where you would intake a bleach solution. This procedure will not sanitize the fresh and city water inlets.
After working the given OTT procedure (per the OTT video), you could attach a short section of hose to the city, then freshwater inlets, funnel attached top of short hose, and pour a small amount of the specified bleach-water solution. I may try this next time to be 100% complete.
I could not figure out how to post the link. Go to Oliver University, click on videos and search or look down the list for "Sanitizing Your Plumbing System."
-
 1
1
-
-
My last addition is to follow. How can you get these parts so clean in just minutes?
Fall of 2016, I had to pull the engine on my Goldwing, just to replace the stator. Poor design, but the bike stopped charging, and the repair meant pulling the engine - wow! After a long day pulling parts, I was thinking about how I would clean and recondition all of them. What a job it would be! As I was washing my hands with GoJo, it dawned on me. If GoJo could remove the grease, so easily from my black greasy hands, why wouldn't it do the same to my engine parts?
Many spray Brakleen, use other degreasers and they are harsh, polluting and never do a complete job. So, I gave my idea a try on my Goldwing engine - the results were amazing! Rub on the GoJo (NOT the pumice kind), push it around, be patient until it breaks down All the grime. Then simply hose it off with a fine mist spray. That's it, and it works amazingly!
It took me 10 minutes to setup and literally 5 minutes to clean the jack post as shown in the pics above. I strongly suggest you give this a try on any part, metal, plastic or whatever, that needs deep cleaning.
Following are a few pics... First my restored 1984 Goldwing Standard (every part, from engine to driveshaft, wheels, brake calipers, etc. were cleaned with GoJo). Then the engine, just after cleaning with GoJo (the top was loaded with oil, grease, dried gasoline and antifreeze, and dirt). Use compressed air to blow dry after hosing.
Next are the battery trays I just removed from my TV (see left vs. right tray, they were both just as dirty). Lastly is everything you need to do the job! GoJo or the Walmart brand ($2.47 plus tax), brushes and do save all your used toothbrushes for the tight spots. It really works well, just an idea I had, and I've never heard another mechanic or restoration specialist speak of it (most mechanics only clean surfaces that are required, and slap everything back together as dirty as it was). I wish I had come up with this idea 30+ years earlier in all my auto restoration work. It would have saved me hundreds of hours of time, delivering better results! Please let me know what you think, after trying it.
-
2
-
-
Thanks John, for your input. When this subject came up earlier in this thread, there were mixed feelings. I believe that if you are jacking up you trailer and the jack is bowing to the point that the center post is rubbing against the housing, you should stop and correct your leveling blocks. Where we camp, there is so much dust and dirt of all kinds and colors, a few miles down the road the grease collects dirt which is more abrasive than metal on metal. I'm going to go with mine dry for now, keeping your advice in mind and now that the metal is clean, I will quickly be able to see if the post gets marred.
-
Monsoon rains came early today in the Arizona high country! Dropped the temp 25 degrees in minutes and I was able to get a lot done on Oliver and our TV!
We're definitely going with a dry jack post. There is absolutely NO need to grease this post, and don't waste $10+ on WD-40 or any other Teflon spray! You only grease fittings with clearances like +/- .030" or less, and there is a good 1/8" difference between the post OD and the housing ID! Just clean her gently and you're done.
Regarding the before and after pic above, the before was actually way dirtier (see the back side in the pic to follow) and the after was really way cleaner!
-
Final steps are to mount the head and clean the jack post...
I figured out why the motor worm gear has the metal cuts, where the bottom of intermediate gear connects. The wear occurs when you bottom out the gear!!! I/we gotta stop doing this! Lol
Following are pics of the final install, with a before & after of the dirty & clean jack post...
-
JD, I feel your pain from similar past loves! One of mine was a '59 Chrysler 300E that I purchased in 1994 and sold in 2010, after fully restoring her, both in appearance and rebuild of every mechanical system. We had a great club too, and this forum reminds me of it (so glad to be here)! We made many new friends over the 16 years, and twice a year we drove these old beauties, somewhere across country to get together, way too much car talk in hotel parking lots over beers.
We are new here, becoming Oliver owners on June 7th (Chris' birthday, what a surprise)! The first thing I noticed on this forum was the multitude of upgrade & maintenance posts, you had worked, with engineering precision, providing full detailed explanations. I have posted a few in my short time, which you have read and commented upon. I hope to post many more, since auto restoration and repair has been my hobby for 45 years. If I work very hard at this over the next 5+ years, posting every possible detail, it will add up to a drop in the bucket, as compared to your contributions here!
Yes, please visit your favorite forum, every now and then, and give us a hand! Best wishes to you and yours, in the next stages of your life. Chris and I are looking forward to meeting you and many other owners in Texas, next spring.
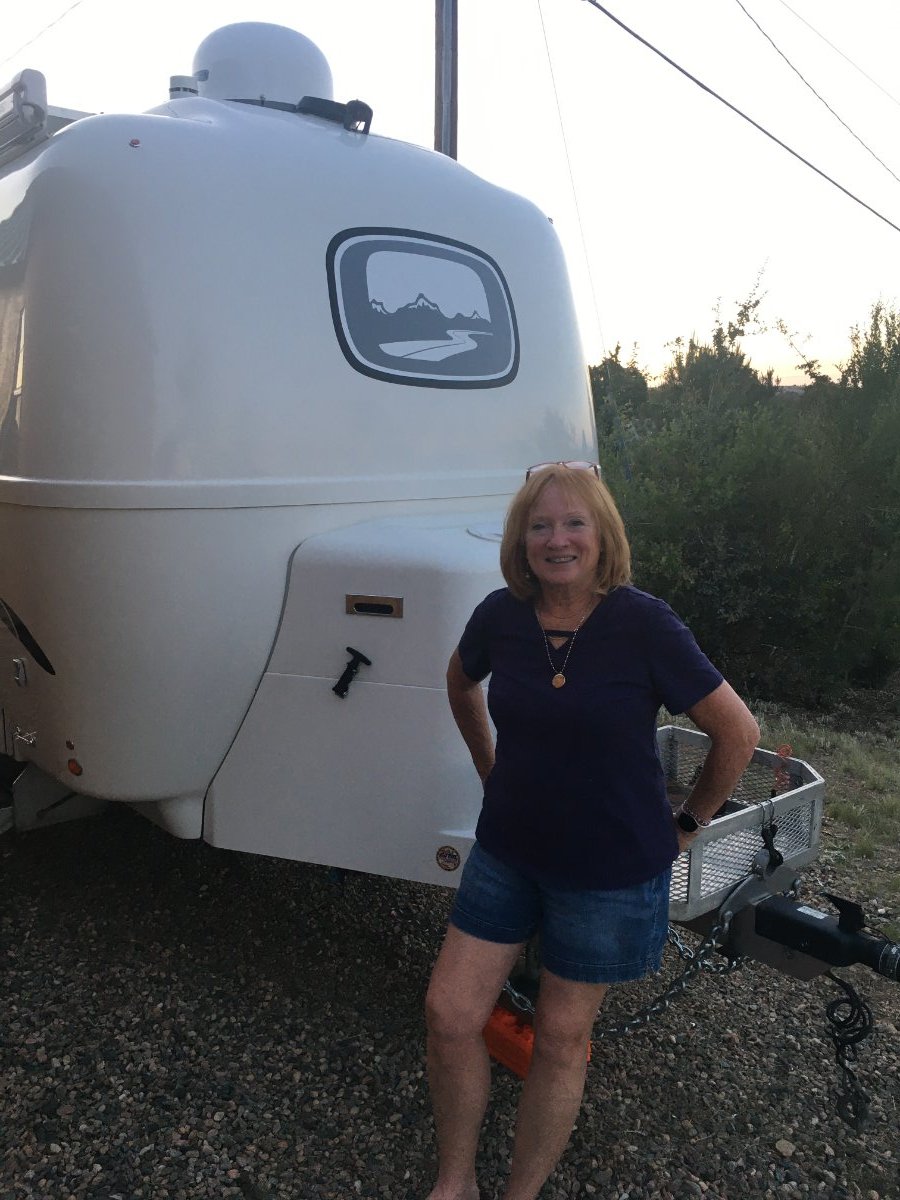
I'll end with a picture showing our first day, with smile on my birthday girl.
Thank you for your help, yes thank you very much.-
1
-
4
-
-
Thanks Art. We haven't slept in our new Oliver more than a few nights yet, but in past RVs I've worked to install small patches over some of those annoying little LEDs. Please let Diane know the monitor in our new system has no LED light, when it's off, it's lights out and dark!
-
1
-
-
My wife Chris agreed with Elizabeth, and I just ordered black. Reads like Mike and Carols came originally with black, hull 135 and ours #113 came with white.
Measured 3 windows at 58" and the bathroom at 25." I ordered 17 feet, allowing me +5" for the gaps. $99 total with $11 shipping, no sales tax applied.
The rear EXIT window has a thinner seal, which I cannot find on the Pelland site. Funny thing is our rear black seal does not have the same mold or mildew, as do the white vinyl seals. I will just reuse the rear seal which in decent shape. Thanks again!
-
3 hours ago, Mike and Carol said:
Looks like the previous owner wasn’t much into maintenance.
Agreed Mike. I imagine there are many, not active members of this forum, that do not know these should be removed for cleaning, or just afraid to pull them out. In fact, one prior owner sealed the bottom gap (where it had shrunk) with a foam and caulk patch, not understanding the seal could be removed and reinserted to cover the lower gap! Besides the nasty mold, every seal we have has shrunk close to 2", almost a 1" gap on the bottom, and same on top. Another reason to buy new.
2 hours ago, Rivernerd said:https://www.pellandent.com/RV-Window-Seal Match the profile of your widow seal to a profile on the Pelland Enterprises web page, link above.
Thanks so much Rivernerd! It appears it's the very first seal on this page. Clicking on it gets to this page: 1/2" Glass Vinyl Seal - RV Windows (pellandent.com)
2 hours ago, Bob and Elizabeth said:We had ours replaced in March when we had our yearly maintenance done. We had a choice of white or black. Chose the black and we love it. I believe it was cheaper than other places. Elizabeth
Thanks for adding your experience, Elizabeth. It appears Pellandent has both choices, white and black, at $5.17 per foot. That's the tough choice! White is the original color, and black would be easier to keep clean. The windows appear black from the outside anyway, so for these reasons, I can see making your choice.
We'll have to make our choice, and order some soon! Thanks again to all. 🙂
-
2
-
-
We're in the process of following this procedure to clean our windows (and more including the blinds) inside and out. We have an older OTT, and the outer rubber moldings are in bad shape (see pic). I soaked them in vinegar/water solution for two days and wife Chris has scrubbed one, without much luck, and it's now soaking in bleach-water. There is considerable mold from past neglect and I'm wondering...
Yes, this question was just asked! Can we just replace these? Does anybody know of a supplier and model number for this exterior seal? I would like to buy 20 feet or more of this stock. Hoping it's not $10 a foot! Thank you for your help.
-
Lastly, what about the remotes? There are always too many, right? I mounted a couple of parts bins, I had on-hand. One bin for the Oliver installed remotes, and one bin for the newly installed components (TV, Blu-ray, Dish Wally, and soundbar remotes). The TV remote will change volume on the soundbar, pause a DVD and more.
OMG, even our Rummikub game has the perfect place, snug fit top of the nightstand drawer! Best wishes y'all. We love this OTT Forum. You guys are great!
-
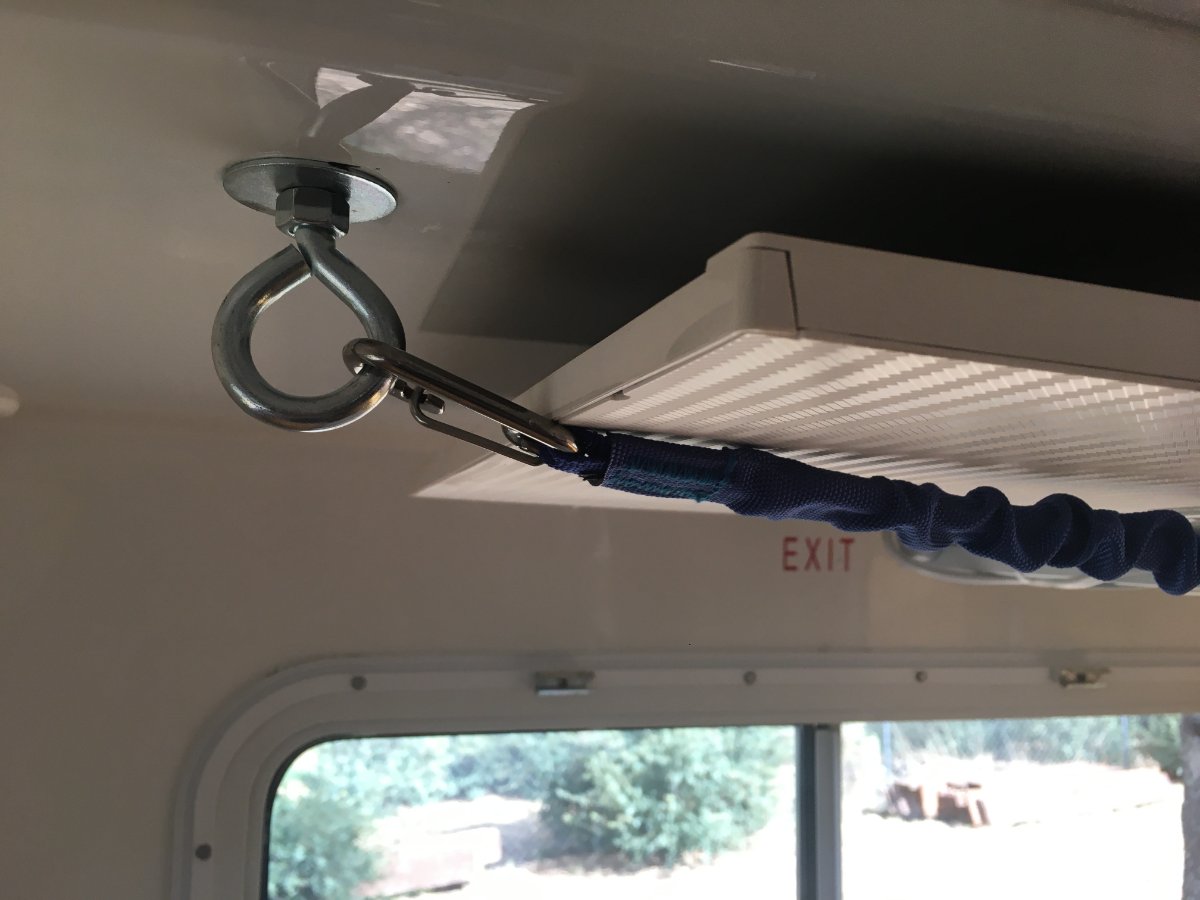
The final need is to fold up the TV, to the attic ceiling, for unobstructed view out of the rear window. Some of you may think my final install is not "professional" but it's easy, clean, and keeps the TV snug, just 2" from the ceiling. BTW, on our maiden voyage we drove 220 miles, 50 miles on dirt, much of it washboard, with the TV in the down position, and all was fine! This TV install can travel in the up or down position, either way no problem.
I installed two hardware store 3/8" eyelets about 3" left and right of the TV, at the front of the attic (should have gone 4", so that the metal of the bungee would not touch the TV, to fix I will add sleeve). Marking the correct spot, left and right is not trivial, with all the Oliver curves. Then drill the 3/8" holes and mount with 2" fender washers, above and below the ceiling. Then I needed to find the right strap, bungee, cable or something. Shopping for this was not easy. I did so many Amazon searches. It had to be HD (strong and taught) and I was wanting white. I settled on Blue, which is what my wife calls her accent color for our Oliver! I ended up with this: Amazon.com: Extreme Max 3006.2786 BoatTector High-Strength Line Snubber & Storage Bungee, Value 2-Pack - 24" with Compact Hooks, Blue : Tools & Home Improvement
The blue bungee is a nice match in color to the bolsters we bought for our evening TV watching: https://www.amazon.com/Retrospec-Sequoia-Yoga-Bolster-Pillow/dp/B092DYYR5W/ref=sr_1
Without measuring, I would think the OTT factory installed TV sits a good 3-4 inches lower. The pics would look better if we were not also cleaning our windows and blinds, and the lovely bedspreads from the prior owner!
-
 1
1
-
-
Anyone of you wanna trade a powered model, for my Fiamma, done in a heartbeat! Perhaps easy on the baby Ollie, but what a pain to unwind. It's coming down, better duck. Can't have your entrance door open, like the newer model. Then mount the side supports, crank them out left and right, role it out some more, lengthen the supports again. No such thing as opening it up just a few feet, the feature I like most about modern power awnings. To each their own, yeah.
This has been fun, and I appreciate everybody's + reactions and posts. Time for me to add my last installation post...


.JPG.5ef5fc4af553ff25473a5c7e608c6fdc.JPG)
.JPG.33bcee2382c19d4a9a76d175c728f789.JPG)

.JPG.d97a9084f204a60505c7e2b8985c1ac3.JPG)
.JPG.9364bf0e4c8aa86175b7edd2c1f00215.JPG)


.JPG.3844a448cfe314b8950a9e45c68c8013.JPG)
Spare tire size 215 70 16 vs trailer tire size 225 75 16 / will a full size tire fit in fiberglass cover?
in Mechanical & Technical Tips
Posted
In reference to the edit mentioned in my post above...
I just check my spare, it is a BFGoodrich P215/70R16 99T. The stated load rating at 44 psi is 1705 lbs. 1704 x 4=6820 so this spare is a bit short of 7000 lbs.
The BFGoodrich tire your found is not only a 100T rate, but it's an LT (light truck) tire vs. P (passenger tire rate). It has additional plys (belts) being an LT and with max 50 PSI rated will carry more weight. Good find! Of the 81 tires this size, shown in a Discount Tire web search, it is the only LT rated tire. When Mine needs replacing, this would be a good choice.
215/70R16 Tires | Discount Tire
BTW, when I've had trailer flats before, my first choice is to remove the rim, detach the TV and drive the rim to the tire shop. I use the spare as a last resort, and mine usually collect dust, so i worry less if they are older. I've had several car-hauler and cargo trailers, carrying no spare. I'd rather drive for service without the trailer, drop the spare, go eat lunch, and not change the tire twice!