-
Posts
2,954 -
Joined
-
Last visited
-
Days Won
206
Everything posted by jd1923
-
What Steve wrote! Thanks @ScubaRx Given the schedule this year, we should have a handful of Olivers during the timeframe of the Big Tent. The Fiberglass Rally is much later this year and I believe most Olivers will be gone by February. Looking forward to meeting you! JD
-
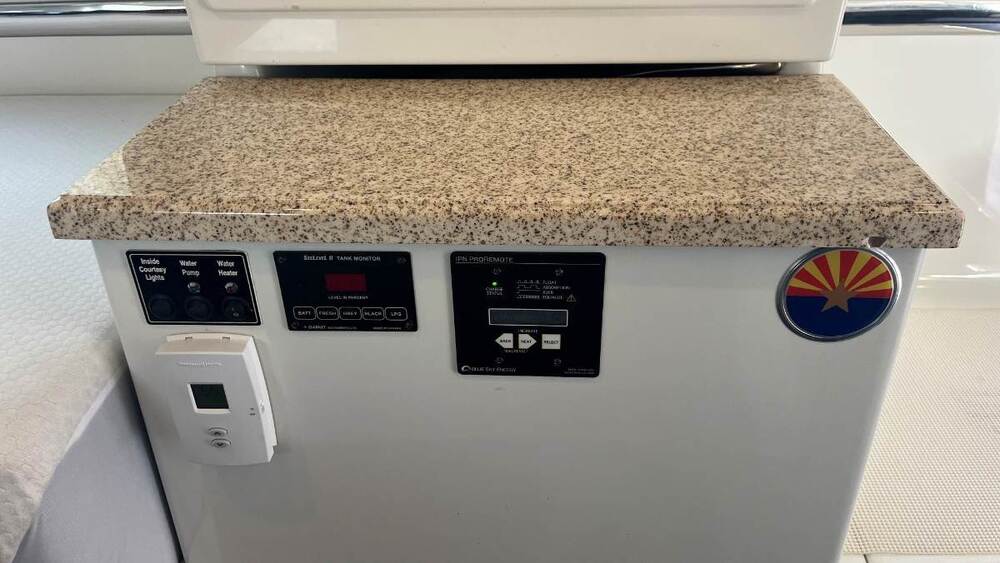
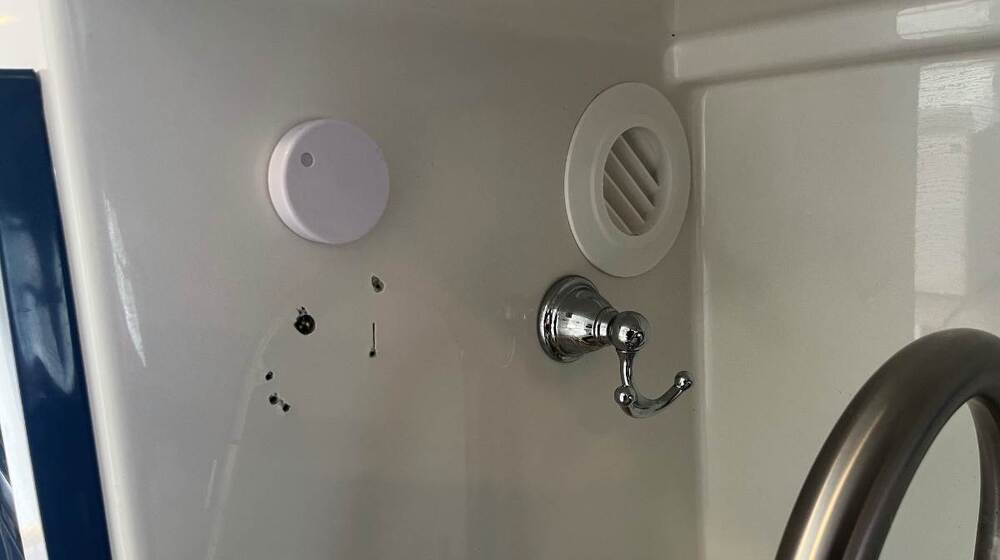
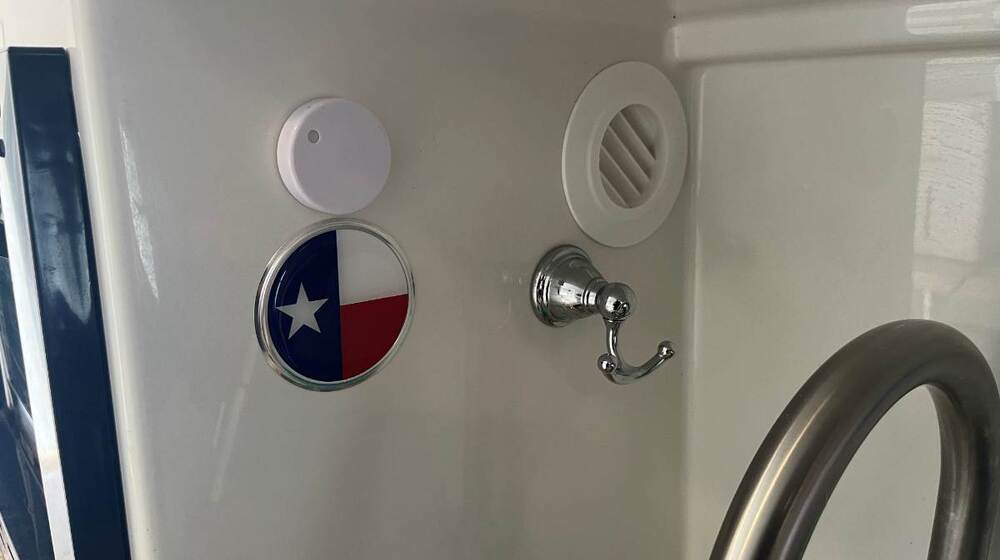
Found these cool decorative emblems that have helped with repairs and mods. Any emblem you like could help cover up where needed. Last year I upgraded the OEM inverter. It had a remote switch, requiring OTT to cut a 2 1/2" square hole in the fiberglass below the pantry shelf. Now we have an emblem of the Arizona state flag in that spot. Just recently, I removed our Dometic A/C and thermostat. I decided to relocate the new furnace-only thermostat under the pantry. That way we could set temp while lying in bed, nice! WOW, what a mess under the old thermostat! There was even a broke-off screw in the wall, like the installer tightened it so hard the head broke off! I used a Dremel to file down the steel screw flush. I mounted the new thermostat, drilling one 1/4" hole for the wires, and mounting using 3M VHB 4950. One small hole is all you need! 😎 This time we went with the flag of the great state of Texas! @Mike and Carol should like this! We lived in Texas for 9 years. It's where our son grew up, went to school, played sports and he stayed for college. We also have a Red-White & Blue theme for our Oliver, so the Lone Star state flag is perfect. Sure looks a lot better! These are really decent quality emblems, 3 3/8" diameter an 1/8" thick and reasonable cost. I chose the semi-flexible models. They have the US flag, the Thin Blue Line, Army, Navy, every one of the 50 state flags and many more: https://www.amazon.com/dp/B09GH2TC75/?th=1 https://www.amazon.com/dp/B09G8SWZ42/?th=1
-

Changing tires in the wild - lessons learned
jd1923 replied to John and Jodi's topic in General Discussion
Yeah, your humidity and ocean salt must be extreme! Perhaps an anti-seize compound would help. -

Changing tires in the wild - lessons learned
jd1923 replied to John and Jodi's topic in General Discussion
I think I would have lowered the jack on the wheel, lugs on just a couple threads. Then place a wheel chock on the inside rim, creating a downhill angle. Gravity/weight of the trailer should do it and lowering carefully it should do less harm than many heavy sledge hammer hits! Given your wheel seized so HARD, I’d bet all 4 wheels are in dire need of bearing and perhaps brake service! For sure this wheel had not been removed in some time. -
I received an email from @rich.dev yesterday and he sent me a link to this video. Thank you Rich! Chris and I enjoyed it after dinner last night. It shows Arizona's Christmas City from an RVer's point of view. The couple are kinda goofy, but it's fun. 😄 BTW, when you come to visit there are infinite camping locations (you don't have to stay as far away as Congress AZ as they did)! Unless there is a special event in town (which is often, e.g. the annual mountain bike race during April: https://mbaa.net/racing/prescott-punisher/) you can camp at designated sites on Copper Basin and Thumb Butte roads which surround the town, climb up to over 7K ft, and just 10 minutes back to the Prescott town square. The close perimeter around Prescott is designated camping only (still a lot of campsites and campgrounds), though as soon as you get 10+ miles out of town there is boondocking everywhere in the Prescott NF! Get the Motor Vehicle Use Map: https://www.fs.usda.gov/r03/prescott/maps-guides The second video is from Living in Arizona Now, one of my favorite YouTube channels for AZ travel. Hope to see y'all in the New Year! 😂 Merry Christmas to all!
-
Thank you @tallmandan and @CRM and other forum members for the 👍! @rideadeuce was my inspiration. Mike installed 920 Ah Epoch back in April 2024. He purchased two of the Epoch 460 Ah Elite Series that come with Victron Comms, upgraded internal components and special cases. I didn't need the extras and preferred the lower price point of the Epoch Essentials Series. They call them Essentials, but they include the app, built-in heaters, internal protection, temp sensors and alarms. Even their Essentials Series batteries are industry leading! Two Epoch 460 Ah Elite Series batteries just barely fit in the bay (see Mike's post linked below). Two Epoch 460 Ah Essential Series will NOT fit! The two side-by-side would be an inch too wide (the Elite Series batteries are much taller). Too bad, or I would have gone that way to begin with. I didn't see that Mike secured his batteries into the bay. Likely they are so big/heavy, sitting on rubber, and since they fit wall-to-wall they would not budge! I felt the 3 smaller batteries should be strapped into place and I was also able to add a locking mechanism which minimizes theft worries. At 900+ Ah these are surely forever installs! 😎
-
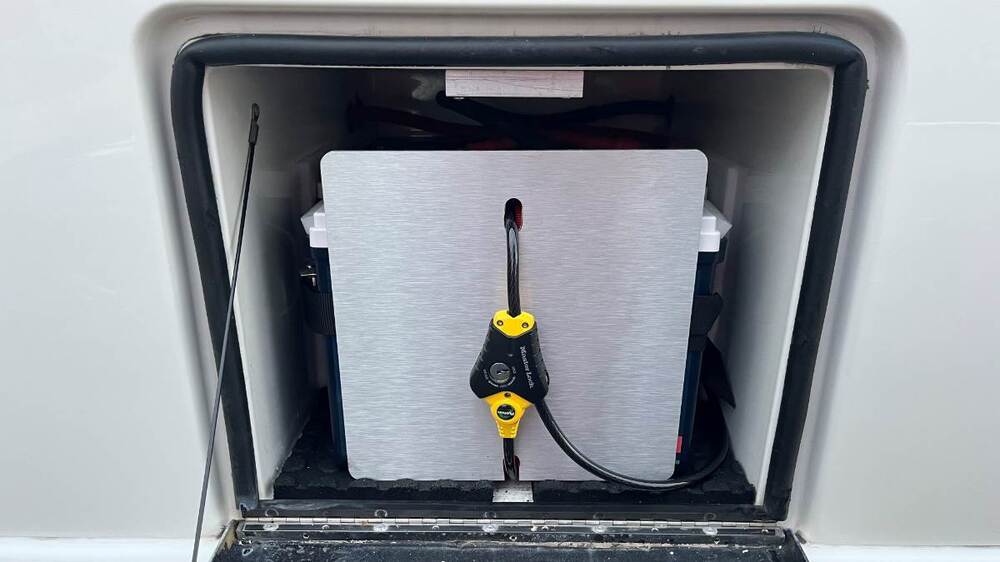
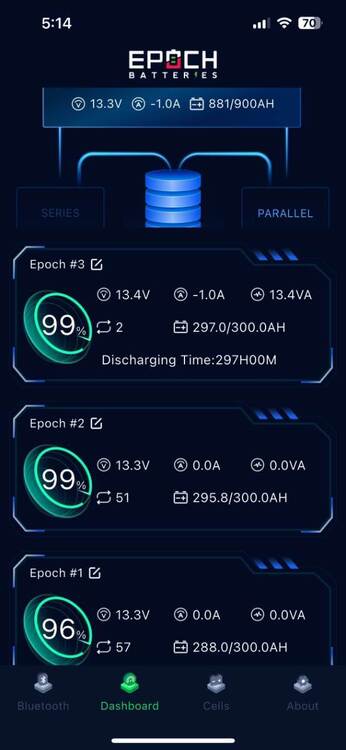
Once I got to this point, I started thinking a thief could possibly undo the battery cables, loosen the straps and even with cable lock in place, slide out the outer battery, then steal them all. Oh No! So, I had a 12x12x1/4" sheet of aluminum left over from another job and it became the perfect solution. Now besides a taking a crowbar to the battery door, a thief would have to cut the 3/8" hardened steel cable. Now these expensive batteries ain't goin' nowhere! I'll cinch down the straps and cable lock again, after putting on some miles... Ya gotta love the new look of our Epoch app! 900 Ah - Priceless! 😎
-
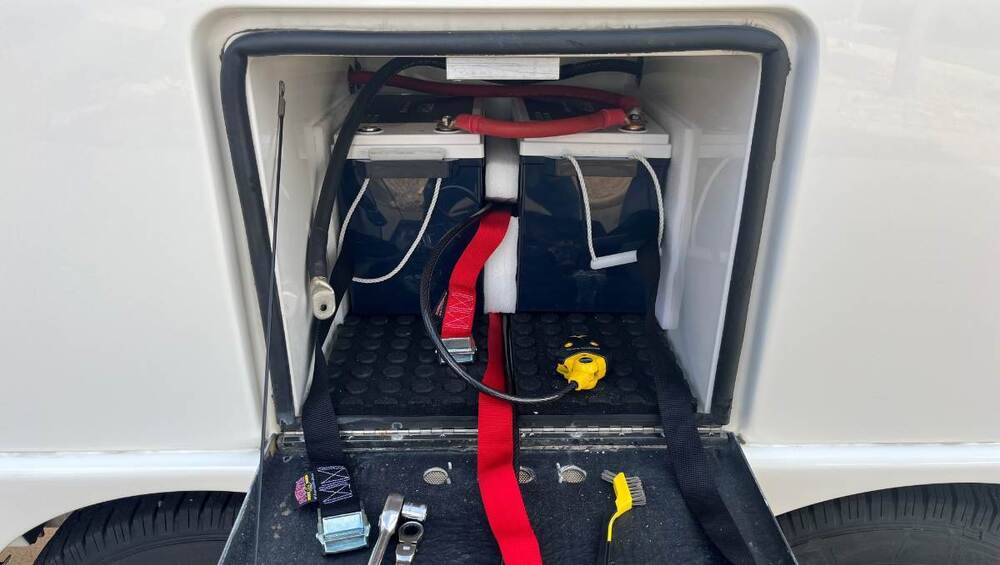
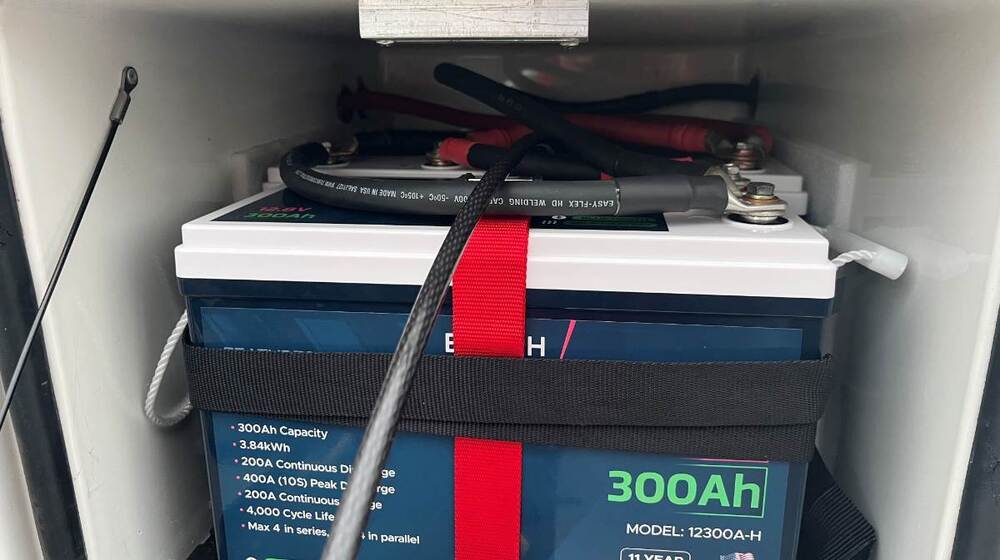
I found this great supplier of Made-in-USA cam-buckle straps and tie-downs: https://www.amazon.com/stores/PowerTyeMFG/page/66AA148A-1600-4E0D-A1AA-AEA3A1050247?lp_asin=B017BYSJ7I/ I purchased this cable lock to secure the batteries: https://www.amazon.com/dp/B00006407M/?th=1 I turned the eyelet bolt on an angle so that the cable lock and strap would fit nicely. I placed foam around and between every side of the batteries. I put 2" of foam between the 2 inside batteries to give the eyelet space, keep it from rubbing. I have an 8-ft cam-buckle strapped tightly around all 3 batteries and these cam-lock straps cinch nicely! A 4-ft strap and the cable lock go through the eyelet to pull the outer battery inwards. I also had to make two more 4/0 battery cables. I planned the layout so the main ground is convenient right-front. And now without the battery tray, I can reach all the way in, over the batteries. I tightened all 6 battery terminal bolts after all 3 batteries were tied down, so these can be easily checked and tightened when needed.
-
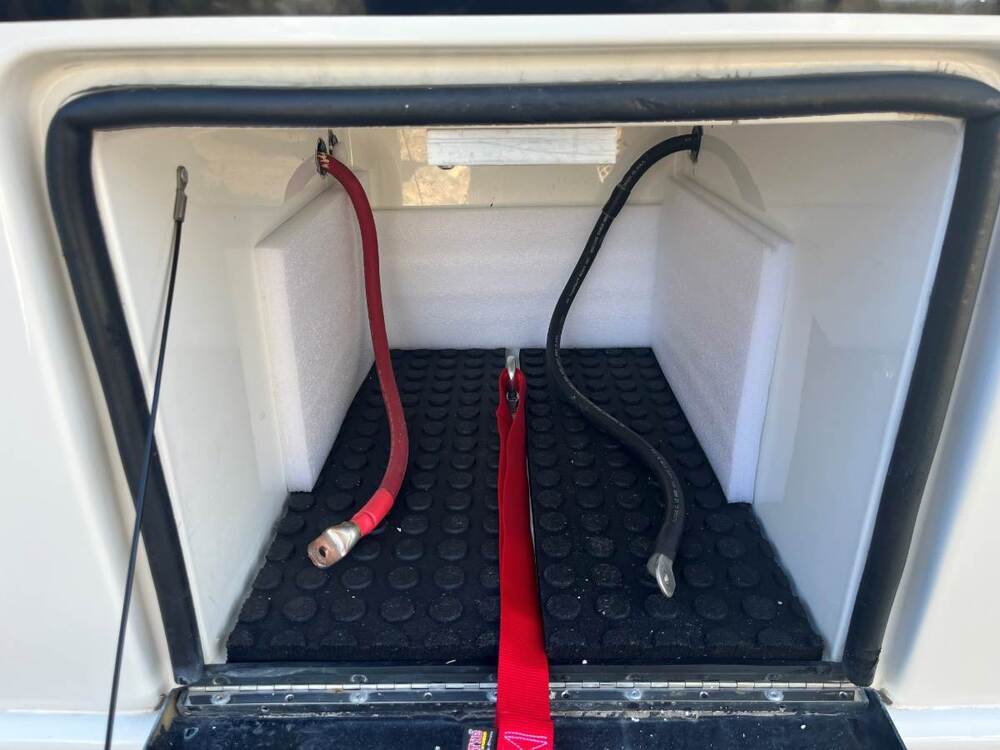
Epoch batteries were on sale again for Black Friday and I'd been thinking about adding another one. Our 600 Ah system has been great, all we needed for the last year+ (MP2 Inverter always ON with many AC appliances running). Since we're adding an efficient A/C this will allow us to run air long enough on those hot afternoons! We're tired of having to be in a campground on hot days! I was back and forth on spending the money, so I asked Chris and, in a heartbeat, she said "Do it!" I've finally let go of the RV owner's syndrome known as SOC-Worry! I'm now just fine when it gets under 50%, but it worries Chris some. Hopefully, NOT anymore! Two Epoch 300 Essentials fit nicely in the OEM battery tray. I knew adding #3 meant a custom installation. First to-do was to remove the battery tray. Would you believe that alone weighs 30 LBS! Then cleaned up the bay and filled the mounting holes. I had scrap rubber from the TSC stall mats I used to line my truck bed (the wheel-well cutouts) and after trimming them a couple inches shorter they fit perfectly! I kept looking at that big bolt in the center of the bay, and wondering why OTT would have done that!? Our friend @mountainoliver gave me a heads up on that and I got under the streetside bed and found the support beam the other end of the bolt (pic2). I started thinking I could somehow secure 3 batteries using that bolt. After sleeping on it, I thought of replacing the bolt with a 1/2" eyelet bolt and use it to strap and lock the batteries down!
-
Mossey, you have both BB and Lithionic batteries? 8mm is pretty much standard, same on Epoch.
-

Document Worth Keeping - List of John Davies Projects
jd1923 replied to Geronimo John's topic in Mechanical & Technical Tips
And Merry Christmas to you! 😂 John, your original file worked fine for me and is much appreciated. I’d say, if you’re still on Office 2010 it’s time to spend $99 a year for Office 365! 🤣 -
Are you camping at Navajo campgrounds? I always find it difficult camping in the Navajo Nation and we drive the length of it (Flagstaff AZ to Cortex CO) every visit to SW Colorado. Can't really boondock on the Nation, can you? Yes, that's for sure!
-
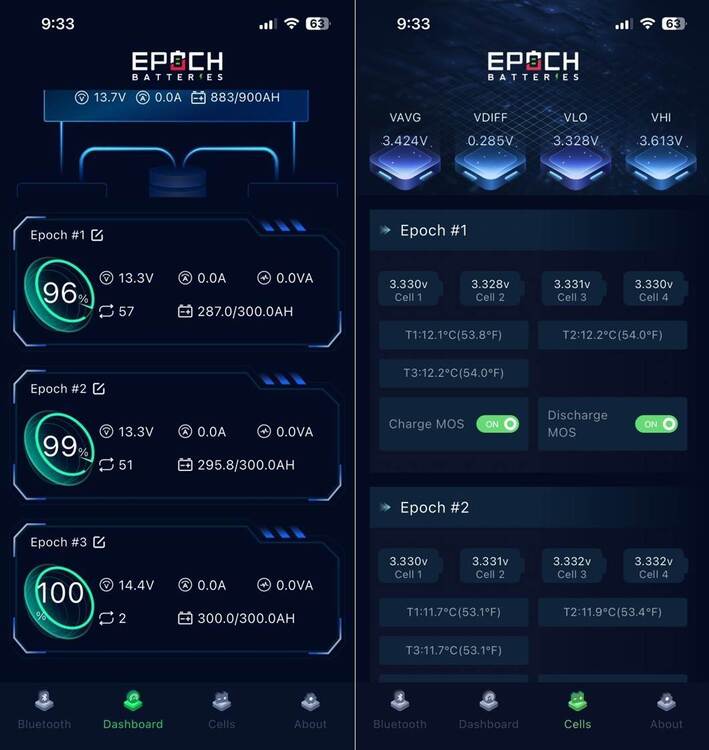
Thank you @T-Oliver, very nice. I didn't noticed the temps on the 3rd screen, with 3 temps per battery! This got me looking for more info on the Epoch app and I found this video quite informative: https://www.youtube.com/watch?v=SZprZ8ncWxs I see from your app screen-print, you have your batteries switched OFF. Perhaps for winter storage? I also did not realize you can do this from the app. If I turn all batteries OFF, would that be as good as disconnecting the main ground? I've physically disconnected several times for maintenance or installations. Looks that way, so cool! 😎 Our first two Epoch Essential 300s have been installed for 18 months always ON, Victron MP2 always ON and rooftop solar ON (unless I want to let SOC drop down when the Oliver is sitting at home). We use the Oliver year round, only connected to shore power during Aug for A/C. Notice our Batteries #1-2 have 51 and 57 cycles used (out of 4000)! Epoch #3 was just purchased, it arrived at 49% SOC and I had it on a small 10A charger overnight. Right now all 3 are sitting in the garage, so I could remove the battery tray for a new installation of 3 batteries. Can we stop worrying about SOC with 900 Ah? 🤣 Love this little charger, get one! I use it all the time in my garage and bring it on the road just in case. It can be switched from LA, AGM or LiFePO4, even 6V and repair settings for when a battery gets drained down completely (yes, the repair function works!): https://www.amazon.com/dp/B07W3QT226/ I have one of these wired to the tow vehicle so it can be charged without poppin' the hood: https://www.amazon.com/dp/B004LWWNLC/?th=1 No app for Battleborn with this kind of functionality? There certainly should be at the price point!
-
We love them! Since this picture we added a Dometic CFX5 45l in the truck bed and I purchased two more Ruuvis. We're always checking fridge/freezer temps, or I'm looking at the trunk temp which is close to outdoor temps. I have one back there to know when the incoming water lines are close to freezing. I'll put one on a battery just to see but we do not have the BBs. Two years ago I purchased a 4-pack of the simple white ones (not PRO model) and from memory it was under $100. Can't find those anymore, only seeing the PRO model. I got two on Walmart.com for about $45 each recently, like these. Anybody find a deal, please let us know! https://www.amazon.com/Bluetooth-Temperature-Pressure-Integrates-Assistant/dp/B0D3MDZCWF/ Picture shows two Ruuvi app screen-prints side-by-side showing how running the A/C while towing brought down cabin temp!
-
In all of my electrical upgrades, I went with NO physical monitors that would be wall-mounted in the Oliver. I like the cleaner look without and I LOVE the Bluetooth apps! 😎 I do have one of those sensors that came with the Victron shunt which I have in a box of extra parts. We have Epoch Essentials 300 Ah, ran two for 600 Ah last 18 months. Installing this week a 3rd 300. Given all this news, I will place a Ruuvi sensor there to measure heat for a while, but with 900 Ah I'd have to run our A/C, our Air Fryer and run a power cord to another RV to run their A/C to get anywhere the 600A of continuous power (2x for peak use) the spec of these batteries. 3x the 100 Ah Battleborns vs. 3x 300 Ah Epoch? 300 vs. 900 Ahs, we live in different worlds.
-
Heat is conductive, so I believe your app is all you need. If your post heats, the battery temp should go up too. Hoewever, small changes in battery temp might mean larger temps at the post. We have Epoch and I searched through their app and did not find temp (anybody with Epoch please let me know if there is temp reading). You could add Ruuvi sensors on the other two. We use these since in the fridge, freezer, cabin, trunk and on truck fridge and cabin. If I had BB I would move a couple , mount top of each battery near the + post.
-

The Saga of corroded brake wires on older trailers
jd1923 replied to Wayfinder's topic in Mechanical & Technical Tips
Chris, you may want to do what I did to #113, now that our hulls are 10 years old! And your grounds look more corroded, seeing the color of the copper. I removed each and every one, trimmed the wires back 1/2” and stripped them for clean fresh copper, retighten good! -

Propane/CO alarm quick-disconnect?
jd1923 replied to GlacierGirl's topic in Mechanical & Technical Tips
2 1/2 years never a false alarm for us. Though no RV antifreeze or hairspray ever in our hull. 🤣 The test button will produce the alarm for a few seconds, and then it continues to be ON. As far as a real test, please see my comment above! -

Propane/CO alarm quick-disconnect?
jd1923 replied to GlacierGirl's topic in Mechanical & Technical Tips
Given these detectors have a Silence/Test switch on the face, I'm not adding a switch and don't believe it's a good idea given it can be left off when needed. Is there a brand preference? Meaning are some brands more effective than others? The brand we have now is RV Safe as pictured above and this link: https://www.amazon.com/RV-Safe-RVLP-2W-Propane-Alarm/dp/B08VCBH66H/ An Atwood detector was OEM on our hull many years ago, reason OTT cut that big square hole in the fiberglass. This model is a replacement that I believe fits recessed into that spot (though I have not yet verified dimensions). It also has a strength readout. Hopefully it's not too bright under the dinette but the RV Safe model has quite a bright green light too. https://www.amazon.com/gp/product/B0F8GMBQ5B/ I'm not sure I trust a built-in "Test" button! We have a LP torch Chris uses for cooking (for melting cheese and browning foods). It will release LP without igniting and when lit it should produce CO. Perhaps a real test is in order time to time. I should wear ear protection and I'll report back when I get around to this test. So, does anybody know that one brand is better at detecting CO and LP than another? -
and to @Geronimo John, who nicely wrote, “Are we there yet?” My answer is “Yep” but perhaps not yet at $500 mark (unless one LiTime 230 Ah does ya). Which btw just beats four big heavy lead-acid batteries of the day!
-
Still working on that rig?! Who isn’t? Come see us in Prescott too. Say hi to Wen. 😎
-
Nan, given you’re a female alone, we certainly understand. If you want to visit Arizona, come to Prescott and see us first! 😂 The Q is only worth going to see other Oliver Owners (otherwise there are 100s of better boondocking sites in AZ! Slow response on this thread! Hey @ScubaRx, if you’re coming, dinner is on us this time! Hey @MAX Burner, it’s perfectly OK you have a new TT! Love to see it. i started this thread to poll those who frequent our great Forum. We have 3 weeks off and if the Q is a bust, we’re going to head towards Tucson, get there asap to tour the SE corner of Arizona. Didn’t want to go that way for a while, but the boarder is secure, god bless. Hope to see y’all! 😎
-

Propane/CO alarm quick-disconnect?
jd1923 replied to GlacierGirl's topic in Mechanical & Technical Tips
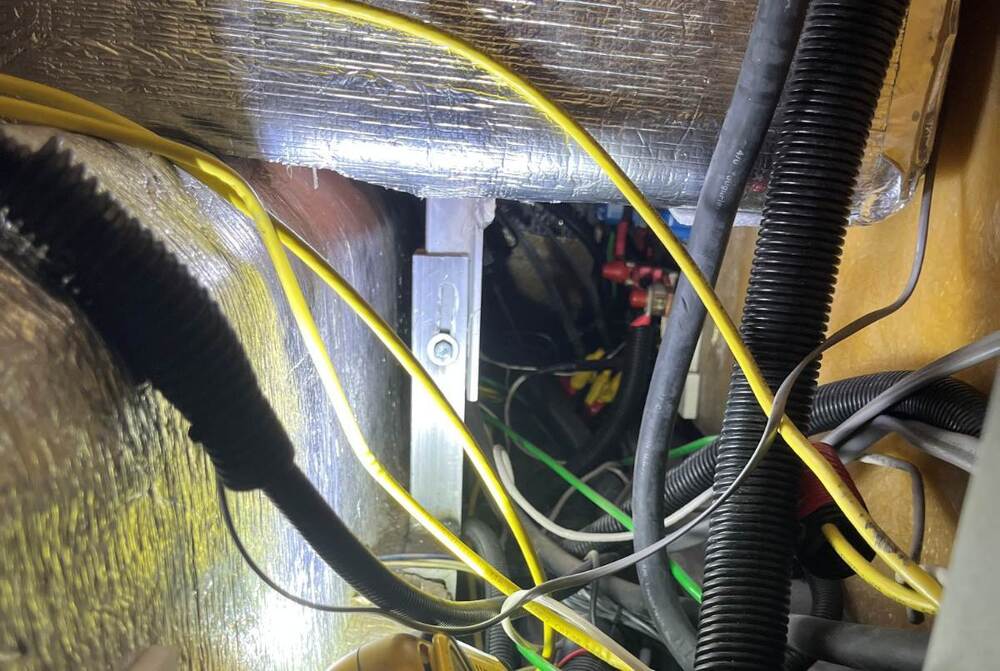
Yours is wired under the bed? Ours is mounted to and wired under the rear dinette seat already. On the right side of the picture below you can faintly see the wiring and a large square cutout. Too bad OTT mounted a recessed model detector requiring this awful 3x3" square hole in the fiberglass! Prior owner replaced it with a surface mount model, same as @Rivernerd has pictured above. Ours is dated 2026 so very soon we have to replace ours. It's simple to rewire most anything from under the beds to under the dinette given that the combined 12VDC and 120VAC power panel is under the dinette. I moved almost everything out from under the beds as you can read in this post. -
My take… 😎 If you own one or more 100 Ah Battleborn batteries you purchased years ago, let it go and it‘s time to scrap them! For $670 (less than what you spent on one (1) 100 Ah Battleborn you can purchase the new 320 Ah LiiTime mini! BTW, so cool! Or for $1200 (I just purchased a 3rd one at 15% OFF for their BF promo) you can buy the Epoch Essentials 300 Ah battery! We’ll be running 900 Ah for 2026 and beyond, so cool! 😎
-
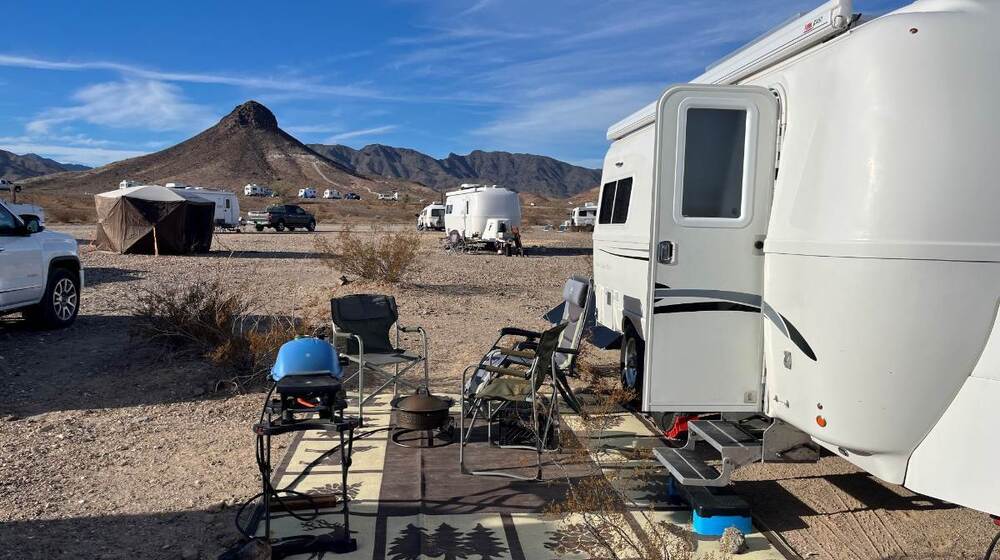
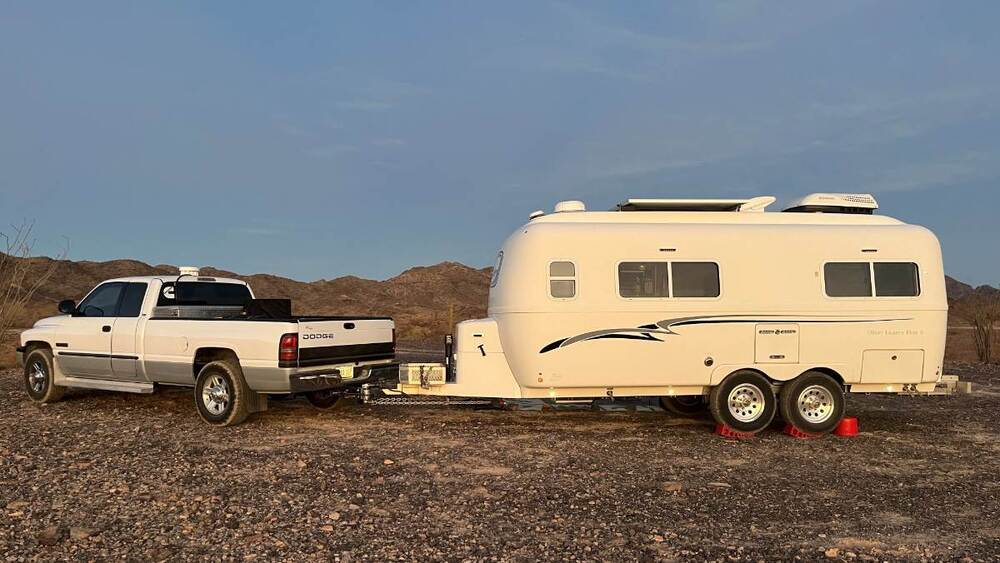
Who's going and when? The Q Big Tent runs Jan 17-25. The Fiberglass RV Gathering will run from February 6-9. I have time off work second half of Jan through first week of Feb and we'd like to visit for a few days when other Oliver Owners are there. Love to meet old friends and new! We weren't so much for Dome Rock (pic1) last year except for meeting Oliver owners! It's a bit crowded with the constant whine of nearby I-10 (and too many little Casitas)! Later we stayed several miles up Plomosa Rd NE of town. It was quiet up on the ridge with great views (pics 2-3). Hope to meet y'all there! 😎


