
jd1923
-
Posts
1,257 -
Joined
-
Last visited
-
Days Won
44
Posts posted by jd1923
-
-
Recently purchased a Victron SmartShunt and I did not want to do a fancy install, perhaps later once upon a Lithium upgrade, but for now the shunt will be physically close as possible to the negative battery terminal. They don't sell shorty 4/0 AWG cables, as far as I can tell, and if you need a bunch of different sized cables, you can cut lengths to your needs and save money buying bulk cable and battery terminals (lugs).
I installed the shunt last week to check it out, grounding it with two shorty 4AWG cables in parallel, because I had them on hand. Twas fine for the testing, but the cross-sectional area of the two 4AWG cables s is about 60% of one 4/0. Amperage capacity is directly related to the quality of the conductor (less resistance) and its cross-sectional area (more capacity).
Cutting 4/0 cable is not easy. When I install an 1800W inverter 3 years ago, I used 2/0 and was able to cut that with the cutters shown. This tool is a bit dull and beat up because of that, and no way it was going through the 4/0. I put the cable on the vise and used the metal hand saw. Saw just touching the vise so that the cable stays put. A new fine steel blade would be best, fine since this is only copper.
Today I crimped the shortest cable that I've ever made, only 5" long, hole to hole. The other thing is I customized it by turning the lug on one side 180 to the other side. This allows for a 1" height gain necessary to mount on the taller shunt (picture mounted later). I used Selterm brand tinned copper lugs, that are so big that the insulated wire between the lugs is only 1 1/4" long.
It is extremely difficult to get all the copper strands into the lug, due to the sawed edges. Hammer the ends as round as you can before you strip the insulation, and then just strip a little at a time.
I purchased TEMCo pure copper 4/0 welding lead "Made in the USA." The crimper tool is their brand too, that I had from last time. Some guys hammer this kind on crimper. But I prefer again using the vise. This is a tug! You'll need a strong extension bar to get the full crimp. The TEMCo HD crimp tool works great btw.
I ordered heat shrink tubing which came in the wrong size, so later on that. Cool thing is 3" of heat shrink will go lug to lug on a cable this short, will show that later.

-
 7
7
-
-
3 hours ago, Ronbrink said:
I then made certain that the button on the Xantrex remote panel was in the Off position, as well as the button on the unit itself. Here is a pic of the Xantrex remote panel showing that unit in ‘BYPASS’ mode.
I observed what sounded like the fan on the Xantrex, continually cycling on and off at varying intervals of a few seconds to minutes in duration. Also when tested, the lights, MaxxFan and radio were operable, and the blade fuse panel was powered. How can that be if the battery bank is presumed to be isolated? Furthermore, the VictronConnect app was showing the added draw by said components. What is wrong with this picture? My only assumption is that the Xantrex (even though totally off, bypassed and disconnected from battery) in someway is the 12V power source, OR the battery bank is not fully isolated by way of simply manually tripping said circuit breaker. Any thoughts (good, bad, comedic) are respectfully, appreciated.
By having the Xantrex OFF, you turned the inverter OFF, and with shore power disconnected you would have no 110V AC circuits. This does not turn off the converter/charger portion of the Xantrex.
The converter was supplying +12VDC to the DC panel. The fan was running because this action creates a lot of heat, supplying 12VDC power with batteries disconnected.
Similar to this scenario. Say you were off the grid for a couple of days and got your battery bank down to 50% for lead acid, or even lower with lithium. Then you arrive at a campsite and plug-in to shore power. The charger portion will work hard to recharge batteries from the newly incoming shore power and since your batteries are very low there is a lot of current supplied for charging, the fan will run on-n-off as it produces heat in the charging. I added positive and negative busbars to facilitate this.
@Geronimo John added this statement; "If you have an Inverter/charger, that could provide an electrical path as well." True. I know when I installed my own solar/inverter setup in a previous RV this was certainly the case. The Bigfoot had its OEM PD9200 converter/charger and I added an inverter-only device. I installed heavy gauge battery cables, connecting the inverter to the battery bank independently.
Investigating these issues would be so much easier if the Oliver pantry was not sitting above the battery bank hiding access to many of the cables. When I upgrade to Lithium in a year or two, I'll have to tear all that out, sort it out to simplify, and will then certainly gain a better understanding!
-
1
-
-
BTW, in the picture above, does anybody understand the term "REVERSE BATTERY FUSES?" What are they, where are they located? I have not had time to research this and have not previously read this terminology in other RV manuals.
Perhaps this has something to do with the converter/charger?
-
1
-
-
3 hours ago, HDRider said:
Just to add, the draw of the inverter is not the concern, but more so the other things you might leave on like the AC, that would draw your battery down. I can see both sides now that I understand the inverter better. Thanks all.
Of course, when you are running AC appliances off the inverter, you want them OFF when not in use, since some pull very high amperage from the batteries. My inverter runs alone at -2.5A but turn the microwave on and it's at -127A! Two hours of microwave use would completely deplete my battery bank, but nobody does that! Our inverter is not capable to run the old OEM A/C unit, but if yours can, then yes running the A/C for 2 hours would use the majority of available AH in the battery bank.
There are only a few AC appliances. You can see the list in the picture, the "AC BRANCH CIRCUITS" in our hull #113. The AC, HWH, fridge, 110V outlets, and converter/charger. Notice you do not see some others, like the microwave we have, our TV/Dish/Blu-ray/AV system. These must all sit on "110V Outlets - 15A" circuit (they really should have another 15A breaker for the Microwave that draws just over 10A itself).

-
4 hours ago, rich.dev said:
I was just stating what Oliver recommended to me when I picked up my Oliver, i.e. leave the inverter off (on the inverter) and use the remote to turn it on/off when required.
This recommendation I Certainly agree with. When you have a remote installed, use it, makes no sense opening up basement access panel to physically push the main power button on the inverter. It's like at home, we all use the TV remote, instead of getting up to push the physical power button on the TV.
-
14 hours ago, HDRider said:
...Oliver does recommend turning the inverter off when connected to shore power. They say that for a very practical reason. If your inverter is on, and you lose shower power your batteries might be depleted without you knowing it is happening.
I'm sorry, but I tend to disagree with a lot of recommendations. I have been leaving inverters on, often around the clock, for 3-4 years now, ever since I've owned my first one. I could not RV without solar and an inverter.
Lately, I left mine on overnight a few times, unintentionally. Watching news, playing music or something on TV while working on my Oliver projects. Each time, when I got back inside the next morning, my batteries were at 100% from the solar charger.
I measured amperage draw on our Xantrex 2000 inverter at 2.5A (while not running AC appliances). Even without solar, it would take days to drain the batteries. We presently have lead-acid with usable 225AH. Given this battery configuration (and most of you with newer models have better), you can run 2.5A for 90 hours, close to 4 days. Of course, when know I'm not going to be in the Oliver for a while, then I look carefully to shut down all accessories.
With the SmartShunt and the Victron app, I can now see the amps on my phone, and know for certain when I left something on. Better advice is always check your amperage draw when leaving!
I have my inverter on 24x7, when camping or working on the Oliver. Let me give you a good reason to do so. When shore power gets interrupted, even for a few milliseconds, I'm still watching TV, staying connected, the modem and all other electronics are running, without missing a heartbeat. Inverters are designed to work in this way. I used to love testing this. Run your AC appliance, shore power and inverter on and pull the plug! Or trip the 30A main breaker, and it doesn't miss a heartbeat!
If you feel safer fine, but you'll remember this, the next time you're waiting... while your systems reboot!
Should Inverter Be On When Plugged Into Shore Power? Ultimate Answer (rvgoer.com)
-
1
-
-
8 hours ago, HDRider said:
Can someone please post a functioning fridge light? My bulb popped out and I cannot get that spring back in correctly.
Compress the spring so that the straight portion touches the contact above. The rounded part of the spring will hold one end of the bulb and the other end of the bulb sits in the round opening in the bracket below, that wraps around the lens and connect to the other contact (terminal).
-
 1
1
-
2
-
-
Agreed, need more support up front. Looks like the one small front bracket is taped to the fiberglass, or temporary not yet mounted. Make 2-3 of these brackets, mount with 3M VHB and you're there!
Awesome installation @Jps190, and there are a few of us who feel as you do, where you wrote, "Ever since getting my Oliver I have loved modifying different aspects of it."
-
2
-
-
My final water upgrade, a cute minor addition! I never was much for RV outdoor showers but given the Oliver wet bath they seem more viable, when at times not wanting to get everything inside wet. Problem is you got to hold the shower head, making it difficult to take a quick shower. So, I wanted a holder for the shower head and found these:
JONKEAN White Handheld Shower Head Holder with 2 Hanger Hooks, Strong Adhesive Shower Head Holder, Adjustable Shower Wand Holder Wall Mount, Bathroom Waterproof Shower Handle Holder No Drill Need - Amazon.comComes as a 2-pack. Being 6' 2" I mounted one as high as the shower cord could extend. The second one will be down below for our dog wash! You only have to leave the clear mounting plate on the Oliver and the holder itself fits behind the outdoor shower door with the shower head. With the new water pump, the stream is now so much better!
-
2
-
4
-
 1
1
-
-
2 hours ago, MAX Burner said:
We disconnected the 7-pin's black wire (to the TV alternator) ...
I disconnected ours too, without a DC-to-DC charger. I can't see any reason for it but causing heat (12GA wire) and battery drain issues on either side. I believe the reason for the black wire on the 7-pin connector was to allow a small amount of power for trailer use of the TV battery. For example, it allows for a cargo trailer to run 1-2 interior lights (better remember to turn them off or your truck will not start the next day). There is NO reason for this wire when the trailer is a travel trailer with its own power source(s). And I don't want a live 12V hot on my trailer plug.
You desire charging any viable AH capacity of trailer batteries while driving, you need to install a DC-to-DC charger.
-
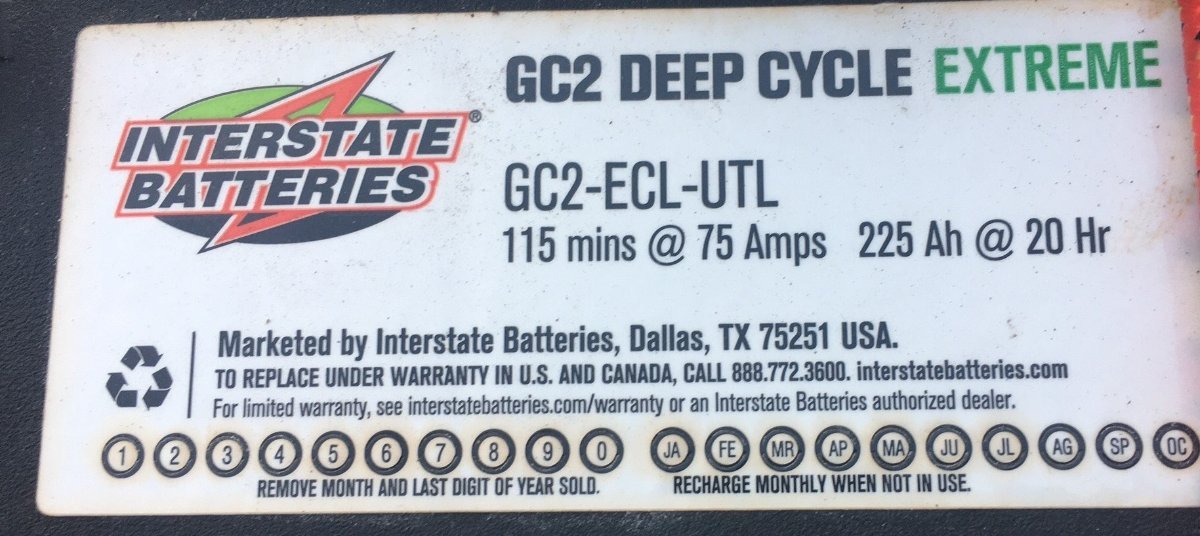
Prior owner put a in a set of Interstate 6V batteries, from the label is where I added up 450AH at 12V (on the set of 4). The installer did not mark the labels with date codes, but I have the original receipt.
Yep, 50% down is suggested. You can actually run them lower when needed (I made this mistake a few times on a prior set) which reduces the number of duty cycles. Just giving you a reason to upgrade.
You know @SeaDawg if you keep taking such good care of your AGMs, you're never going to get lithium for your Ollie!
-
2
-
-
48 minutes ago, MAX Burner said:
We're using the BMV-712 located under aft dinette seat - the iPhone must be within 5-10' of the outside hull to connect... It would be SOOOooo nice to be able to access the 712 with the app while towing.
So then, the BM-712 signal is not any stronger than the SmartShunt Bluetooth signal. I haven't tried mine while towing yet. I was connected yesterday to drain the tanks and too bad I did not think of it. Soon, I'll back my truck up the Oliver to see. I wanted signal strength to my living room! You would think at a minimum to the driver's seat!
On other forums I read the Smart Dongle has a stronger Bluetooth signal: Amazon.com: Victron Energy VE.Direct Smart Dongle (Bluetooth) : Electronics There were many forum members complaining about buying the SmartShunt and having to spend more $ on this. Also, you may need one of these to connect: Amazon.com: Victron Energy VE.Direct Cable, 5.90 ft : Automotive which comes in various lengths. We could get the Bluetooth signal out of the battery bay, higher up and run it closer to the TV.
I don't have the time to worry about it now, but perhaps another $60 would allow the app to read the signal from your driver's seat. I'm not betting on a 60' broadcast to my living room, but perhaps it could if I mounted the dongle rear left of the Oliver where I have line-of-sight. Closer to my living room, would be farther from the TV driver's seat!
-
20 hours ago, Jps190 said:
...Epoch also has some 300ah batteries coming out that are sized so you could put 2 in the battery tray. 👍🏻 John
Wow John, and I liked the 460AH when you first posted it. 600AH in the Oliver battery bay, priceless! I'd add that before adding more solar wattage.
Recent purchase of our older Oliver came with 450AH 6v lead-acid batteries, now 2 years old. We gotta get at least a season or two of camping in before anymore major upgrades, but (2) Epoch 300s is now on the Wishlist for sure!
-
1
-
-
28 minutes ago, StillGame said:
One more consideration. Replacing an external unit is a lot easier than the cost and time to replace the onboard unit.
To me it's like paying two insurance companies to cover liability on your truck! Borderline paranoic, no need from any engineering or electrician point of view.
The PD EMS-HW30C is quite a capable device, which over 99.9% of the time can be reset by unplugging shore power. You'd likely have plug this into a 240V circuit to get the E10 error "Replace Surge."
I just installed one in our older hull, since back then OTT did not include one. If you have to replace it, a small Phillips to open the cover and a flat-blade screwdriver to do the rest. The AC wires coming in (black, white and green) and the same 3 in the same orientation going out. The hot on the output side goes through sensing coil, and that's that. What if a lesser outdoor unit failed, caused a dead short and in turn killed your EMS-HW30C?
Sure glad I will not have to work one more camp setup/tear-down task and stow another device! But that's me and I never wear suspenders! As they would just give me a kink in neck or sore shoulders.
-
2
-
-
1 hour ago, Geronimo John said:
Do you have any experience with damage potential to the hull for a removal of a wide bands of VHB tape secured equipment? GJ
Not "wide bands" and you do not need much. The installation above, each panel had eight 1x3" 3M VHB 4950. BTW, I like this model for many things, but there may be better versions over 4950, they have so many.
I have removed some on several kinds of surfaces. I start with an old soft putty knife with rounded corners, to break the seal and get the bulk off (you don't get too far with plastic scrapers). Then let a little Goo-b-gone soak in.
Real damage would come from 8 min or 12-16 screw holes per panel and all the Dicor crud to remove. I've seen YouTube videos where the use VHB tape and then put "Dicor over the brackets to be safe." There is a difference between being safe and just being stupid.
-
2
-
1
-
-
On 12/28/2023 at 7:48 PM, Mike and Carol said:
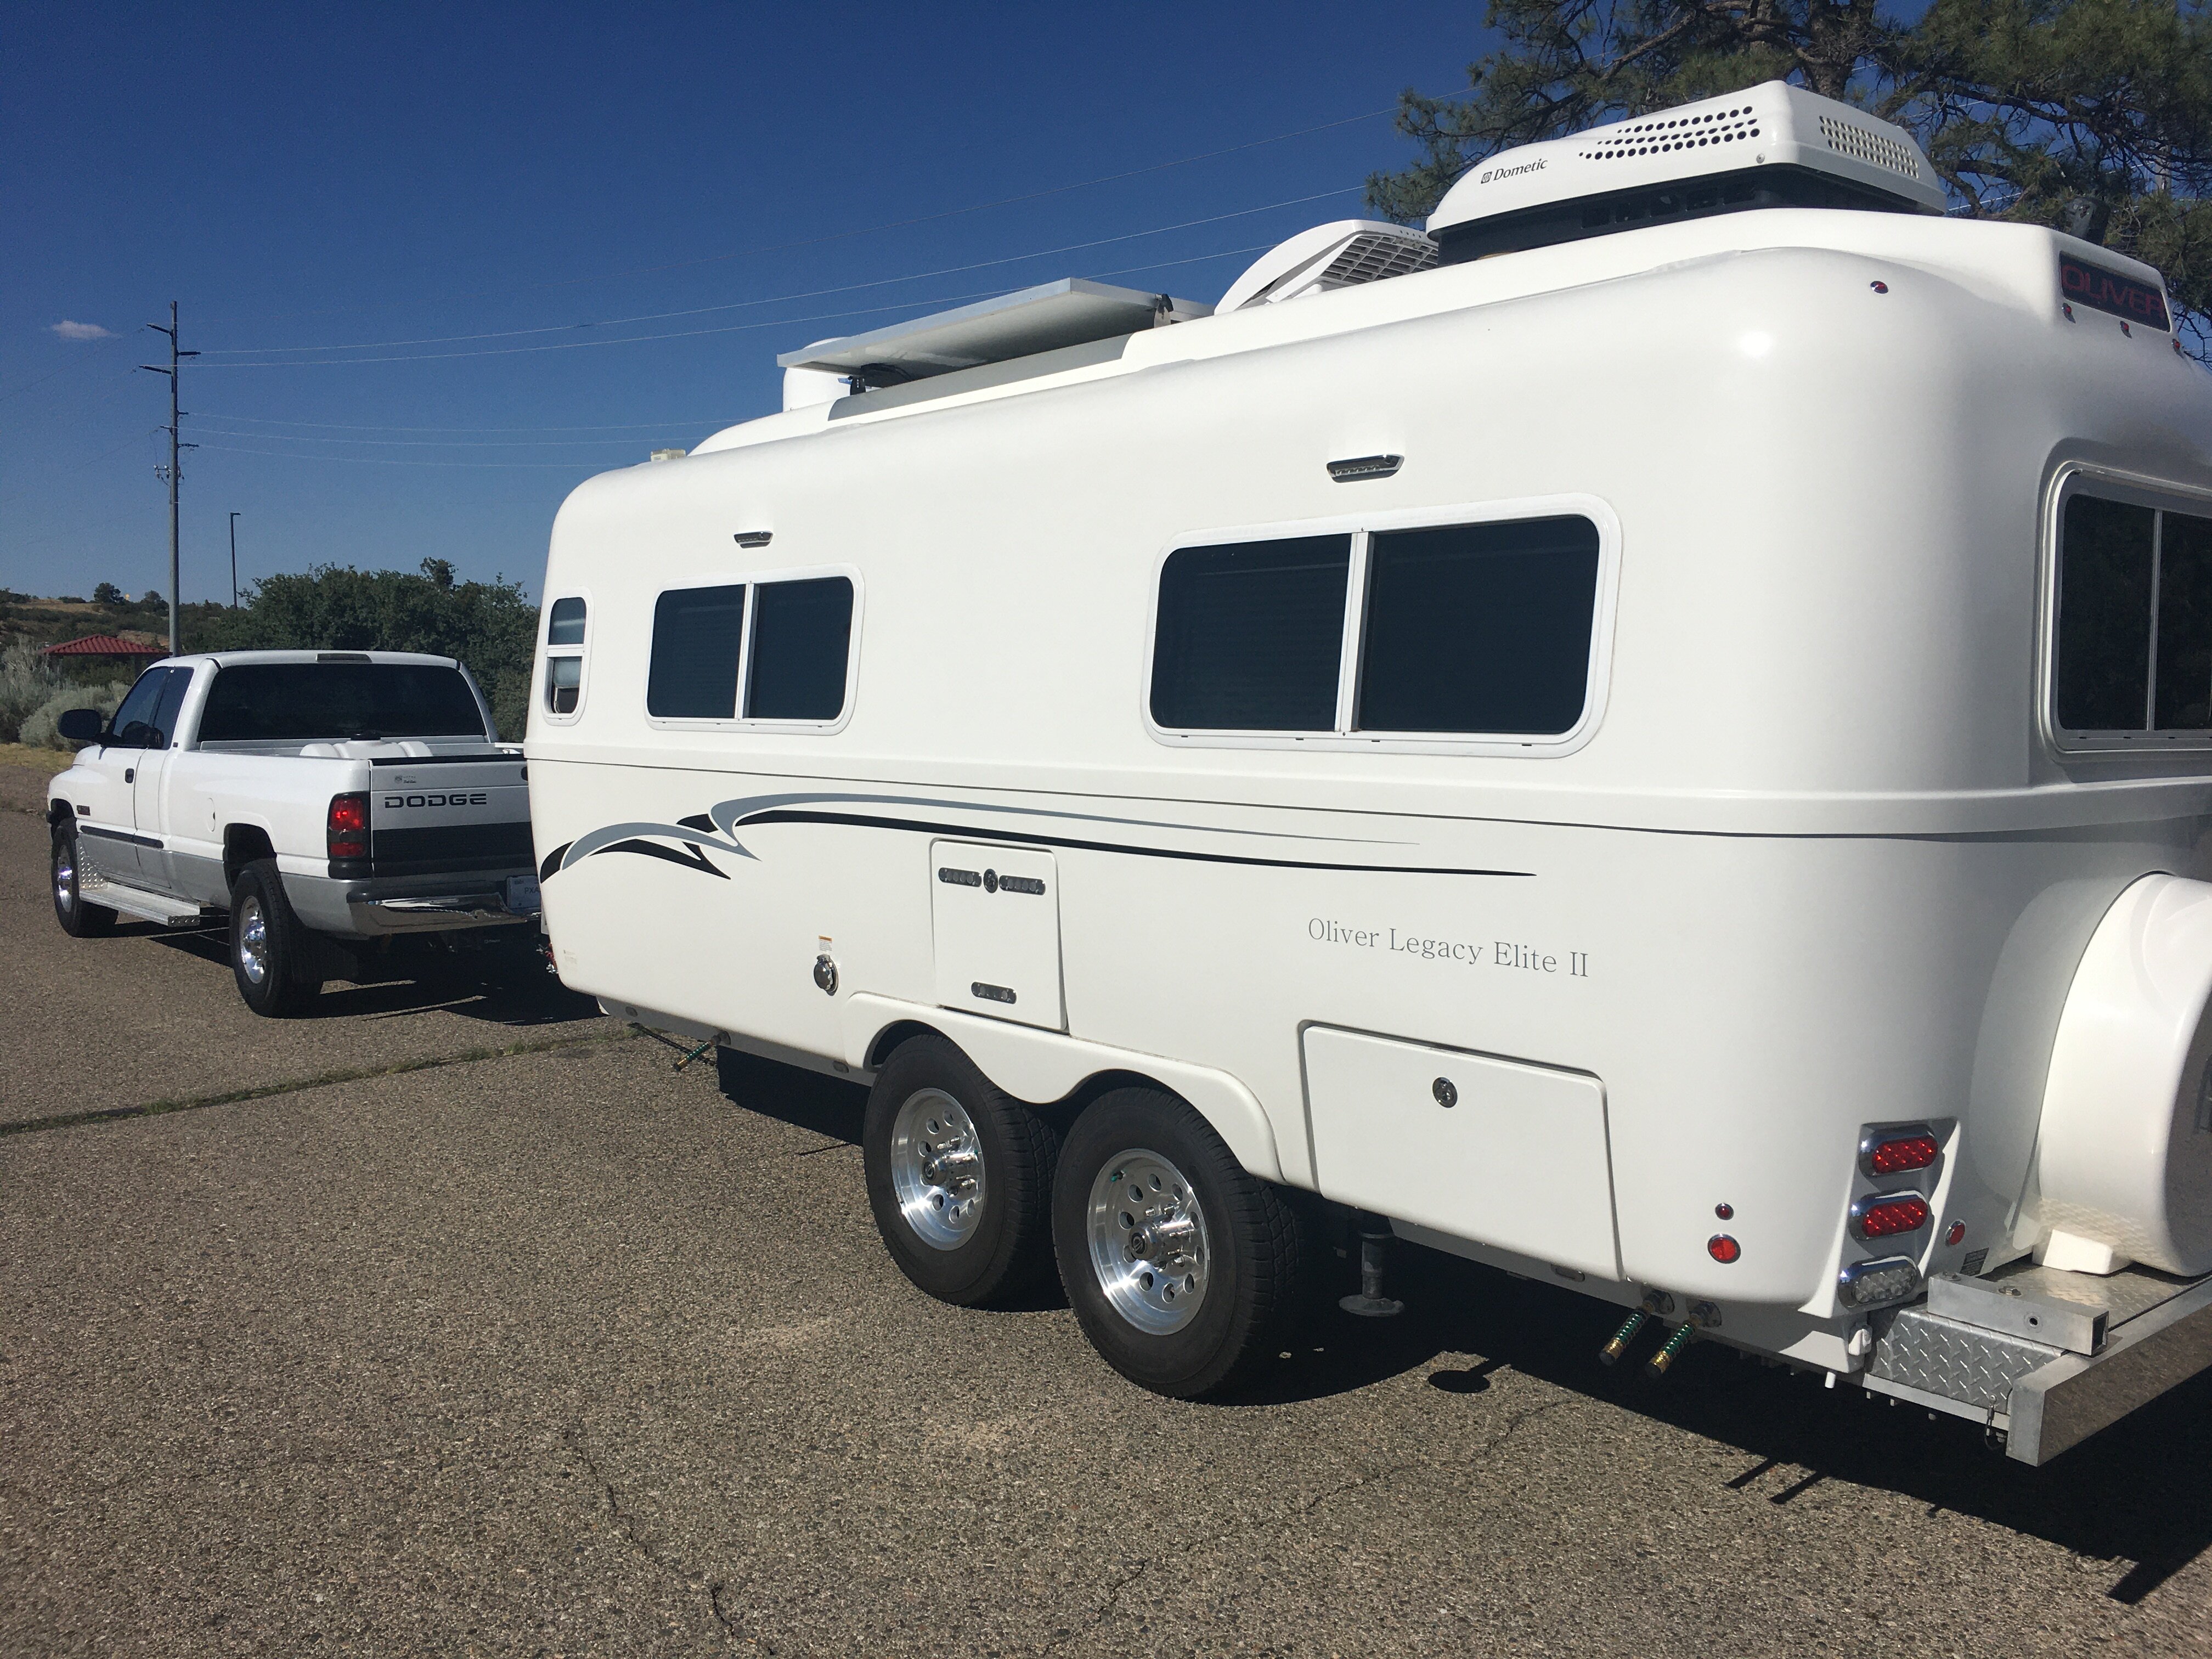
I replaced my original tires (BF Goodrich) somewhere between 5 and 6 years. There was lots of tread left but they were starting to show some small cracking close to the wheels. They probably had about 60K miles on them. I used Discount Tire. Mike
And 20K vs. 60K miles is a big difference. You certainly have ample time at near 5 years with relatively low miles. My advice is the same advice Mike already gave, but I'll say it another way.
Don't buy tires from OTT, as they are a long way from a Rocky Mountain trip, down to Key West, up to Maine, or wherever you will travel. Discount Tires is likely the largest national tire chain in business today. Buy from them when the time is right (I stick to 7 years max) and whenever you need to check pressure or add air, fix a flat, replace a tire or leaky valve stem, or just to rotate and balance, they will be nearby at no charge for many of these service needs. You may pay a little extra up front for this national service coverage, but it could save you later.
They are everywhere and generally have very large parking lots and driveways, easy to pull into with a trailer (except for their store up here in Prescott, AZ!) The fact that they have a store up here, in a small town in the mountains says a lot too.
-
4
-
-
So you got 80", fore to aft, longer and narrower than what we have (yes OTT could offer this). Keep us posted after you thaw out up there!
Re VHB tape, I use it on bracketed models, anything and everything. It does not work well with textured surfaces but will bond to anything clean and flat.
The picture below is the solar install I added on our Bigfoot Class-C. (BTW, every white-colored accessory in this picture was installed by me. I was not up on VHB when I install the Dish, so that item is screwed and Dicor'd.) I used two sets of solar mounts per panel to be safe (2 sets, 8 standard Renogy brackets) to install these extremely heavy panels: Pro 200W 12V Monocrystalline Solar Panels w/ 9BusBar Technology -Newpowa
Zoom in on the mounting brackets in the pics, no screws, the brackets just sit on VHB tape! You could not budge them. The Bigfoot also has a fiberglass roof. Screws in fiberglass are an issue long-term, 3m VHB will outlast a screw mount.
-
1
-
1
-
-
Not sure how accurate sound noise (dB) measurement apps are? I just downloaded one. However, when using any tool, carefully in the same manner, it should show a reasonable relative comparison.
The new water pump was at 50 dB (pretty quiet!). I closed the basement door to the water pump, placed a 4" dinette seat to cover the opening and placed the phone on the seat cushion, showed 50 dB. I went into the bathroom, ran the water holding the phone down below the sink to measure the noise within vs. the water pouring, it was 73 dB.
Lastly, I started our older Dodge Ram Cummins, on a colder day and ran the app while idling. The 2nd Gen Dodge Cummins are noisy, not like the older Ford PowerStroke, but certainly noisy! It came in at 64 dB.
Conclusion, the plumbing under the bathroom sink in our older Oliver is louder than an old Dodge Cummins diesel on a cold start! That's really bad.
-
1 minute ago, Geronimo John said:
Chris or John: That would be very much appreciated... GJ
@Geronimo John, I was writing as you were! See my previous post. JD
-
 1
1
-
-
@SeaDawg and @Geronimo John,
Got back up there today, took more pics and measurements...End-to-end there is 84" between two hard constraints, the bathroom plumbing vent and the MaxxFAN. The picture showing the tape measure starts at the rear solar panel mount. You can see from the picture I posted yesterday that there is another 2-3" behind that rear mount to the MaxxFAN. So approx. 84" total front-to-back, where an 80" panel can fit nicely. And two of these, running front to back, could hardly be seen from below! That would be nice, clean and mount nicely. I would mount mine with 3M VHB tape ONLY, no need to screw into the fiberglass (you would only need to drill two 1/4" holes for the solar charge leads. I read here where some members would not put solar up top to detract from the beauty of the Oliver. Two of these lengthwise could hardly be seen, but if you mount 3 panels, wow we're seeing it, just sell the generator!
Personally, I would move the TV antenna, and in my previous post I suggested one method. I'm adding a TV antenna soon, and I plan to mount mine at the rear, drill ONLY a 1/4" hole into the roof, straight down to the attic (with only a little dab of Dicor self-leveling sealant you're good). You're there with a straight short cable, not 30+ FT of multiple coax cables and connectors that OTT uses.
From what I could see, while up there on the ladder, at 80" wide your panels would hang over the awning(s) and be as wide as my awning, left and right (sorry, not good with the starboard stuff!). Think another 11" each side when looking at mine. Hopefully my measurements and pics will help your plan. Best to you and stay warm somehow! Sheesh
I cannot fathom how people install stuff today! Look at my Winegard below. I would have used NO screws, no bracket wings and NO Dicor! The coax only needs a 1/4" hole and VHB to housing to clean fiberglass. It ain't going nowhere, I promise!
-
1
-
-
2 hours ago, Geronimo John said:
Ollie is 7' wide with two puff up/downs along the width of the roof. As such, dimensionally they will easily fit on our roof running starboard and port (S/P) direction with room to spare... GJ
Really, you're thinking 80" wide? It seems like mine stick out enough sideways at 52" wide. And BTW, if you're thinking 3 panels, it almost doesn't matter at 78x80" total, but 3 panels would install easier sideways.
Yeah, the OE2 is 7 FT wide, but not at the roof and then the very top it is much narrower. I would go with 2 mounted lengthwise, if it were me. The antenna is an easy move, though you would likely have to run the coax on the roof for a foot +/-. You would seal that opening and the newly installed panels would then cover the current opening.
I'm working and more day out there today (just finished the sanitize process). I'm going to take some more measurements for you, like how much length between the bathroom fan and the MaxFAN. More later...
-
1
-
1
-
-
After working this project, I feel like I spent so many hours and considerable money, as they say, "putting lipstick on a pig!"
Others may prefer a limp water system, great if that's your preference, and keep lifting those mattresses! I like mechanical systems to perform, allowing the user freedom to choose how it's used. At home, I widen or remove all the government-imposed restrictors in faucets. We conserve in our own way, eliminating slow drips, minimal water for dishes, not rinsing recyclables, using the diverter to stop water flow when not needed, and in other ways. But when I'm going to spend 3-4 minutes in the shower, I want a true shower and not dribble!
The new pump is extremely quiet, while the OTT plumbing system is not, at least in our hull. There is more noise under the kitchen and bath sink cabinets, by far, than the pump itself. All that rigid PEX is likely part of the cause as well as other restrictions. The bathroom vanity is really bad. I was able to increase flow at the kitchen sink by 33%, but only 5% at the bathroom sink which means the shower!
Any ideas on where the restrictions lie in both hot & cold-water lines the bath sink? I will say the toilet bowl fills a good twice as fast with these improvements.
The plumbing is so LOUD when running water. Loud inside the bath vanity, where there is no access panel! I'm not really wanting to tear that apart now has many here have done. Perhaps some do not notice, but after years of auto mechanic work and troubleshooting, I hear every little sound anywhere.
I'm going through the sanitize procedure today and will then pull the trailer to my driveway where I can get the rear downhill slant necessary to drain the fresh tank. Then blow out the lines again, since it's getting colder the next few nights. We might even get a little snow tonight. No antifreeze in ours, since next week we're camping at Burro Creek and Vulture Mountain at Wickenburg! (We were going to go before Christmas, but this and other projects went long.) 😌
-
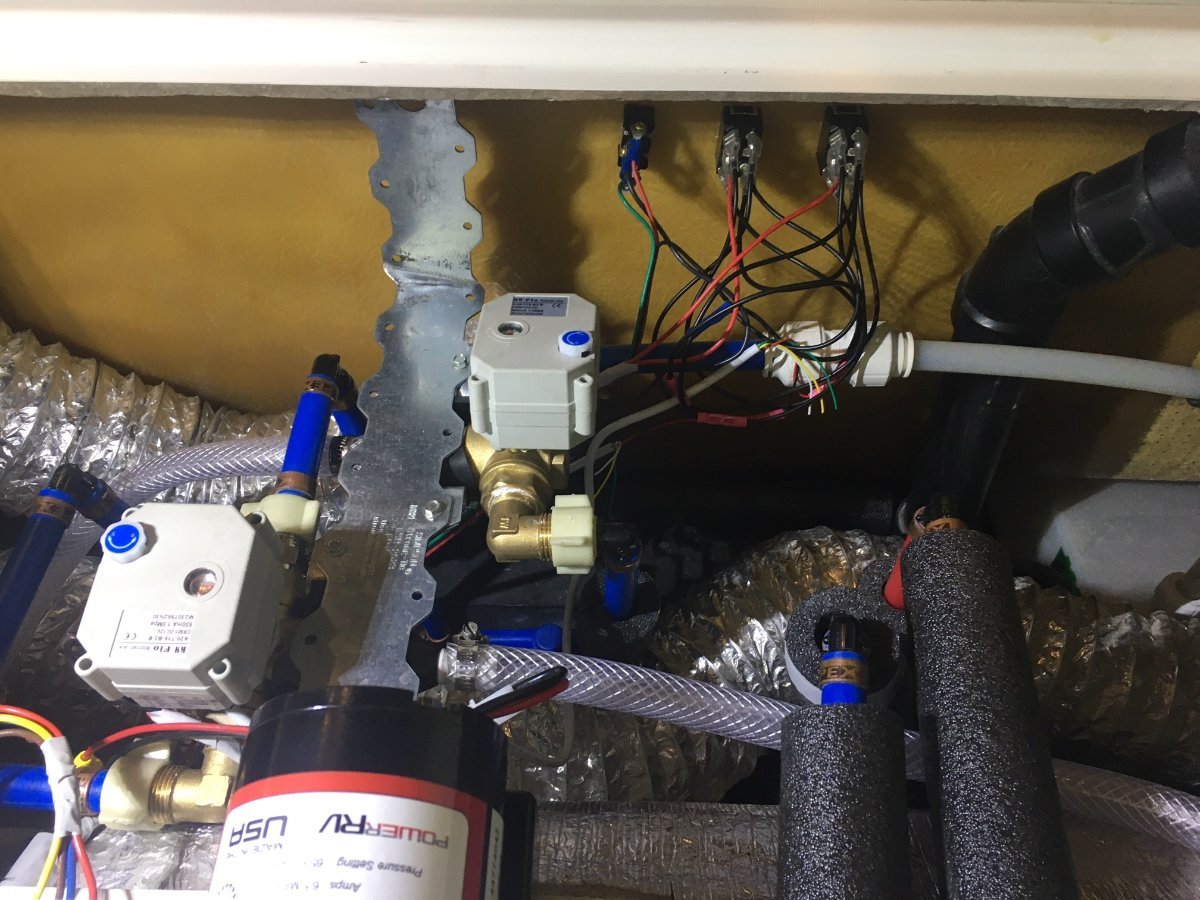
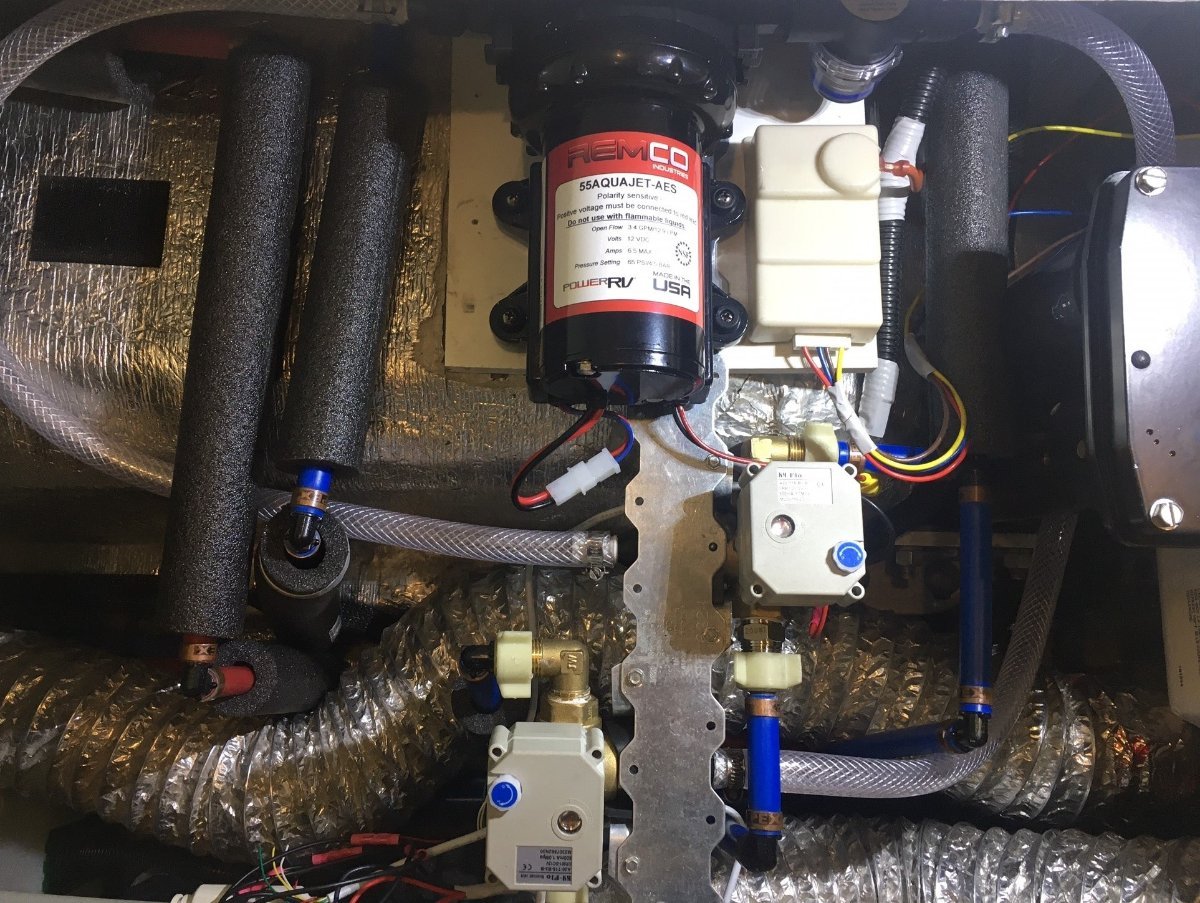
More detail to follow. In the next pic you can see the electrical switches and wiring. Yes, it's a bit complex to keep them all straight. A shout-out and thank-you to @ScubaRx for suggesting motorized valves wired to DPDT switches. Once you get the X-pattern of the wiring they're not complicated. After taking the picture, I wrapped each switch with electrical tape to keep the terminals in place.
Each motorized valve has a rubber-lined steel U-bracket underneath the main bracket for support. It was the only way to do it considering the height of the plumbing and the installed bracket height. The structure is rather solid once it was all tied together.
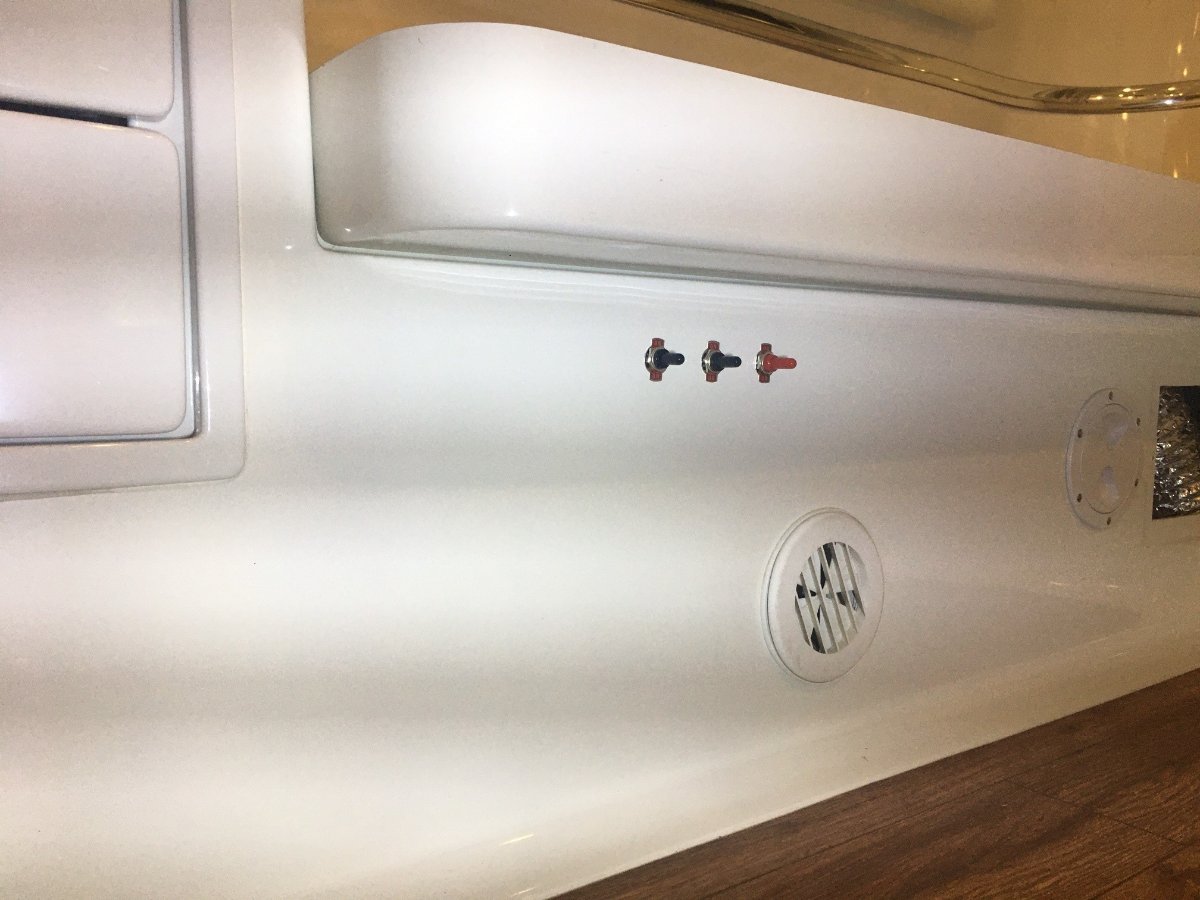
Lastly the toggle switches to the exterior. I drilled three 12 mm holes about 2" apart, in a straight line just 3" below the bed frame. The default setting is ALL switches up, for what OTT calls "Normal Camping Position." I wrote up an instruction sheet (PDF below, with a borrowed OTT graphic), but believe me, after all this work I have the settings down!
-
3
-
5
-
-
Here is our upgraded water system now completed. New water pump, Remco Made in USA, 3.4 GPM variable speed advanced RV water pump: AquaJet PUMP – Remco (remcoindustries.dreamhosters.com) Remco suggests that accumulators are not necessary for variable speed water pumps. This pump works better and is quieter than the OEM installed Shurflo, and they do cost more.
Motorized water valves were installed for 1) fresh water source (Fresh Tank or Boondocking port), 2) pumped water direction (faucets or Fresh Tank), and 3) Fresh Water tank drain. I had to build a bracket to hold these valves as OTT had not mounted the manual brass valves (one leaned on the wheel-well and the other was suspended in air held only by the attached PEX plumbing).
I was able to shape a bracket hung by two screws drilled into the internal fiberglass of the bed support (just off pic to the bottom). As you can see, the other end is held by the water pump mount. I cleaned up and taped the pump wiring and spliced 12V to the ball valve switches.


Making Battery Cables
in Mechanical & Technical Tips
Posted
Using a hand saw to cut the cable worked for building one, got me through the day. Just put this one on my wishlist! Klein Tools 63041 Standard Cable Cutter, 25-Inch - Wire Cutters - Amazon.com
More pics --