All Activity
- Past hour
-
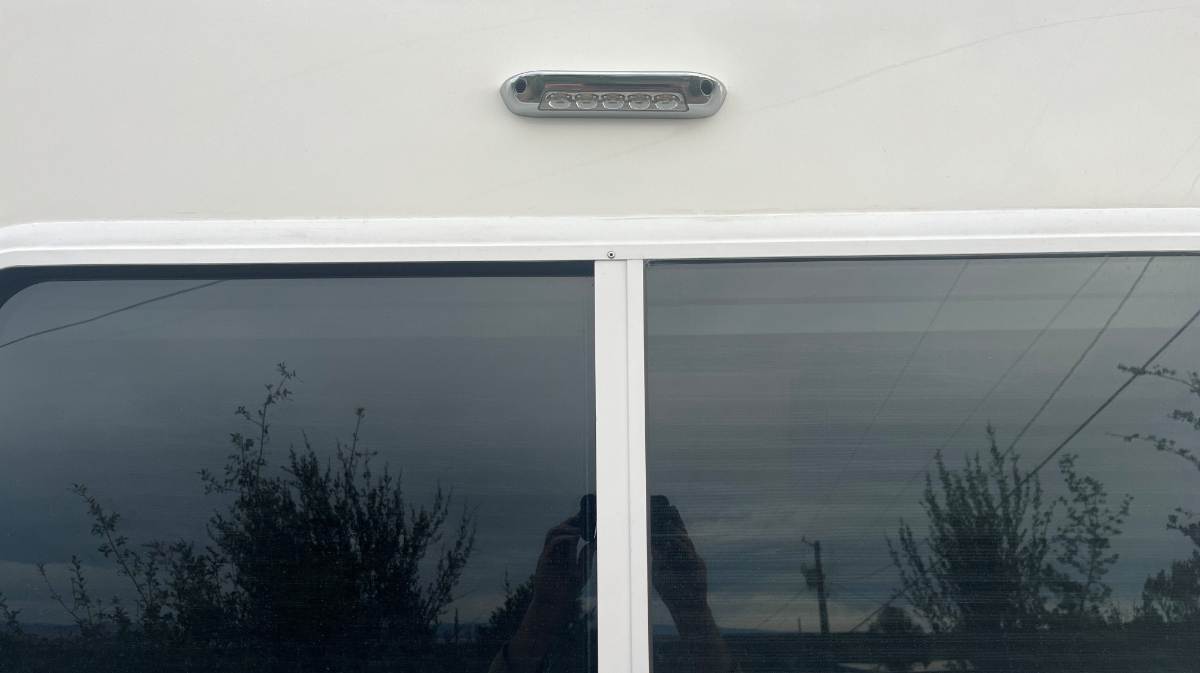
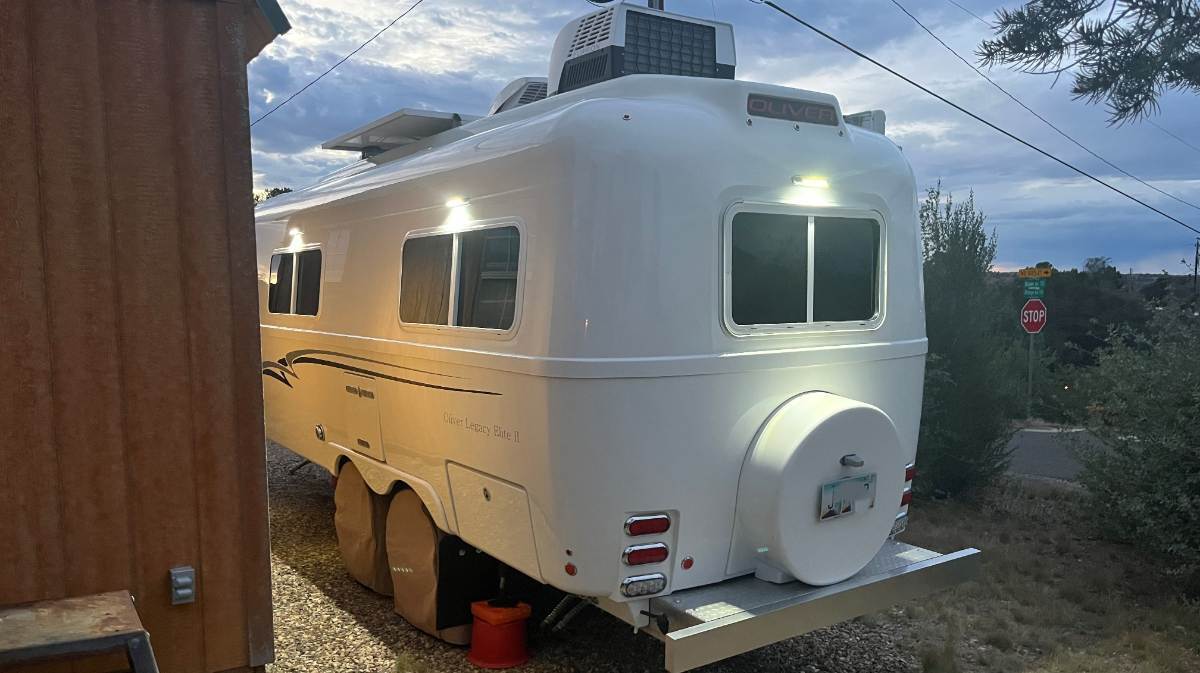
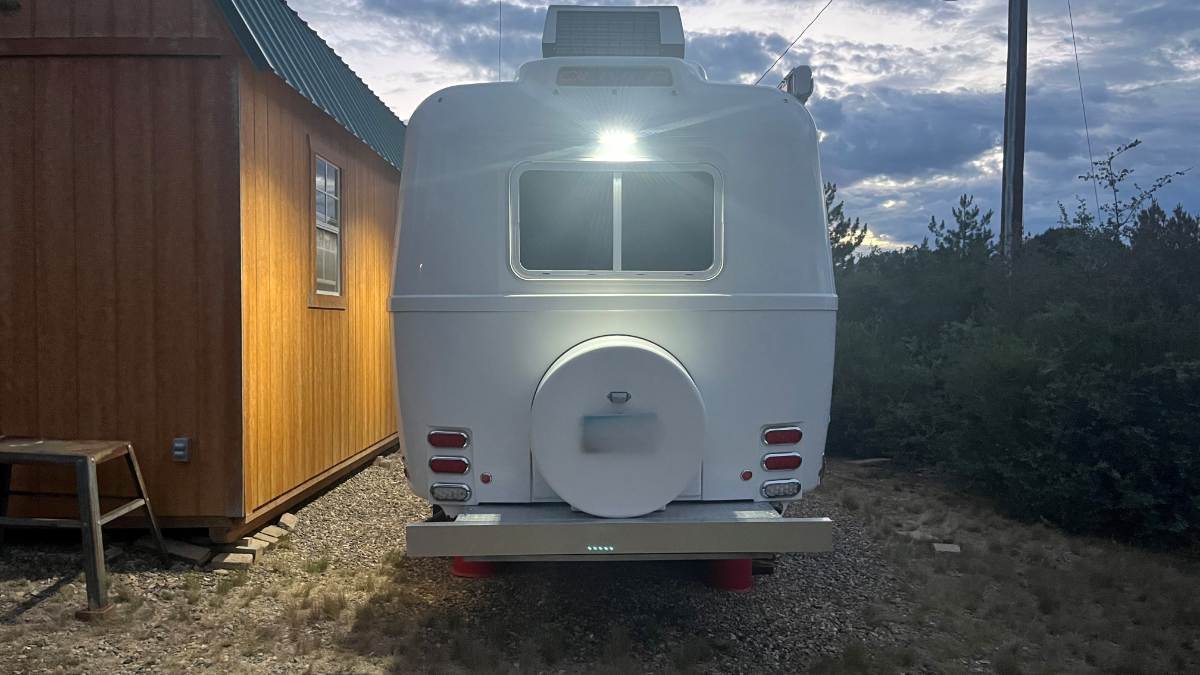
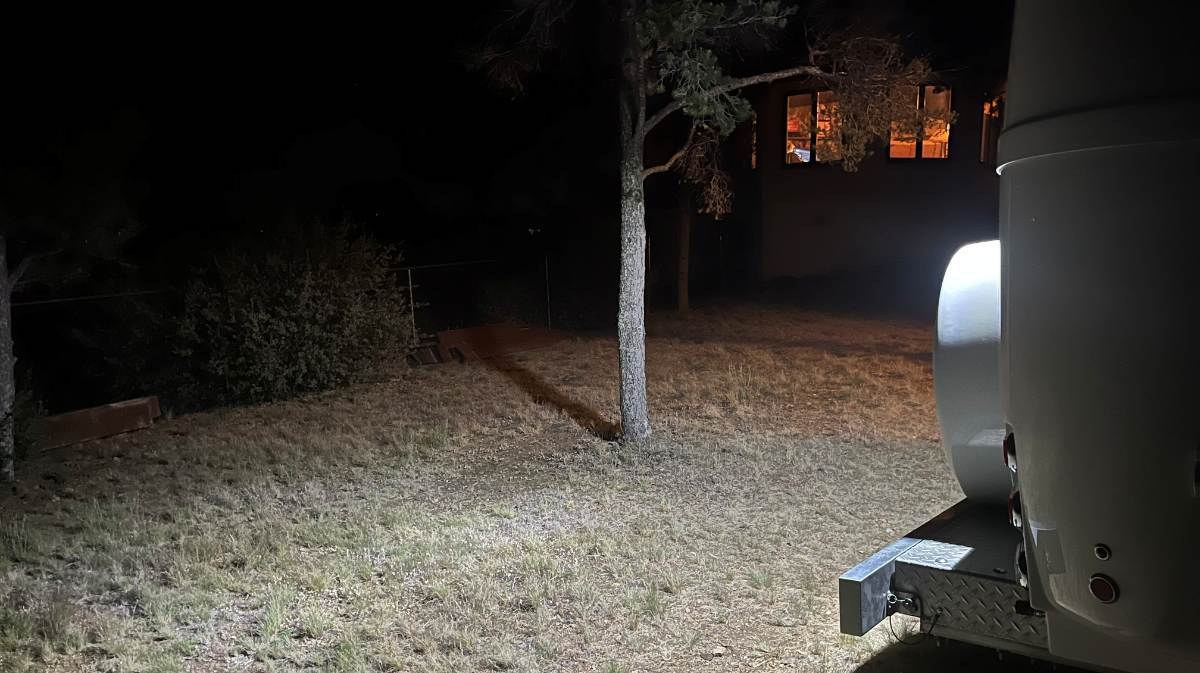
 I finished the rear light! It looks great and lights up the park! The hard part is removing all the dishes, glasses, spices, etc. and putting them back! I worked a little trick and used some existing wiring. I'll run an extra switch leg, next time Chris wants to rearrange things up there! Thanks, Mossey.
 -
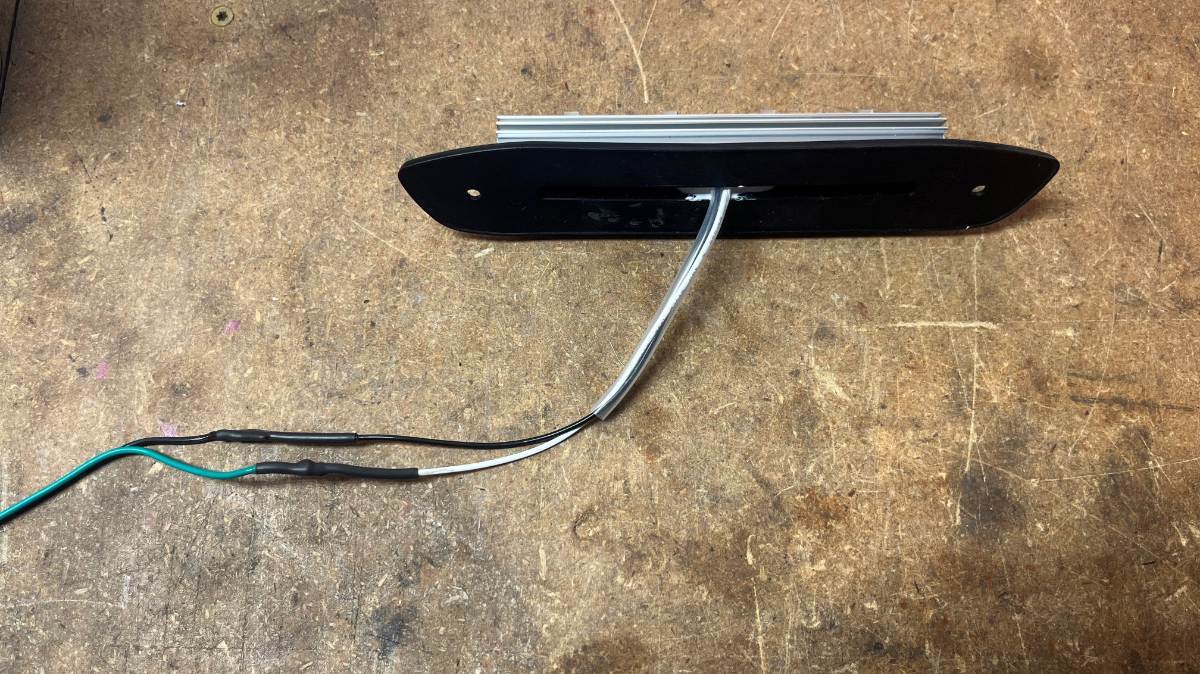
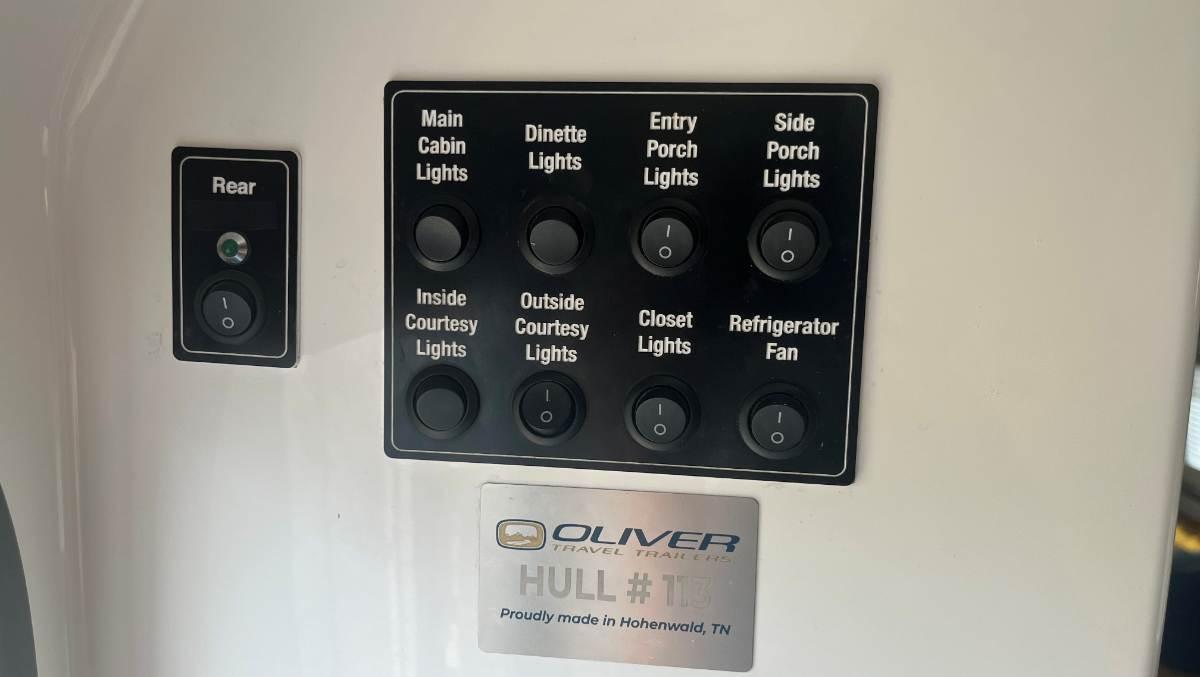
The Oliver Porch Lights are bright for a dark campsite, so we rarely use them. But if you need to light up the area they work great. I've often wondered, why isn't there lighting on the front and rear of the Oliver? I asked a year ago about replacement lights for our OEM Porch Lights and just purchased some recently. OTT should install these lights in all four directions. I would have done one up front too, but running wire would be difficult. I got something else for up front, more on that later. https://itcshopnow.com/products/assurance-exterior-flood-light?variant=50392962007319 I carefully measured the four Porch Lights OTT installed, as the distance from hull belly line, which btw holds a tape measure nicely, up to centerline of the Porch Light at the mounting screws. Turns out they were all installed at different heights +/- 3/4". As a special bonus, this light is 1/4" off from front to the rear mounting screws. My new Rear Porch Light, I promise is the straightest of the bunch! 🤣 It's not easy to choose the best spot to drill into the exterior of your hull, this one especially. I cut away some of the white insulation in the back of the attic. I used a 2-ft piece of metal fish-tape with the ends curled back, running it down the inside of the back exterior hull. Repeatedly, it measured 12" form the bottom of the OLIVER taillight to where the fish-tape hit the top of the rear window frame. It measured 12" so I figured I should go 10" max. Looking from the outside, there is a flat fiberglass frame around the rear window. Above that, the top rear is convex. I had to find the best spot so that the approx. 8" x 1 1/2" light would sit flat in both directions. If not water would get behind it. I drilled a 1/4" hole centered to the window, so the light is just above the flat frame area of the rear window. I soldered and heat shrink some extra wire to the light. If they only attached 18" of wire! Offset the splices so that the fit in the 1/4" hole drilled into the fiberglass. It wasn't an easy pull but a few ins and outs and the light pulled flush. I eyeballed level to the window frame and I promise you they're within 1/16". I wanted to VHB the light housing vs. drilling two mounting holes but the design of the light would not allow for it. They do not include hardware. Found the stoutest 1" course thread screws that would fit the openings and I drilled 6/94" holes after marking the centers. Wiring? I wanted to add the new rear light to the Side Porch Lights (streetside). However, I could not find the switch leg in the back corner of the attic and I did not to remove all the stuff out of kitchen cabinets, but that would be the right way to do it. Our hull had a rear camera and a switch to power it. I removed the camera a year ago, so I'm using this separate switch with existing wiring. I copied something Geoff did, where he used a Sharpie to black out the word "Awning." Mine has a thin cut piece of black tape over the word "Camera" so it just reads "Rear" now! 🤣 I had to wait patiently for dusk and dark tonight! The hull looks great with the new Rear Porch Light to compliment the side lights. And finally, it alone lights up the yard! 😎

- Today
-

True Induction Stove Top will not turn on
Steph and Dud B replied to Lamar's topic in Mechanical & Technical Tips
Could it be that Oliver did the same thing with the cooktop? Is it simply plugged into a hidden outlet like the microwave and fridge is on our unit and that outlet is on Circuit 4? If the cooktop is on the 2000 watt inverter it could easily overload it. Most small induction burners max out around 1800 watts/15 amps. At full power that only leaves 200 watts/1.7 amps for anything else. If it's NOT on the inverter, that sucks, too. -
Just looked at our faucet which overall looks similar except we do not have an Allen screw on top. I would remove the handle again to see if with some kind of tool it can be moved. You can’t make it worse! It’s likely not serviceable, so if it remains to be stuck it will have to be replaced. I was back there a couple years ago because the water lines on our faucet were loose and leaking. It will not be a fun job to R&R since there is so little room and you’ll need a mirror to see behind the sink. Hope you can get it to work somehow.
-
We've had decidedly mixed results with service at Hohenwald.
-
I would definitely contact OTT Service. if you just had the “Full Monty” service then they should have noticed this.
- Yesterday
-
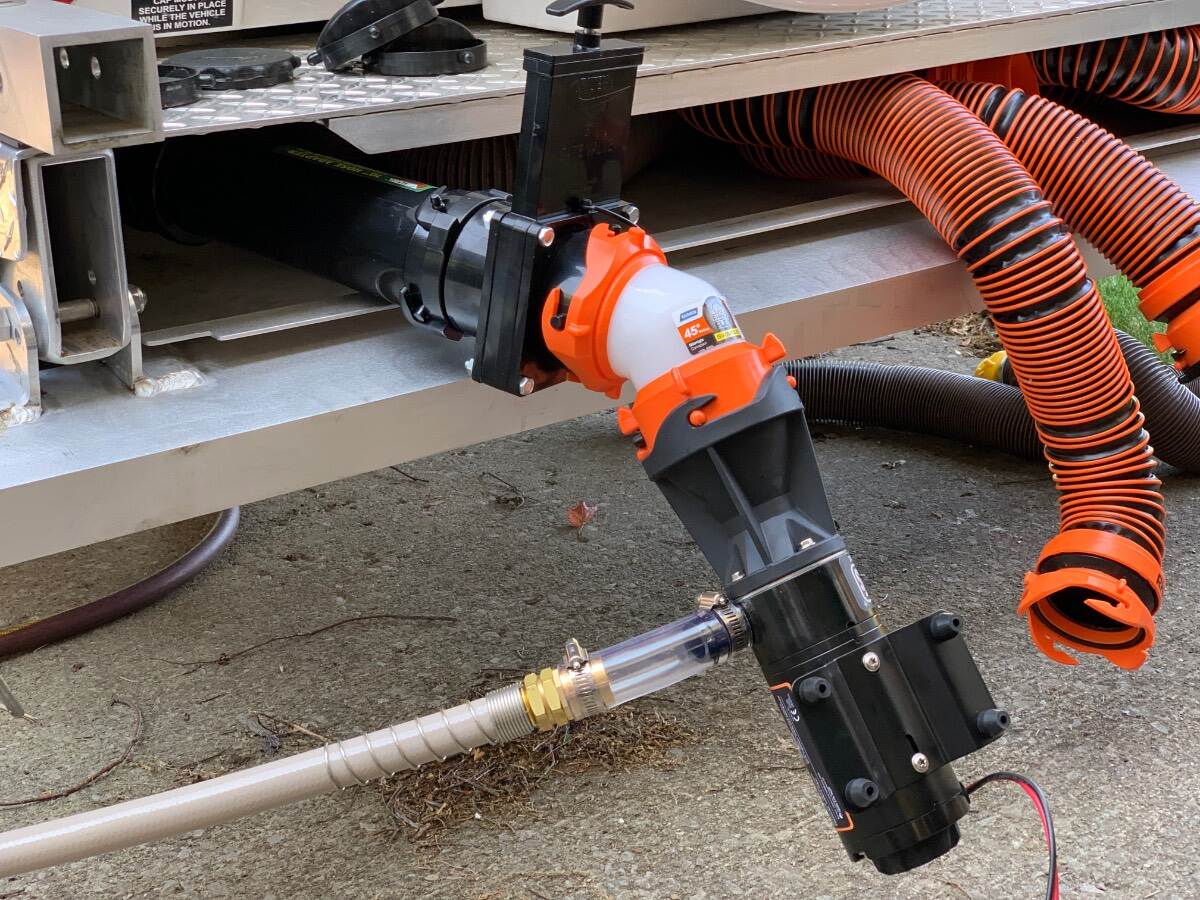
FIDISP 12 Volt Water Pump, Portable Transfer Pump, 330GPH Larger Flow, 1/10HP Electric Utility Pump with On/Off Switch, 2 * 6’ Water Hose Kit for Garden Pools Aquariums Hot Tub https://a.co/d/0hzZ7HoS Camco Durable Sewer Cap with https://a.co/d/0h5qZBVm Been using this for 4 years. Takes 3 minutes to fill black tank and takes up minimal space. As a bonus it is simple to hook to a hose bib to flush out. John
-
On further thought, actually no. I doubt any of the pump ideas you mention would work, in my description above I mention that this high powered pump is just doing the job. It’s pumping slower than the spec. I’d only go with this one personally. Yeah I researched these on the forum. The sink option didn’t seem to do a lot for me. The pee bottle diversion would be a big benefit, with three of us (wife and adult son) we need to empty it several times a day. And now Natures Head has this option making it easy https://natureshead.net/multi-directional-urine-diverter-kit/ But that would involve some drilling and a permanent solution, not ready to go there as this trailer isn’t yet three months old. So I just bought a couple extra bottles.
-

True Induction Stove Top will not turn on
Snackchaser replied to Lamar's topic in Mechanical & Technical Tips
In looking at the circuit description that @Steve and MA provided, it seems that there are two separate feeds. The 30 amp main feeds circuits 1 through 3 which include the water heater, AC and Inverter. These would appear to be circuits that run only on shore power. The water heater (20 amps) must be a propane/AC unit and it makes sense that this would not be energized from the inverter, likely not the AC either. Then there is the "SUB-MAIN INVERTER SUB-PANEL 25 AMP." You could infer that this 25 amp feeds loads that run from the inverter (circuit 4 receptacles and circuit 5 microwave). This is not the correct circuit description for your trailer because stove top load is not listed. However, it does provide clues for what could be going on in your trailer. If the inverter does not support the AC, then it probably doesn't support a high amp induction cooktop either. That would be crazy that a stove cannot be used while boondocking! There are some Xantrex models that have built in circuit breakers for split feeds like this. So there could be the AC sub panel under the dinette feeding AC inverter circuits, and shore power breakers built into the inverter for the water heater, and stove-top. Just an idea to look at, I hope that's not the case though. Geoff . -
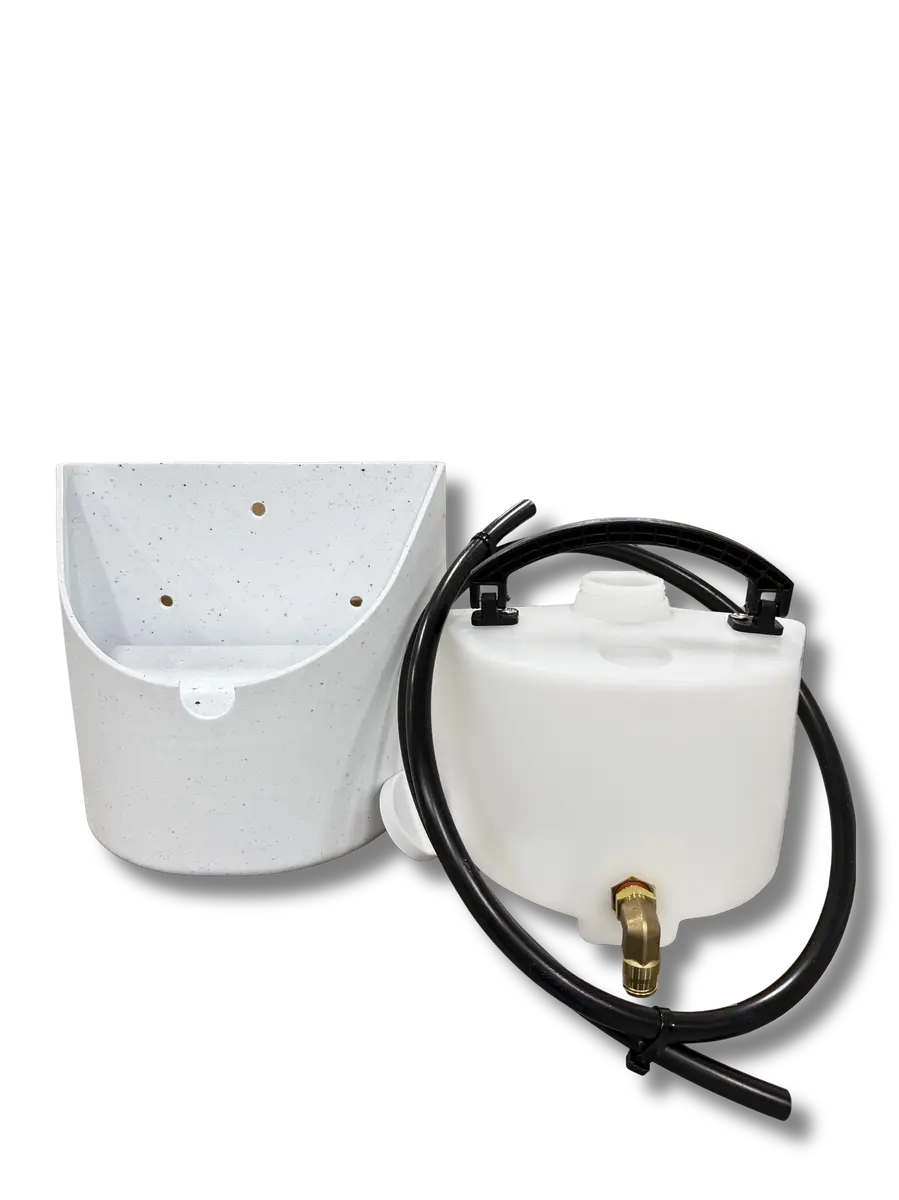
Hank White has used a portable pump as you’re describing, so it does work. Another option is to plumb your pee bottle to the black tank. Several owners have done this. An additional step would be to swap the bathroom sink drain from the gray tank to the black. Just connect the sink drain to the vent pipe and it will go to the black tank. This gives you 15 gallons of pee and sink water, and the soapy water dilutes the urine and prevents crystallization. I use a macerator pump on the sewer drain at home to pump black and gray water to my septic tank 50 feet from my driveway. Works great!
-
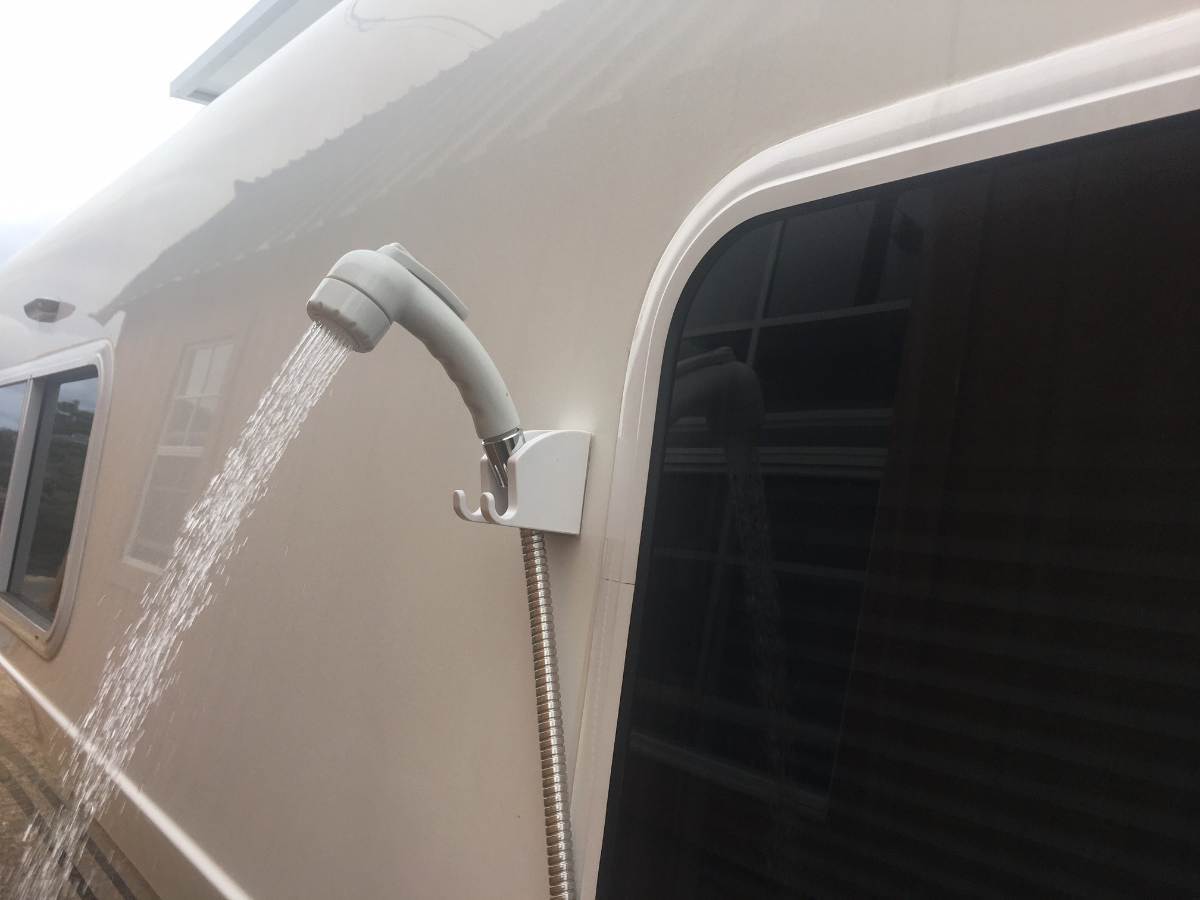
It is a little wimpy, but I use the outdoor shower often when boondocking. Chris showers in the wet bath, but when the weather is good enough, I prefer being outside, not getting the bathroom wet and not adding to the gray water! All I needed was a holder. I had the one pictured but now I use a suction cup version on the window. I like the standby function built into the shower head. I dislike the fact that the trunk, the rear basement door, has to be open to extend to hose and operate the faucets! So I lay a wash cloth and bottle of body wash on it. I don't use it for much else except for cleaning shoes on occasion. I have good hose attachments for when we have campsite water. If you get too crazy, your FWT will empty quickly! I'm interested in seeing what you come up with as your work matures! 😎
-
True Induction Stove Top will not turn on
jd1923 replied to Lamar's topic in Mechanical & Technical Tips
I assumed when Lamar wrote this in his original post that there was a separate breaker for the induction cooktop. There truly should be, but not according to the manual that @Steve and MA found. In our hull, OTT wired the microwave to the breaker marked “Outlets.” They wired two separate hots to the breaker (outlets GFCI and microwave on separate 12/2 Romex runs). Maybe they did something similar here. I corrected our situation by connecting the microwave to a free breaker when I disabled the OEM converter for the Victron inverter/charger. The fix I suggested above just got more complicated! I would still rewire the main panel so that induction cooking is possible off-grid! @Lamar last logged in 9 hours ago. Hard to say, but the first thing he should do when connected to shore power is to run the cooktop and trip each breaker to know where in the world OTT wired their True Induction cooktop! -
I take it into Hohenwald and get the entire service/maintenance package done. I did take the allen screw out and removed the lever to see if calcification had occurred or if something else was blocking the lever from being pulled forward. Couldn’t really find anything. Just have to do without the kitchen sink this trip. I also did submit a service ticket. Thank you for your reply!
-
Thank you for your reply. I was able to screw the female adapter onto the T connection on the water heater and had enough pex on the other side to connect it. So far it is working. Luckily Ace Hardware had everything I needed. I still can’t figure out the faucet in the kitchen area. It is weird both things going wrong on this trip especially since I had it serviced like two months ago. But I know things happen.
-

True Induction Stove Top will not turn on
Steve and MA replied to Lamar's topic in Mechanical & Technical Tips
Just looked at the 2026 LE1 sales info. The only factory inverter option is the 2000 Watt Pro series. Also looking at the 2026 LE1 owner's manual, it shows the following for inverter equipped units: CIR #3 AIR CONDITIONER 15 AMP CIR #2 WATER HEATER 20 AMP CIR #1 INVERTER 25 AMP MAIN — 30 AMP SUB-MAIN INVERTER SUB-PANEL 25 AMP CIR #4 RECEPTACLES 15 AMP CIR #5 MICROWAVE RECEPTACLE 15 AMP Circuits #4 and #5 are on the inverter sub-panel side of the breaker box. This is just a guess, but could it be that the Cir #4 receptacles and Cir #3 air conditioner are reversed? It would be easy to test. Does the air conditioner have power when the inverter is your 120 vac source? If you try this, make sure no other circuits are in use. -
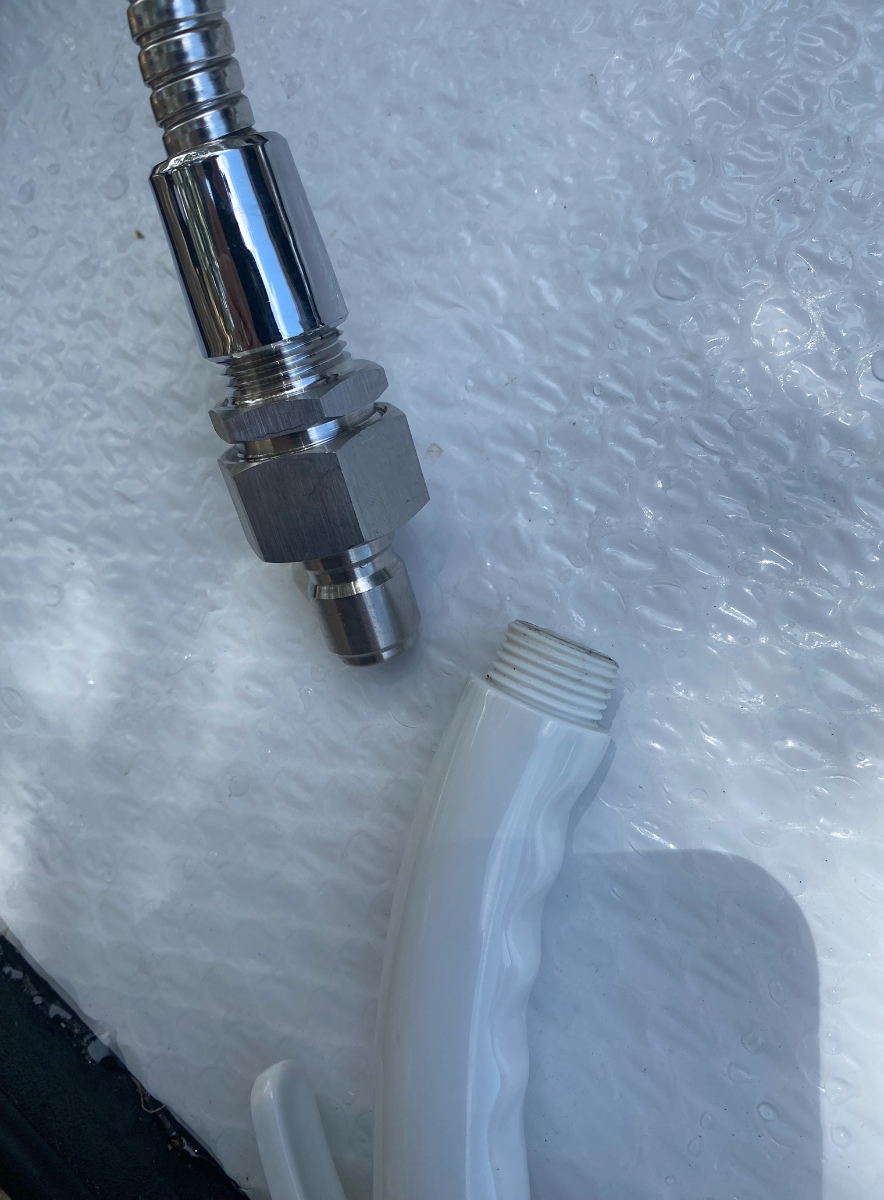
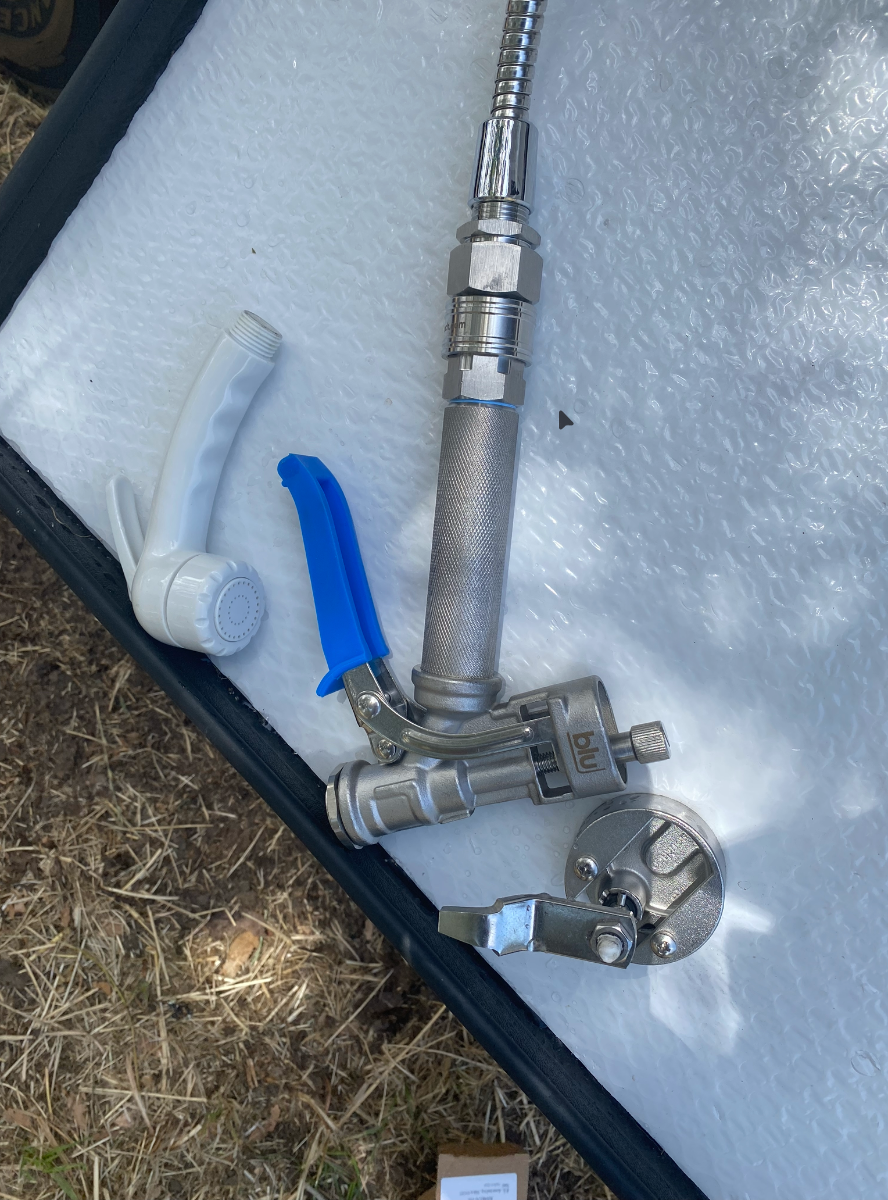
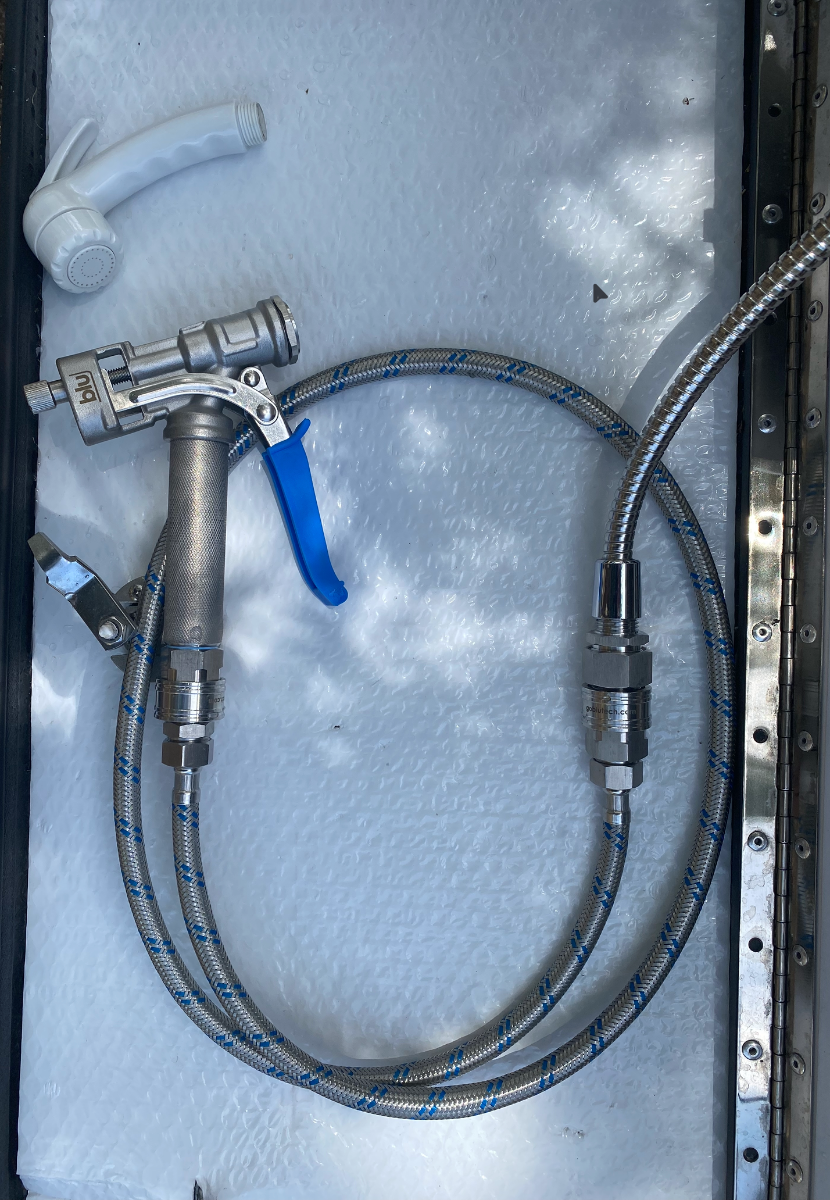
I’m unhappy with the outdoor shower. The knobs are hard to get to, the line is short and the control handle is clumsy with the ‘stay on’ option. I want something that I can attach hoses to wash the bugs off the truck and camper. I’ve looked into something more extensive - there are ones that include quick hose disconnects, but I won’t do anything that drastic this year or maybe never. And anyhow I’m not happy with any of them. OK, can I adapt the existing solution? 304 Stainless steel garden hose Adapter Bathroom shower tube to garden hose adapter, 3/4" GHT male to 1/2" G (1/2"IPS) male, lead-free, shower to garden hose adapter This just test fitting, I recommend using teflon tape. Shown is the adapter and my favorite Blutech quick adapter … so that I can attach a Real Man’s spray head 😅 But what about more length? Now that it’s hooked into my quick adapter system easy peasy Shown with a short hose, I can hook any of my hoses into this. This is a concept test but it works and I love it. To be decided is how to prevent the hose from disappearing in the hole. Most likely I’ll put a proper reverse fitting and quick connect on the existing sprayer so that’s the default setup. But it then can be quickly removed and reconfigured for whatever I’m trying to do. TBD …
-
The macerator isn’t relevant, I chose this one because it’s made for this purpose and has a sewer line adapter built in. Cost isn’t a consideration for me but obviously you can do it any way you wish These are all 12V except for the floor lights which are 24, they can be converted to 12V easily and I’m considering it. I prefer Hue and IMO they’re entirely suitable for mobile. The lamps are the perfect size on this trailer for example, but again it’s a free country 🙂
-
The pump setup seems a little overkill. Why do you need a macerator for pumping grey water? A simple 12 volt water pump can be had for under $50. As far a lighting goes I would look at GOVEE. They have 12 volt solutions and are much less expensive. Don’t get me wrong, I love HUE lights. I have them throughout my home but they aren’t really made for a mobile solution in my opinion. My .02 John
-
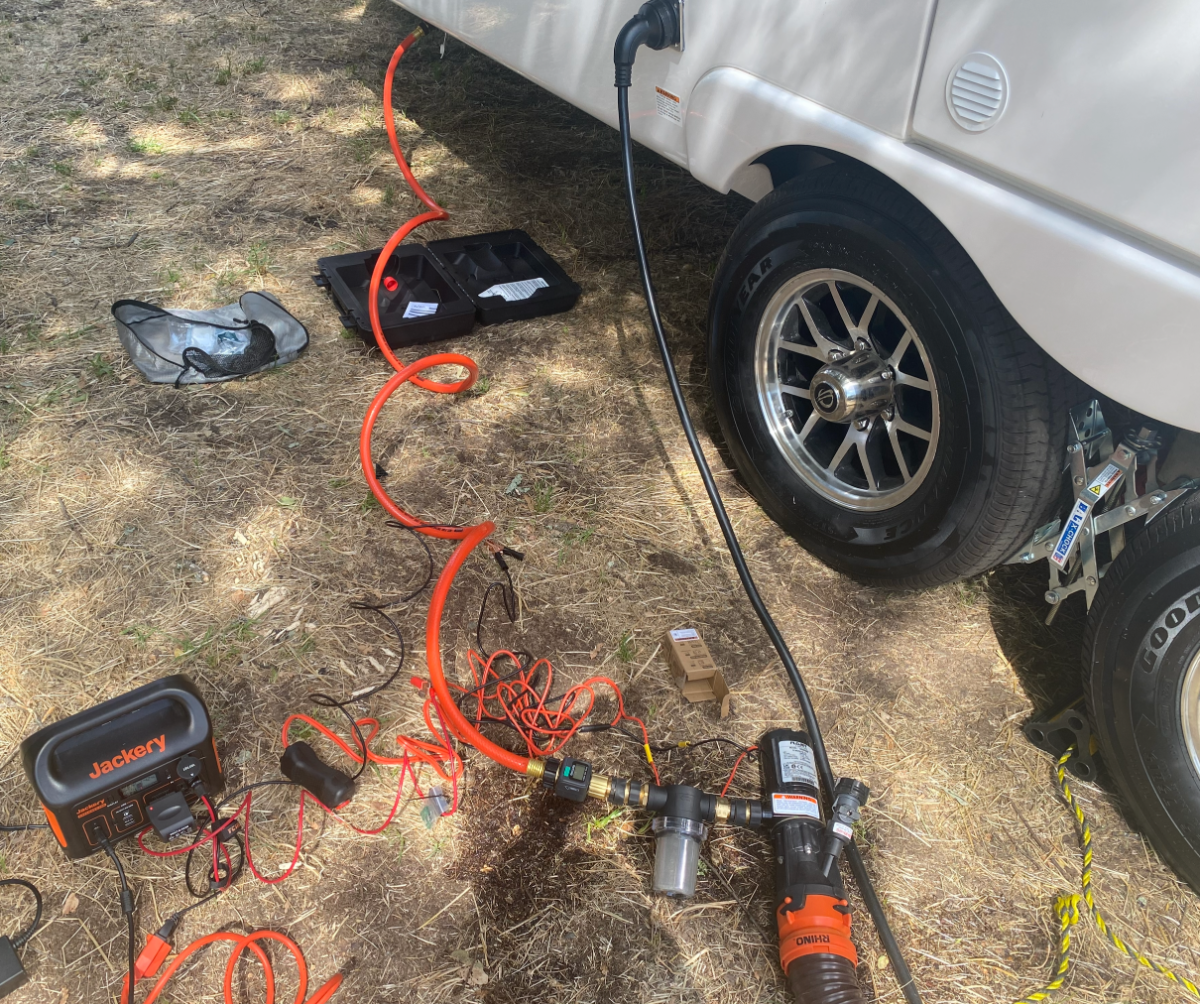
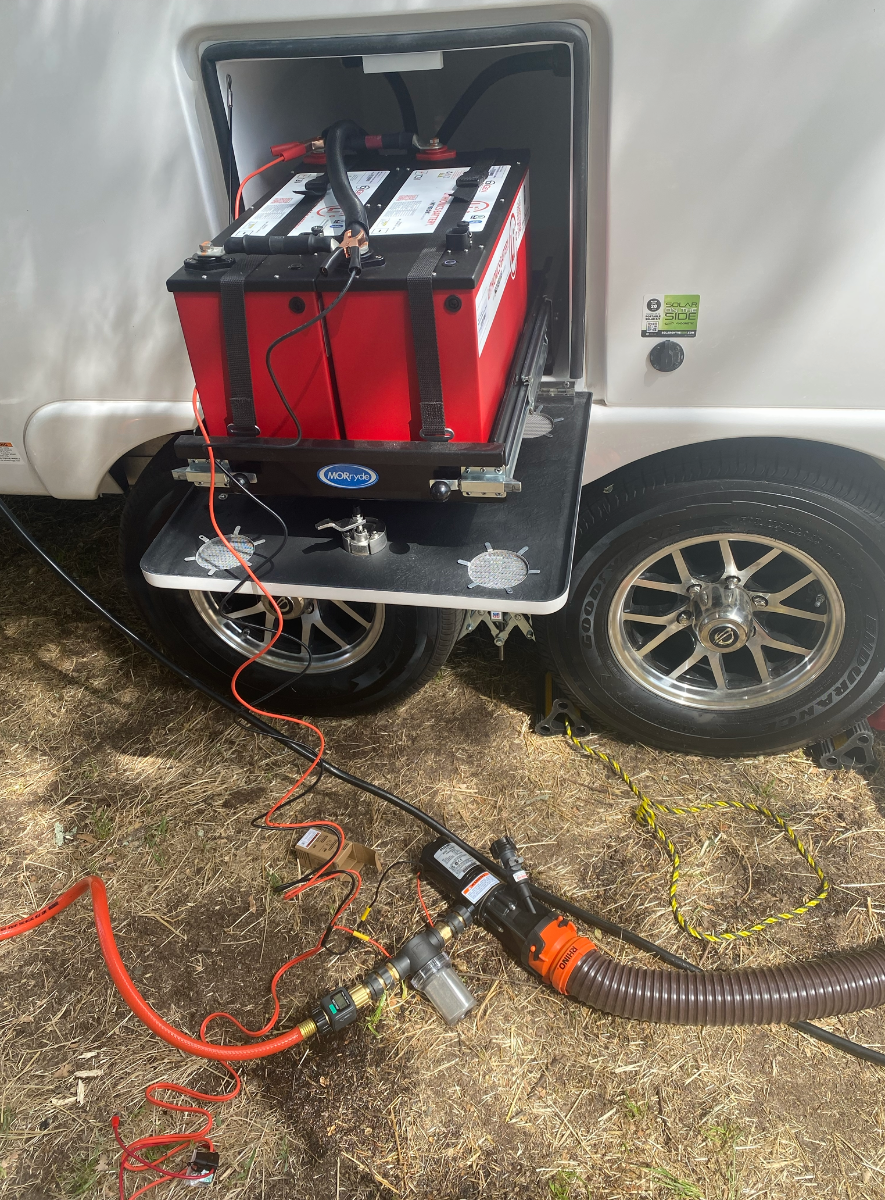
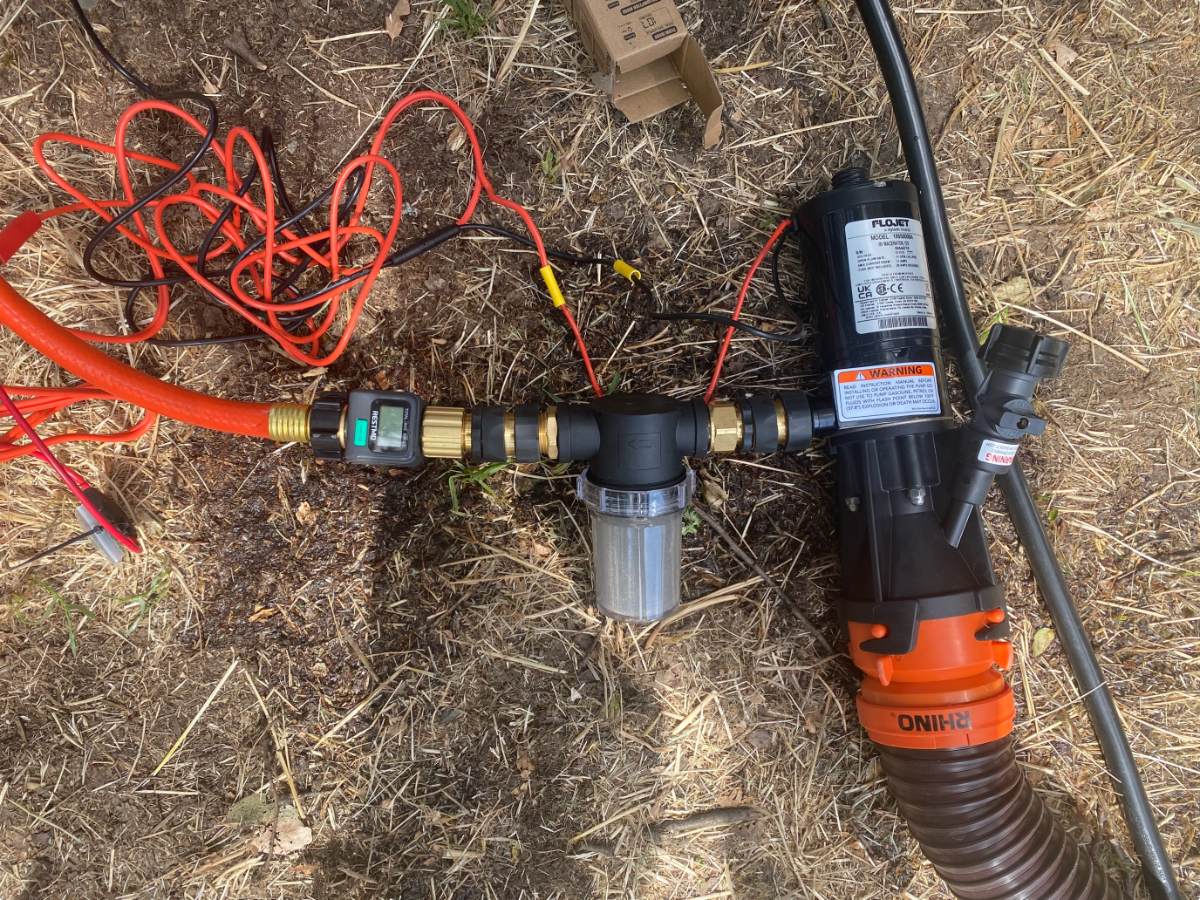
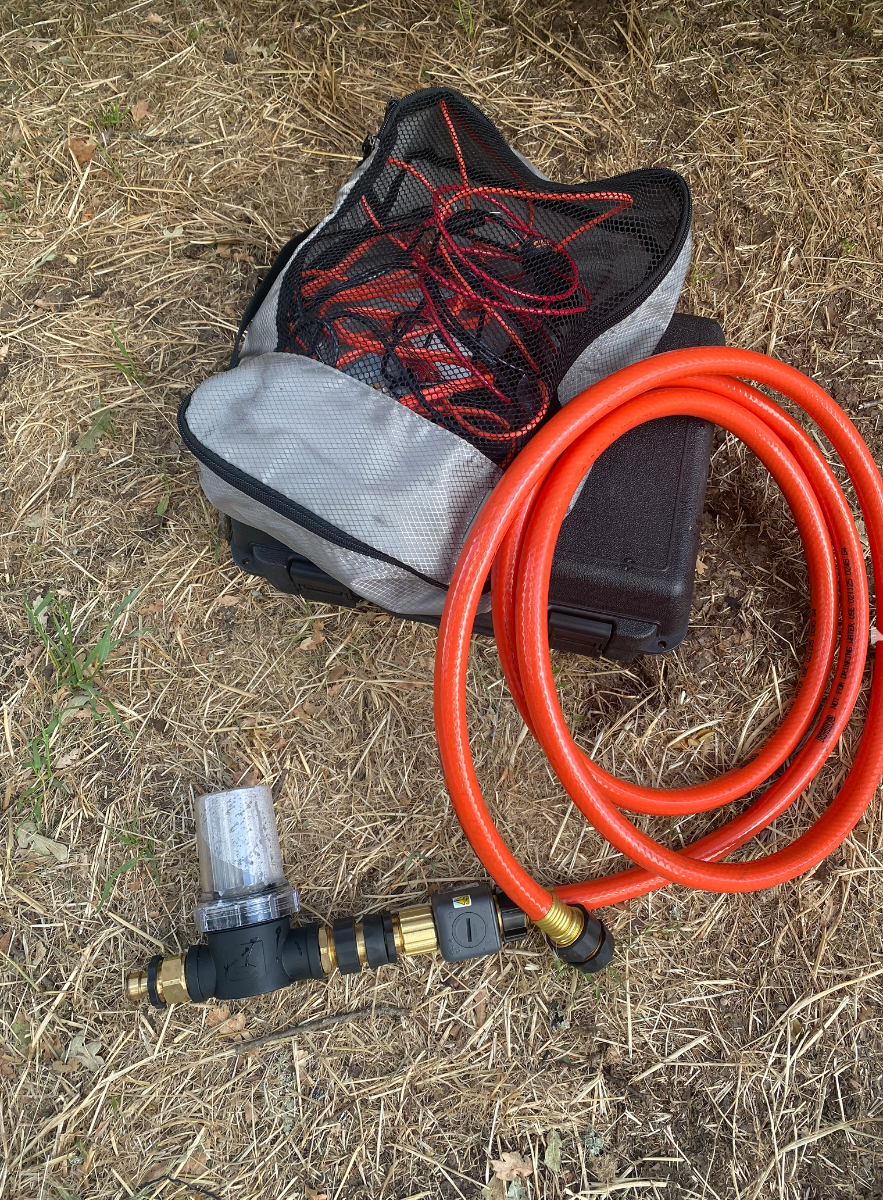
For the composters out there … what about that black tank, can we move grey to black? Experiment … Shopping list Flojet Macerator Pump 18555-000A - 12V DC Waste Pump for Camper/RV RESTMO Water Flow Meter with Brass Inlet Twinkle Star Hose Filter Attachment Line Water Hose Filter Water hose quick connects Garden hose Goal: Transfer from grey to black utilizing the black flush out inlet port. I’d rather not make more drastic changes to the trailer so let’s see if this works Attempt #1 The pump comes with a quick switch which is handy, its sitting near the Jackery. I got a 12V cig line and used the included pump battery alligator clips to attach to that. Results: Unsuccessful, the Jackery 12V kept turning off so I kept hitting the 12V switch. The flow meter showed no transfer, but water did flow. The pump was running and the orange hose did fill up with water, but it seemed there was little transfer occurring. First I tested the flow meter to see if it was working on a fresh water outlet, it’s fine so there’s just not much flow happening. OK, so I got a 120VAC-12VDC adapter I had handy and used the 120V on the Jackery (you can see the adapter there) but that was even less successful. Conclusion: Probably not enough power. Now how can I get more power into this pump? I looked at the truck, nah too much trouble and maybe not enough line. Do I have a spare battery around? How much does the 12V outlet on the truck supply? I’ve got 7kW out the back (electric truck), maybe a higher power inverter? Or how much can the Oliver 12V cig sockets output? I looked up musing on this problem, looked at the side of the trailer, and wondered “how many engineers does it take to change a lightbulb?” The answer was right there in front of me, embarrassing, the pump even comes with battery alligators …. 🤯😅 Attempt #2 Success! The flow rate seemed a little low compared to the rated GPM. I took a video and will calculate, maybe the resistance through the cleanout jets reduces it. In theory this will stress the pump, but it’s not something being used all the time and I kept an eye on how warm the pump got. Seemed fine … So I’ll take this as a viable solution. Far less space than hauling along a today. There was no solids being caught by the filter. I try to keep solids out of the grey but anyhow not an issue. Good enough for today, I closed up shop Future direction: the only problem is having a neat solution. The lines are filled with residual water you don’t want around the campsite. A bucket (I have a collapsable with lid that’ll work great), or no leak quick connects (if such a think exists) maybe too. KISS, I think I like the bucket solution better. Overall it’s a small tidy package. The whole thing can be stored in the bumper if you take the pump out of its case. But it’s a really nice case with real latches, so I keep that in the back storage and the rest of it in the bumper.
-
True Induction Stove Top will not turn on
jd1923 replied to Lamar's topic in Mechanical & Technical Tips
We do not know yet... - What inverter/battery setup is installed in this LEI? - Will it still work on Shore Power? (if so, then not a CGFI issue) - Error codes? If so, then the usual Xantrex settings issue, but @Lamar made no mention of a failed startup, just no power. - Is the induction cooktop wired to the inverter circuit? To be or not to be! -
True Induction Stove Top will not turn on
Steph and Dud B replied to Lamar's topic in Mechanical & Technical Tips
Sorry, missed that. This is an odd problem, to be sure. Could the cooktop be tripping overcurrent protection on the inverter? Do any error codes appear on the Xantrex display? Does the cooktop have varying power levels? Will it work on a low setting? -
Your first picture is very dark, so it's hard to see how it broke and what's left there. If you have can physically connect this Sharkbite female adapter, have enough PEX on both sides that would be great. You need the PEX on both sides to be cut square with minimum 3/4" length to attach Sharkbite fittings. If there is not enough PEX on the water heater side, the broken PEX must be removed (get Sharkbite PEX removal tool to push in the collar) and a new short piece of new PEX must be added. This kind of failure is odd and at the same time your kitchen faucet is stuck!
-
Hey I just got it and already did a Tennessee trip this year! 😅 Anyhow still working, close to retirement so one big trip is all that can be managed
-
True Induction Stove Top will not turn on
jd1923 replied to Lamar's topic in Mechanical & Technical Tips
Lamar, the GFCI under the dinette should power ALL your AC outlets in line. Plug something into the outdoor outlet (or the one above the kitchen sink) and trip the GCFI under the dinette. The other AC outlets should then ALL be OFF. @topgun2 Bill suggested this in his comment. However this is NOT your main issue re your induction cooktop. If the induction cooktop is on a GFCI circuit it should be wired to an independent GCFI (not that outlet under the dinette). And if your induction cooktop works on Shore Power, then GFCI is not your issue either. I see you have a Legacy I. What inverter and battery setup do you have? I hate to think that what @Steve and MA wrote is correct in that OTT did not wire your induction cooktop to your inverter circuit. If you have the Xantrex 3000, all 120VAC circuits should be wired to it, but not so with a lesser 2K inverter. Wow, if this is the case, OTT should have installed an LP cooktop instead! You wrote that your microwave works on inverter. Given all this is true, you need to get this corrected for the long-term. (OTT wired several things in very strange ways in our hull, so I have rewired everything!) Not the right time while boondocking, but I have a short-term on-the-road fix for you! 😎 First be OFF shore power and turn your inverter OFF. This ensures there is no 120VAC in your hull, so you can safely rewire the AC power panel. You can do a quick fix in your breaker box! Do the following at you own risk (I would do it)! Remove the breaker box cover and remove the breaker labeled for your inverter. Loosen the front screw and pull the black wire free (the hot). Do the same for the microwave breaker. Replace the hot for the induction cooktop into the breaker for your microwave. Now you have induction cooking on inverter but your microwave will not be powered. You could wire both hots to the microwave breaker, if you want to use both on inverter. However if you do so, it would not be wired "to code" and you'll only want to use only ONE appliance at a time. However, if you turned both ON at the same time, the breaker would merely trip, no big deal. If it was me and I found it to be TRUE that OTT did NOT wire the induction cooktop to the inverter circuit 😒, I would get this done in 10 minutes just in time for breakfast! 🤣 -
What service was done?