

Mountainman198
-
Posts
309 -
Joined
-
Last visited
-
Days Won
4
Posts posted by Mountainman198
-
-
I am sure there are other US Spring manufacturers that use US made 5160 spring steel. I encourage people to do their own research and let the group know if you find other sources. In my week-long search I found only two manufacturers that returned my inquiries. I knew previously of ALCAN and their offroad spring Creds and they had the springs in stock so I went with them. St. Louis Spring also replied to my inquiry but required that I purchase a new replacement spring of the specs I wanted and send it to them to replicate. I have included their response below in case there are owners local to St. Louis and for whom this requirement would not be such a obstacle. Note in their response they also recommend adding a fifth leaf.
Best of luck in your own sourcing. Please post any concrete updates on places which meet the "made in USA with USA 51560 steel" criteria. It is always good to have multiiple sources from which to choose. Also, perhaps Oliver may wish to follow this path for suspension on future trailers. Our legwork may help facilitate this as a future upgrade, placing Oliver even farther up the quality metric amongst the pool of RV mediocrity.
As far as running a set of 8,000 springs vs. 7,000 I am prepared to run even lower tire pressures to smooth out the ride in order to avoid the roadside PITA of a broken spring, instead having a potential trade-off of quicker tire wear and lower towing mpg.
I was lucky that my issue was noticed at a Love's with a newly built, adjacent RV Stop RV park which featured large, newly poured cement pads, new luxury showers, power and quiet sleep. Also, a local, Good-Ole Boy RV shop/contractor who had the pair of springs to get me home and did not bend me over the cash register. Your mileage may vary should this happen to you. I am doing everything I can to make sure I do not end up in this predicament again. At minimum, I recommend buying a spare spring (or two) to carry with you on every trip. Ironically, ScubaRX and I had this exact discussion not more than two weeks earlier (after meeting another E2 owner in Quartzsite who had broken a spring) and I was planning to order a pair of springs to carry as spares once I got home...UGH.
Best wishes, Lance
Spring Team <springteam@saintlouisspring.com>
Fri, Mar 1, 9:06 AM (6 days ago) to me
We can definitely makes this for you and would be made here with American steel, however we would need a sample to duplicate and a lot of times on these travel trailers we make them heavier by adding a leaf to each.ThanksThe Spring TeamSt. Louis Spring CompanyTel: 314-533-2132
to me
We can definitely makes this for you and would be made here with American steel, however we would need a sample to duplicate and a lot of times on these travel trailers we make them heavier by adding a leaf to each.ThanksThe Spring TeamSt. Louis Spring CompanyTel: 314-533-2132-
 2
2
-
 4
4
-
-
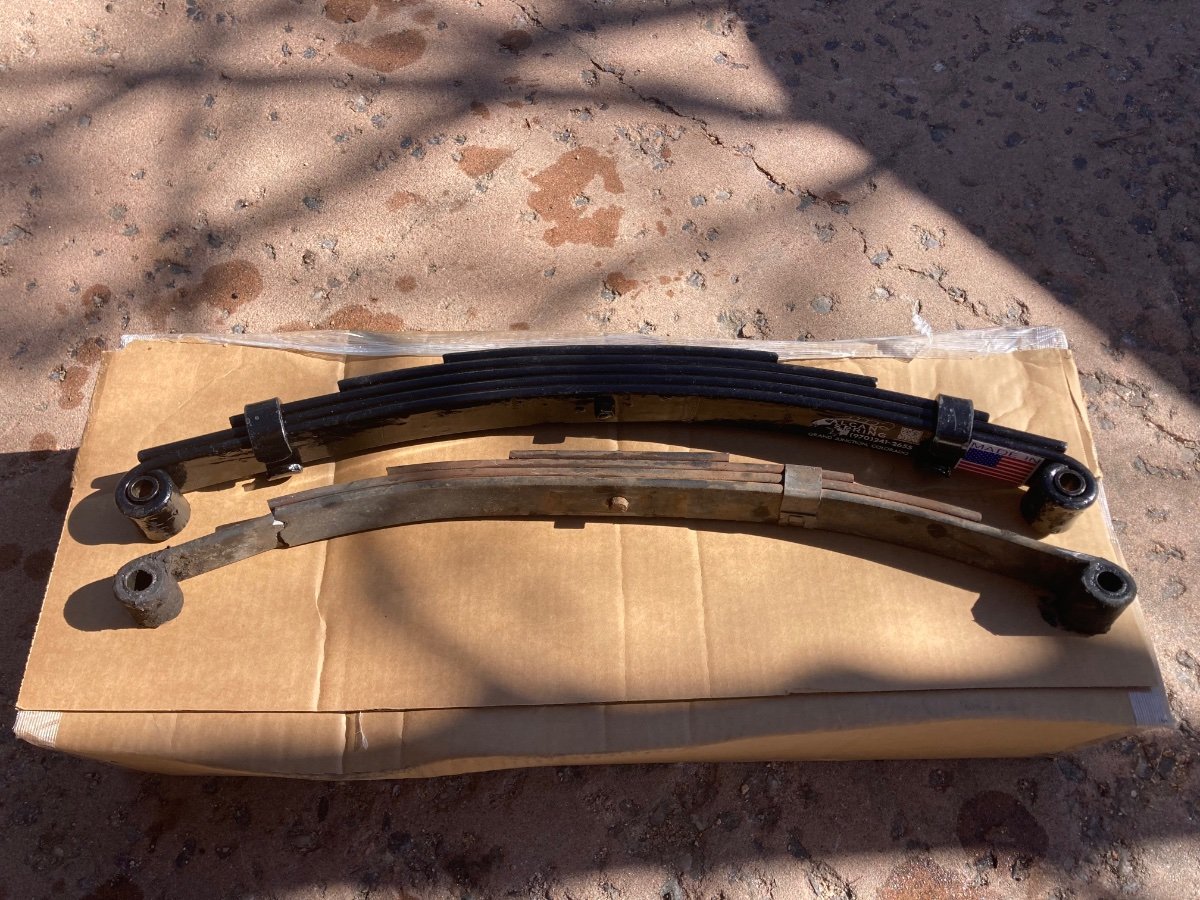
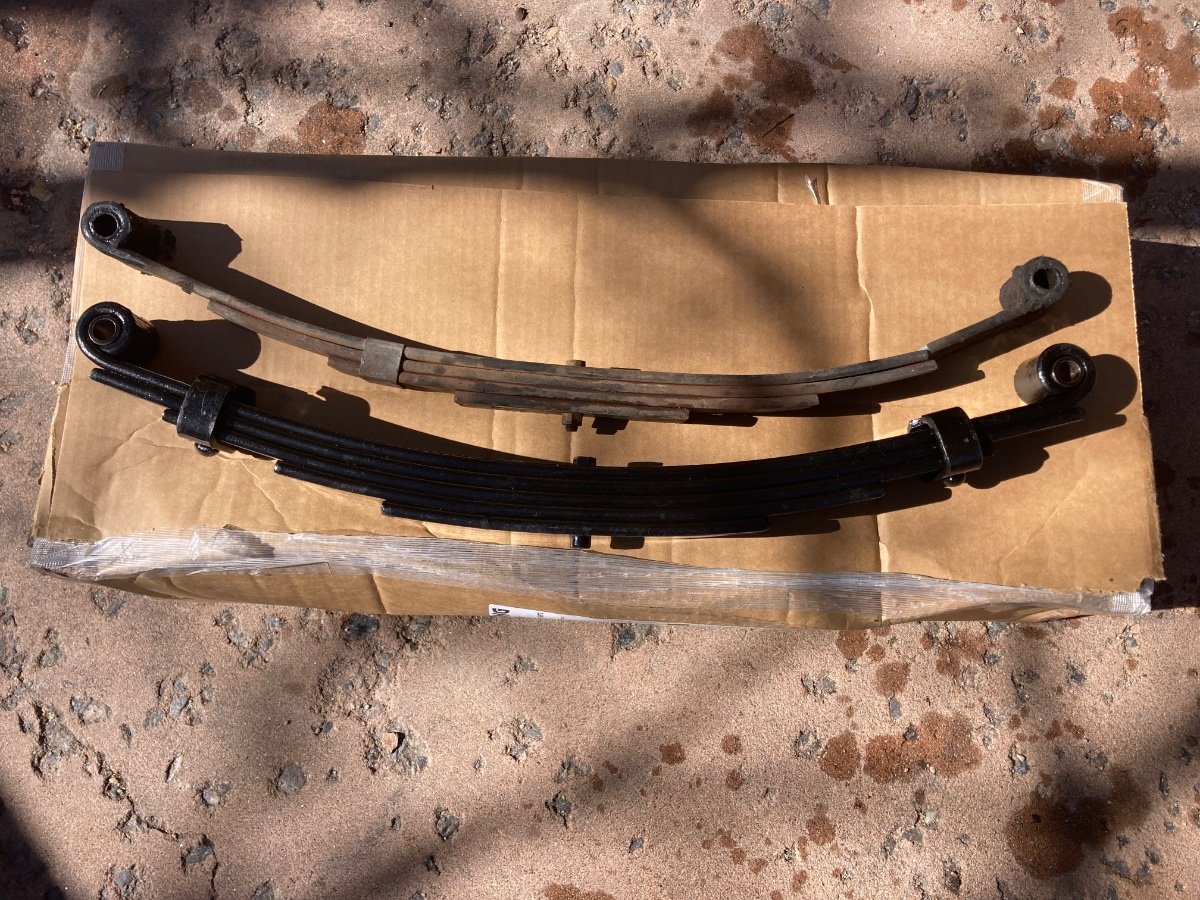
My new springs arrived today. I confirmed measurements are correct and that they are the same size as what my E2 had when it shopped from the factory. Should be a direct bolt-in.
Here are the specs on the new springs:
-Made in USA with USA sourced 5160 spring steel
-Bronze eye bushings vs. plastic
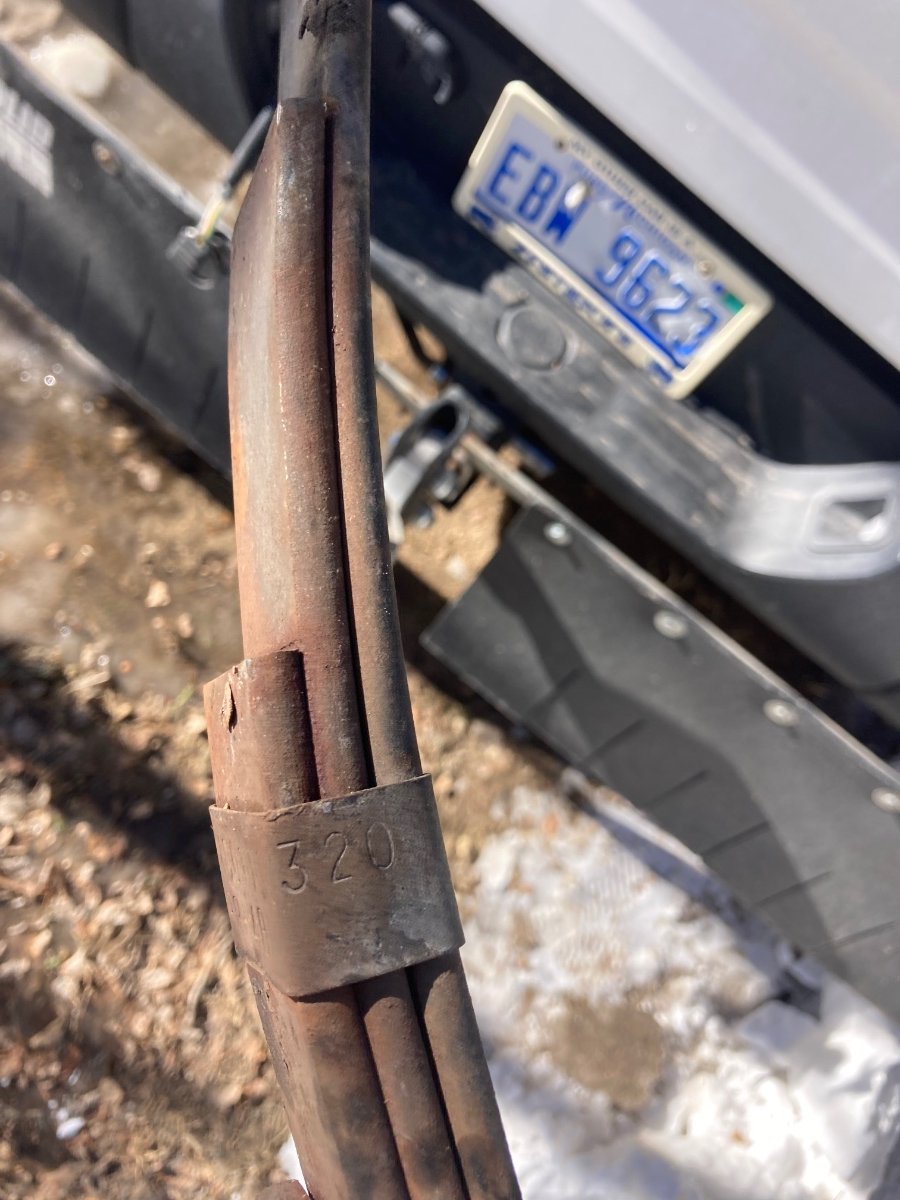
-2,000lb rating/ea vs. 1,750 (will not change gvwr as axles/bearings remain determining factor)-5 leaves vs, 4-second leaf extends underneath eye on each end (protecting common break area)-steel, bolted spring keepers (one each end) vs a single, sheet metal band-width = 1.75"-drop = 3”-length (eye-to-eye) = 25.25”
The company I sourced them from is ALCAN. They are known for durable offroading springs and have been building custom springs for rock crawlers and overlanding vehicles for decades. Attached below is their contact info. Ask for Mike and tell him you are interested in the 1.75” wide trailer springs like he sold to Lance from Colorado.
I will report back when I have them installed, but that may not be for a couple months until after the snow melts up here in the Rockies
-
9
-
3
-
 1
1
-
-
1 hour ago, mountainoliver said:
A different suspension design would be great going forward but I doubt that it actually could be retrofitted at a reasonable cost. Right now I’d be happy with USA made springs. That small change could make a huge difference. Maybe Oliver could start buying just the axle assemblies from Dexter and springs from a different manufacturer. I know that none of the other mainstream trailer manufacturers would ever do anything so bold or even consider out of the box thinking but Oliver often thinks out of the box, that’s the very reason we have such a great trailer and they’re in such high demand!
This is the direction I would like to see as well. One of the US Spring manufacturers (St. Louis Spring) said they would replicate the springs on my E2 with USA sourced 5160 spring steel if I would send them a new one to copy. Knowing what I know now, I certainly would have paid a premium at time of purchase of my Oliver for USA made springs. I would like to see Oliver investigate this path. Now that they are at dealers, it would certainly further set them apart from the rest sitting on Chinese suspension. I cringe now knowing that my trailer went 25,000 miles supported by a $150 set of springs (again, not Oliver's fault. The entire RV components industry has gone to the cheapest possible cost model without regard to quality or safety).
-
5
-
-
3 hours ago, topgun2 said:
Interesting too that it appears as though the one that broke was on the street side.
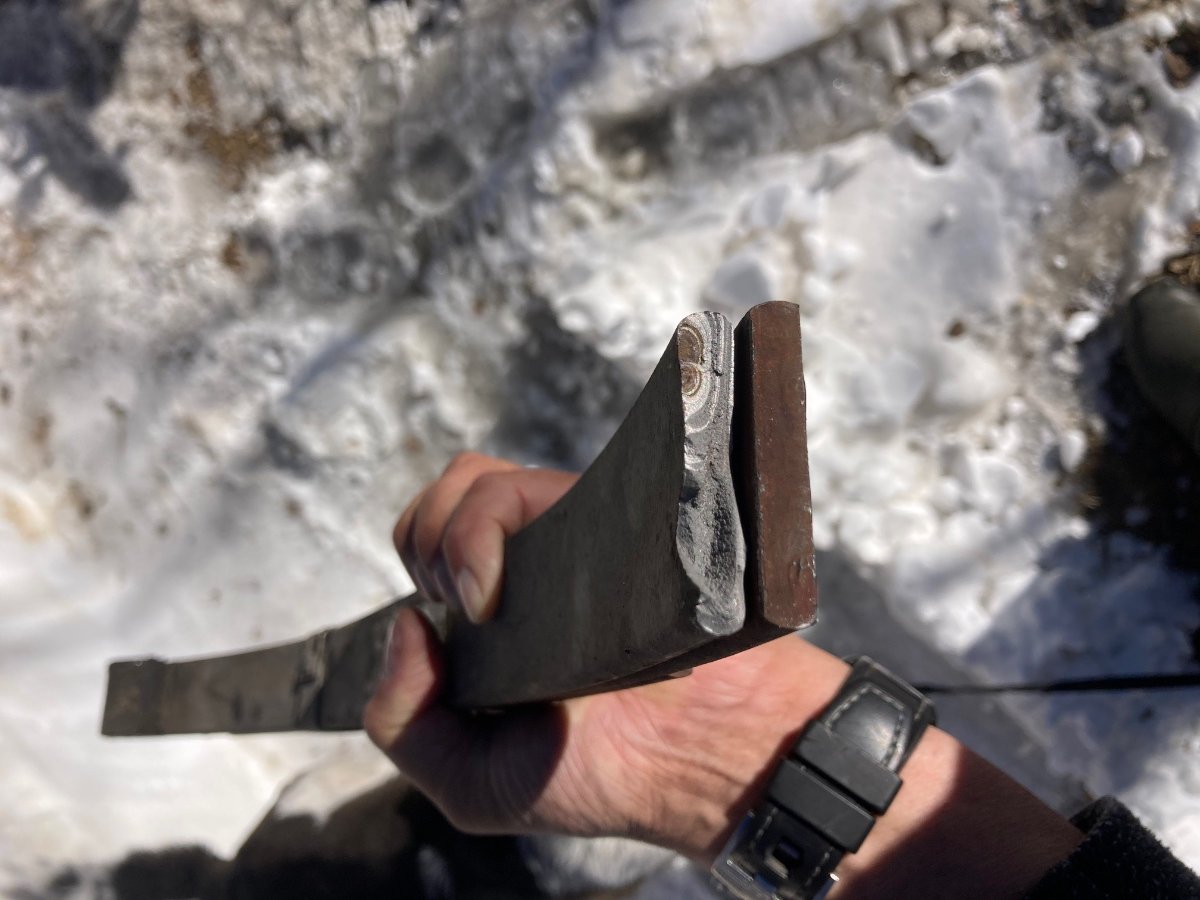
Certainly it does appear that the steel simply doesn't look right.
Bill
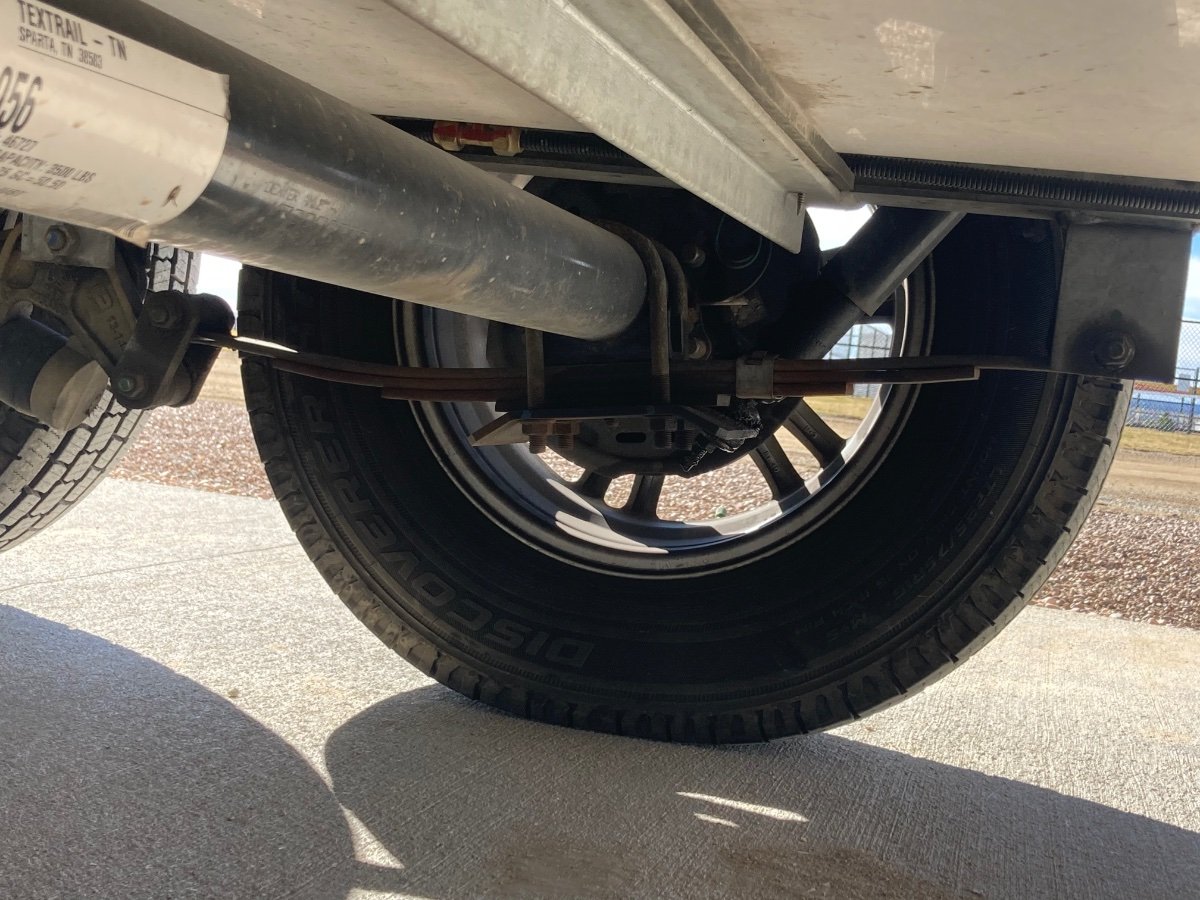
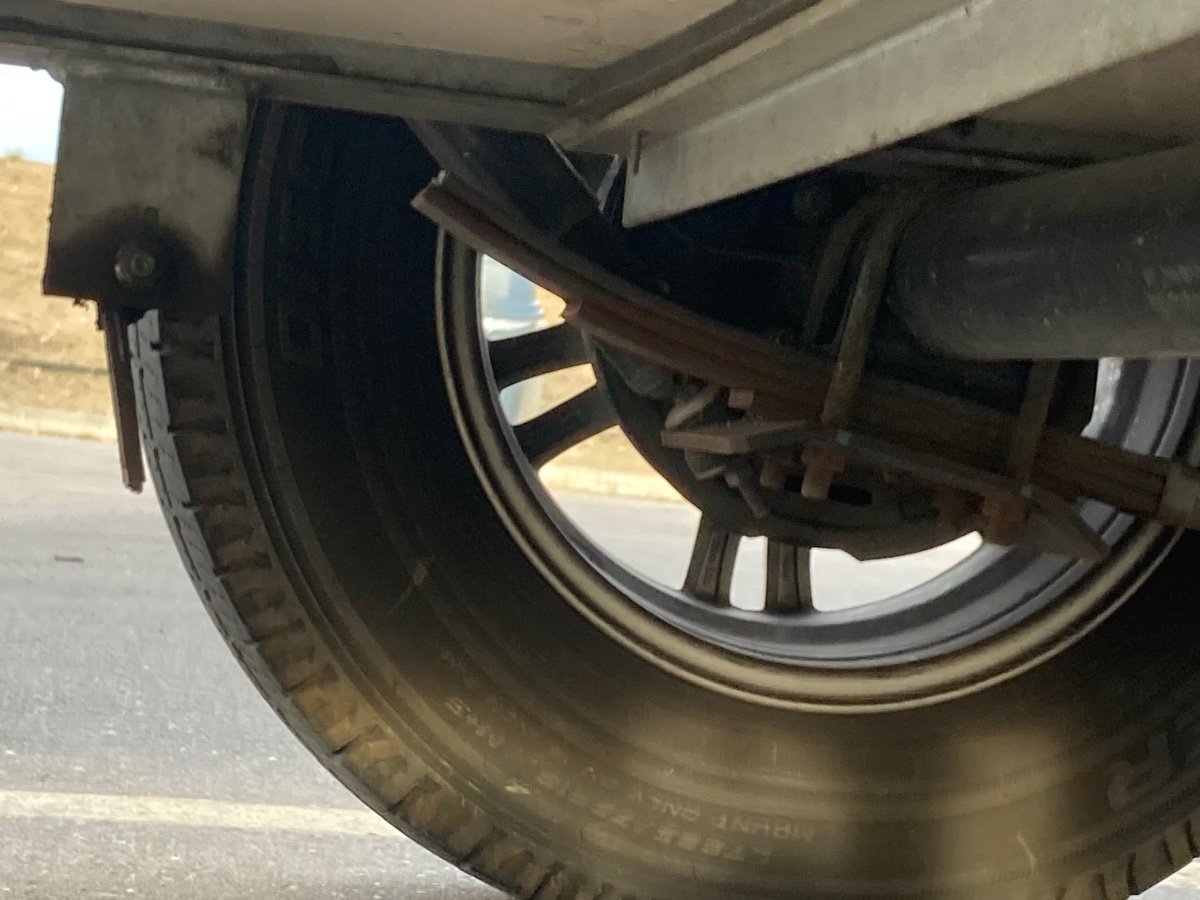
The curb side rear spring was in the process of failing as well. Starting to flatten with the rearward end starting to invert.
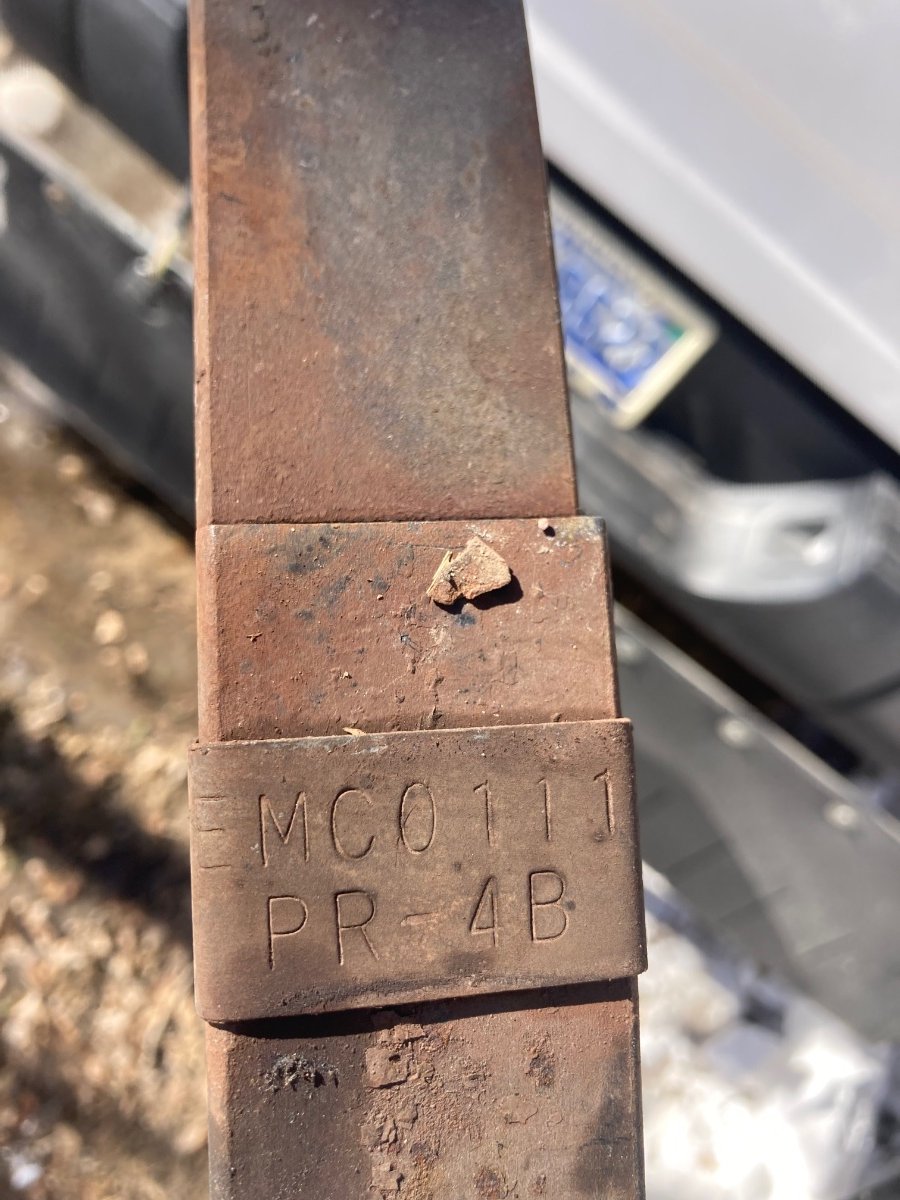
I have attached the tag from the springs on my trailer. According to Oliver, they are made by Emco
-
2
-
 1
1
-
-
29 minutes ago, mountainoliver said:
If you don’t mind, please share the information on where you purchased your new USA made springs. Last year I purchased two replacement springs from Dexter along with new U bolts and nuts, wrapped the springs and carry them in the truck just in case.
I most certainly will. Waiting to see and touch them first and confirm the measurements and specs are right (should be no issue). Once I have confirmed this I will share the info and contact details.
-
5
-
8
-
-
On the way home from the SW this year, I had the pleasure of experiencing a broken LR leaf spring while underway. It broke in the usual place (see pic). Fortunately the broken spring was noticed quickly and I found a safe place to overnight and perform the repair the next day. Unfortunately, I was not carrying a spare spring. After finding a pair of springs locally and installing them I made it home the next day. What I found when inspecting my broken spring was what appeared to be a defect in the steel (see pic). In no way do I blame Oliver for this failure as the trailer spring market is monopolized by Springs made of Chinese steel and Oliver, like all other manufacturers source from the same pool of components. In fact, after opening a service ticket, Mike was extremely helpful in getting me the specs and info I needed.
I decided that once I got the trailer home I would replace all four springs with the best springs I could find. Preferably from a US company, made in the US and with US made 5160 spring steel. What I did not appreciate was that there did not appear to be any trailer parts sources which met this criteria. This was not proving to be a simple task. Everything I could find in the RV aftermarket was sourced from China. No exceptions. The only good news I found was that Chinese springs are cheap ($35-55ea).
I remembered a Spring Company from my offroading days and gave them a call. They had a set of four springs which fit the measurements provided by Oliver Service and were made in the US with US 5160 spring steel. Cost is $150/ea spring but since I had already spent a fair amount of $ upgrading to stainless lugnuts and US made Timken bearings this did not prevent me from placing the order for a set of four springs and new ubolts. New springs should be here later this week.
I will update with pics once I get the springs and also once I install and of course again after towing a few thousand miles.
-
6
-
6
-
4
-
 1
1
-
-
Have not heart of a travel trailer being stolen but a Buddy shared Ring video of his 20’ enclosed trailer being stolen from his driveway. Had a hitch lock and was supported by the electric tongue jack (power disabled). Video shows thieves backing to trailer, hooking safety chains to trailer and dragging it off down the road with sparks flying from the jack. Took all of 5 seconds. Trailer was never recovered. I use a tongue lock and carry good insurance. If someone wants it badly enough they will take it.
-
Thanks
-
This morning I was stopped in a parking lot in Lake Havasu City, AZ, while sitting in my truck with my trailer in tow, planning my route and drinking coffee when a woman sporting a big smile approached. We have all had this happen before so I rolled down the window and prepared to start answering questions about Oliver Travel Trailers. Not this time. The woman introduced herself and I was caught a bit off guard as I knew there would not be yet another request for me to show the inside of my messy trailer. Her name was Evon Oliver. She asked my hull number then the discussion quickly turned to Family, growing up in Michigan and things to do while in Lake Havasu City. What a wonderful surprise this morning talking to a delightful Lady.
-
1
-
11
-
1
-
-
After seeing this thread I checked my tanks. Sure enough, a small amount of surface rust is forming along the bottom of the ring. I had some of thjs black rubber door edge guard left over from when I installed the screen bug covers on my water heater so figured I would try it on the tanks. Fits great, eliminates the metal on metal contact, stays on when removing tanks to fill and does not impact height of tanks and hold-down.
can’t remember where I bought it but do recall it was about $10, maybe at TSC?
-
1
-
-
4 minutes ago, Mountainman198 said:
I bought them at a brick and mortar Target, so unfortunately do not have a link
I just did a quick search on 5L stackable bins and I believe this is the link as the price, material, description and dimensions match.
https://www.target.com/p/5l-stacking-bin-with-lid-white-brightroom-8482/-/A-86300286#lnk=sametab
-
1
-
-
3 hours ago, dhaig said:
@Mountainman198 great idea? Could you please provide a link to the bins? I had no luck searching Target's website.
Thanks, Don
I bought them at a brick and mortar Target, so unfortunately do not have a link
-
- Popular Post
- Popular Post
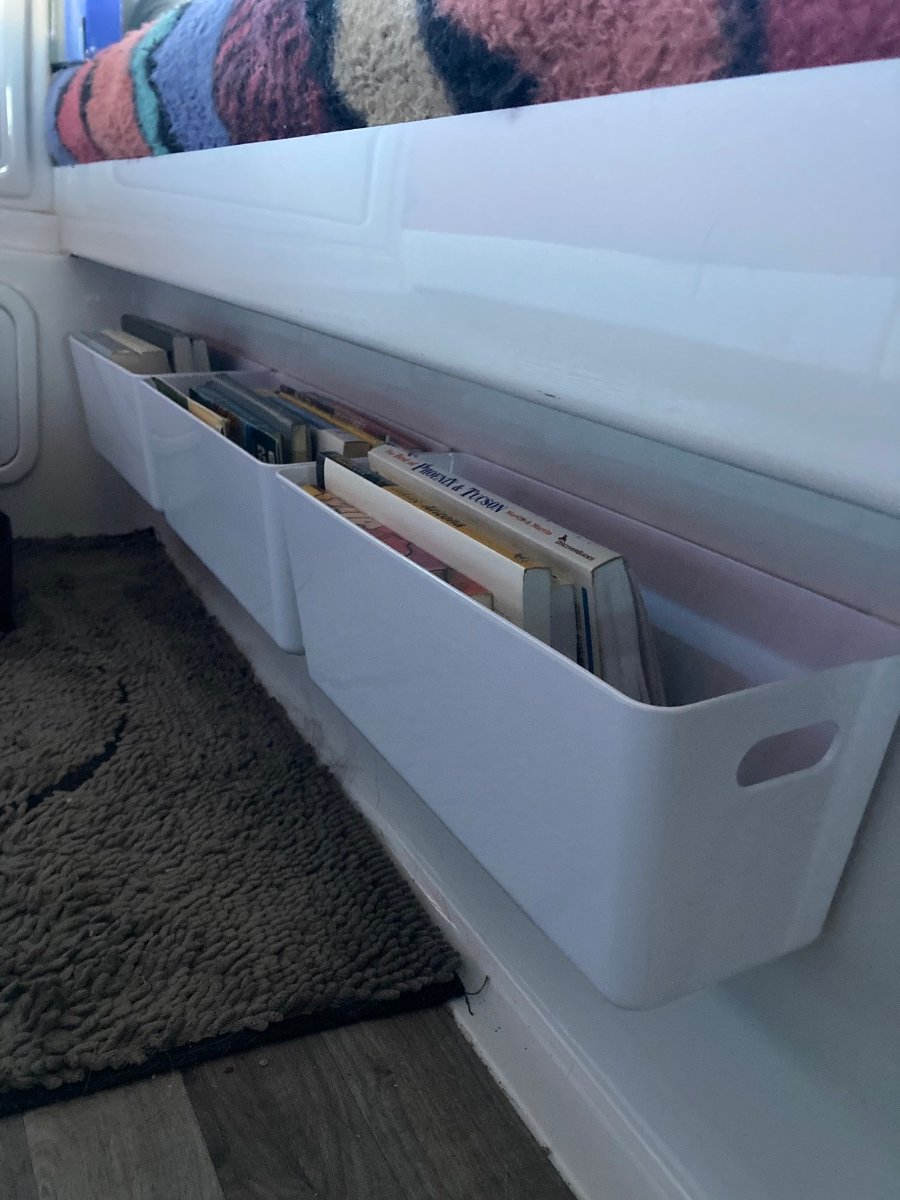
Tired of my books scattered all over the trailer and staring at the wasted space under the streetside twin bed “wing”, I installed three plastic bins that I found at Target ($6/ea) and installed using command velcro strips so they can be easily removed for cleaning. Now my books have a home, are easy to access while in bed and don’t fly around on rough roads. Bin dimensions/ea are roughly 5”Hx5”Wx14.5”L. I installed them about mid-way up the wall under the bed so there is still toe room underneath and books can still be removed easily.
-
2
-
11
-
4
-
Riverside Campground, Gila Box Riparian National Preservation Area, Safford, AZ. BLM campground $5/nt. Worth the 3 mile drive in on mostly paved, mostly single lane road.
-
1
-
10
-
-
Peggy, I like your plan to flip the door. I understand your desire to find a permanent solution to hold it open. Interim to finding your final solution, something like a command strip toggle hanger might work. The toggle can swing down to 90 degrees from its point of attachment on the ceiling and may be able to hook to the cabinet door loop handle. Command strips are strong (these hold 2 lbs) and most importantly, remove without damage to the gelcoat once you find your final solution. This is what I would use until the final result is found. Good luck.
FYI...I have seen them in blister packs at Walmart.
-
On 11/1/2023 at 2:17 AM, Patriot said:
Per a previous post and very solid recommendation by @ScubaRx I ordered and installed these SS lugs last June. I carry a torque wrench and I too check torque specs while traveling. On our most recent 42 day 6000 mile trip out west all lugs maintained their proper torque setting. https://www.ebay.com/itm/144965685434
Same here. I had a similar concern to what many have over the description given on the website when ordering. Upon receipt I was happy to see that the seat on the new solid SS nuts was that of the expanded, continuous style (like a bulge acorn) and not the scalloped style of a regular acorn. I see no reason why these lug nuts would not seat and perform the same as the OEM lug nuts. The only issue I had during installation was that the new nuts are larger, forcing me to buy a larger 6-pt socket for my torque wrench and breaker bar.
-
1
-
3
-
-
Before you re-apply the GE silicone, I would contact Oliver service and find out the exact sealant they use. The sealant they use returns to bright white after a light scrubbing with Roll Off and a microfiber cloth. I don't have the exact brand and product they sent me when I replaced the bathroom window or I would send you a pic.
-
20 hours ago, Wandering Sagebrush said:
I don’t have a solution for you (we use Melita cone and pour into a Stanley thermos), but I’m interested in seeing the responses. Maybe we’ll find a better way.
I do the same, using a number 6 paper filter into a stanley thermos. Makes even better tasting coffee than my 70's 1500W Norelco or vintage W. German-made Krups
-
2
-
2
-
-
Dates for 2024 as posted to the Casita forum on the fiberglassrv.com site:
2024, Feb 5-11: 2024 Quartzsite Gathering
The annual Quartzsite Gathering will be February 5th thru 11th, 2024 at Dome Rock! Once again this will be a "No Host" get together and everyone can do as they please, visit with friends, make new friends, ask questions, see mods, sit around a campfire, tell jokes, sing whatever you want to do! The town of Quartzsite is only 3 miles away and has pretty much all you need, gas, food, places to eat, dump facility, trash dump station, and lots of RV vendors. Come when you want and leave when you want, find a spot you like and set up camp. This is a total dry camping get together so come test out your boon docking skills! Best of all it is on BLM land and totally FREE and the most gorgeous sunrises and sunsets you will see anywhere! The 2023 Gathering was a great success after the pandemic with about 125 trailers attending so 2024 should be even better.
See you all there!
Location--
GPS: 33.643617,-114.304752Last year was my first year and I met and camped with several other great Oliver Owners as well as many Casita, Scamp, Escape and Bigfoot owners, I am hoping to attend again. Anyone else planning to be there this year?-
1
-
5
-
-
My 3500 is a bit newer than yours (next gen( as it has 17" wheels. I would not go to a larger wheel on mine as I like taller sidewalls than most new trucks have. I find that a taller sidewall rides better and handles better when towing.
If I had your truck I would stay with the 16's. Keepin it old school, Man!
-
27 minutes ago, Wandering Sagebrush said:
John, rather than splice into trailer wiring, the previous owner of our trailer ran a second circuit from the tow vehicle to the back of the Oliver. It’s for the storage box on the back, and there is a quick disconnect for the box. Wiring is under the hull.
There is a down side to this approach, both he and I had to cut an opening into the door of the TV 4 pin to connect the new flat four circuit. I’m probably going to build a new jumper that comes off the TV 7 pin, and splits to a 7 and 4 so I can better weather protect the TV connection. If you would like, I can take photos for you.
I have installed this 4 four pin accessory connector in-line and just before the 7pin socket. I don't have a part number but I bought it at a local trailer supply. It is unplug, plug and play. This modification gives you a additional flat 4 pin connector on a pigtail which can be used when the 7pin socket is occupied (since the use of the 7pin often blocks the access to the integrated 4pin socket). As I recall it was less than $30
-
3
-
2
-
-
1 hour ago, topgun2 said:
Any idea of how you main solar switch got turned to the "off" position? This is not a bad thing - of course unless you didn't know that it was off and wanted it on. There can be times when you will want to turn that switch to the off position - like when you want to work on your batteries without any current coming to them.
The switch could have been turned off and just not turned back one when the new batteries were installed as the panels would need to have their power feed to the controller interrupted to avoid damage to the controller when the batteries were removed and new ones installed.
-
4
-
-
On 5/27/2023 at 11:14 AM, ScubaRx said:
These are the best deal I found and it took me a couple of years to find them. They are solid stainless steel. No outer sheath. Seat is perfect and they look great. $3.67 each.
I just got around to doing my annual bearing maintenance and switched out all lug nuts to the ones recommended above by ScubaRx. They are super high quality and fit perfect. As a side note, I did not find any cracked sheathing on my old lug nuts. Likely had to do with spending most of the year out West and use of a 6 point socket.
Thanks Steve!
-
4
-
-
45 minutes ago, snakeriveridaho said:
Hello,
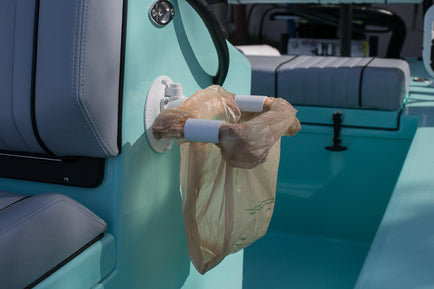
We use SeaSuckers paper towel holder https://www.seasucker.com/. it is a bit pricey but works great. Even better is their small waste band for trash. We have a couple of their hooks also, but the trash can band is the best. We keep the trash can attachment on the surface below the counter, under the pantry. There is room for the paper towel holder over the sink.
Kirk
Seqaucker suction cups are really secure and have a strong hold. I have the suction rooftop rack for my car. Ended up using it on the dent in the fender of my Tundra to successfully perform paintless dent removal, the suction is that strong. I will look for the waste band as it ould be great to be able to move it outside/inside as needed.
-
4
-


Made in USA leaf springs
in Mechanical & Technical Tips
Posted
Best to call them and ask. Their specialty is custom leaf springs, based upon owner provided specs. You will need to provide them with msmts, loaded weight, likely gvwr and perhaps more details. I would be surprised if they would be unwilling to make something custom to meet your specs