Steve and Cindy
-
Posts
36 -
Joined
-
Last visited
-
Days Won
1
Steve and Cindy's Achievements
")


-
Starlink Mini Installation- 2022 LEII- Alternate Approach
Steve and Cindy replied to dhaig's topic in Ollie Modifications
Happy to report that my installation, guided by this thread, was fully successful! My only significant deviation was to install the power switch under the dinette beside the DC fuse panel using this switch. (I'm getting over my fear of drilling through gelcoat.) I used heavy duty velcro to anchor the POE injector and router mini. I think it will hold just fine but yet to be road tested. Thanks @dhaig for sharing your project! -
Starlink Mini Installation- 2022 LEII- Alternate Approach
Steve and Cindy replied to dhaig's topic in Ollie Modifications
@dhaigI like your setup and I'm going to give it a try. With the RJ45 pass-thru connector, do you have to take any precautions in rainy weather with water getting into that connection from outside the trailer and causing problems? -
Starlink Mini Installation- 2022 LEII- Alternate Approach
Steve and Cindy replied to dhaig's topic in Ollie Modifications
The POE injector from MobileMustHave has been running about $150 but is now marked as $119.20. -
Quieting the Dometic Penguin A/C
Steve and Cindy replied to Ray Kimsey's topic in Ollie Modifications
I finally got around to giving this mod a try today. I took care to cut and shape the foam to smooth out the airflow as much as possible. I found that the foam cut very well with a tabletop bandsaw, and was shaped into rounded corners easily with a wood rasp. I applied a generous covering of silver metallic tape to hold it all in place. Unfortunately, I didn't get the reduction in noise. 74dB on low and 84dB on cool after the mod, same as before, using my iPhone. I think it did eliminate a little bit of crackling that was caused by the flex duct vibrating. Maybe it had to do with the thickness of the foam, where mine was generally thinner that what is shown in this post. I took advantage of the opportunity to seal up the edges of the return airway as much as possible since it was fully exposed to the rough cut through the hull, and all the dust that comes with that. Overall it was a good experience and I don't regret the time spent, even though I didn't get the hoped-for noise reduction. It was worthwhile to clean up the return air path. -
Dexter EZ-Flex zerks not accepting grease
Steve and Cindy replied to Fargoman's topic in General Discussion
I did try it both lifted and unlifted, and I can try rotating the bolt. Pulling the bolt entirely is a more involved undertaking I was hoping to avoid. -
Dexter EZ-Flex zerks not accepting grease
Steve and Cindy replied to Fargoman's topic in General Discussion
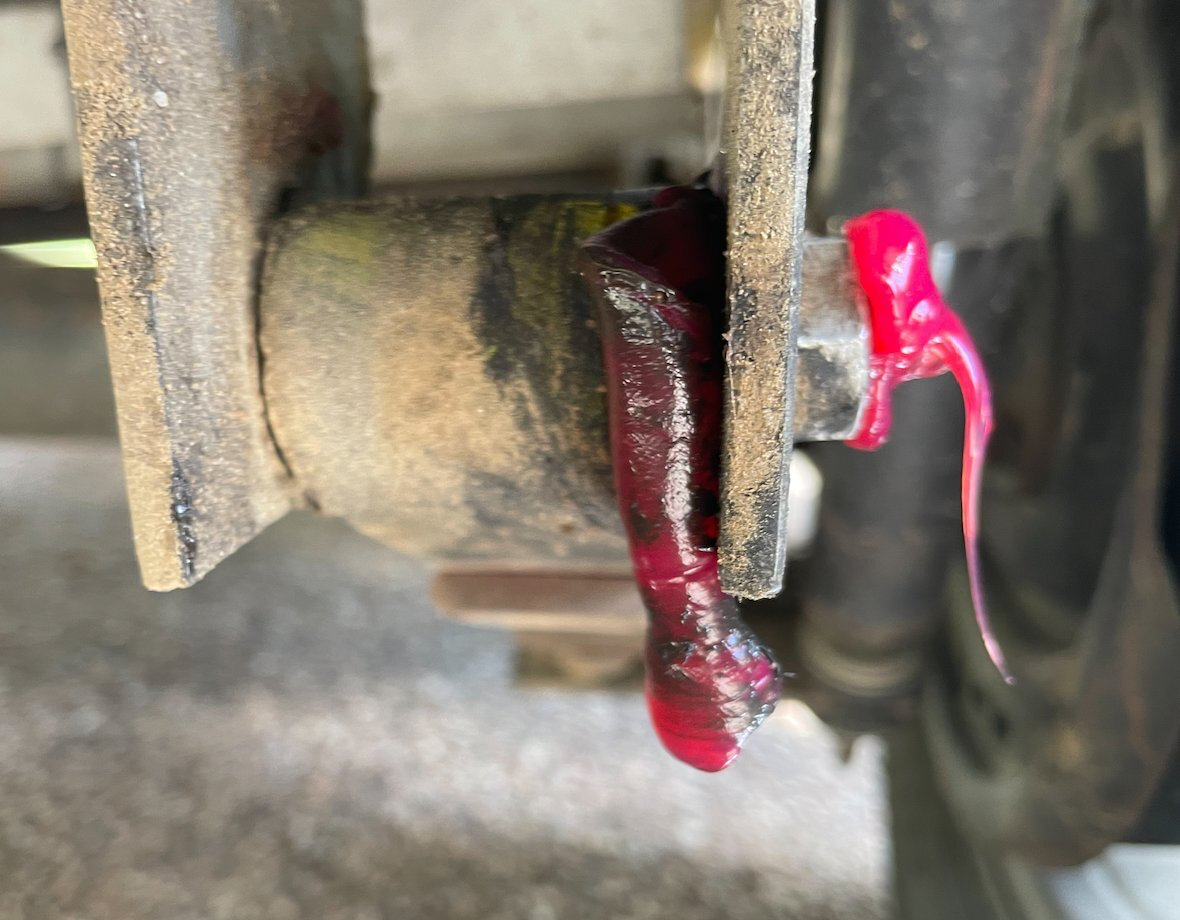
I didn't see anyone answer from one of the commenters about this situation where the grease does not flow across and come out the opposite side from the zerk. (I borrowed this awesome photo). I ran into this issue yesterday on the rear-most leaf spring bolt. Is this this a case where I need to remove and replace the bolt? I have about 7000 miles on the trailer.
-
Replacement of Plumbing vent cap
Steve and Cindy replied to rideadeuce's topic in Ollie Modifications
Nice work! Did you find that the black pipe was attached to the cap? Our black pipe slips up and down an inch or so, and I don't know whether it is supposed to be attached at the roof penetration. -
Girard awning remote
Steve and Cindy replied to Steph and Dud B's topic in Mechanical & Technical Tips
Our Girard remote batteries died this weekend while camping. We had to manually shake the awnings to activate the wind sensor in order to retract. For removing the backplate, we found online somewhere that there is a tiny groove in one corner under the word "OPEN" that you can slip a screwdriver into and twist. From there it was pretty simple to pop the plate off working our way around the edges. The 2430 batteries seemed fairly secure and not slipping around, so that may be some variability between units. The 2450 is an equivalent battery that is a bit thicker, so it might be an option if the mounting slot is too loose. Replacement 2430s were actually pretty hard to find and not stocked at most locations locally. Got the last three at a Walgreens. Surprisingly, the display was actually bright with the new batteries. -
I ended up ordering the exact same replacement part without the light, so hoping it will be very straightforward. I did do some gelcoat drilling for the infamous toilet flange repair, but I guess that's a story for another thread. Thanks for the tips!
-
For anyone who has replaced the original Maxxair model 3812 bath fan, are the screw holes in the same location on the exterior and interior? Since I have to replace my fan, I'd consider doing the LED upgrade, but I'm not really motivated enough to drill new holes.
-
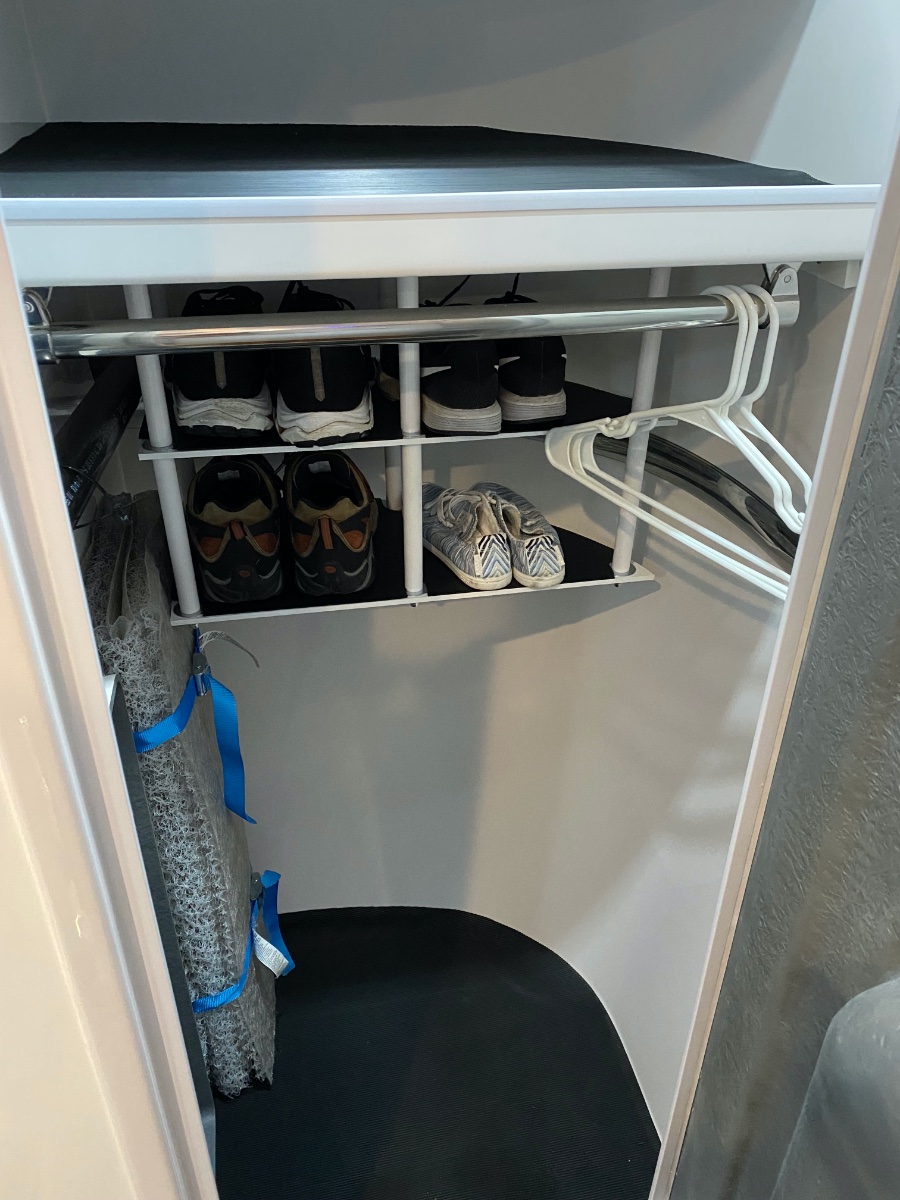
Very nicely done! That closet is hard to figure out and this is a great solution, and well-crafted.
-
Sorry, I wish it was commercially available in some form. I put it together from scratch. I had been thinking for a while whether there was some existing product that could be adapted to hang below the shelf, but couldn't find anything.
-
It's a tight fit depth wise, but I was able to size the dimensions to provide a small amount of clearance to the plastic hangers shown in the picture. It could be scaled back a bit if just used for odds and ends, or if someone has smaller feet than my size 13's. I have about 13-14 inches of shelf depth on the left side, and the depth decreases as it follow the contour of the hull around to the right side.
-
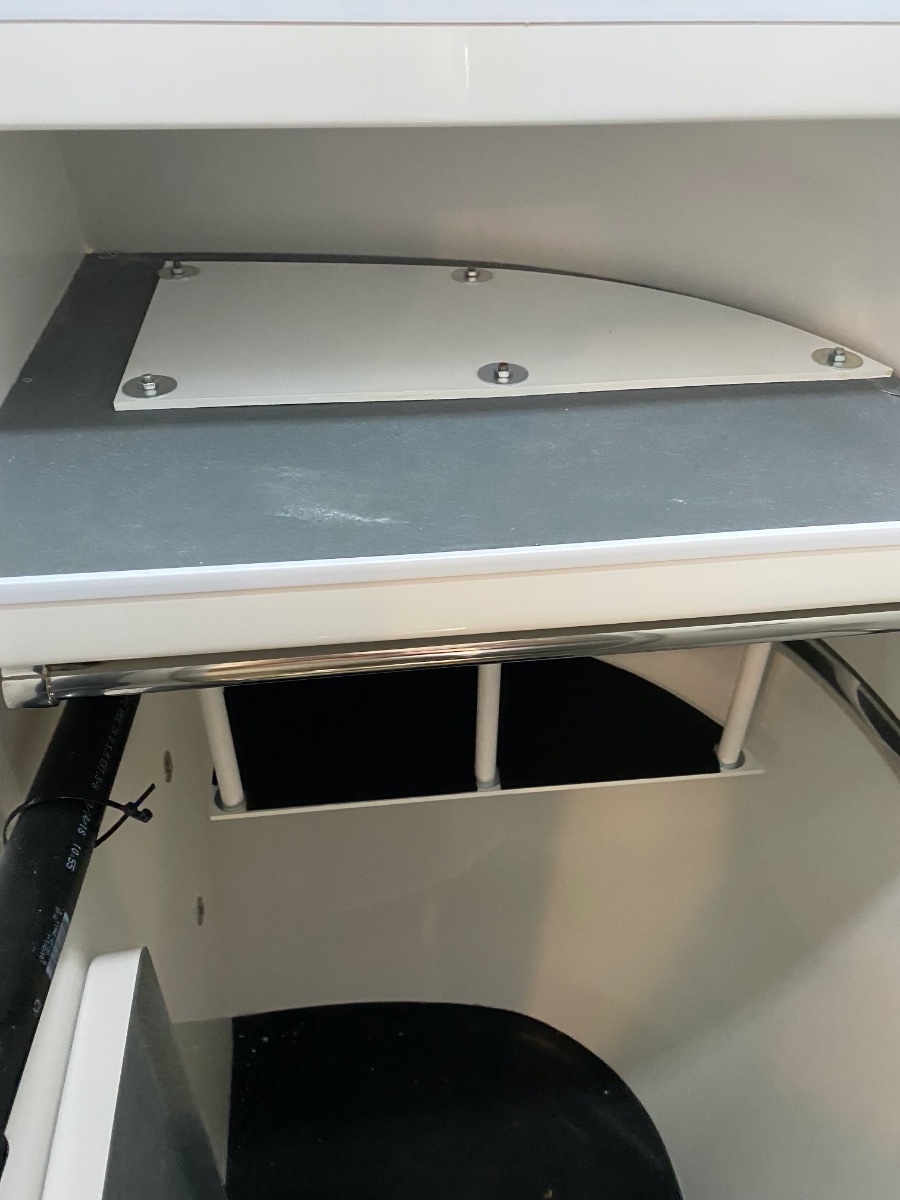
We have always struggled with what to do with our shoes other than a pile at the bottom of the closet. After much thought, we came up with the idea of a rack suspended below the lower closet shelf. This is two shelves made of 1/4" MDF suspended on threaded rod, with 1/2" PVC concealing the rod and providing some stability. It is set back just far enough to allow the clothes hangers in front to move freely. As a bonus, the offset from the black vent pipe leaves just enough room to snugly tuck in the extra piece of hypervent. Looking forward to road testing it in the coming year!
- 14 replies
-
- 16
-

-

-
Norcold drain line missing?
Steve and Cindy replied to Steve and Cindy's topic in Mechanical & Technical Tips
Thank you! Just what I was looking for. Yes, there is a tube coming out the bottom of the hull under the vent, and it appears to snake up thorough the vent cavity and disappears somewhere inside the back of fridge. I'll have to get in two fixes on this ticket. I spent the entire weekend collecting temperature sensor data to prove that the LP mode just does not cool well at all.