sailorashore
-
Posts
50 -
Joined
-
Last visited
-
Days Won
1
1 Follower

sailorashore's Achievements
")


-
Ralph: The center beam installation has a lot to recommend it. I think I was the first and did a post on how to do it. John Davies did a follow up with much better pictures. The advantages: 1. Center beam is strongest structural member with better lead angle; 2. Center beam installation allows brackets to be doubled-up, ensuring that there is no slippage; and 3. easy to reach for adjusting the bolts. If I were handier with the forum would give you a link, but I’m not. You should be able to find our posts with a bit of research. Best regards, John Shkor, SailorsAshore
-
John Davies: Take a look at the port visors offered by Seaworthygoods.com. Used as rain deflectors mounted over vessel portholes. Come with 3-M tape ready for mounting. It may be that something may be adaptable for what you want. I have a port visor over the bathroom window and it has stayed in place for the last 2,000 miles. John Shkor SailorsAshore
-
Am I missing something? Isn’t the ideal solution disc brakes coupled with the Dexter EZ-lube spindle? Then you can keep the bearings lubricated without the risk of blowing a seal and getting grease on the brake pads & drums. Whether it should be 3500 lb or 5000 lb axles I don’t know. Doesn’t cure John Davies desire for more throw in the suspension, but for those of us who explore more on the interstate than off-road it would seem to be just right. If Dexter offered a disc-brake-and-EZ-lube replacement axle package, that might be a useful way forward. John Shkor SailorsAshore
-
Andersen Triangle Plate Shackle Pins
sailorashore replied to CedarForks's topic in Mechanical & Technical Tips
Bill: I have used the socket handle and can see no evidence of damage. The new model Anderson shaft ball turns much more easily than the old. If I happen to have the triangle plate installed and the chains unshackled I can turn the shaft with just my hands on the triangle plate, That of course is with no trailer weight on the ball. Best regards, John Shkor SailorsAshore -
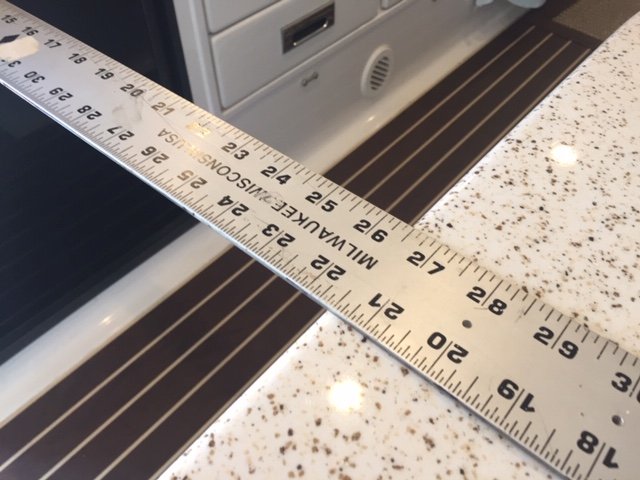
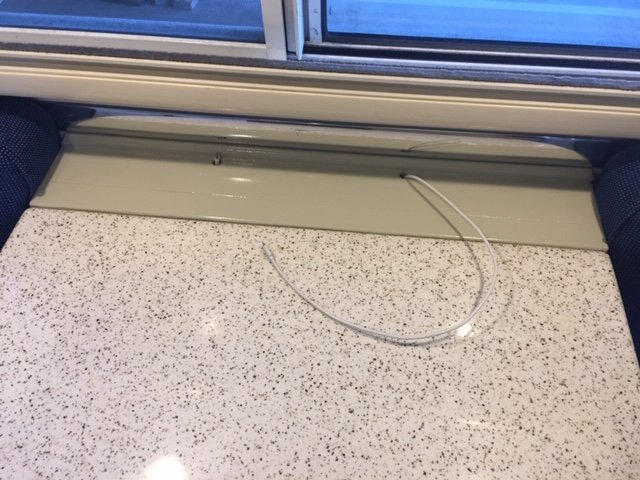
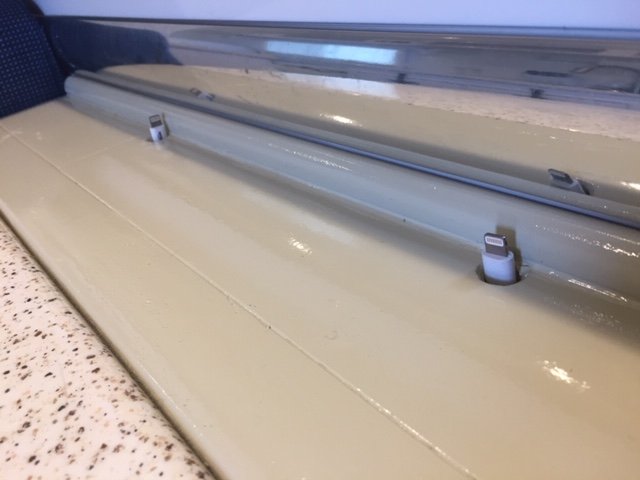
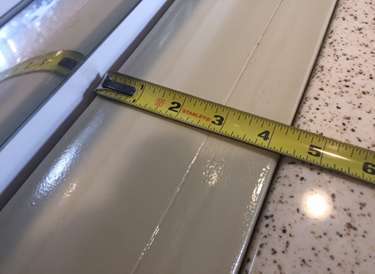
More on a Larger Dinette Table A number of interesting ideas came up in the responses to my proposal that Oliver should offer a larger dinette table as an option, and for after-market sale to current owners. I wanted to provide some additional information for some of them. 1. As can be seen in the picture of my "new" table below, even after adding almost five inches to the table length there is actually still more than 26" of space in the walkway between the table and the refrigerator. Plenty of room for two people to maneuver. If I were to do it again, I would add a full 5" to the table, making the new table dimensions 27 3/4"W and 29" long. Then the walkway would be exactly 26" 2. I like the idea of a drop leaf and other expanding table designs when space permits, but in exploring design options for myself I was concerned that unless raised the drop leaf would block one from sitting down at the dinette. Also, I was concerned about sharp square corners being a safety hazard when the leaf was down, and wanted to preserve the rounded corners for safety. 3. For those who might to want to use their third bunk, if Oliver were to follow the same pattern used for its current table, the larger table could still be used as the filler for establishing the bunk. Probably with a couple of barrel bolts underneath and near the sidewall to lock the table in place when it was in the "down" position. 4. Finally, and just to gild the lily, I led the charging cables for our computers & smartphones up through the table edge under the window. When not in use they drop back down into the holes and are out of the way. Much neater than having them flop all over the place. Oliver ought to do a similar thing with its table(s). Thanks to all who chose to comment. John Shkor SailorAshore

-
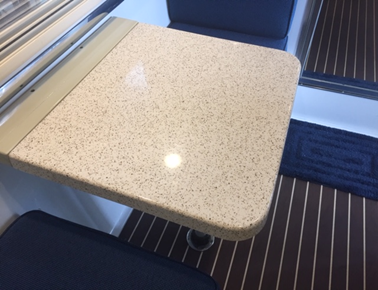
Larger Dinette Table Having a properly sized dinette table contributes significantly to the pleasures of life in an Ollie. That’s how Sheila and I feel after I modified our dinette table to add 4 1/4 inches to the table’s length. What a difference a small amount of additional space makes. We find it more comfortable, now have room for morning computers and coffee, and indoor dinners are more gracious. Also, I can now put both elbows on the table if I want to. We have had a desire for a larger dinette table ever since we picked up our Ollie (hull 217) and got some experience under our belts. We camp as a couple, never set up the third bunk, and don’t like having a table that is too small because of the bunk design issue. Oliver wasn’t interested in making a larger table when I broached the subject. Why mess with a successful product? But hunkering down to avoid corona virus gave me some extra time, and I used it to modify my existing table to see if I was on the right track. I worked up a design that used material from my leftovers bin, and which would allow me to undo the mod if it didn’t pan out. Unless you are really looking for it, the additional table length is not readily apparent. Aesthetically everything still looks proportional. The added length doesn’t interfere with the refrigerator door, and there is plenty of room to move about. While the pictures below show what I did, this isn’t really a how-to-do-it report. My goal is to stimulate Oliver. My hope is that the powers-that-be at Oliver will order a mock-up of a table like mine to be made, sit at it, and confirm for themselves how much nicer it is. It is my hope Oliver will then authorize a supplemental mold for laying up the larger table, offer it as an option to new buyers, and make it available for purchase by existing owners. I would be one. If you think you might like a larger dinette table too, please tell me in a comment to this string. I would like to ascertain if there is actually any demand for this, and if so, report same to Oliver. And if you are so inclined, please contact Oliver directly as well. Best regards, John Shkor SailorAshore
-
I have been reluctant to take my Ollie to a shop for wheel bearing and brake service. Don’t lift under the axles, don’t lift under the aluminum frame, the guidance says. How does one ensure a shop tech doesn’t do one of these bad things when you aren’t there to observe? Any practical experience with this? Am I being overly concerned? Advice appreciated. Thanks, John Shkor SailorsAshore
-
Battery Cut-Off Switch Installation
sailorashore replied to sailorashore's topic in Ollie Modifications
Overland: Fully understand. The Blue Seas 360 is a nicely engineered panel. And if you have spent enough time inside the boat cabin during foul weather, electrical panels begins to look good anyway. Carnivore: Look forward to reading about your 12V lithium ion battery experience. We have lithium batteries in two electric bikes, and they pack a lot of power in a small package. Best regards, John Shkor SailorsAshore -
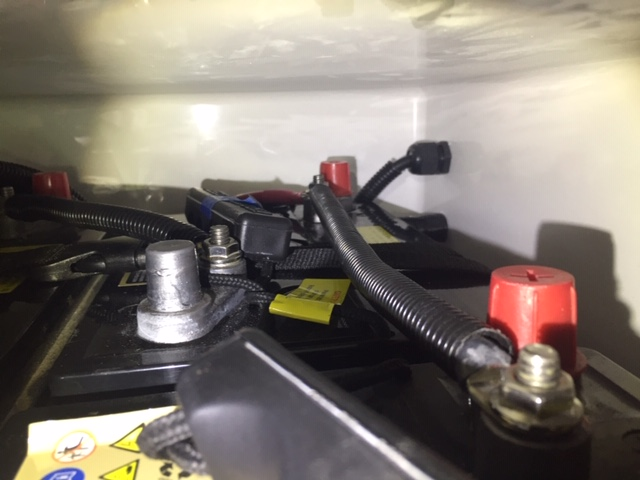
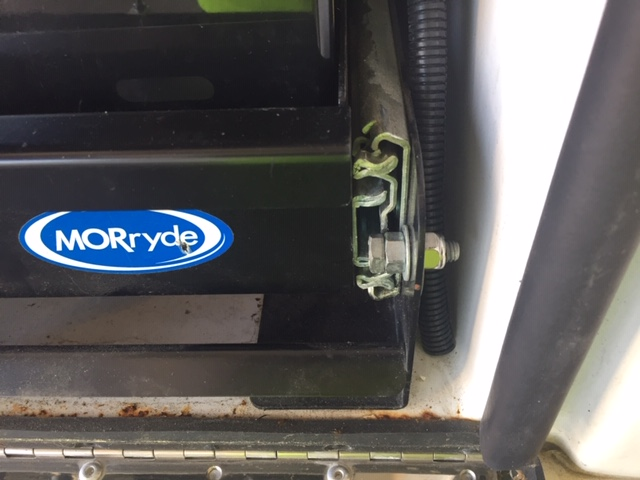
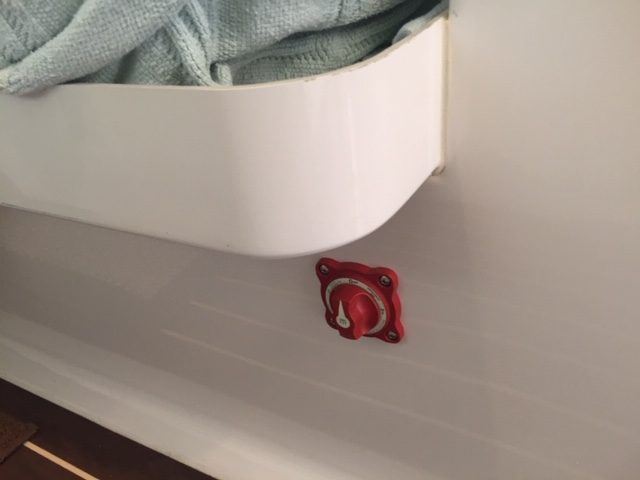
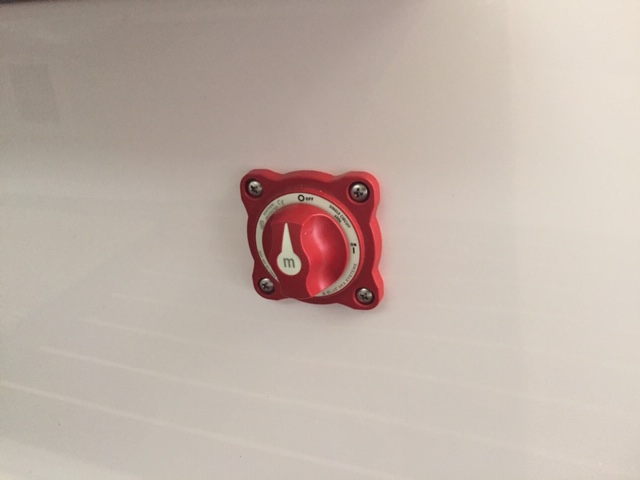
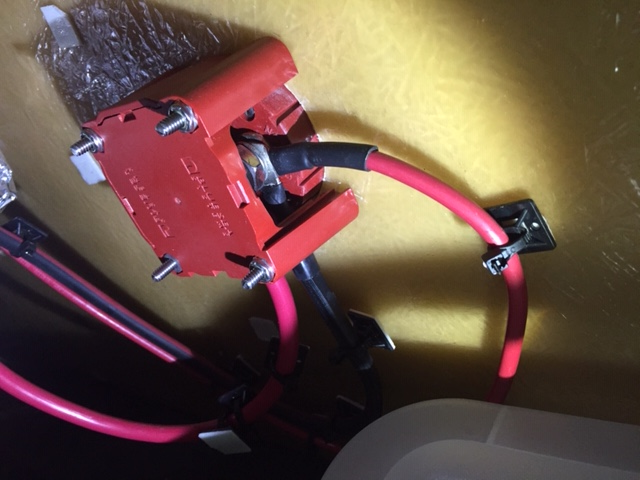
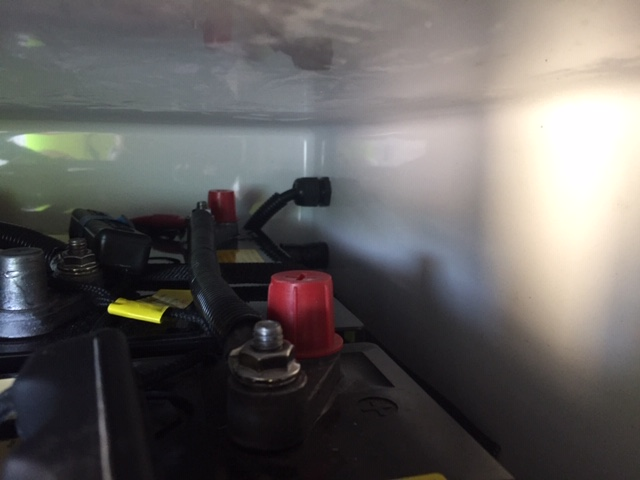
How I Installed a Battery Cut-Off Switch: After much delay becuse I couldn't figure it out, I finally installed a battery cut-off switch on our Ollie hull 217, and it turned out easy to do. We store the trailer at a remote covered location. I didn't like to keeping the batteries on charge for long periods, and I didn't like the seemingly unavoidable small drains take the batteries down over time. My new switch installation cures both these problems. I know other owners have installed similar switches, but still wanted to share my method. The installation will be familiar to anyone with boating experience. I wanted the switch inside for convenience, and because I had installed safety bolts on the slides on each side of the battery rack. The rack is really secure, but removing these bolts takes a bit of time. Fortunately on my Ollie both of the two hot (+) wires installed by the factory and and coming off the batteries both go through the aft compartment wall and into the space underneath the streetside bunk. That greatly simplified my switch installation. The steps were: 1. Disconnect & remove batteries from rack. With four batteries there are a lot of short connecting wires. Take a picture or make a sketch before you disconnect anything so you know battery orientation and what wires go back where. 2. Install a Blue Seas or similar marine battery switch underneath the streetside bunk. With a properly sized hole saw and a bit of sanding the body of the switch can be placed into the under-bunk compartment with only the switch face projecting into the living space. 3. Pull the two factory installed hot (+) supply wires through the aft compartment wall and into the space under the streetside bunk. Do not disconnect the wires from their connections inside the under-bunk compartment. 4. Prepare and run a new hot (+) supply wire to run from the batteries to the new switch. There needs to be enough slack so that the battery rack can be pulled out once the installation is complete. In my case I used 48" of #6 gauge wire, with a 5/16" and a 3/8" terminal at each end. Only #6 gauge wire, because most everything in our Ollie is low amp load LED or solid state. If I had a larger amp draw, perhaps from an inverter, I would have used #2 gauge wire for the new supply run, and used automotive lugs which can handle a higher amp load. Run the new supply wire through the battery compartment wall and hook up to the input side of the Blue Seas switch. 5. Continue to leave the old hot (+) wires connected to the factory installed terminals inside the under-bunk compartment. Prepare new runs for these two wires backwards so they can be hooked up to the load side of the new switch. Cut the wires to the right length so they can be connected to the new switch without too much excess length. Install new wire terminals and connect these two wires to the load side of the new switch. Secure these wires from vibration along their runs with self-stick mounts and cable ties. 6. Carefully reinstall the batteries and rewire. 7. When desired, turn off the new switch to completely disconnect batteries from the trailer load. If plugged in, I disconnect shore power before doing so. Best regards to all, John Shkor SailorsAshore
-
small white fan with suction cup mount?
sailorashore replied to nrvale0's topic in Ollie Modifications
Go to Defender Industries or West Marine. Both marine suppliers. Get the 12 volt fans with suction cups. I have two. They work great and run forever. I think they are Carafamos, but I am not in the the trailer. Should be about $25. Biggest benefits are circulating ambient air when not too hot, and circulating cold air from AC when running. Good luck. John Shkor, SailorsAshore -
Bulldog coupler complete bolt failure !
sailorashore replied to John E Davies's topic in Mechanical & Technical Tips
John Davies: Got it. Makes sense. Will use side bolts. John Shkor SailorsAshore -
Bulldog coupler complete bolt failure !
sailorashore replied to John E Davies's topic in Mechanical & Technical Tips
John Davies Thank you for the report and pictures. For some time I have been thinking about adding an extra bolt to the coupler-tongue assembly. Drill a 1/2” hole vertically through the top of the coupler and install bolt about where the letters “FT” show up in your first photograph. Can you think of a reason why this would be a bad idea/wouldn’t work? Please advise. John Shkor SailorsAshore -
air conditioner stops and starts
sailorashore replied to MaryandBill's topic in Mechanical & Technical Tips
What Da: Great idea. Thanks. John Shkor, SailorsAshore -
air conditioner stops and starts
sailorashore replied to MaryandBill's topic in Mechanical & Technical Tips
Mary & Bill: Funny, we just had your problem for the first time. We are camping in Maine, yesterday was an unusually hot hot day, and we chose to start the AC. Had the same intermittent cutouts you describe, with everything losing power and coming back on a minute or two later. At first I thought it was electrical overload, with the fridge, hot water heater and AC all calling for electricity. Couldn't find any circuit breakers that had tripped. I changed the fridge and the hot water heater to gas, but that didn't cure the problem. Turned out the issue was our Progressive Industries EMS30 surge protector (external, plugged in at the electrical supply post) which was apparently working properly and doing what it is supposed to do. It was cutting off the flow of electricity and then coming back on after a time delay. It showed an E4 low voltage code. Not surprising in that a lot of other air conditioners got turned on in this camp site. However, according to the manual, the device cuts out if the line voltage goes less than 104V for six seconds. The device when I looked at it was showing a line voltage reading of 116V. It being a hot day I balanced marital harmony with risk to the AC from low voltage, and decided to take the EMS30 surge protector out of the line. So far all is well. AC continues to function well and we had a cool night inside the Ollie. Best regards, John Shkor, SailorsAshore -
Mike: I will definitely contact Anderson about this issue, once we get home. On the road now and comms sometimes difficult. I have always gotten great customer support from Andersen and expect a satisfactory outcome. Best regards, John Shkor, SailorsAshore