GrayGhost
-
Posts
155 -
Joined
-
Last visited
-
Days Won
4
Everything posted by GrayGhost
-
FYI- The new forum platform is working OK on a laptop or cellphone, but has serious flaws when accessing from an iPad, don't know about other tablets. This was not the case until this weekend...the formatting was fine immediately after the switch over. The formatting issues on the iPad make it almost impossible to follow.
-
The formatting on the forums page is out of whack...at least on iPad....

-

Where to carry spare gas for the generator?
GrayGhost replied to John E Davies's topic in Ollie Modifications
I don't know if these are the same as the military spec or not, but here is a site that sells CARB compliant Scepter cans in the US. http://t.basspro.com/Scepter-5-Gallon-Military-Style-CARBGas-Can/product/1510051447/ -
I've never experienced anything like that.
-
I had a couple of issues over the past two days that seem to be ironed out now....one was that images were not displaying correctly, and the other was that updating the posts was delayed. Thanks for updating the site.
-
The "Long Long Honeymoon" channel on YouTube has a series of very informative videos about the Alaska run. John posted one of them on a different thread.
-
Thanks, I'll give it a go.......
-
Thanks John, I subscribe to this channel and they do have some good videos, this one was very informative. On a somewhat related note, traveling to Alaska and high elevation locales could result in running into unexpected low temps at night. This one just came across from a different channel. While the jacks used on this diesel pusher are different than what's on the Ollie, the same situation might cause a blown fuse in our jacks if they become stuck to the ground. Good reason to use blocks between the ground and the jack pads.
-
Thanks, John. Does this also increase the cetane rating of fuel? Didn't see it mentioned in the product description. I'm currently using Hot Shots EDT. Wondering if you know if the Archoil does not boost cetane, can it be used in combination with Hot Shots EDT?
-
Rubber Gaskets Around Porch Lights
GrayGhost replied to Mike and Carol's topic in Mechanical & Technical Tips
Thanks for the walk through on your process, it will help when I do the same to mine. -
Rubber Gaskets Around Porch Lights
GrayGhost replied to Mike and Carol's topic in Mechanical & Technical Tips
Thanks for the photos and update. Anything to watch out for when removing the fixture, or is it self explanatory once you get into it? -
Rubber Gaskets Around Porch Lights
GrayGhost replied to Mike and Carol's topic in Mechanical & Technical Tips
The old style are also LED and downward pointing. Seems like the big difference is size. -
Rubber Gaskets Around Porch Lights
GrayGhost replied to Mike and Carol's topic in Mechanical & Technical Tips
The old style are also LED and downward pointing. Seems like the big difference is size. -
Rubber Gaskets Around Porch Lights
GrayGhost replied to Mike and Carol's topic in Mechanical & Technical Tips
I have hull #98, which was delivered in Sept 2015 to the original owner. As with Try2Relax, I have the old style lights with no streaking, but streaking around the shore power gasket. It's almost like soot. It takes very little moisture to produce the streaks. Seems like an oxidation problem. The streaks come off easily enough, I just worry about the gasket integrity and water eventually getting behind it and between the hulls.- 97 replies
-
- 1
-

-
- lights
- captain tolley
- (and 3 more)
-
Having owned and built boats, I am very familiar with the 3M 5200 and 4200 products. I was expecting the panel on the front of the vanity to be much more difficult to remove because I thought I would run into a thick bead of 4200. If you look closely at the first photo you can see a thin bead of caulk. And, it was very easy to slip a razor blade between the vanity and the panel and slice through the caulk. I know they use 4200 on all the major joints In the Oliver, and I could be wrong, but I honestly don't think it was 4200 that was holding that panel on....it seemed to me to be silicone. It also cleaned up very easily with the blade, with no damage whatsoever to the gel coat. I believe the newer Ollies have the panels fixed with a couple of screws in the same location I put mine, but they have decorative caps to hide the screw heads.
-
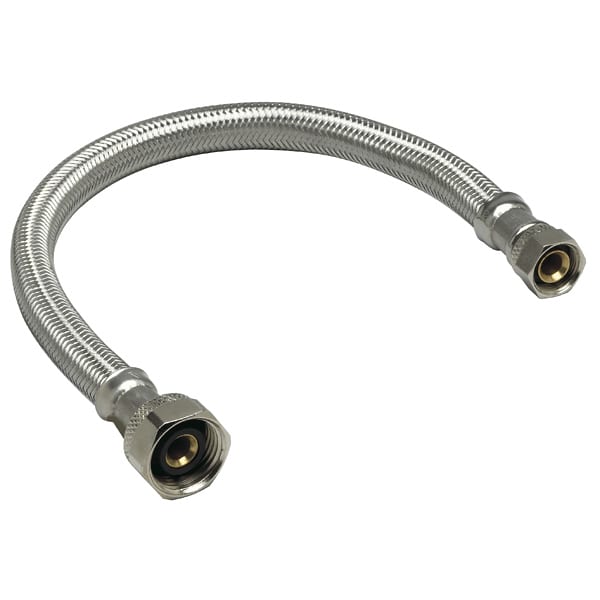
Yes, the plumbing looks plenty rugged. Also, the pex to faucet connections are done with braided plumbing line. So if you ever wanted to change out the faucet/shower head for any reason it would be very easy.
-
Previously I thought that a hatch in the closet was the way to go. After opening up the front,I can see that there just isn't enough room for anything but a small round port. Enough for an easy visual check of things, but not a practical accesss to do much else I don't think.
-
Yes, much better, thanks. I think though, unless I missed it, the edit function has disappeared... as one who is a bad proofreader, that function is invaluable ?
-
Also, the old caulk came off very easily, also with a blade (carefully). Re-caulked with 3M marine grade silicone caulk.
-
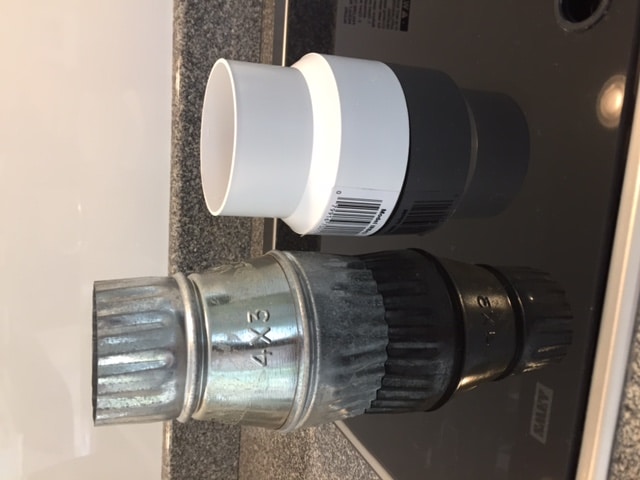
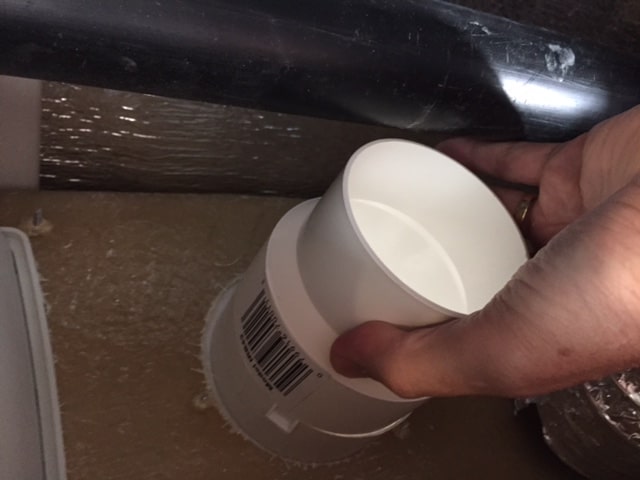
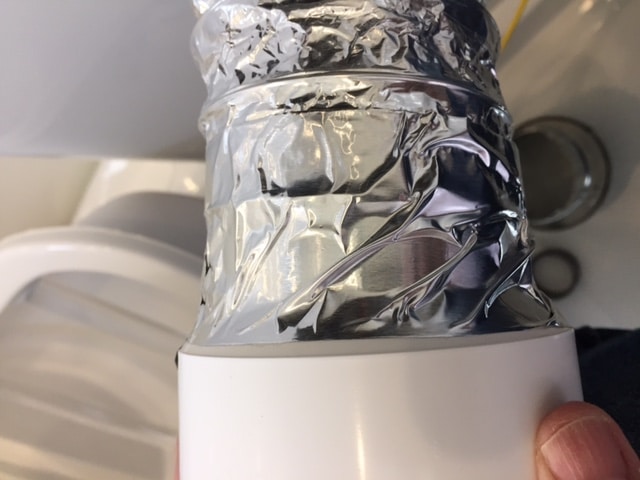
The front came off very easily, just a sharp razor blade to cut the caulk. It went back on fairly easily, but to make it even easier I re-attached it with stainless screws and washers first, didn't want just a bead of caulk to hold it on and have it slip before it dried. I caulked around it after it was attached with screws. The only way I can see to avoid doing that would be to hold it in place with tape while it dries. I thought about attaching the reducer with a screw(s), but that would have been very difficult within that space to get a drill in there. And it was so ill-fitting because of size, weight and the angle it was at because of plumbing in the way, I opted for another method. The duct splits at the second cabin vent. I don't know if it reduces from 3-4" there, or somewhere else prior to the bathroom. A three inch vent in the bath would negate the need for a reducer, but perhaps they aren't available.
-
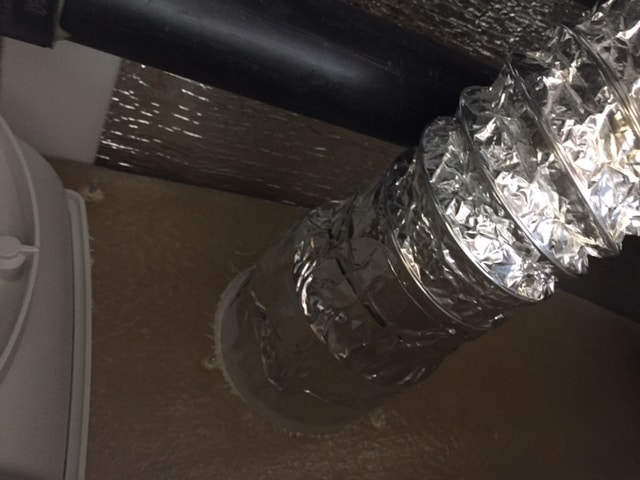
Cabin vent duct on mine are on really tight as well. It looks to me that the duct to the cabin is 4", and the run back to the bathroom is 3" to help keep the velocity up over the extra distance, so the reducer is needed to accommodate the smaller duct.
-
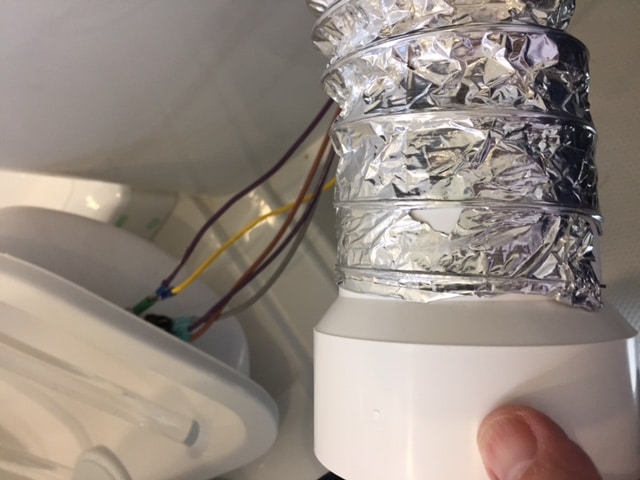
Did some "unscheduled maintenance" today. I discovered a while back that I was not getting any airflow out of the bathroom heat vent.... None. Took a flashlight and looked into the vent, and sure enough, the duct had separated from the vent. When I took the little rack off the front of the vanity, discovered the following: 1. For those who thought that perhaps there was wasted space in there, there really is not. Duct, plumbing, wiring and the recessed wash cloth rack take up almost all of the room. You will be glad to have space to maneuver under there if you ever want to do some mods or repairs. 2. The reducer that attaches the duct to the vent is metal, really heavy for the application, and just barely fits if everything is lined up just right during the build. In my case, the plumbing vent angles out away from the front wall just slightly, and it's just enough to make the reducer not fit. The joint was held together with foil duct tape, and the weight caused it to separate. 3. Found a very light weight plastic reducer on Amazon that fit the situation much better. The joint between the reducer and vent still not a good fit, (meaning it's just a tad too wide to slide into the vent), but with a couple of good wraps with foil tape it's on securely. And feather weight, so no danger that it will come loose.
-
Thanks for the added info and links.... you mentioned the Stone Stomper previously....do you have a US source for one, or are you going to order direct from Australia?
-
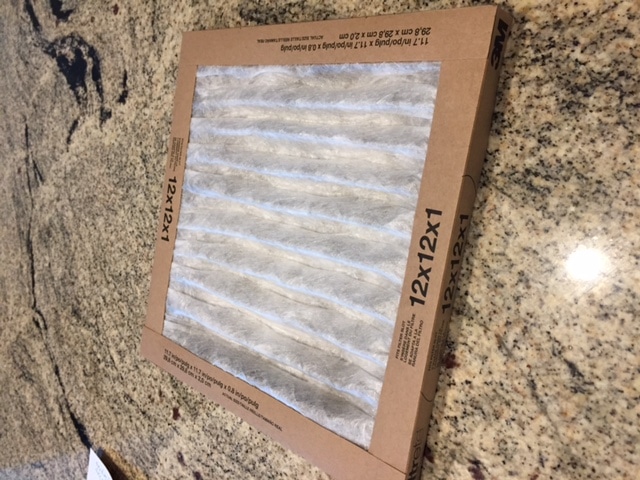
The 14x14x1/2 filter will probably work fine, thanks for the lead.... For now I think I will stay with a temporary filter unless it turns out to be too much of a pain to dismantle. While I agree that the fan is not particularly attractive, I do like how it is somewhat translucent and lets light into the interior during the day. I have an air source to keep tires topped off that would work for clearing dust as well: https://www.amazon.com/Viair-40047-Automatic-Portable-Compressor/dp/B004B68XGC/ref=sr_1_3?ie=UTF8&qid=1485795417&sr=8-3&keywords=viair+air+compressor As far as the main door dust intrusion is concerned- I have to compress the gasket pretty well to get the door to close tightly. In fact, a couple of times when I thought the deadbolt was locked and wasn't, the door has popped open underway. Given how tightly it closes I don't think I'll have issues with dust intrusion there.
-
I think I may try trimming a 14x14 version of this down to size, and attach with painters masking tape.