Ready to Hit the Open Road?
Spring is just around the corner, and everyone is ready to get their campers out of storage and hit the open road. Before taking off across the country, we need essential preparation to ensure our camper is ready. Dewinterization and/or freshwater sanitization are crucial in preparing for your travels. Some people may not winterize in their part of the country, but it is always a good idea to sanitize/clean the freshwater system each year. Some people may have different preferences regarding how they want to de-winterize or the best method. This article considers that you have followed our winterization instructions and need to de-winterize accordingly.
Dewinterizing Process for Your Travel Trailer: The Revival
This is the process for removing RV Antifreeze from your freshwater system.
- Run water into the fresh water tank, preferably 50 – 100% full, to dilute the RV antifreeze inside the tank. Allow this water to drain back out under the camper from the fresh tank drain.
- Connect your water hose to the winterization port at the rear of the camper, turn on the water source, and then turn on your onboard water pump. Turn on your kitchen faucet on cold until the water runs clear.
- Verify that the fresh tank is empty and close the Fresh water tank drain. This valve is located on the curbside of the camper below the bed. You can access it in the same access panel where the water pump is located. The valve is located at the very bottom of the lower shell and may be hidden by one of the furnace ducts. It will be silver and attached to a blue PEX pipe that drains below the camper.
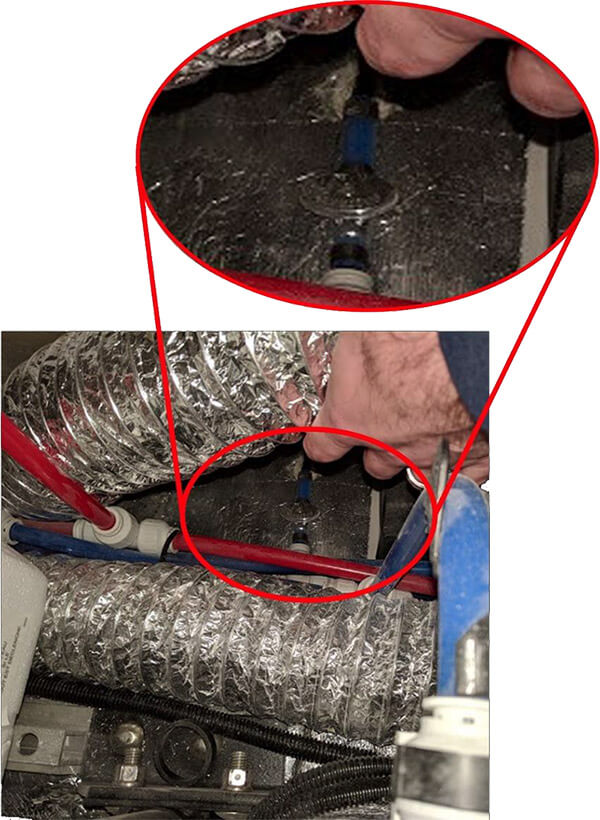
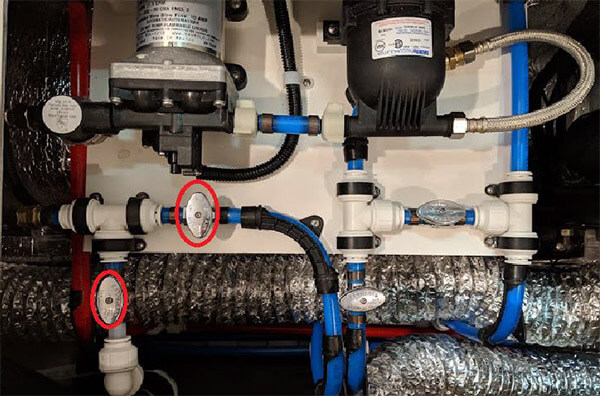
- Revert the water pump valves to their standard configuration. These valves are conveniently located within the same access panel we just used for the fresh tank drain. You’ll find either 4 silver valves (for 2017 and newer models) or 2 brass valves (for 2016 and prior models). It’s a straightforward process that you can easily handle.
In 2017 and newer models, we will turn the two valves on the left of the water pump.
The picture below shows the valves in standard configuration. The valves outlined in red are the only ones you should turn to change the system from winterization mode to standard mode.
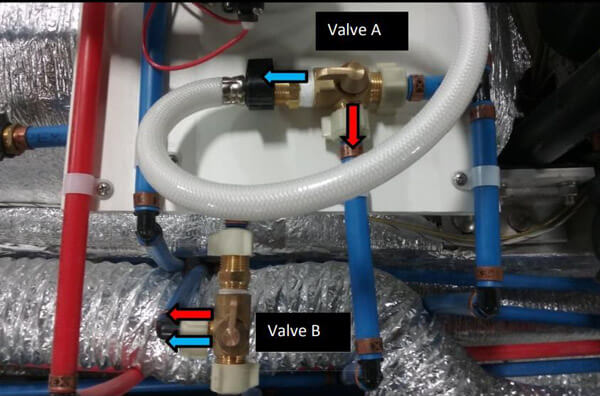
The picture below shows the valve configurations for 2016 and prior models. The valves are shown in standard mode. The blue arrow represents the direction in which the valve turns for winterization.
- Connect your water hose to the City connection and turn on the water supply. *This will be the outside water inlet labeled City Connection.
- Turn on your outside faucet cold water until it runs clear, then open the hot until it runs clear.
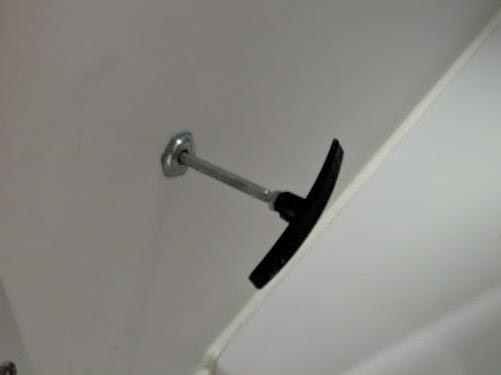
- Open your backflow preventer to allow water to properly drain into your grey waste water tank. *If you opted for the auto drain option, you will have a pull handle located in the bathroom next to the toilet or a power switch. The power switch may be outside or inside the closet, depending on the model year.
- Turn on your bathroom faucet cold water until it runs clear, then open the hot until it runs clear.
- Turn on your kitchen faucet cold until it runs clear, then open the hot until it runs clear.
- Turn the water heater bypass hose back to standard mode to allow water into the tank.
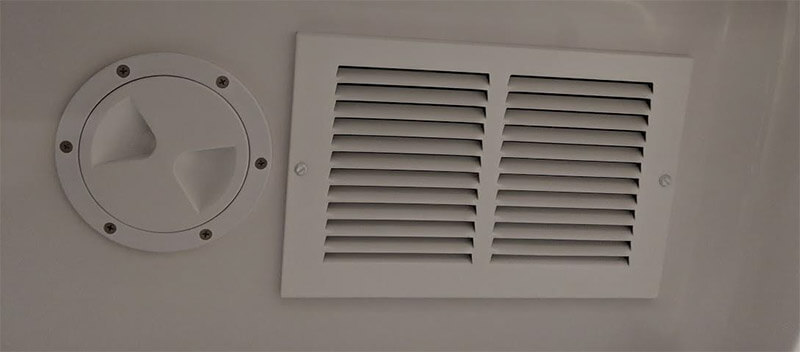
The water heater bypass valve is accessed inside the trailer via the 4” deck port under the curbside bed. The deck port is located next to the furnace air return vent. See picture below
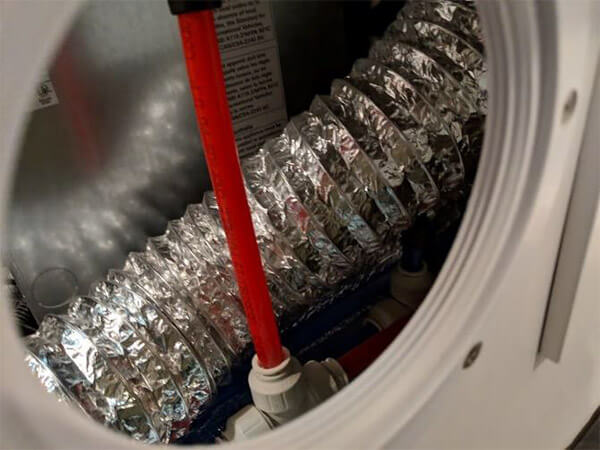
The below picture shows the furnace duct running on top of the bypass valve. It would help if you lifted the furnace duct out of the way to see the bypass valve.
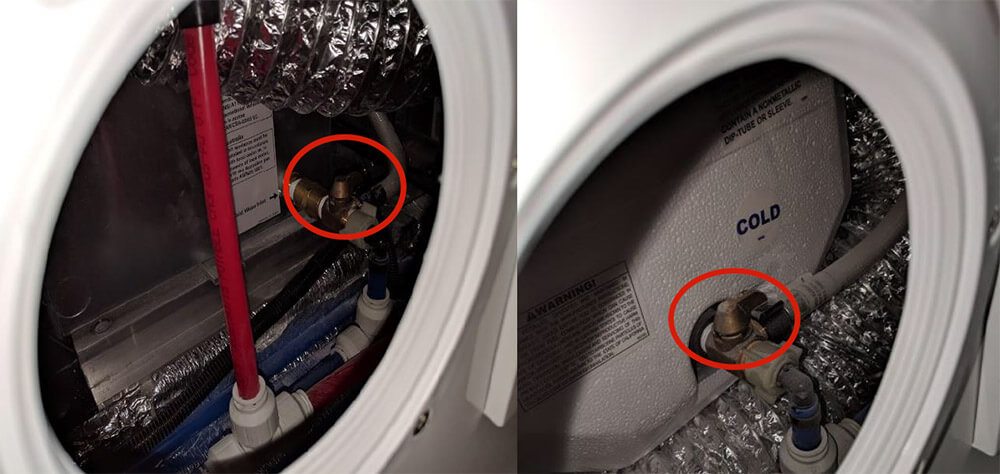
The pictures below show a Truma and Suburban Water Heater bypass valve currently in winterization mode. To allow cold water to enter the water heater chamber, you must turn the valve towards you.
Open the hot side of the kitchen faucet to remove any air inside the water heater tank to relieve pressure so the tank fills.
Congratulations, your camper is now dewinterized and ready to sanitize or use.

