Leaderboard


Popular Content
Showing content with the highest reputation on 04/28/2026 in Posts
-
https://www.elephants.com/5 points
-
Very impressive! My head hurts.😉2 points
-
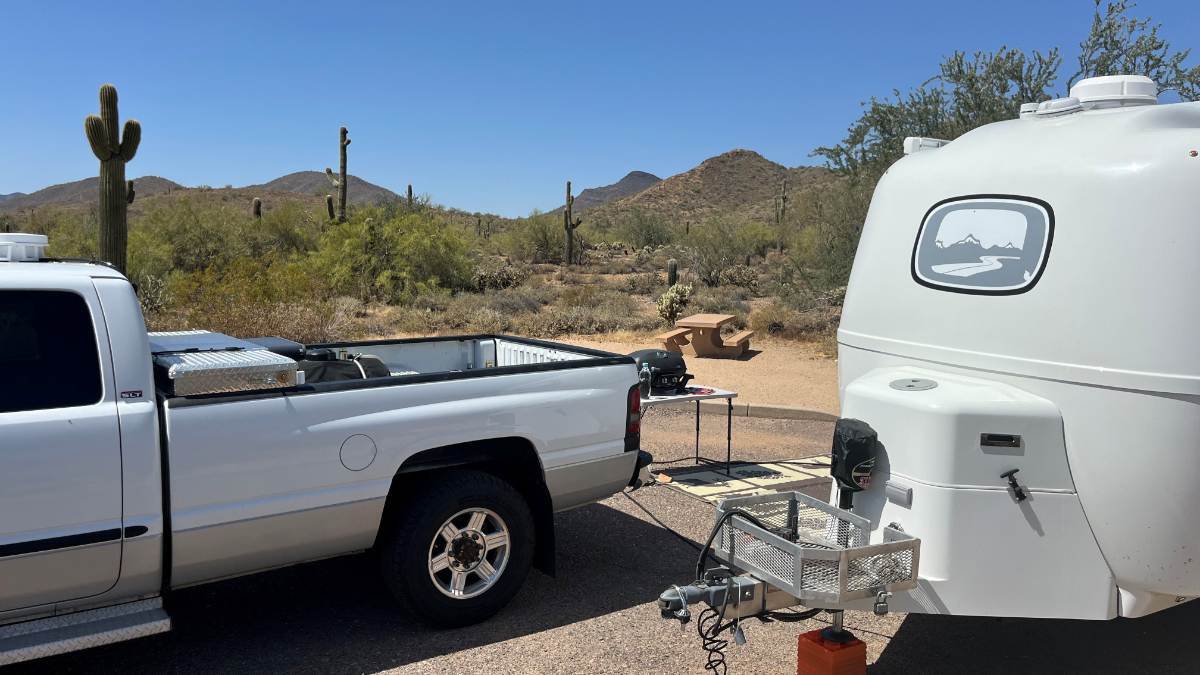
Cave Creek is our favorite of the Maricopa County Regional Parks. Often our first night away, just 90 min from home! There are currently 5 county parks, all excellent camping with hookups, around the perimeter of the Phoenix Valley. We've stayed at all of them! https://www.exploremaricopacountyparks.org/maricopa/facilities Snowbirds are gone, so the campground has lots of availability and it's not hot yet (high 80F today). Staying at campsite #9 for a few nights, the best in the park. It's like you have your own 5-acre campsite! 😎
 2 points
 -
We left for a trip yesterday. No Cat Scales where we live, but our city dump has scales. I go there often to recycle engine oil. With both Oliver axles on their scale, it came to only 5700 LBS. I’ve measured hitch weight separately at 580 LBS. We are packed light for a 3-day trip, so I estimate we’d pack another 220 LBS in food and clothing for a long trip adding to 6,500 LBS Max. So she’s sitting at only 5700 LBS on two axles! Shouldn’t 7,000 springs be enough? The Oliver is more top-heavy than most trailers, with its upper double hull, tall body, multiple cabinet storage at head height, rooftop A/C, solar panels and other rooftop accessories. We dropped 4000 FT in elevation yesterday! Coming down steep, hard turns, exhaust brake on, descending smoothly! The top of the Oliver stayed put, maybe leaning left or right 2” going into a hard turn. Look out your mirrors when towing to observe this. Our hull used to lean over a foot vs. just inches! Original springs, the Andersen WDH was a must! Not anymore, since the Alcan springs keeps the Oliver weight centered over its axles. This is why the OEM suspension is undersprung. It’s not only the weight it carries, it’s the total body weight it must control while towing in various conditions! 😎1 point
-
We like all of the Maricopa County parks, too!1 point
-
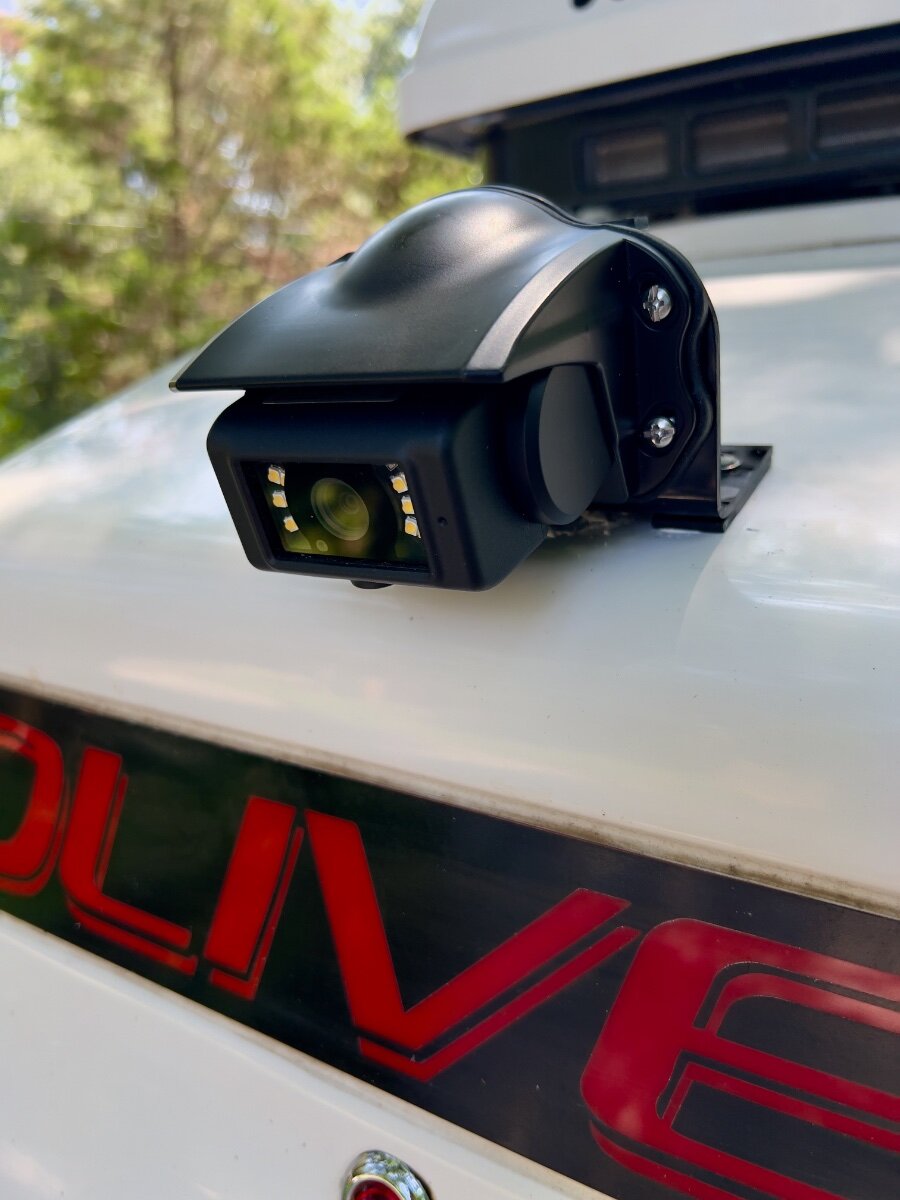
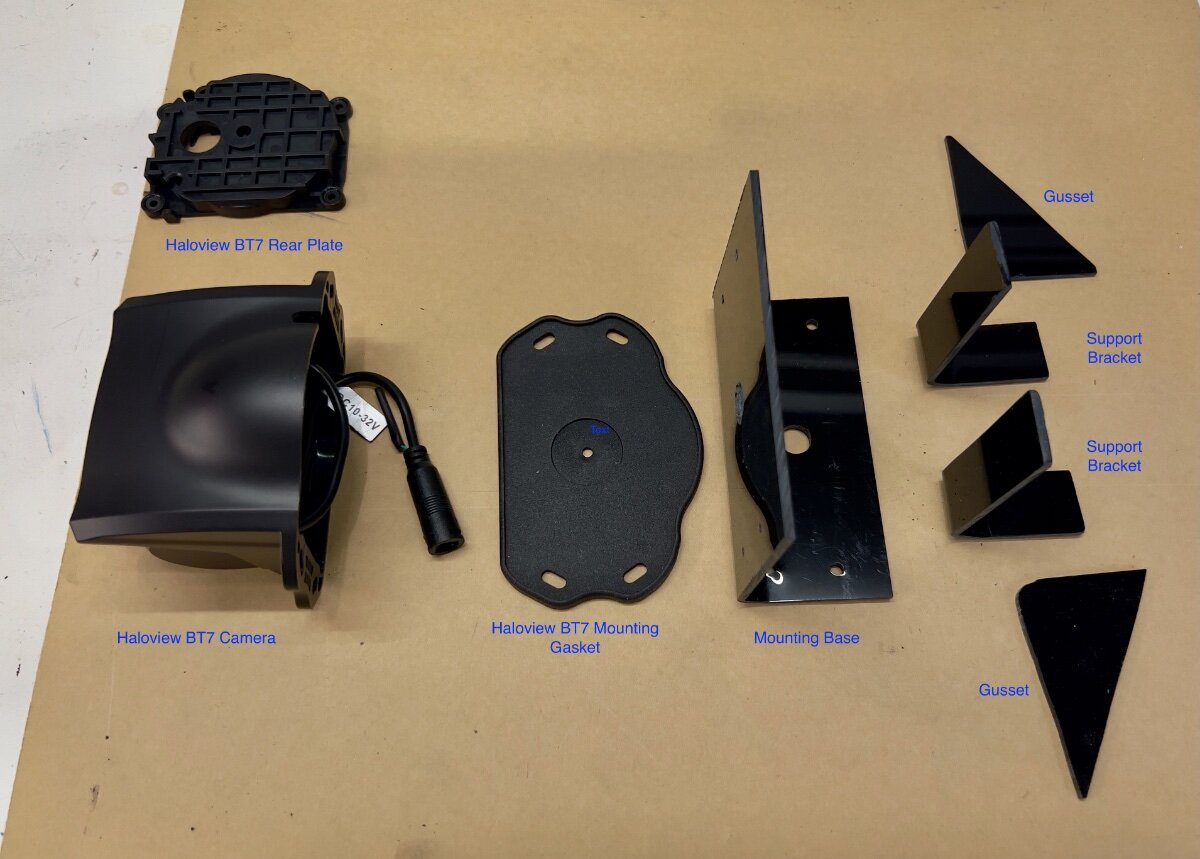
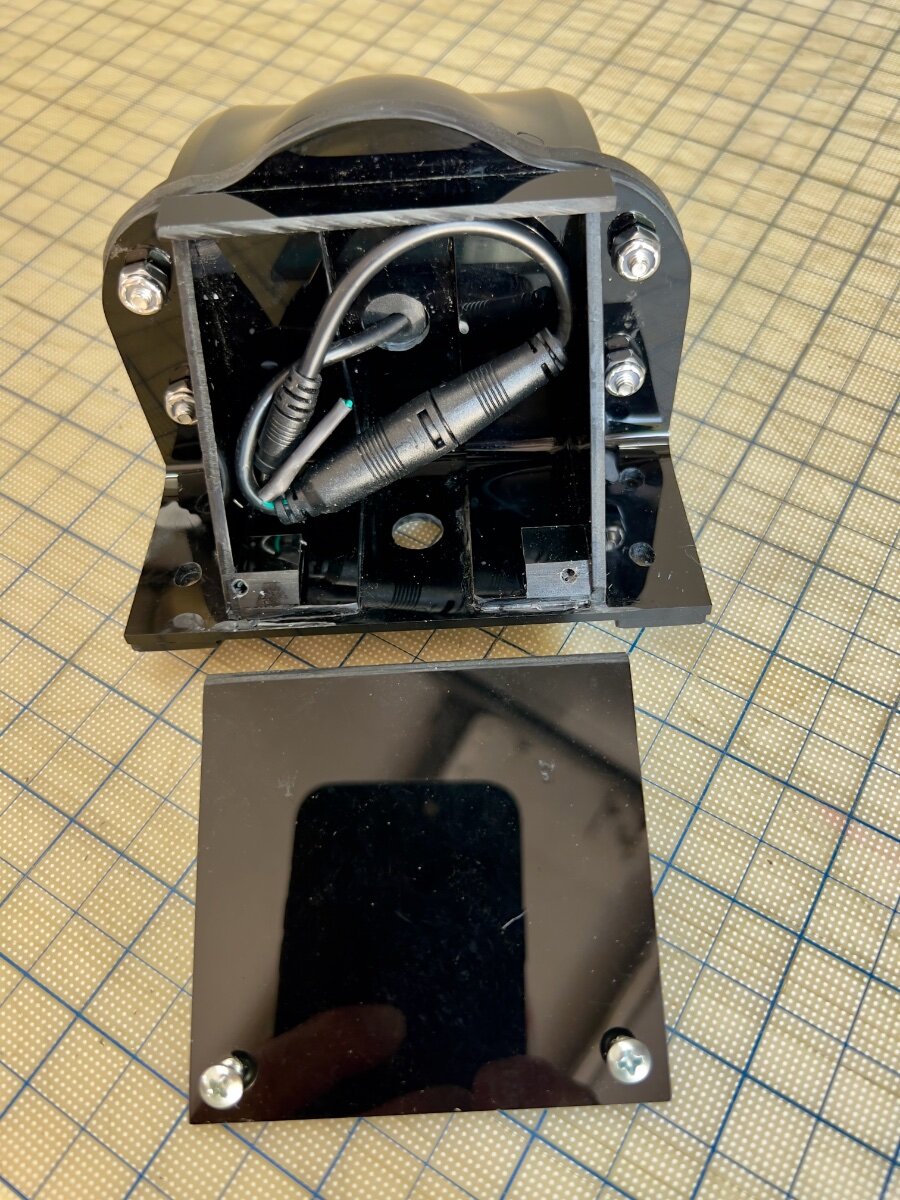
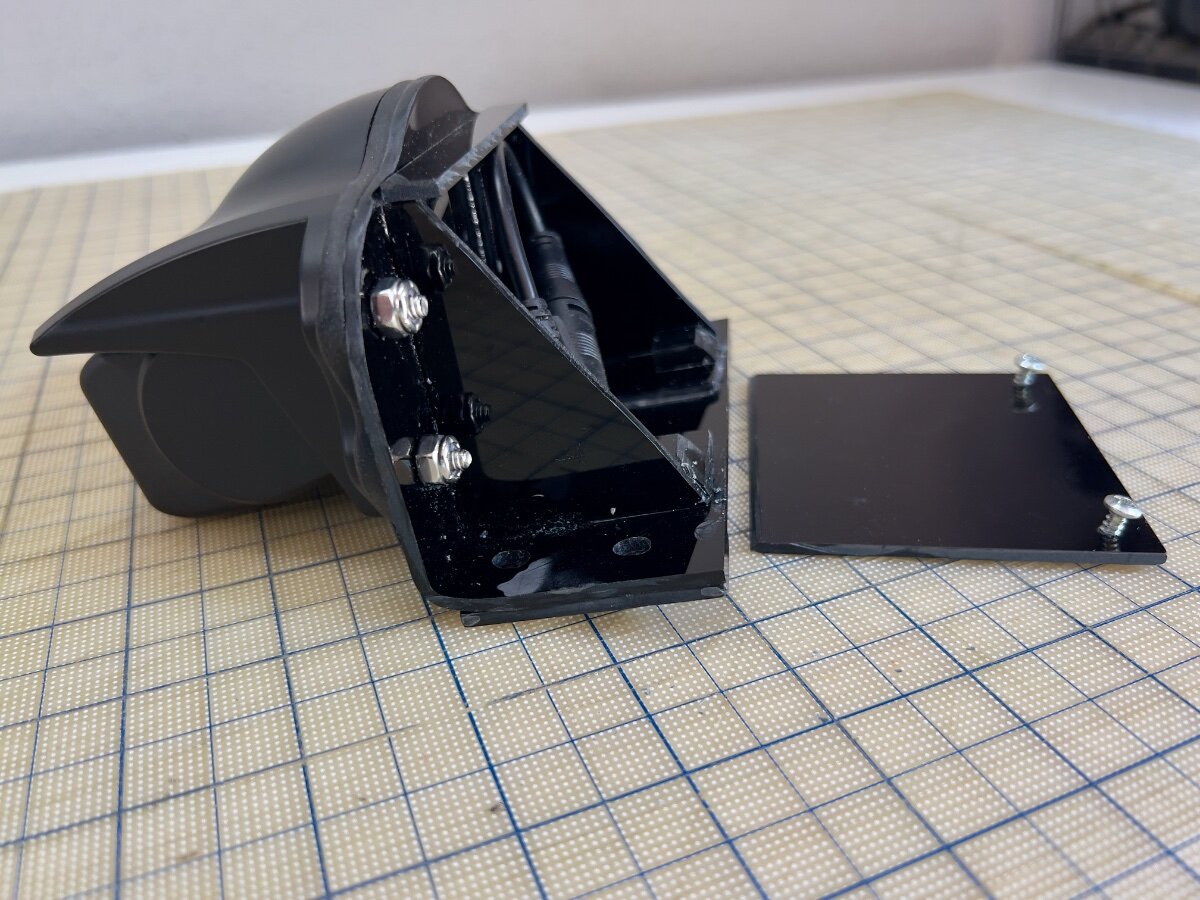
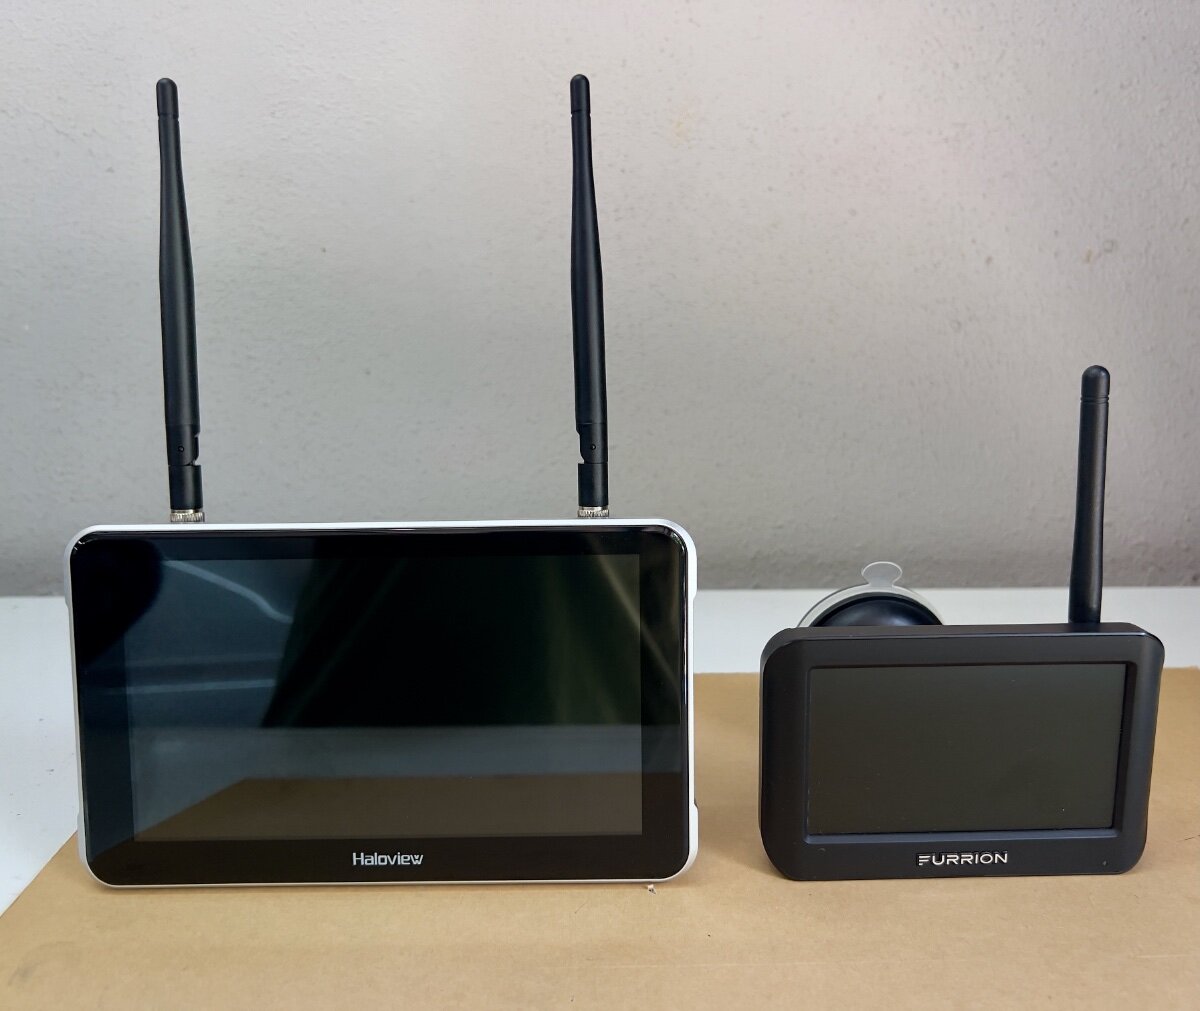
I recently purchased a Haloview BT7 Touch Rear Camera to replace the Furrion Vision S Camera System (Model F0S43TADS) we purchased as an accessory option on our 2022 LEII. Following delivery of our trailer in February, 2022, it was quickly evident the Furrion camera was largely useless. I continued to use the Furrion camera, with increasing frustration. The very limited view to the rear was a safety issue. I began to research RV rear cameras and after reading many reviews selected the Haloview BT7 Touch. I was impressed by the specs and favorable reviews, but failed to note the camera is designed to mount to a vertical rear wall, not the sloping rear roof of an LEII. I could have returned the Haloview camera, but I did not see a good second choice. Thus, I decided to fabricate a mount to be installed in the same position as the Furrion camera. The result is the custom mount below: Fabrication Process I had some black acrylic sheet, .010" thick, from a prior project (See: Window Vent Mod- Louvered Ventilators), which seemed suitable material for a camera mount. I had some thicker acrylic sheet, but decided to first use the thinner sheet to create a mockup by bending the acrylic sheet. Initially, I had concerns the thinner sheet would not be sufficiently rigid to hold the camera steady, but I was not sure I could bend the thicker sheet. The Furrion camera and its mounting gasket were removed from the roof of our LEII and used to begin the layout of the base for the new mount. I wanted to use the four existing holes in the roof which held the Furrion camera in place. I had a scrap piece of acrylic about 7" wide and 20" long. I used 2" blue painter's tape applied to the acrylic and, with a fine point mechanical pencil, began marking out the mounting hole pattern from the Furrion gasket. Next, I flipped the scrap sheet of acrylic over, applied blue tape and began positioning the Haloview camera on the tape. My initial concept was to have the main part of the mount be a single piece of acrylic bent to an angle of approximately 80 degrees. When mounted to the sloped roof of the trailer, the face of the mount would be approximately vertical for mounting the Haloview camera. The layout of the mounting base resulted in the base being approximately 2.0" wide, and the nearly vertical mounting face approximately 3.5" tall. I also allowed about 0.75" for the bend radius. So, before bending the rectangular sheet of acrylic was approximately 6.25" x 7.0". I cut this piece from the end of the 20" long scrap. Before bending, I drilled all needed holes in the mount base, as marked during the layout process. NOTE: See YouTube for many useful videos on bending acrylic sheets. To bend the mounting base, I sandwiched the rectangular piece of acrylic between two pieces of scrap wood approximately 12" x 3", with the acrylic area to be bent aligned on the long side of the wood scraps. I extended the acrylic from the wood scrap approximately 2.5" to 3.0" in preparation for bending. I clamped the sandwiched pieces to my workbench to ensure it would not move during the bending process. Using a heat gun, I began to heat the area to be bent, moving back and forth. Wearing gloves, I held two other pieces of wood, each approximately 2" x 5". As the acrylic became heated, I applied gentle pressure to the extended portion of the acrylic, using the pieces of wood in my hand. I continued to move the heat gun along the bend area until I could begin to bend the acrylic. As the acrylic began to bend, I used care to keep the bend straight and at 90 degrees to the sides. I used a steel carpenter's square to test the acrylic as I bent it. As I approached the desired finished bend angle, I released the acrylic to check the angle. Satisfied with the bend angle I trimmed the top of the mounting base to the contour of the Haloview mounting gasket with a scroll saw. Having the mounting base bent as desired, I began to plan how I would make it sufficiently rigid to hold the camera steady. The photo below shows the other parts which would comprise the rear support area. Also at the rear I wanted to enclose the wiring connecting the camera to the 12VDC power from the trailer. Haloview BT7 Camera and mount parts Once the mounting base was bent as desired, I cut two pieces approximately 1" wide from either end of the mounting base using a table saw. These two pieces became the support brackets. Being bent at the same angle as the mounting base, they fit well to backup the mounting face. The triangular gussets also add rigidity, being bonded to the mounting base and the support brackets. The photo below shows the mounting base (face down) with the support brackets and gussets attached at the rear. Acrylic cement was used to weld all parts together. Mounting base face down with support brackets and gussets in place Side view of mounting base with support brackets and gussets in place To protect the power supply wiring from UV exposure and squirrels, I added a cover and a top piece across the gussets. The rear compartment does not need to be watertight, since the wiring connectors are watertight. Haloview includes a short adapter which connects to the existing Furrion connector protruding from the roof. The photos below show the camera on the mounting base and cover from the rear and side views. Mounting base and cover (Rear) Mounting base and cover (Side) Mounting the Camera to the LEII When I removed the Furrion camera from the roof of the trailer, I noticed several things: The 12VDC power supply wiring passes through a hole in the trailer and was effectively sealed with the white caulking used throughout the trailer. This was not visible before removing the Furrion mounting gasket. The sealant was in good condition, however, it formed a small mound on the roof of the trailer. The base of Furrion camera was hollow and the mounting gasket conformed to the mound, allowing the outer shell of the camera to meet the trailer roof. The holes for the screws holding the camera to the trailer roof are NOT through holes, reducing the risk of water leaks into the trailer. The Furrion camera was not mounted at the lateral center point of the trailer, but not so far off that I had noticed in over three years using the trailer. The Furrion camera was also not quite parallel to the Oliver sign just below its mounting position. From the ground this was not perceptible. There were multiple trial fittings of the new mount as the fabrication process proceeded. From these fittings the following adjustments were made: The mounting holes for the new base were elongated (using a Dremel tool) to permit the new mount to be swiveled slightly in azimuth to have the front face of the camera parallel with the top edge of the Oliver sign. Two acrylic "runners" approximately 0.5" wide and 2.0" long, were attached to the bottom of the mounting base to straddle the mound of caulk where the power supply wire passes through the roof. I reused the mounting screws, putting fresh caulk into the screw holes and around the screws. The new mount covers the same area where the power supply wire passes through the roof. It is protected from UV by the new mount, but water can run under the new mount. The Results The Haloview BT7 comes with two mounts, one with a suction cup for windshield mounting, the other a 3M VHB bonded disk for attachment to the upper dashboard. I prefer the windshield mount, which is substantial and widely adjustable. It is very stable, with no vibration. The signal strength indicated on the monitor showed a 5 bar strong connection to the rear camera. Monitor comparison- Haloview 7" vs. Furrion 4.3" (diagonals) Yesterday, I took a 35 mile shakedown cruise for the camera on the way to the storage facility. The Haloview camera and monitor have met all my expectations. The visibility to the rear is vastly improved. I now see vehicles approaching in the same lane and in lanes on either side. I was particularly impressed to see merging traffic entering the highway on my right, before I could see them in my mirrors. Overtaking traffic is now seen well before they come abreast of the trailer. In bright Texas sun, the video on the monitor is clear and not washed out. There is no jitter in video from the camera, and the signal was always strong, even with the antennas folded horizontally across the top of the monitor. The touch screen controls work well and are easily used while driving. Also, my custom mount proved to be very solid, with no vibration of the video due to camera movement. I recommend the Haloview BT7 Touch camera to anyone considering replacing their Furrion rear camera. Unfortunately, Haloview does not appear to have a roof mount adapter available. I had sent an email query to Haloview Support and received a reply indicating they did have such a mount and provided the following URL: https://www.haloview.com/bt-series-camera-peaked-cap-bracket-compatible-with-furrion-and-voyager-pre-wired-rvs.html. Nothing on this page convinced me it was a roof mount. It does say the Furrion hole pattern is matched for mounting to the trailer. But only if the Furrion camera was mounted to a vertical surface. I have not yet received a reply to my email pointing out they sent me a link to a vertical mount. I hope this is useful to other OTT owners with Furrion cameras. Regards, Don
1 point
-
I just upgraded my Furrion S rearview camera with the S+ and a 7-inch display. Huge improvement in resolution, features and display brightness over the original S and 5-inch display that was OEM (and basically worthless)!! The S+ camera slips into the old S housing so no mounting of the new housing on the exterior of the trailer and no rewiring needed. Since my TV is GM with the trailer camera functionality, I seriously considered going the way of this original thread instead, but my GM screen is small, and I can mount the 7-inch Furrion screen partially over the rearview mirror which isn't useful when towing and retain my TV display for the TV cameras. And again, no rewiring was necessary. (I thought I saw a prior thread where someone else did this upgrade but could not find it.)1 point
-
Mr. Jim Oliver told me personally that the frame was engineered to support 3X the GVWR. He stated that it was good to 21,000 pounds. Actually Oliver's GVWR of only 7000 pounds is due to their continued use of the underrated four leaf spring pack (the same ones that are breaking). This causes the otherwise 5200 pound Nev-R-Lube axle to be de-rated to 3500 pounds each.1 point
-
Wow. The first three statements encapsulate my position of opposition for 90% of OE2 owners to the 3,000 pound springs. For most owners they are "Over Sprung". But the 1750's for all of us running in the 6,000 pound class I have advocated long and hard that those springs are "Under Sprung" as they are loaded 100% of the time and are failing. For a new trailer, I would monitor the rear ends of the OEM 1750's and push their replacement out 4 or 5 years. If you see any flattenng of the rear ends, time to replace them. Also as a 50 Year Mechanical Engineer here and 3 independent Dexter Tech's determined that the middle ground between the 1750's and the 3,000's... The 2400 Dexters was a logical choice. They have been doing just fine for the last 20K miles or so..... WIll be putting another 9K this summer. For every one, it is wise to inspect your springs at the end of each season. If any flattening is observed, you would have the off season to replace them as you see fit. GJ1 point


.jpeg.bc5410dca345743218c7cdd61cd7a837.jpeg)
.jpeg.db24308a47698837a565fc55eec3a655.jpeg)
.jpeg.b601f1e7eac4638423f2297d1cfed3e5.jpeg)


-
Recent Achievements
-


")


")


