Leaderboard




Popular Content
Showing content with the highest reputation on 06/28/2026 in Posts
-
I started mine in early 2026 preemptively because it all seems like a train wreck around the next bend. Waiting until 70 for max benefit seemed too risky so thought i should just start pulling my money out now. My benefit fell into place with only online input in late 2025. The spousal benefit took an additional two phones calls and there too, SSA didnt have the work record. But in the end that straightened out and the money is flowing. It helped to keep records of the agent you are talking to, get their phone number and work with the same person everytime!!! It might also help to work thru your local office.2 points
-
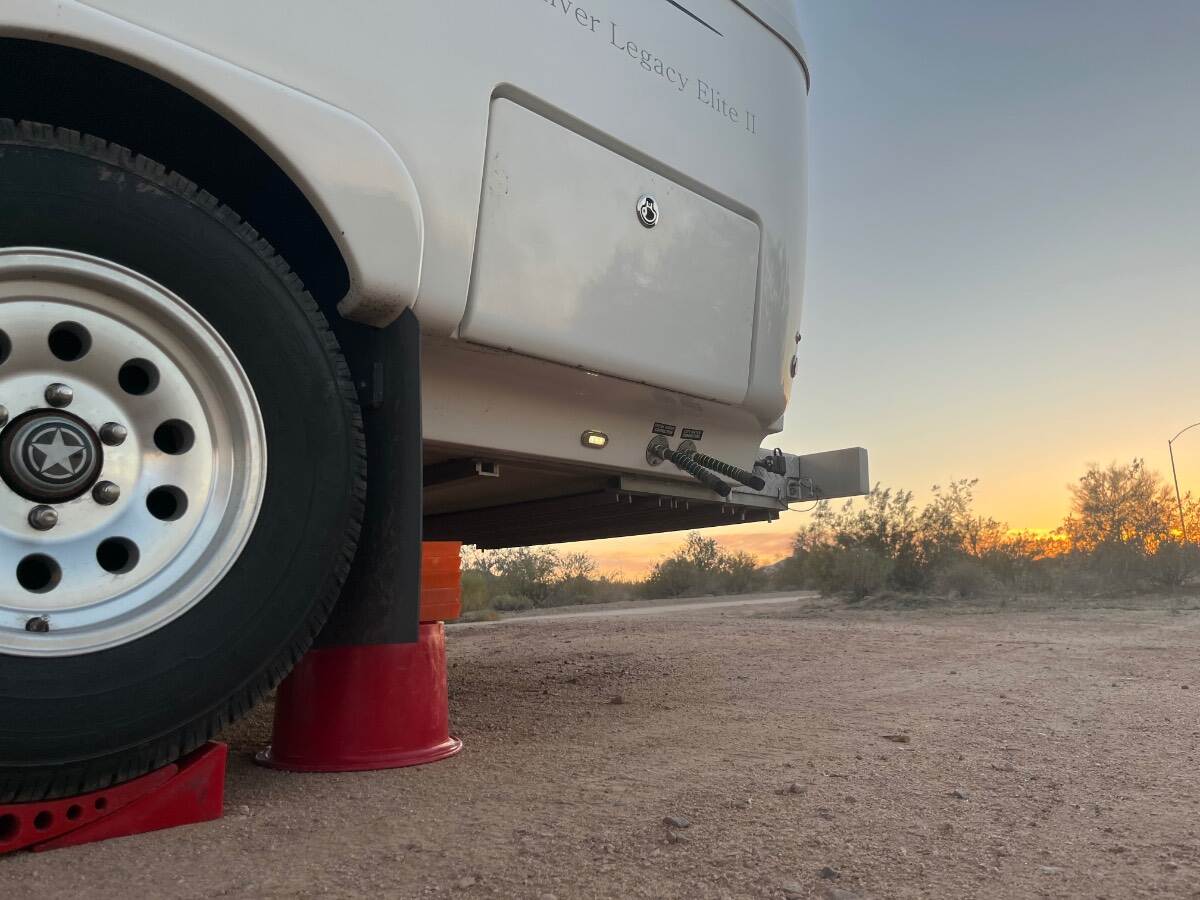
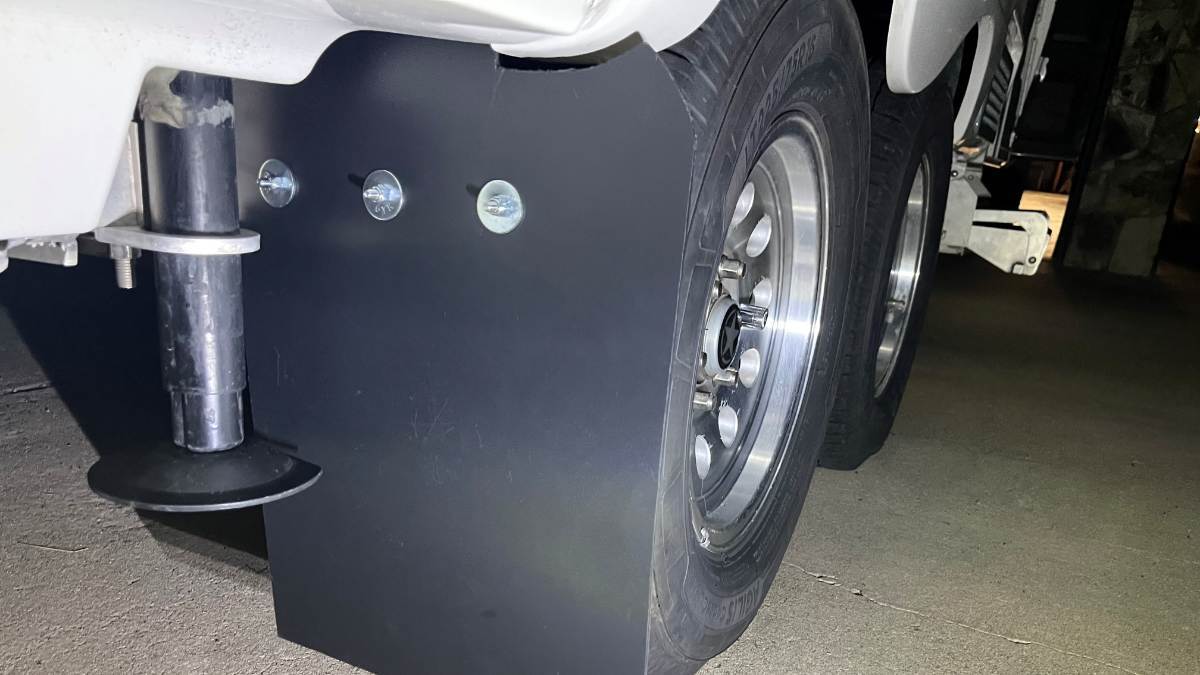
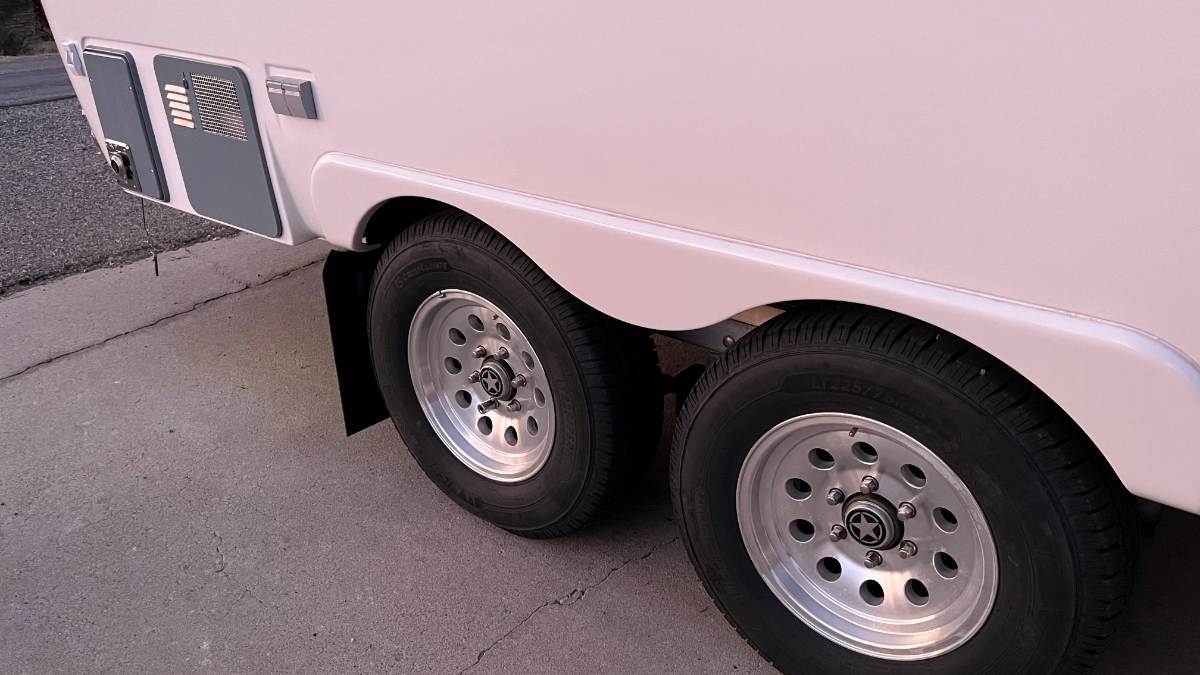
Taylor, I just measured it to answer your question. At the closest point, bottom of the L-bracket, the clearance measures 1 1/2". When you see 3-4" of caked mud, how much is actually above the tread? Most of it is in the treads and caked around the side. I've had my truck wheels caked up but not so much on the trailer. This doesn't worry me. And below the rubber/plastic flap material bends outwards while towing and no big deal if it got damaged. It's so easy and cheap to replace if need be. John E. Davies did an amazing amount of work to his "Mouse!" I studied most of his work 3 years ago when I first joined The Forum! In the case of mud flaps, I believe my design is superior for a couple reasons. The mud flap in his design is a full 6" further back. The 6" of open fiberglass will be hit extra hard since dirt and stones will hit the mud flap and bounce upwards due to the rotation of the tire. The open area will get chipped and be doubly hard to clean. And next mud episode; do you want your stabilizer jacks packed with mud or protected behind the mud flaps? We've had 49 overnights since this upgrade, on a bunch of short trips this year. They still look like new. I wouldn't change anything. Anybody who wants to copy my installation, send me a PM with your mailing address and I'll mail you a paper template to make cutting the mud flap material easy. Everything else you need is explained above in this thread!1 point
-
One of my trucks has the double door 4 and 7 pin receptacles shown in the pic. When using the 7 pin, the door blocks the 4 pin access. A solution is to add another flat 4 pin connector behind the 7 pin (plug and play and doesnt affect existing 4 or 7 pin connector use). I have used one of these before and they are a 5 minute install
 1 point
 -
@Katy McAnarney welcome to the dysfunctional Oliver window club but sorry you are having this issue like so many of us. This is how I have re-installed the sliding window with either new or cleaned and refurbished gutter track. First put the siding window into its channel without the rubber track. Coat the rubber track with silicone and wipe off excess. Position the sliding window approximately half open/closed and gently start feeding the rubber track into the bottom of the channel and below the sliding window first. You will only get so far, then start to close the window part way, hold the rubber track against the sliding window then start to push open again as far as it will go. Repeat this back and forth process for a few efforts until the rubber track appears on the far side of the sliding window at which point you should be able to grab the rubber track and pull the it through as far as it needs to go. Open the window all the way and feed the rubber track into the remaining channel along the bottom then up the vertical side and into the top leaving several inches of dangling rubber track. At this point you will need to slide the window forward into a partially closed portion so that you can repeat what was done on the bottom channel. This will also take a few passes to complete. It will be virtually impossible to do this without the use of silicone. The rubber alone just has too much friction. Once you get the hang of it the process will go much easier in the future. I don't think it is possible to do this with the rubber track already installed. The silicone allows for very easy back and forth maneuvering of the rubber track and window. It's far easier to start on the bottom rail first before the top. Hope this helps1 point
-
Thanks for the info @jd1923! Our trip so far this year (Jan-June) has been pretty schizophrenic weather-wise. From NOLA to Reno we’ve had surprisingly cool weather - toying with needing tire chains, and once having to depart a camp site early to avoid having to get stranded by a major storm. I think we’ve run the A/C only 4 times - and just long enough to bring the temp down from high 80’s to mid 70’s. We’ve yet to make that “seeking 70’s” circle tour of the US work for us. Last year in Florida - we were freezing our butts off or running from mosquitoes. I guess I’ll look into this “Chill Cube”….1 point
-
I have "flat plug" four pin connections on my Oliver bike rack. I ran a connection wire under the Oliver to my F-150 and plug it directly into the truck. To accomadate both the trailer electrical cord and the bike rack cord I remove the truck outlet cover and replace when not towing. To remove and replace the outlet cover I replaced the plug hing with a pin that can be pulled and replaced. (If you are interested I can post photos tomorrow. This system has work flawlessly for two years1 point
-
We pretty much dont travel in July unless we get an unusual cool stretch and can mobilize quickly. We have the quieter Truma ac but still the point is to be outside. If the heat doesnt get you up here in northland the humidity and mosquitoes will. I have researched how far north i need to go to get substantial temperatures drops (vs south central wisconsin) and the outcome was not encouraging. By heading to far northern wisconsin or the southern portions of the UP, we might see about a 5 degree temp drop. If we get up to the northern side of lake superior or the Apostle Islands that might improve to a 7 to 10 degree drop depending on positioning of the jet stream. Anything more probably requires the Canadian rockies!1 point
-
I agree working with the local office has been far better for us dealing with my wife's alzheimer's sister. It was very easy to get a call through, leave a message and they return the call. Apparently, or at least in this neck of the woods SSA office no longer takes in person visits any longer and haven't for quite a few years. It's also true their workforce has been substantially reduced. I would also recommend going back to the source of your wife's work place which is where this problems originates not the SSA per se. It's ludicrous they do not have a record of her working there for 20 years. Get a lawyer then I'll bet they will come up with her work records in short order. Sorry you're having to go through this, what PITA.1 point
-
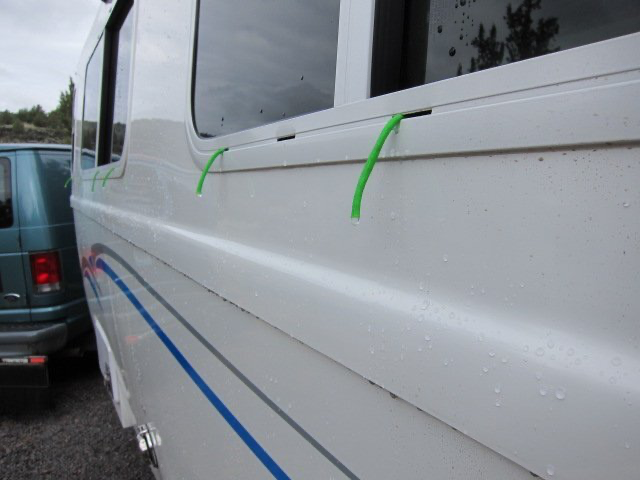
I posted this pic a couple years ago in another leaky window thread. Those weep slots are just not up to the task of keeping water from building up in the tracks (capillary attraction really hinders water flow). Folks talked about using pipe cleaners and lantern wicks to help wick out the water (maybe they work as well) but I find that 1/8" paracord works great. Cut some 3" lengths and stuff them in the slots. It's amazing how well they work! Don't heat seal the ends! Easy to replace and everyone has some paracord around right? Some may think it's kind of ugly looking but better than a wet bed! Cheers, Dave
1 point
-
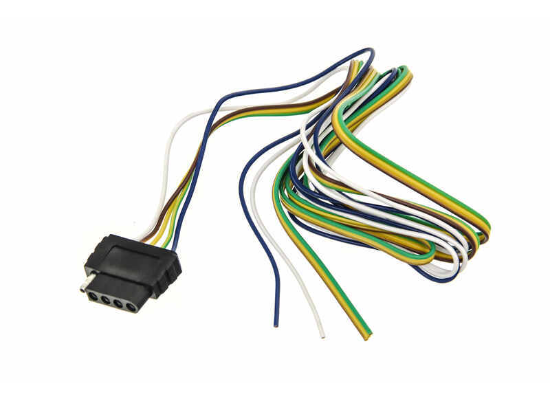
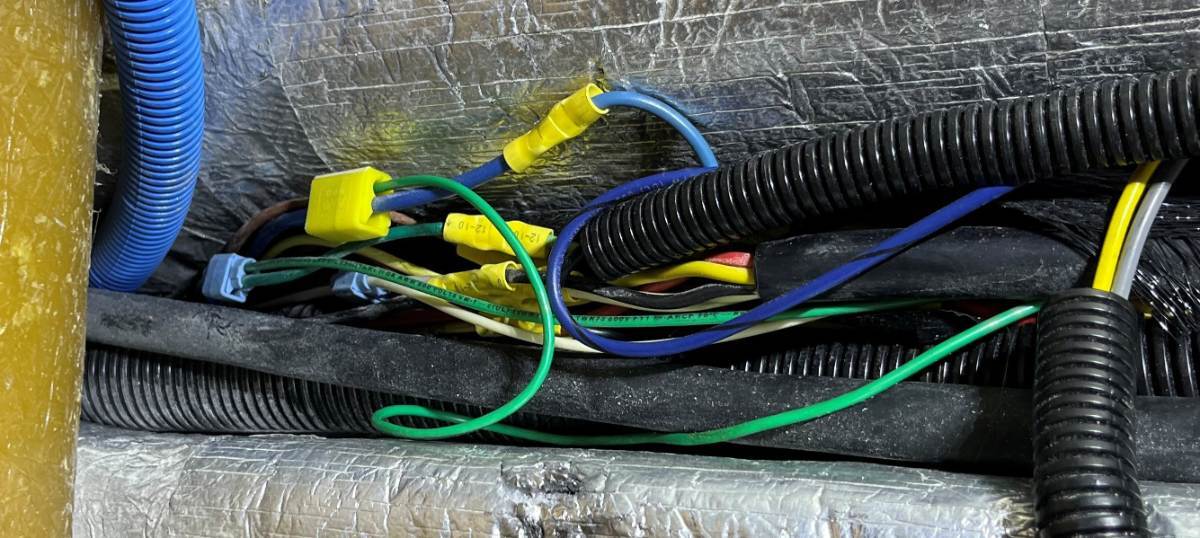
It would help if you showed a picture of the "flat plug" on your new bike rack. Without seeing that, I might guess it could be the 4-pin trailer connection (for small trailers without brakes). Here is an example: Curt Vehicle Wiring Harness with 5-Pole Flat Trailer Connector - 60" Wire Lead CURT Custom Fit Vehicle Wiring C58531 What you're attempting is not an easy job! Most trucks that have the 7-blade connector also have a 4-pin connection zip-tied somewhere above the bumper. But the Oliver doesn't have one! 🤣 You can pick connections for brake lights, turn signals, reverse and running lights in one of two locations. 1) tap into the lights at the rear of the Oliver, or 2) at the junction box where OTT splices the 7-blade harness into the Oliver trailer wiring. I believe this junction box in newer Olivers is inside the bathroom vanity, but who knows on a 2026. In our hull it's easily accessed under the front dinette seat (see picture). If I was doing this for our hull, I would pick option #2 since you can see these wires are easily accessible (likely not so in your Oliver). The link I supplied shows a 60" wire which is fine for rear wiring. If you are going up to the front harness, you want something like this that has longer wires. It's actually rather easy to run wiring from the rear, along the streetside basement, all the way up to front junction box. 35 Ft 4-Way Trailer Wiring Harness - Wishbone Style - 42" Ground Optronics Trailer Wiring A35W42B The hard part front or rear is to tap into the existing wiring. I rarely recommend using 3M Scotchlok™ connectors, but I would in this case since secondary rear wiring on a bike rack is not exactly "mission critical." Hope this helps! 😎
1 point
-
We do that too with the carpet runner. That way I can walk around in bare feet. We found that in colder weather, it also keeps your feet off the cold floor.1 point
-
Sorry for being so negative. We truly love our Oliver. China tires on an Oliver really got me.1 point
-
We do the same with the “Dustbuster” to pick up the loose dirt and grit and various grass clippings and such. Since we have a cat box crammed under the dinette, this is the prime spot for kitty litter that refuses to stay where it belongs. I’d be leery of anything that sounds like “wash and wax all” on floors. I had a previous roommate who thought that Pledge was great for shining up wood floors. It it - but it makes them into ice rinks if you try to stop or change direction wearing socks…1 point
-
Perhaps I am beating a dead horse on this subject and thread but wanted to add a few things that might be of interest to those with Lippert 8800 series of windows. This past week I ordered 3 sample packs from Steele Rubber in NC which includes many if not all of their rubber weather stripping and glass sliding seals they manufacture. They arrived today. The samples seem to be well made, albeit very expensive for what they are. On my unit the outer most rubber w/s does not nor has it ever touched the sliding glass window and in fact misses the glass by a full 1/8th of an inch. Needless to say our windows were more like a sieve than a sealed window. Weeps holes do little to nothing to mitigate the incoming water during heavy rains. For those of you who need to replace their exterior rubber w/s for what ever reason the part # I have ordered is 70-4500-257 and this sample does indeed provide a relatively tight seal against the sliding window. This part also has a tighter fit in the channel, a good thing. No doubt the wrong w/s was installed on our windows given its rather loose fitting in addition to it not being wide enough to seal against the sliding window. Effectively the original does nothing at all to seal water. Steele Rubber company has a huge amount and variety of gaskets and seals making it nearly impossible to determine the correct fit without the sample packs. They also produce a much different type of glider seal/track that appears to be better and less likely to allow further leakage into the window channels. The ones that came with these windows do nothing to prevent water from entering into the channels and dripping into the cabin. The part # for that item has conflicting information between the website and the sample pack ID's they sent. It is either 70-3577-58 or 70-3577-256 come in 8ft lengths and priced at nearly $49 for each length. The exterior w/s piece is sold by the foot at $7 per foot. In addition to the effort of sealing the windows I have also finally added gutters over the windows. I put this off for a long time mainly because I didn't have faith in these small channels being effective during a downpour. I also installed them a bit different than most by gently curving the ends diagonally away from the window. The sharp bend pointing toward the ground never made sense to me and also caulked above and under the J channel to provide a longer lasting seal, hopefully. Thanks, hope this helps some others
1 point
-
One week on the road. Besides 700+ miles so far, we’ve run 30+ miles on washboard dirt, and through some muddy washes too! No dirt on the rear lowers and no splatters front of Ollie due to the wider TV mud flaps! 😎
1 point
-
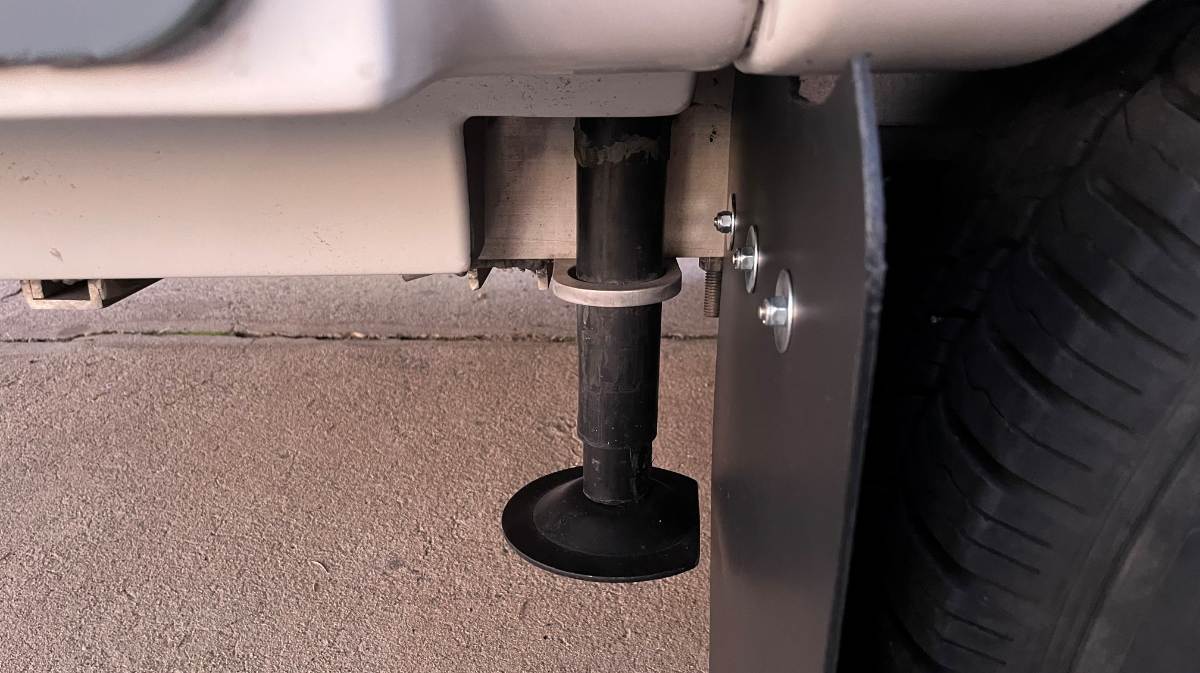
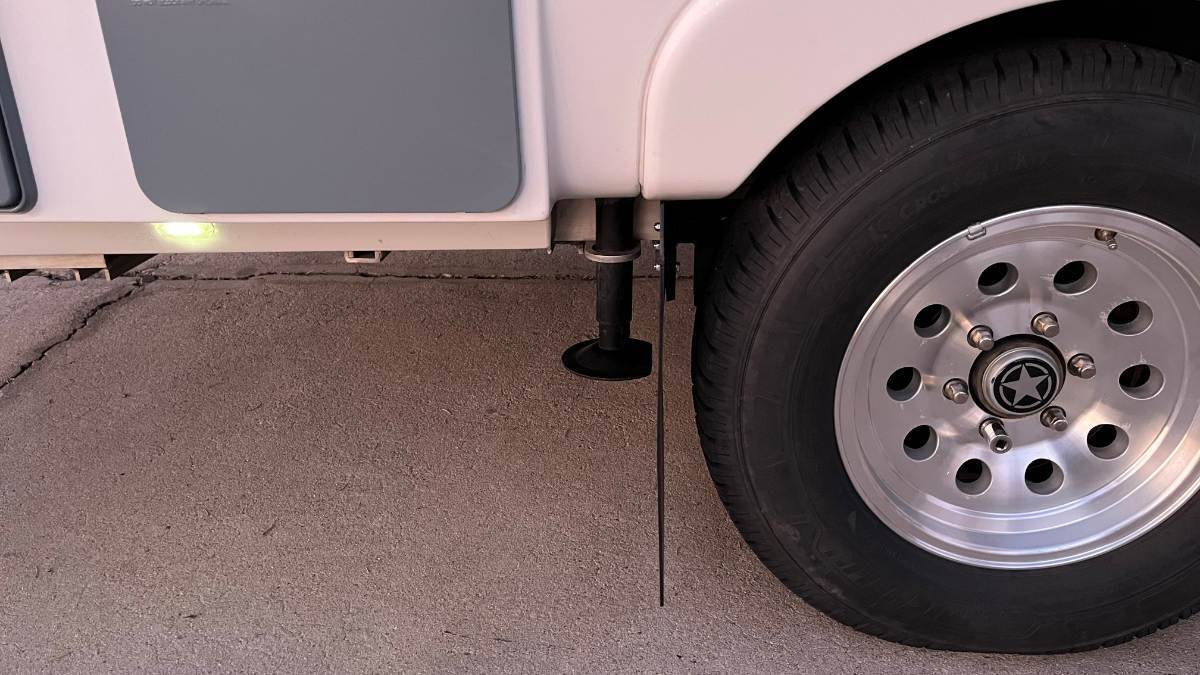
I cut the base of each rear stabilizer jack to have one flat edge. This allows more room for the flap to arc rearward while towing and so the flap material is not always hitting the same point on the arced edge. I don't believe the strength of the part was reduced much and these parts are readily available. I already have one spare! Use a 10" steel cutting blade on a chop saw and this is quite a strong piece of metal. By the time it cut through it had melted a ring into the plastic plate below. Filed the edges smooth on my bench grinder and steel brush. I may hit the open edge with spray paint later. So, the right side is done and I'm very happy with it! 😎 Several views to follow...
1 point
-
Yeah, and then you have altitude. Our trip was mainly in June, not July-August! I expected heat in Kansas or Iowa but was not expecting it in the Dakotas and Wyoming. Finally, Colorado camping at 9K ft was cool! 😎 Drove down to Phoenix on Thursday to pick up Chris from Sky Harbor Airport. High temp on the truck trip computer was 112F on Phoenix highways. The high in Prescott was 85F (low 58F). Our home is at 5400 FT. That's a 27-degree difference with 4300 ft change in elevation. In Arizona you can drive a couple hours and change your weather which doesn't work in the Midwest!0 points
-
In our case my wife's first employer no longer exists so that made things a bit more difficult.0 points



-
Recent Achievements
-