rideadeuce
-
Posts
397 -
Joined
-
Last visited
-
Days Won
20
Everything posted by rideadeuce
-

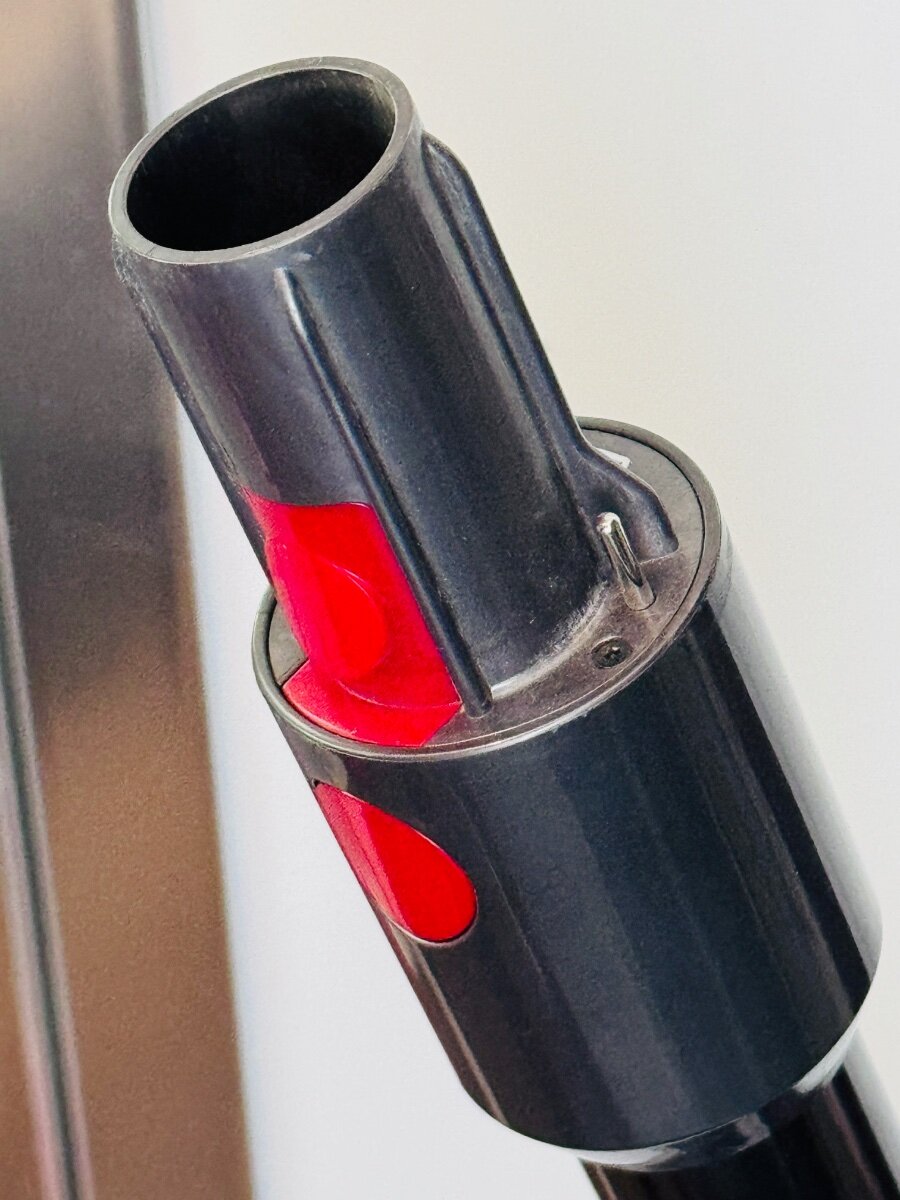
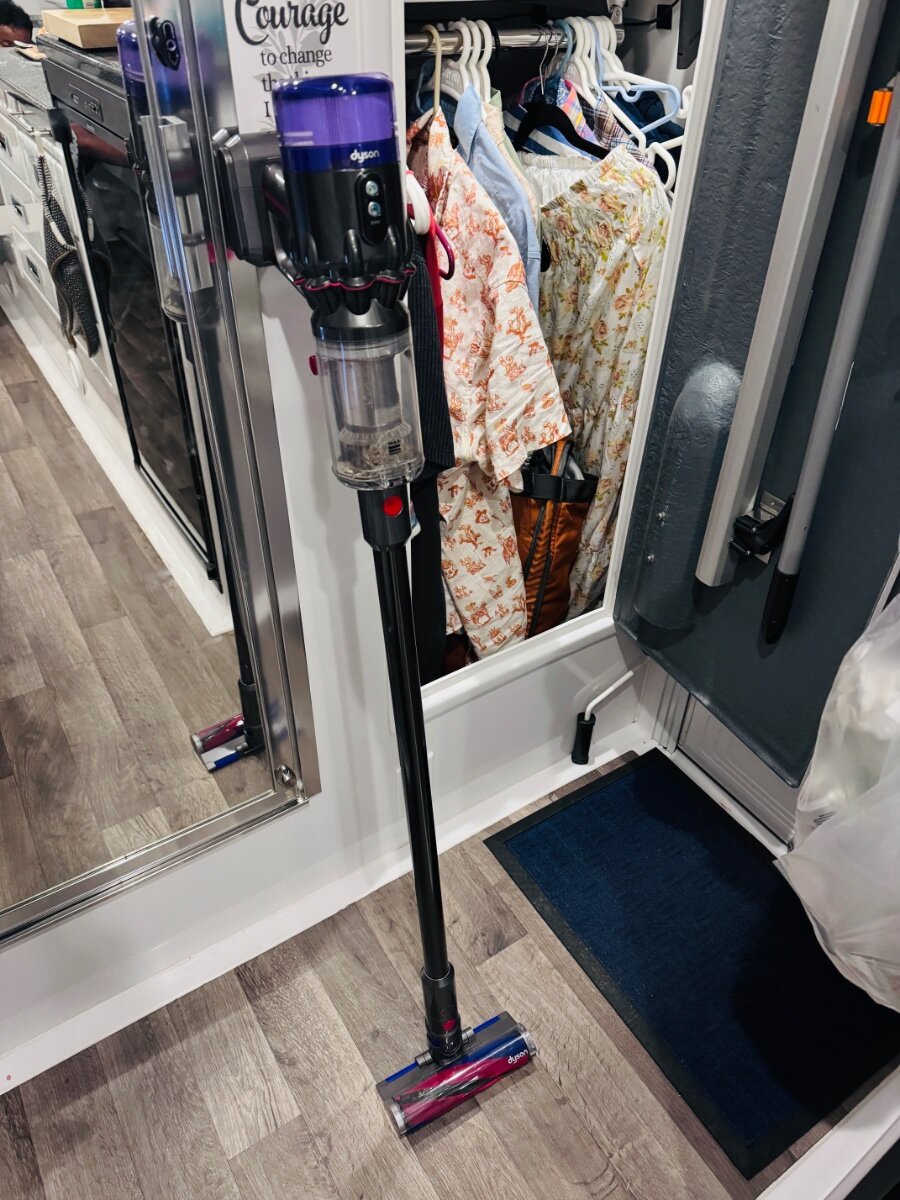
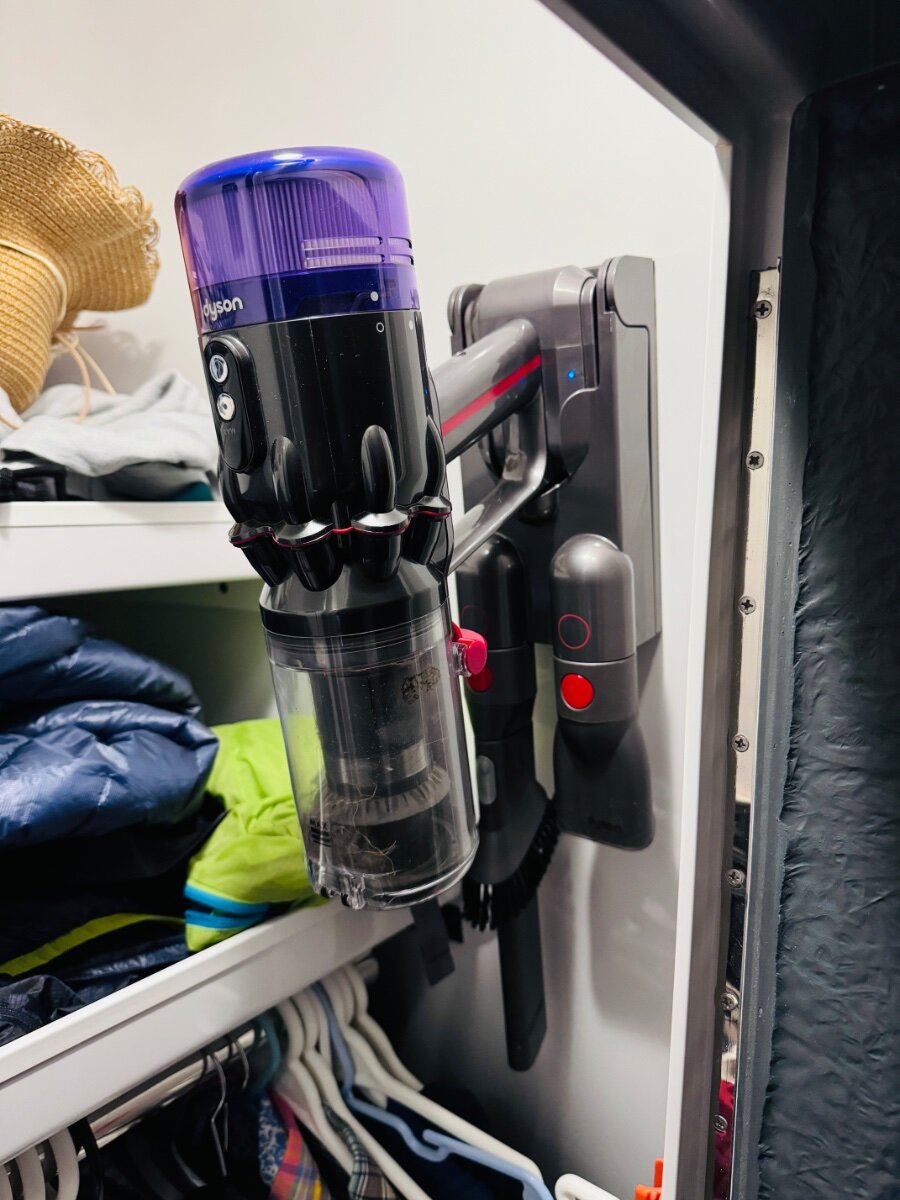
Mini Dyson Humdinger Frankenstein
rideadeuce replied to rideadeuce's topic in Mechanical & Technical Tips
The unique part of my Dyson humdinger setup is the extension wand so that the handheld can be used with a motorized hard surface head standing up! Maybe the micro tube replacement will work but you probably need to call Dyson support to check for compatibility. And acquire the mini motorized head. Anyway, I think it is a scavenger hunt. Wish I had my old links, I did this a couple of years ago. Maybe there is another solution I am not aware of. I too threw out the long runner carpet a long time ago. This may work: https://www.dyson.com/support/journey/spare-details.971606-10
-
Yes, we have some redundancy built in to monitor TT temps in cabin and fridge. https://a.co/d/fDlGGL2 https://a.co/d/4mDqwXo To monitor your Victron system you will have to setup some kind of cellular/satellite modem/router. You probably already know that but it is very useful. I will also be able to monitor and make changes remotely to the Victron DC to DC charger. NEway, HA, too much tech!
-
Bought the Dyson Humdinger handheld vacuum and thought this would be great for the Oliver if it had tube extensions to be able to vacuum standing up. Somehow I found tube extensions in the EU market and hopefully it becomes available soon stateside. Works great and is small/lightweight. Uses a mini hard surface roller that picks up sand and dirt efficiently. Mounted (VHB tape) it in closet for recharging. One of my favorite things in the TT with 3 kids and 2 dogs... Clean floors! To cleanliness, Mike After a little research... looks like the micro is what it is called. It is very similar to what I put together. https://www.dyson.com/support/vacuum-cleaners/cordless/micro
-
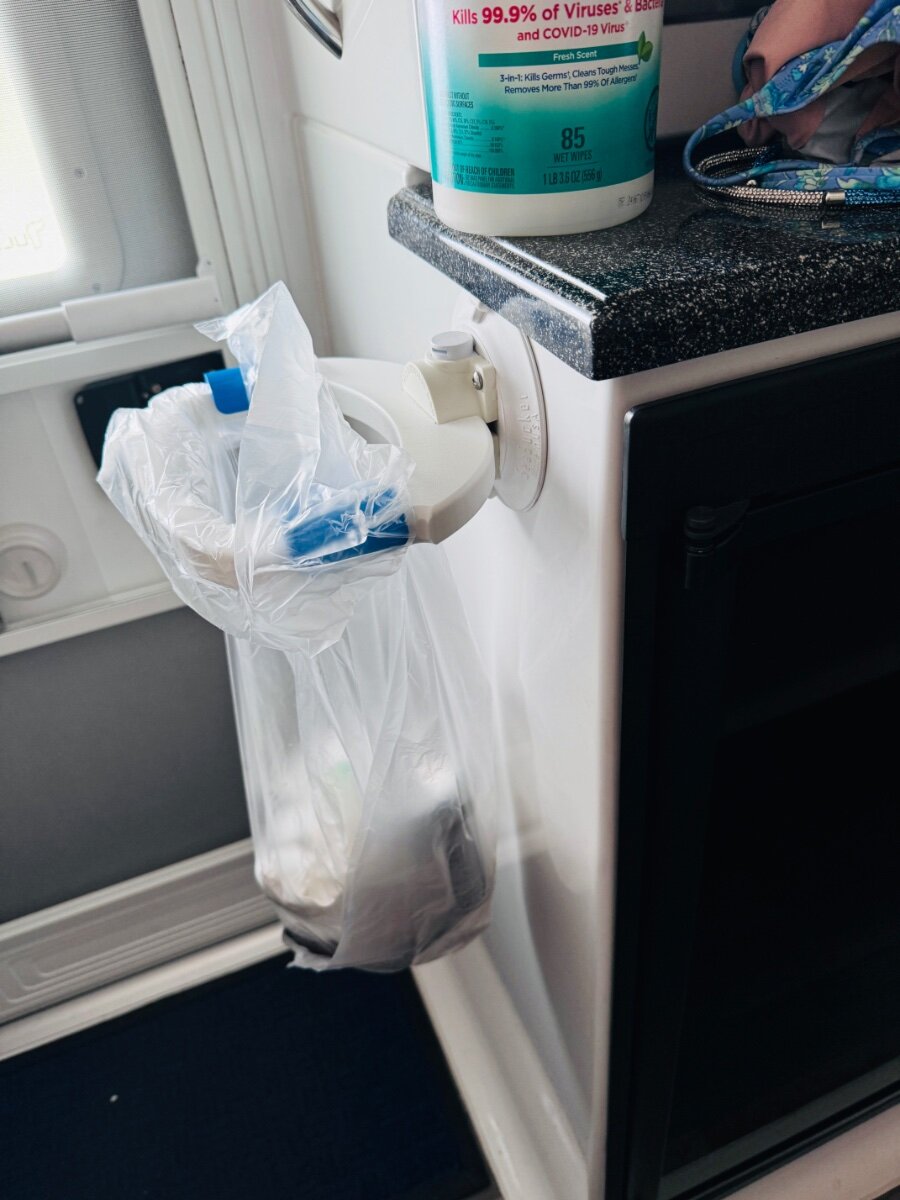
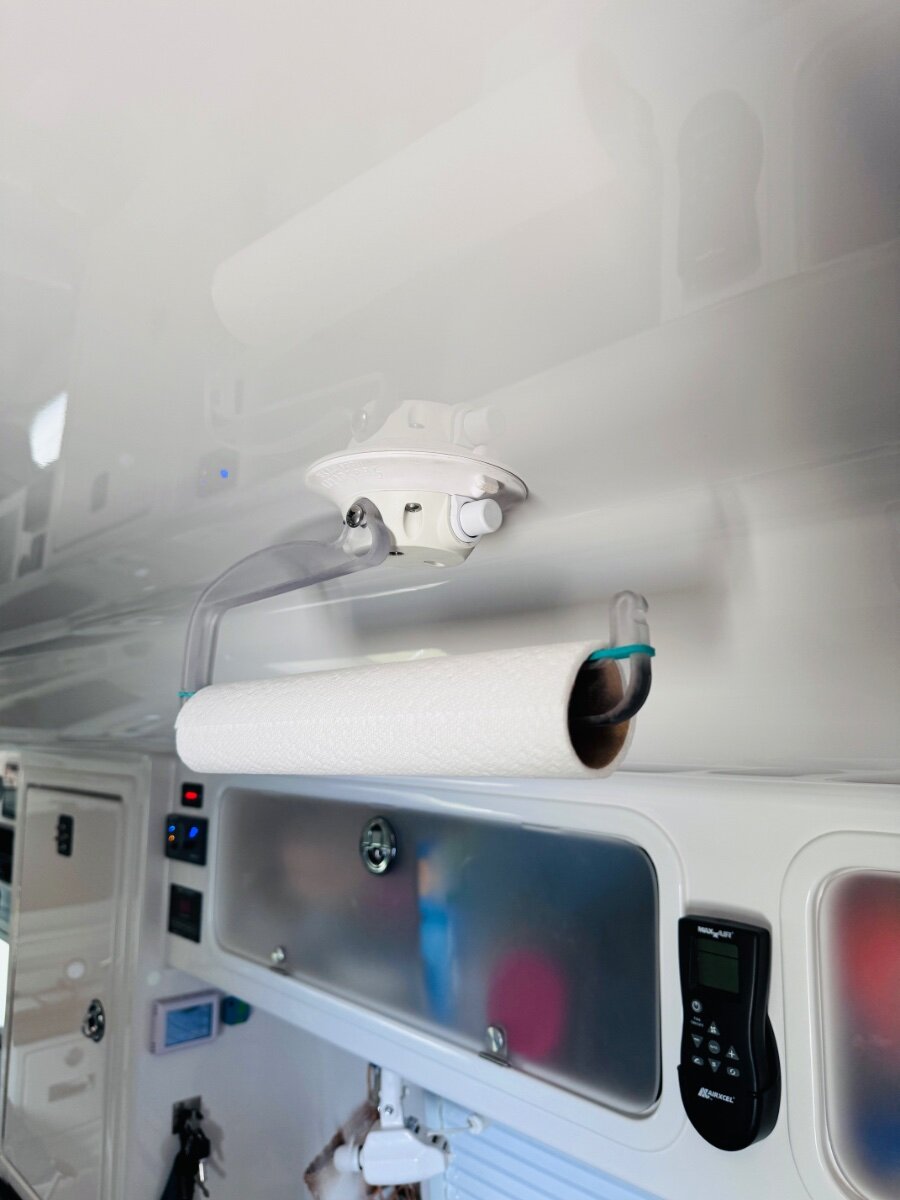
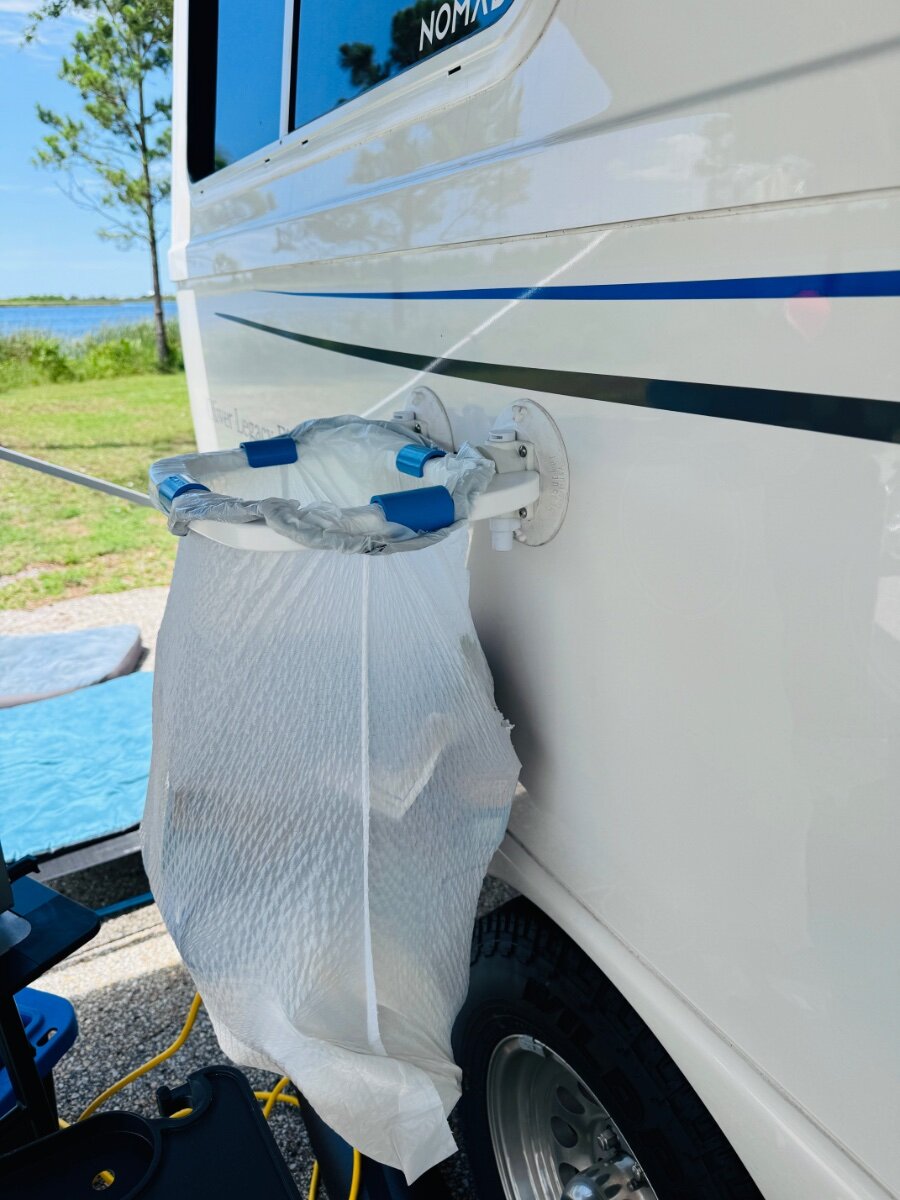
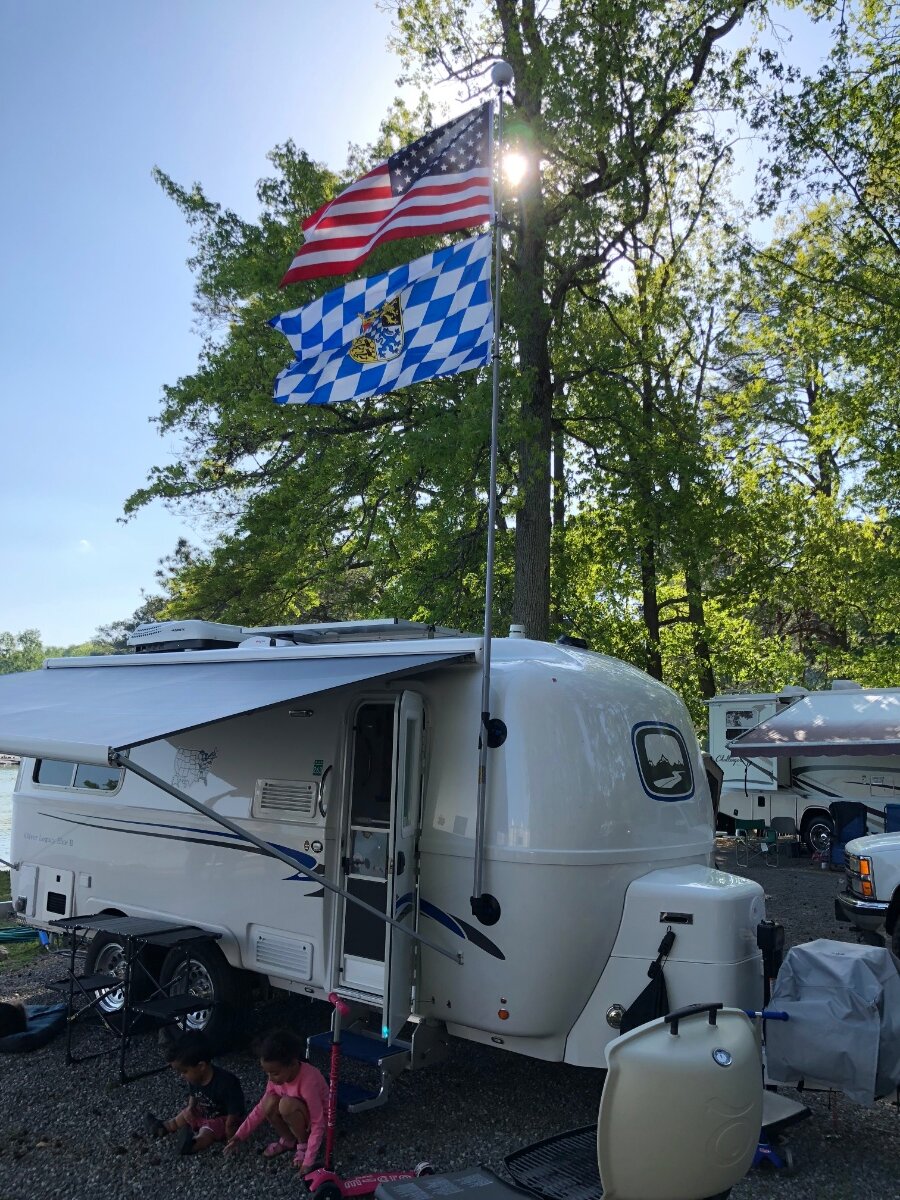
Fontana/ITC shower head holder (suction cup)
rideadeuce replied to rideadeuce's topic in Ollie Modifications
We use suction cups for everything. Flag poles, trash, paper towels, etc. Just have to have clean surface. Though, I like your solution. M
-
-
So first real world test using new system to power AC on our trip from TN to Gulf Shores, AL. With the AC set on 74 we left at 4am and arrived at the beach around 1pm with temps in the upper 80s. Battery level was 64% but dwindling fast with higher temps. Pretty happy with the 8 hour drive with no DC to DC charging yet and able to easily make it with dogs in the camper resting comfortably. Looking forward to heading out West with on the road charging using the new 50 amp DC to DC charger and seeing how that works. Best, M
-
It is an interesting install idea. Not ready to change things around yet. I am still stuck on the wifi being based out of the camper not the TV. Also, The access point/router with Starlink basically turns it into a unified mesh wifi network from what I understand so may try that first if I get caught up on other projects. Thanks for the offer and like the newly found site MobileMustHave.com. I might come around to your way of thinking eventually. Best, M
-
Found this while looking for a shower head replacement. Might come in handy. https://itcshopnow.com/products/fontana-exterior-shower-adapter-and-sprayer-holder
-
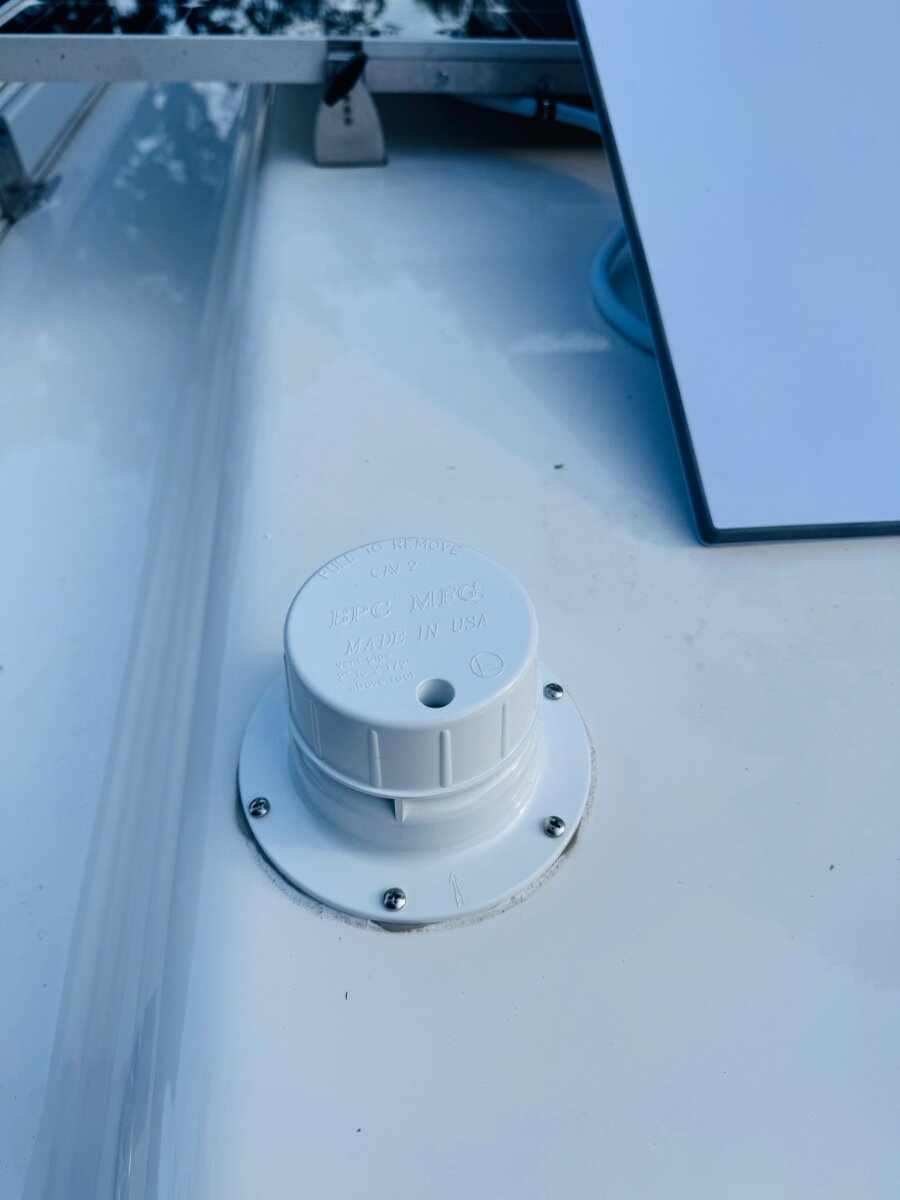
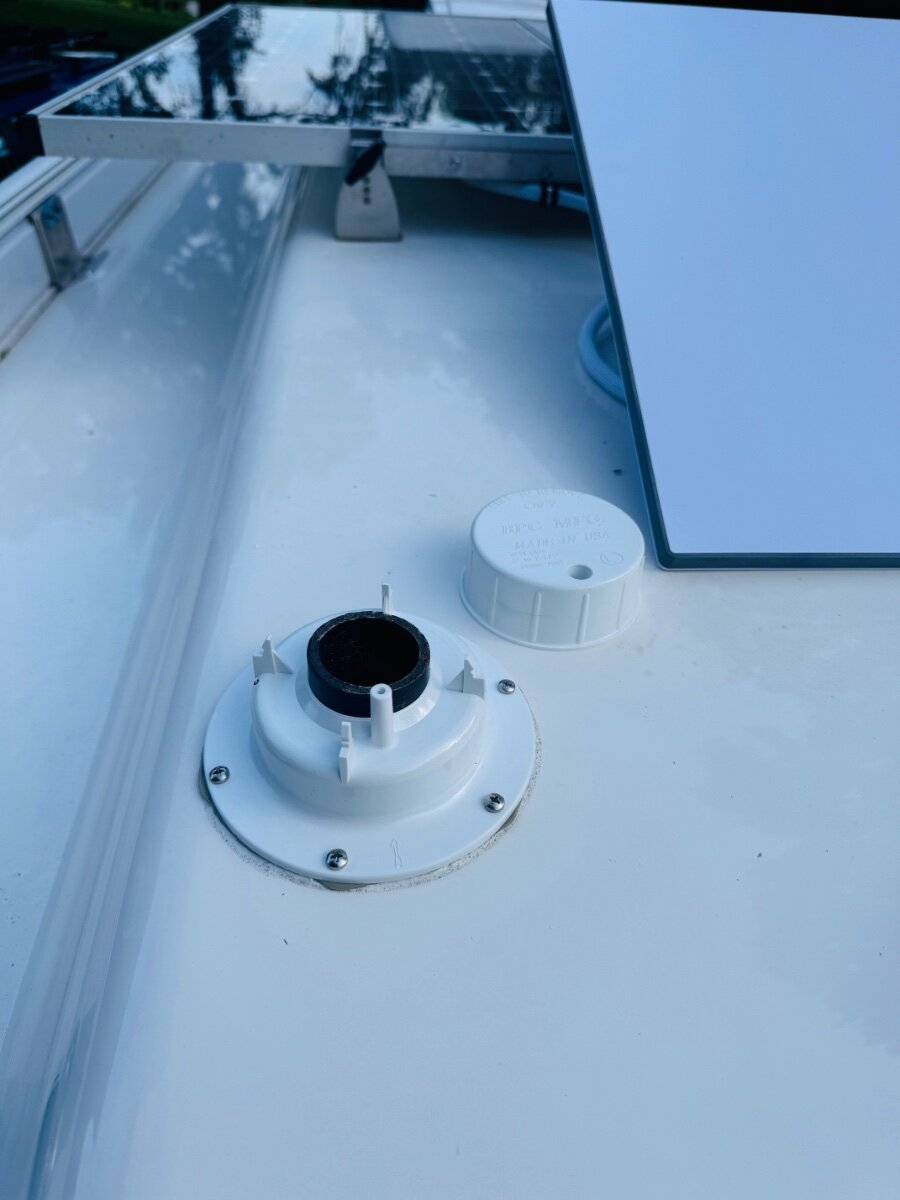
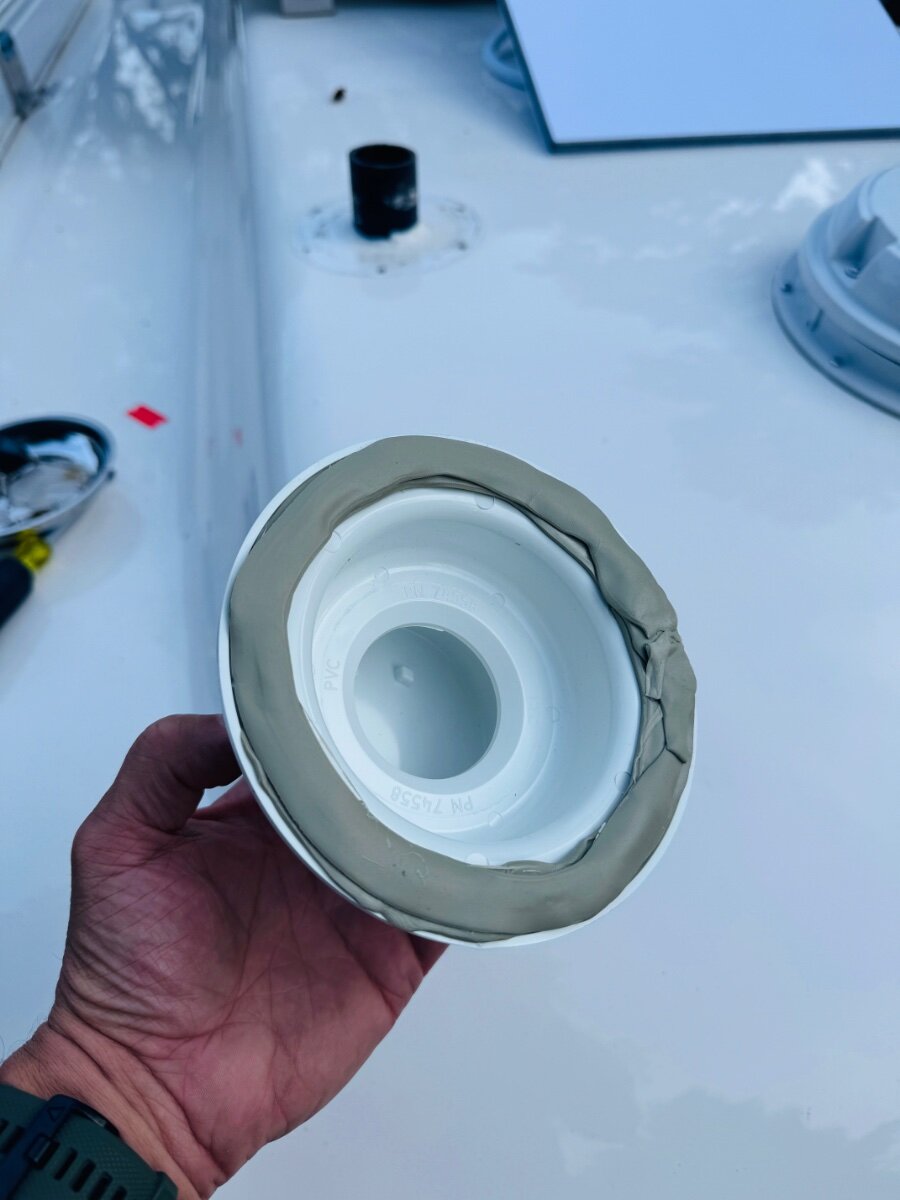
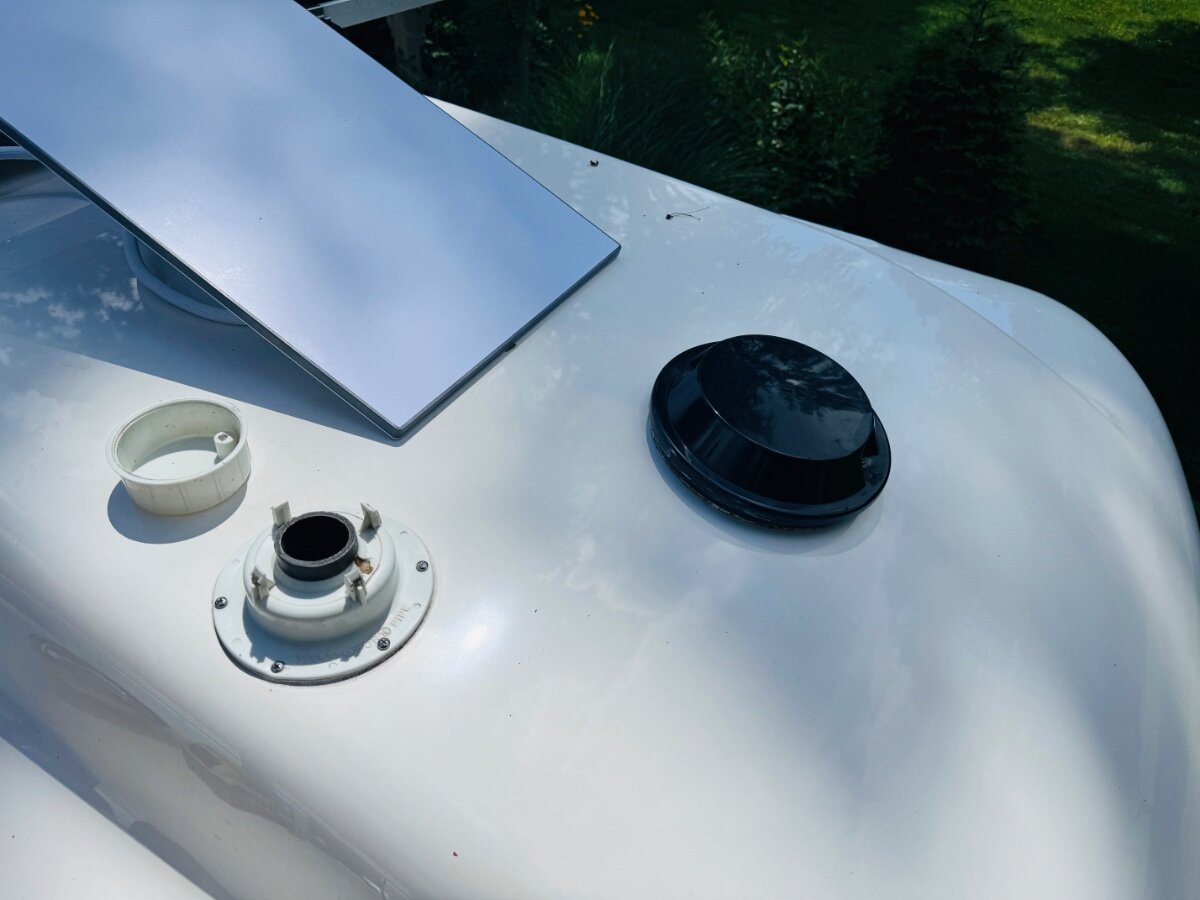
My black pipe had a nice bead of sealant at the hull penetration, so it didn’t move and was secure. The old cap slid off easily. I just cleaned up some foam that had been used to give it some support I guess, not really needed.
-
Bulldog coupler recall for some LE2s
rideadeuce replied to Steph and Dud B's topic in Mechanical & Technical Tips
SAFETY RECALL REPORT RCLRPT-24V322-5775.PDF I am glad the recall was done looks like there was a 2nd unit found with incorrect coupler during service in April (See Chronology section). Appreciate Oliver for following through with this but agree with @Geronimo John and @jd1923 it should be posted in Safety/Recalls and it seems like Bulldog MFG should be doing their own recall. Also, it looks like OTT is planning to send out letters to owners by July 17th, 2024 just waiting on approval. Stay safe, Mike -
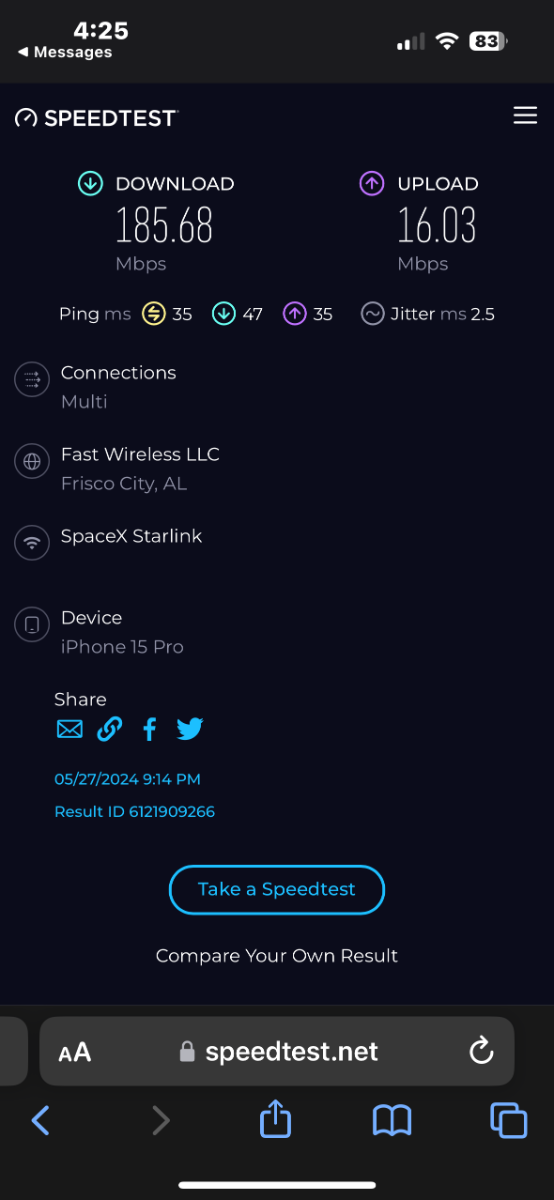
So unfortunately not good reception in the Tundra on the way down but I might get a second router to place in the front closet. If I had to do the cradlepoint modem and and antenna install originally I might have put it in the front closet so that the reception driving down the road would have been better. Maybe second router can work as an extender. Way down on the list at the moment. Speed at Gulf State Park is awesome though!
-
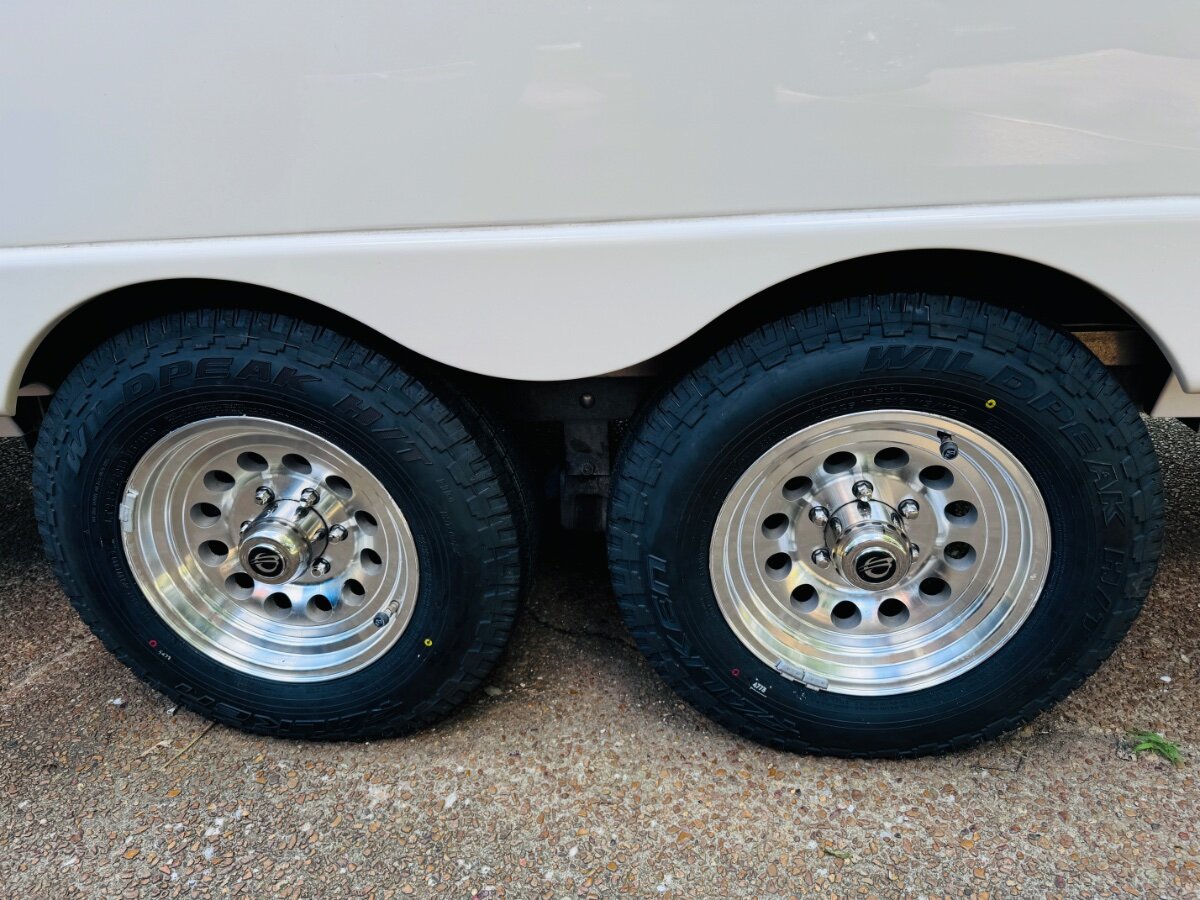
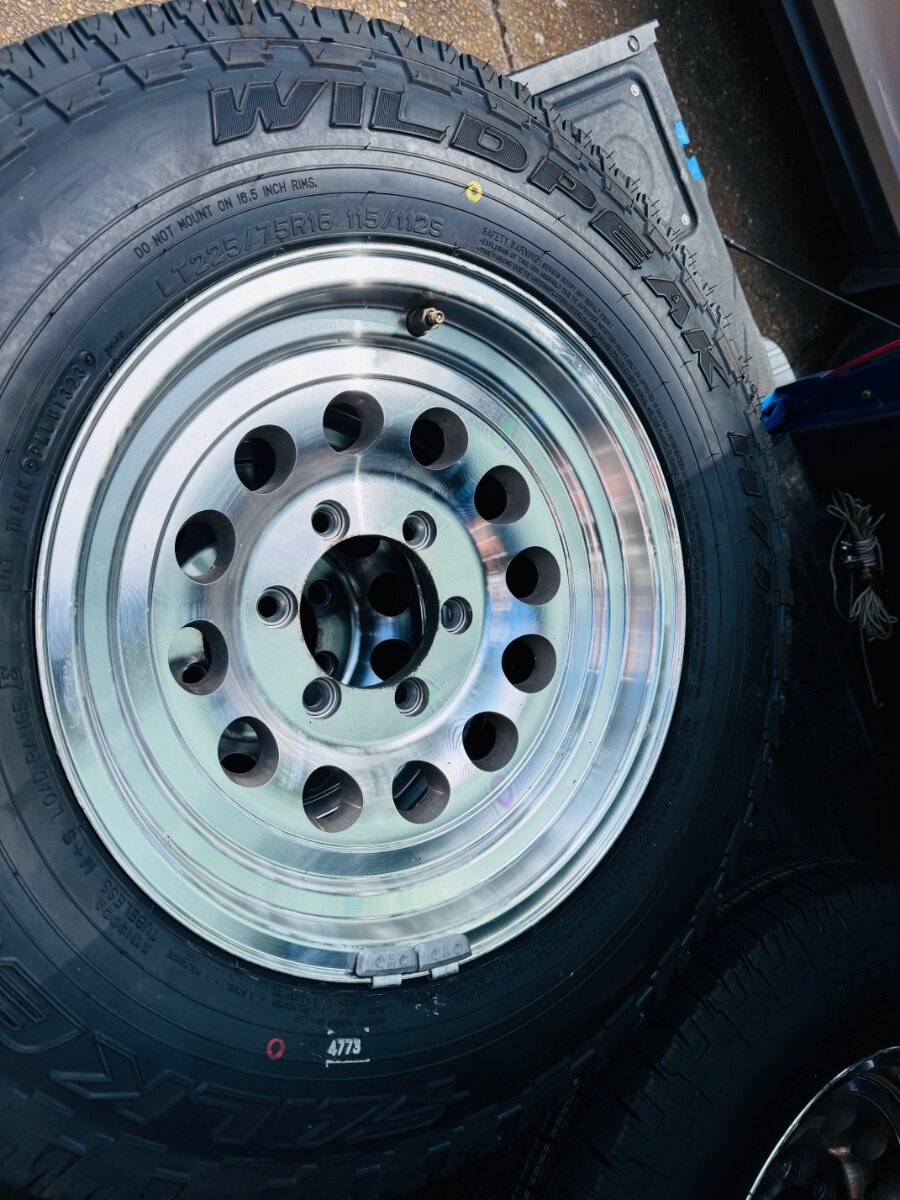
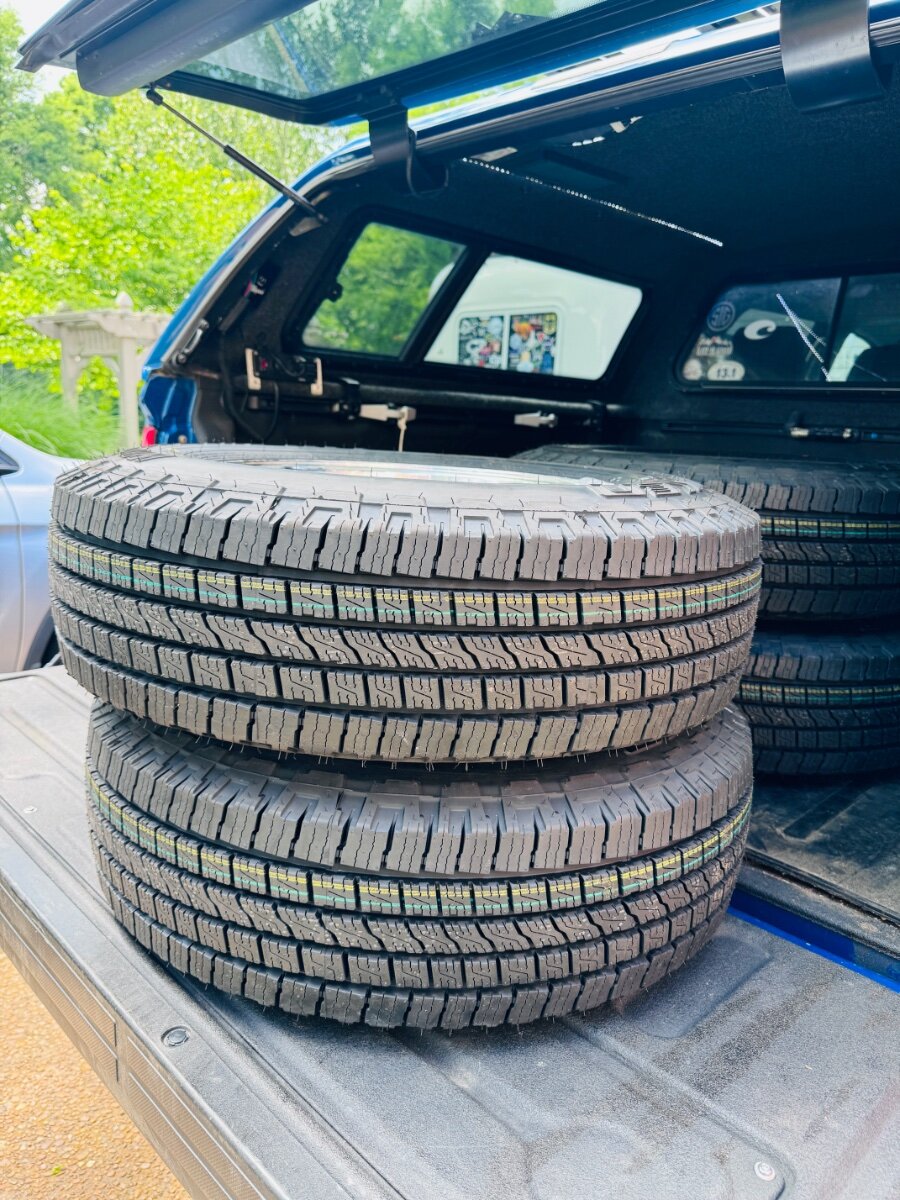
Wildpeak H/T02 LT225/75R16 E/10PLY BSW
rideadeuce replied to rideadeuce's topic in Ollie Modifications
Yeah, what I like about them is they are super durable. Having had my Tundra long enough to use two sets of Michelins and now a second set of Falken Wildpeak A/T tires I have become a big fan of the Falkens Wildpeaks. They are not loud, good traction, and last almost as long as the Michelins. When having had to plug for a screw/nail, no comparison in how difficult it is to get a plug in (thought I was going to have to get the drill out!) The Falken's are incredibly tough. The Wildpeak line has an all season road tire all the way to A/T, M/T and R/T. -
New tires after 6 years with the Michelins. They performed well just had some very small cracks starting to form on the side wall. Changed the TPMS batteries while I was at it.
-
Nice, simple video for electric brake inspection while you have hub off for packing the bearings. https://youtu.be/P5J3OFKK4DI
-
- 2
-

-
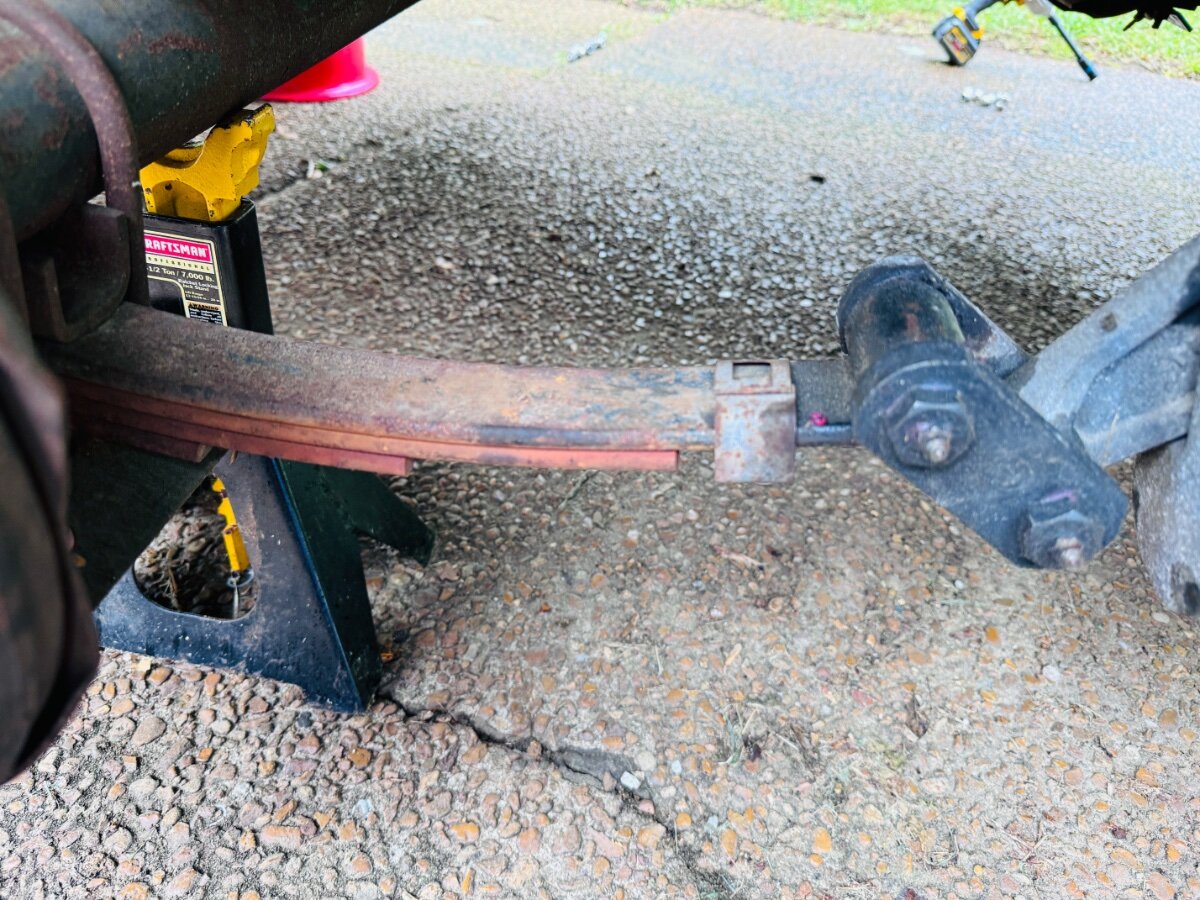
Torque settings and wet bolt grease cross-hole alignment. Wet bolt 30-50 ft-lbs Center bolt 65-75 ft-lbs Grease cross-hole alignment 3 or 9 o'clock position 059-A45-00E-ZFlexInstructionSheet-3.pdf
-
- 2
-
-
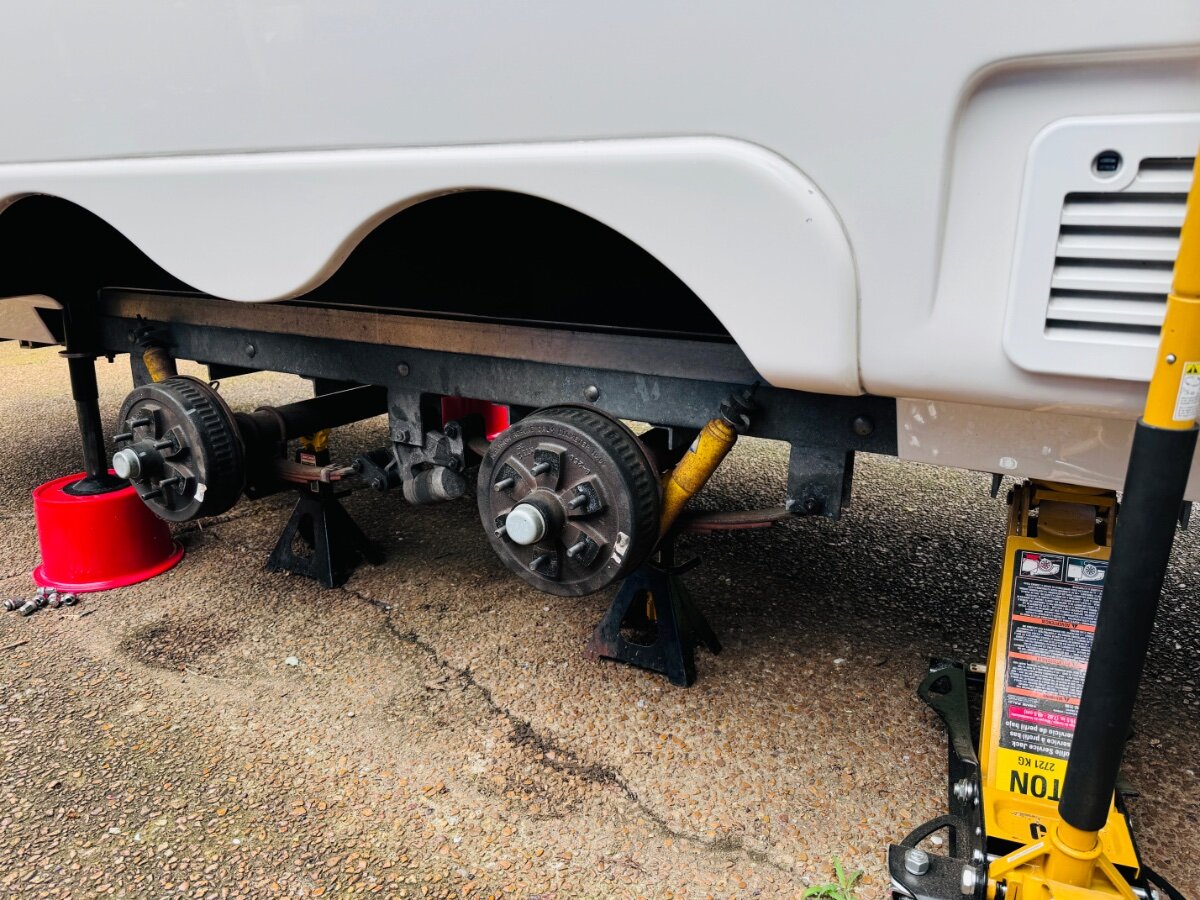
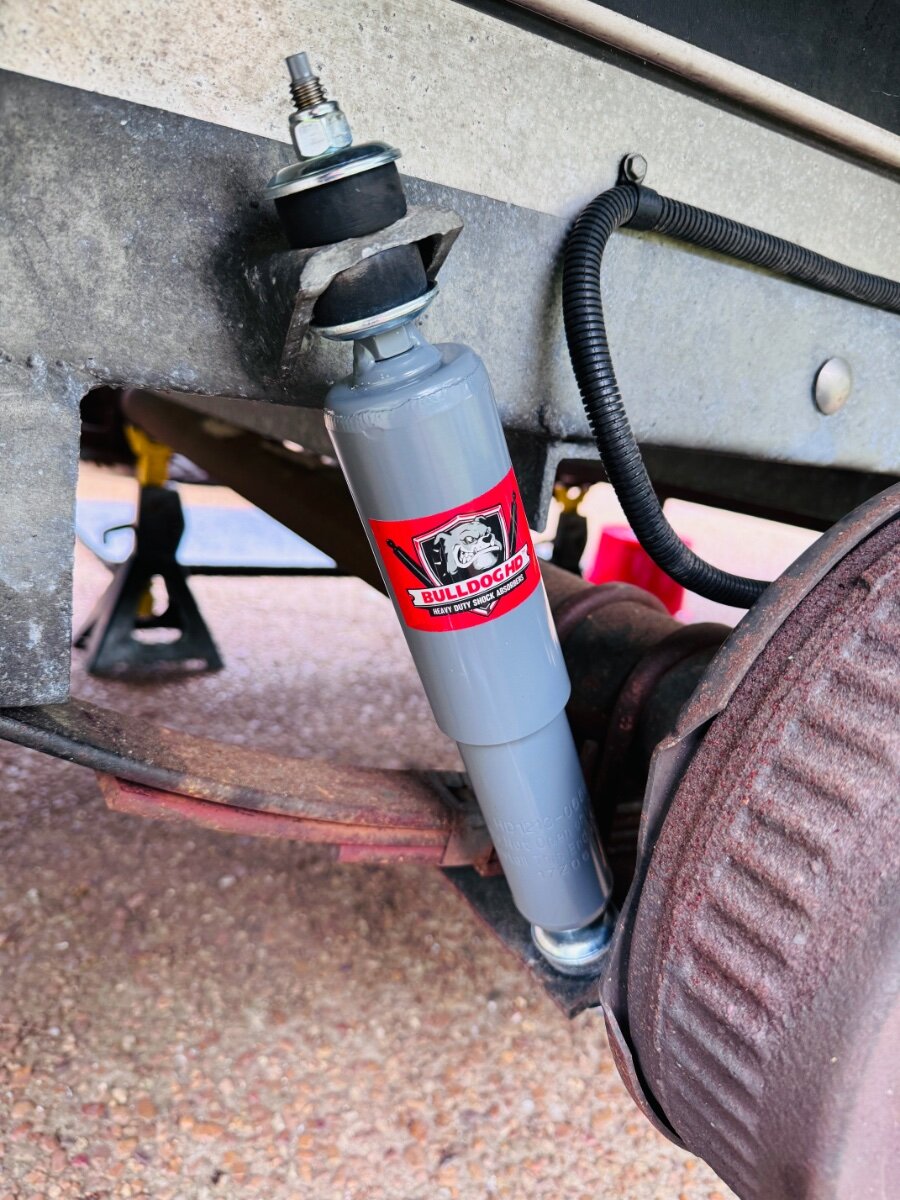
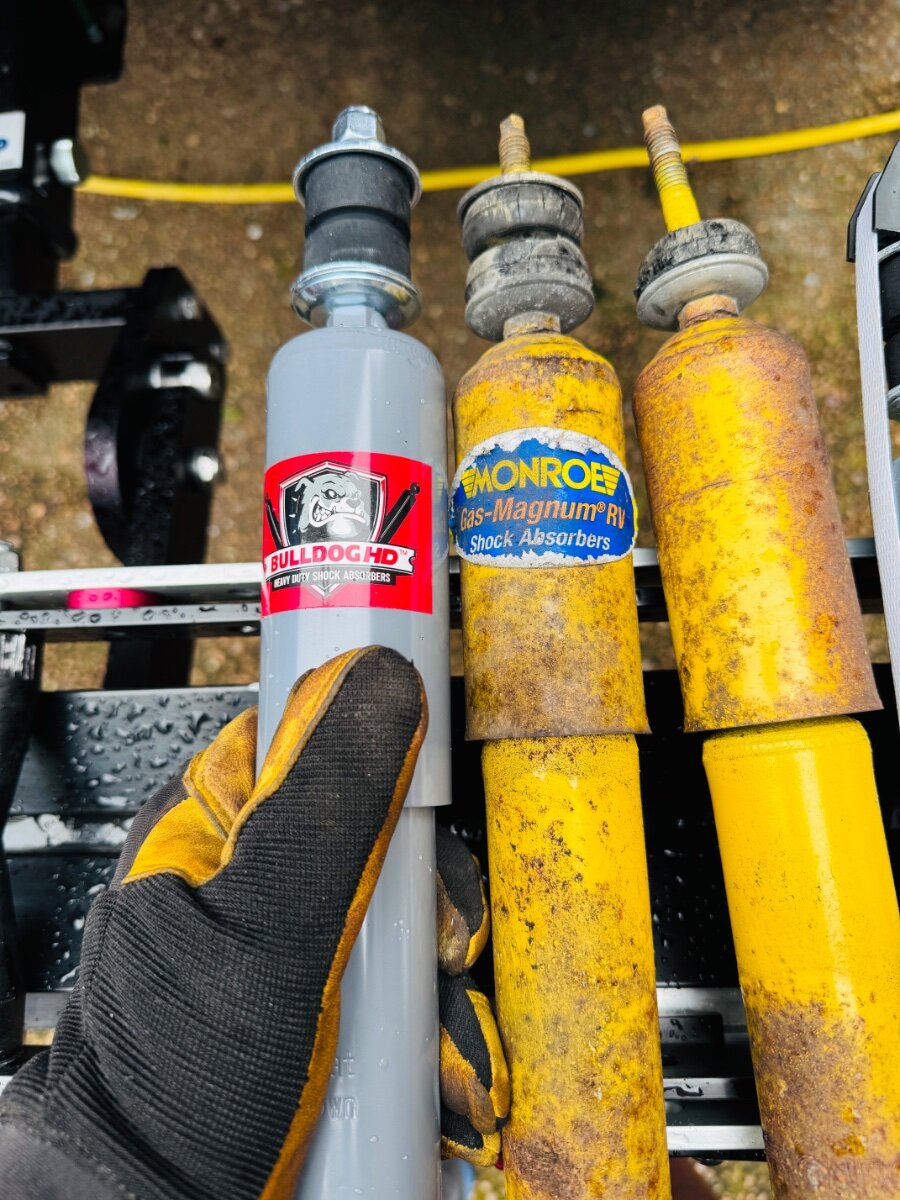
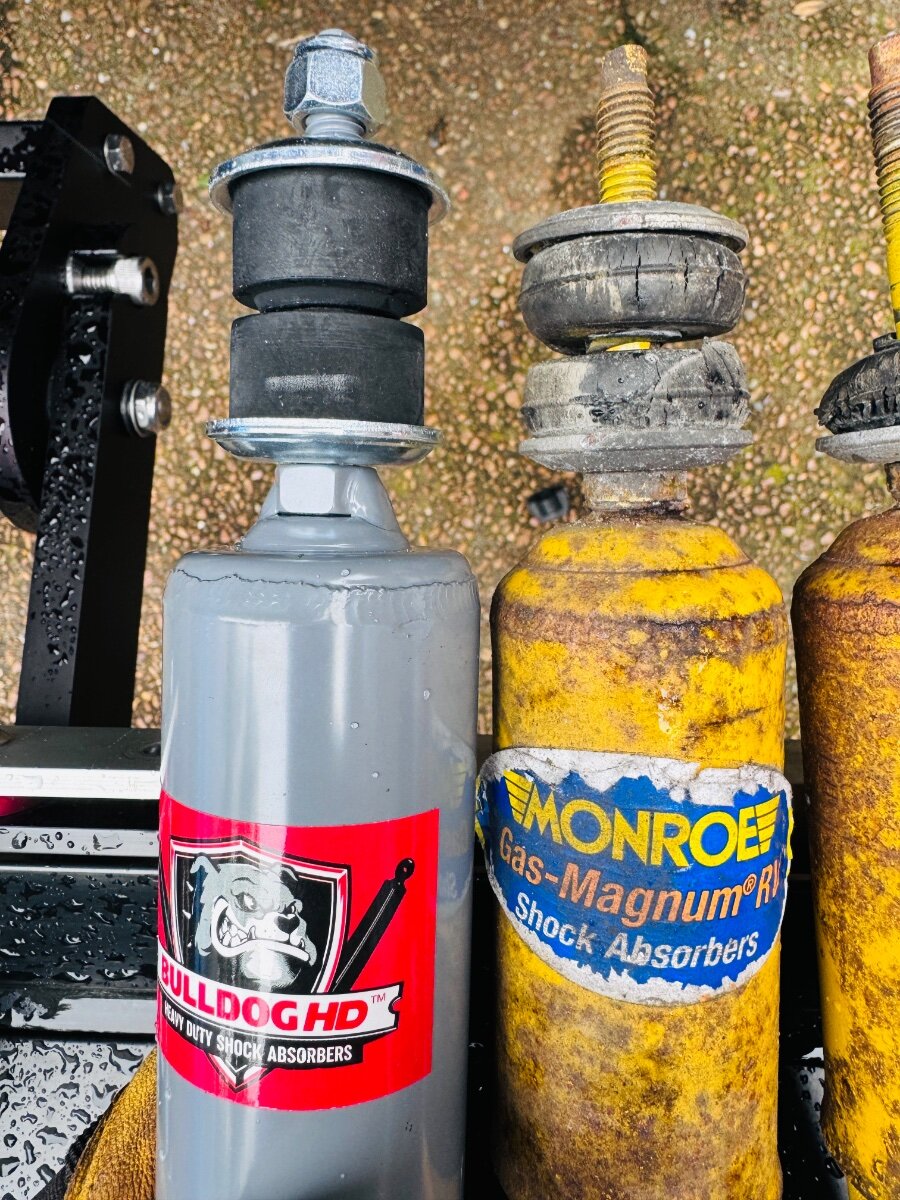
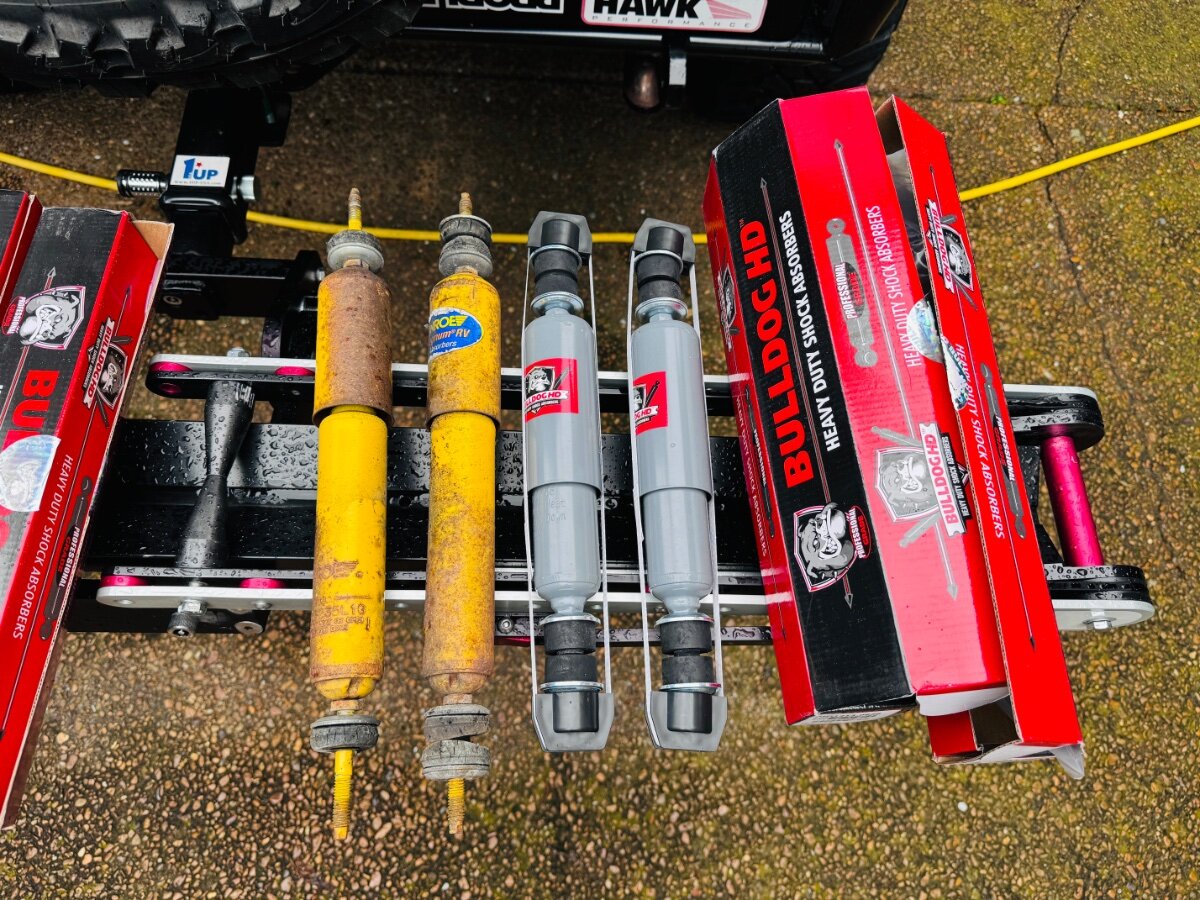
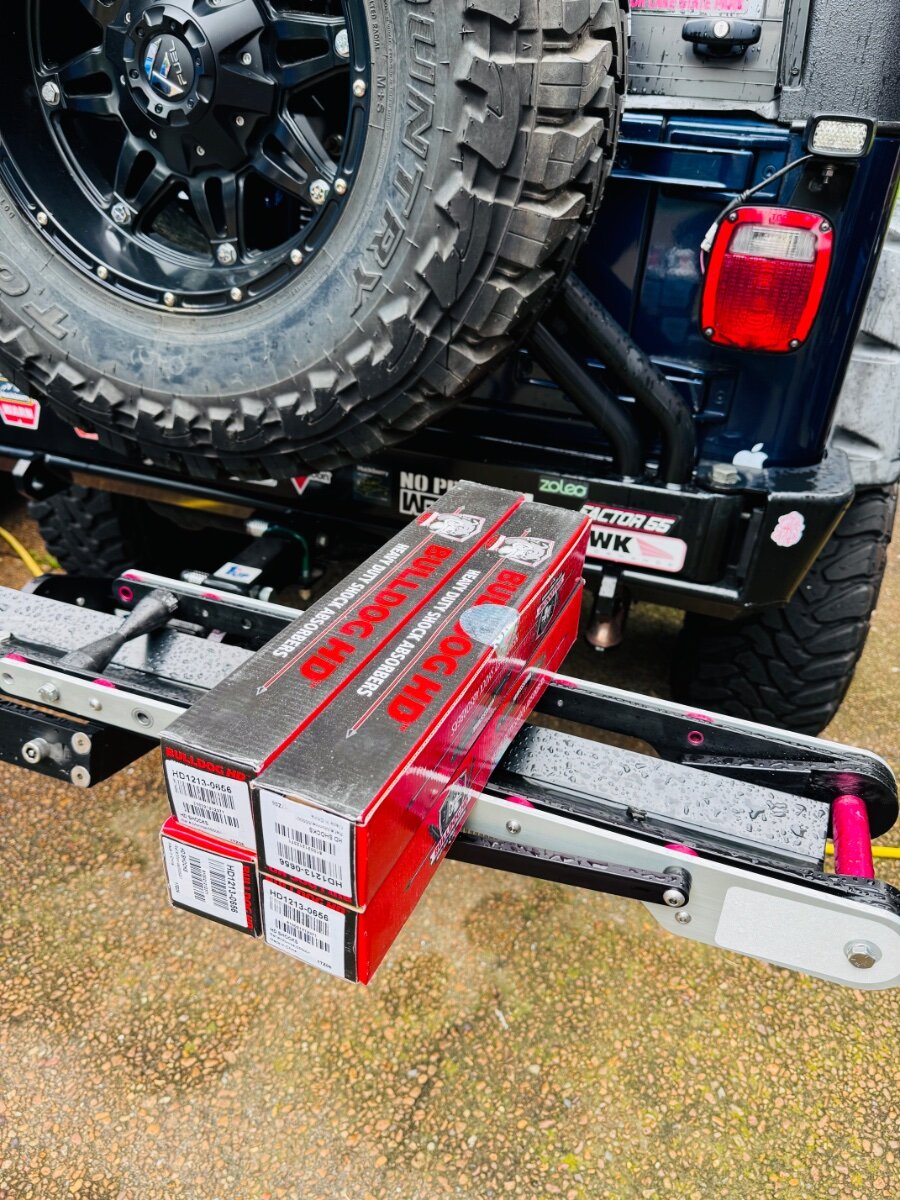
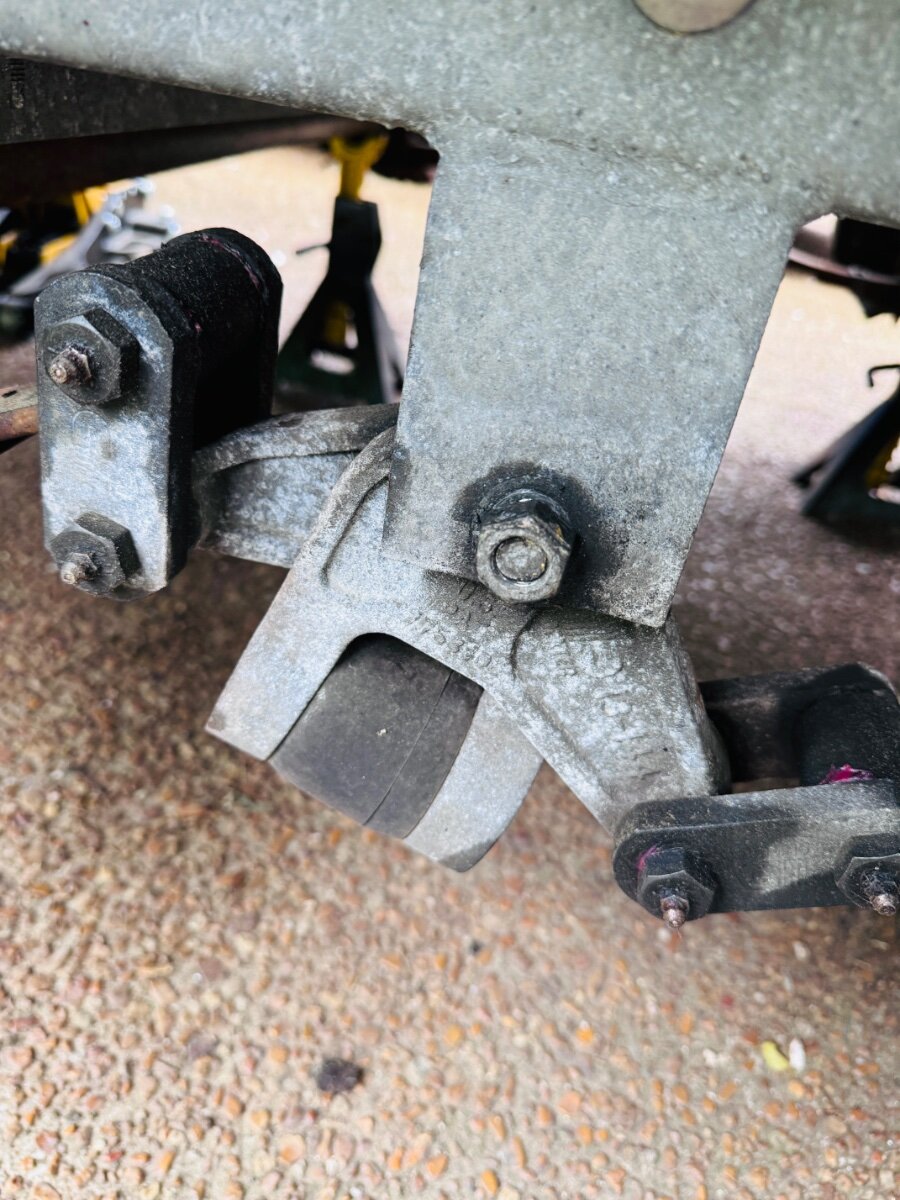
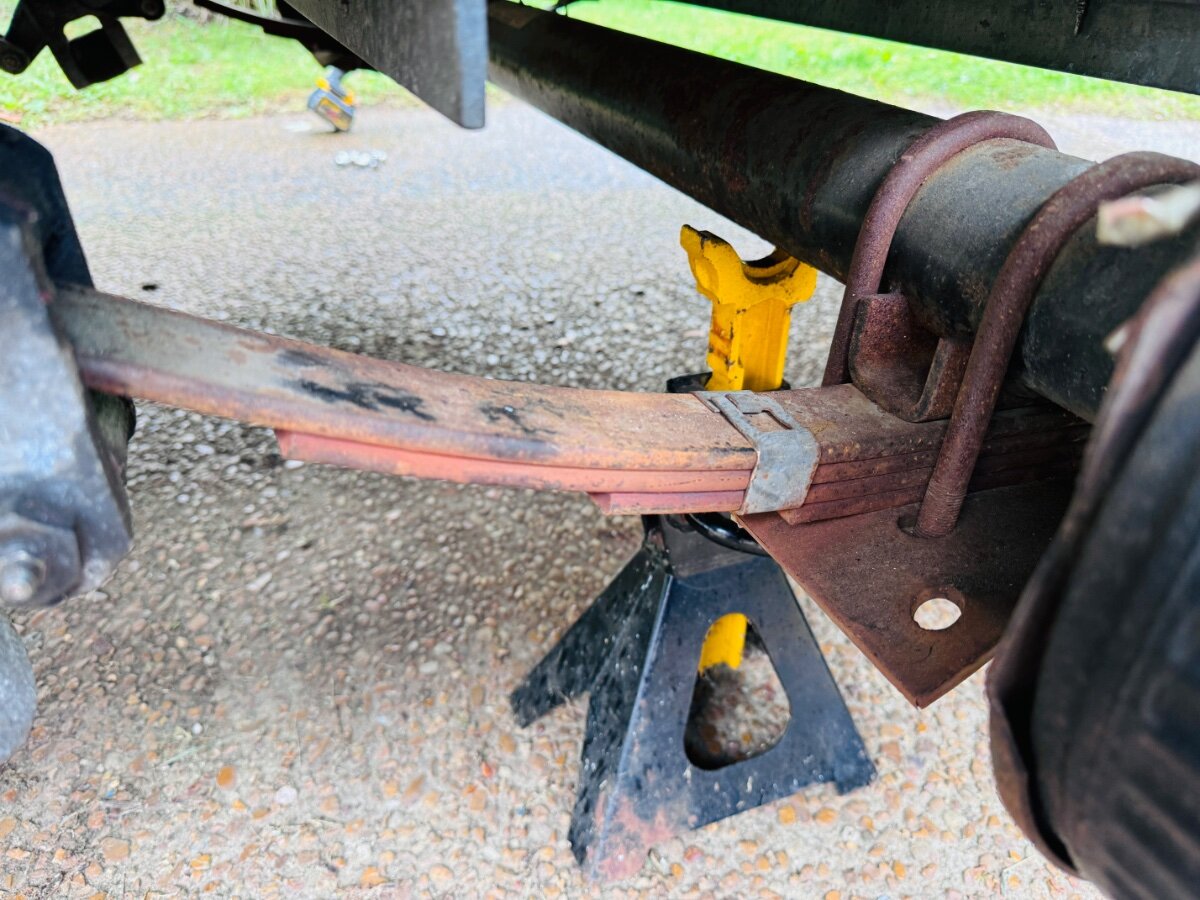
Bulldog shocks are a bit beefier and look like they are well made. Easy swap. Leaf springs look good, still on the fence about upgrading to the Alcan 5 leaf springs. Clips were loose on both springs on the right. Center bolt nut on the left EZ flex was loose and about to fall off. All of the Monroe shocks seemed to be in good working order just rusty. Future plans include the ALCAN highway so trying to get everything done now. New tires in the morning. https://www.4statetrucks.com/bulldog-hd-shock-absorber-replaces-555001-19-050000007 Wildpeak H/T02 LT225/75R16 E/10PLY BSW *** Now back to torquing the shocks so that the cushion is the same diameter as the metal retainer but not larger. ***
- 46 replies
-
- 15
-
-

-
Not the fastest, but definitely better than anything else we have had especially for remote areas.
-
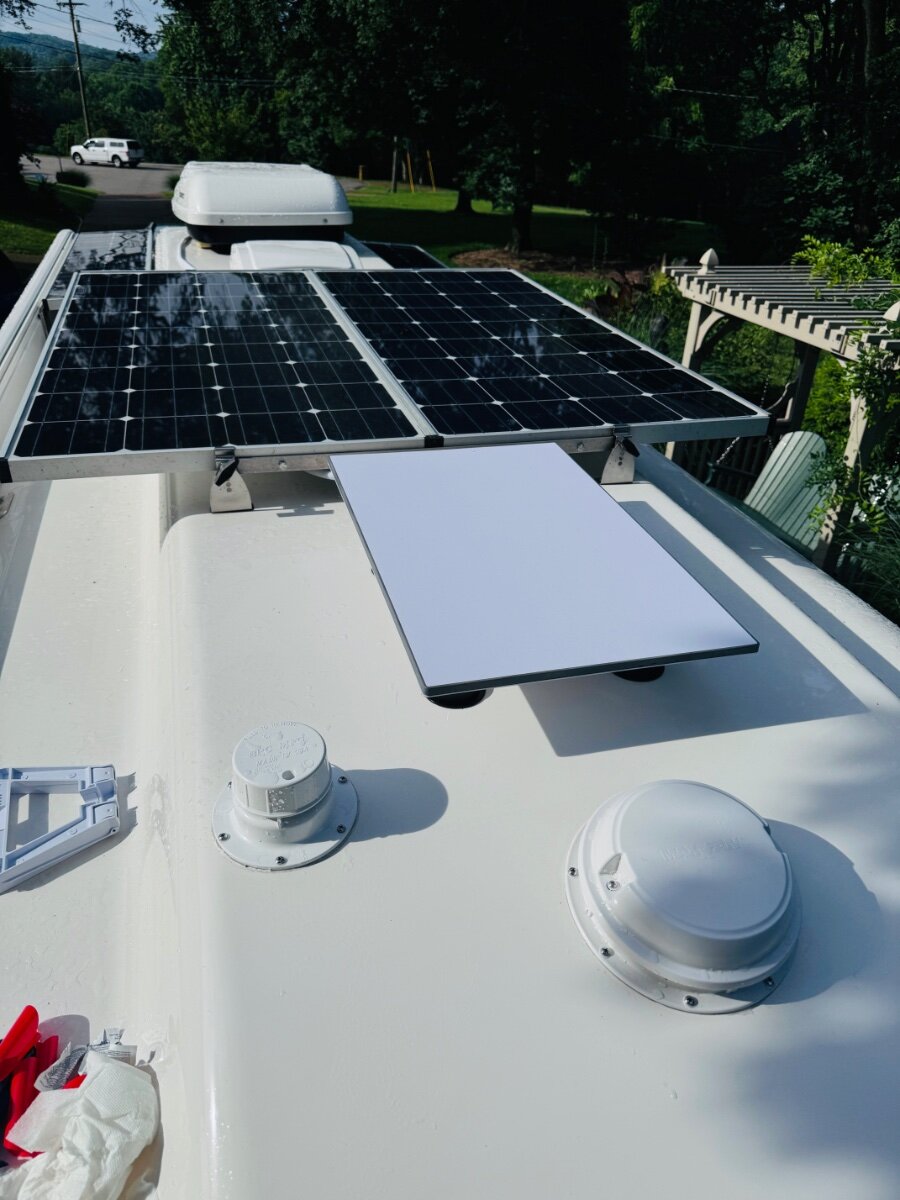
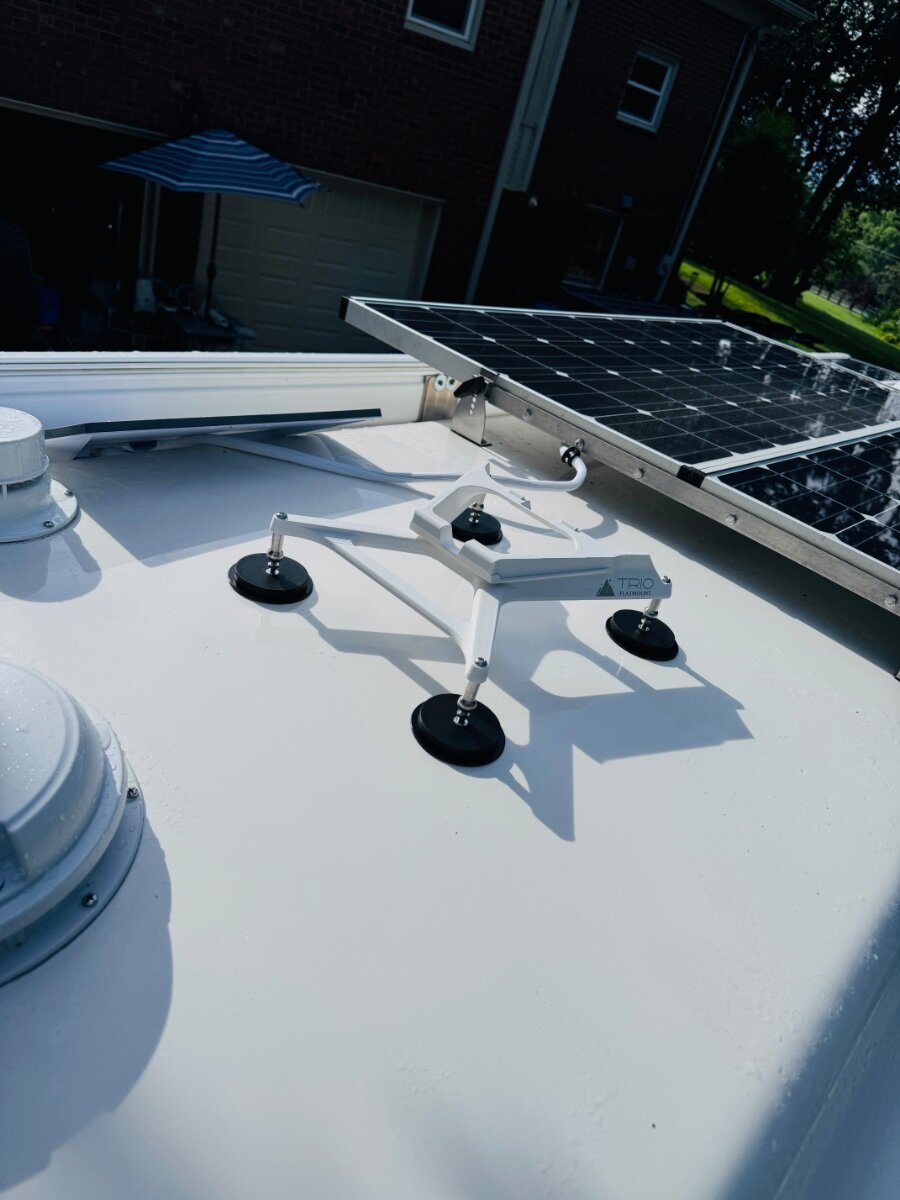
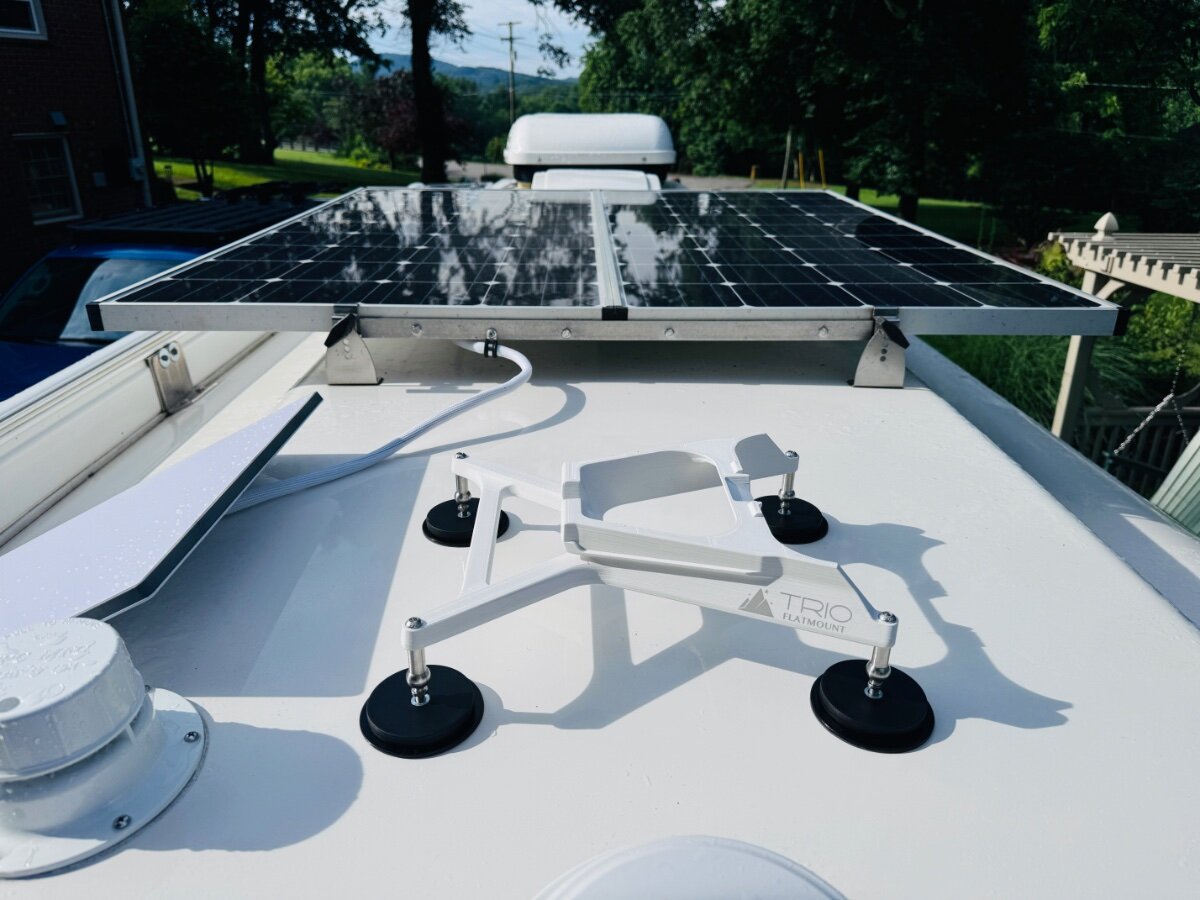
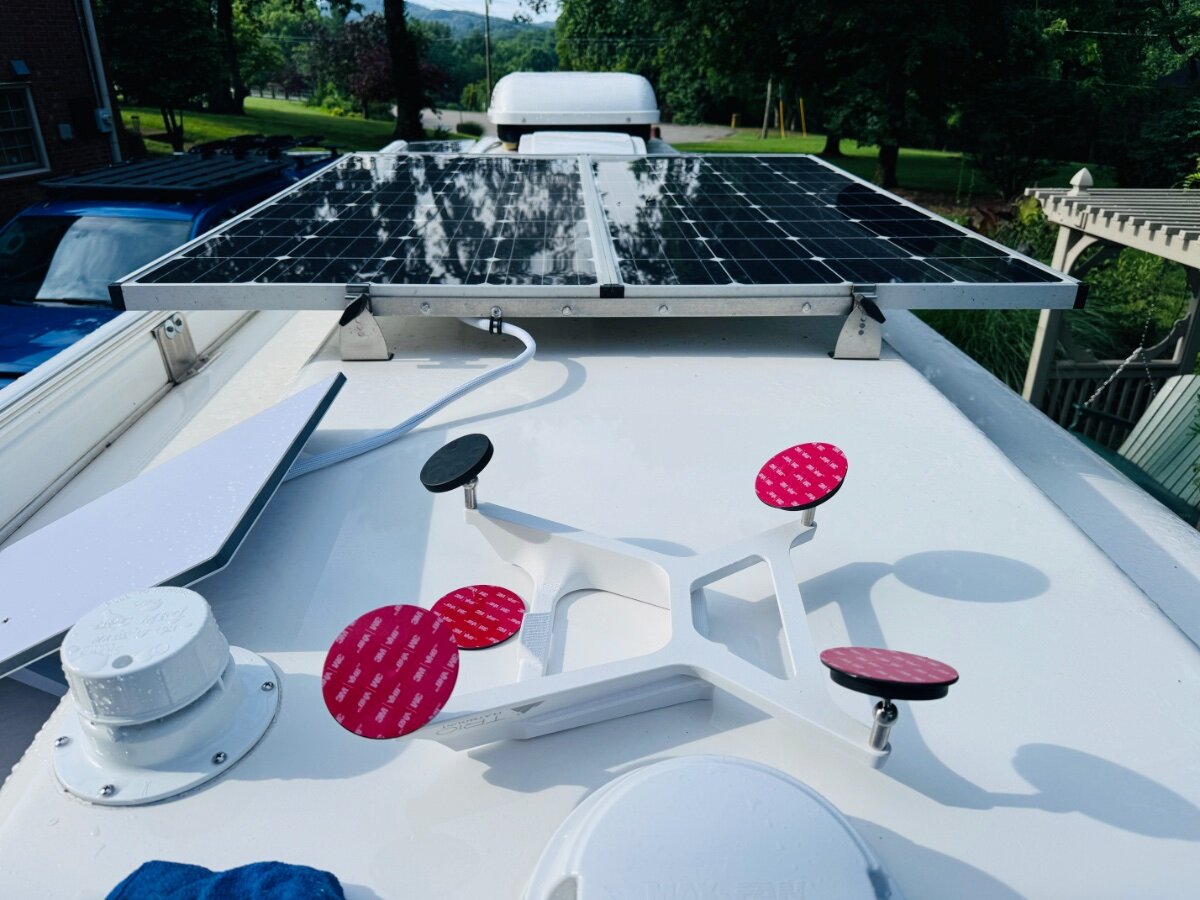
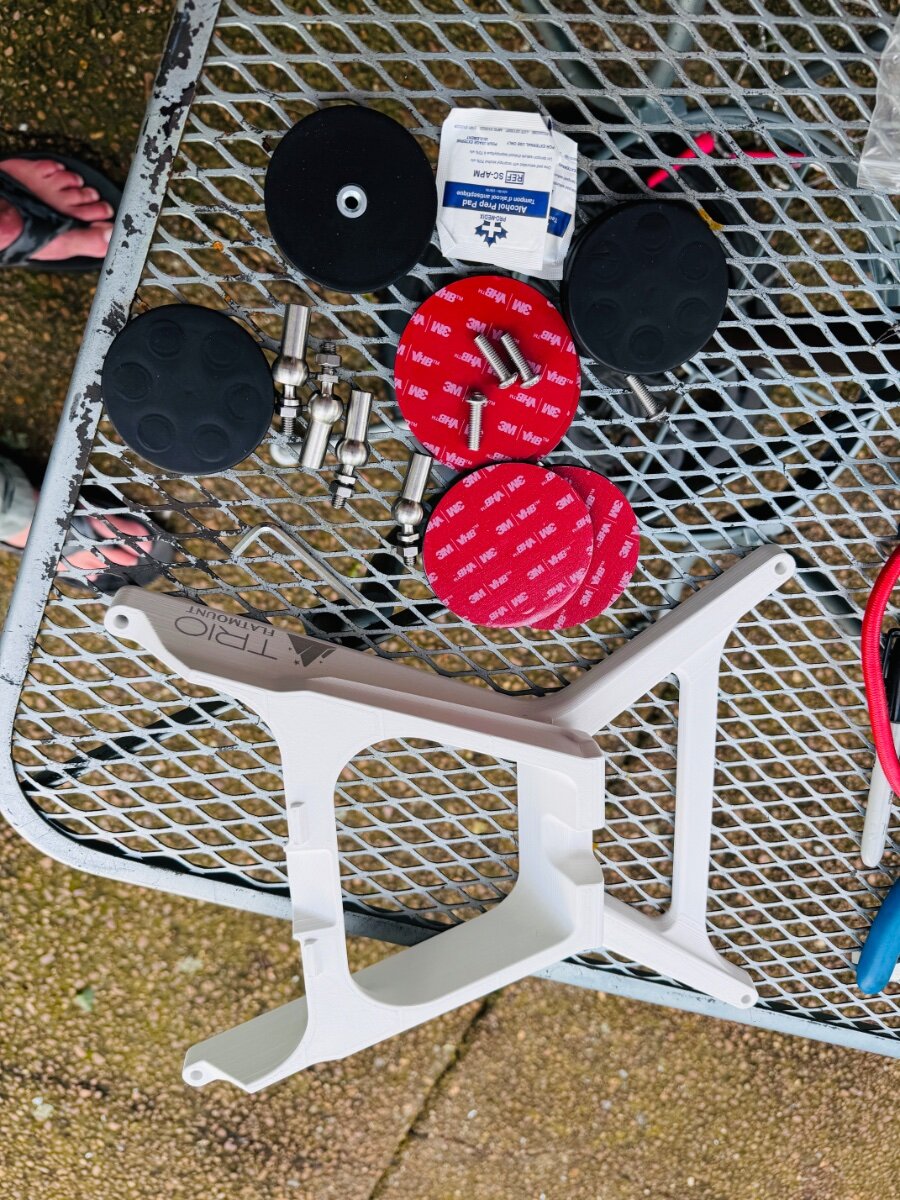
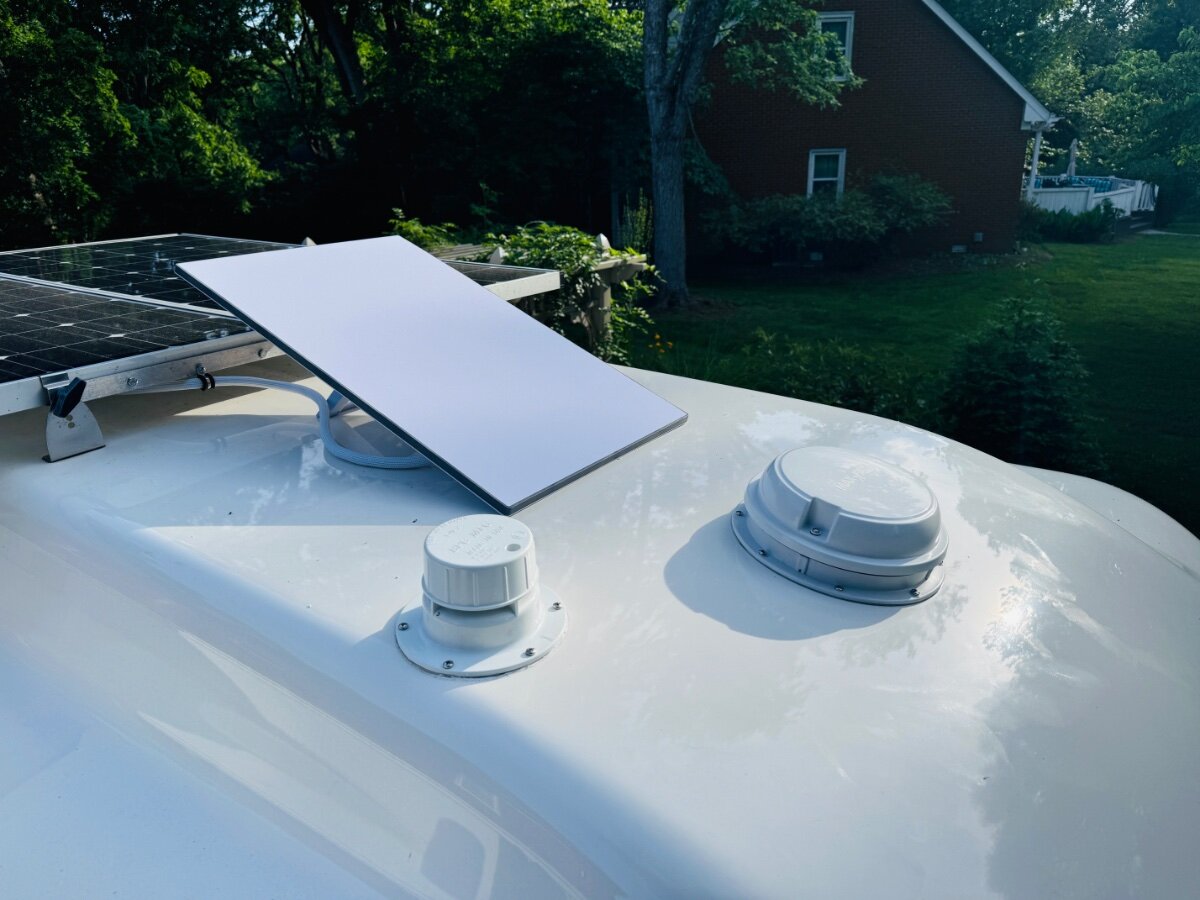
The VHB metal discs are permanently applied, but the magnetic rubberized feet on the mount make it removable for land mount or cleaning/waxing.
-
Really happy with the mount and semi-permament installation.
-
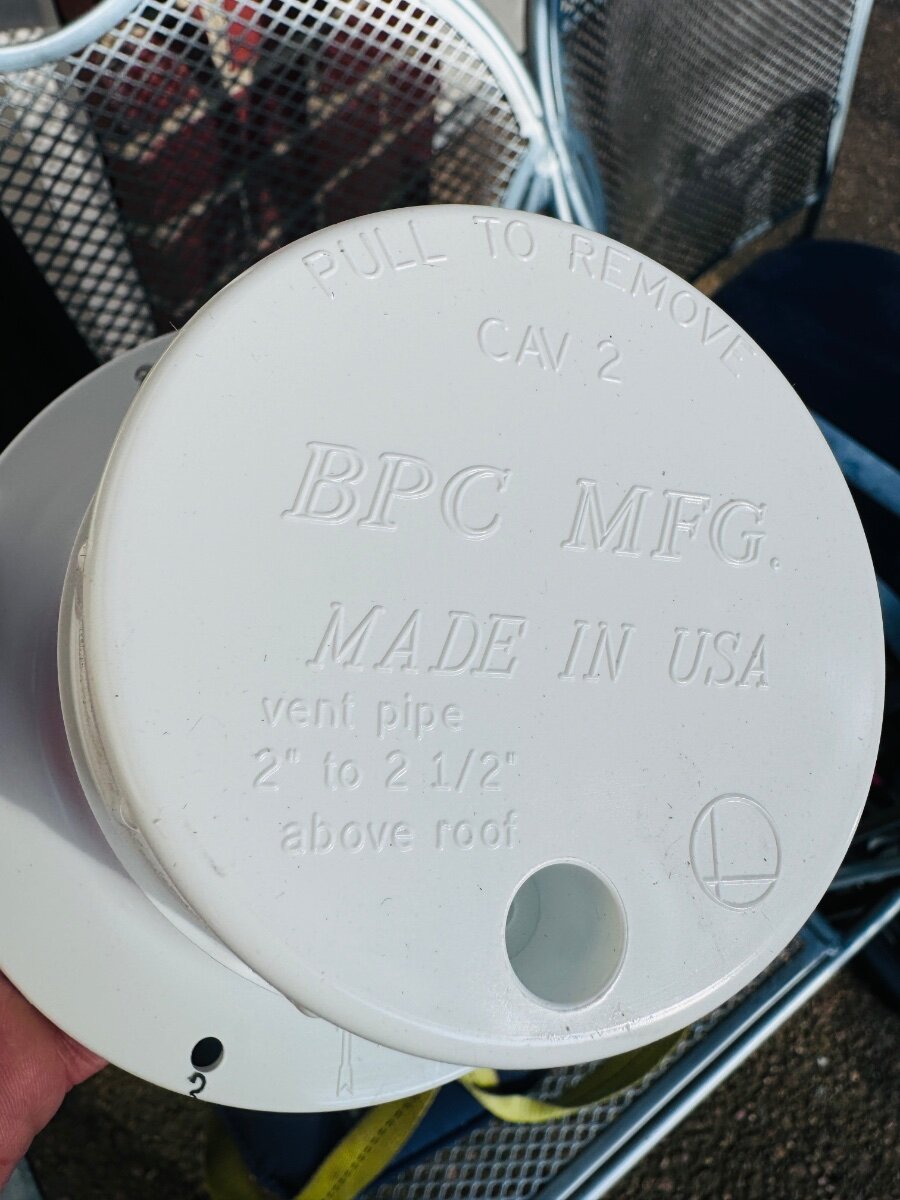
You can't see it in the picture but the cap posts were cracked and the screw mount that held it down had been broken as well during a wash/wax job. Kept falling off.
-
I have to agree most things can be attached with proper prep using VHB tape, especially on fiberglass, it is a perfect medium for VHB tape. I was actually going to use it to attach the rain guard on the new Maxx-Air fan but decided not to use the guard at all. My two 90 watt panels I installed up top are held in place by VHB only. I did use some backup attachment screws for the wiring mounted on the aluminum solar panel frame. It's been 4-5 years and everrything has held up great. AmSolar.com swears by it, says they have never had a panel come off that was installed correctly. One does hate to drill into the beautiful, waterproof fiberglass unnecessarily, maybe with time, more and more people will ask for VHB tape's use. The drive for its use also needs to come from the manufactures of 3rd party items to make them more conducive to VHB tape installation. This is I am sure is not a priority for them but it sure would be nice for us. https://amsolar.com/shop/mounting-accessories/#
-
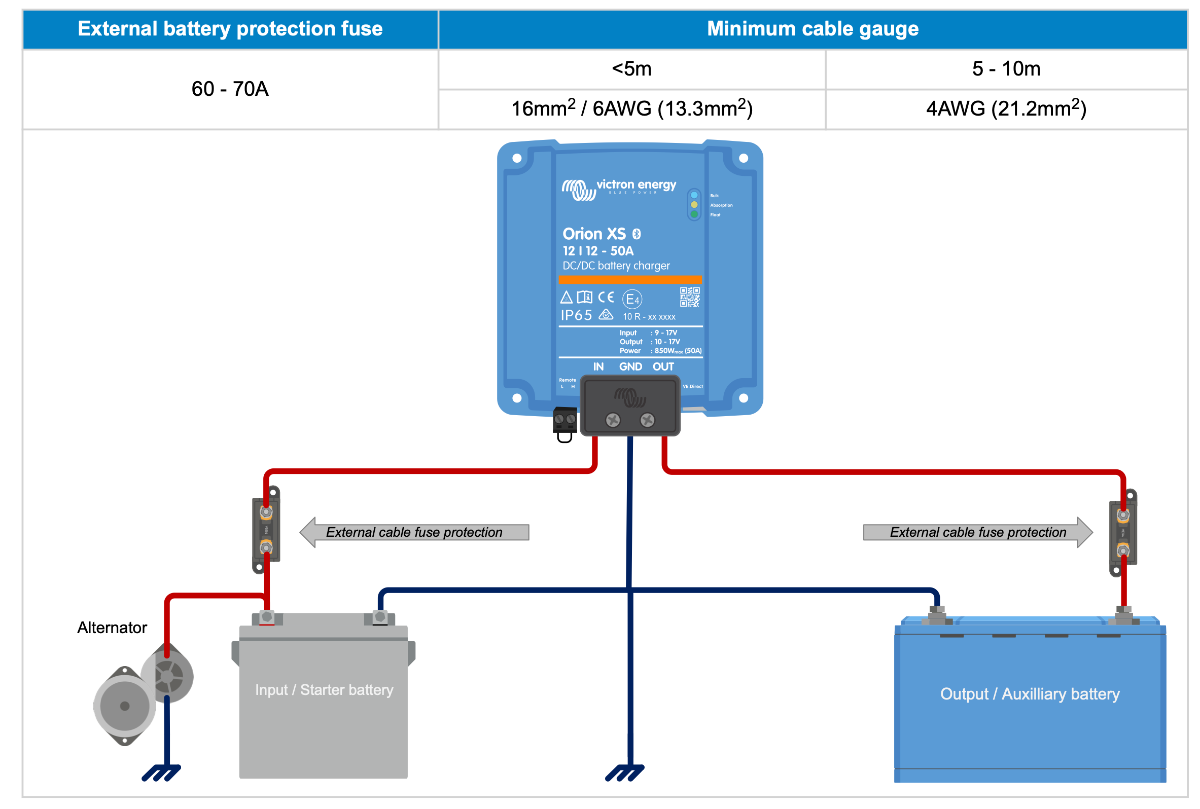
I don't know enough to really answer your question but what the deciding factor for me was that Victron stated somewhere that the non-isolated version will work for most (99%) of applications. Maybe @MAX Burner will have some input after having had some experience using it.
-
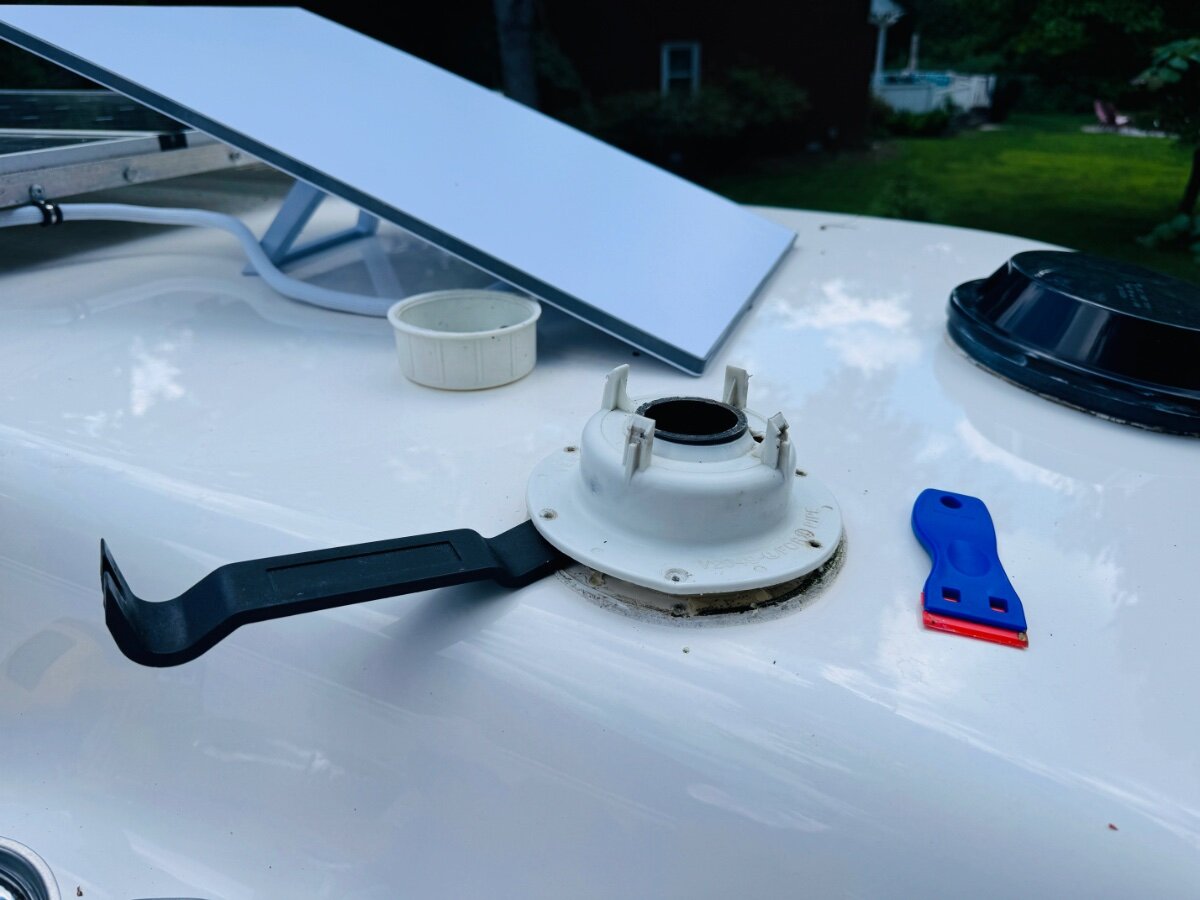
The hardest part of this job was finding the correct part so that you do not have to drill new holes. Make sure to get one that is 5 1/2 in wide NOT 5 1/4 which most are. The one I found is from eTrailer and it is made in the USA even better. After butyl tape cures for a few days, I will put down some marine caulk. https://www.etrailer.com/RV_Vents_and_Fans/LaSalle_Bristol/34474558.html Best, Mike
-
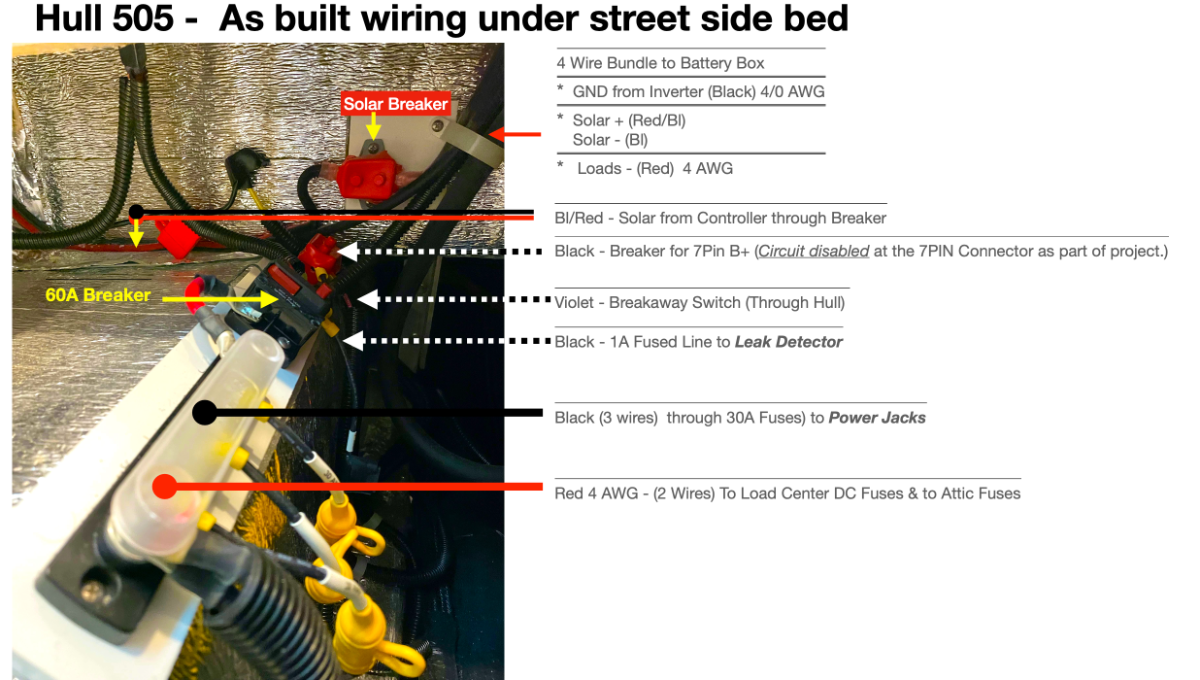
@Galway Girl Did you swap out your hot bus bar for better or more connections? Could you wire ORION XS Pos output directly to the post where the (2) 4 AWG wires are already connected.
-
@MAX Burner I just noticed that you installed a non-isolated DC/DC charger. The newly released Orion XS 12/12 50amp charger is only available in non-isolated version and one of the requirements is that the starter battery and house battery share a common earth ground. Did you just run your black negative from the TV battery to the negative bus bar => charger negative to negative bus bar => then from bus bar to ground. I wasn't sure about the wiring. I have the new version that is non-isolated on order and was trying to figure how to wire. https://www.victronenergy.com/dc-dc-converters/orion-xs-12-12-50a-dc-dc-battery-charger Oh, and do you think it is possible to snake the 4 awg cables from the cable gland opening under the toilet to the aft dinette area without removing the bathroom shelf. Is it worth attempting? Or just remove it and proceed.