-
Posts
1,541 -
Joined
-
Last visited
-
Days Won
39
Posts posted by mossemi
-
-
1 hour ago, rich.dev said:
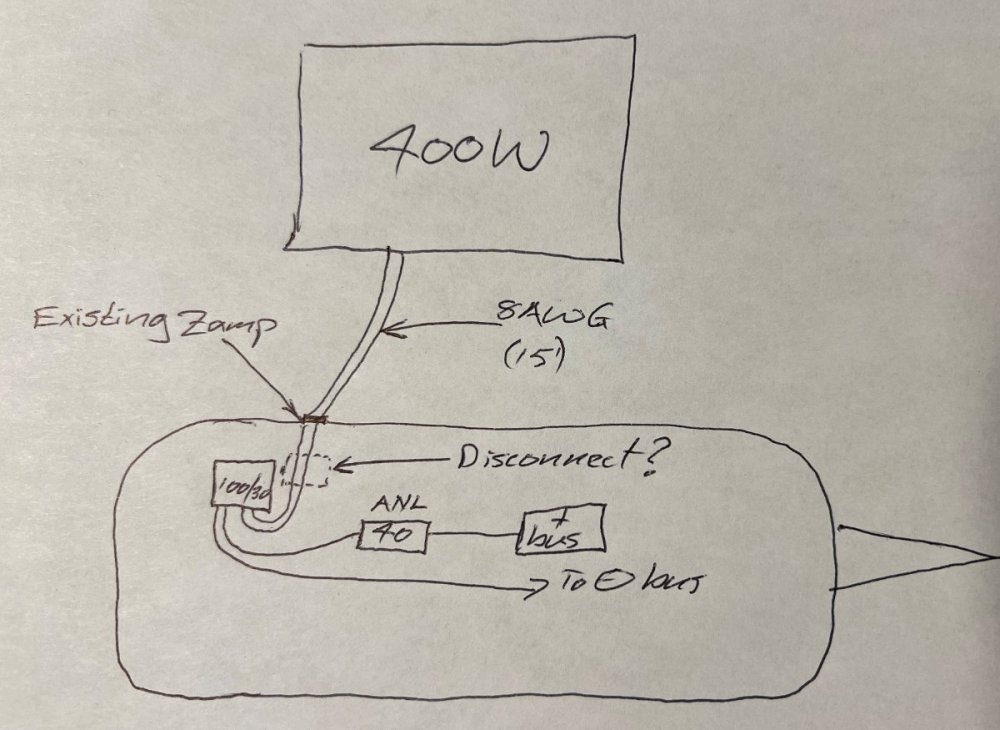
I'm adding a Renogy 400W solar suitcase and onboard Victron 100/30 charge controller to my solar setup via the existing Zamp solar port. The existing Zamp connection/setup does not have a solar disconnect like my roof top solar has. However, the stock Zamp setup is geared towards an external solar panel/suitcase with integrated charge controller. So, is a solar disconnect required with a ground deployed suitcase and onboard charge controller? My concern is, it might cause an arc if no disconnect switch and I remove/pull the solar suitcase connector from the Zamp external connector.

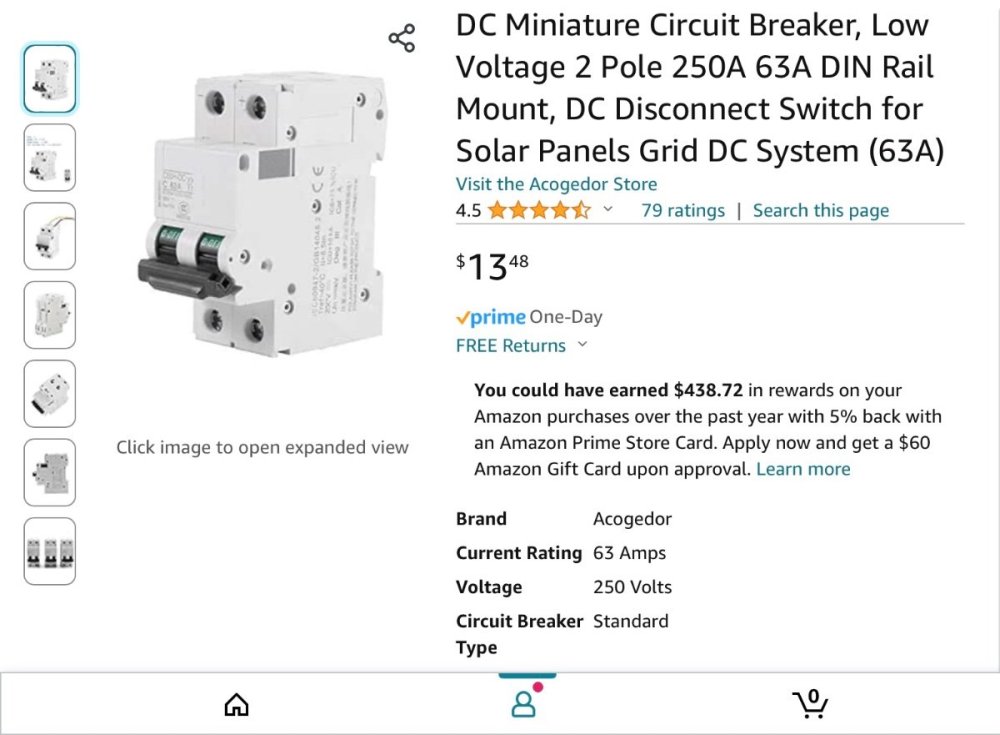
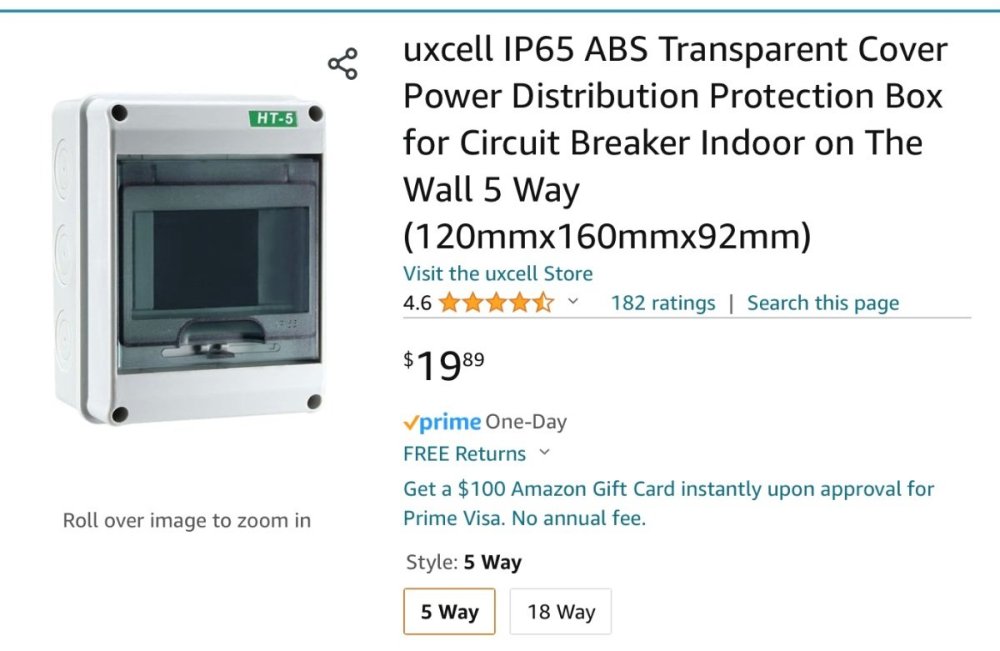
Hull #193 did not have an OEM supplied disconnect, so I would get a ladder out and cover the solar panels with a tarp or moving blanket. That process got old in a hurry, so I added a disconnect between the panels and CC. There are lots of choices for this task, but this what I used.
Mossey
-
4 hours ago, ScubaRx said:
At least in my lifetime that grid has never failed. I've lived in this house for over 40 years and I can remember only twice the power went out. Once during a severe ice storm in 1994 and again in 2014 after an EF3 tornado that we missed because we were traveling.
They sure don’t build them like they used to!
Mossey
-
-
10 hours ago, John Dorrer said:
Wonder how long to tow an Oliver LE-2 coast to coast,maybe 3-4 weeks🤣
That actually sounds like a great trip, a month going, a month there and a month back. Now if I just could convince Krunch of that!
Mossey
-
 1
1
-
-
-
2 hours ago, rich.dev said:
I don’t want to hijack the OPs thread, but to all of you that’s also using the external Solar suitcase port as a power source, I assume that’s only possible if the charge controller is part of the solar suitcase and not inside the the trailer?
I have a folding 100 watt solar panel with an on board CC. I have always thought that a CC mounted in the Ollie would be a better solution if I needed to place the solar panels further away from the batteries due to line loss. This would provide a higher voltage at the CC in the RV. Which led me to think a 3 position battery switch would be needed if I did mount the CC in the Ollie and wanted to supply 12V's to power an electric cooler. I can plug into my solar port now because it is wired straight to the batteries.
Mossey-
 2
2
-
-
On 4/20/2024 at 7:36 AM, Patriot said:
Our Blueberry Hill - is a small ridge where we built our home in the foothills of Western North Carolina. We have been growing (pesticide free) blueberries now on a small scale for 15 years. We deep freeze, enjoy, and eat a lot of blueberries and always share with family and friends. Our best year we harvested 43 gallons.
Just so everyone knows, you don’t have to live on Blueberry Hill or farm blueberry's to enjoy some blueberry pie!
Mossey
-
 3
3
-
 3
3
-
-
On 4/17/2024 at 9:23 AM, Steph and Dud B said:
Please remove us from the list (F38). We won't be able to attend due to a family medical emergency. Hope everyone has a great time.
Family should always come first! Hope everything turns out fine.
Mossey
-
 1
1
-
 4
4
-
-
14 hours ago, Ronbrink said:
To whomever is interested, perhaps someone can further explain the significance of these wires.
It looks like a bundle of Zamp Solar Panel to Charge Controller wire on top of the wheel well under the street side bed. Edit: I should have also mentioned that the wires are like a lamp cord in that both positive and negative are joined together. Zamp sold the bundle of wires in 25 or 30 foot lengths, but I’m not sure which. They run vertically up the wall to the radio cavity aft of the pantry. The solar charge controller is usually located above the radio and the wires would be cut in the cavity and attached to the CC input and output. The bundle in your picture would eventually go to batteries.
Mossey
-
 2
2
-
 1
1
-
-
On 4/16/2024 at 4:30 PM, DaveAndBecky_NorthernMI said:
Oliver pump says max 10 volts but has a 15 volt fuse?
I think you mean amps, correct?
In the past, some owners have solved some pump issues by closing the outside shower valves that were inadvertently left open.
Mossey
-
 2
2
-
 3
3
-
-
15 hours ago, SeaDawg said:
Anyone know which type AM Solar uses?
The type that came pre installed on the mounts I bought from AM Solar.😂🙈😂 And I also used Dicor to protect the VBH tape per AM's instructions.
Mossey
-
 1
1
-
-
9 hours ago, mountainoliver said:
I don’t remember that there were any wires pre installed in the ceiling but know that there were #6 cables and the temperature sensor wire running from the basement area just aft of the pantry up the wall between the window and pantry, into the open area where the radio is located. Oliver service connected to the #6 cables near the radio and ran those back to the attic area up between the roof panels and to the location where they mounted the combiner box.
I replaced my Zamp PWM CC with a Victron MPPT CC which I installed beneath the street side bed and I had to connect the wiring from the solar panels to the wiring going to the Victron CC. That splice was done behind the original Zamp CC location. And I found that solar panel wiring ran from the original Zamp CC location back to the attic and up into the inner/outer hull cavity and onto the combiner box. It seems to be the same route mountainoliver mentions above.
Mossey
-
 1
1
-
 2
2
-
-
1 hour ago, Patriot said:
It’s hard to believe the Rally starts a month from today
What! I guess I better get busy on my Ollie do list!
Mossey
-
 3
3
-
 1
1
-
-
10 minutes ago, Dennis and Melissa said:
Is there a way to keep the grey tank drain open without leaving the garage door open?
I like to keep the grey tank closed so when I am ready to dump the black tank, I can use the grey water to flush the hose. I like to have about 75% grey when I dump black. If you have a composting toilet, this method does not apply.
Mossey
-
 1
1
-
 4
4
-
-
1 hour ago, Dennis and Melissa said:
2) We got a drawer stuck. I was able to slide a ladle in, push down on the offending dish, and get it to open. But this is the second time I wish I knew how to remove the drawers.
If your drawers now open without trouble, it’s a good time to practice taking them out. Before you begin, a word of caution is needed! The edges of the metal portion of the drawer slides are very sharp, so be careful. Also take the time and unload the drawer you want to remove, it will make everything that follows easier to complete.
Only 5 of our drawers come out, the exception being the one under the sink. So pick any of the other drawers and slide it all the out until it stops. Now put your thumbs inside the drawer on each side close to the front of the drawer and your fingers outside with the tips of your fingers under the bottom of the drawer. Now you should be able to feel the release for the drawer slide and squeeze the tips of your fingers to the outside of the drawer on both sides and slide the drawer out of the drawer slides. Dang if that paragraph doesn't have a lot of drawers in it!Or just get on the floor and slide a drawer out and you will see the orange handles that you will squeeze to remove the drawer.
Good luck,
Mossey
-
 1
1
-
 4
4
-
-
18 minutes ago, rideadeuce said:
So everything is mounted except Ekrano display.
If you have decided where you were going to mount display, I was able to mount a a 7" Raspberry Pi touch display with the Pi mounted to it in the old Zamp CC hole. I replaced that with a GX Touch 70 display in the same location.
Have you reached out to Galway Girl to discuss your wiring troubles?
Mossey
-
We are all hopeful it works for you! And if you do need to add some additional support to keep it vertical, a couple of machine screws through the wall up high on your HDPE board wouldn’t be noticeable under the lip up the bed support.
Mossey
-
 1
1
-
-
17 hours ago, rideadeuce said:
HDPE Marine Board from Buyplastic.com. 12x27x1. It is heavy and expensive but turned out to be very well suited for this install. $57.00
PC-11 Epoxy adhesive paste. 1 lb in 2 cans. from Amazon.com
I was curious about your use of HDPE and PC-11 Epoxy as I haven’t ever tried using the 2 products together. I haven’t used any of PC-Products line of adhesives, so I went their website and looked into their does and don't. I found the information below, so I will be looking forward to your results.
Mossey
-
 1
1
-
 2
2
-
-
Very nice work Mike and I am talking about the write up and installation. Keep us posted with your progress. Is the stand for the MP2 a Victron product? I haven’t seen it before.
Mossey
-
 2
2
-
-
4 hours ago, 2008RN said:
I used the 3/4" thick instead of 1/2" thick so I could have a few more threads on the screws holding things.
I like to use t-nuts and machine screws with my initial installation of equipment.
Mossey
-
 5
5
-
-
13 hours ago, rideadeuce said:
Anyone know what the name of the material that is used in the basement for mounting electrical components. It is strong and lightweight. Most boating HDPE and marine lumber material is very heavy. Or any ideas for using something else? Trying not to use wood.
M
I think the material is the same as the trim boards mentioned above which is also available is sheets
Mossey
-
 3
3
-
-
11 hours ago, mountainoliver said:
I think Oliver uses a material that is used by the boating industry called starboard.
I don’t think Oliver uses Starboard because I believe SeaDawg once mentioned that Starboard only excepts mechanical fasteners. I bought a piece Starboard to make attic access panels at HD and I think it resembles cutting board material more than anything else.
11 hours ago, mountainoliver said:I have used vinyl trim board readily available at Lowe’s and Home Depot in various widths and thickness.
This is the same trim board material that I have used with success, but I use JB Weld. I do believe the attaching to a horizontal surface is pretty straightforward, it’s the vertical placement that much more difficult. I have had pretty good success with 2 pieces of all thread joined with a coupling nut used as a spreader between the walls of the area under the beds or seats.
Mossey
-
 2
2
-
-
11 hours ago, Wandering Sagebrush said:
I haven’t pulled the cover off the power supply, but will do that later this week, and wish I had that fan switch.
My thermostat was installed on the right side behind the upper vent. It was attached to the black piping of the evaporator or condenser.
I haven’t tried it but I think running wiring to a switch near the main control panel by running up to the porthole in the upper cabinet above the microwave is doable.
Mossey
-
 1
1
-
-
11 hours ago, Wandering Sagebrush said:
using the now identified DC source. Chances are it will be switched, too 😊.
Although my Ollie #193 has the fan in the same location as @topgun2 and @rideandfly I had to replace the original fan due to noise. My fan has an on or off switch mounted in the main switch panel inside the door and a thermostat midstream of the DC power supply before the fan which automatically controls the fan as long as it has the power switches on. Did you find a thermostat in your fans DC power supply?
Mossey
-
 1
1
-


Exterior 12v access!
in Ollie Modifications
Posted
That goes without saying!
Mossey