

mossemi
-
Posts
1,638 -
Joined
-
Last visited
-
Days Won
40
Posts posted by mossemi
-
-
1 hour ago, John E Davies said:
I will finish by a comment about the Fast Lane tow videos. Those guys used an Andersen hitch for a quite while, and claimed that it was wonderful. Now they use a different brand with steel spring bars.I would like to know why they stopped, does anyone have the answer?
I do not know why they changed hitches, but my best guess is that both hitches were promotional items provided free of charge. I do believe that everyone on YouTube with more than 100 videos, is doing it for promotional or income related purposes. And I don't remember ever seeing a "truth in advertising statement" on YouTube.
Mossey

-
 3
3
-
-
13 hours ago, Liana said:
I've received all of the components I ordered to copy *someone*s portable installation (why is it that when I find cool stuff that someone does, I can never find it again when I go back to look for it?), tho that installation changed out the connecters from MC4s to super cool "foolproof" ones, I didn't go that far.
This may be the post you were looking for:
Mossey
-
3
-
-
The original post is the first reference I have ever seen to fuse F52. Where is the fuse located and is it specific to the Xantrex Freedom XC 2000/3000 inverter/charger installations?
Mossey
-
 1
1
-
1
-
-
Thanks Sherry,
I just watched this video today and as usual, Will presents information in a manner I can follow.
Good stuff,
Mossey
-
1
-
-
15 hours ago, John Welte said:
Maybe I don't know the right way to search even though I put in "backup camera" in the search bar.
Try either of these search methods.
Mossey
-
2
-
3
-
-
12 hours ago, Dave Mazone said:
I have the AGM's and I disconnected three different cables that lead into the Ollie (just the negative side). The cut off I attempted to use just has a lever the you pull up to severe the connection to the battery. The lever had two different sized holes, one with threads and the other without. The cables wouldn't slide over éither termimal I tried to use (and I didn't feel comfortable drilling the holes larger). I hope the pictures help my explanation.
The basics! It's all about safety
And let me be clear about any information I provide below. I have not looked at any battery installations on Ollie's newer than 2017, so if any knowledgeable OTTO's with 2021 or 2022 model Ollie’s that see anything I have wrong, please chime in with any current information.
The first thing I would like to say is that you should never ever enlarge the hole in a cable lug/connector. And you should never ever use a cable lug/connector with a hole that is larger than the stud you are connecting to. And make sure that any equipment you install is capable of the battery load you have. The battery disconnects in your pictures are probably designed for single car or truck batteries.
Disconnecting either the 4/0 positive or negative cables that pass through the battery box wall into the inside of the lower hull should break the battery connection. That would still leave solar positive and negative cable connected to the batteries and the same may apply to the battery charger section of the Xantrex equipment.
Mossey
-
2 hours ago, Dave Mazone said:
I'm dumbfounded (perhaps a little dumb, too). In an attempt to eliminate the power drain, I tried to install a cutoff switch...didn't work. Since I was sending my new Ollie to covered storage, I shut off the solar and disconnected the negative battery terminal (the one with cables going into the hull). To my surprise, all my lights still turned on. What the heck? I really hate electrical. Any help?
Can you elaborate on your attempt to install a cutoff switch. Maybe some pictures as well.
Mossey
-
3 minutes ago, John Welte said:
Are you referring to TechnoRV? That was the video I watched.
No! The TST support team is who I was referring to. Sorry about the confusion.
Mossey
-
1
-
-
12 hours ago, Kirk Peterson said:
Maybe the little red clips are powering the battery heater?
Born and raised in Florida! Never would have thought about a heater.
Mossey
-
 2
2
-
-
10 minutes ago, John Welte said:
Mike, I watched the video on how to set it up. Looks easy. Thanks for confirming that.
Make note of the support phone number just in case you have any questions. They are excellent!
Mossey
-
1
-
-
36 minutes ago, dewdev said:
SteveCR:
What are you powering up with the small red covered aligator clip?
Very good eye! I am looking forward to the answer.
Mossey
-
2 hours ago, John E Davies said:
I am a JB Weld Fan Boy.
JD suggested JB Weld to me about 2 years ago. And I have had very good success with it since then and as he mentioned, the self life is excellent even in Florida, where the 3M product's last a month if I’m lucky. I order the large size tubes from Home Depot. So I’m nominating him for president of the JB Weld fan club of which I am a member.
Mossey
-
4
-
-
We purchased a used 2017 LE2 with the standard bed and used that bed for one trip. We left the table at home on the second trip. We experimented with different sleeping arrangements and as a 6' side sleeper, the rear bench worked best for me. Krunch claims to be 5' but I don't believe it, so she could sleep on either side or the dinette. And the dogs are just happy to be touching one of us while they sleep, so they had multiple choices. After the third trip, we made an appointment to take it back to Hohenwald for a twin bed conversion and we have never looked back. I believe that the standard bed takes up about 40% of the square footage and made the three rear cabinets very difficult to access for both of us and we didn’t enjoy the twice a day bed to table change over. And if you upgraded the standard mattress, you are pretty much locked into leaving to bed up 100% of the time. There are multiple OTTO's that have made the twin bed into a standard bed for temporary usage, such as camping with grandkids. Check out the option Mike and Carol created, allowing the very clever use of modified dinette cushions to fill in the gap.
Mossey
-
2
-
-
On 2/17/2022 at 5:23 PM, mtkadan said:
made it to livingston tx...heading to the hill country next.!
10-q
dan
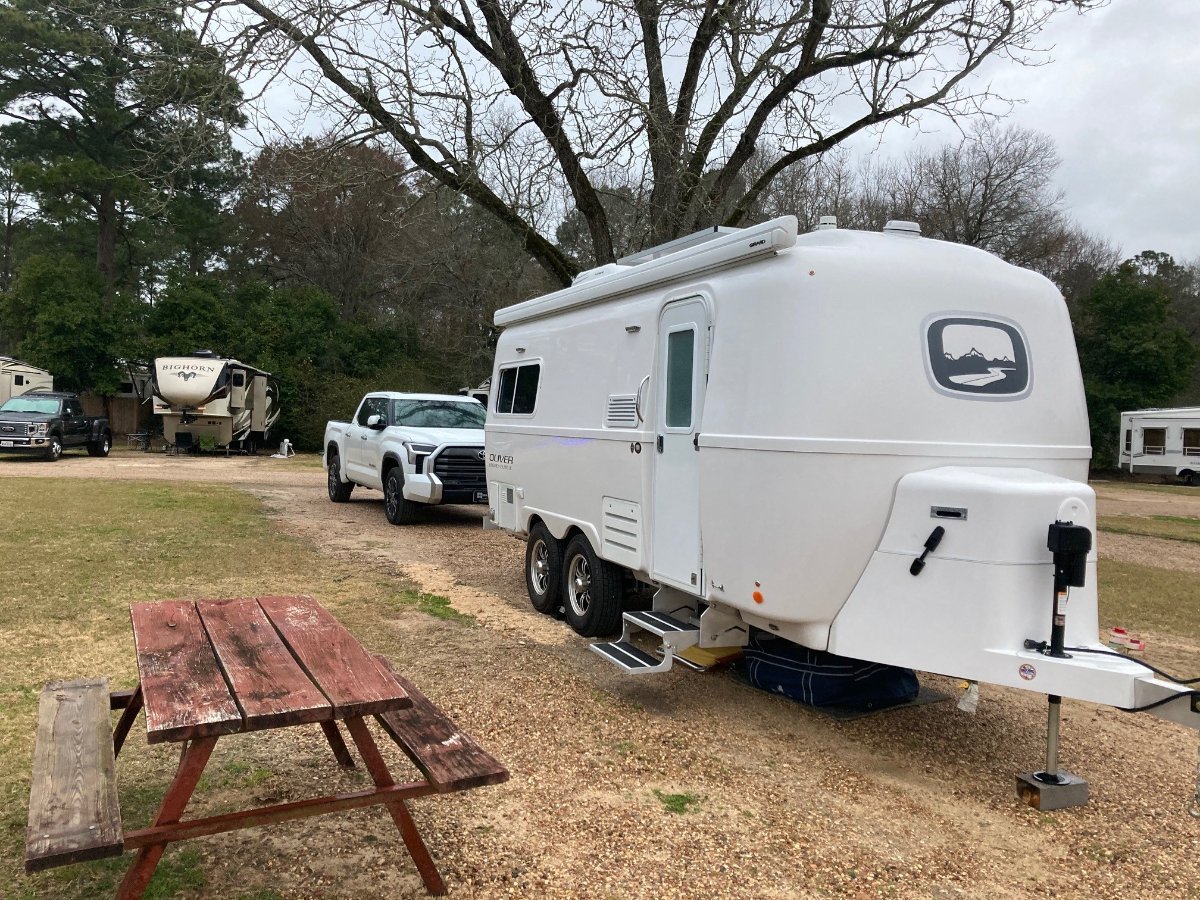
How’s the new 2022 Tundra working out? Which model did you get? Please share any details about the truck you care to.
Mossey
-
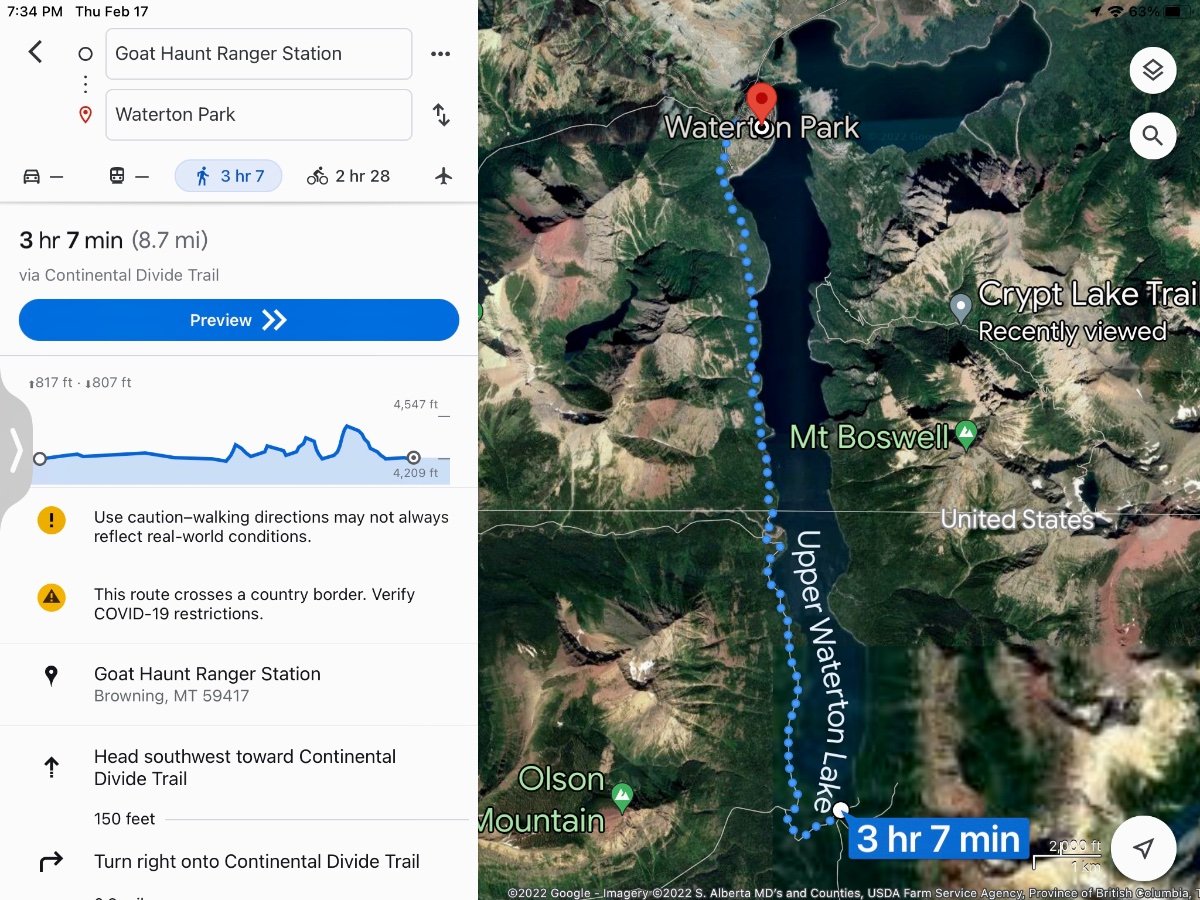
6 hours ago, LongStride said:
Bring some warm clothes that you can layer so you can strip some off as the day warms up. We hiked up to Grinnell glacier a few years ago in August. It was 21 degrees when we started the hike early in the morning.
The Many Glacier area of the park is our favorite and it is close to Waterton Townsite. It has excellent hiking like the Ptarmigan Trail/Ptarmigan Tunnel trail which we picked up behind the Swiftcurrent Motor Lodge. If you make it to the tunnel, the view on the other side is pretty special.
The Red Buses are a great way to see the park if you are a designated driver, you can actual see what everyone else in your vehicle gets to see.
And don’t miss the pie’s at the Park Cafe in St. Mary’s.Mossey
-
1
-
-
20 hours ago, topgun2 said:
If you go to Glacier and then on up to Waterton be sure to investigate taking the boat across the lake to do a hike to Crypt Lake.
The Crypt Lake Trail is an excellent hike and don’t let Bill discourage you from trying it. And an alternative hike that is a little less strenuous, but about 4 miles longer and much less crowded, involves taking the boat ride to Goat Haunt Ranger Station, which is actually back in the US and Glacier NP. Disembark at the ranger station and hike back to Waterton Townsite following the west side of Waterton Lake. If you are lucky enough to be camping in town, you’ll end up back at the campground. And if hiking isn’t your thing, just take the boat ride, you won’t be disappointed.
Mossey
-
1
-
2
-
-
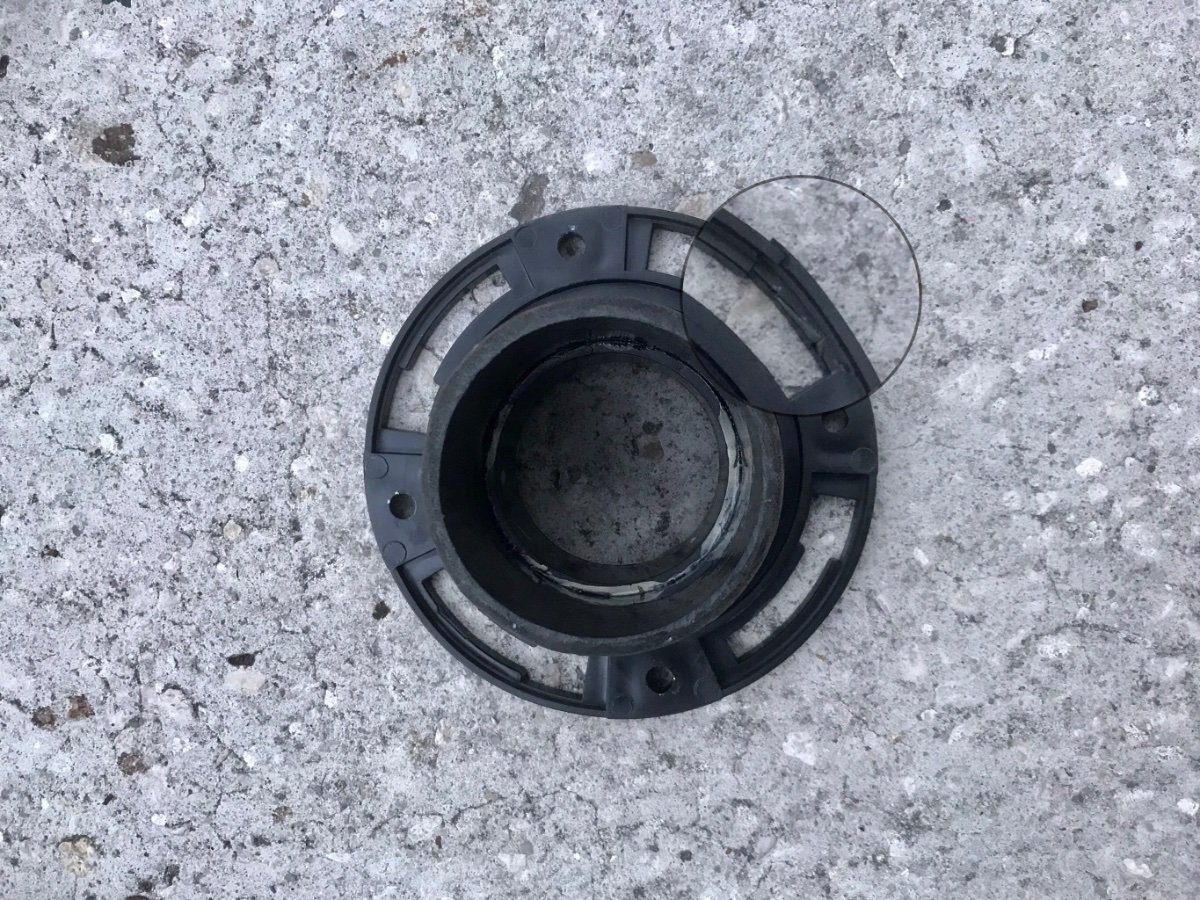
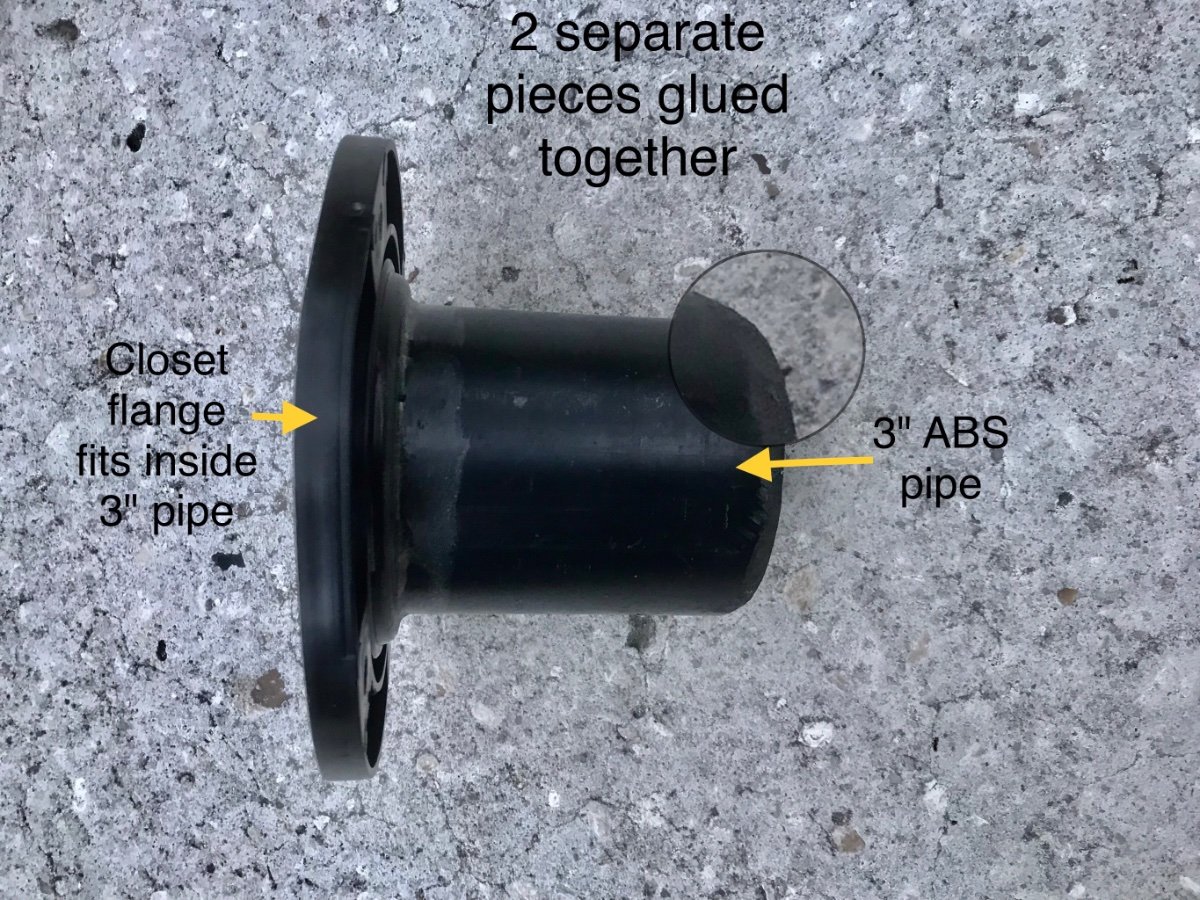
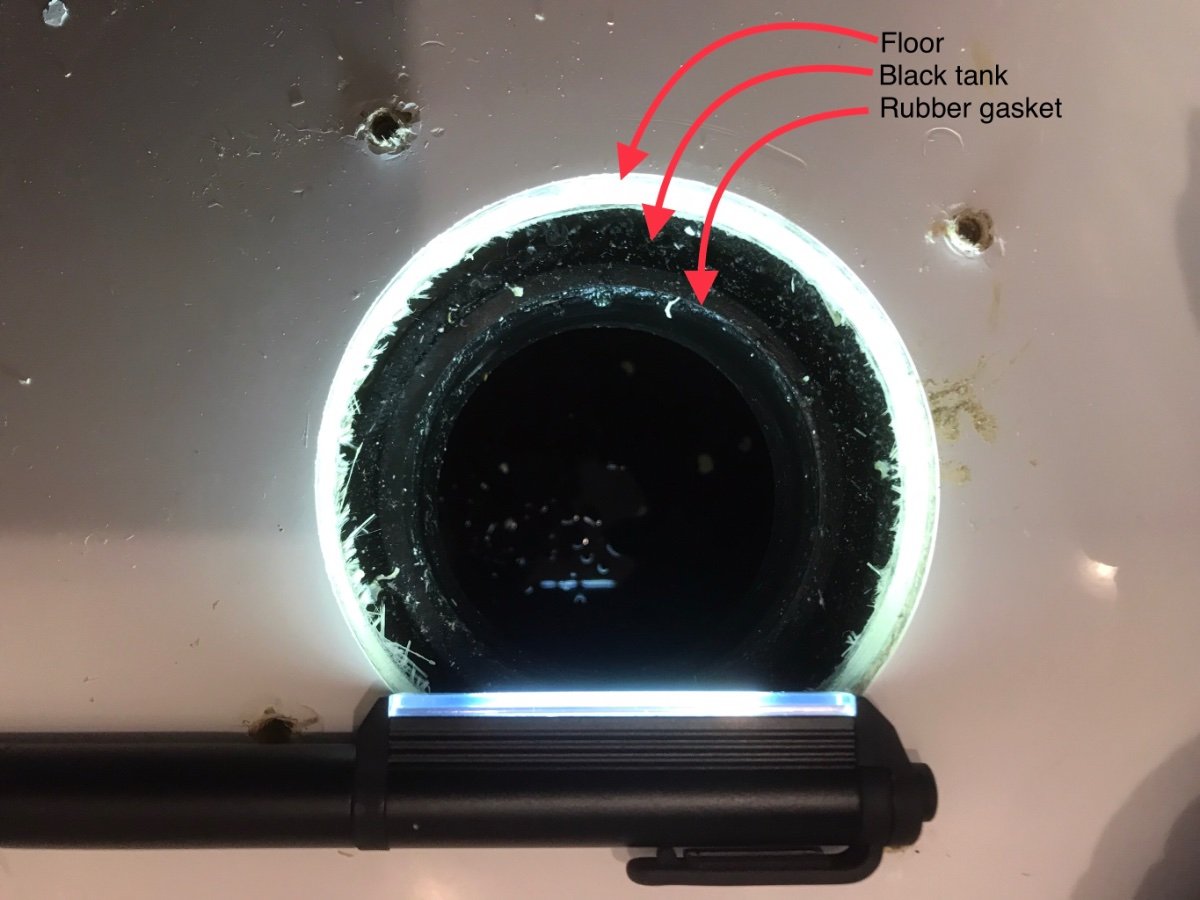
Bill, I edited the pictures to clear things up. It is actually a closet flange with a short 3" pipe glued on and the bottom is filed down to ease insertion.
Mossey
-
1
-
2
-
-
Broken Closet/Toilet Flange Replacement
So as is usually the case with whatever I touch, I break something else! Or maybe it’s just an opportunity to learn something new.
While camping over the Thanksgiving holidays, we suffered a water pump switch problem in the bath vanity. I had to remove the vanity caddy while troubleshooting and there were 2 wires off of the switch mounted at the top of the caddy when I pulled it out. I doubt 2 wires fell off at the same time, so I think maybe 1 was off and caused the problem and the other fell off during caddy removal.
This gave me the opportunity to start a plumbing project and install a hatch in place of the caddy as NCeagle did here. So I was sitting on the throne cleaning up the hatch caulking job and broke the closet/toilet flange while rocking around. After removing the toilet, I removed the 4 screws holding the flange in place and remembering someone else’s flange replacement, I just pulled up on it and one side moved a half inch or so. I then moved a piece of wood under that side and worked the other side and the flange pulled out. The 4" tail of the flange fits into a rubber gasket in top of the black tank.
I have ordered some parts from HD that may or may not be correct one’s, but I’ll know in a week or so and post the conclusion to the story.
Until then, enjoy the picturesMossey
Break
flange description
tank and gasket
-
2
-
3
-
-
1 hour ago, Mike and Carol said:
79” back bumper to rear axle centerline, +/- an inch or so.
168” end of hitch to front axle centerline, +/- an inch or so.
78.5" and 171" on mine, just eyeballing in the dark.
Mossey
-
1
-
2
-
-
I think Overland mentioned an obstruction in that area in one of his postings. He cut a hole below his sink or maybe the refrigerator, I dont remember exactly. I think he may have been reworking his ductwork.
Thank you for the pictures, they will be helpful.
Mossey
-
23 hours ago, Minnesota Oli said:
So when Overland put up a post back on January 3 titled Truma Comfort Plus via Modification,
Overland and I had a discussion about using the SHOWERMI$ER that Steph and Dud B posted a link to on January 1st, to create a Truma AquaGo Comfort Plus. I reached out to him because he is the only person I now of the has the Comfort Plus. He then posted about adding the tee inside of the Truma to recirculate the cold water back to the water heater, where the SHOWERMI$ER routed it back to the tank. Either method required a return pipe to work and I was still leaning towards Overland’s idea of just using a manual shower diverter which would definitely be better looking than the SHOWERMI$ER. And "BOOM", you jumped in with a different and excellent twist.
One thought that I had was to connect the return to the fresh water fill line near the check valve on the street side if I couldn’t route it back on the curb side to the fill line. Did you give any consideration to connecting to the fill line on the street side instead of the curb side? And could you share a picture of your connection to the fill line?Mossey
-
1
-
1
-
-
51 minutes ago, John E Davies said:
Soooo….. where should it be located inside the trailer? Beside the thermostat? On the back wall near the factory smoke alarm?
topgun2 and I had this discussion in the past and he remembers correctly. There is a combination Smoke/CO detector above the street side bed, below the attic. So, I think an additional CO monitor should be located near the thermostat.
Mossey
-
I prefer my trips to Silverton via the D&SNG Railroad. The views are nearing as good as The Million Dollar Highway and as the designated driver, I actually get to see them and leave that driving to the engineer in the striped cap!
Mossey
-
2
-
-
My TST'S are mounted on rubber and I love ‘em. Keep looking, there’s something or somebody for everyone.
-
3
-


2 5/16" Bulldog Hitch Available for Oliver Elite II
in Towing an Oliver
Posted
After reading Mr Truck's WDH preferences, I also wondered how he distinguished a light or heavy trailer. But that really doesn’t matter as long as I know the GVWR/TWR. My SUV has a 14400 GCWR and a 8100 lb. GVWR/TWR and it requires trailer brakes if the GVWR/TWR is more than 1000 lbs., a sway control device if the GVWR/TWR is over 2000 lbs. and a WDH if the GVWR/TWR is over 5000 lbs.
My utility has a TWR of 3500 lbs. and no brake's, so I break rule #1 and #2 every time I use it. Ollie left the factory at a slim 5180 lbs. and a GVWR/TWR of 7000 lbs., so I can add 1820 lbs. of cargo to the trailer. And following the 80/20 rule, that's 80% for her and 20% for me.
So I think the difference between a light and heavy trailer depends on your tow vehicle. And in my case, both of my trailers are heavy.
Mossey